Overview
This setup guide will run through a typical setup of the Booking Appointments plugin from start to finish. The Booking Appointments plugin extends your directory by allowing listing owners to sell slot-based bookable services such as dentist appointments, classes, consultations and more. You can choose to take a commission percentage and/or add a service charge (like Airbnb).
For a full list of features, see the Booking Appointments product page.
Installation
The first step if you haven’t already, is to install the Booking Appointments plugin. This can be done by following our guide on installing addons
1. Install Required Plugins
The Booking Appointments plugin uses GetPaid to take payments. If not already installed, you will be prompted to install or activate the required plugins, GetPaid and GetPaid Wallet. These plugins enable you to accept payments and allow listing owners to request withdrawals from their wallets.

2. Plugin Settings
Configure the plugin settings under WordPress Admin > Appointments > Settings
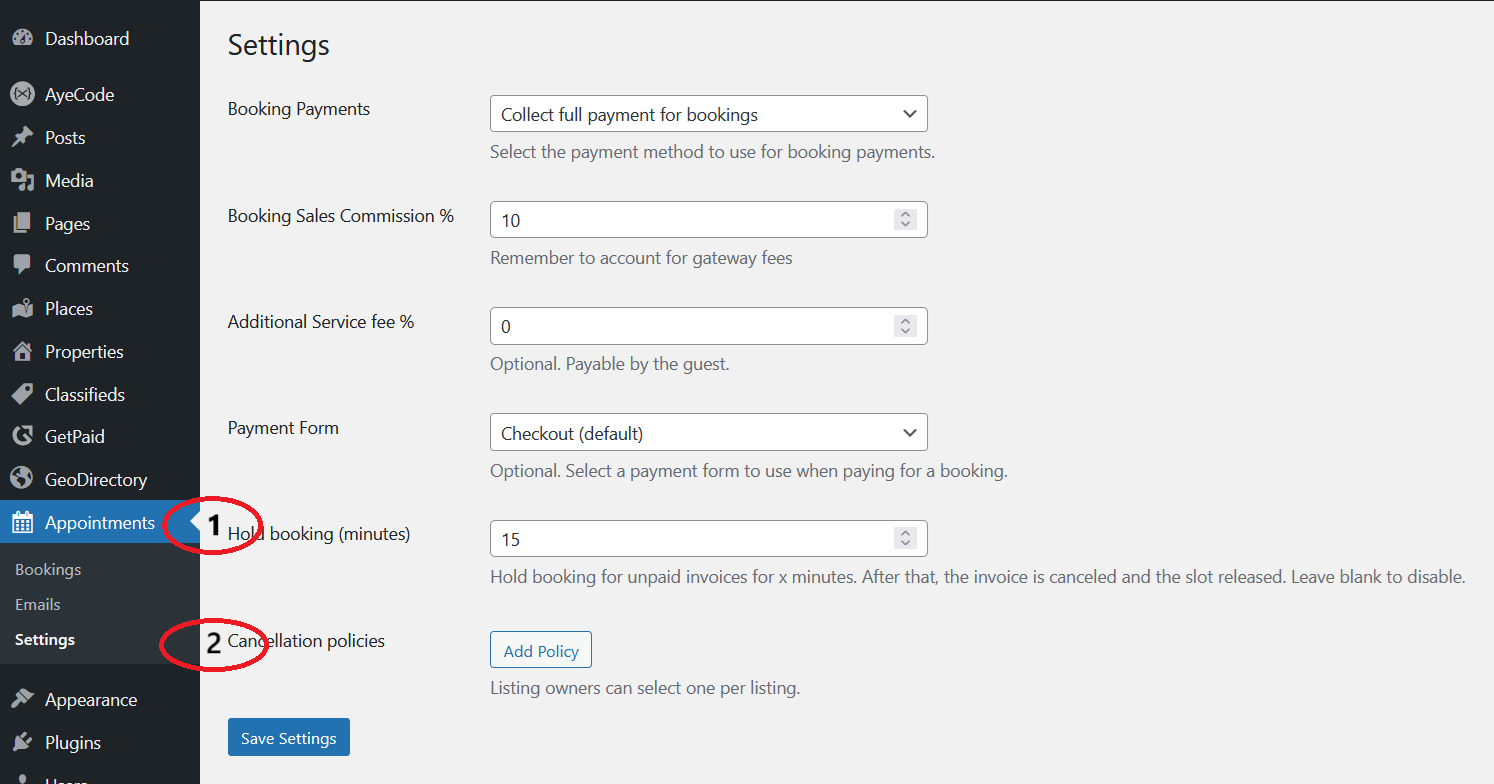
Here you can set how your appointment booking system should function. Set your commission rates and add a few cancellation policies listing owners can choose from. See the settings documentation for a more detailed overview.
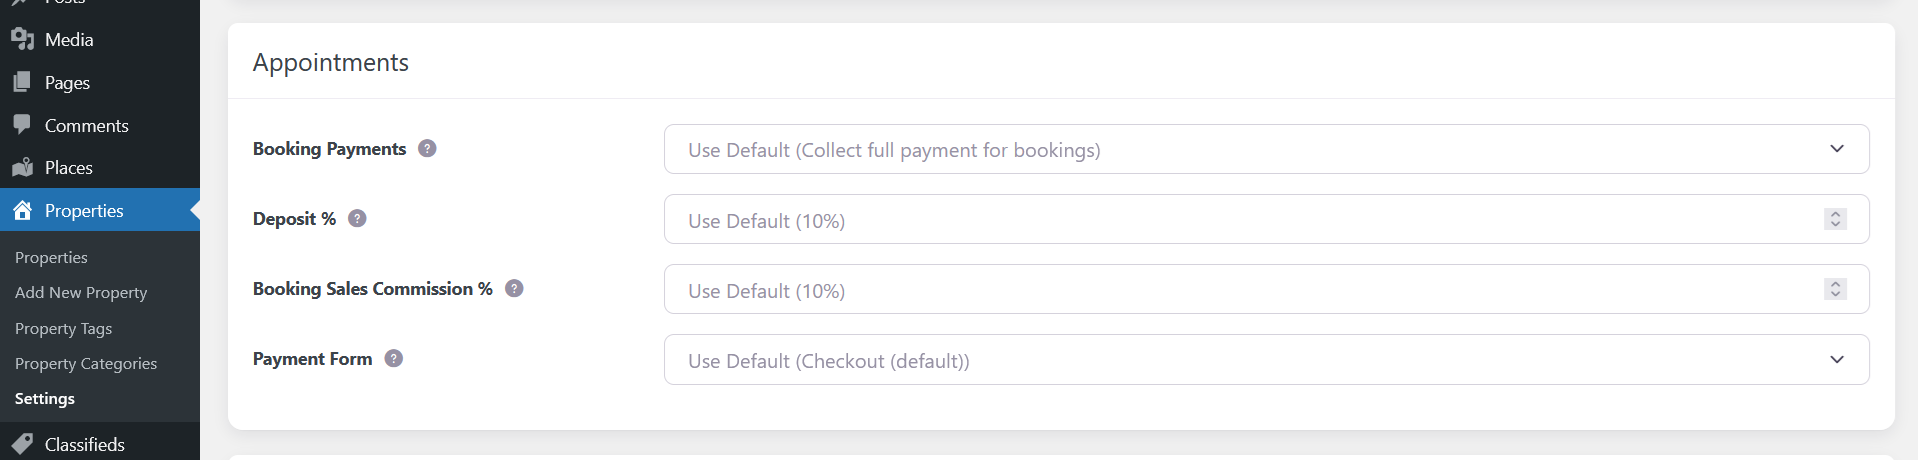
NOTE: If you have the Pricing Manager plugin installed, then you can set commission rates per price package.
3. Setup Appointments Custom Fields
Navigate to your Custom Post Type (CPT) custom field settings. Places > Settings > Custom Fields.
Here you will see some new custom fields added by the addon.
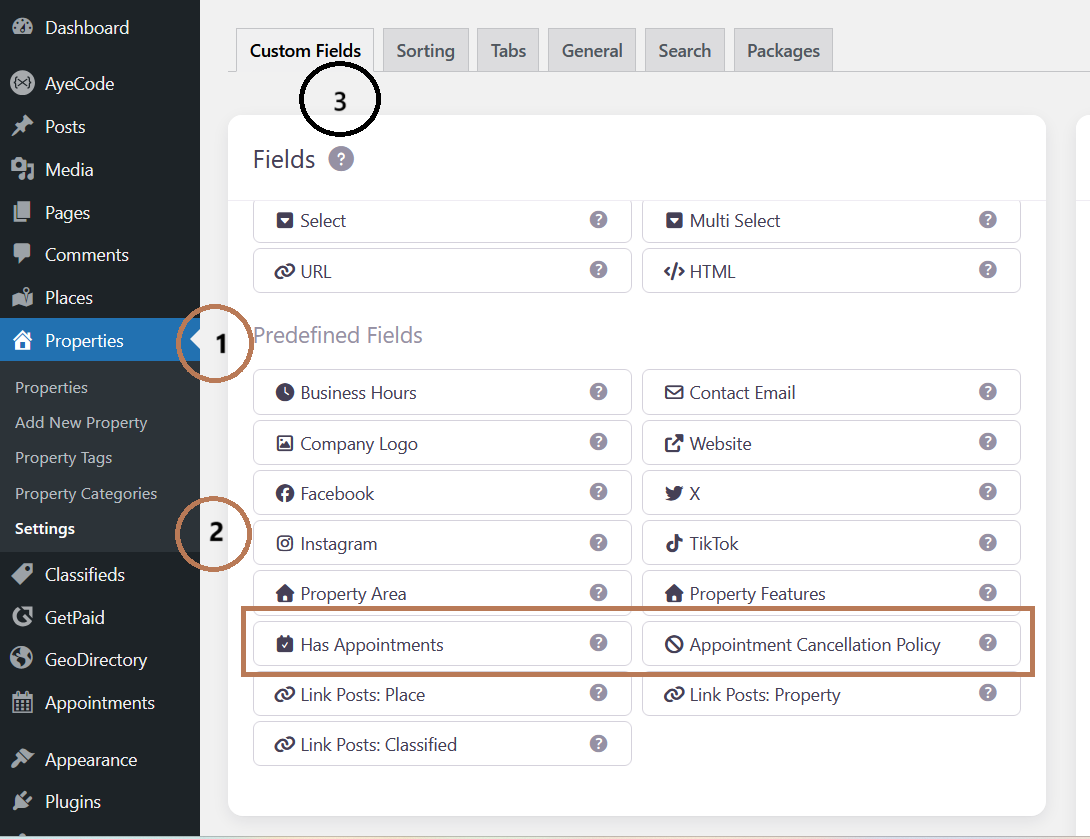
Has Appointments: This allows the listing owner to enable appointment booking functionality on their listing. This field is required for appointment booking to work.
Appointment Cancellation Policy: Here the owner can select one of the predefined cancellation policies you added in the main settings. (optional)
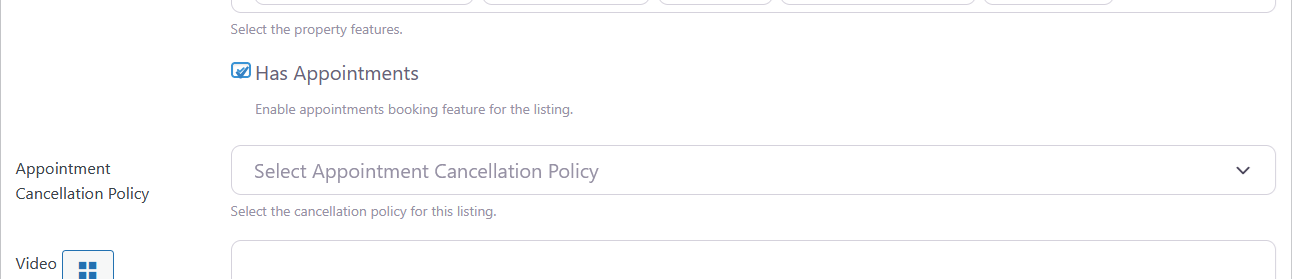
Make a Listing Bookable
Go to edit listing > Tick “Has Appointments” > Update. This will make a listing as bookable product.
4. Setup Blocks for Listing Owners
There are two blocks for the listing owners. GD > Listing Appointments Management that allows the listing owner to manage appointments and GD > Owner Appointments that displays all appointments booked under the owner’s listing.
GD > Listing Appointments Management
Add this block to the listing details page template. It will display three buttons to the owner.
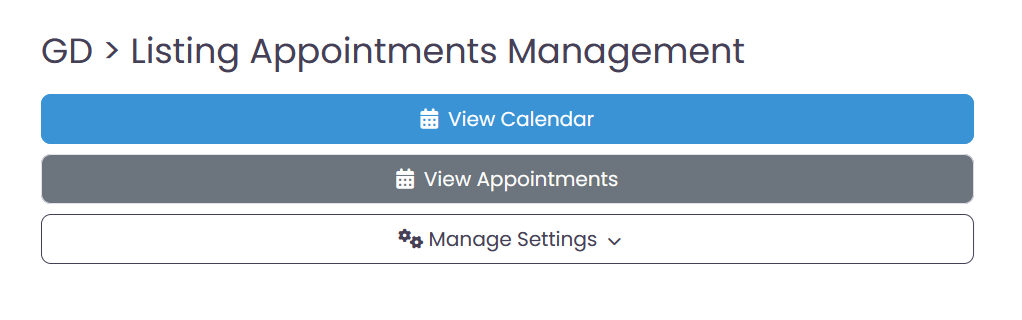
- Manage Settings > Manage Settings
The Listing Owner manages the settings for the appointments.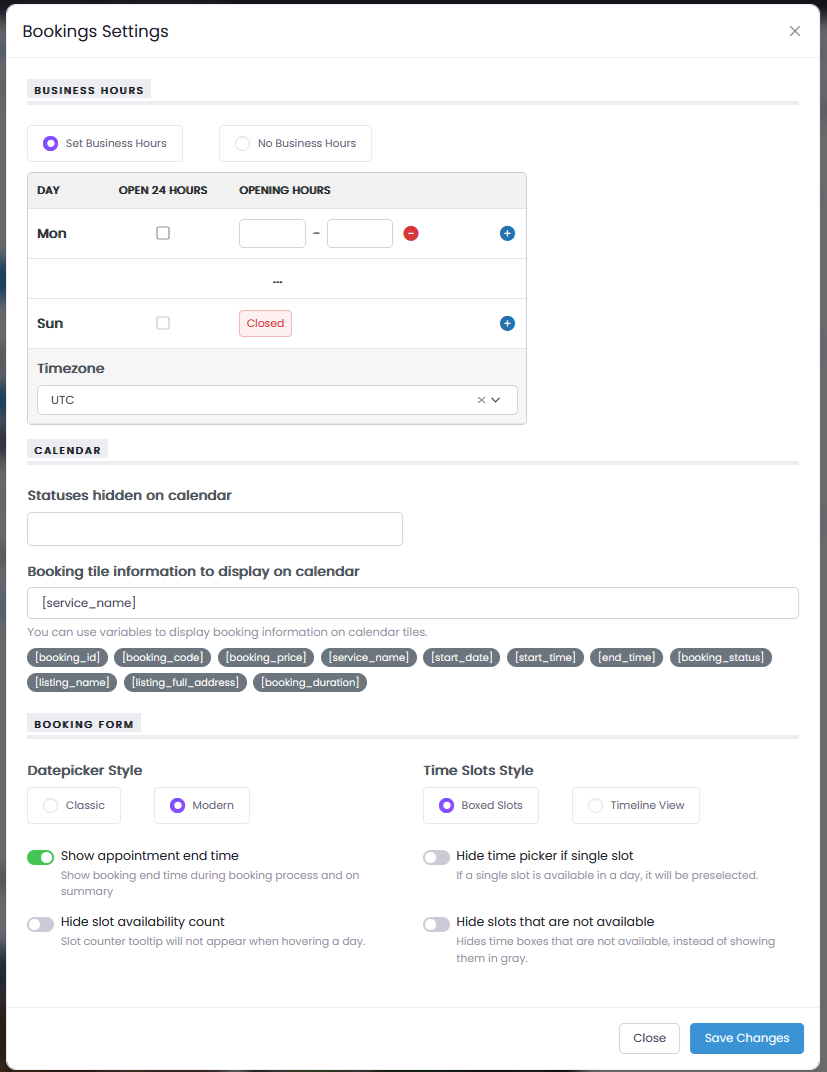
- Manage Settings > Add/Edit Services
Lists the services to the listing owner.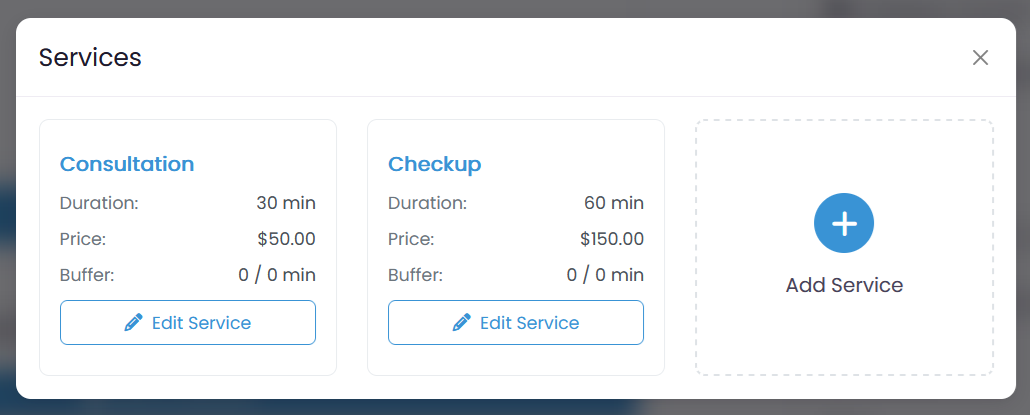
- Manage Settings > Add/Edit Services > Add/Edit Service
Listing Owner add/edit the service.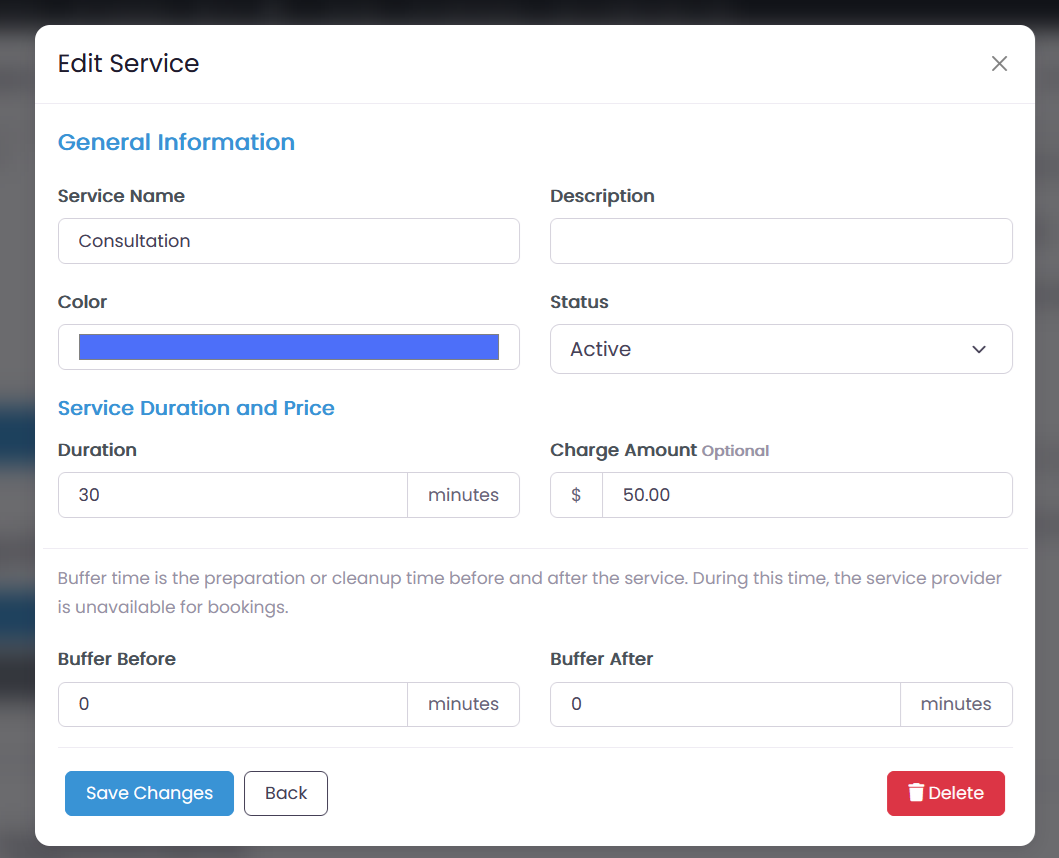
- View Calendar
Calendar displays available appointment slots, booked slots in different views like month, week, daily.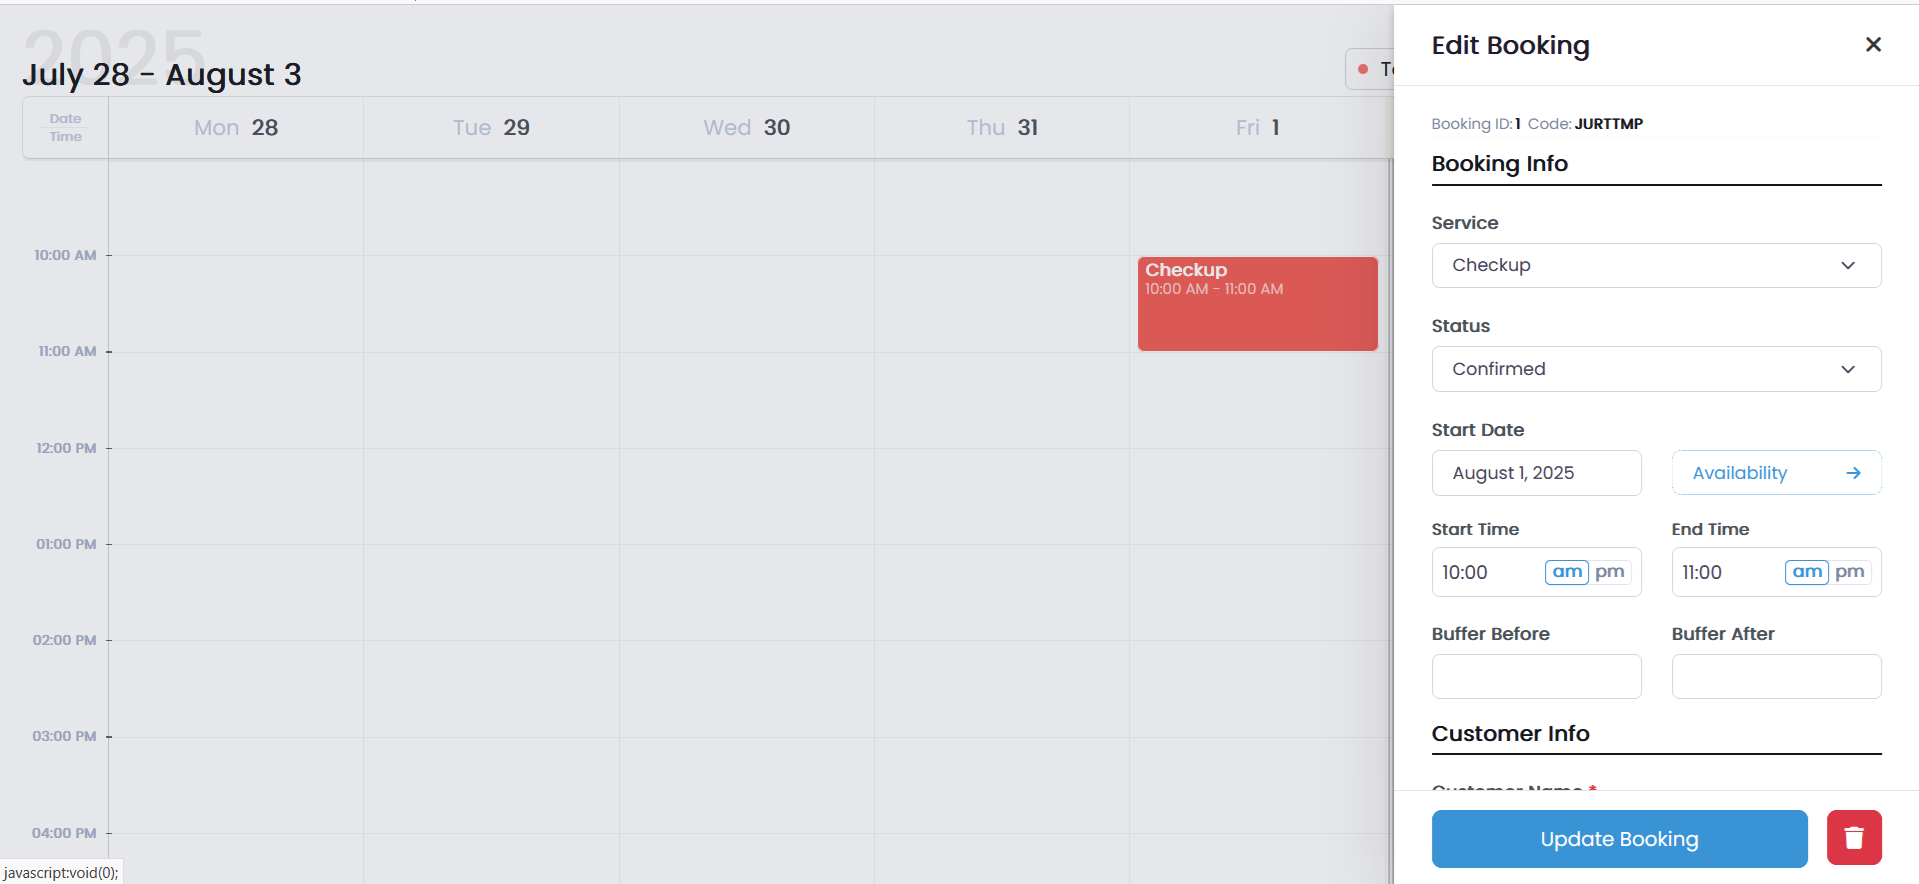
- View Appointments
Displays all the appointments to the listing owner that received under the current listing.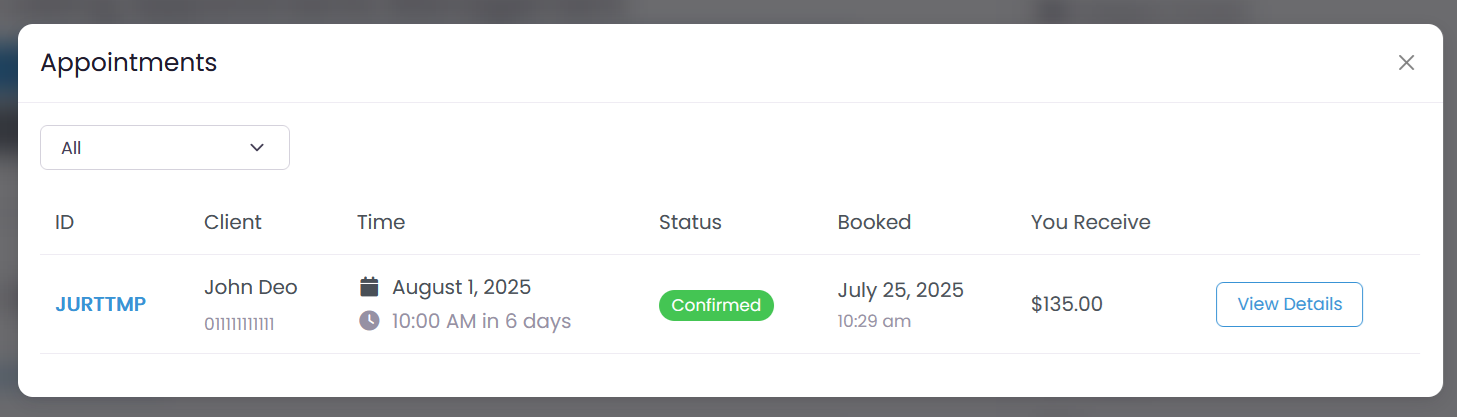
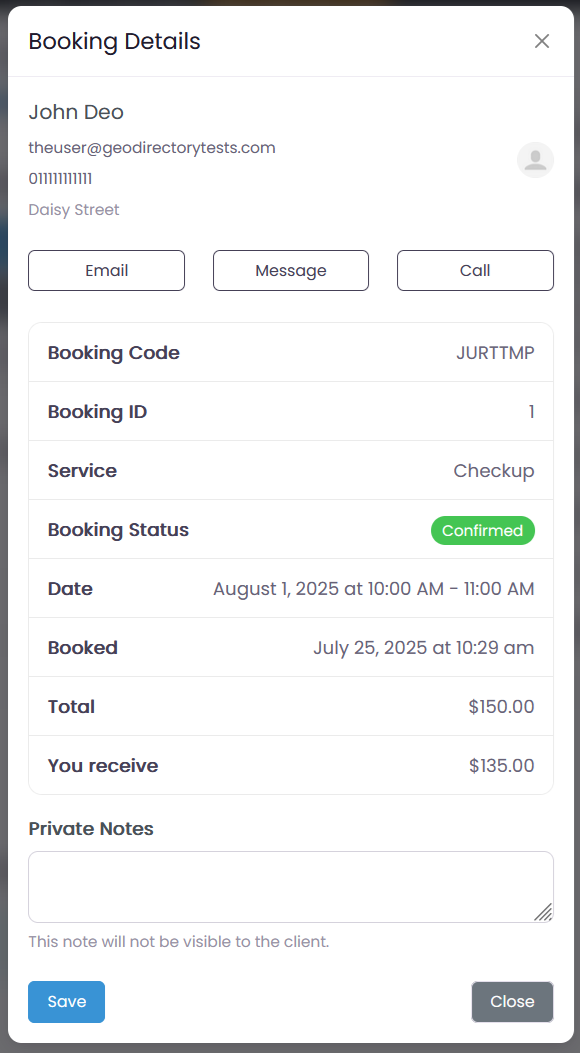
- View Appointments > View Details
Displays the appointment details like customer details, booking details, price breakdown etc. Owner can contact the customer via email, instance message or phone call.
GD > Owner Appointments
Add GD > Owner Appointments block to user account area or user dashboard or listing details page. It displays all the appointments booked under owner’s all the listings.

5. Setup Blocks for Customers
There are two blocks for the customers. GD > Appointment Booking Form to book an appointment and GD > Customer Appointments that displays all the appointments booked by the customer.
GD > Appointment Booking Form
This allows the customer to book an appointment. Appointment Booking Form can be configured to display as inline form or as a button to open booking form in popup window.
- Appointment Booking > Available Services
Choose a service to book an appointment.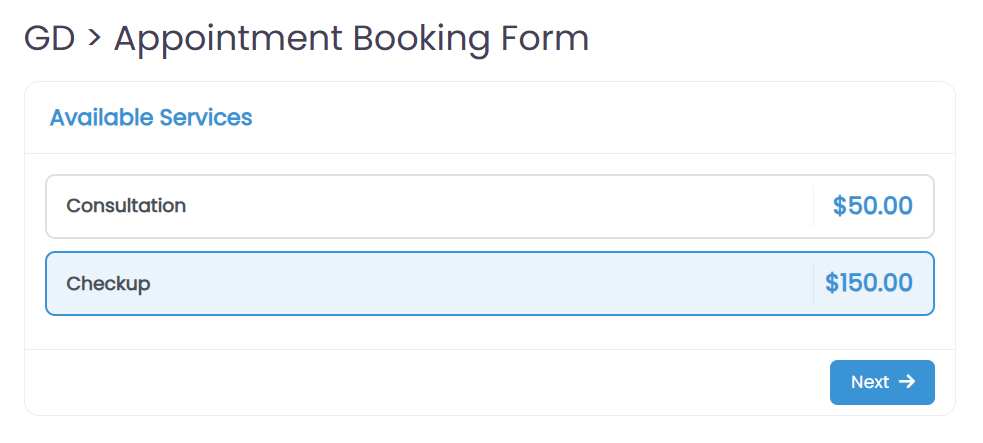
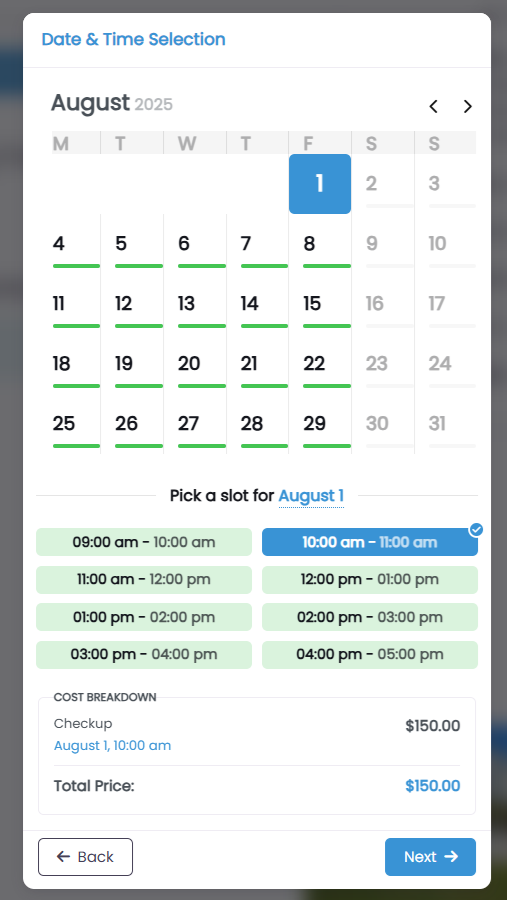
- Appointment Booking > Date & Time Selection
Choose a date & time for the appointment.
- Appointment Booking > Account Information
Enter customer information like phone and add comments if any.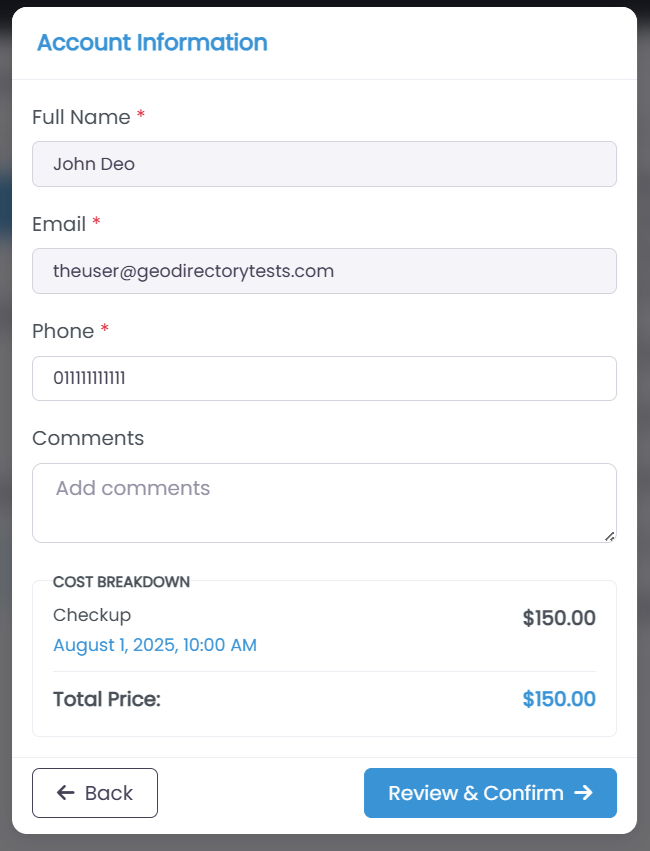
- Appointment Booking > Confirm & Pay
Display the appointment details and final booking amount before confirm & pay for the appointment.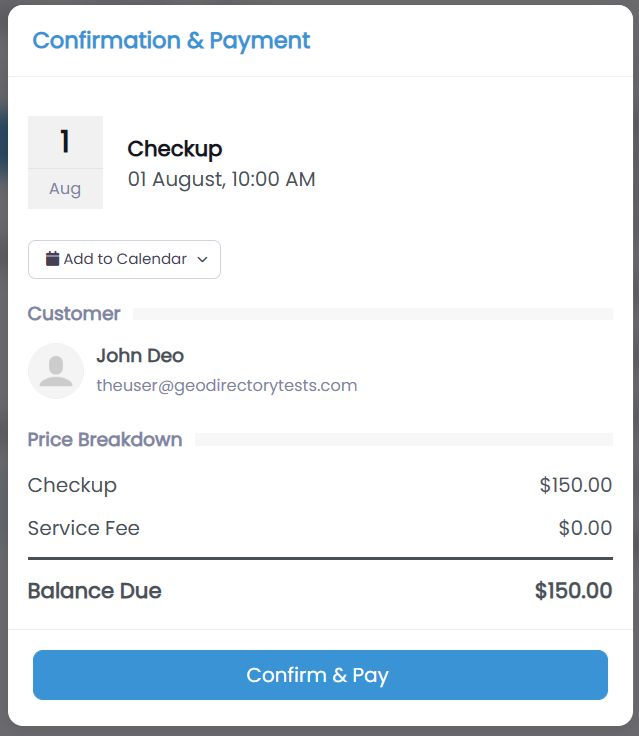
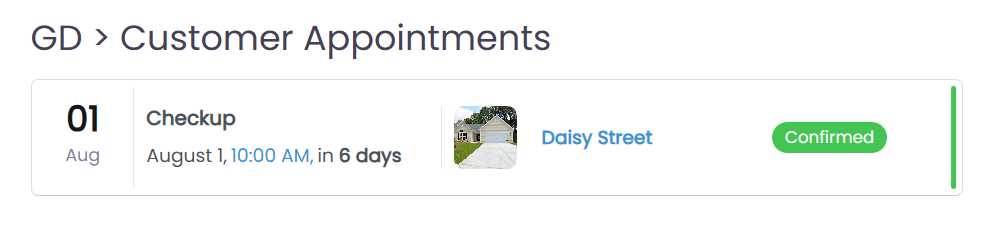
GD > Customer Appointments
Add GD > Customer Appointments block to user account area or user dashboard or listing details page. It displays all the appointments booked by the customer.
- Customer Appointments > View Details
Display customer details and booking details with price breakdown. Customer can add appointment date and time to Google, Apple, Outlook, Office 365 calendars.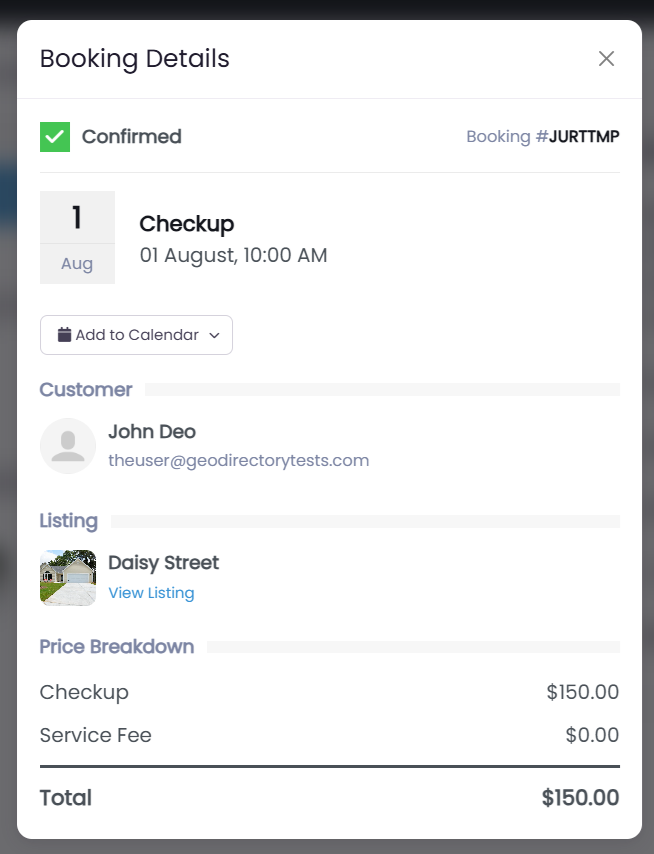
6. Wallet Setup
When a appointment is confirmed, the owner’s wallet will receive the booking amount minus site commissions (if any). Add GetPaid > Wallet block to user account area or user dashboard or to the listing details page to display wallet amount to the users.
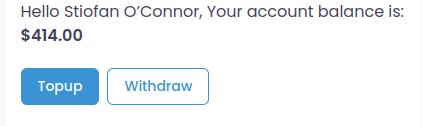
By default withdrawals are disabled. Enable withdrawals from WordPress Admin > GetPaid > Settings > General > Wallet to allow users to withdraw money from their wallet.
All the wallet transactions are displayed under GetPaid > Wallet Transactions block.
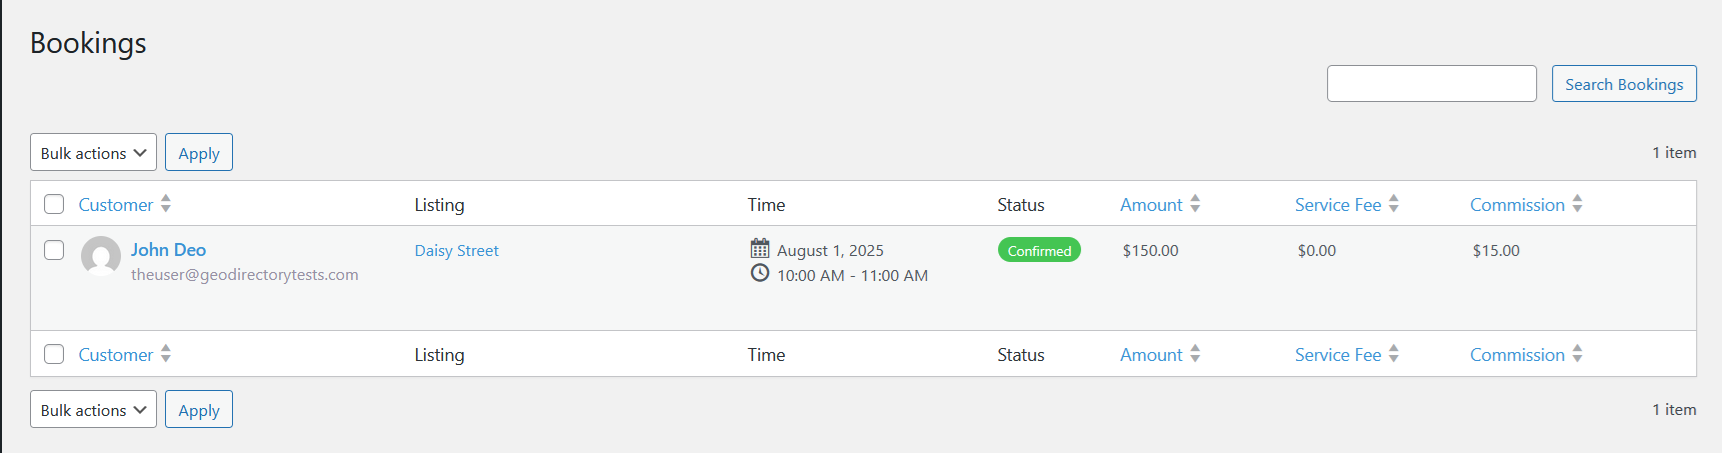
7. Site Admin Area
Site admin can see all the booking appointments under WordPress Admin > Appointments > Bookings Admin can manage the booking by updating the booking status, customer details, booking timing etc.
Site Admin can manage all the appointments related emails notifications under WordPress Admin > Appointments > Emails