Overview
The Franchise Manager extension allows users to submit listings for chains of businesses or franchises faster and allows directory owners to monetize those listings.
Installation
The first step if you haven’t already, is to install the Franchise Manager extension. This can be done by following our guides on how to install an extension.
Step 1 – Settings
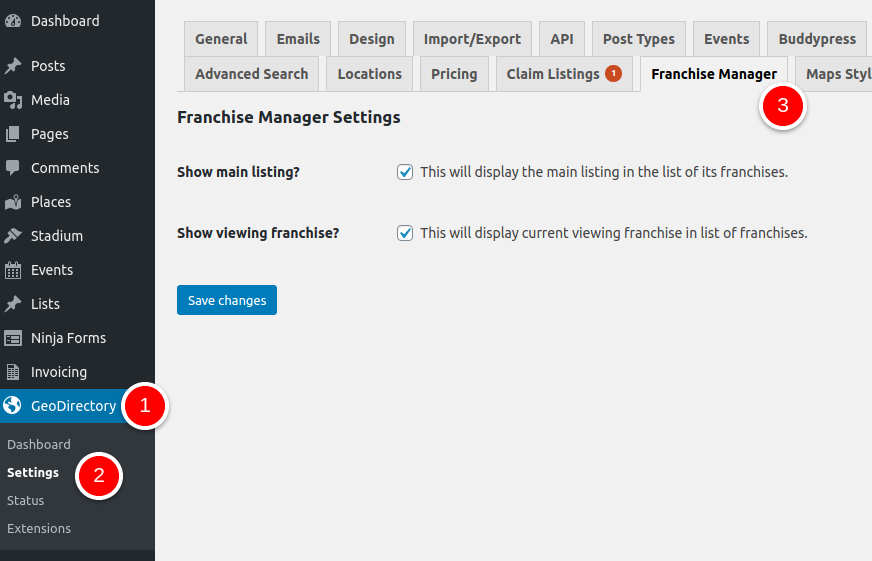
Once installed and activated, you can find the Franchise Manager settings at GeoDirectory > Settings > Franchise Manager.
The option shown below will have an effect on the way franchise listings are presented on the frontend of your website.

Step 2 – Enabling Franchise Support
For each CPT that you wish to add franchise listings, you need to enable support for Franchise Manager.
- 1
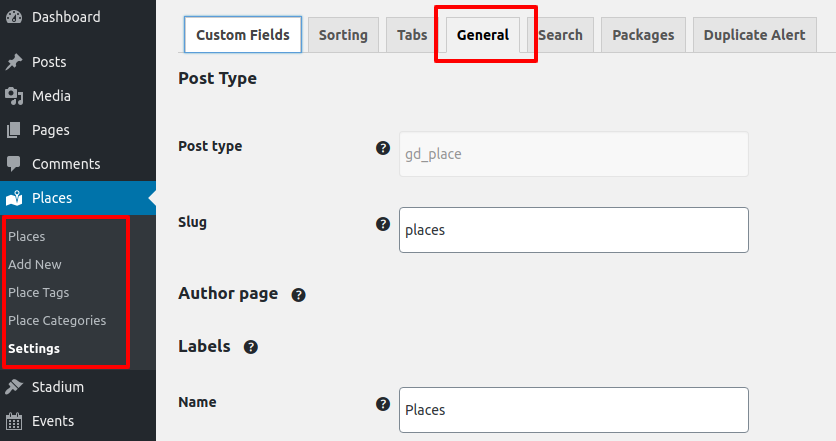
- Navigate to CPT > Settings > General and click the Show Advanced button.
- 2
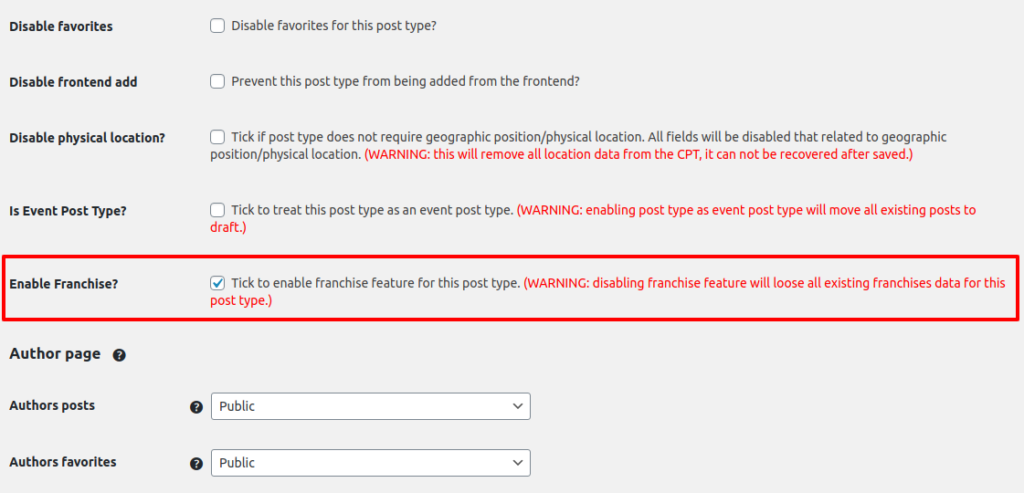
- Tick the checkbox next to Enable Franchise? option, and save your settings.


You can now start adding main and branch listings for that particular CPT listings. Read how to add main and branch listings.
- Has Franchise?
- Lock Franchise Fields
Step 3 – Integration with Pricing Manager
Franchise Manager offers seamless and out of the box integration with Pricing Manager.
- 1
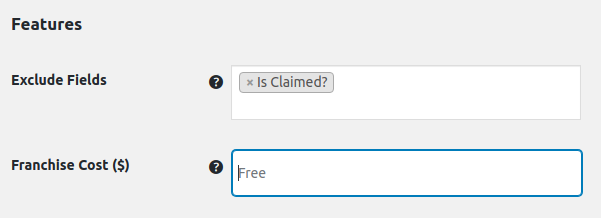
- You can fully disable the “Add Franchise” option for particular packages by adding Has Franchise to Exclude Fields.
- 2
- Alternatively, you can enable the “Add Franchise” option, but specify the price for each extra franchise. To do so, simply specify the price in the Franchise Cost field.


Troubleshooting – Unable to See the Franchise Info
If you are unable to add franchise listings even after activating the extension, please double check and ensure that you have:
- added the “Has Franchise” field to the CPT and set for Active,
- added a listing and set the “Has Franchise” field to “Yes”,
- visited the listing with “Has Franchise” selected and checked the GD > Author Actions links for the option “Add Franchise”.