How to Build a Real Estate Website
If you’ve relied solely on word of mouth or traditional methods to market your Real Estate Agency and property listings, you’re missing out on a huge opportunity.
Building your real estate website can open up a whole new world of potential buyers, giving you a platform to showcase your properties and build your brand in a way that reaches far beyond your local network.
In this article, I’ll explain why you should have a personal website and the steps to building one.
I’ll also share some tools you can use to build your real estate website using WordPress.
Should real estate agents have personal websites?
As a real estate agent, you can create a website to list and browse properties for sale or rent.
You can add detailed property descriptions, photos, and virtual tours for each property.
You can also provide information like contact details, interactive maps, and reviews.
This allows users to explore potential spaces from their devices.
You might have heard of Zillow and Realtor.com, both leading real estate marketplaces.
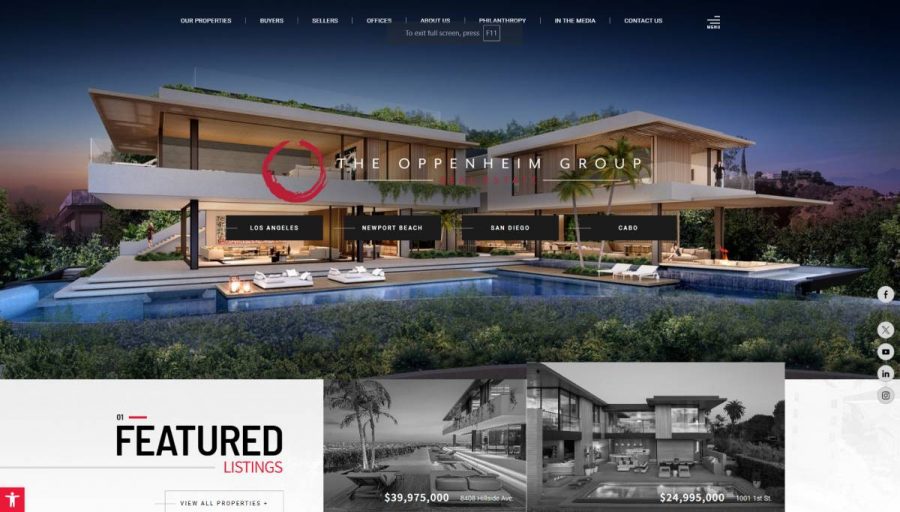
Here are some more examples of excellent real estate websites for inspiration:
The Oppenheim Group
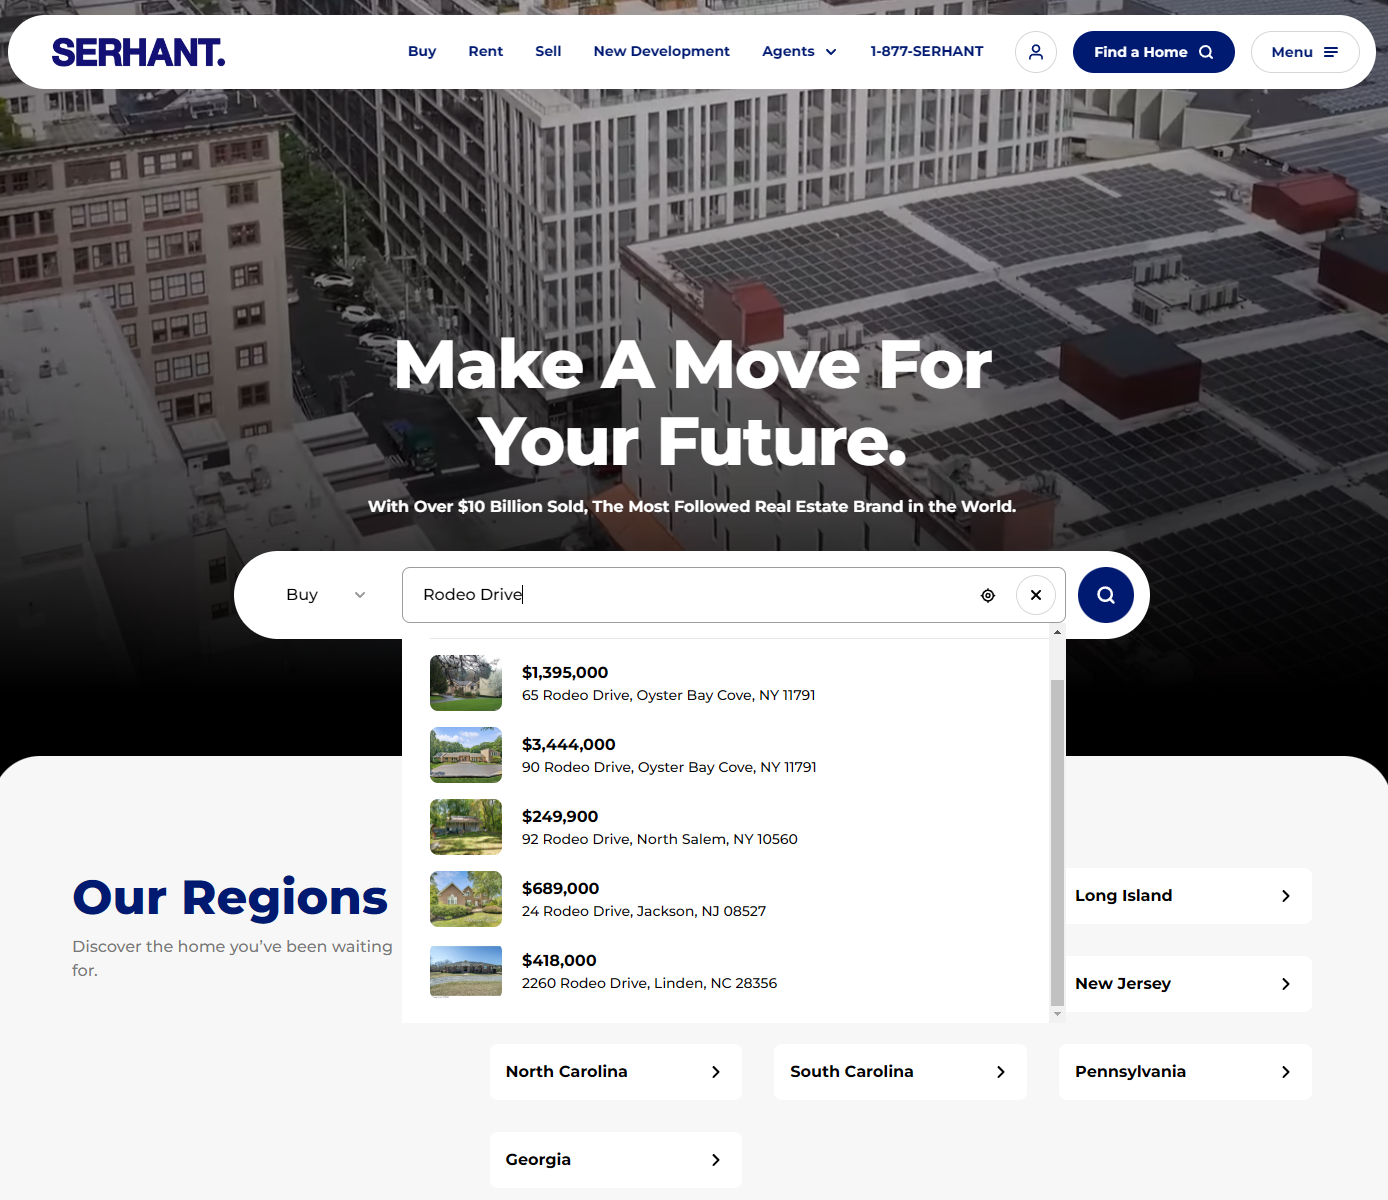
SERHANT
The Agency

Real estate websites allow users to browse a wide range of properties easily.
Save time by viewing virtual tours and gain valuable market insights to make informed decisions.
So, is it advisable for real estate agents to have personal websites?
The short answer is yes! Here are three reasons why:
- Improve visibility and credibility. A real estate website can enhance your online presence and make it easy for potential clients to find you through search engines like Google. It also helps you establish credibility and expertise in the real estate market.
- Create a unique brand identity. Setting up a real estate website means you can create a unique brand identity. Showcase listings, share client testimonials, and blog about relevant topics to build a stronger connection with viewers.
- Direct communication and lead generation. A personal real estate website provides a platform for direct communication with potential clients. You can also add lead generation features to it to capture contact information and track user behavior to enhance marketing efforts.
Can a real estate agent create their own website?
Yes!
A real estate agent can create a personal website in simple steps. There are three main options available to you:
- Hire a developer to help you create a custom real estate website. This option can be expensive but can result in a unique and feature-rich website.
- Use a DIY website builder or real estate-specific platform to create a website using drag-and-drop builders. Real estate-specific platforms come with built-in features for real estate agents, like showcasing listing and lead capture forms, but often lack customizability and flexibility.
- Use WordPress to create a real estate website, if you want customization and flexibility. Numerous plugins and themes are available in the WordPress ecosystem, and you can get the exact look and feel you want on a budget.
We recommend WordPress because you will completely own your site and the data you collect.
You can do several things to make your real estate website unique.
Let’s go through some examples quickly:
- High-quality visuals. Consider investing in high-quality photos and videos to showcase properties on your website. For example, you can add drone footage, 3D walkthroughs, and high-res images of the interior to deliver a more immersive user experience.
- Interactive features. Virtual tours, interactive maps, and mortgage calculators are excellent tools you can add to your real estate website to engage site visitors.
- Helpful resources and guides. You might consider publishing a resource section with valuable content such as buying/selling tips, market analysis, real estate news, and neighborhood guides.
What are the steps to create a website similar to Zillow?
Creating a website similar to Zillow involves several steps, including planning, development, and ongoing maintenance.
Let’s break these down into specific steps:
Plan and research
To start planning and researching for a real estate website, start by conducting thorough market research.
In this step, you analyze the real estate market and study the features that make platforms like Zillow successful.
Clearly define the primary objectives of your website.
- Is it to showcase property listings?
- Are you creating a website to enhance user engagement and collect data?
- Or do you want to maximize revenue generation?
In this stage, it’s also essential to identify and understand your target audience and their specific needs.
You should also perform a detailed competitor analysis to identify gaps in the market and uncover opportunities for differentiation.
Design and development
The next step is to start conceptualizing your real estate website.
You can create a list of features to meet your user’s needs.
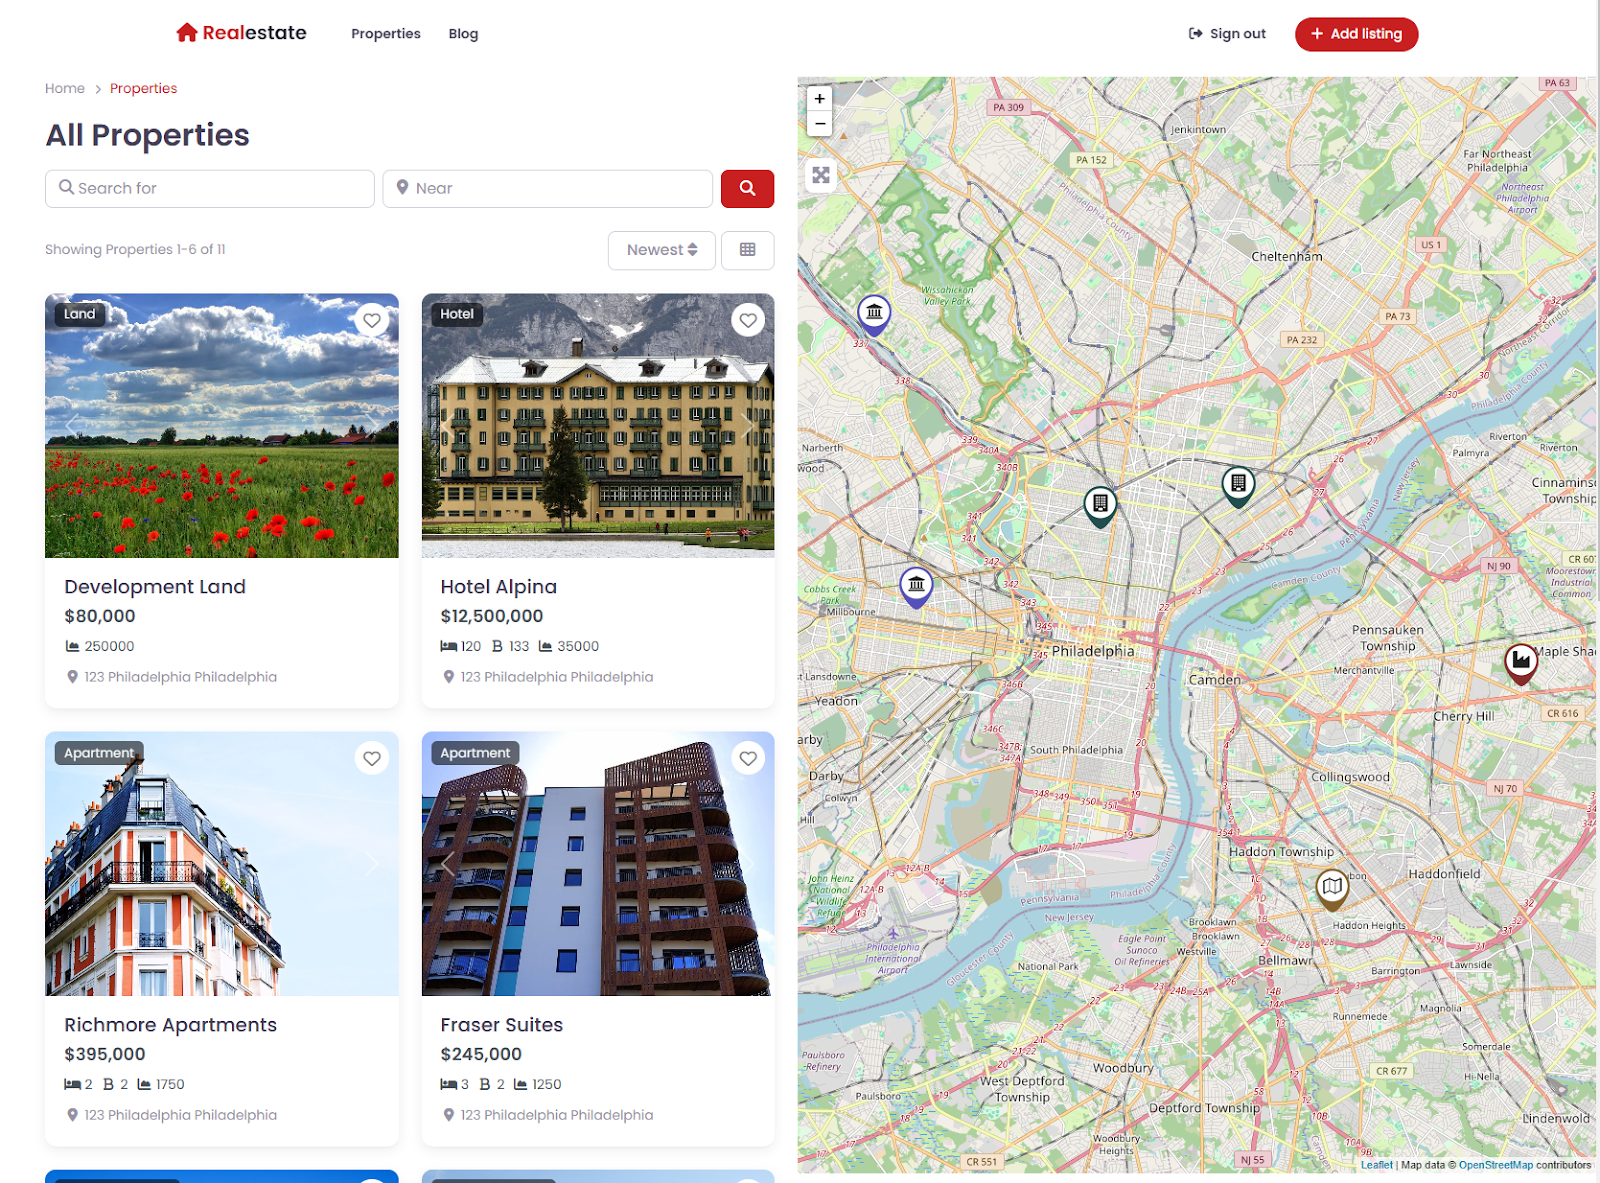
Some essential features real estate websites have include property filters and search options, listings, interactive maps, and reviews.
Once that’s done, you can design wireframes and mockups to visualize the layout and user interface.
This helps ensure a clear and organized front end.
In terms of design, you want to lean towards a visually appealing and user-friendly interface while prioritizing user experience.
Simply put, this means creating an intuitive navigation experience so it’s easy for users to find what they’re looking for.
At this stage, it’s also essential to choose a platform that best suits your needs and fits your budget.
We recommend WordPress because it gives you access to real estate plugins that make it incredibly easy to add essential features to your website.
The GeoDirectory plugin, for instance, lets you begin adding listings as soon as you install it on your site – no coding required.
Add listings
Once you have your website ready, you can start adding property listings.
Include high-res photos, videos, and detailed descriptions for each listing.
Using a plugin like GeoDirectory, you can also show interactive maps, open house dates, reviews, and search forms.
In addition to this, you may also consider adding helpful resources to your website—such as market insights, buying and selling guides, and neighborhood information—to help users make informed decisions.
Test and launch
Now that your site is ready, all that’s left to do is test and launch!
At this stage, you should thoroughly test your site’s features, ensure they work as intended, and fix any bugs.
How to build a real estate website
Now that you’ve gotten this far, I’m sure you have some questions:
- How do you organize all that property information?
- How do you present it in a way that’s easy for visitors to navigate?
- How do you ensure it looks professional and appealing while delivering a good user experience?
And even if you nail all those elements, how do you drive traffic to your site?
Sure, you could hire someone to build your site for you.
But what if I told you that you can do it quickly and easily using WordPress and a top-notch real estate plugin?
GeoDirectory simplifies creating a property listing website that perfectly suits your market’s needs.
It’s ideal for featuring property listings with essential details like maps, contact information, open house dates, and reviews.
If you decide to use WordPress, you only need a domain name, web hosting, and the GeoDirectory plugin.
Once you have that, follow these steps to create your real estate website:
Step #1: Install the AyeCode Connect plugin
The free AyeCode Connect plugin connects your WordPress website to the GeoDirectory website, allowing you to import pre-built demos.
In addition to this, the free plugin lets you sync license keys of purchases and remotely install and update purchased products.
To install the plugin, go to Plugins → Add New from the WordPress admin panel and search for “AyeCode Connect.”
Click on the Install button and then Activate to start using it.

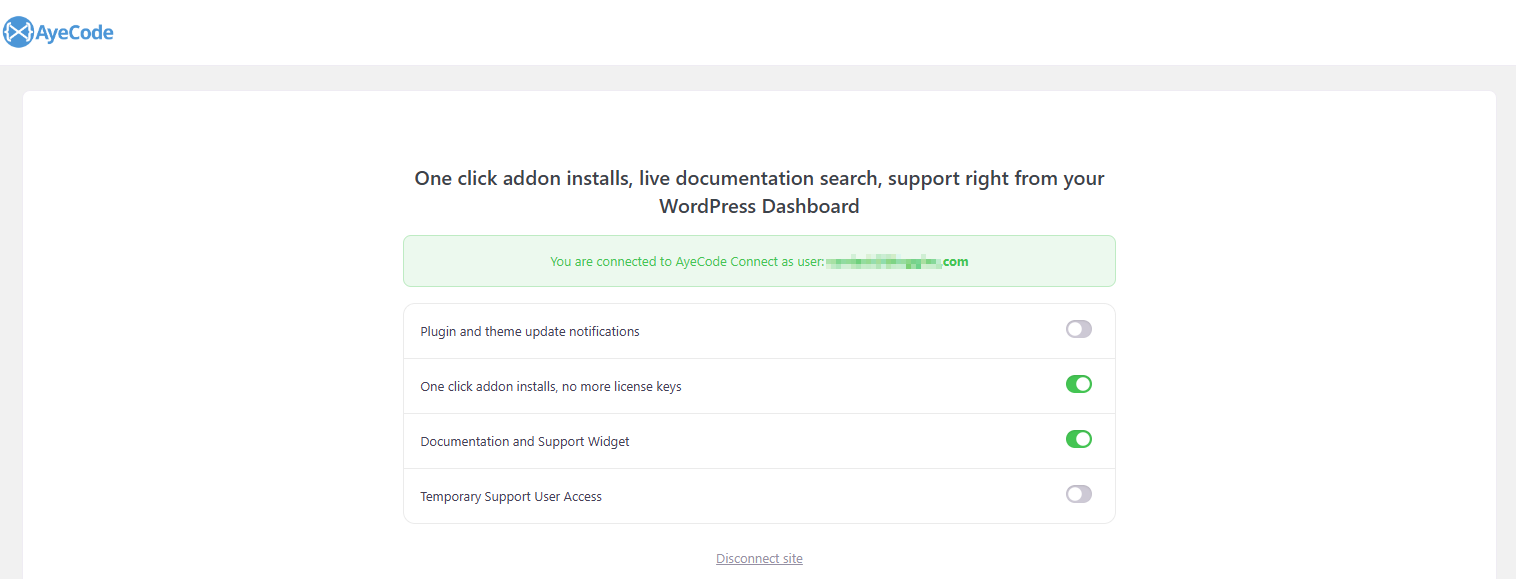
You’ll see an AyeCode menu item in the sidebar. Click on it, then click the Connect Site button to proceed.
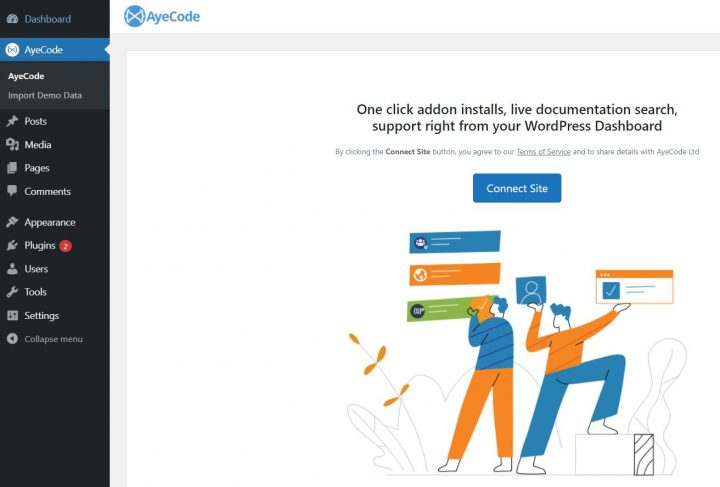
Now, you can import a demo to get started.
We recommend selecting the free Real Estate Listings theme. Once you have it, the free real estate directory plugin (GeoDirectory) will also be automatically installed on your WordPress site.
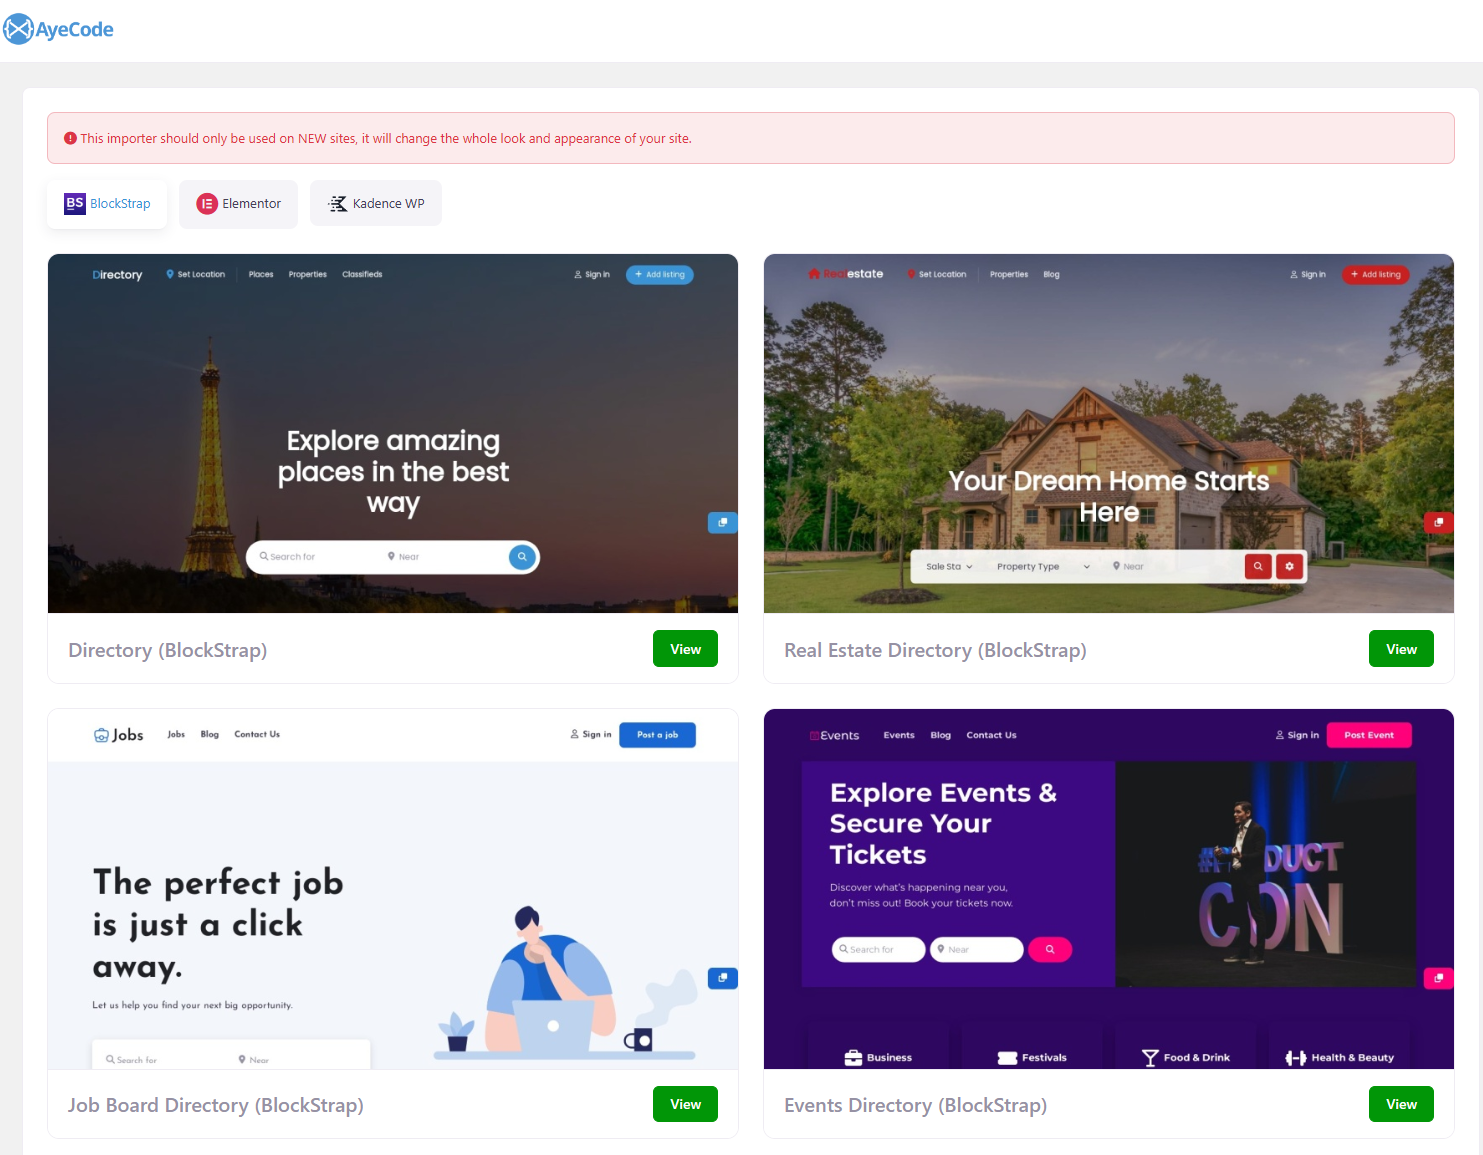
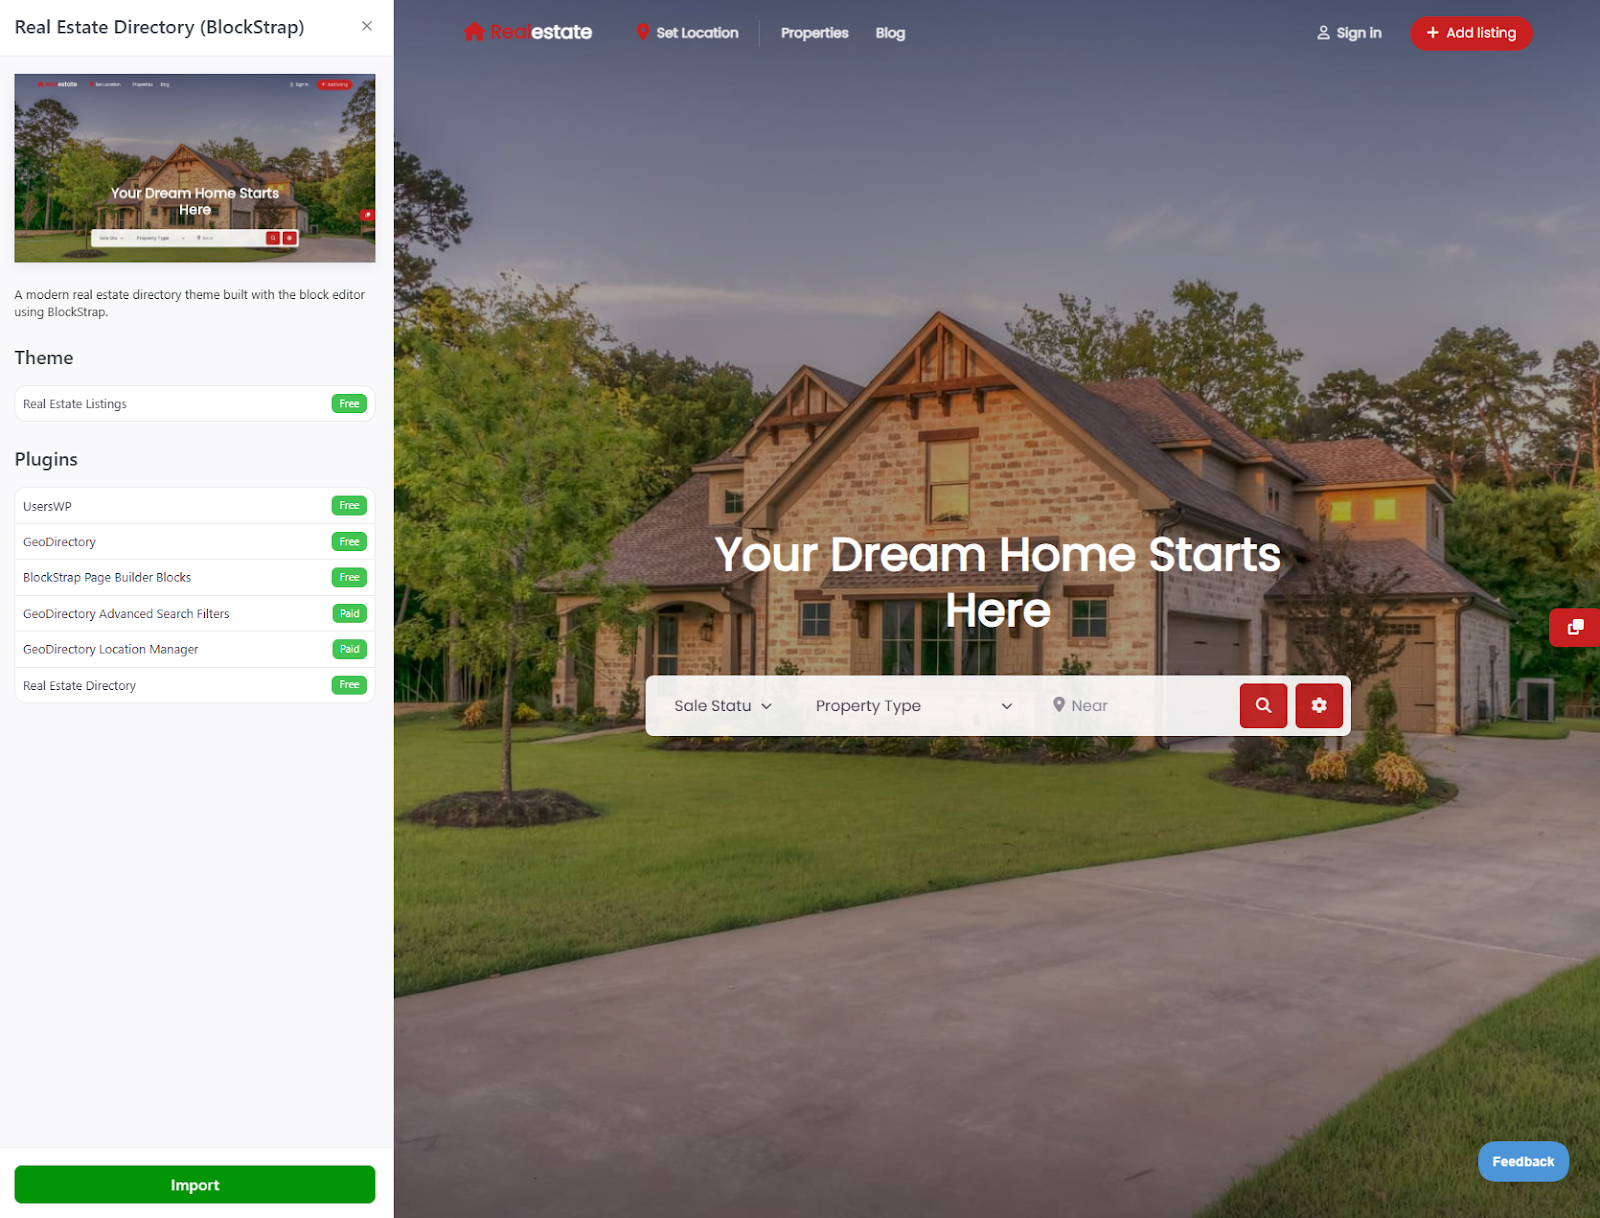
To do this, click the Real Estate Directory (BlockStrap) option and then the Import button.
When it’s done importing, click the View Site button.
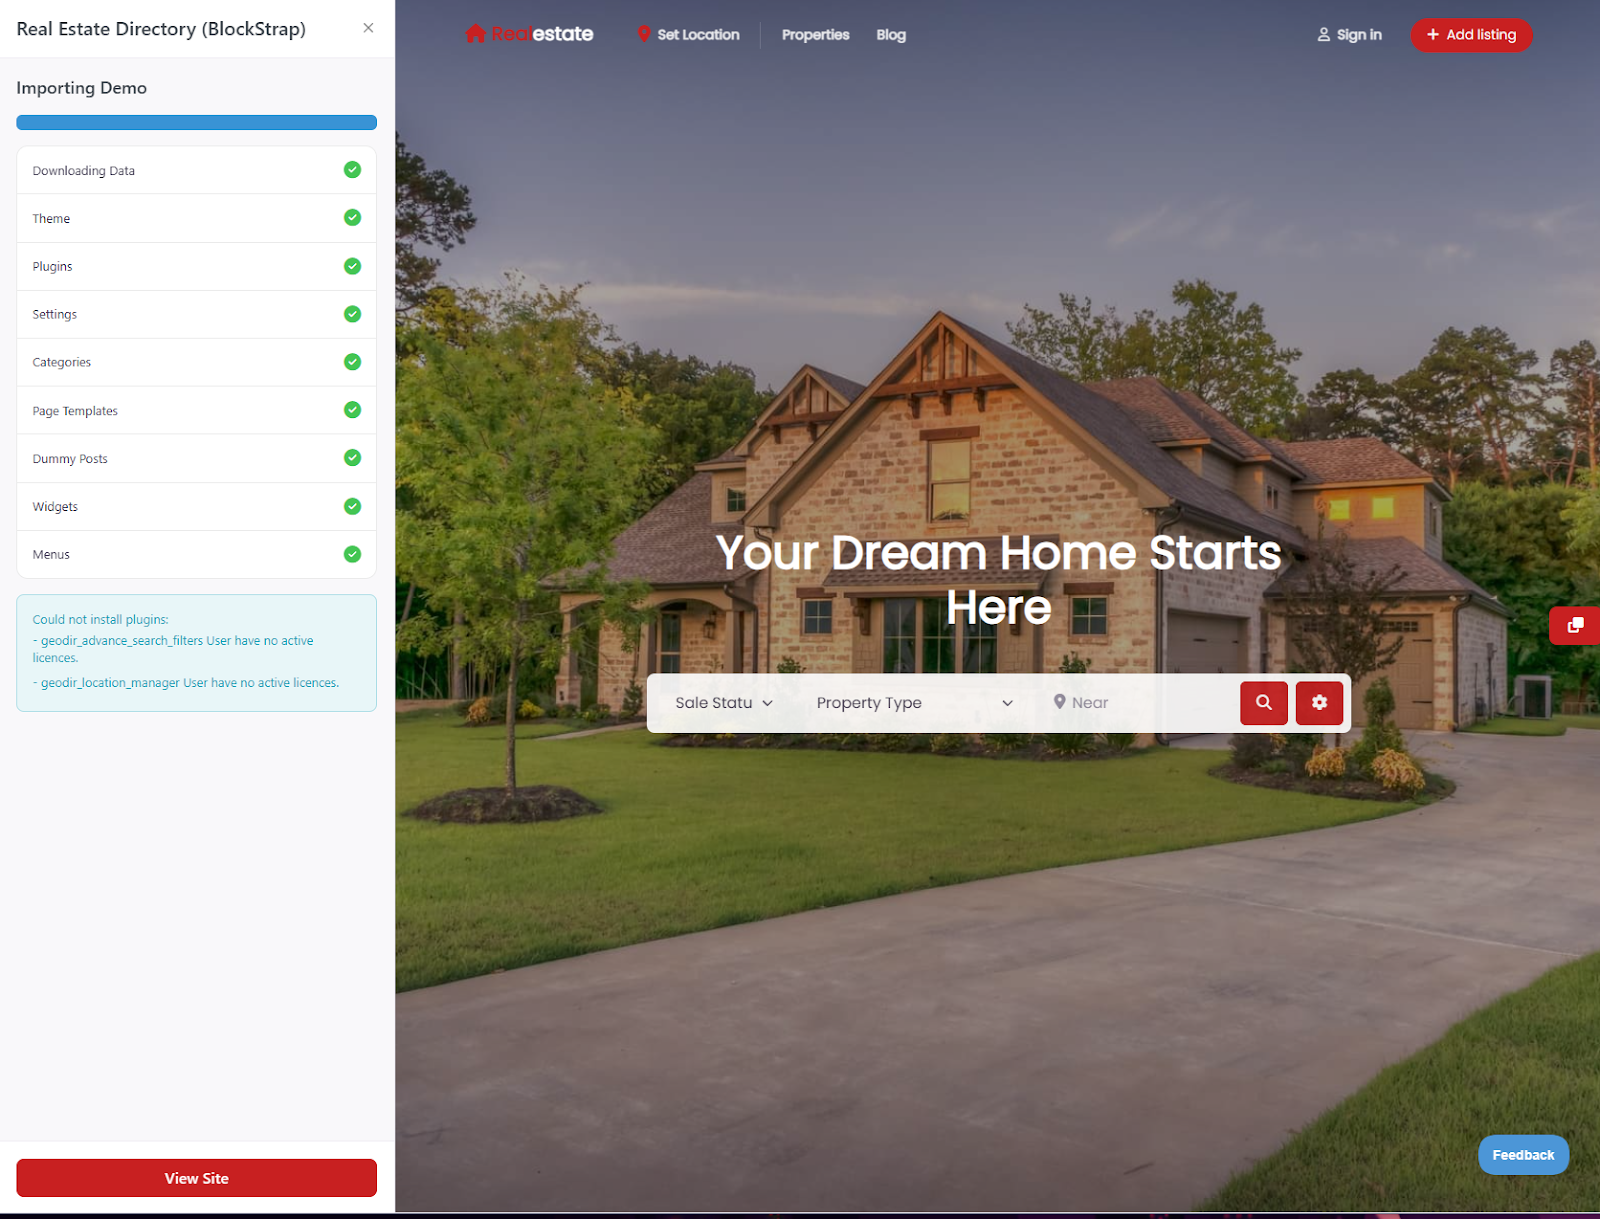
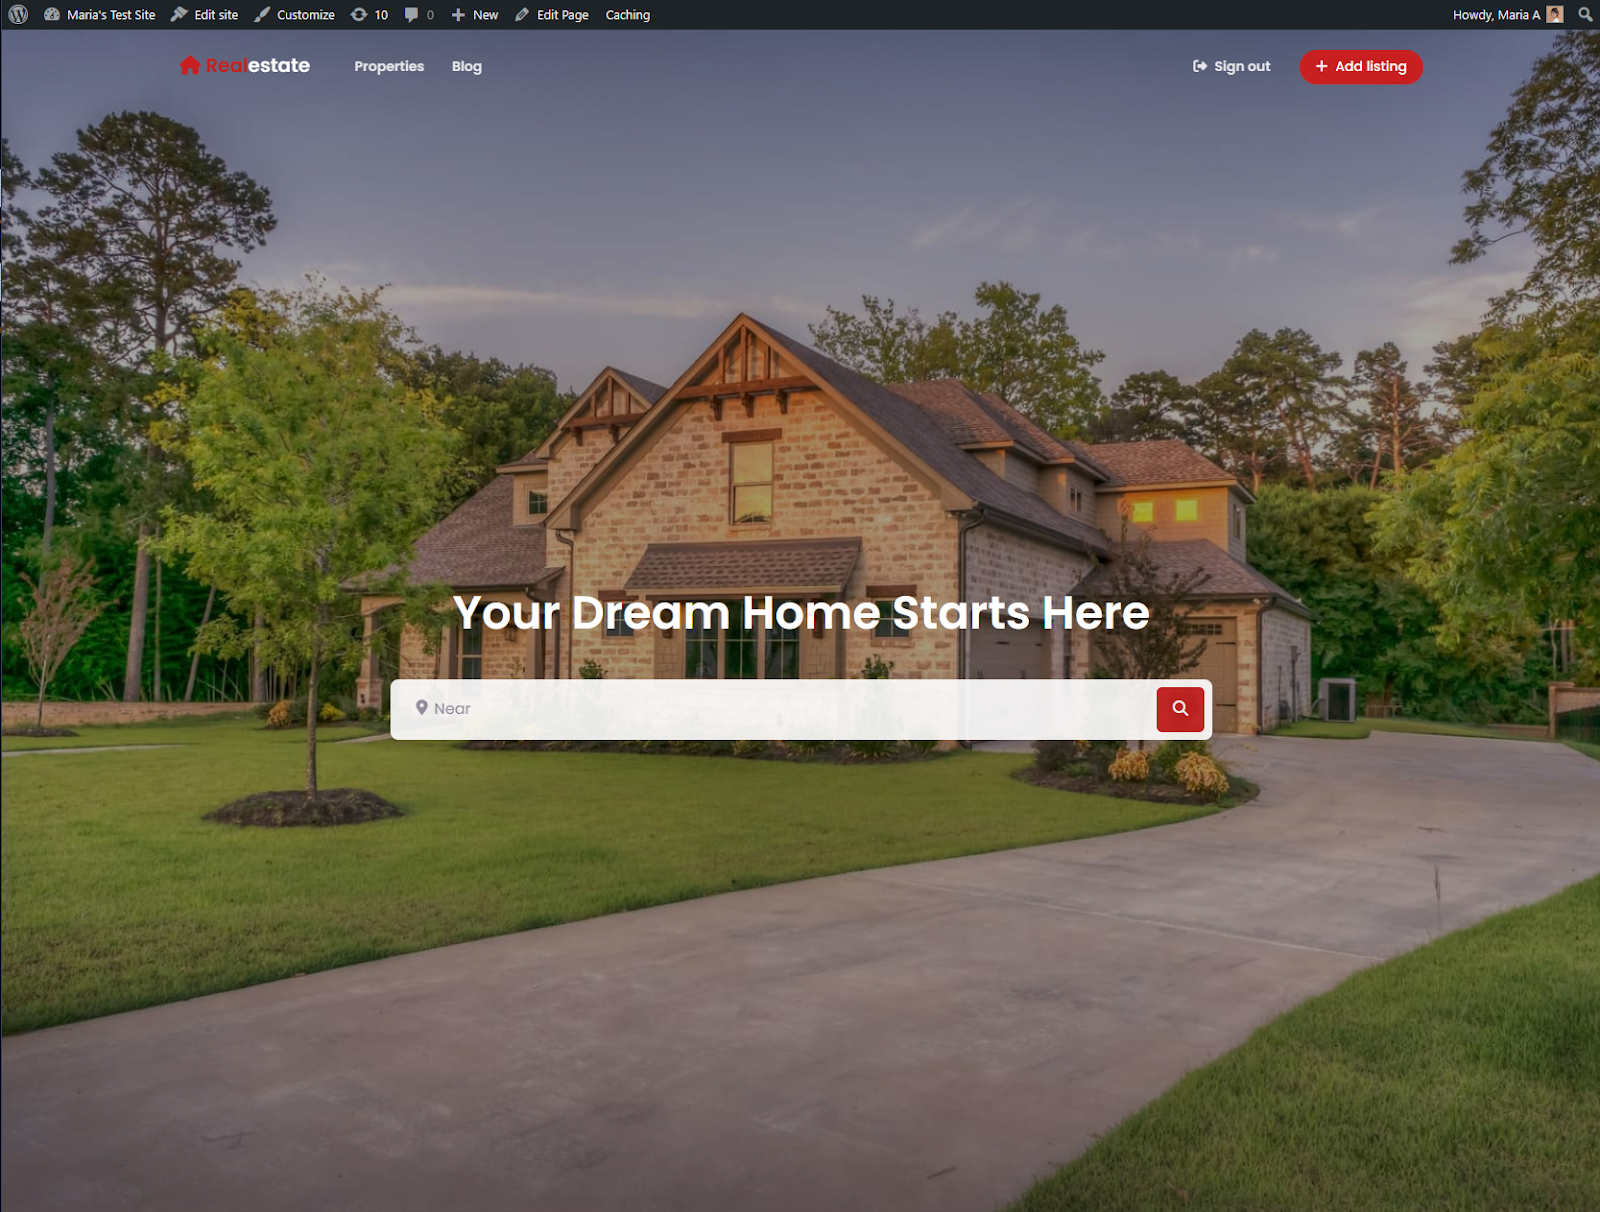
This will give you a site that’s identical to the pre-built demo. It’s a great starting point for creating your own real estate website.
All you have to do now is replace the dummy data with your listings.
Step #2: Customize your website
Now that your site is set up, you only need to customize it.
Start by adding your logo and changing the colors to fit your unique brand aesthetic.
Next, edit the dummy listings and replace the information with your property listings data.
You can add new listings, as well.
The Real Estate Listings theme is incredibly powerful and customizable.
To get started, go to Appearance → Editor.
You’ll see a neat theme editor with a customization menu in the left sidebar.
From here, you can customize the appearance of your real estate website using the block editor.
Header Customization and Navigation
Click the Real Estate Logo, next click the Document Overview icon.

Next, click Header Transparent and then Edit.

Finally, click the chevron icon next to the BS > Navbar Block and again next to the BS > Nav Block.

The menu items will be revealed, and you can now rearrange, edit, or remove them from the menu.
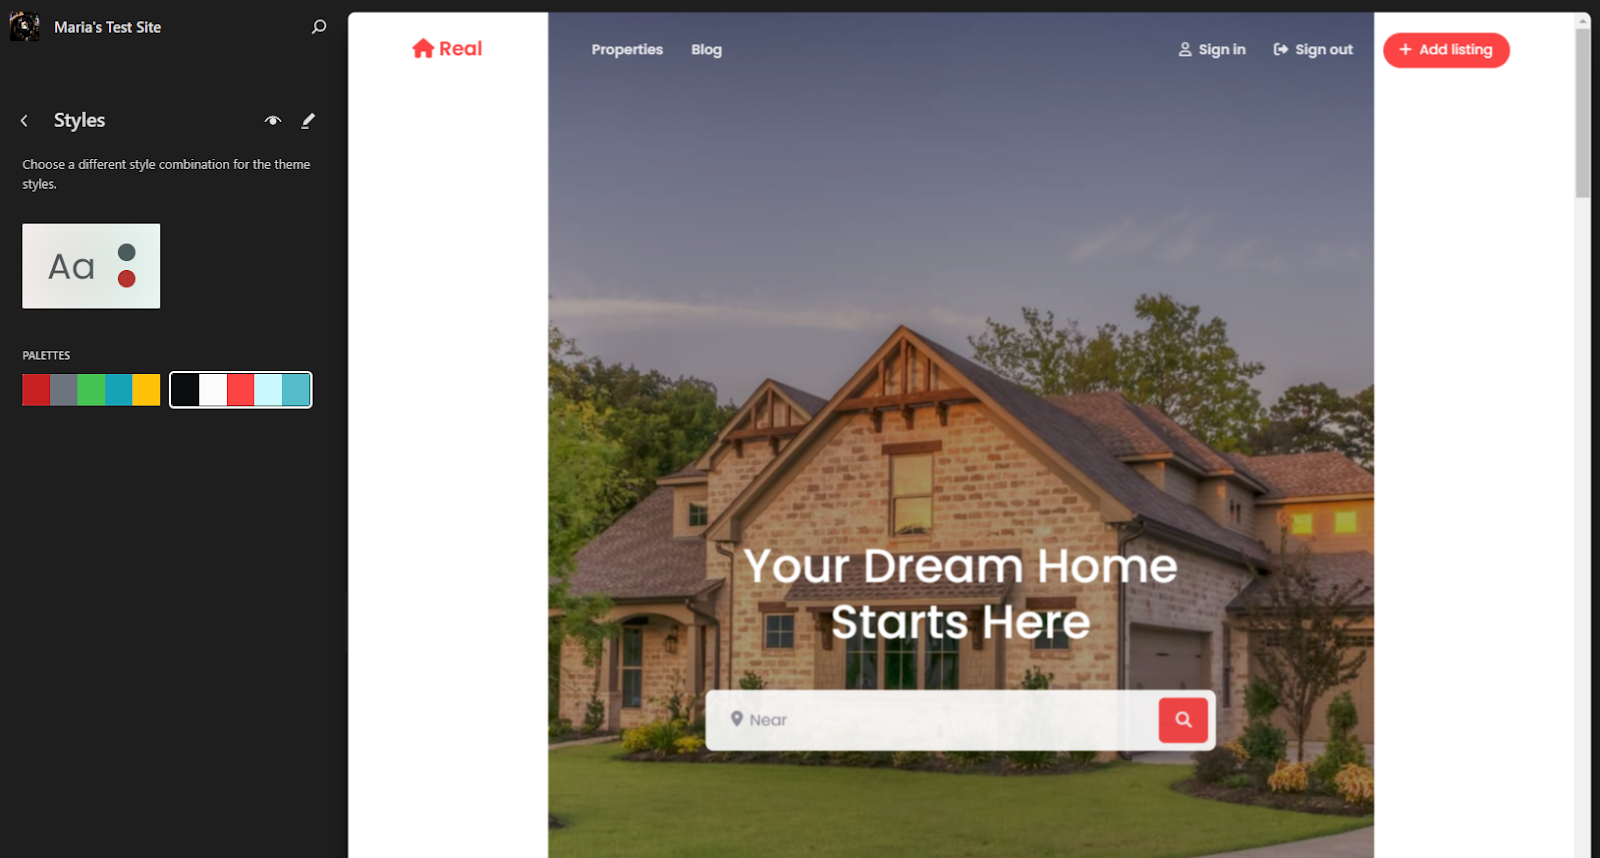
Styles
Select a style combination for the Real Estate Listings theme from the Styles menu item.
Try different styles by clicking on the color palettes to see which fits your brand.
The theme also allows you to add custom styles.
To do this, click on the pencil icon in the sidebar to open the styles in the block editor.
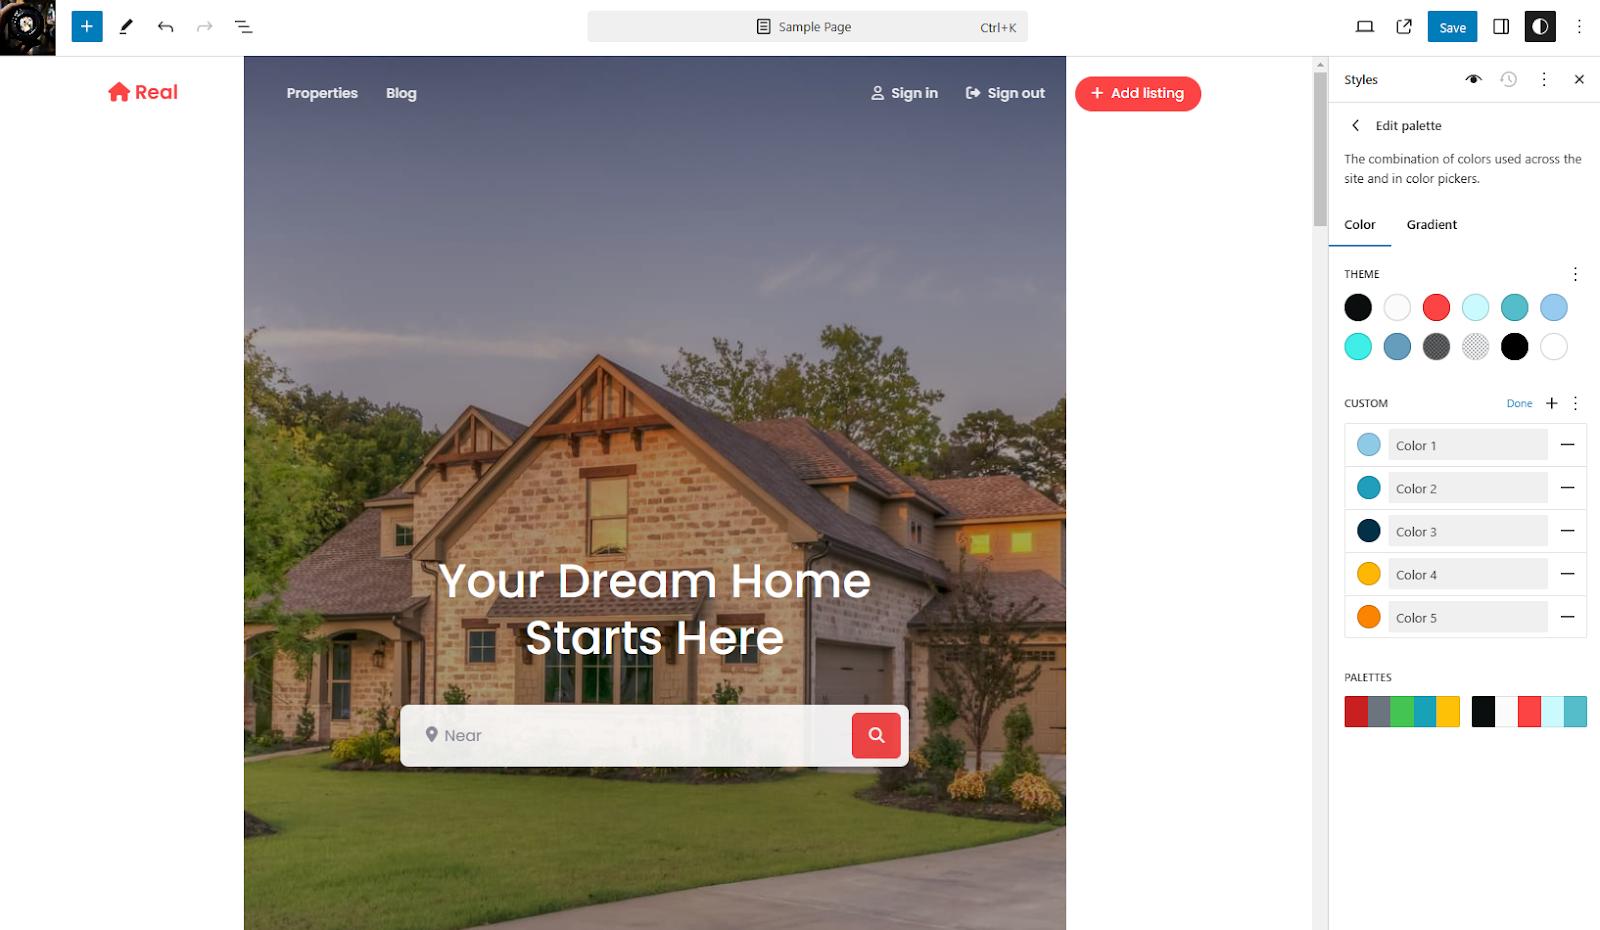
Next, click Colors → Palette → Custom to create a custom palette for your website.
I recommend using a website like Coolors to build a color palette or pick from trending palettes. Click the Done link to continue.
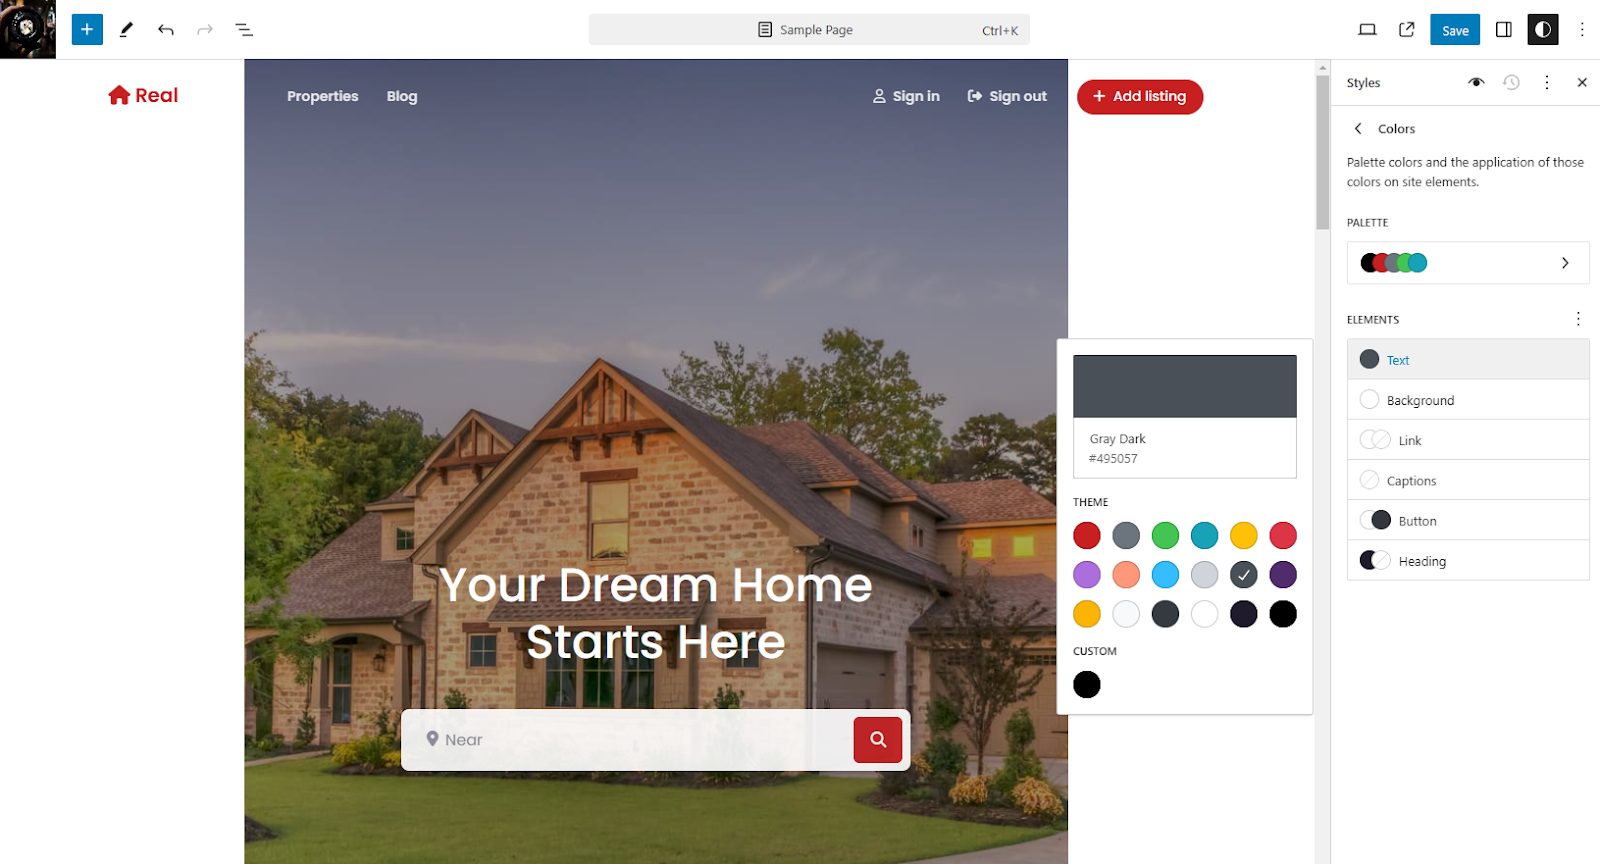
You can also control which color each element should be.
Go to Colors → Elements to set the colors for each page element.
The theme lets you set different colors for text, links, backgrounds, buttons, and headings.

Additionally, you can change the typography styles and how those styles are applied to on-site elements.
Pages
Another neat thing you can do directly from the theme editor is view a complete list of your real estate website’s pages.
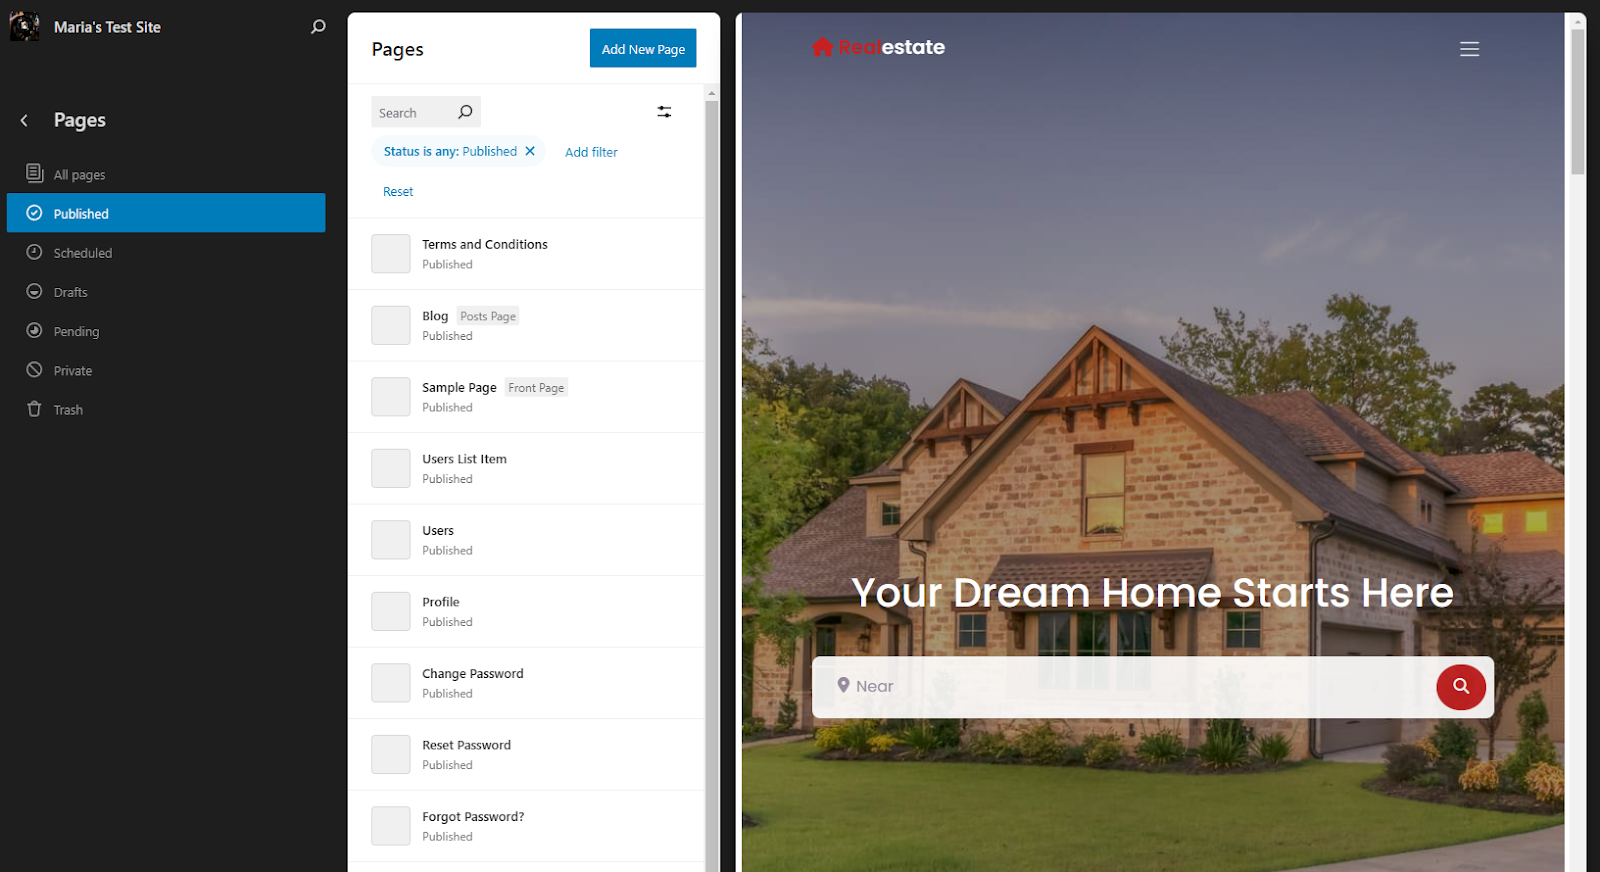
You can see all published pages, scheduled pages, drafts, and more.
Templates
The Templates section lets you see all page templates you get out of the box with the Real Estate Listings theme.
You can create new templates from the same screen or reset any customizations made to the default templates.
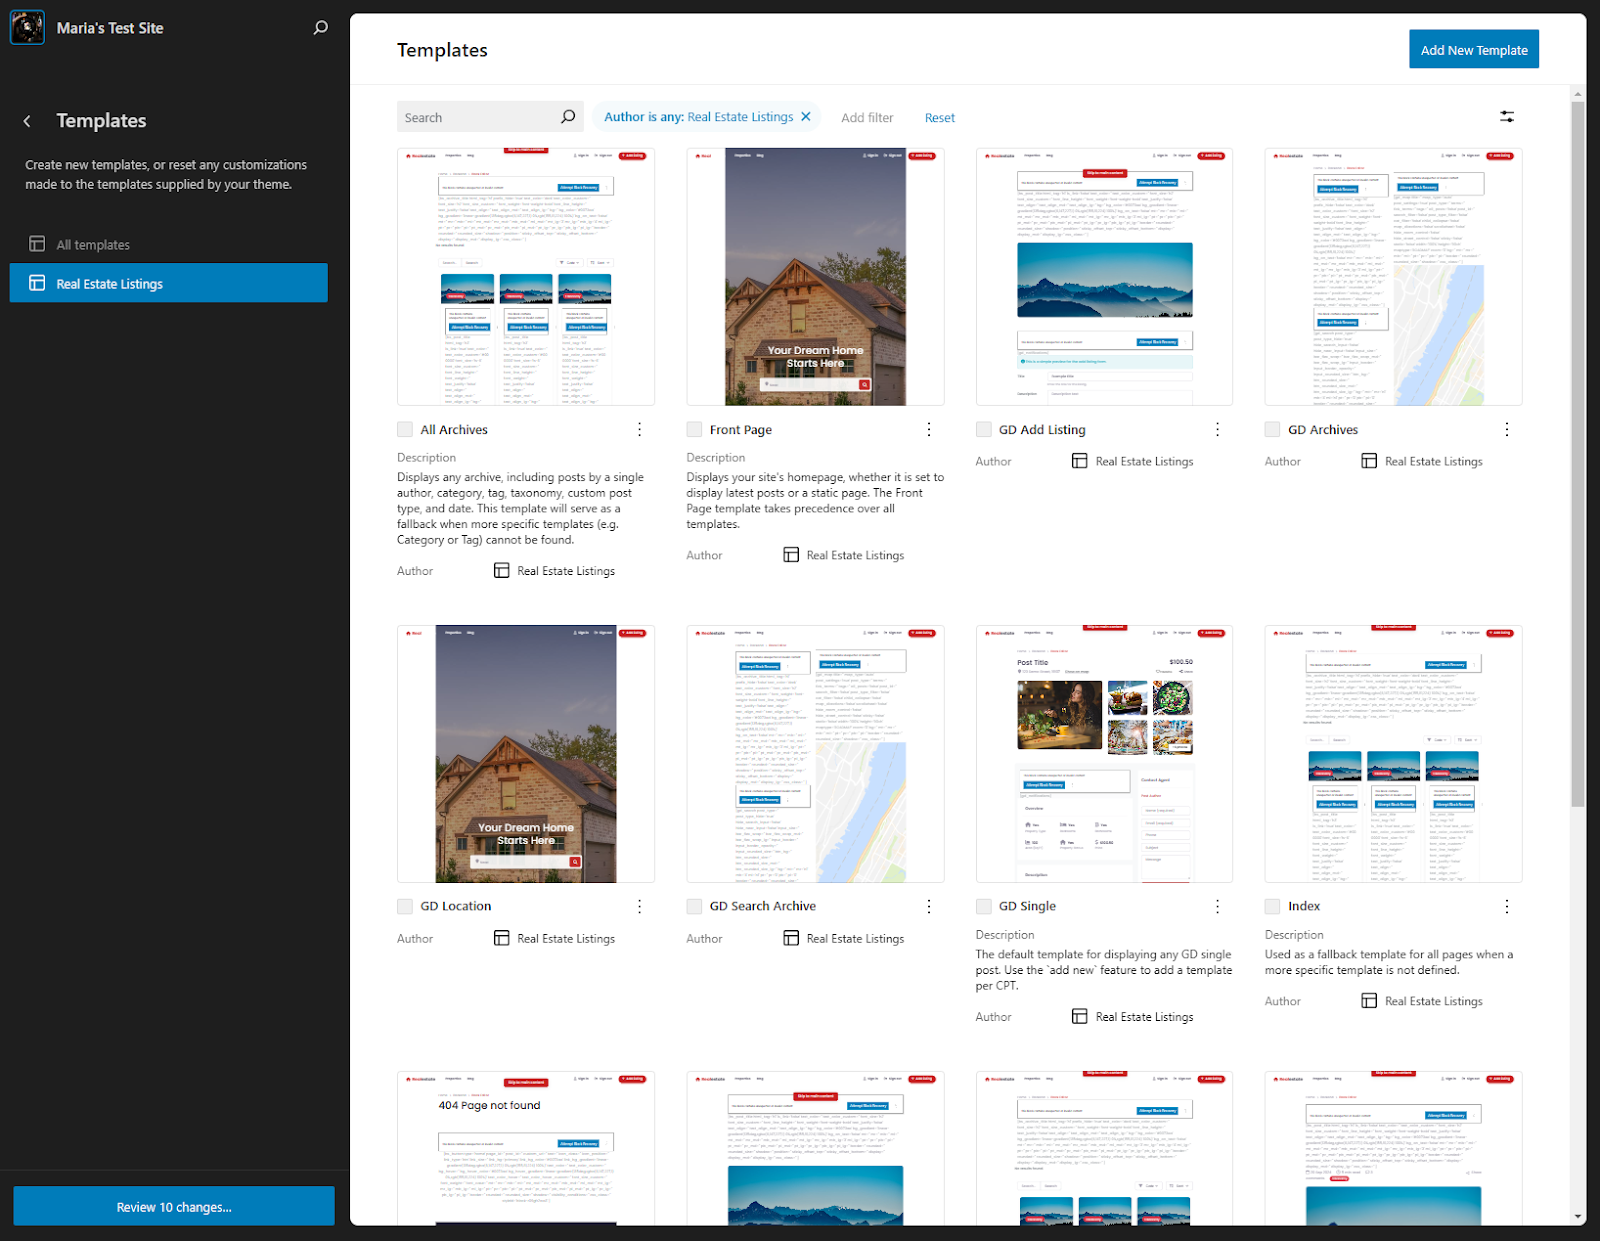
Let’s edit a template together to see the options available. This is the GD Single template:

Let’s say we want to change the look and feel of the gallery at the top.
Click on the gallery element to open up its settings in the sidebar on the right.
You can change the Content of the gallery by changing its Image source, Image size, and Lightbox.
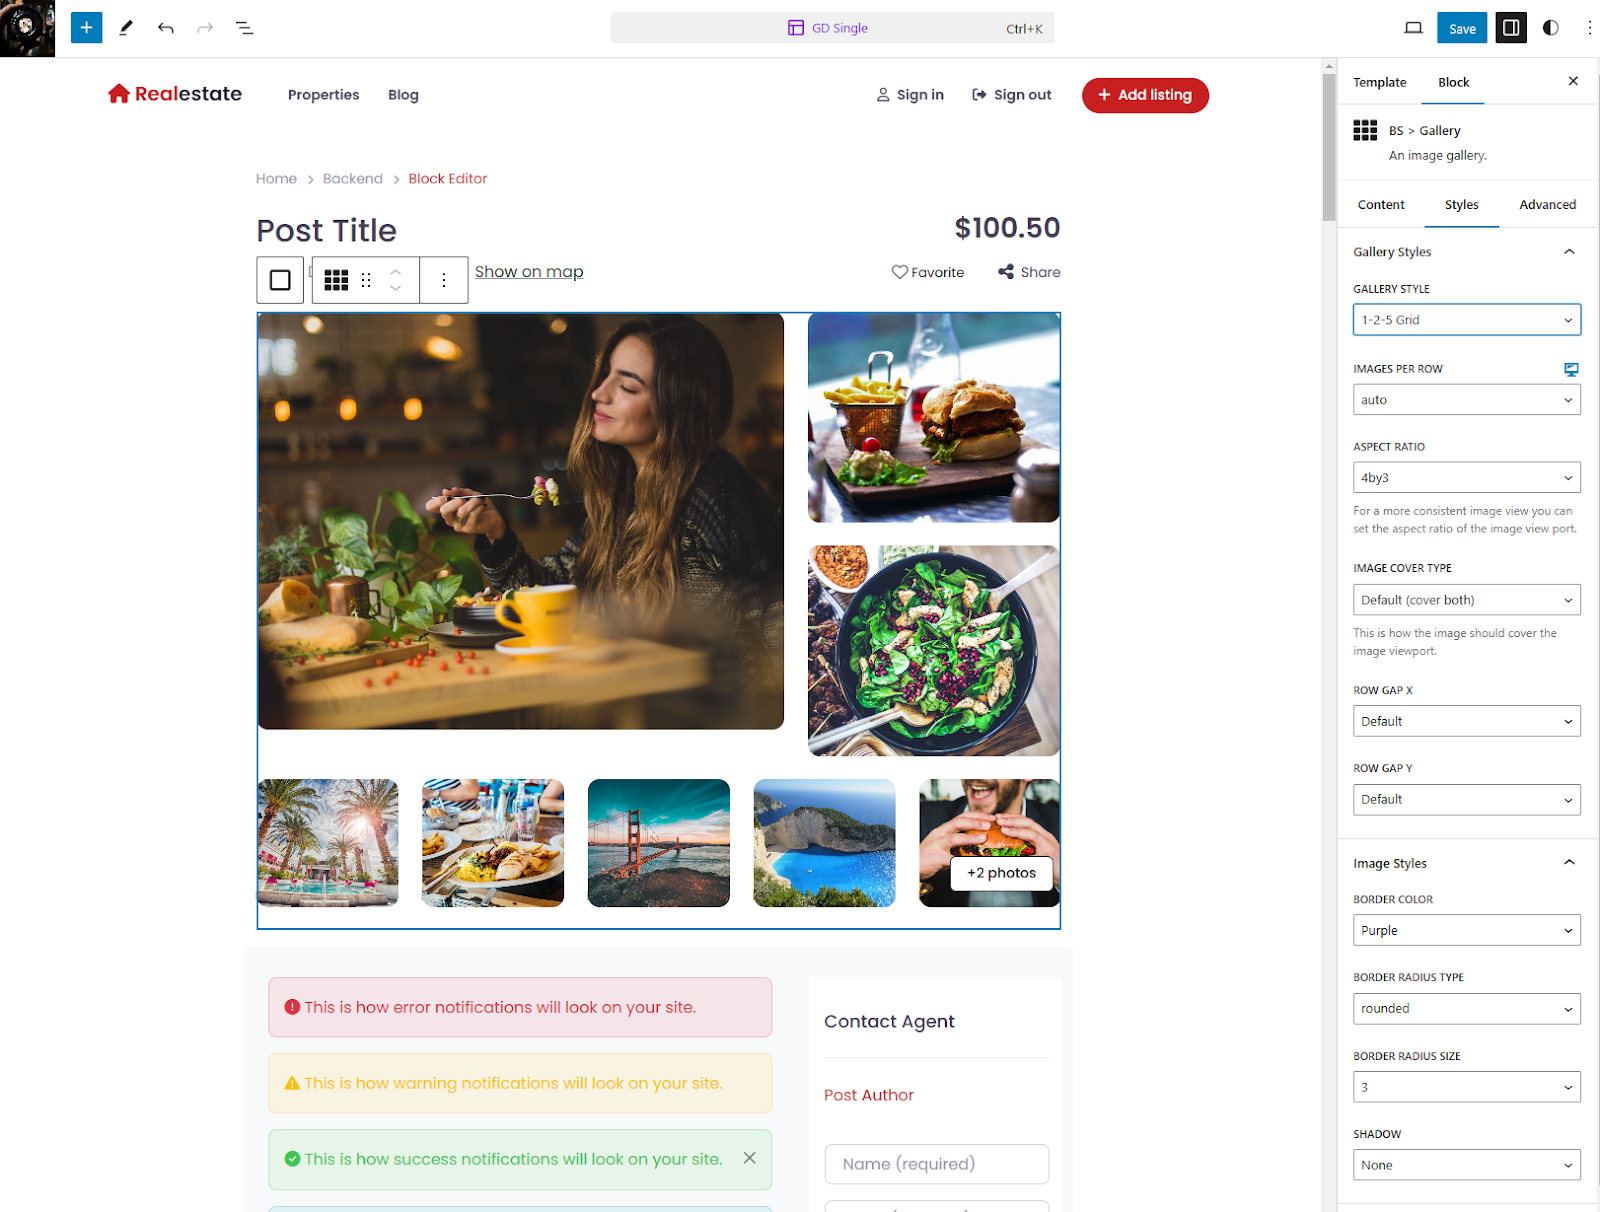
By heading over to the Styles tab, you can change the Gallery Styles, Image Styles, and Typography.
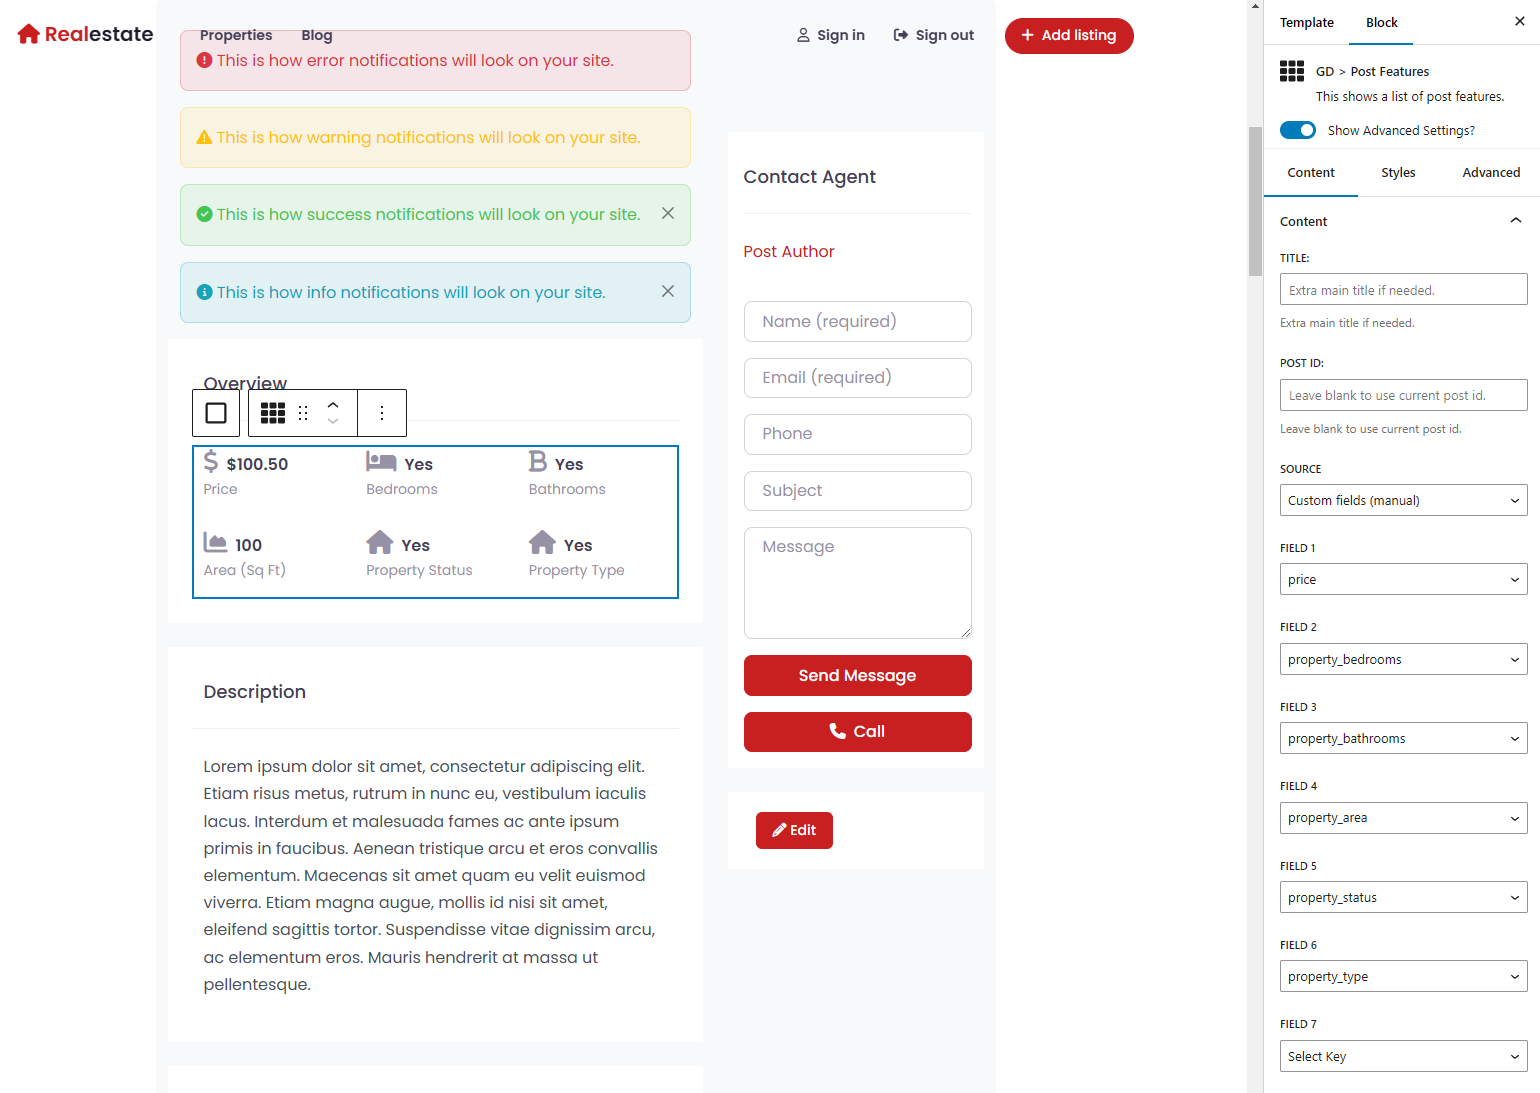
Let’s say you wanted to change the order of the fields that appear in the Overview section.
As before, click on the section and use the dropdown menus in the sidebar to set each field.
In the screenshot above, we’ve switched around Property Type and Price.
Step #3: Add important sections
Real estate websites feature distinct elements like mortgage calculators, walk scores, and virtual tours that set them apart from other websites.
The good news is that the Real Estate Listings theme comes with a free add-on with these elements built-in.
The Real Estate Directory Plugin
The Real Estate Listings Theme comes with a free GeoDirectory add-on called the Real Estate Directory Plugin, which adds a set of extra features tailored for the real estate market to GeoDirectory listings.
These extra features are:
Mortgage Calculator
Mortgage Calculators allow potential buyers to estimate their monthly mortgage payments based on the property’s price, down payment, interest rate, and loan term.
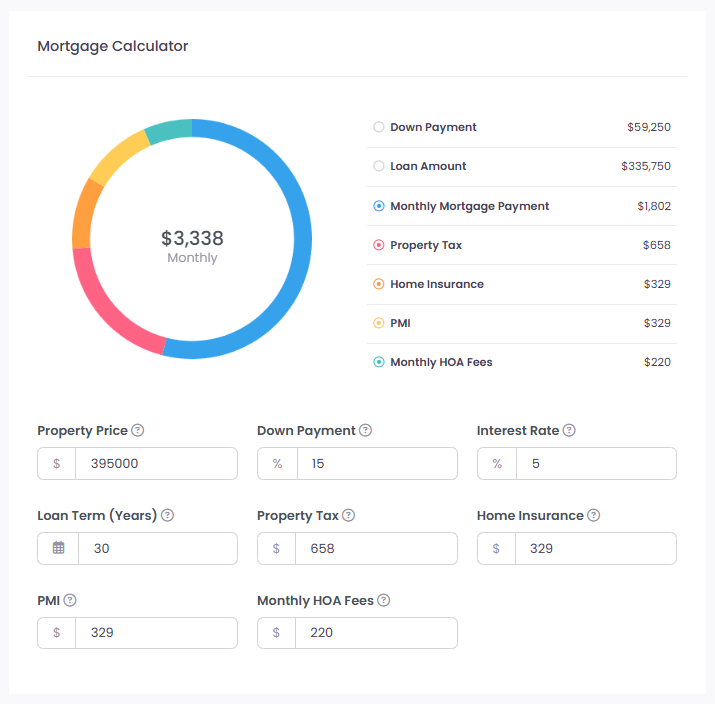
You can integrate it into your site to help buyers understand the financial commitment of purchasing a property.
The mortgage calculator is added to your listing page template from the get-go.
You can customize it by heading over to Appearance → Themes → Customize → Templates → GD Single.

From here, you can set the different fields that appear in the mortgage calculator such as the down payment percentage, interest rate percentage, property tax, monthly HOA fees, and more.
Energy Rating Chart
An Energy Rating Chart displays a property’s energy efficiency. This is typically shown as a letter grade and sometimes as a numerical score.
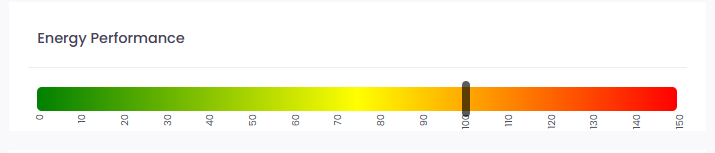
It helps highlight the property’s sustainability features, which might be a significant selling point for eco-conscious buyers.
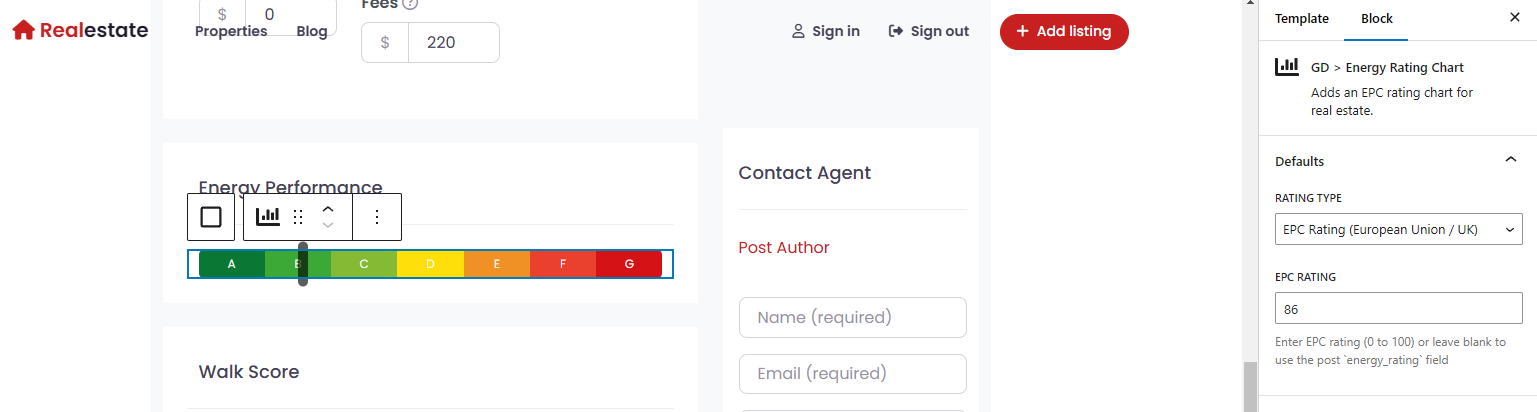
The Real Estate Directory Plugin lets you select the Rating Type you want to use for your listings.
If you’re in the US, you might prefer to use HERS, whereas if you’re in the EU, you might instead go with the EPC Rating.
Walk Score
Walk Score is a feature that rates the walkability of a property’s location based on its proximity to amenities like restaurants, shops, and parks.
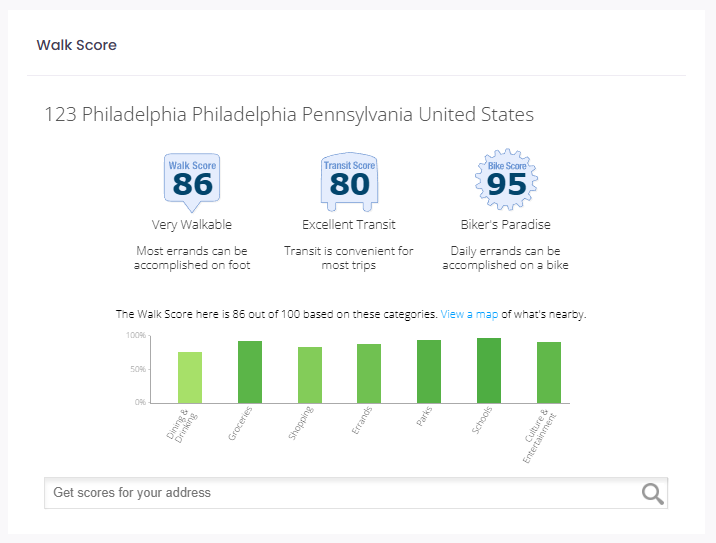
Adding a Walk Score to each property listing helps potential buyers assess the convenience of the location at a glance.
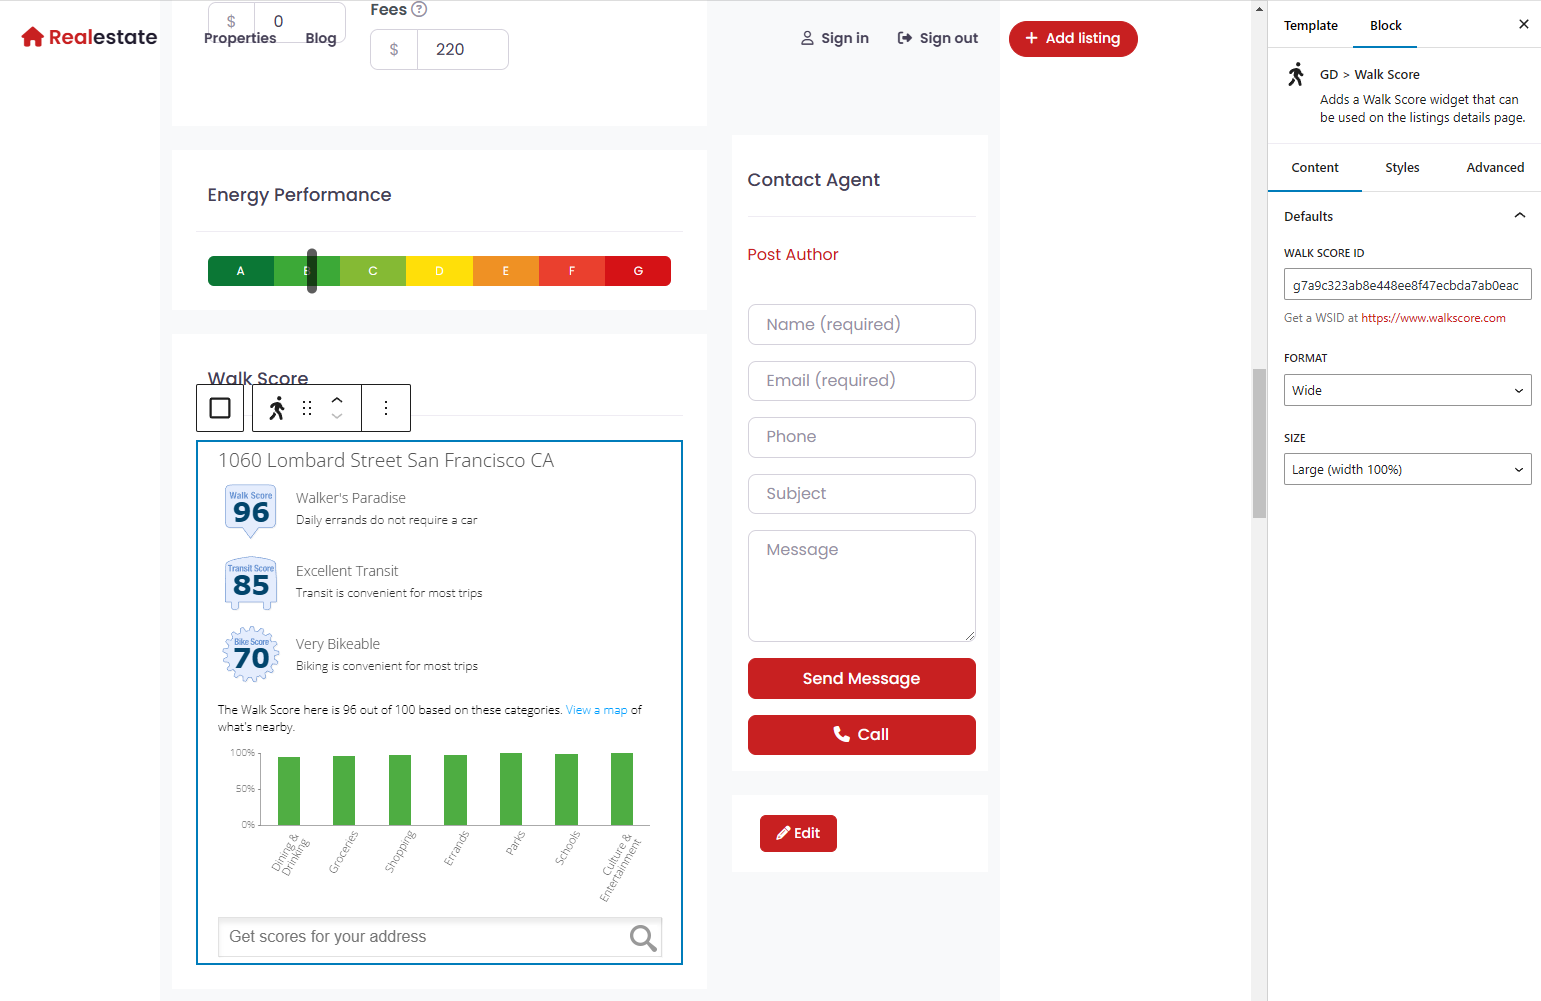
With the Real Estate Directory Plugin, you can get a Walk Score ID for your property from walkscore.com and enter it in the field.
It will automatically import the data and populate it on the front end.
Virtual Tour
A Virtual Tour is an interactive online experience that allows potential buyers to explore a property’s interior and exterior via 360-degree images or videos.
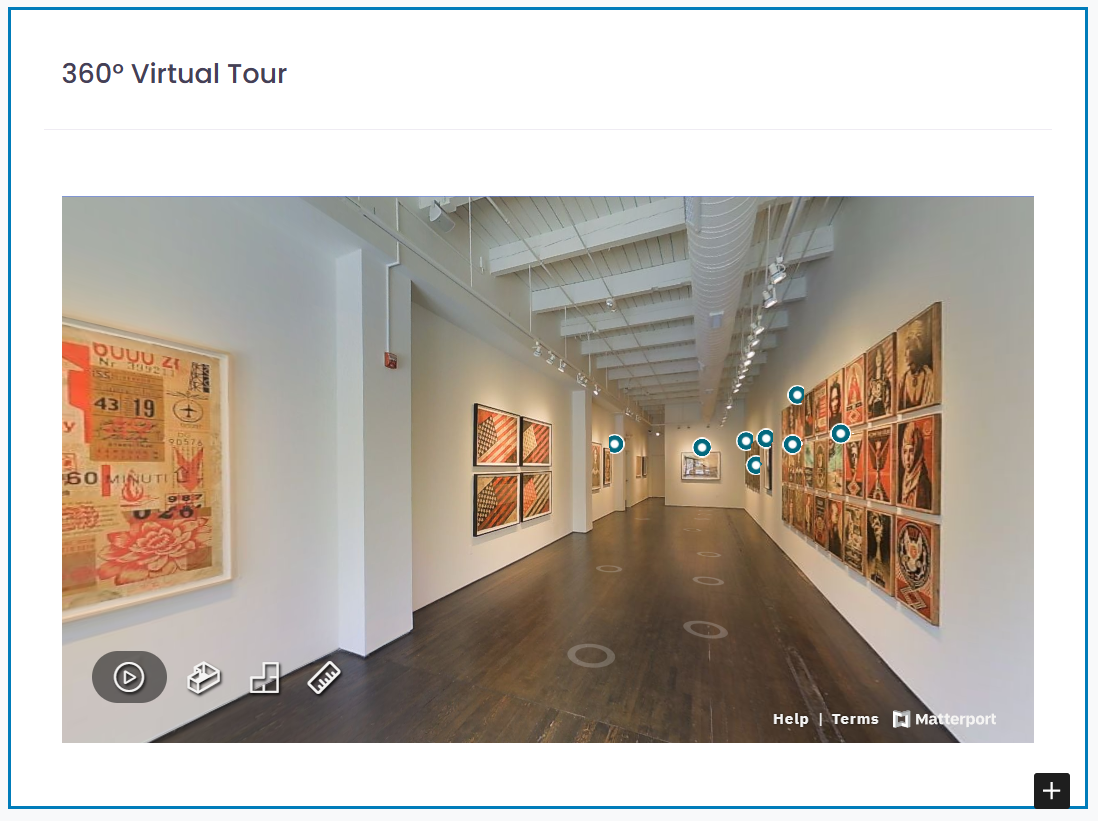
Offering a Virtual Tour of your property listings enhances the user experience by giving buyers a realistic feel for the property without visiting in person.
The Real Estate Directory Plugin allows you to easily embed a Virtual Tour using tools like Matterport.
Conclusion
Creating a real estate website is pretty easy if you have the right tools in your arsenal.
With WordPress and the GeoDirectory themes and plugins, you can set up your site in a few simple steps and start adding property listings.
The toolset comes with plenty of essential features, including maps, open house dates, reviews, and various search options.
Ready to build your real estate website? Get GeoDirectory today!
Newsletter - Stay Updated!
Get the latest news, tips, and exclusive content directly in your inbox.