How to Create an Outstanding Directory Website With the Blockstrap Theme and its Directory Child Theme

Recently we built Blockstrap, which is both a plugin (providing the page building blocks) and a block theme (FSE – Full Site Editing) that combines the power of WordPress’s new Site Editor and Bootstrap 5.
We built Blockstrap as the framework for our new wave of Directory Themes, which soon will include a Generic Business Directory and Events Theme, a Real Estate Theme, a Job Board Theme a Classified theme, and many more Directory Templates for WordPress,
All these themes are specifically designed to create a pixel-perfect Directory site using Geodirectory.
In this tutorial, you will find a step-by-step guide to building a Directory Website using the Blockstrap Theme, the Directory Child Theme, and our Geodirectory plugin:
- Install the Blockstrap/Directory Theme
- Install and setup GeoDirectory
- Design the Directory Website using the Block theme Builder
In this guide, we’ll show you how to make a cool online directory using the Directory Theme and the GeoDirectory Plugin.
With this setup, you can easily add features based on location, make your site look awesome, and add different kinds of content that changes dynamically.
But for now, we’re going to keep things simple and easy to understand.
In this tutorial, we’ll cover:
Installing Theme and Plugins.
1. Install the Blockstrap Theme and its Directory Child Theme
First, Let’s Install the Directory theme. Since it’s a child theme of Blockstrap it will automatically install the main theme too.
Installing the Blockstrap theme will also prompt you to install the Blockstrap plugin.
the Blockstrap plugin is our page builder, needed to add the collection of Blockstrap blocks to enhance the design of your directory website.
If you’re curious about the three 1-star reviews for the Theme, please note that these reviews are actually for a very old version of this theme built by other developers, not the current one. We acquired the original “Directory” Theme and its URL (wordpress.org/themes/directory/) because we appreciated its concept and wanted it for our new product. Unfortunately, this meant inheriting its past negative reviews.
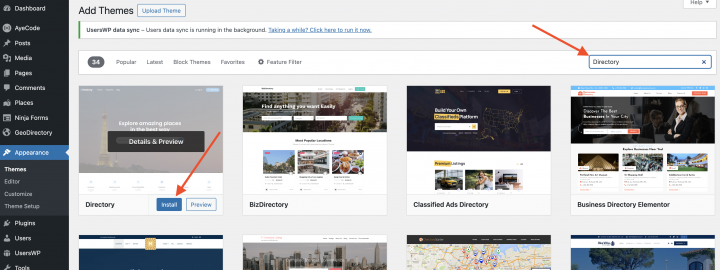
You can go to your WordPress website and from
WP-Admin >> Appearance >> Themes >> Add New: Search Directory and install the first theme option.
2. Install GeoDirectory
Here’s what to do:
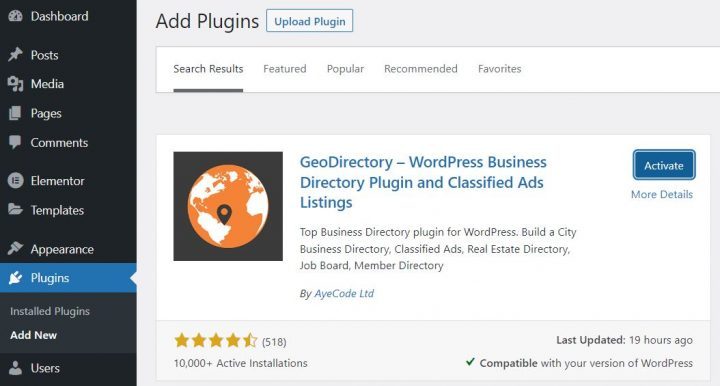
- Go to “Plugins” and then “Add new”.
- Search for GeoDirectory.
- Install and activate it.
That’s it! The plugins are all set up now.
3. GeoDirectory Install Wizard
For GeoDirectory, you must complete the Setup Wizard to configure the Google Maps API key and import a few dummy listings.
Choosing the Map System (Google Maps or OpenStreetMap)
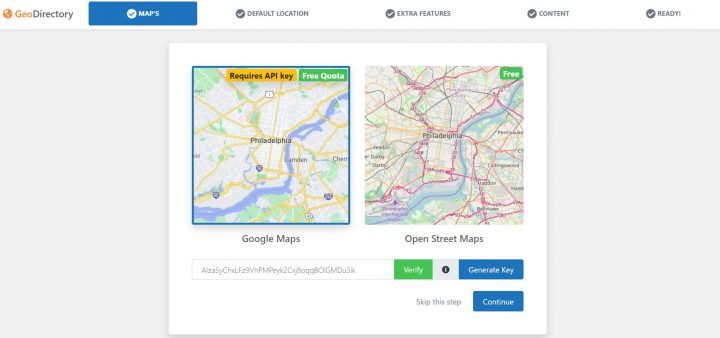
In the first step of the setup, you choose between two map systems: Google Maps and OpenStreetMaps. For this guide, we’re going with OpenStreetMaps.
If you prefer Google Maps, there are a few extra steps:
- Click on the “Generate Key” button and follow the instructions provided here to create a valid API key.
- These are the important steps:
- Activate the Keys.
- Create a new project or select an existing one.
- Obtain the Key.
- Set up a billing account.
- Limit the API key (so it only works from your website’s URL).
Step four is essential, but you only pay if you exceed $200 a month. However, the free credit usually covers the needs of most directories.
Now, let’s move on to setting the default city.
Setting the default city
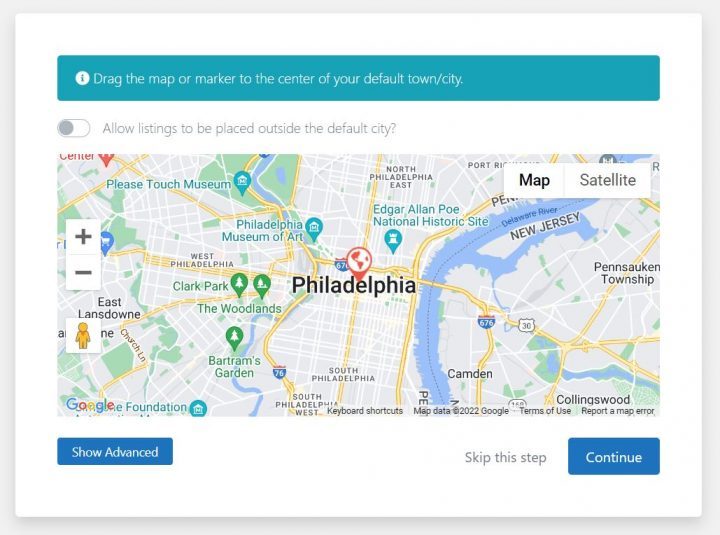
Afterward, you’ll select the default location, which is the main city featured in the directory.
We’ve decided on Philadelphia as the default city, but you’re free to choose any location you prefer.
If you’re creating a directory covering multiple cities, you’ll require the Location Manager add-on.
Adding extra features
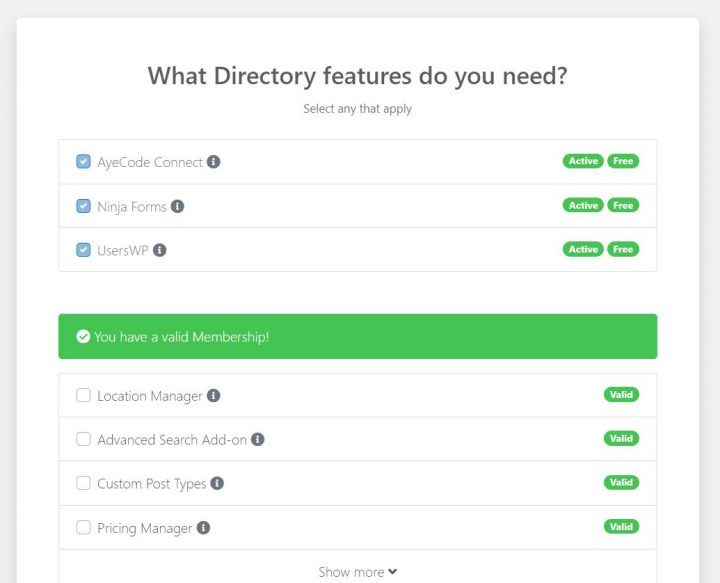
In this step, we’ll set up UsersWP, a plugin for user registration. This allows users to sign up and log in to your website.
UsersWP is essential for users to manage their listings, create profiles, and access features like reviews.
Additionally, we’ll install Ninja Forms, which adds contact forms to all listings. These forms send emails directly to the listing owners. (NOTE: BlockStrap has a simple contact form that can be used for this, Ninja forms is useful for more advanced forms)
Note that AyeCode Connect isn’t required for this tutorial unless you want to add premium GeoDirectory add-ons directly from your WordPress Dashboard.
Adding Dummy Data
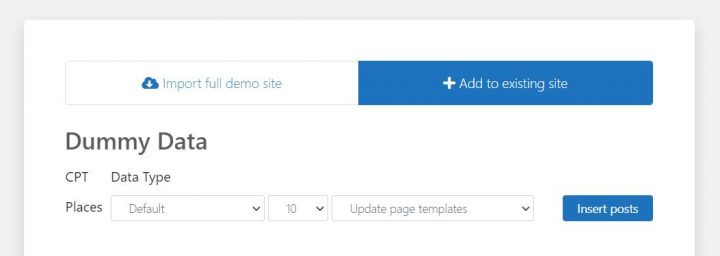
The last thing to do in the installation wizard is to add some sample listings. This also creates categories for the listings, but you can always change them later if you want.
Design the Blockstrap/Directory Theme Directory Website
Now that we have installed the theme and plugins, and completed the preliminary setup of GeoDirectory, we can begin designing our directory website.
Our Blockstrap’s child theme called the Directory theme, already provides a prebuilt block template for Geodirectory pages.
In this article, we will customize these prebuilt templates directly.
1. Blockstrap/Directory Home page design
To customize the homepage design.
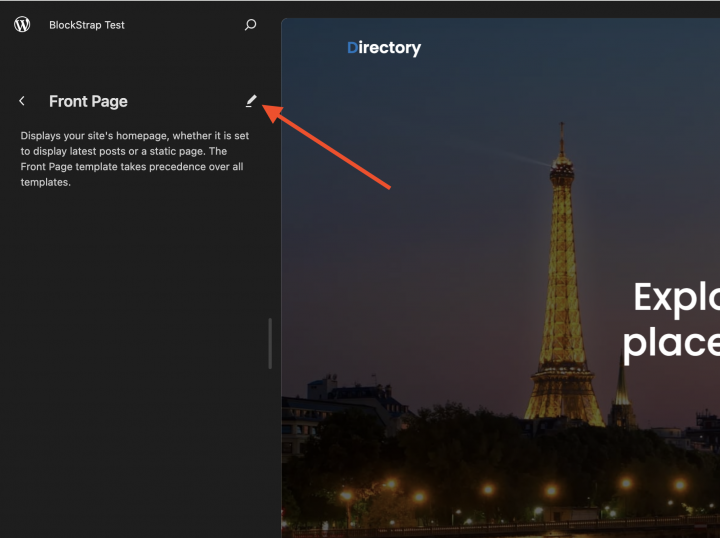
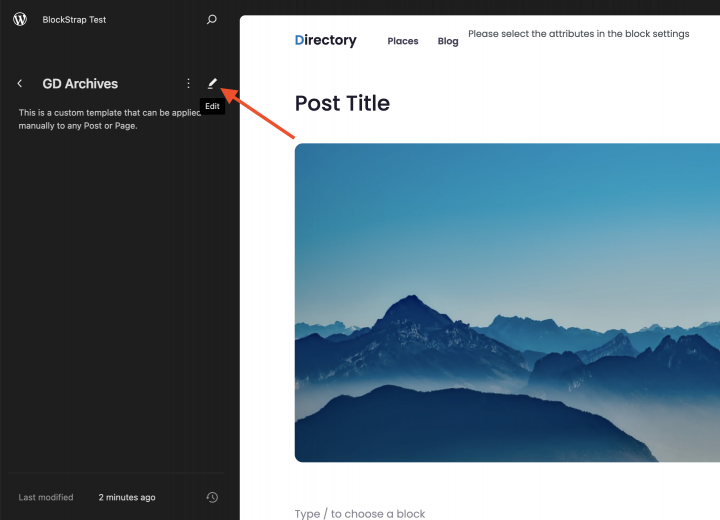
Go to Appearance >> Editor >> Click Templates
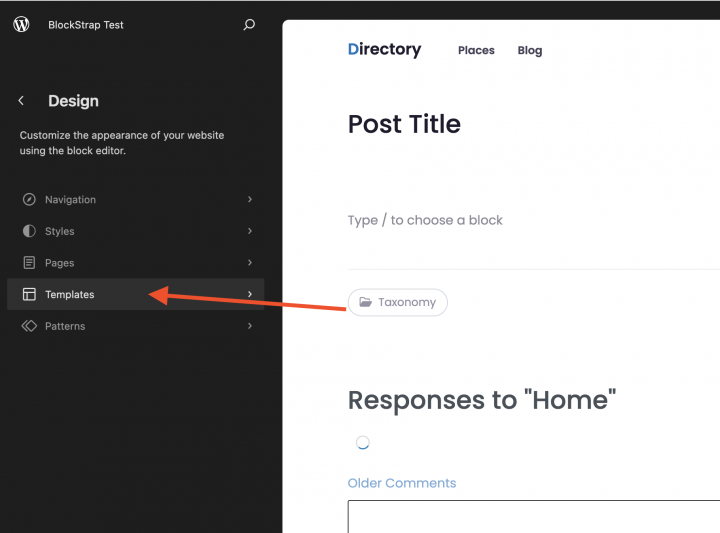
Now select the Front page template and click the edit icon.
before editing the homepage template let’s first create a Logo for the website.
1. The Logo
First things first, we need a logo for our website.
You don’t have to hire a designer to create the first version of your logo.
One of the biggest mistakes you can make when starting a new directory is spending too much time and money before testing if people need what you intend to build.
You can make a logo in just five minutes using an app like Canva, which is amazing and free (or cheap for what it offers if you choose a premium plan).
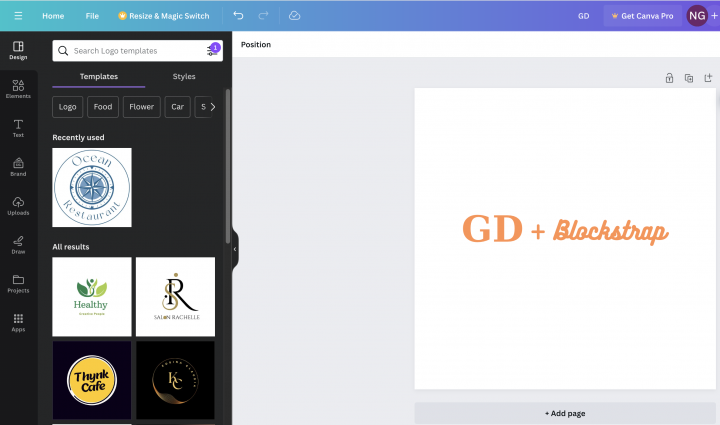
For a basic version of your product (called MVP, or minimum viable product), a logo made with Canva will do just fine.
There are lots of logo templates to pick from, and it’s okay if your first logo isn’t perfect or super unique.
If your project starts to do well, you can always work on improving or completely changing the logo later on.
A regular logo usually isn’t why a project fails.
We’ll use this logo when we create the header for the website.
The Header
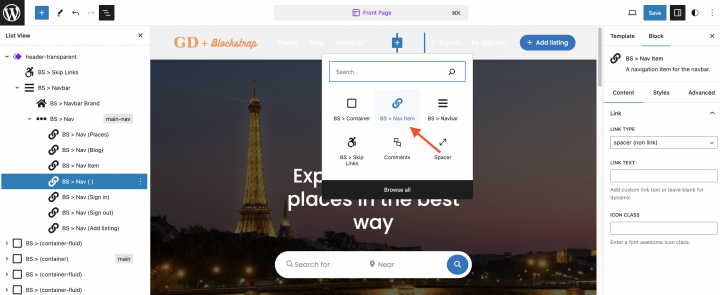
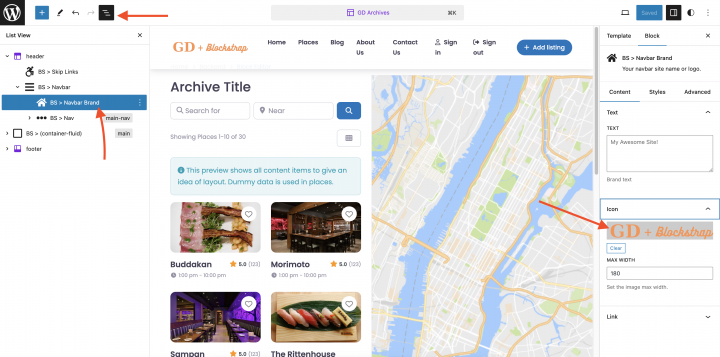
Now let’s add this logo image by selecting the proper block from the left side as mentioned in the below screenshot.

Now Let’s add a few required menu items. Like Home, Places, and Blogs, Contact, and About in our case.
You can use the BS > Nav item block to add the new menu item.
PRO TIP: If you decide to use the transparent header for the home page, you’ll need to add the logo to both the regular header and the transparent header.
The Content
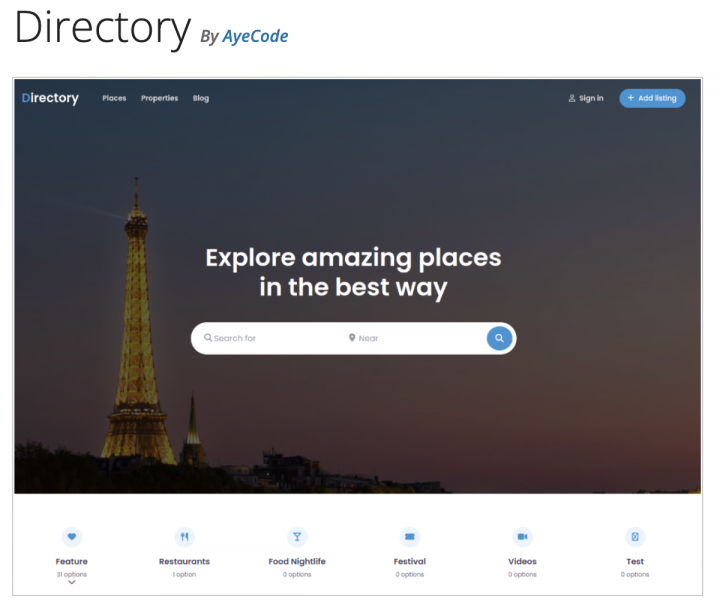
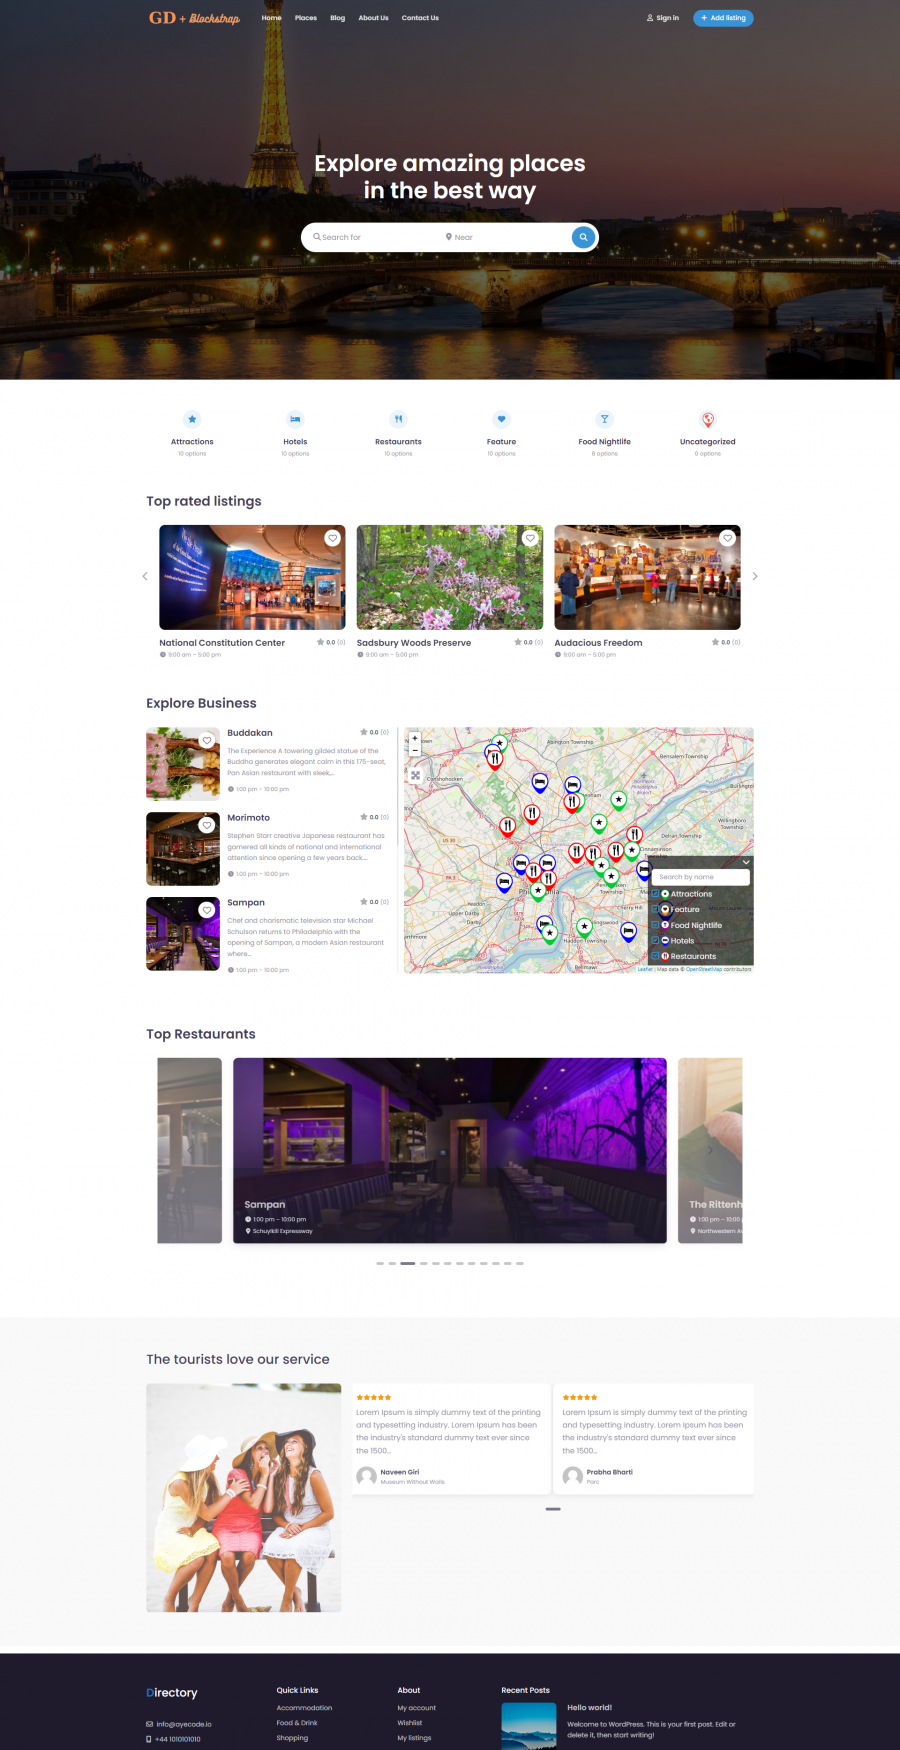
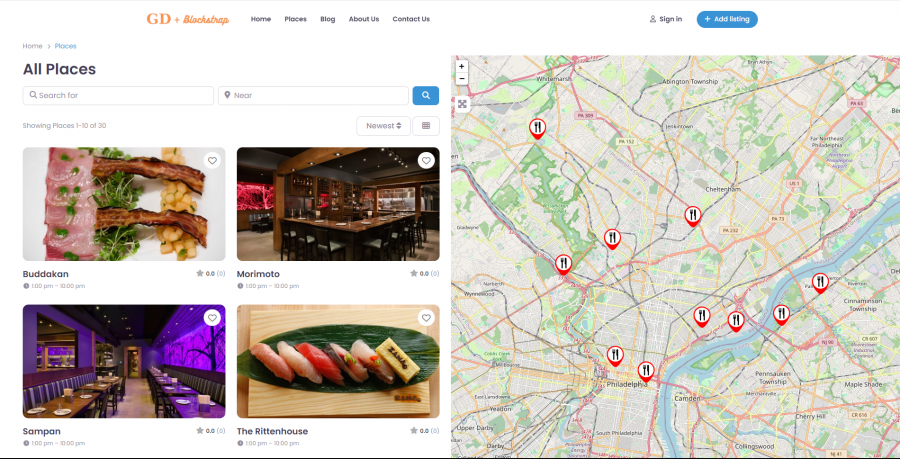
This is how the default homepage looks with the Blockstrap’s Directory Child Theme.
It already seems complete in itself but we will make some minor changes to it.
The gd_location shortcodes belong to the Geodirectory Location Manager addon. since we are not using this addon at the moment I am removing these shortcodes that you see in below screensort.
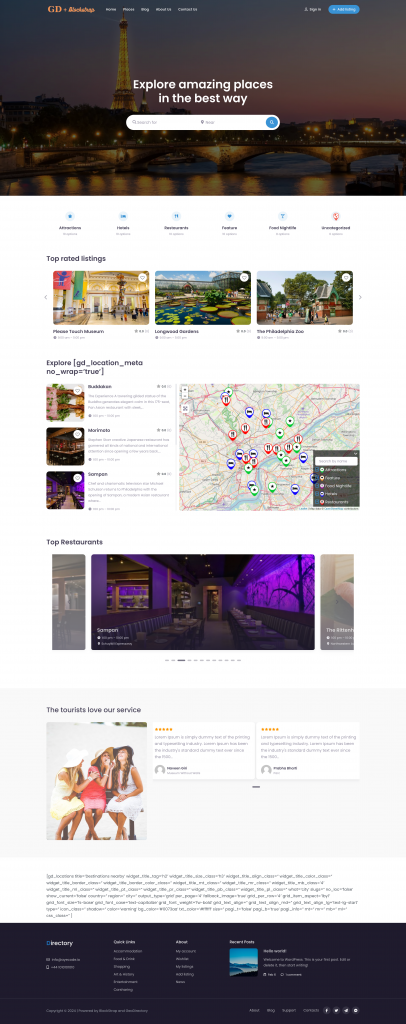
Now this is how our homepage looks now.
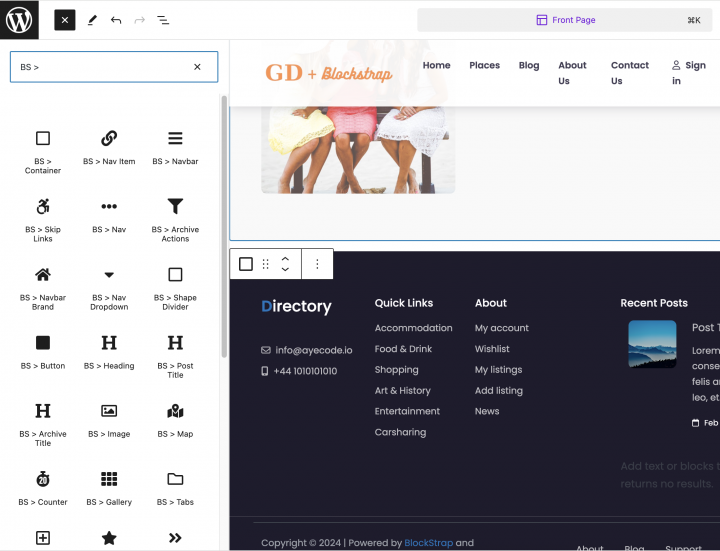
If you want to add a new section or make any changes to any page content. You can use the Blockstrap theme inbuilt blocks that start with BS >
2. Blockstrap/Directory Website Listings and Search page design
As mentioned earlier Blockstrap and Directory themes already have prebuilt templates for GD Pages.
All these templates are complete in themselves so we aren’t required to make any changes to them.
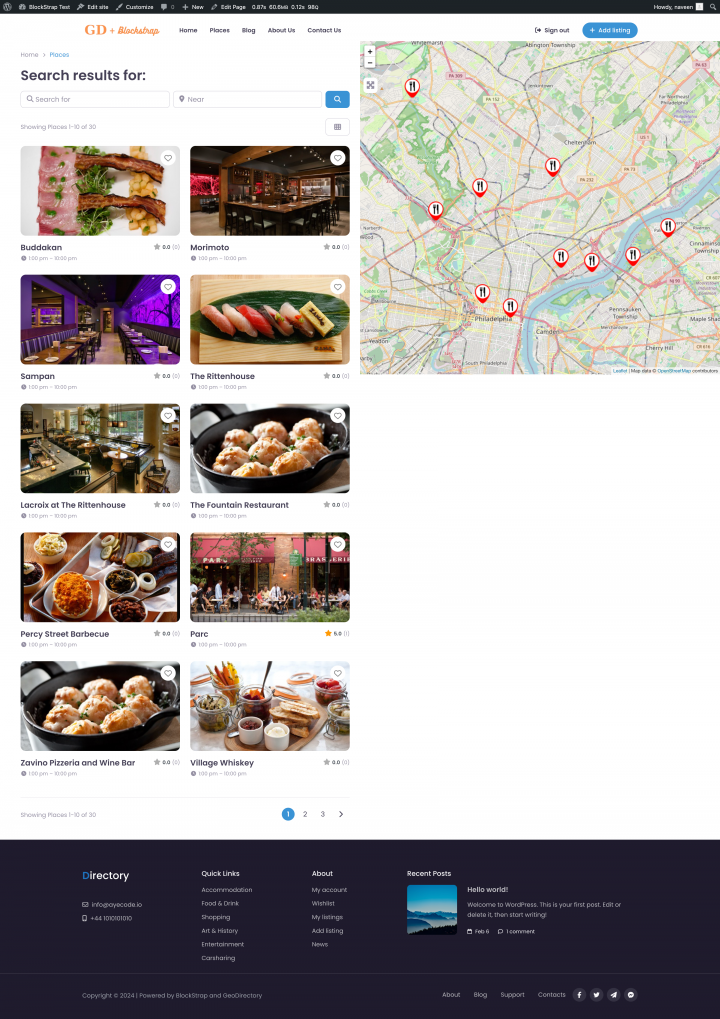
Since inner pages use a hero header. we have to customize the Archive page header section and update it with the new logo and menu items.
Let’s Go to Appearance >> Editor >> Click Templates >> Select GD Archive for Archive page layout.
Similar to the homepage we will upload the new logo and menu items here on the GD Archive page header.
This is how the GD Archive page looks with the default design.
similarly, for the GD Search page select the GD Search Archive template and make the necessary changes in it.

I am keeping the layout to default for this article.
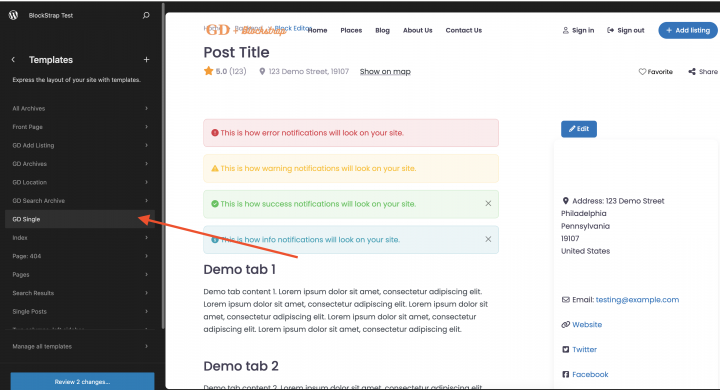
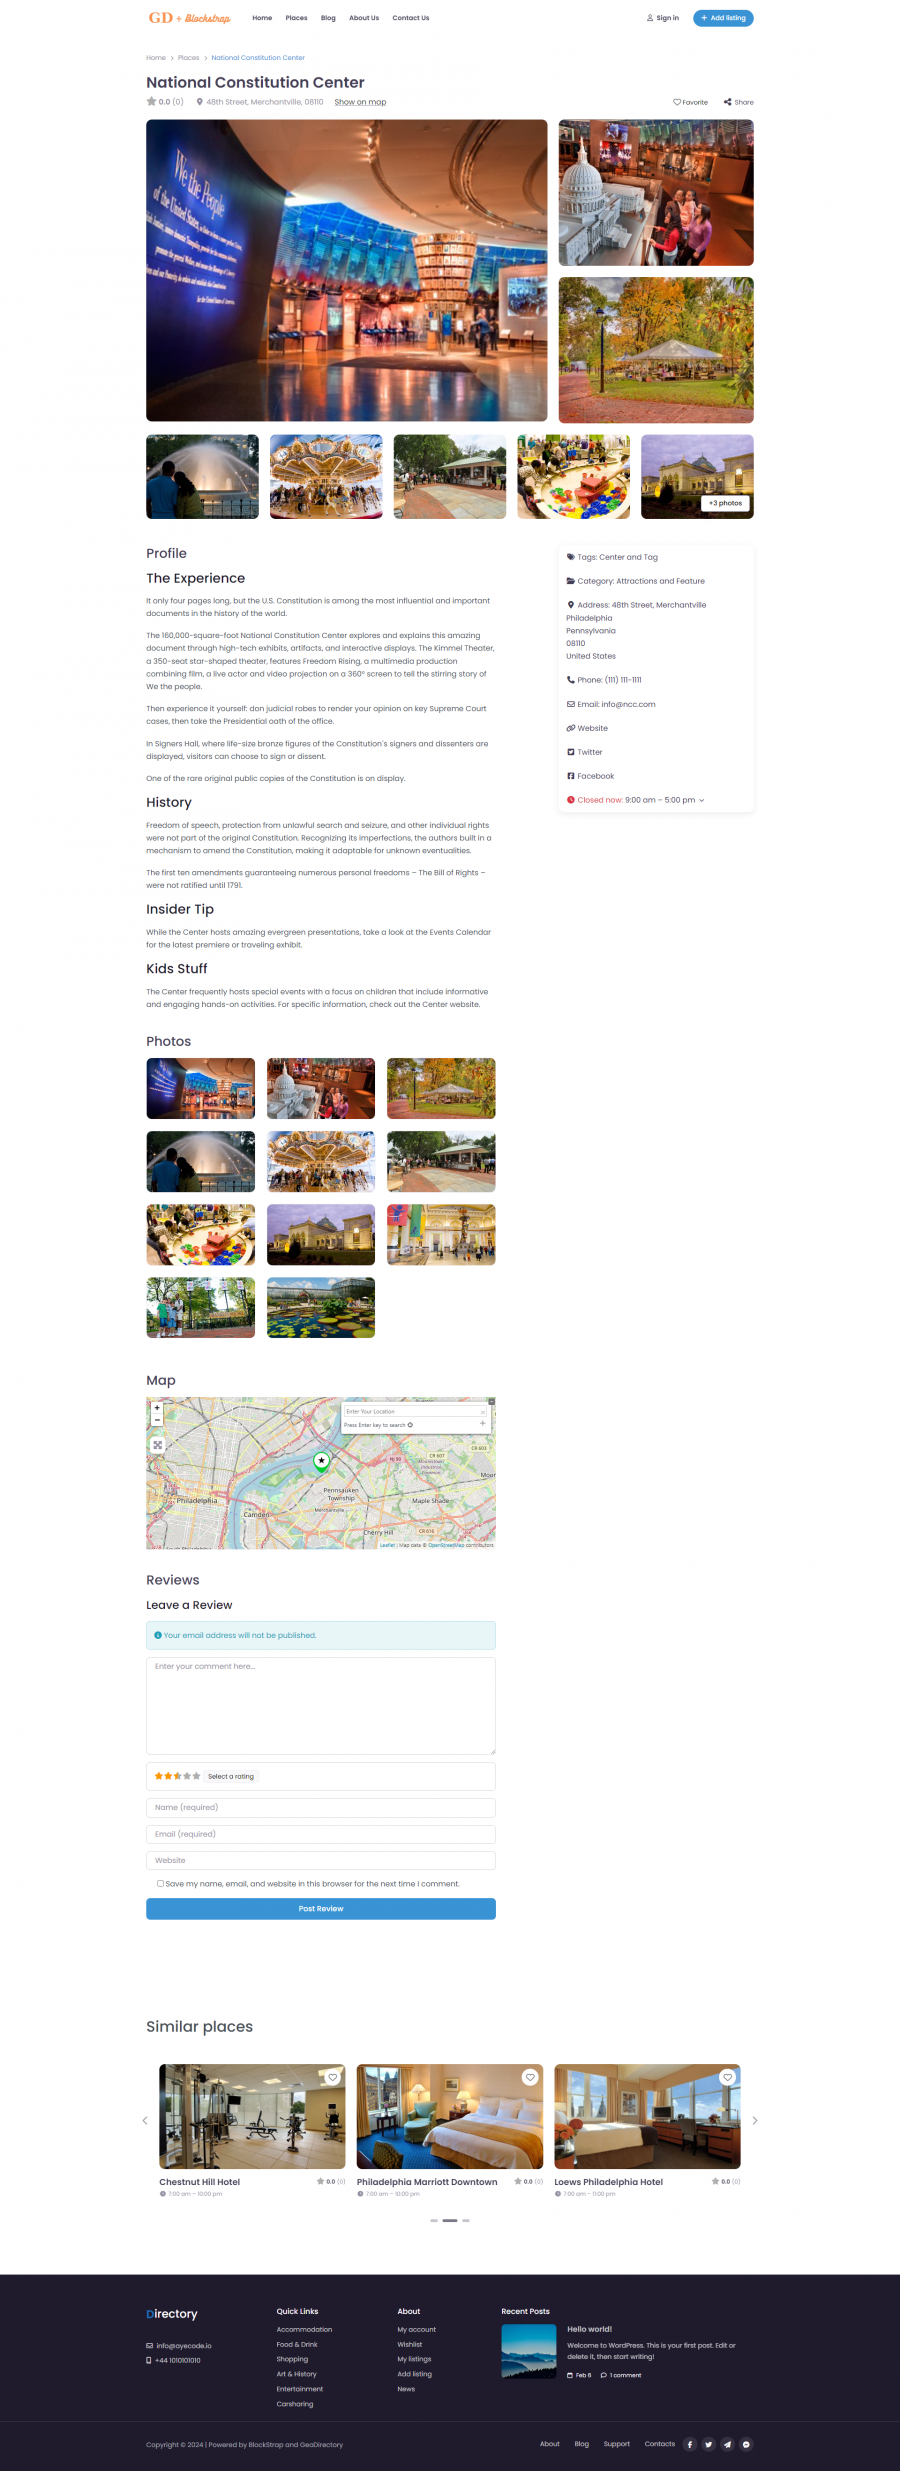
3. Blockstrap/Directory Website single Listing page design
To customise the GD Detail page select the GD Single page template and make the necessary changes in it.
This is how the default template of the GD Details page looks. which seems complete and contains all the required elements. So I am not going to edit it.
Adding Premium Features to your Blockstrap/Directory Website
If you wish, now you can add premium features to your directory, such as:
- Paid Listings: with the GeoDirectory Listing Price Manager add-on, You get to choose how much it costs to add a listing. You can set different prices for different options. For instance, you might offer more features for paid listings, like allowing more pictures, while limiting features for free ones. You can also decide which special fields are available and how long the descriptions can be.
- Claim Listings: This feature is super important for a directory. Here’s how it works: First, the admin sets up the database. Then, they invite business owners to manage their free listings. If a business owner wants full control, they might need to upgrade to a paid listing first.
- Advertising: selling ads is another form of monetizing an online directory. If your website has many visitors, you can use ad networks. But if it doesn’t, you can sell ads directly. This means businesses can pay to display banners in specific areas of your site, or their listings can appear as ads, such as at the top of search results.
These are just three examples. However, a directory website offers many ways to make money online.
You can create a worldwide market for handmade items, sell tickets to events, or offer discount coupons.
If you’re interested in getting started, dive into this resource: How to create a directory website from scratch.
This tutorial is versatile and can be adjusted to work with any theme or page builder.
The options for what you can do with your website are endless.
Conclusion
We published a large number of tutorials, about building a Directory with the most prominent themes and page builders.
If you read any of them, you will notice that building with the Blockstrap framework and its directory child theme, is easier.
The result is way better looking.
And least but not last, if you test a Blockstrap Directory Website, you will also notice that it is a lot faster than any other we created tutorials for, up to now.
The best thing, both the Blockstrap Theme and Plugin and the Directory Child theme are 100% free!
So, what are you waiting for? Start your Directory Website with Blockstrap and the GeoDirectory Plugin and start making money online now!
Newsletter - Stay Updated!
Get the latest news, tips, and exclusive content directly in your inbox.