How to Create an Outstanding Directory Website With Bricks Builder
How to build a directory website with Bricks Builder?
🚨 New Bricks Template Available! 🚨
We’ve just released an awesome Bricks Builder template to make building your GeoDirectory-powered directory site 100x easier and faster!
🎯 Live Demo: Check it out here
📥 Download & Tutorial: Grab the Bricks Directory template
💬 Join the conversation: Discuss it in our community forum
Give it a try and let us know what you think!
If instead you want to design your own tempalte, here’s a getting started guide to building a Directory Website using the Bricks builder and Geodirectory plugin:
- Install the Bricks theme
- Install and setup GeoDirectory
- Design the Directory Website using the Bricks Builder
Using the Bricks Builder alongside the GeoDirectory Plugin enables you to create an exceptionally sophisticated online directory.
This combination allows for effortless integration of location-based features, customization of aesthetics, and incorporation of dynamic content blocks, resulting in a user-friendly and engaging website experience.
However, in this tutorial, we will focus on simplicity and ease of use.
We will use the Bricks builder mainly with the GeoDirectory Shortcodes.
In the next few weeks, we will dig deeper and publish detailed tutorials on how to design each GD template mainly with Bricks Element and query loops (dynamic data).
In this tutorial, we will:
Installing Theme and Plugins.
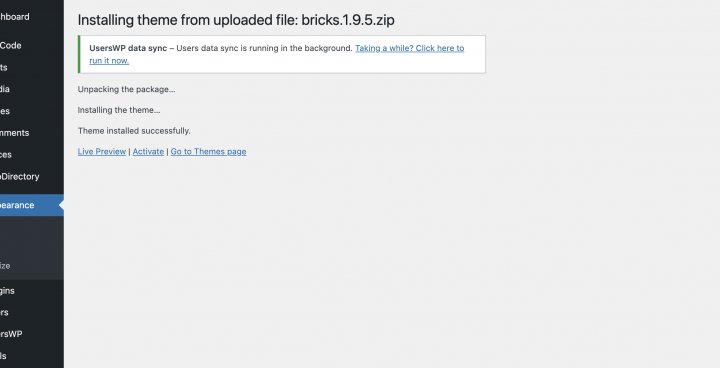
1. Install the Bricks Theme
First, download the theme and child theme from the Bricks website.
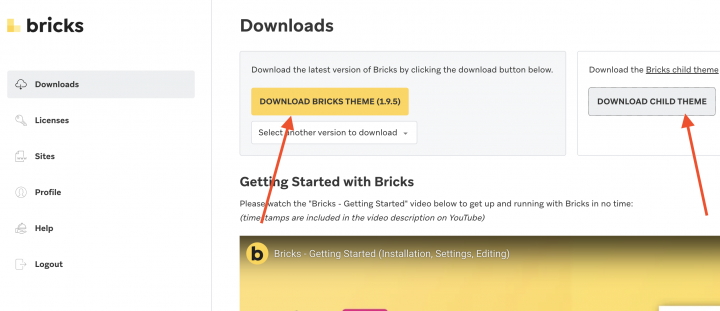
Install the theme in your WordPress website from WP-Admin >> Appearance >> Themes
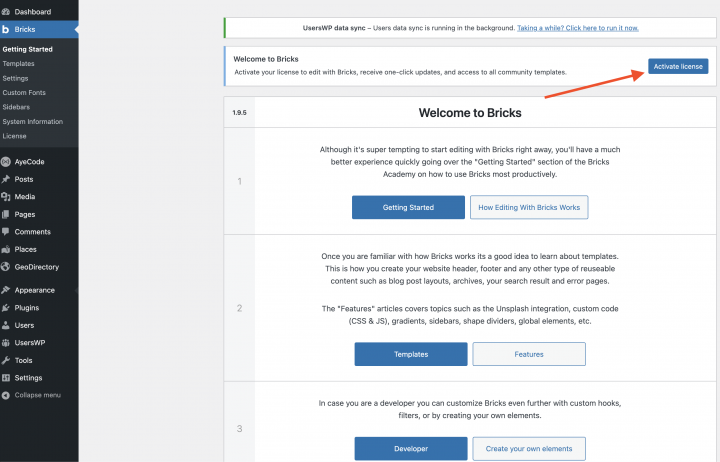
Activate the theme license.
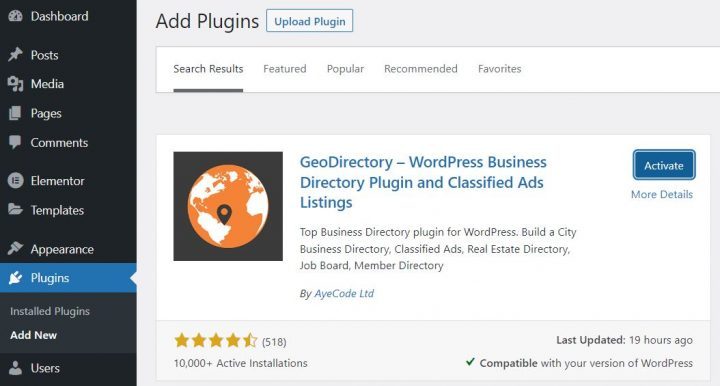
2. Install GeoDirectory
Finally, you need to install GeoDirectory.
Go to Plugins >> Add new, search GeoDirectory. Please install and activate it, and we finished installing the plugins.
3. GeoDirectory Install Wizard
For GeoDirectory, you will need to complete the Setup Wizard to configure the Google Maps API key and import a few dummy listings.
Choosing the Map System (Google Maps or OpenStreetMap)
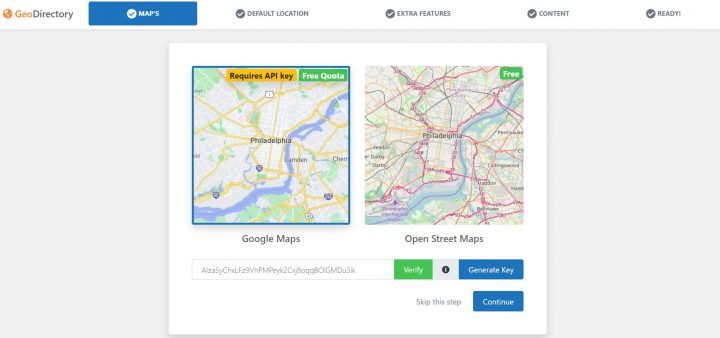
On the first step of the wizard, you get to pick between two mapping systems: Google Maps and OpenStreetMaps.
For this guide, we’re picking OpenStreetMaps.
If you want to use Google Maps instead, you’ll need to do a few extra things:
- Click on the “Generate Key” button and follow the instructions in this guide to make a valid API key.
- Here are the important steps:
- Turn on the Keys.
- Make a new project or choose one you already have.
- Get the Key.
- Set up a billing account.
- Restrict the API key (so it only works from your website’s URL).
Point four is a must-do, but you only pay if you go over $200 a month.
This free credit is more than enough for 99% of directories.
Setting the default city
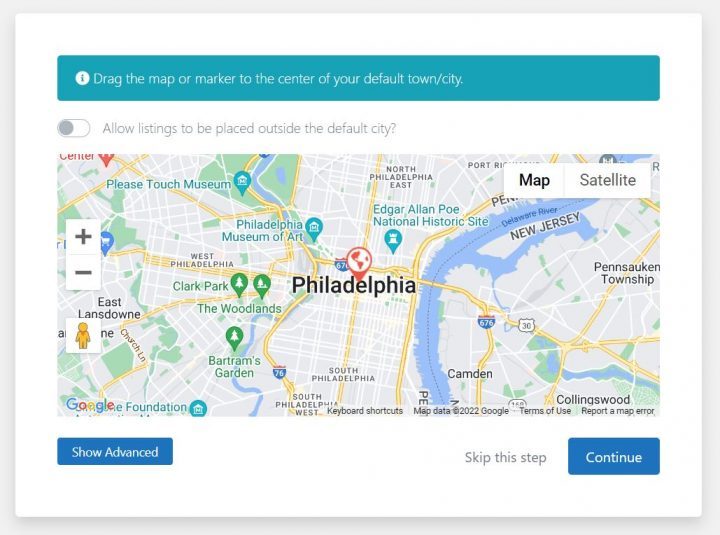
Next, you’ll choose the default location, which is the city the directory is all about.
We’re going with Philadelphia as the default city, but you can pick any place you want.
If you’re making a directory for multiple cities, you’ll need the Location Manager add-on.
Adding extra features
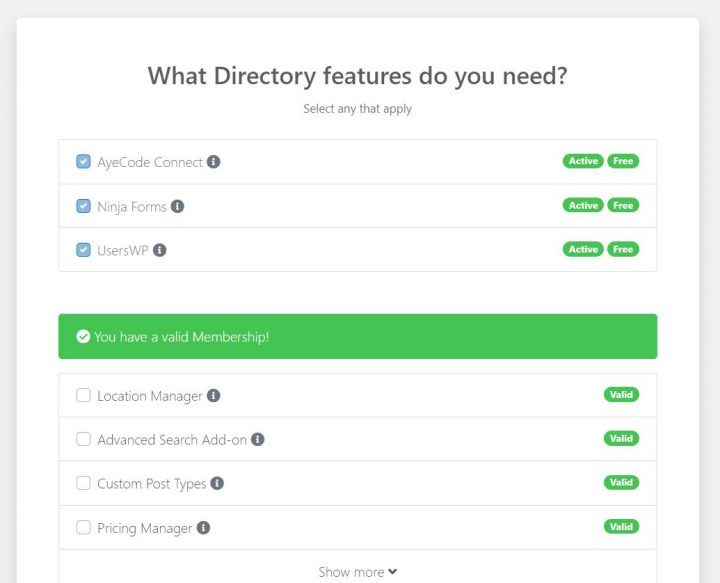
In this step, we will install our UsersWP, a user registration plugin that lets users register and log into your website.
This is needed to allow users to add and edit their listings. It will also create user profiles where they can find their listings, reviews, and so on.
We will also install Ninja Forms so that all listings have a contact form that sends emails directly to the listing owners.
You don’t have to use AyeCode Connect for this tutorial. It’s only necessary if you want to add premium GeoDirectory add-ons and install them right from your WordPress Dashboard.
Adding Dummy Data
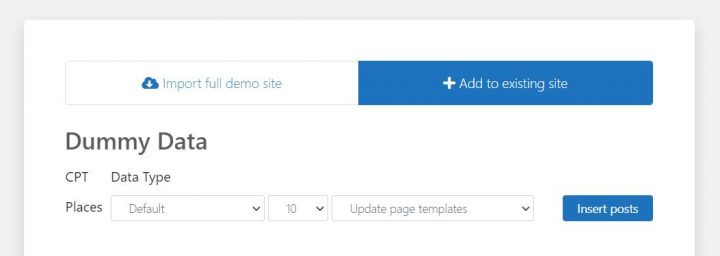
The final step in finishing the installation wizard is to put in some dummy listings. This also sets up categories for listings, which you can change later as you like.
Right now, we won’t add any sidebar widgets or menu items. We’ll take care of that later.
Design the Bricks Directory Website
Now that we installed the theme and the plugins and done the preliminary setup of GeoDirectory, we can start designing our Directory Website.
1. The Logo
First things first, we need a logo for our website.
You don’t have to hire a designer to create the first version of your logo.
One of the biggest mistakes you can make when starting a new directory is spending too much time and money before testing if people want it.
You can make a logo in just five minutes using an app like Canva, which is inexpensive and really good.
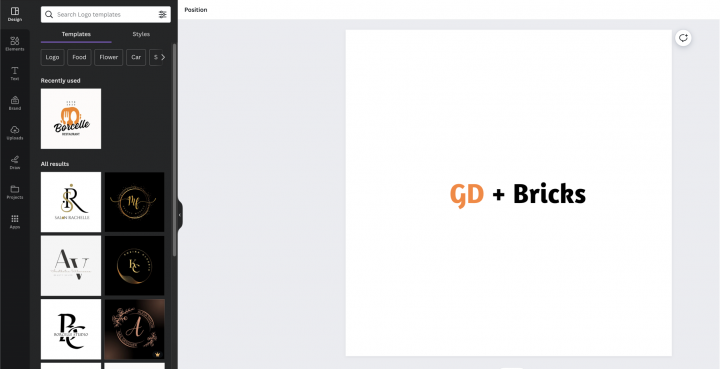
For a basic version of your product (called MVP, or minimum viable product), a logo made with Canva will do just fine.
There are lots of logo templates to pick from, and it’s okay if your first logo isn’t perfect or super unique.
If your project starts to do well, you can always work on improving or completely changing the logo later on.
A regular logo usually isn’t why a project fails. We’ll use this logo when we create the header for the website.
1. Bricks Directory Home page design
You can create a new page or use one WordPress creates by default, like the Sample Page.
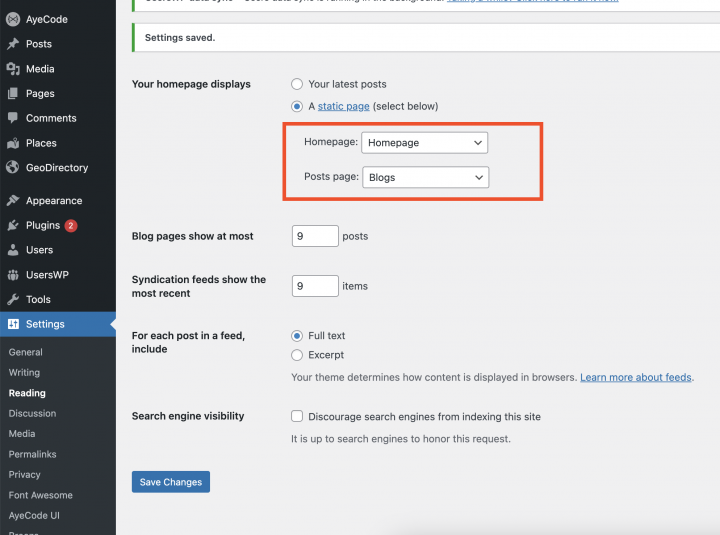
Go to Pages, edit the Sample page, and rename it Home or create a new page for this.
You will have to set this page as the site Homepage for that go to wp-admin >> Settings >> Reading
Now let’s first set up the site Navigation menu.
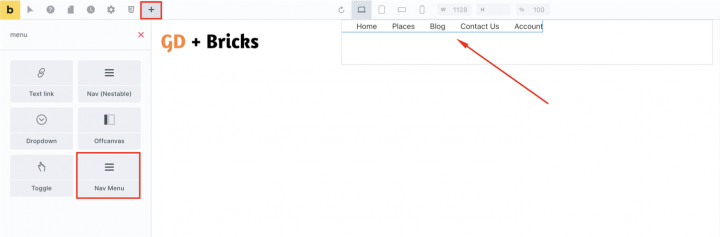
The Navigation Menu
Go to Appearance > Menus, and create your menu.
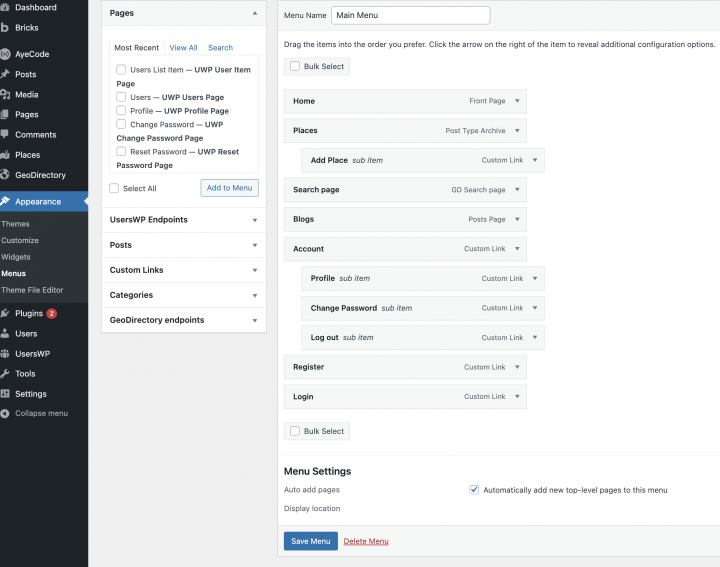
Add the links needed (from the left column to the right column) and save. In the Menu Settings > Display location section, you can check the “Header menu – Logged in user and Header menu – Logged out user” options.
If you want, you can make the same menu appear on the mobile or create another menu to appear there.
In this example, we’ll only have the header navigation menu.
We added seven main navigation links and a few sub-navigation links:
- Home
- Places and add places
- Search
- Blog
- Account
- Register & Login pages
The Header
To set the site header go to wp-admin >> Bricks >> Templates >> Add New
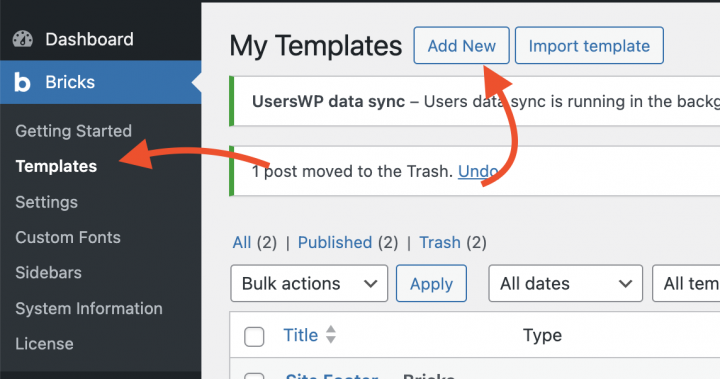
Create a Bricks template for the header.
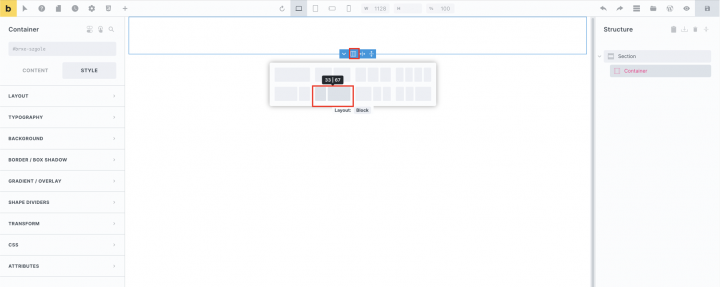
we will select a two-column layout with a 30::70 ratio.
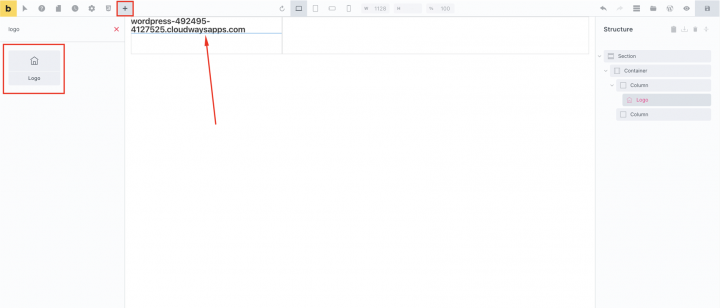
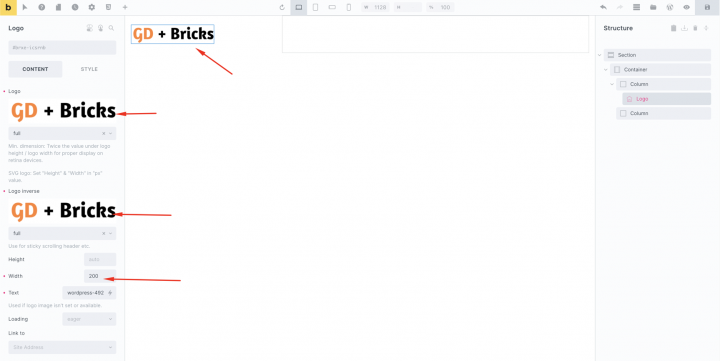
In the left column drag the Logo block and upload the site logo in it.
Let’s set the width:200px
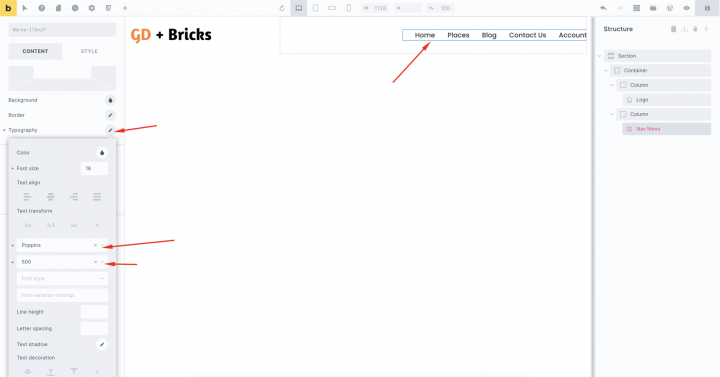
In the right column drag the Nav menu in the right column.
with settings like
Algin main axis: center
Align cross axis: Right
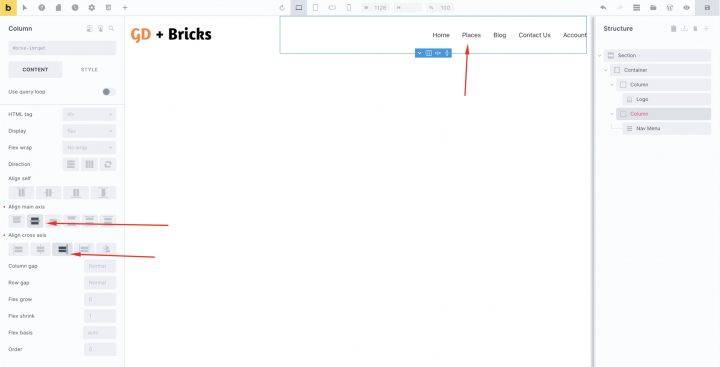
Typography
Text Transform: Poppins 500
The Content
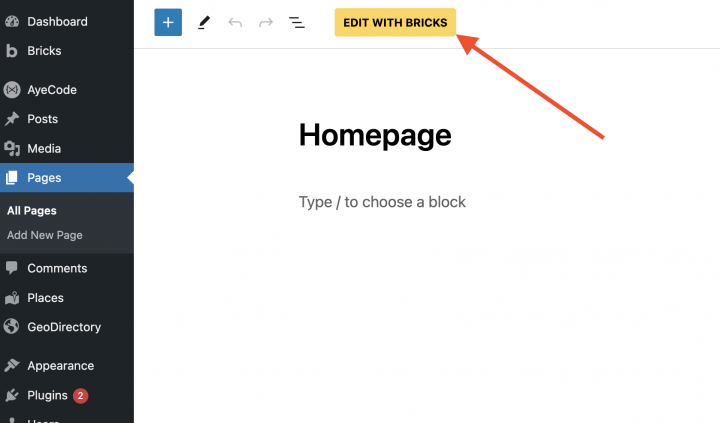
Now to design the homepage. we will edit the homepage by clicking on the edit with Bricks buttons.
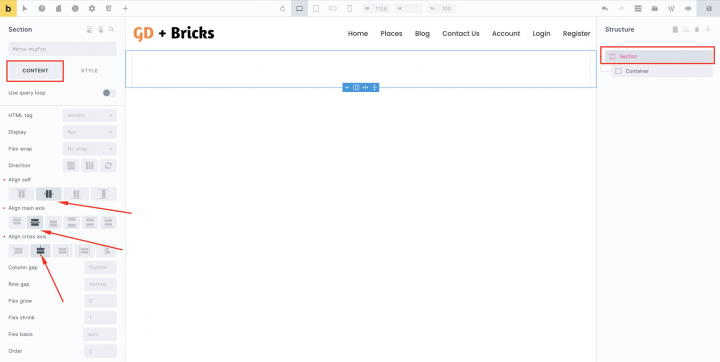
We will add an empty container with following settings
Align self: Center
Align Main Axes: Center
Align cross axis: Center
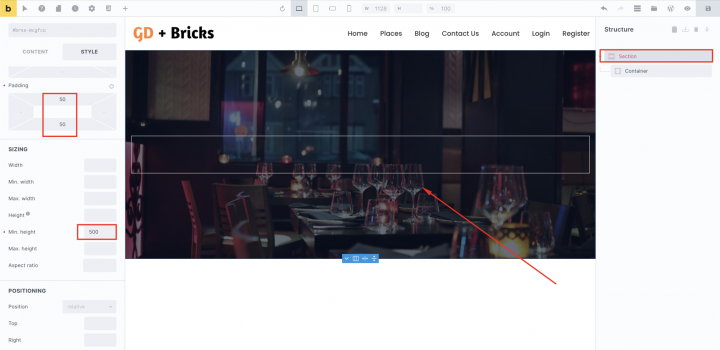
In the Style tab of section
Padding: 50px (Top) 50px( bottom)
min Height: 500
Upload Background Image
Background position: Center Center
Background repeat: Repeat
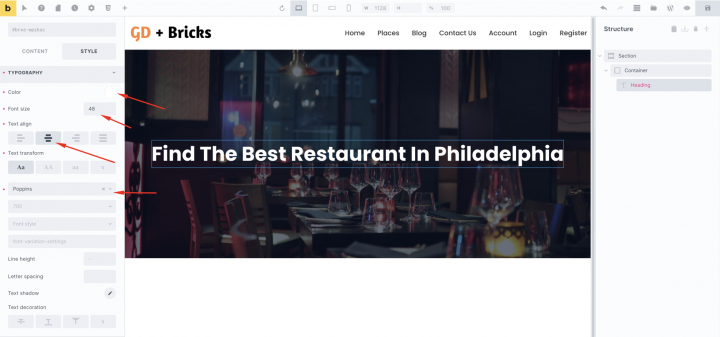
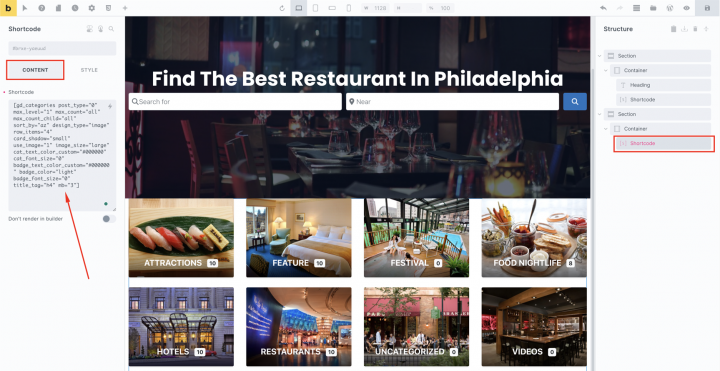
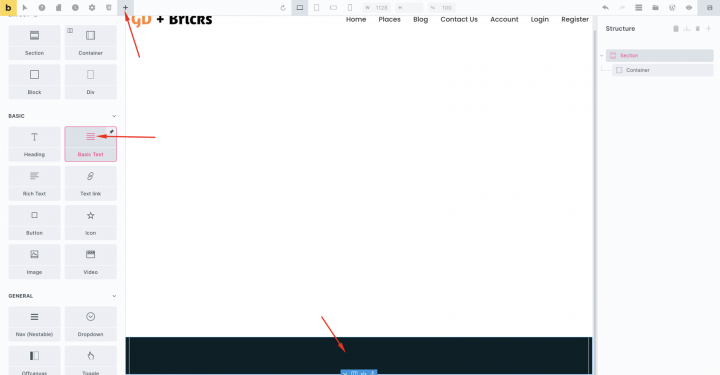
Now let’s add a heading tag over this container.
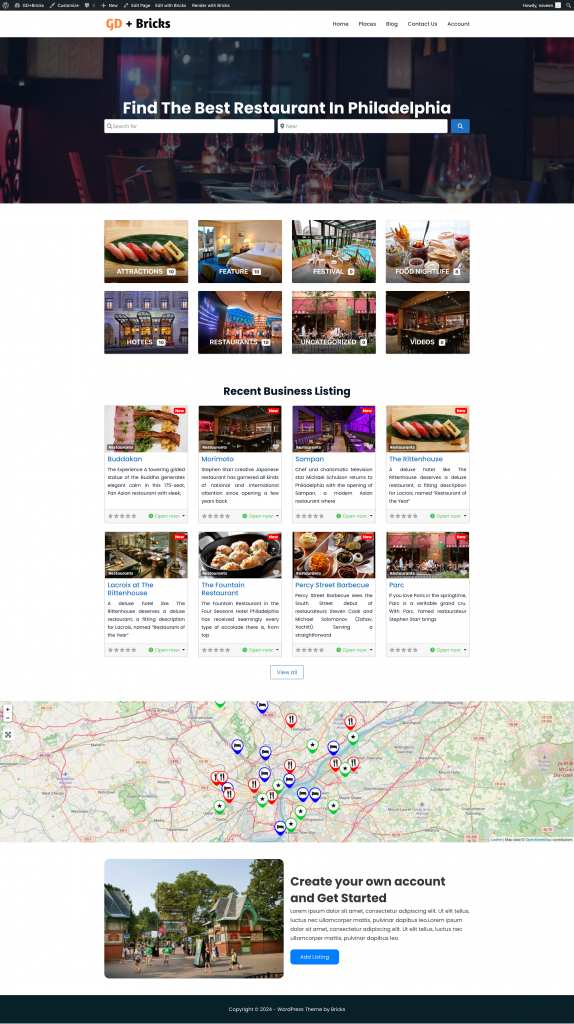
Text: Find The Best Restaurant In Philadelphia

Now in the style tab of the heading tag add the following settings.
Typography:
Font size: 48px
Text align: Center
Text transform: Captalize
Font: Poppins
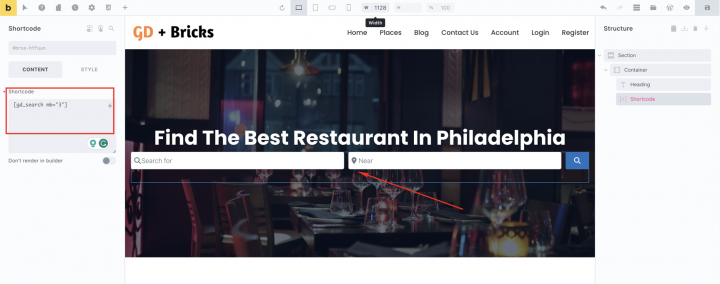
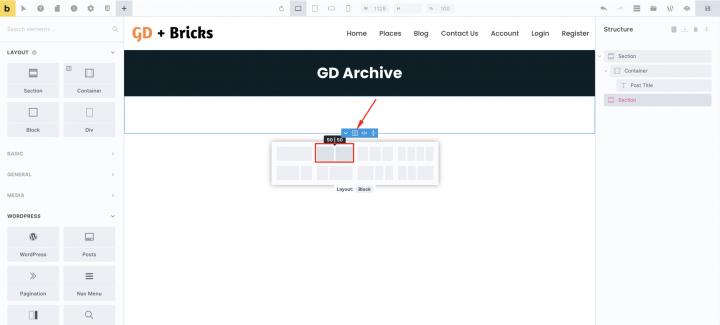
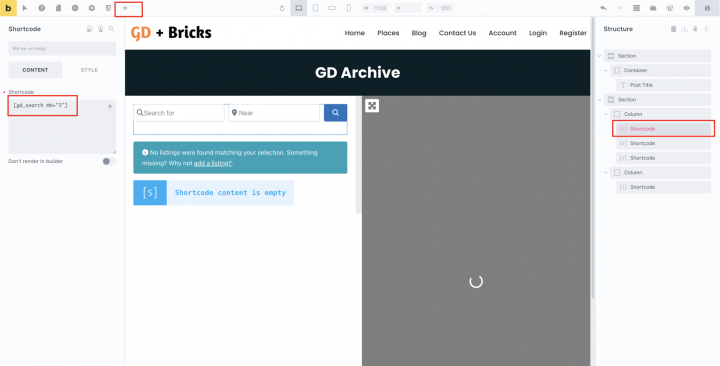
Now add a shortcode block below it and add the [gd_search mb=”3″] shortcode inside it.
Now let’s add one more empty container and add a shortcode block in it with the following shortcode.
[gd_categories post_type="0" max_level="1" max_count="all" max_count_child="all" sort_by="az" design_type="image" row_items="4" card_shadow="small" use_image="1" image_size="large" cat_text_color_custom="#000000" cat_font_size="0" badge_text_color_custom="#000000" badge_color="light" badge_font_size="0" title_tag="h4" mb="3"]
In the style tab of the category container. Go to Layout > Margin
Padding Top: 50px
Padding Bottom: 50px
Padding Left: 50px
Padding Right: 50px
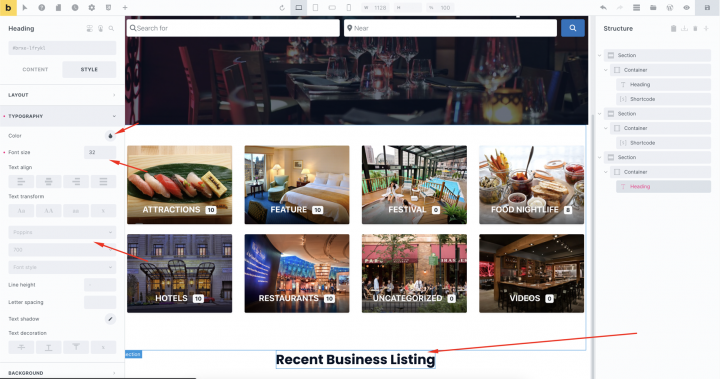
Now we will add a section to display Recent business.
let’s add one more empty section with a Header tag and
Text: Recent Business Listing

with the following typographical like
Font Size: 32px
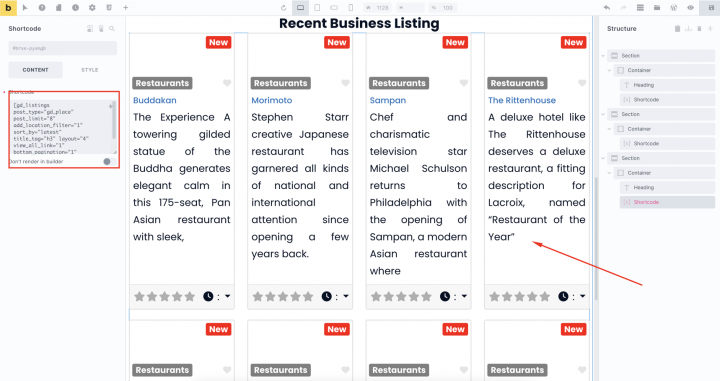
Now below it let’s add the following shortcode
[gd_listings post_type="gd_place" post_limit="8" add_location_filter="1" sort_by="latest" title_tag="h3" layout="4" view_all_link="1" bottom_pagination="1" slide_interval="5" mb="3"]
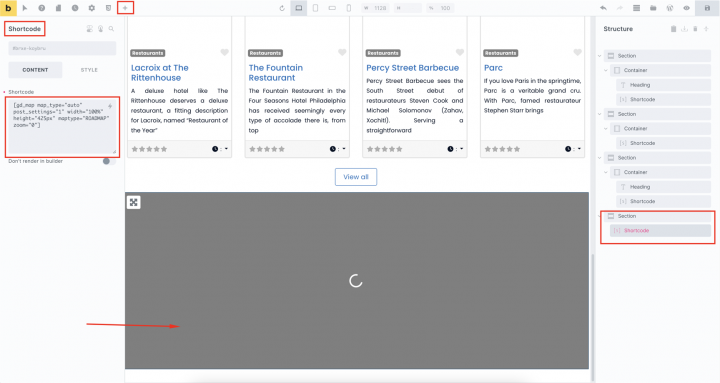
Now below it, we want to add a map that lists all the businesses.
For that, we will add an empty container and shortcode block inside it with the following shortcode.
with the following style for the container.
Padding top: 50px
Padding bottom: 50px
[gd_map map_type="auto" post_settings="1" width="100%" height="425px" maptype="ROADMAP" zoom="0"]
Now we want to add a CTA for that we will use a two-column layout.
With following settings
Direction: Horizontal(row)
Align self: Center
Align cross axis: Center
Column gap: 20
Row gap: 20
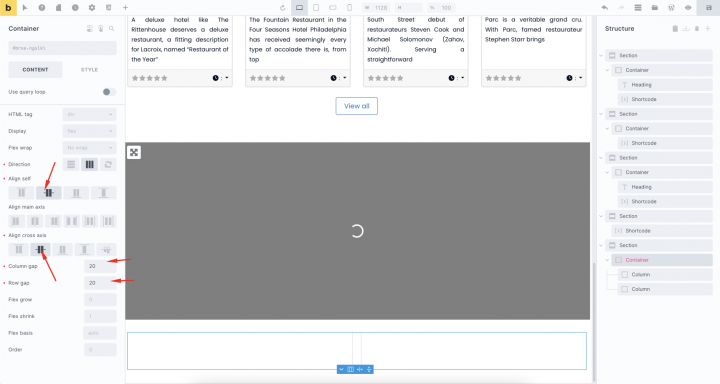
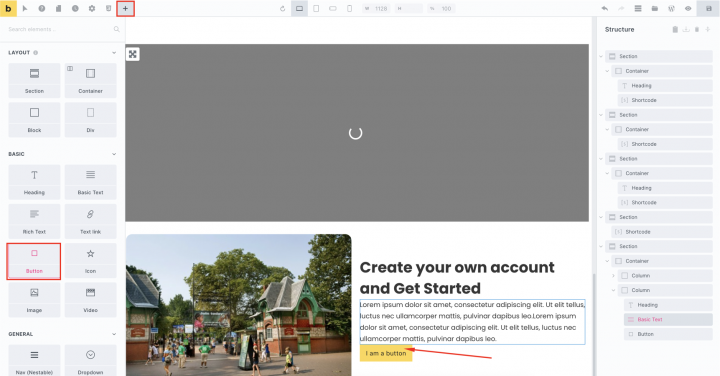
In the left column, we will drag an image and in the right column we will add some text and a button to add listing page.
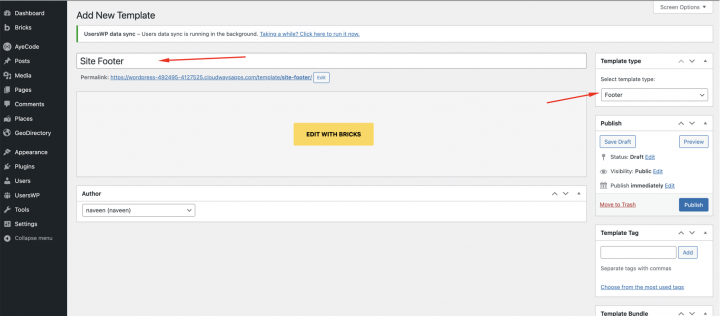
The Footer
Now to design and create a footer go to wp-admin >> Bricks >> Templates >> Add New
and select the template tag as Footer and edit the template with Bricks.
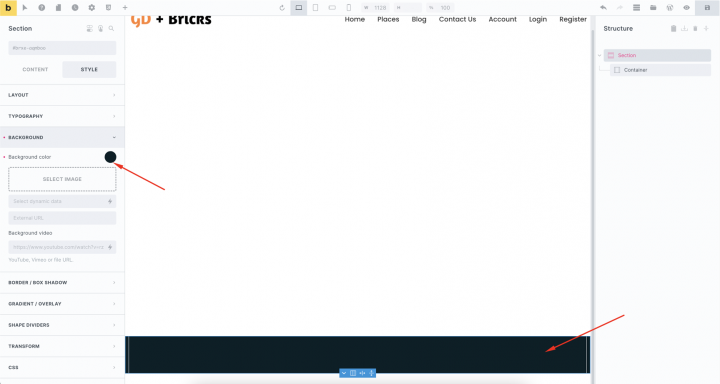
Now let’s add an empty container with the Background color: #072027
Add the basic text block with some text and style Text Align: Center
After this our homepage is ready.
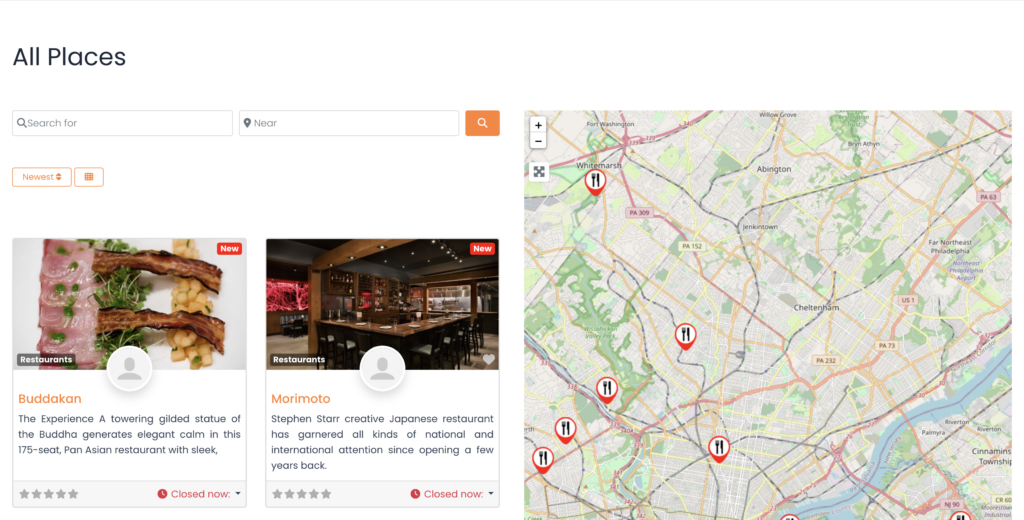
2. Bricks Directory Website Listings and Search page design
You have to make two important pages for a directory: one for listings (including an archive, categories, and tags) and another for search results.
GeoDirectory automatically sets them up with a basic design. This guide will help you tweak the look of these pages a little.
Since the listing and search pages are very similar, we’ll design them once and then use the same layout for both.
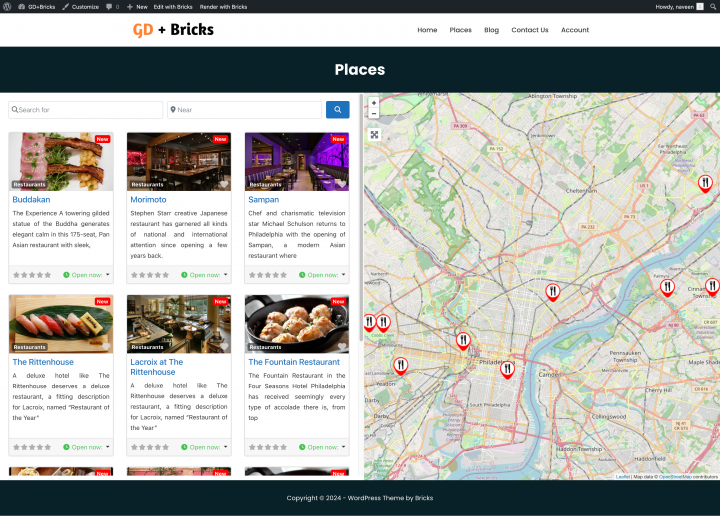
Our choice for the Listing page design is to have the listings on the left and a sticky map on the right, showing where each listing is located.
This is very easy.
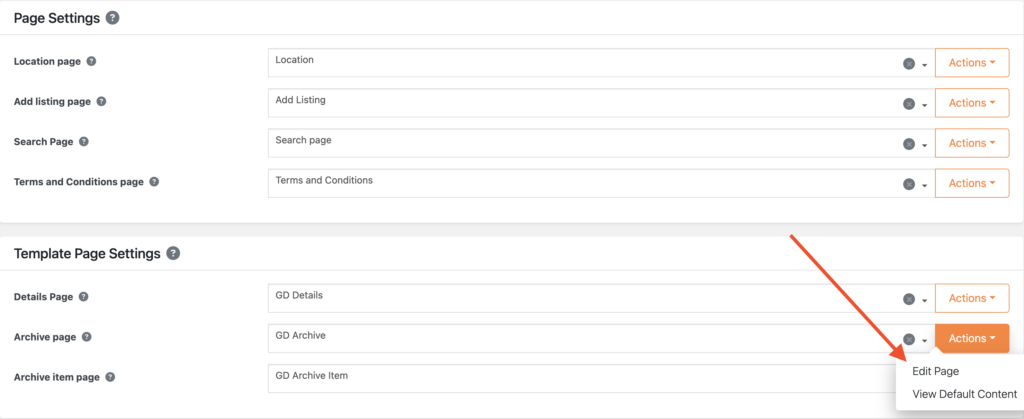
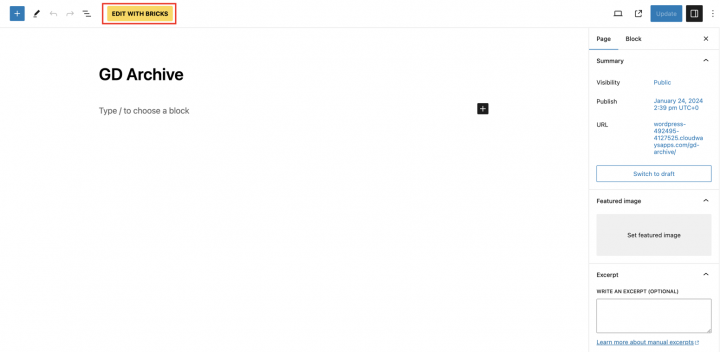
Go to Geodirectory > Settings > General > Pages > Click on edit GD Archive page template
Remove all the content from this GD Archive page template and edit it with Bricks Builder.
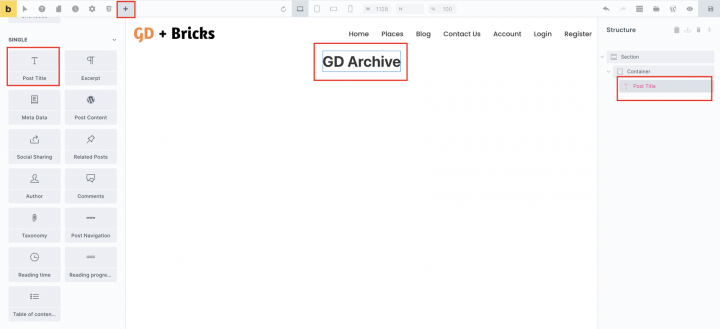
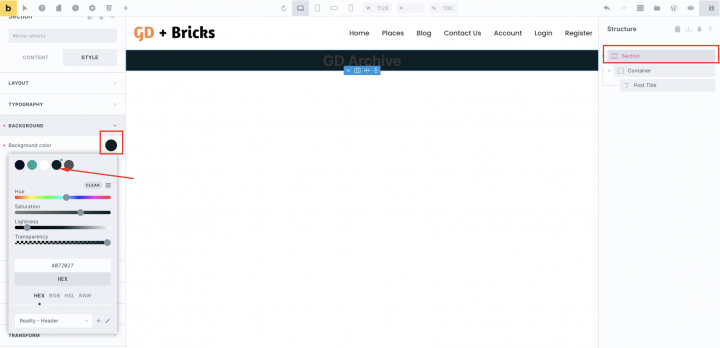
Now we will add an empty section and inside it drag the Post Title block.
From the section style setting set
Background color: #072027
Padding: 30px 10px 30px 10px
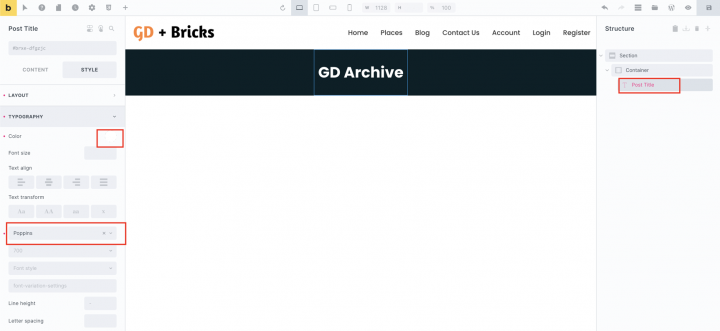
For the post-title block set the Typography setting to
Font: Poppins
Color: #fffff
Now let’s add an empty section and two column container ( 50::50 ) in it.
Next, on the left container, we will add shortcode blocks with the GD Archive page-related shortcodes like GD > Loop Action, GD > Loop, GD > Loop Pagination, and GD > Search on top so the user can search from the Archive page.
[gd_search bg=''  mt=''  mr=''  mb='3'  ml=''  pt=''  pr=''  pb=''  pl=''  border=''  rounded=''  rounded_size=''  shadow='' ]
[gd_loop_actions bg=''  mt=''  mr=''  mb='3'  ml=''  pt=''  pr=''  pb=''  pl=''  border=''  rounded=''  rounded_size=''  shadow='' ]
[gd_loop layout='2'  row_gap=''  column_gap=''  card_border=''  card_shadow=''  bg=''  mt=''  mr=''  mb=''  ml=''  pt=''  pr=''  pb=''  pl=''  border=''  rounded=''  rounded_size=''  shadow='' ]
[gd_loop_paging show_advanced=''  bg=''  mt=''  mr=''  mb='3'  ml=''  pt=''  pr=''  pb=''  pl=''  border=''  rounded=''  rounded_size=''  shadow='' ]
We will add a Shortcode block with the GD > Map shortcode on the right column with the following setting.
[gd_map map_type="auto" post_settings="1" width="100%" height="100vh" maptype="ROADMAP" zoom="0"]
We will also add a class scrolling-gd-loop to the left column for scrolling touch. You can check the option marked in the below screenshot.
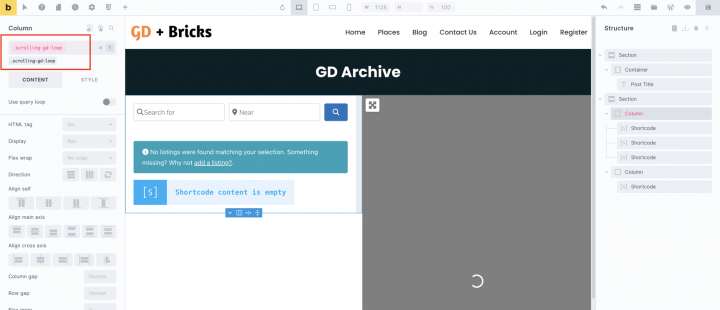
Let’s add the following style to the theme customizer.
.scrolling-gd-loop{
    overflow-y: scroll !important;
    max-height: 1000px;
}
Now after this, our Archive page is ready.
To create the search page layout.
We will create the GD Search page template from Bricks >> Templates >> Add New. Make sure to select Select template type: GD Search Results
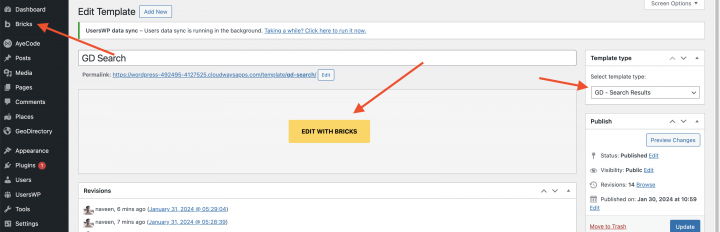
Copy all the content of the GD Archive Bricks template and paste it into the GD Search page Bricks template.
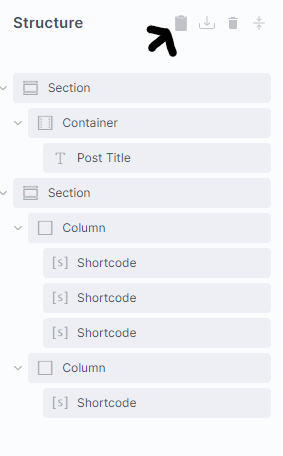
To do so, on the GD Archive Page, click the Copy (all) icon on the Bricks Builder right column (Structure)
Navigate to the Search Page, You can find the Search page from Geodirectory > Settings > General > Pages.
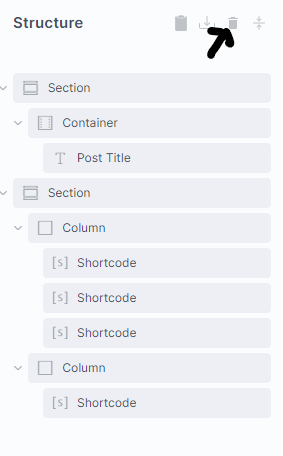
Edit it with Bricks. Click the Remove (all) icon on the Bricks Builder right column:
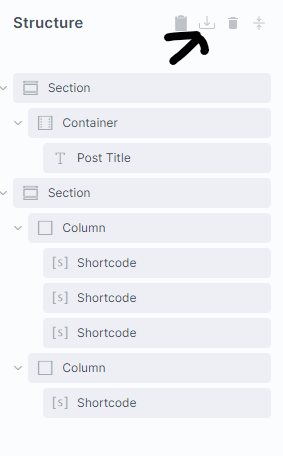
Finally, click the Paste (all) icon on the Bricks Builder right column:
This will make the search page and the Archive page identical, full width, with the results on the left column and the fixed map on the right column.
For the search page, we also need to instruct Bricks to show this template on the individual page.
To do this we need to click on the Gear Icon > Template Settings > Conditions > Individual > Search Page (Title of your search Page).

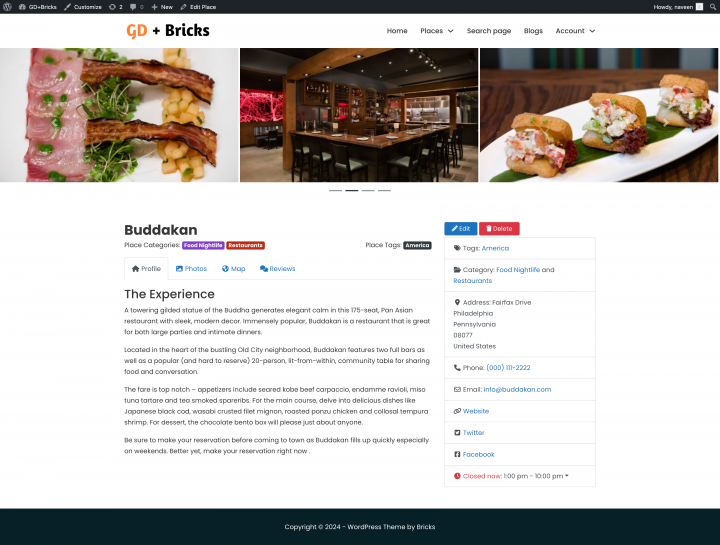
3. Bricks Directory Website single Listing page design
It’s time to create the detail page template. We will go and edit the GD Detail page template in Bricks.
You can go to Geodirectory > Settings > General > Pages > Click on edit GD Detail page template.
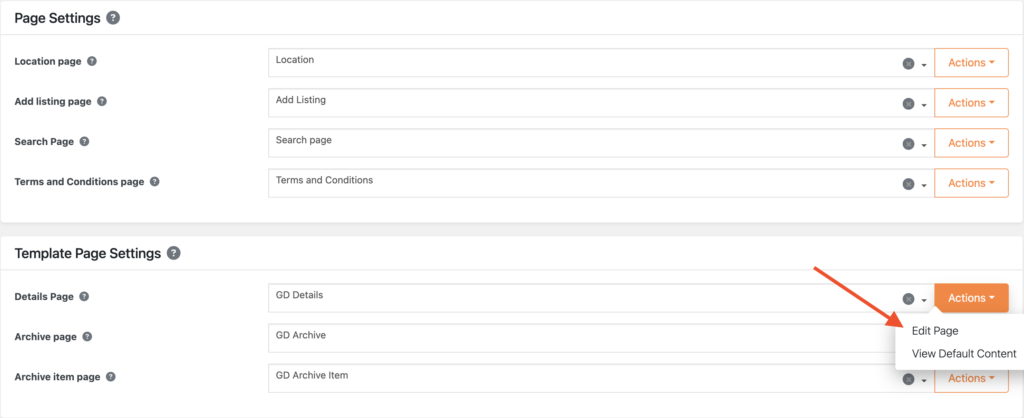
In this template, you will already find default content generated by Geodirectory.
we will remove all these default content and edit it using Bricks.

Let’s add an empty section and add a shortcode block inside it.

Let’s use the following shortcode to show the image slider.
[gd_post_images ajax_load="1" limit="10" limit_show="3" type="slider" slideshow="1" controlnav="1" animation="slide" image_size="large"]

Now with in an empty section let’s add a two-column container.
In the left container, we will add the following shortcodes.
Which includes GD > Post Title, GD > Single Taxonomies, and GD > Single Tabs.
[gd_page_title tag='h1'  no_wrap='false'  title_container='1'  strip_html=']
[gd_single_taxonomies taxonomy=''  prefix=''  link_style=''  link_color=''  link_color_custom=''  link_icon='false']
[gd_single_tabs heading_font_size="0" heading_text_color_custom="#000000" mt_lg="3" border_type="border"]
In the right column, we will add the
GD > Author Action, and GD > Output Location block.
[gd_author_actions hide_edit='false'  hide_delete='false'  author_page_only='false']
[gd_output_location location="detail" list_style="wrap"]
After doing it, our Listing Detail page is complete.
Adding Premium Features to your Bricks Directory Website
If you wish, now you can add premium features to your directory, such as:
- Paid Listings: with the GeoDirectory Listing Price Manager add-on, You can decide how much it costs to add a listing. For different price levels, you can choose what features are included or not. For example, you might allow more pictures for paid listings but limit them for free ones. You can also decide if certain custom fields are available or not, and if descriptions can be longer or shorter.
- Claim Listings: This feature is really important for a directory. Here’s how it works: the admin sets up the database and then invites business owners to manage their free listings. When a business owner wants to take control of a listing, they might need to upgrade to a paid listing first.
- Advertising: selling ads is another form of monetizing an online directory. If your website gets a lot of visitors, you can use ad networks. But if it doesn’t, you can sell ads directly. That means businesses can pay to put banners in certain parts of your site, or their listings can show up as ads, like at the top of search results.
These are just three examples. However, a directory website offers many ways to make money online.
You can create a global marketplace of handcrafted items, sell event tickets, or sell discount coupons.
For those embarking on their first project, here’s your guide: Building your own directory website.
This generic tutorial can be adapted to any theme or page builder.
The possibilities are limitless.
Newsletter - Stay Updated!
Get the latest news, tips, and exclusive content directly in your inbox.