How to Build an Online School Directory in WordPress
Imagine spending hours manually typing every detail about each student or staff in a spreadsheet. Wouldn’t it be great to have an easier way to do it?
With WordPress, you can create a comprehensive online school directory that’s easy to use and looks professional. Here’s a step-by-step guide on building an online school directory in WordPress with one of the best directory builder plugins on the market: GeoDirectory.
Ready? Let’s go.
What is a school directory?
A school directory is a list of all the students and staff in your school, their contact information, photos, and other relevant details. It’s like a virtual yearbook that makes it easier for students to stay connected with one another.
Why might a school directory come in handy?
- Quick Contact Info: It’s a one-stop shop for finding contact details of students, parents, teachers, and staff. No more digging through multiple sources to get in touch with the right person.
- Seamless Communication: With a directory, schools can ensure smooth communication among everyone involved. Important updates, announcements, and notifications reach the right people promptly.
- Collaboration Made Easy: Finding and reaching out to fellow teachers, students, and staff becomes a breeze. It encourages teamwork, resource sharing, and coordination for projects and extracurricular activities.
- Parent Participation: Parents can stay informed and actively engage in their child’s education. They can easily connect with teachers, administrators, and other parents, fostering a solid home-school partnership.
- Substitute Teacher Support: When regular teachers are absent, substitute teachers can refer to the directory for classroom locations, contacts, and quick familiarity with staff members they need to communicate with.
- Networking Opportunities: The directory acts as a networking tool, helping individuals connect with others with similar interests or expertise. Teachers, parents, and students can find and collaborate with like-minded people.
- Alumni Connections: Alumni directories within the school directory facilitate connections between former students and the school community. It keeps alumni engaged, enables knowledge sharing, and allows potential contributions to the school.
- Subject-Specific Resources: You can have department-specific directories for students and faculty, making it easy to access subject-related resources, contact details, and specific academic information.
- Privacy and Security: While directories provide information, they also ensure privacy and security by controlling access to sensitive data, making sure only authorized individuals can access the directory.
- Building a Strong Community: Ultimately, a school directory brings everyone together. It encourages communication, collaboration, and engagement among students, parents, teachers, and staff. It creates a supportive and connected environment.
What to include in a school directory
- School Contact Details: Provide the school’s official contact information, including the address, phone number, and email address.
- Administrative Staff: List the names, titles, and contact details of the principal, vice-principal, and other administrative personnel.
- Teachers and Faculty: Include a directory of teachers and faculty members, their names, subjects taught, and email addresses. Optionally, you can add their office locations or availability hours.
- Support Staff: Include contact information for support staff members such as guidance counselors, librarians, nurses, and IT technicians.
- Student Directory (Optional): If permitted and appropriate, you can include a student directory with basic information like student names, grade levels, and classroom assignments. Ensure that privacy regulations and consent are respected.
- Department Listings: If applicable, create separate sections or listings for various departments such as science, mathematics, arts, athletics, etc. Include contact details of department heads and faculty members.
- School Calendar: Incorporate a calendar highlighting important dates, events, holidays, and academic schedules.
- Resources and Services: Provide information on resources available within the school, such as the library, counseling services, extracurricular activities, clubs, and academic support programs.
- Parent-Teacher Association (PTA): Include contact details for the PTA or parent association, enabling parents to connect with fellow parents and engage in school-related activities.
- Emergency Contacts: For quick reference, list emergency numbers, school security, and relevant safety protocols.
Ensure that the directory is regularly updated to maintain accuracy and relevancy. Additionally, adhering to privacy guidelines and obtaining necessary consent when including personal information in the directory is essential.
Step 1: Choosing the Right Theme for Your School Directory
The perfect theme is essential when creating a school directory site with WordPress. GeoDirectory offers a range of beautiful and customizable themes with free and premium options ($19 to $39).
These themes are designed for single or multi-city directories and seamlessly integrate with Google Maps. They provide predefined listing types for various school features and events, ensuring a user-friendly experience for listing submissions.
Step 2: Setting Up Your Domain and Hosting
You’ll need a domain and hosting service to bring your school directory website to life. Choose a domain name that reflects your school’s identity and purpose. Opt for simplicity, incorporating your school or region’s name.
Regarding hosting, we recommend Cloudways and its Vultr High-Frequency 1GB plan, which costs only $15 per month and is an excellent choice for 99% of Chamber of Commerce Directories. It offers reliable services for storing your site’s data and making it accessible online.
Step 3: Install GeoDirectory & Configure Your Settings
After securing your domain and hosting, the next step is to install the GeoDirectory plugin. This plugin is essential for creating a functional school directory, offering a range of tools to manage staff and faculty profiles, event management, and school facilities and amenities.
Here’s how to install the GeoDirectory plugin:
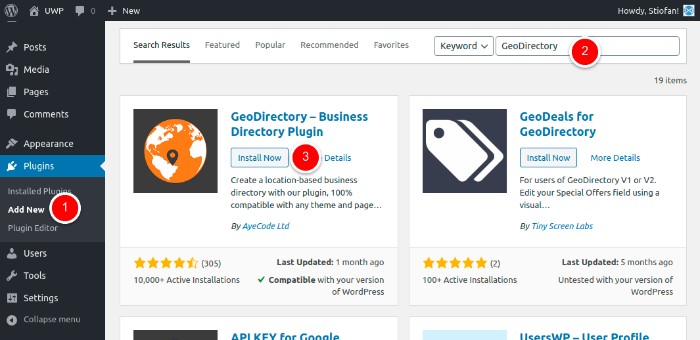
- From your Dashboard, navigate to Plugins > Add New.
- In the search field, enter “GeoDirectory” and click Enter.
- Look for the “GeoDirectory – Business Directory Plugin” and select the “Install” button.
- Once the installation is complete, click on the “Activate” button.
Next, you’ll want to tap into the vast array of features specifically designed to meet the needs of school directories:
- Easy Listing Management: With GeoDirectory, you can manage and organize listings for different departments, classes, clubs, or school facilities. Keep track of relevant details such as contact information, descriptions, and photos.
- Events Management: Organize and promote school events, including parent-teacher meetings, performances, workshops, or sports tournaments. GeoDirectory allows you to create event listings with dates, locations, and descriptions.
- Staff and Faculty Profiles: Showcase your school’s dedicated teachers and staff by creating profiles highlighting their qualifications, areas of expertise, and contact information. This helps students and parents connect with the right educators easily.
- Parent Reviews and Ratings: Enable parents to share feedback and rate their experiences with various aspects of the school, such as classes, extracurricular activities, or support services. This valuable feedback can assist other parents in making informed decisions.
- School Facilities and Amenities: Highlight the different facilities and amenities available within the school, such as libraries, sports facilities, laboratories, or cafeterias. GeoDirectory allows you to create listings for each facility, providing essential details and photos.
Step 4: Personalize Submission Form Fields
Here’s how you can tailor the form fields in GeoDirectory for your school directory:
- Access the WordPress dashboard and navigate to ‘CPT > Settings > Custom Fields’.
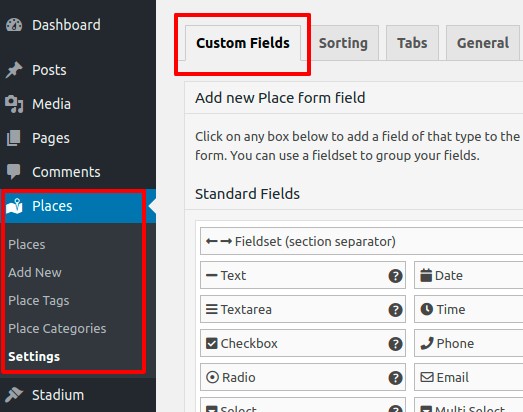
- In the interface, you’ll find two sections. On the left, ‘Add New CPT Form Field’ allows you to create new fields. The ‘Add New CPT Listing Form’ on the right displays the currently available fields.
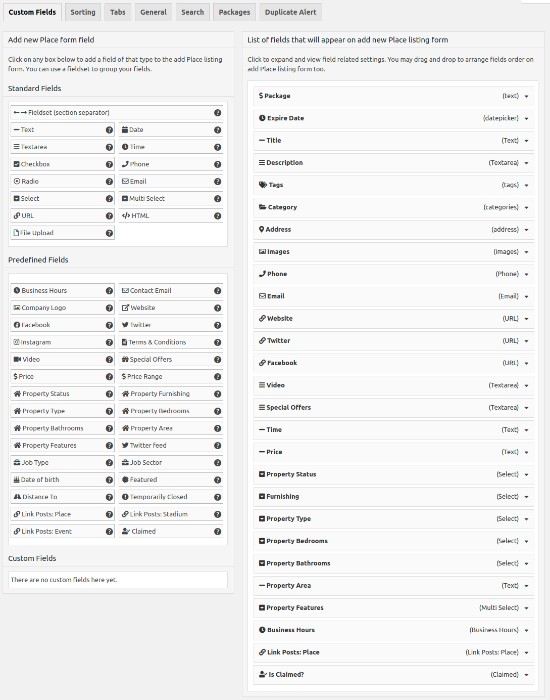
- You can choose from ‘Standard Fields’, ‘Predefined Fields’, or utilize the ‘Custom Fields’ area to incorporate your custom fields through custom code specifically designed for your school directory needs.
- To add a new custom field, select your desired field from the left panel, which will be added to the right panel. The process is similar to using the WordPress Widget Manager interface.
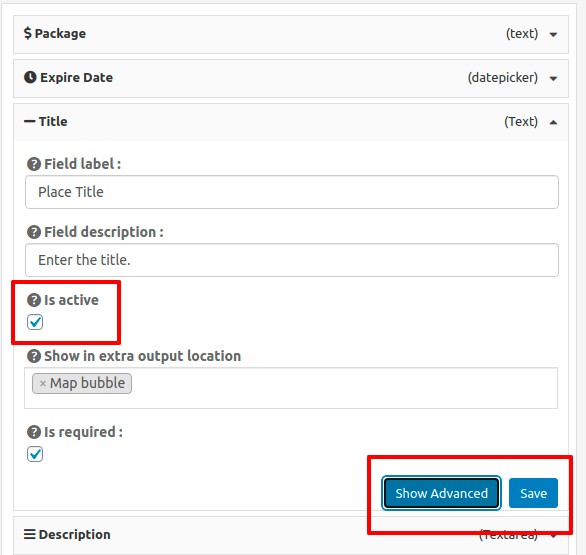
- Once you’ve customized the field, click ‘Save’. Remember to check the ‘Is Active?’ option to ensure the field is visible on your school directory website.
Consider these customization ideas for your school directory:
- Additional Field for Grade Levels: Include a dropdown menu or checkboxes to specify the grade levels associated with each listing, helping users find relevant resources for specific grade levels.
- Subject or Department Field: Add a field to specify the subject or department related to each listing, allowing users to search and filter resources by subject or department.
- Extracurricular Activities Field: Include a field where schools can provide information about various extracurricular activities, such as sports teams, clubs, music groups, and more.
- Facilities and Amenities Field: Create a field to highlight the facilities and amenities available within the school, such as libraries, science labs, sports facilities, playgrounds, and cafeteria.
- Staff Profiles Field: Provide a section where schools can showcase profiles of teachers and staff members, including their qualifications, areas of expertise, and contact information.
By customizing the form fields in GeoDirectory to suit your school directory’s unique needs, you can create a comprehensive and tailored platform that effectively presents your school’s offerings, resources, and staff information to students, parents, and the school community.
Step 5: Creating Your Categories
Creating a well-structured category system is essential for maintaining organization and usability in a school directory website with many listings.
GeoDirectory themes can establish hierarchical categories, including parent and subcategories, tailored specifically for school directories.
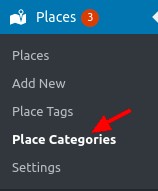
To begin, follow these steps within your WordPress dashboard by selecting ‘CPT > CPT Categories’:
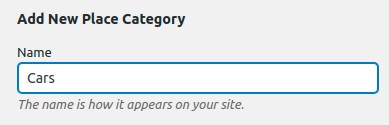
- Name: Enter the category name you want to create, such as ‘Subjects,’ ‘Extracurricular Activities,’ or ‘Facilities.’ It’s recommended to use descriptive plural terms. This field is required. Here’s an example below:
- Slug: Define the category slug, which is part of the URL leading to the category’s page. For example, ‘subjects,’ ‘activities,’ or ‘facilities’.
- Parent Category: If applicable, position your new category as a subcategory under a parent category. This helps to organize listings hierarchically. For instance, ‘Sports’ could be a parent category, with ‘Football,’ ‘Basketball,’ and ‘Swimming’ as subcategories.
- Description: Optionally, provide a brief description of the category, offering additional context or details about the listings it encompasses.
- Category Top Description: This text will appear at the top of the category’s listings page, serving as an introduction or providing essential information related to that specific category.
- Default Listing Image: Choose a default image representing listings within this category. It could be an icon, photo, or graphic that visually represents the nature of the category.
- If desired, select a map icon from your media files to represent this category visually on any maps displayed in the directory.
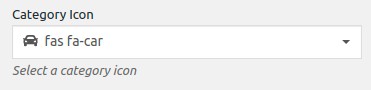
- Category Icon: Set a category icon that represents the category visually. This icon can be utilized within the directory for easy recognition and navigation.
- Category Color: Choose a color that corresponds to the category, providing visual differentiation and aiding in categorization throughout the directory.
- Schema Type: If a suitable schema type is available for your category, select it. This helps search engines understand the data within the category and may enhance search result display.

Once you’ve filled in these fields, save your new category. It will now be available when adding new listings to your school directory. By structuring categories effectively, you’ll enhance the organization and usability of your school directory, making it easier for users to navigate and find relevant information.
How to get people to use your school directory
Now that you know how to build an online school directory, it’s time to encourage sign-ups and engagement. Here are some ways you can do that:
- Student Ambassadors: Recruit enthusiastic student ambassadors to promote the school directory among their peers. These ambassadors can share the benefits, demonstrate how to sign up, and organize engaging activities or contests to incentivize student participation.
- In-Class Presentations: Collaborate with teachers to allocate time for in-class presentations about the school directory. Explain its advantages, demonstrate the registration process, and answer students’ questions. Make it interactive and emphasize how the directory can benefit them.
- Exclusive Student Features: Offer exclusive features within the directory tailored explicitly to students, such as a platform to connect with classmates for group projects, access to academic resources, or a forum to share interests and hobbies. Highlight these features to make the directory more appealing to students.
- Staff Engagement: Engage staff members by highlighting the benefits of the directory in staff meetings or professional development sessions. Demonstrate how it can streamline communication, facilitate collaboration, and provide convenient resource access.
- Contests and Incentives: Organize contests or incentives exclusive to students and staff who sign up on the directory. For example, offer prizes for the most active users, encourage participation in surveys or feedback sessions, or reward staff members who consistently update their profiles with special recognition.
- Integration with School Activities: Integrate the directory into school activities and events. For instance, during orientation days or parent-teacher meetings, have a dedicated booth or station where students and staff can sign up and explore the directory’s features.
- Student Portfolios: Position the directory as a platform for students to showcase their achievements, projects, or portfolios. Emphasize how it can be a digital record of their educational journey and support college or job applications.
- Collaboration Opportunities: Highlight how the directory can foster collaboration among students and staff. Showcase its features that enable group discussions, shared document repositories, or project management tools to encourage sign-ups.
- Peer Recommendations: Encourage students and staff who have already signed up to share their positive experiences with their peers. Word-of-mouth recommendations from trusted school community members can be influential in driving sign-ups.
- Simple Registration Process: Ensure the registration process is simple, user-friendly, and age-appropriate. Minimize the required fields and offer assistance or tutorials to help students and staff complete the sign-up process effortlessly.
Tailoring these strategies to students and staff members’ specific needs and preferences will increase the likelihood of sign-ups and create an engaged school directory community.
Ready to give your school an online presence?
Building an online school directory in WordPress offers a transformative solution for enhancing communication, collaboration, and community engagement within educational institutions.
By following the steps outlined in this article, you can create a comprehensive directory that connects students, parents, teachers, and staff in a user-friendly and efficient manner. Every aspect of theme selection to customization and strategic sign-up incentives contributes to a thriving digital hub that strengthens the educational ecosystem.
Start connecting, collaborating, and transforming your educational environment today!
Newsletter - Stay Updated!
Get the latest news, tips, and exclusive content directly in your inbox.