How to Build a Restaurant Directory Website in WordPress (Step-by-Step Guide for 2026)
BONUS: Add a marketplace of orderable menu items from each restaurant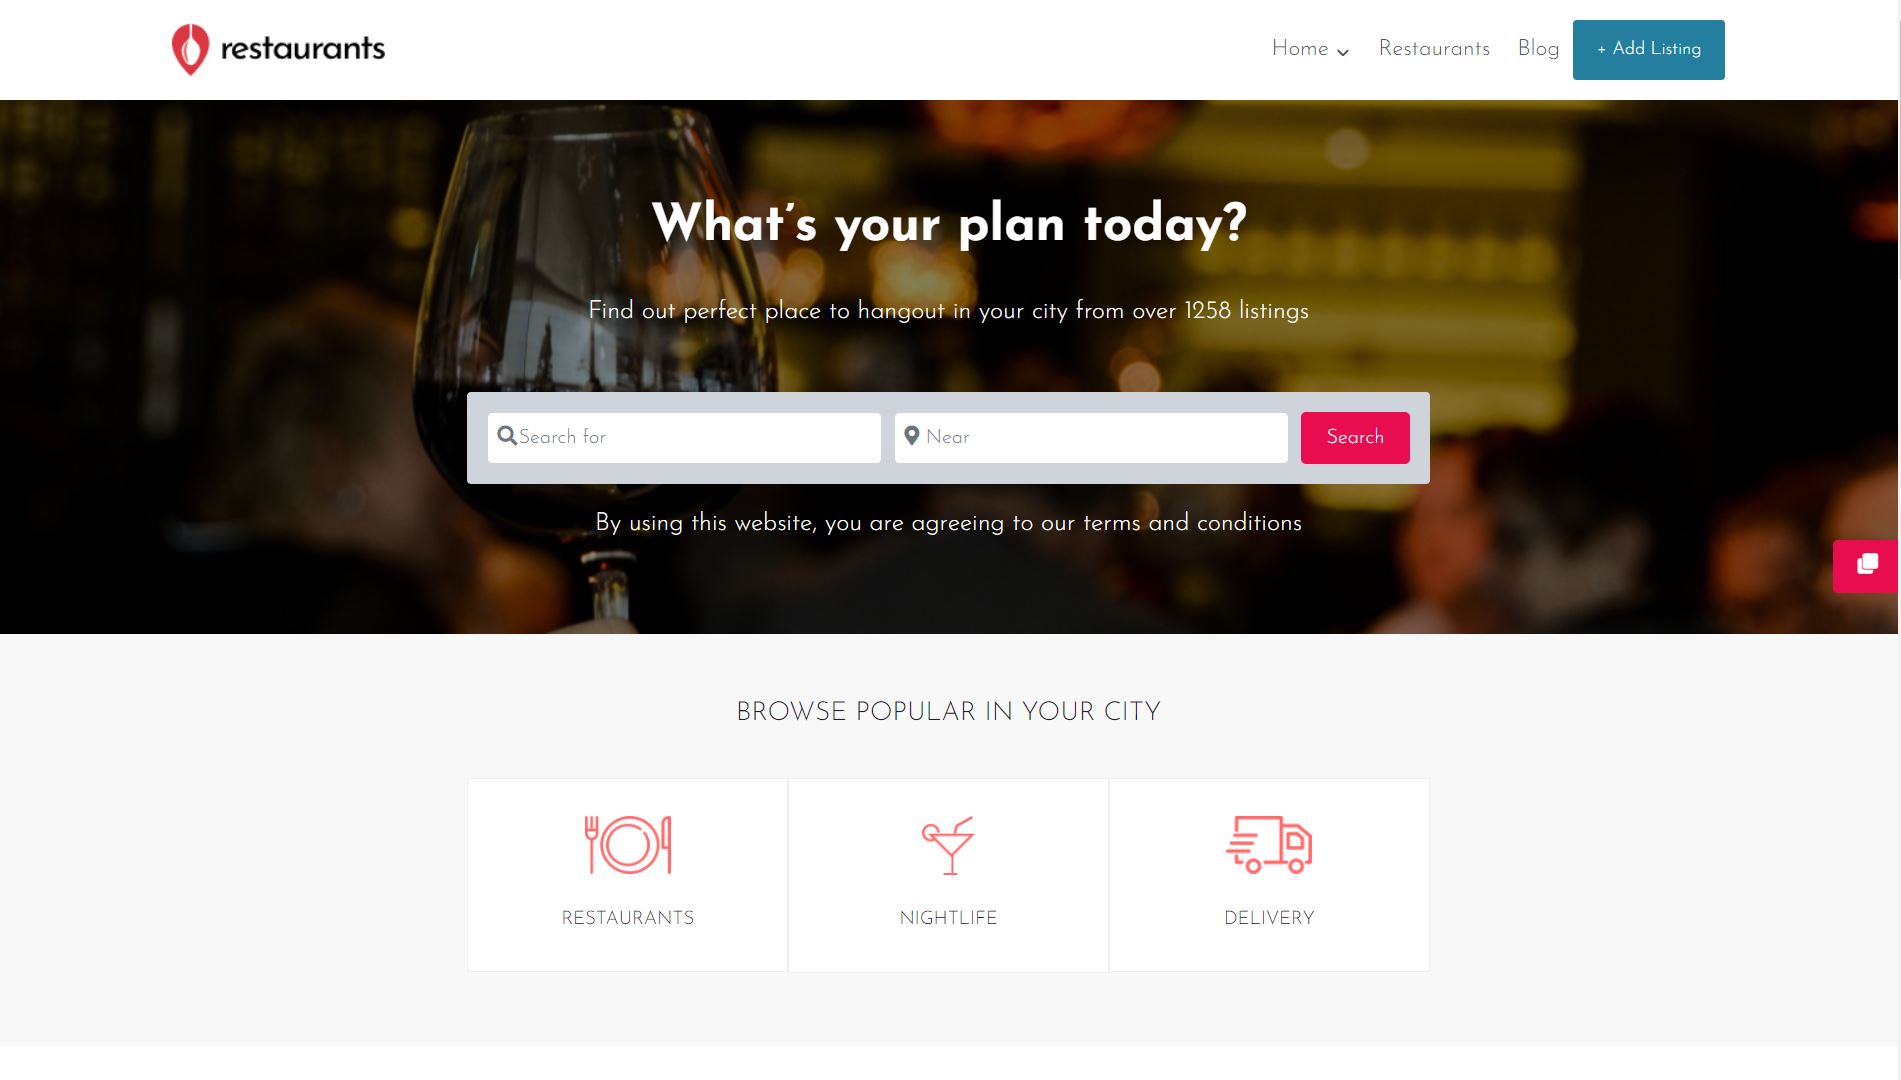
Most “how to build a restaurant directory” guides eventually push you toward Grubhub, Uber Eats, DoorDash, or Yelp for the discovery and ordering side.
The pitch is convenient: list your restaurant on someone else’s platform, pay a fee for visibility and orders, watch the customers roll in.
The math gets ugly fast.
Grubhub, Uber Eats, and DoorDash take 15-30% of every order, plus delivery fees on the customer side that push average ticket prices well above what the restaurant charges at the door.
Yelp charges $300-1,000+/month for premium business pages, with the listings of non-paying competitors appearing on their pages by default.
OpenTable charges restaurants $1 per online reservation and $0.25 per phone reservation, plus a $249/month base fee.
None of those platforms give the restaurant the customer email, the order history, or the marketing relationship.
You can build your own restaurant directory website with full marketplace capability for a fraction of those costs, own the customer relationship, and keep the commission.
This post walks through the practical build, step by step, using the free GeoDirectory plugin as the directory engine and the optional GeoMarketplace add-on to turn it into a multi-vendor ordering platform.
What a Restaurant Directory Site Actually Needs
Strip away the noise and a serious restaurant directory has the same core features as Yelp or Grubhub at their useful core:
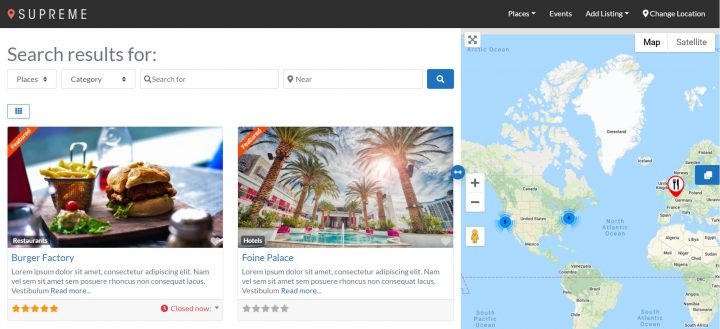
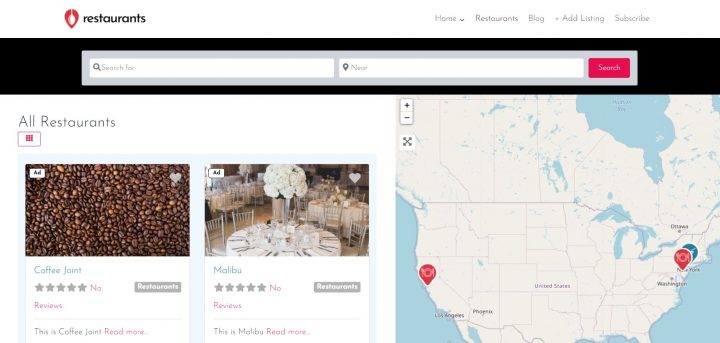
- Searchable restaurant database with filters for cuisine, neighborhood, price range, dietary options (vegan, gluten-free), and “open now”
- Map view with pins for every listing and clickable info windows
- Detailed listing pages with photos, menu, hours, contact details, and reviews
- User accounts for restaurant owners (to manage their listing) and diners (to leave reviews and save favorites)
- Front-end submission so restaurant owners can claim or add their own listings without WordPress admin access
- Optional: orderable menu items per restaurant, with multi-vendor commission split (the Grubhub feature, without the Grubhub commission)
- Optional: paid premium listings, paid claim listings, and ad slots for monetization
The GeoDirectory plugin handles every item on that list, with the GeoMarketplace add-on handling the multi-vendor ordering piece.
What You Need (Free Stack)
Three pieces of software, plus a domain and hosting:
- WordPress, the free CMS that powers 43% of the web
- The free GeoDirectory plugin for the directory engine, search, maps, and listing pages
- A theme that pairs cleanly with GeoDirectory (Elementor PRO with the Hello theme, the free Kadence theme, or one of our free BlockStrap themes)
Total cost for the free directory setup: $0 in software, plus $5-15/month for WordPress hosting and $10-15/year for a domain.
For the broader case against SaaS directory platforms, see our best business directory software guide.
For step-by-step build guidance on directory websites generally, see our tutorial on how to create a directory website.
Step 1: Set Up WordPress Hosting and a Domain
Skip this section if you already have a blank WordPress site ready.
For a fresh setup, pick a WordPress hosting provider that gives you at least 2GB RAM and SSD storage. Managed WordPress hosts handle the underlying optimization automatically.
Register a domain that matches what people will type when they search for your directory (e.g., bestbrooklynrestaurants.com, valenciafoodguide.com).
Step 2: Install AyeCode Connect
AyeCode Connect is the free helper plugin that imports pre-built restaurant directory demos directly into your WordPress site, saves you the layout work, and syncs any premium add-on licenses you own.
Navigate to Plugins → Add New in your WordPress admin and search for AyeCode Connect.
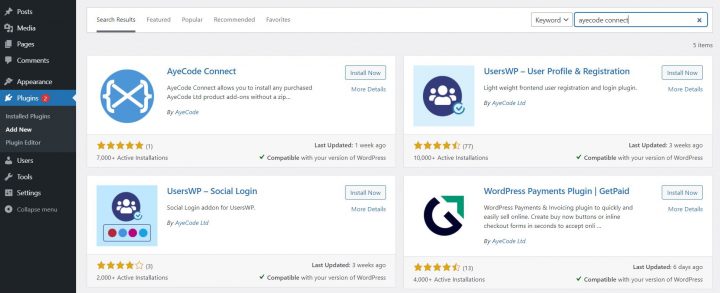
Click Install, then Activate.
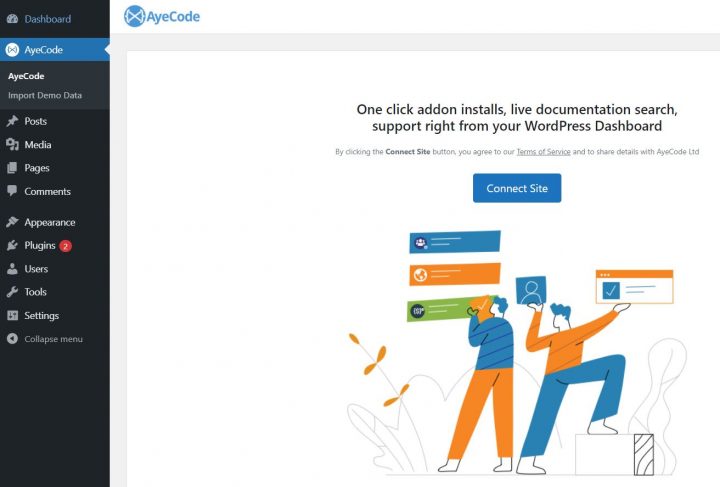
Click the Connect Site button to link your WordPress site to the AyeCode demo library. Registration is free.
Step 3: Import a Restaurant Directory Demo
Two pre-built restaurant directory demos are available through AyeCode Connect, one for each page builder approach.
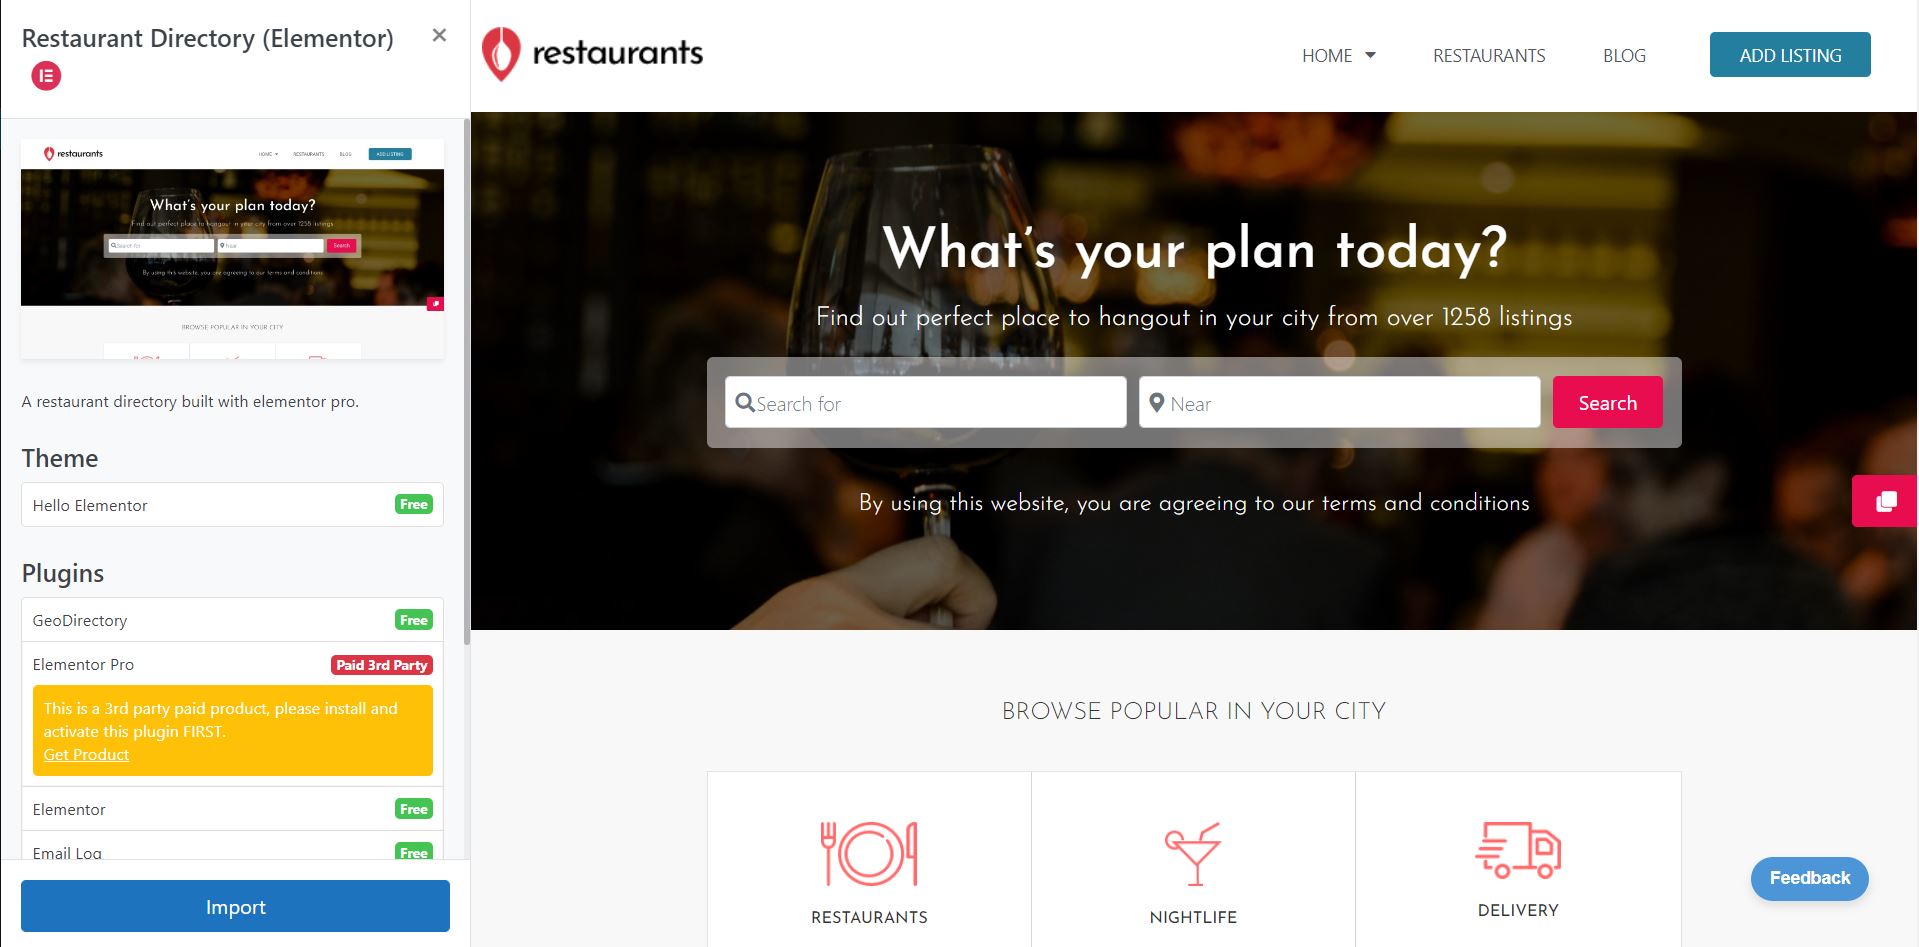
Option A: Elementor PRO + GeoDirectory

The Elementor PRO path gives you maximum visual flexibility for custom listing templates, archive pages, and search results.
Cost: $59/year for Elementor PRO (entry tier), plus the free GeoDirectory plugin.
Setup: install the free Elementor plugin, upload the Elementor PRO ZIP from your Elementor account, install the free Hello theme by Elementor, then in AyeCode Connect go to Import Demo Data → Elementor restaurant directory → View → Import.
Option B: Kadence Theme + GeoDirectory (Free Path)
The Kadence path is fully free, faster on regular hosting because it uses native Gutenberg blocks, and has no recurring page builder costs.
Cost: $0 for the Kadence theme, $0 for GeoDirectory, $0 for the demo. Total: $0 in software.
Setup: in AyeCode Connect, go to Import Demo Data → Kadence restaurant directory → View → Import.
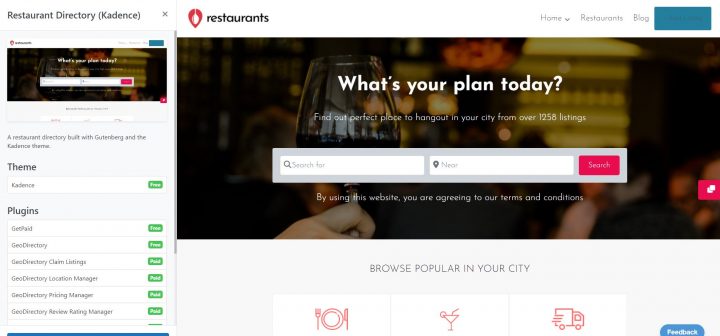
The import installs the free Kadence theme, GeoDirectory plugin, restaurant-specific custom fields, and a set of demo listings to use as a starting point.
For the deeper comparison of which page builder fits which type of operator, see our guide to how page builder choice affects directory site performance.
Step 4: Customize and Add Your Restaurants
Once the demo is imported, the post-import workflow is the same for both paths:
- Replace the placeholder logo with your brand mark
- Adjust colors and typography in the theme customizer to match your brand
- Edit the menu navigation to match your site structure (Home, Restaurants, Cuisines, Neighborhoods, Add Your Restaurant, Contact)
- Replace the demo listings with your real restaurants under Places in the WordPress admin (or use the front-end submission form)
- Configure the contact form and lead capture flow
- Submit your sitemap to Google Search Console
You can add listings one at a time through the front-end form (the same form your restaurant owners will use) or in bulk via CSV import.
The Marketplace Bonus: Orderable Menu Items Per Restaurant
Beyond the basic directory, the GeoMarketplace add-on turns your restaurant directory into a multi-vendor marketplace where each restaurant becomes its own shop.
Restaurant owners create their menu items as products tied to their listing. Diners order through the directory. You collect a commission on every order, at whatever percentage you set.
This is the Grubhub model on your own platform, with you setting the commission rate instead of paying 15-30% to a third party.
What You Need for the Marketplace Setup
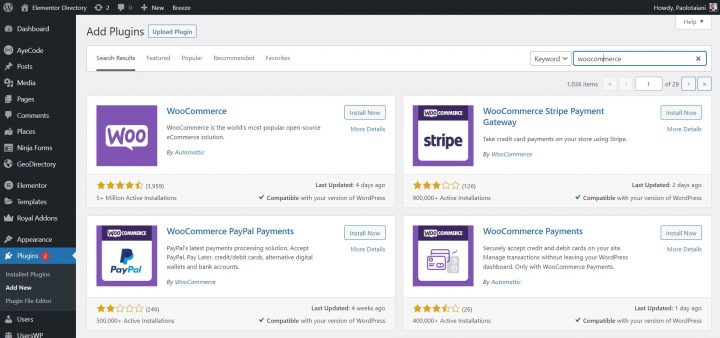
- WooCommerce (free) for the underlying e-commerce engine
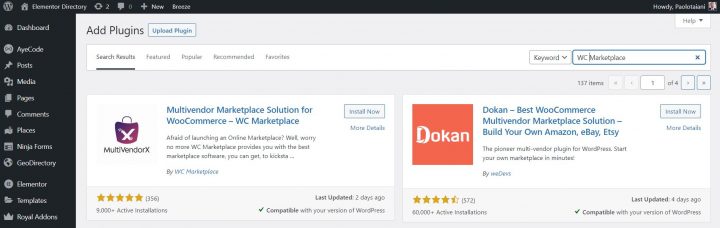
- MultiVendorX (free) for the multi-vendor functionality
- The GeoMarketplace add-on (premium, included in the GeoDirectory Membership) to connect WooCommerce + MultiVendorX + GeoDirectory into one workflow
GeoMarketplace also works with Dokan, WCFM, and WCV if you have a strong preference for one of those over MultiVendorX.
Marketplace Setup Walkthrough
Install WooCommerce: Plugins → Add New → Search WooCommerce → Install and Activate. Run through the WooCommerce setup wizard.
Install MultiVendorX: Plugins → Add New → Search MultiVendorX → Install and Activate. Set your commission percentage in the MultiVendorX settings.
Install GeoMarketplace: if you have an AyeCode Membership and AyeCode Connect set up, go to GeoDirectory → Extensions and install GeoMarketplace from there. Otherwise upload the GeoMarketplace ZIP through Plugins → Add New → Upload Plugin.
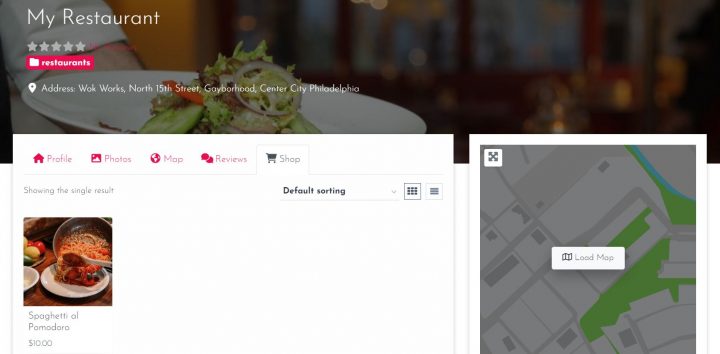
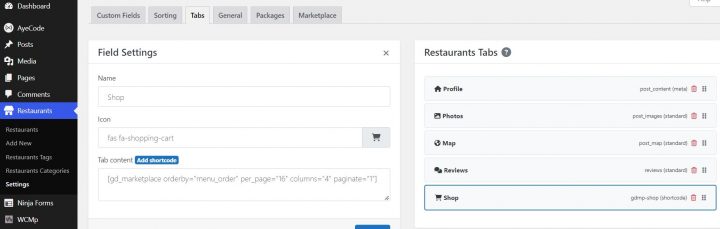
Add the Shop tab to restaurant listings: Restaurant → Settings → Tabs → Insert “Shop” tab → Save.
How Restaurant Owners Sign Up and Sell
Create two pages in your WordPress menu: Vendor Registration and Vendor Dashboard.
Enable WordPress general registration: Settings → General → “Anyone can register”.
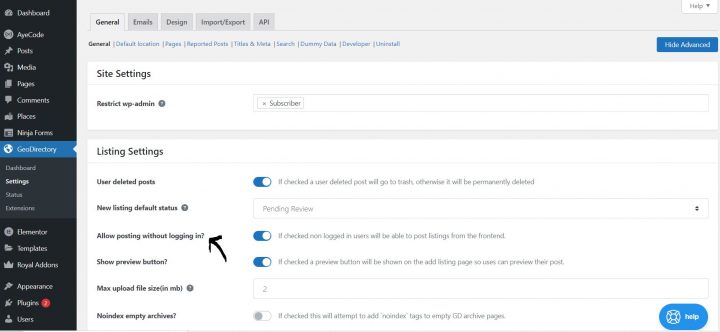
In GeoDirectory: GeoDirectory → General → Show Advanced → Allow posting without logging in.
Restaurant owners now have a four-step flow:
- Submit their restaurant through the Add Listing form (creates the listing and the user account in one step)
- Receive an email to set their password
- Apply to become a vendor through the Vendor Dashboard
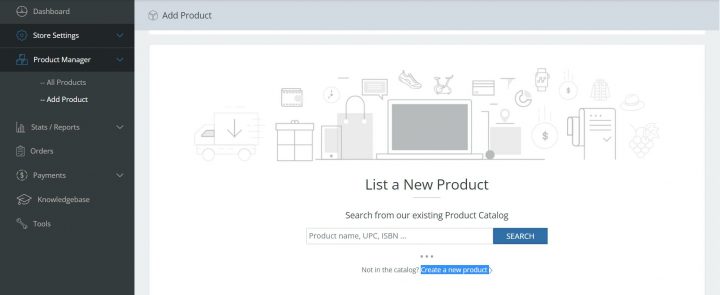
- Once approved by you (the admin), create menu items as WooCommerce products tied to their listing
The product is then linked to the restaurant listing through the GeoDirectory tab in the product creation form.
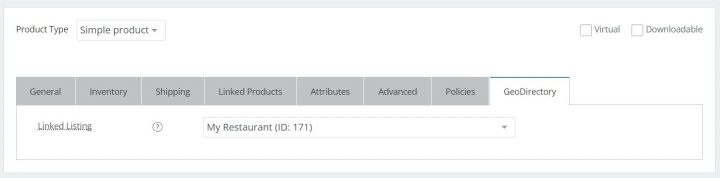
After admin approval, the menu item appears under the Shop tab of the restaurant’s listing page. Customers order through your site, and your commission gets deducted automatically from each sale.
Hiding Premium Restaurant Data Behind Member Login
Many serious restaurant directory operators eventually want to gate premium fields behind member registration: the direct phone number, the owner’s email, reservation booking links, or premium photo galleries.
The cleanest way to handle this in GeoDirectory is with our free BlockStrap themes and BlockStrap page builder plugin, both of which support block-level visibility rules tied to UsersWP membership tiers.
This is genuinely different from how every other directory plugin handles membership gating. For the full architectural breakdown and worked examples, see our guide to the best WordPress membership plugin for directory sites.
Other Ways to Monetize a Restaurant Directory
Beyond the marketplace commission, three additional revenue streams work well for restaurant directories:
Paid Premium Listings
Restaurants pay a recurring fee for featured placement in category pages and search results, additional photos and videos, longer descriptions, and direct contact links.
The Pricing Manager add-on handles the listing tiers and the recurring billing.
Paid Claim Listings
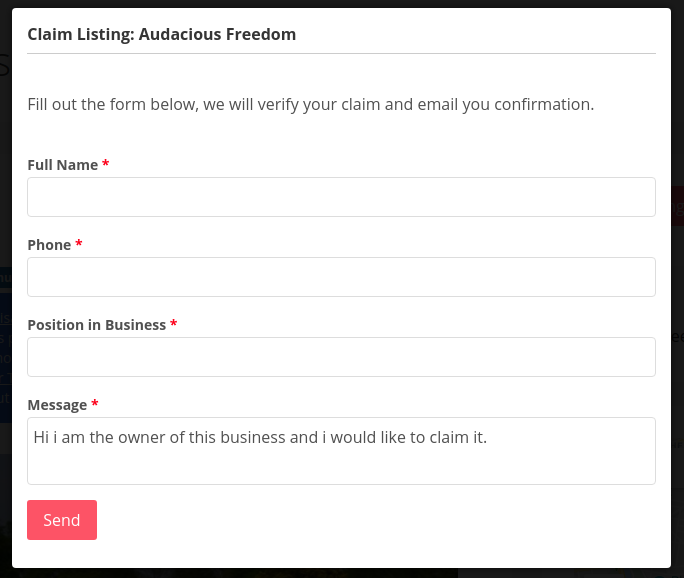
Add restaurants yourself (from public sources), then charge restaurant owners a fee to claim and manage their listings.
The Claim Listings add-on handles the claim workflow, with Pricing Manager handling the paid upgrade flow.
Sell Ads
Sell ad slots on search results, category pages, blog posts, or the home page. Ads can be styled to look like listings or as traditional banner placements.
The Pricing Manager and Advertising add-ons handle the sales and rotation.
What This Costs to Build and Run
Honest cost breakdown:
- Domain: $10-15/year
- WordPress hosting: $5-15/month ($60-180/year)
- GeoDirectory plugin: Free
- Kadence theme: Free (or Elementor PRO at $59/year for the Elementor path)
- AyeCode Connect plugin: Free
- WooCommerce: Free
- MultiVendorX: Free
- GeoDirectory Membership (for GeoMarketplace + monetization add-ons): $139/year single site or $229/year unlimited sites
Year-one total for a full restaurant directory with marketplace and monetization layer: $215-400 depending on hosting tier and which page builder path you pick.
Year-one cost of running a single restaurant on Yelp (premium page) + OpenTable + Grubhub commissions: easily $10,000+ for a restaurant doing meaningful online ordering volume.
The directory side is producing recurring revenue for you (commissions, premium listings, ads). The platform side is paying rent to someone else, forever.
The Practical Path
The fastest way to launch a restaurant directory that you own is:
- Buy a domain and basic WordPress hosting
- Install AyeCode Connect
- Import the Kadence restaurant directory demo (or Elementor PRO if you prefer)
- Customize the branding (logo, colors, typography)
- Replace demo listings with your real restaurants
- Set up the GeoMarketplace stack if you want orderable menu items
- Open front-end submission so restaurant owners can add themselves
- Submit your sitemap to Google Search Console
A weekend of focused work gets you a working site.
The first three months of consistent content (neighborhood food guides, cuisine roundups, new restaurant announcements) build the SEO foundation.
By month six, organic search starts producing diners and restaurant owner inquiries.
By year two, your restaurant directory is producing more orders, more featured listings, and more ad revenue than you could justify paying Yelp for in a single month.
Final Thoughts
The restaurant industry runs on rented attention.
Yelp, Grubhub, Uber Eats, DoorDash, OpenTable, and TripAdvisor have built billion-dollar businesses by sitting between diners and restaurants, charging both sides for the introduction.
The operators who own their own restaurant directories stop paying that toll.
The technical setup takes a weekend. The free GeoDirectory plugin handles the listings, the maps, the search, the reviews, the customer accounts, and the marketplace infrastructure.
For the broader case against SaaS directory platforms across all categories, see our best business directory software guide.
For the parallel real estate equivalent of this tutorial, see how to build a real estate website.
For the membership-gating side of the stack, see our guide to the best WordPress membership plugin for directory sites.
Stop renting customers from delivery apps.
Build the directory.
Newsletter - Stay Updated!
Get the latest news, tips, and exclusive content directly in your inbox.