How to Create a Classified Ad Website: The Step-by-step Guide
Are you looking to build a classified ad directory faster than you can say “classified ad”? Then you’ve come to the right place.
The total market of classifieds ads is $21.72 billion in 2023 alone. It can be a profitable endeavor – and creating a revenue-generating classified website doesn’t have to be difficult.
Whether you’re new to web development or an experienced coder, this guide will walk you through every step of creating a powerful classified site using GeoDirectory.
So if you’re ready to get started on building your perfect classified ad website, read on!
What is a classified ad website?
A classified ad website is a site that allows people to buy, sell, and trade items online.
It’s like your very own Craigslist, Kijiji, or Gumtree.
It’s like an online marketplace, and it can be used to find almost any type of item you’re looking for.
With a classified ad website, the sky is the limit!
The aim is to bridge the gap between a seller offering a product/service and a potential buyer seeking it, or in the case of job boards or wanted ads, connecting a provider with a seeker.
How do I make money with my classified ads website?
Classified websites can be a goldmine for owners looking to earn some cash. Here’s the lowdown on how you can make bank:
- Listing sales: The classic way to make money – charge folks to post an ad on your site.
- Ad sales: Offer paid banner ads for placement on the site – it’s a great add-on for those purchasing a listing.
- Pay-per-click advertising: Use ad networks like Google Ads, Ezoic, or Mediavine to earn some dough from third-party banner ads shown to visitors. Tip: if you use a tool like GeoDirectory to create your classified ad site, then you can connect with networks like Google Adsense (using the advertising add-on) to earn ad revenue through text, image, and HTML ads.
- Membership fees: Give your members exclusive perks and make some recurring revenue with membership options. (coming soon to GeoDirectory)
Some examples:
- Priority listing: Allow members to have their listing appear at the top of search results or on a dedicated “featured” section.
- Analytics access: Offer members access to detailed analytics on their listing’s performance, such as the number of views and clicks.
- Unlimited listings: Offer members the ability to post unlimited listings, rather than limiting them to a certain number.
- Custom banners: Allow members to display a custom banner or logo on their listings for added visibility.
- Affiliate links: Include links to partner products and watch the money roll in from sales generated from these links.
In short, there are loads of ways to make money with a classified website. Get creative and start raking in the dough!
Setting up your classified ads site: DIY vs Classified Tools
Once you’ve decided to build a classified website, the first question you should ask yourself is: should you do it yourself or use a specialized tool?
Doing it yourself (DIY) means coding from scratch. This approach might be up your alley if:
- You’re a web developer with the coding skills
- You are willing to pay for a developer to do the job for you.
But it’s worth noting that if you go the DIY route, it can take a very long time to get your classified website up and running.
There’s also a lot of maintenance involved, as your custom code might need constant updating to make sure it’s secure.
Alternatively, you can take the path of least resistance and use a specialized tool like GeoDirectory to quickly create a powerful classified ads website.
With this method, you’re not bogged down with coding and too much of the tech stuff and enjoy a range of special features.
- With user-friendly tools like a drag-and-drop builder, even those without a tech background can easily build and manage their own classified site.
- Increased money-making opportunities through built-in revenue-generating features like pay-per-listing, advertising, and (coming soon) membership add-ons).
- Integrated blog modules for hassle-free content management.
- Professional appearance that helps establish a good reputation.
- Advanced search capabilities (e.g. customizable filters) make it easy for users to find what they’re looking for.
- Mapping system and GeoLocation search features.
- Users Profiles and community features.
If you start with a pre-built design and you don’t pretend to have a complete custom design before even validating your idea, with the help of the classified dummy data, you’ll have your classified ad website up and running in under an hour.
It’s safe to say that for most people, using a classified tool is a no-brainer.
How to Create a Classified Website
With the assumption that you’re probably not here for a coding tutorial, we strongly recommend using WordPress – the most popular website builder on the planet – and the GeoDirectory plugin (the most advanced of the WordPress classified plugins) to create a professional-looking classified website.
Follow along with this guide as we show you exactly how to do it.
Step 1: Pick your niche
When creating your classified website, the first step is to find your niche.
What type of industry or market do you want to target? If you already have a business idea, great!
If you see a gap in your industry or local area, seize the opportunity to create a thriving online classified community that connects people, businesses, and services while earning you classified ads revenues.
And if you’ve got nothing at the moment, don’t worry.
There’s still plenty of room for new and innovative classified sites as they continue to grow in popularity.
A good idea is worth nothing, execution is what makes the difference.
Here are some ideas for classified websites to start you off:
- Real estate listings
- Used car sales
- Services (e.g., lawn mowing, house cleaning)
- Local marketplaces for goods
- Industry-specific job boards
- Membership directories
However, if you are able to find a tiny niche and dominate it, that’s where the chances of success are a lot higher.
Craigslist can be a great source of inspiration and the bigger niches have already been exploited, but you could always come across an emerging gem.
Step 2: Purchase your domain
Next up, pick a memorable and easy-to-spell domain name. Your niche should influence your business name, which should be the foundation of your domain name.
You can then purchase the domain from any number of providers, like Google Domains, GoDaddy, or Namecheap.
Step 3: Get a hosting plan (server)
This will be the most expensive part.
But it doesn’t have to be hundreds of dollars per month.
An entry plan with Cloudways (we suggest the 1GB High-Frequency Vultr instance) costs less than $15 per month and it’s a great starting point for a fast classified website that can sustain heavy traffic (and make healthy profits).
Step 4: Download & install GeoDirectory
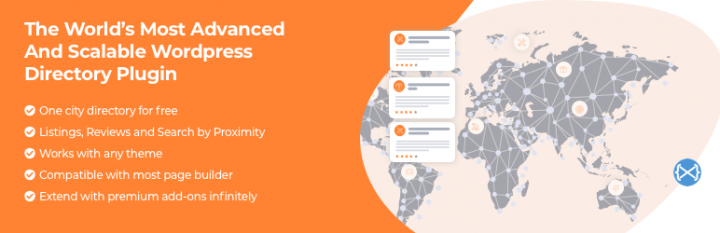
Now that you have your domain set up and your server ready, it’s time to download and install GeoDirectory.
No need to shell out big bucks for a web dev to build your WordPress site, or constantly fork over cash for updates.
Once you’ve got your hands on top-notch classified ads software like GeoDirectory, it’s time to get organized and categorize your site.
The great thing about using the plugin is that it works with any theme or page builder.
And if you’re an experienced developer, you’ll be happy to know that GeoDirectory is developer-friendly since all the code is built to be extended with many hooks and filters.
The directory starter theme can help you put a basic classified website online in minutes.
Step 5: Adding Dummy Data
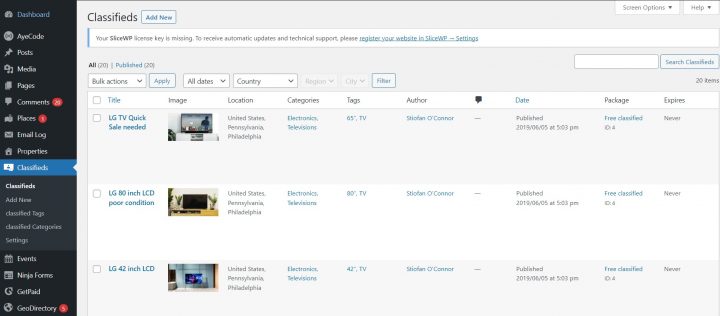
The last step in setting up your classified website is to add dummy data.
This will give you the best chance of making a good first impression with visitors and search engines alike.
Dummy data provides realistic content that shows off what your classified ad site has to offer. You can test the site’s features, see how it looks with actual data, and make any necessary changes before the website goes live.
Here’s how to add dummy data to GeoDirectory (alternatively, you can watch this instructional video):
Head over to Settings –> General (tab) –> Dummy Data (sub-tab).
- Pick your data type: Decide what data you want to import for each custom post type (CPT) and set the number of items. In this case, you would select “Classifieds.”
- Update templates: Opt to update the template pages if you want to show specific custom info, like prices. Just a heads up, if you’ve made custom changes to the archive or details page templates, this option will override them.
- One-click import: All you have to do is click “Insert Posts” and GeoDirectory will handle the rest. Pro-tip: installing the Advanced Search addon before importing will add extra search fields to non-default data types.
- Removing dummy data: When you’re done building your site, removing dummy data is as easy as clicking the “Remove Data” button.
And there you have it! Keep in mind, when using the CPT addon, each CPT will have its own settings for dummy data import.
The same goes for the Events addon and its Events CPT – it’ll have its own special dummy data types.
Step 5: Customize the functionality
Now that you’ve got your dummy data in place, it’s time to customize the functionality of your classified ad website and make it a breeze to navigate for both visitors and search engines.
How?
- Add new categories and fields: Customize the existing fields or add new ones to get more detailed information from your visitors (here’s a guide on how to do that). Make sure to provide detailed information for each category, and don’t be afraid to add sub-categories for advanced filtering options.
- Bonus tip – offering to feature a listing in multiple categories is a smart way to upsell your premium membership levels.
- Configure search and filter options: Tweak settings and create custom search options to make it easy for people to find exactly what they’re looking for (check out this guide on adding filters to the main search bar).
- Set up user registration and submission forms: Enable users to register on your site and submit ads without any hassle (refer to this guide with instructions).
Step 6: Promoting your website
Your classified ad website is ready, now it’s time to get the word out and start driving traffic.
Here are a few tips:
- Optimize for SEO: Make sure your site is optimized for search engines by adding keyword-rich titles and descriptions, submitting your sitemap to Google Search Console, and creating high-quality content. Blogging is one of the best ways to drive traffic and sales to your website – Being a WordPress plugin, GeoDirectory is easily coupled with WordPress’s Blog Module where you can create, monitor, and optimize your content.
- Leverage platforms like Twitter, Facebook, Instagram Linkedin, and Pinterest, to spread the word about your classified ad website and drive traffic. Use catchy hashtags and visuals to catch people’s attention and link back to your site.
- Advertise online: You can also use online advertising to reach a wider audience. You can use Google Ads, Facebook Ads (including Instagram), or other platforms to target specific audiences. Include special offers like discounts or exclusive deals on premium membership levels to encourage more people to register.
- Reach out to local media outlets: If your classified ads website is focused on a specific region or area, reach out to local media outlets like newspapers, TV stations, and radio stations. They may be able to help you reach potential users in your target area.
- Use email marketing: Build an email list and send out regular newsletters or promotional emails to your subscribers. This can help keep your website top of mind and encourage repeat visits.
Parting words
Creating a classified ad website doesn’t have to be hard. With the help of GeoDirectory and its dummy data, you can get your site up and running in no time.
From setting up categories and fields, configuring search options, customizing user registration forms, optimizing for SEO, leveraging social media platforms, or advertising online – there are plenty of ways to promote your new classified ads website.
But don’t forget about email marketing too – building an email list is one of the best strategies for driving repeat visits.
Pro tip: Add-ons are the key to making your classifieds website truly functional and unstoppable. You can save a lot of money (90%) by grabbing a plan that includes all of them instead of paying for them individually ($30-$40 each).
Newsletter - Stay Updated!
Get the latest news, tips, and exclusive content directly in your inbox.