Building a Directory Website with Divi

How to Create a Directory Website with Divi theme?
The easiest way to build a Directory Website using the Divi WordPress theme is to implement the following 3 steps:
- Install the Divi theme
- Install and setup GeoDirectory
- Design the Directory Website using the Divi theme
Before I describe the details of how to create a business directory step by step, I would like to quote a post published on September 11, 2023, on the official Elegantthemes blog, the developers of the Divi theme.
Is GeoDirectory the best WordPress plugin for creating a business directory website with the Divi theme?
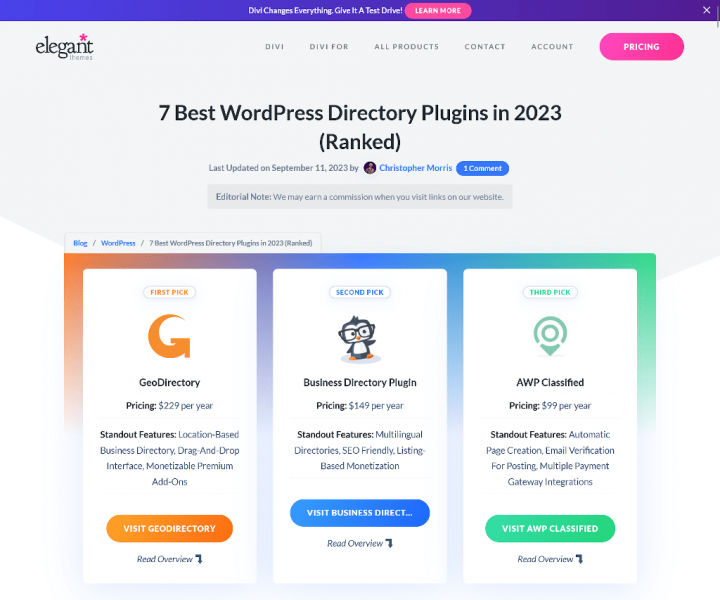
On the Elegant Themes blog, an article titled “7 Best WordPress Directory Plugins in 2023 (Ranked)” was published.
GeoDirectory plugin took the top spot in the ranking. In the article’s content, the author justifies why GeoDirectory is the best WordPress plugin for creating a directory website.
I encourage you to read this article. Below is a quote from the FAQ section of the mentioned article.
What is the best directory plugin for WordPress?
Quote from the FAQ section of the article: 7 Best WordPress Directory Plugins in 2023 (Ranked).
GeoDirectory is the best WordPress directory plugin. It offers customizable listings, advanced search, user reviews, Google Maps integration, monetization options, and great theme/plugin compatibility. You can create feature-rich directory websites easily with GeoDirectory.
My first WordPress site, created in 2013, was a business directory without any dedicated plugins.
I recall when the creators of WP GeoDirectory, Paolo Tajani, and Stiofan O’Connor, forked the “GeoPlaces” theme from Templatic and fixed all its issues.
They enhanced its performance and subsequently introduced GeoTheme over 10 years ago.
Later, adapting to the evolving WordPress ecosystem and drawing from their experiences, they shifted from theme development.
Building on its foundation, they crafted the GeoDirectory plugin, which facilitates the creation of directory sites of nearly any kind.
I’ve tested most of the plugins and themes for WordPress that allow for the creation of a directory website.
Both the aforementioned entry and my 11 years of experience confirm that WP GeoDirectory is the best plugin for this purpose.
Step-by-step guide on how to create a directory website using the Divi theme and the GeoDirectory plugin
Let’s see how we can build a Directory Website with GeoDirectory and the Divi theme in detail.
In this tutorial, we will:
Table of Contents
- How to Create a Directory Website with Divi theme?
- Installing Theme and Plugins.
- Design the Divi Directory Website
- Maximize Your Divi Directory Potential with DiviGeo
- Adding premium features to your Divi Directory Website
Installing Theme and Plugins.
1. Install the Divi theme
First, you will need to install a Divi Theme
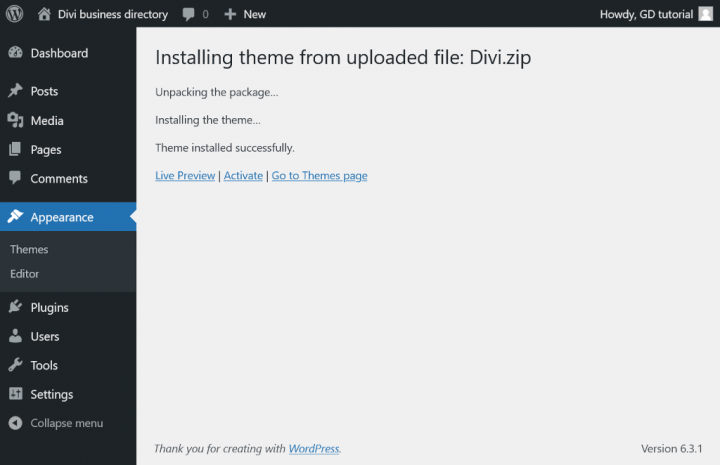
Go to Appearance >> Themes >>
Select Add New, Upload Theme, Install, and Activate the Divi Theme.
2. Install GeoDirectory
Now you need to install the GeoDirectory plugin.
Go to Plugins >> Add new, search GeoDirectory. Please install and activate it.
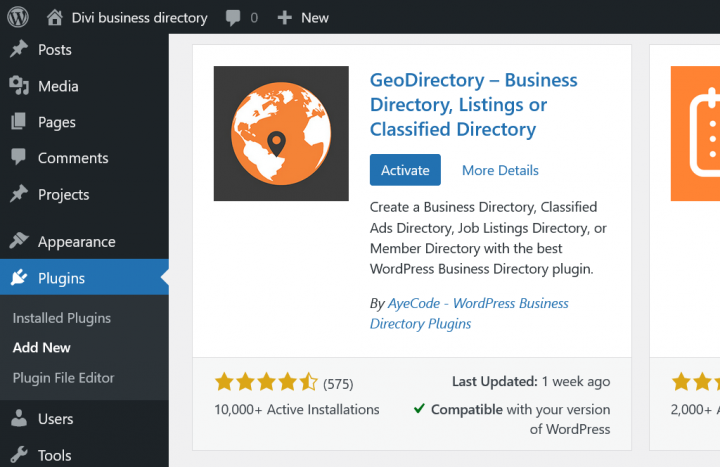
Done, once the Divi theme and GeoDirectory plugin are active, we can move on to the next step.
3. GeoDirectory Install Wizard
If you appreciate Divi Builder for its simplicity, you’ll surely appreciate the Setup Wizard built into the Geo Directory plugin.
Choosing the Map System (Google Maps or OpenStreetMap)
Now you have to complete the Setup Wizard to configure. You can choose between two mapping systems on the wizard’s first step. Google Maps and Open Street Maps (which doesn’t require an API key).
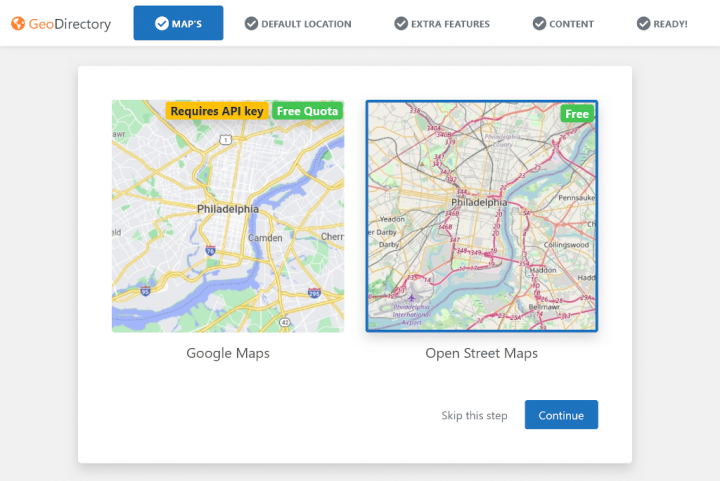
In this tutorial, we select OpenStreetMaps.
Select OpenStreetMap and click continue.
In case you wish to select Google Maps, do the following extra steps.
Click on the Generate Key button and follow the steps in this doc to generate a valid API key.
The essential steps are:
- Enable the Keys.
- Create or select an existing project.
- Get the Key.
- Activate a billing account.
- Restrict the API key (so it can only be used from the URL of your website)
About point four: it is a requirement. However, you only get charged if you pass the threshold, which is $200/month.
This free credit is more than enough for 99% of directories.
Setting the default city
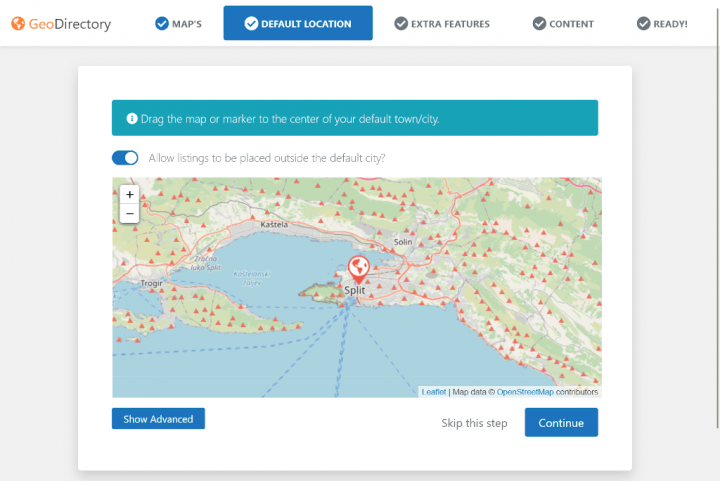
After that, you will set the default location. This is the city for which the directory is created. GeoDirectory uses Philadelphia as the default City.
Considering the niche I chose for this tutorial, we will set the default city to Split in Croatia.
You can drag the map marker to use whatever location you need, or use advanced settings by clicking “Show Advanced”.
If you need to add listings to more than one city, you will need the Location Manager add-on.
Adding extra features
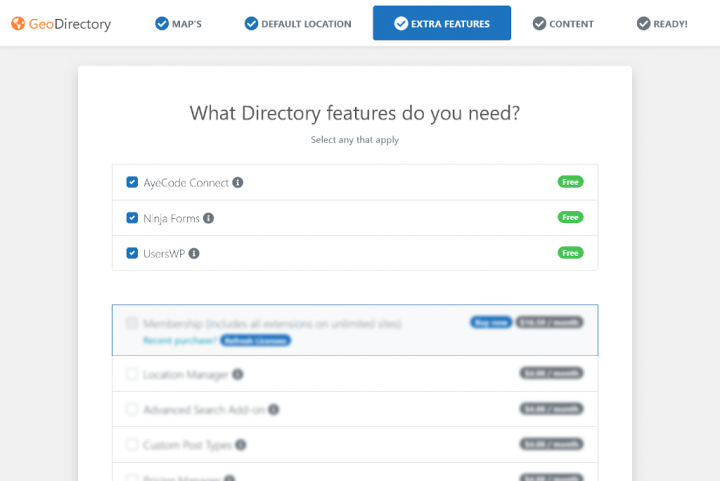
In this step, we will install our UsersWP, a user login plugin that lets users register and log into your website.
This is needed to allow users to add and edit their listings. It will also create user profiles where they can find their listings, reviews, and so on.
We will also install Ninja Forms so that all listings have a contact form that sends emails directly to the listing owners.
AyeCode Connect is not mandatory for this tutorial. It is mainly needed if you want to add GeoDirectory premium add-ons and install them directly from the WordPress Dashboard.
Adding Dummy Data
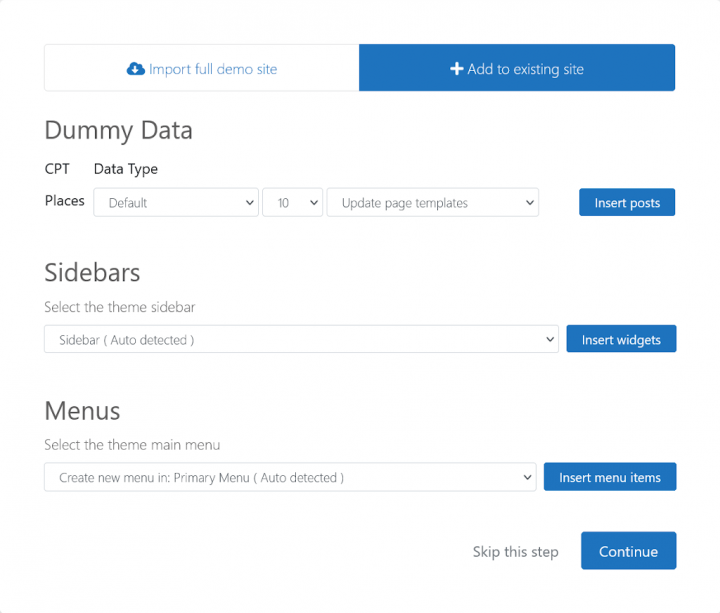
The last step to complete the installation wizard is adding some dummy listings. This will also add listing categories that you can edit later according to your needs.
You will not add sidebar widgets and menu items right now, as we will do that later.
Design the Divi Directory Website
Now that we installed the theme and the plugins and done the preliminary setup of GeoDirectory, we can start designing our Directory Website with the Divi Theme.
1. Divi Directory Website Home Page design
You can create a new page or use one WordPress creates by default, like the Sample Page.
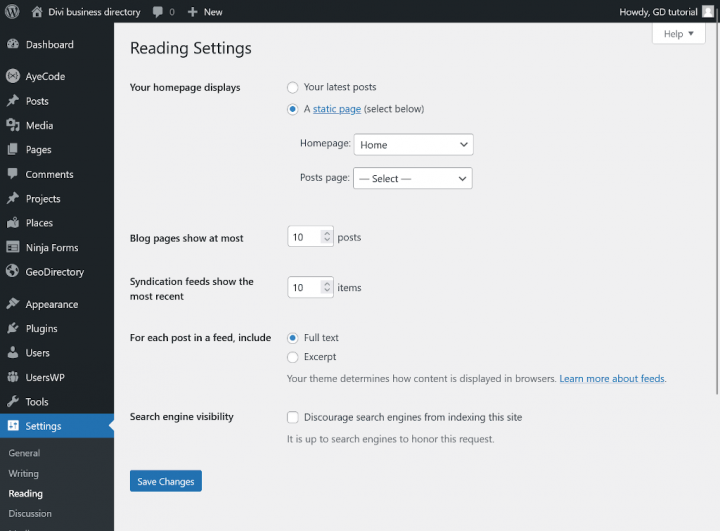
Go to Pages, edit the Sample page, and rename it Home or create a new page for this.
Next, go to Settings > Reading > Homepage Settings and select your Home.
We will select the Posts page later.
The Logo
Avoid spending on a designer for your initial logo.
Many make the mistake of investing heavily before assessing the market fit.
Use apps like Canva for quick, affordable, and quality designs.
For an MVP, a Canva-designed logo suffices.
While initial perfection isn’t crucial, you can enhance the logo if your project succeeds.
Remember, an average logo isn’t the reason for project failures.
After designing your logo, go to Divi > Theme Options, click upload and select the logo you created with Canva.com.
Skip cropping (or crop the image as needed) and click Save changes in the upper-left corner of the screen.
The Navigation Menu
After creating and adding the logo, go to Appearance > Menus, and create your menu.
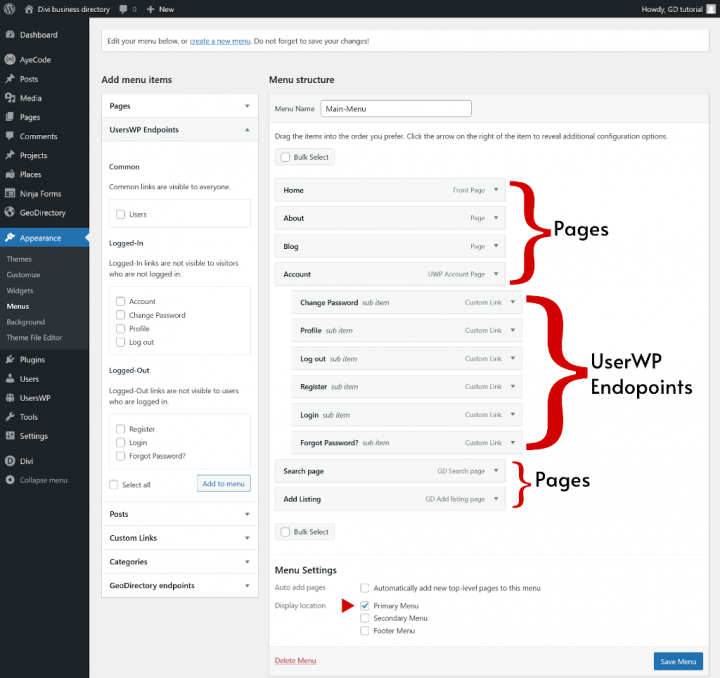
Add the links needed (from the left column to the right column) and save. In the Menu Settings > Display location section, you can check the “Primary Menu” option.
In this example, we’ll only have the header navigation menu.
We added twelve links:
- Home
- About
- Blog
- Account
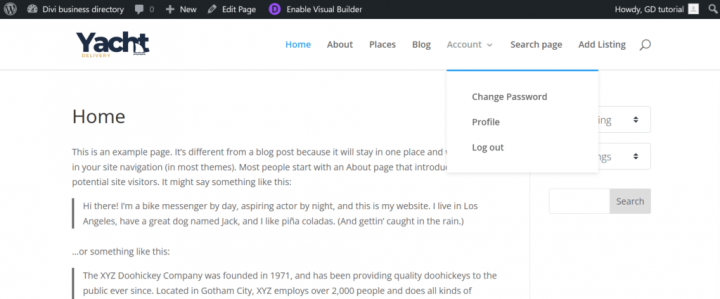
- Profile (Visible for logged-in users)
- Change Password (Visible for logged-in users)
- Log out (Visible for logged-in users.)
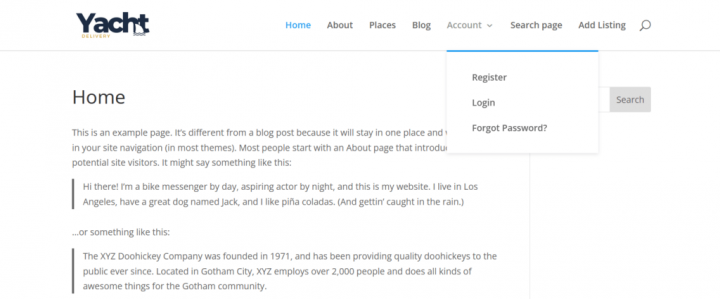
- Register (Visible for not logged in)
- Login (Visible for not logged in)
- Forgot Password? (Visible for not logged in)
- Search Page
- Add Listing
Links from UserWP Endpoints are dynamics, see parentheses above.
The Content
The Divi theme offers over 330 pre-made Layout packs.
For the purposes of this tutorial, I will choose a ready-to-use layout that allows for the creation of an attractive business directory without the tedious task of styling Divi modules.
For this tutorial, I chose premade Charter Divi Layout Pack.
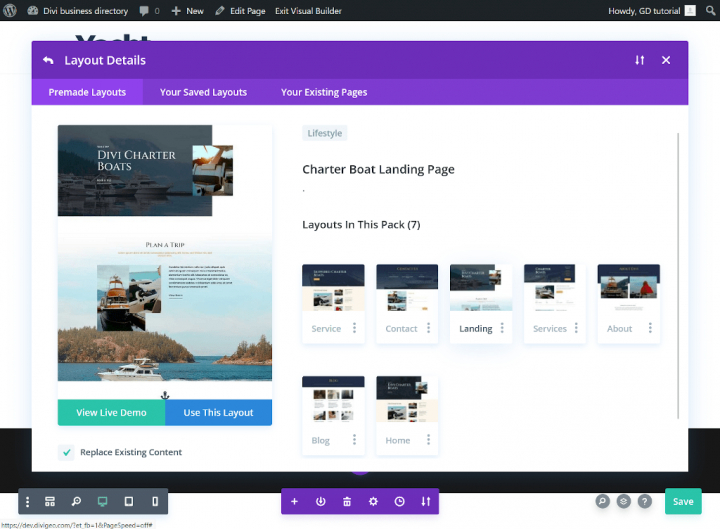
Go to your homepage, click ‘Enable Visual Builder’, and then click ‘Browse Layouts’.
In the premade Layout library, select the ‘Charter Boat Landing Page’ and click ‘Use This Layout.
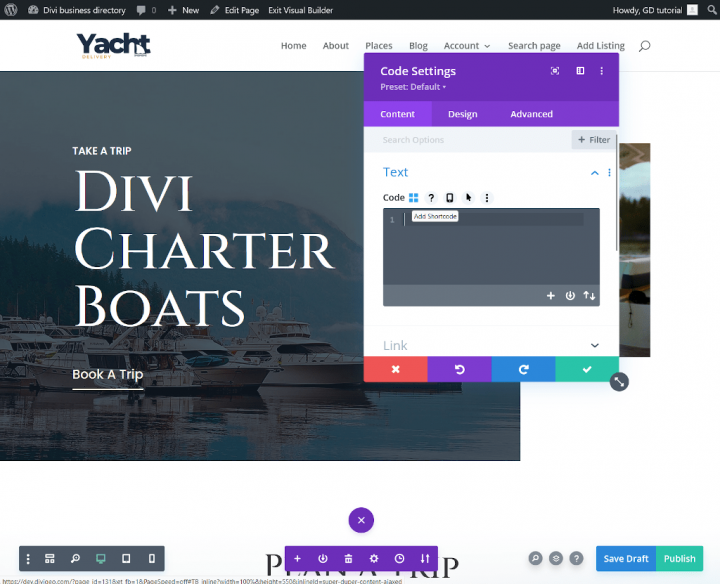
After the second text module, add the code module and click Add Shortcode.
Divi does not allow the use of Gutenberg blocks, but the creators of the GeoDirectory plug-in have implemented shortcode generator.
Thanks to which, you can easily add dynamic widgets using the Divi Code module.
So, the shortcode generator feature is your friend when creating a directory website in Divi.
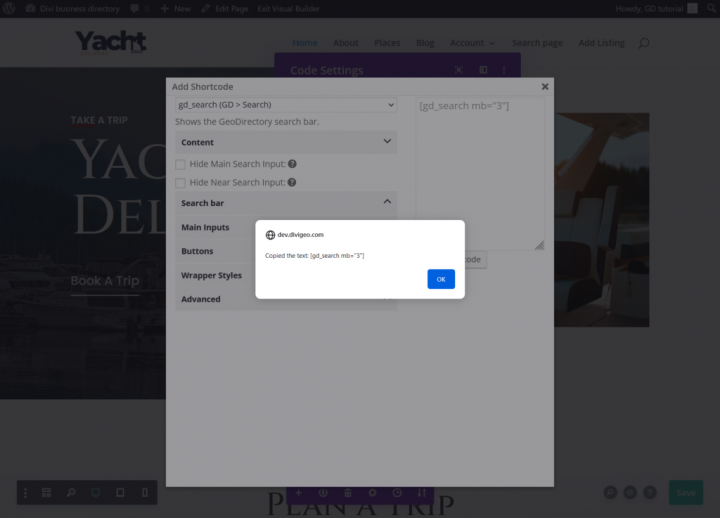
Select “gd_search “(GD > Search)” from the drop-down list and click Copy shortcode.
The copied shortcode is in the clipboard. Paste the copied code into the code module. And click on the check mark icon.
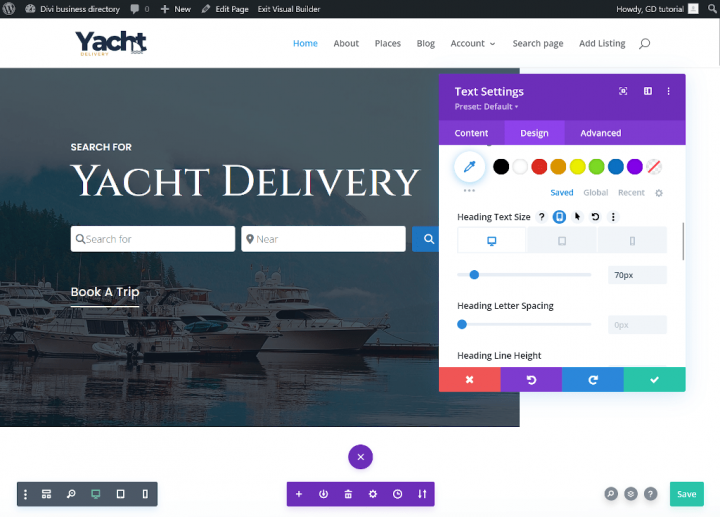
Change the first text module content to “Search for”.
Change the header content in the content tab to Yacht Delivery. In the Design tab, change the h1 header font size to 70px and click the check mark.
Remove the “Book a Trip” button module.
So now our Hero section is completed.
In the next section, from the predefined Divi landing page template, change the content of the H2 header to “Listings Categories”.
Remove the text module under the heading (gold font) or change the content to your own, I will leave the Lorem Ipsum fragments to make the website design more interesting.
Delete the two-column row with photos and text, then add a new row with a code module. When adding, click ‘Add Shortcode’ in the same manner as you did for the search form.
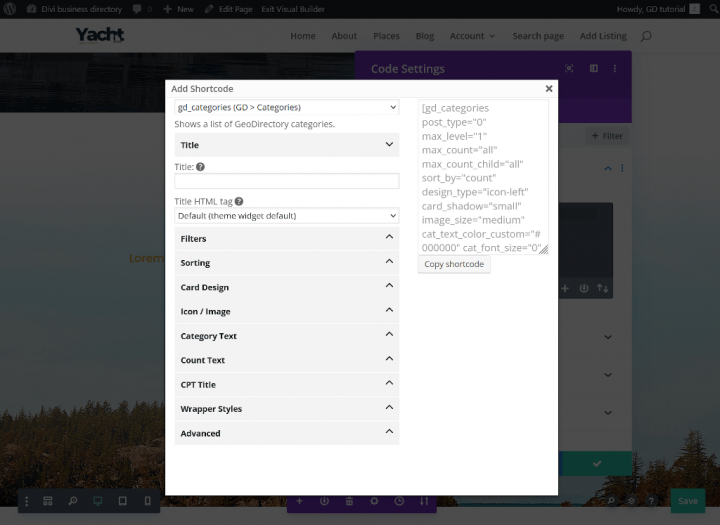
Select “gd_categories “(GD > Categories)” from the drop-down list.
The options I changed in the shortcode generator to achieve the appearance of the category columns as shown below:
Filters tab:
Max cats to show per CPT: 3
Mark: Hide Empty
Card Design Tab:
Design Type: Image Background
Row positioning: Center
Card shadow: Large
Icon / Image Tab:
Mark: Use category image
Image size: Large
You can also copy the shortcode below and paste it into the code module.
Generated shortcode:
[gd_categories post_type="0" hide_empty="1" max_level="1" max_count="3" max_count_child="all" sort_by="count" design_type="image" row_positioning="center" card_shadow="large" use_image="1" image_size="large" cat_text_color_custom="#000000" cat_font_size="0" badge_text_color_custom="#000000" badge_color="light" badge_font_size="0" title_tag="h4" mb="3"]

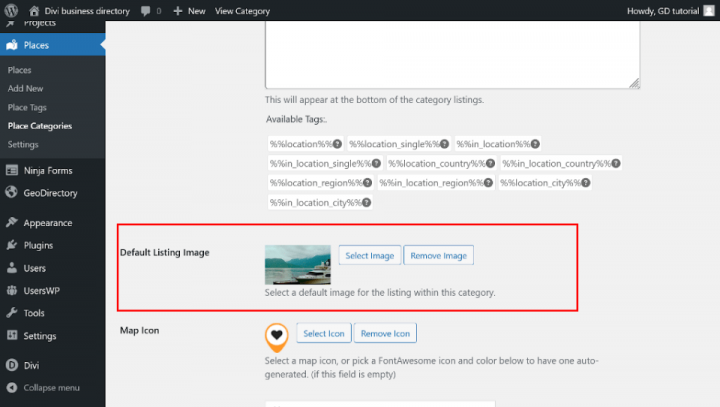
You can set the image to a category by editing the category from wp-admin -> places -> Place Categories.
Each category has an option to set a default image.
I also changed the category names to match the niche I chose for this tutorial.
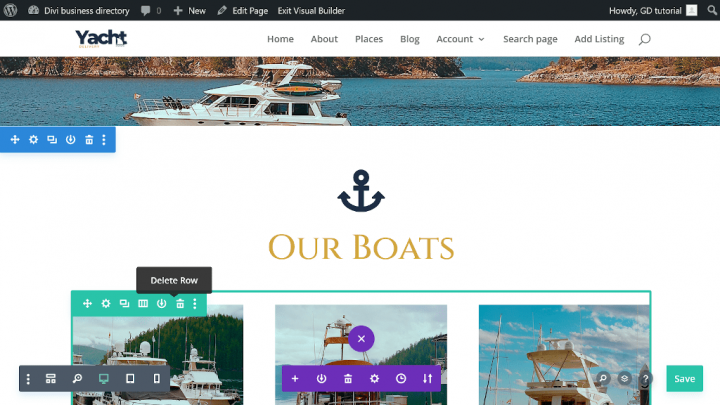
We will use the next section to show the latest entries.
Change Our boats heading to the Latest Yacht providers. Delete the row after the heading and add a new section with Divi code module.
Similarly to the search form and categories, we need to generate a shortcode that will show the latest listings.
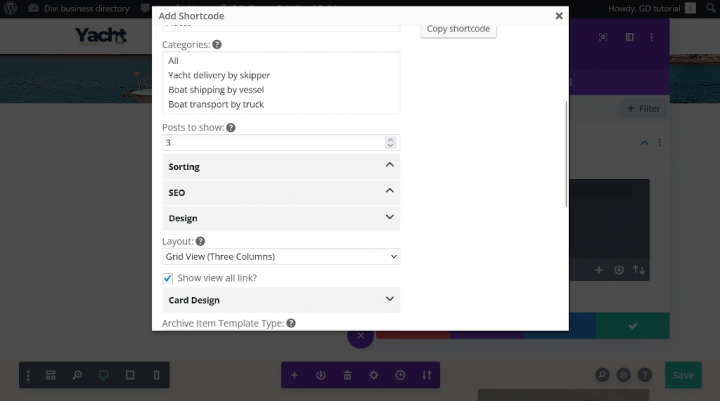
Select “gd_listings “(GD > Listings)” from the drop-down list.
The options I changed in the shortcode generator to achieve the appearance as shown below:
Filters tab:
Posts to show: 3
Design Tab:
Layout: Grid View (three Columns)
You can also copy the shortcode below and paste it into the code module.
Generated shortcode:[gd_listings post_type=”gd_place” post_limit=”3″ add_location_filter=”1″ sort_by=”az” title_tag=”h3″ layout=”3″ view_all_link=”1″ bottom_pagination=”1″ slide_interval=”5″ mb=”3″]
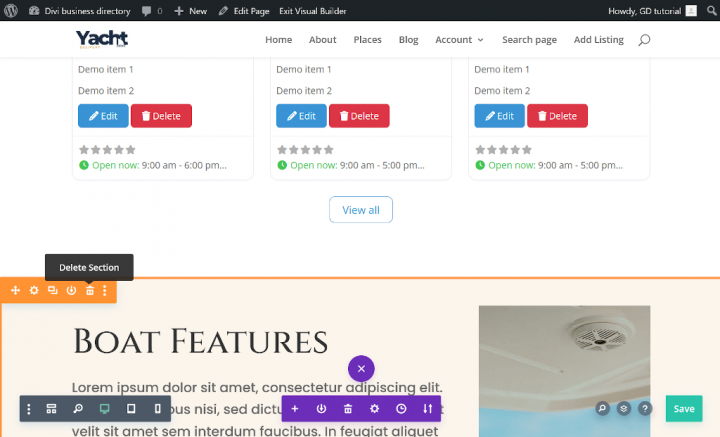
This section will not be needed, so delete it.
The next section will serve as our CTA section. Change the text to “Do you provide Yacht Delivery services?” In the design tab of the text module, change the size of the h2 header to 60px.
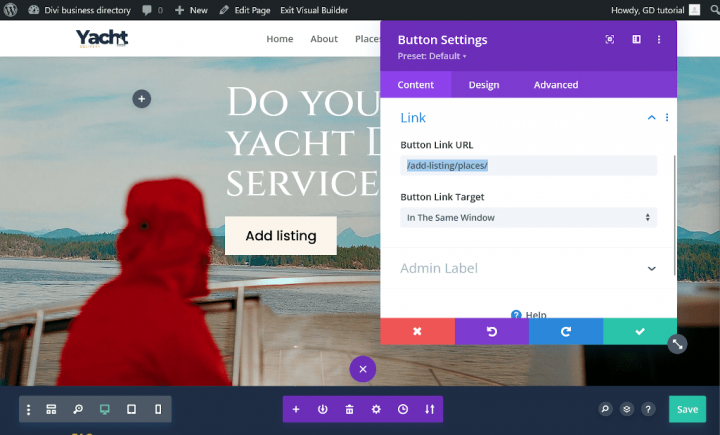
Edit button module text to add listing and set link to “/add-listing/places/”.
You can remove the next “FAQ” section, but I won’t, to make the project look more interesting.
I recommend populating the FAQ section with content related to the niche for which you are creating a business directory.
The more thematic content, the better for optimizing your website in search engines.
Similarly, with the next section, I will remove it in this guide, but you can use it to optimize your website for search engines.
I won’t remove the reviews section for a better homepage design. You can do as you wish.
Create Global footer
The homepage of the Divi Directory website is complete. Now, let’s create a global footer for our site.
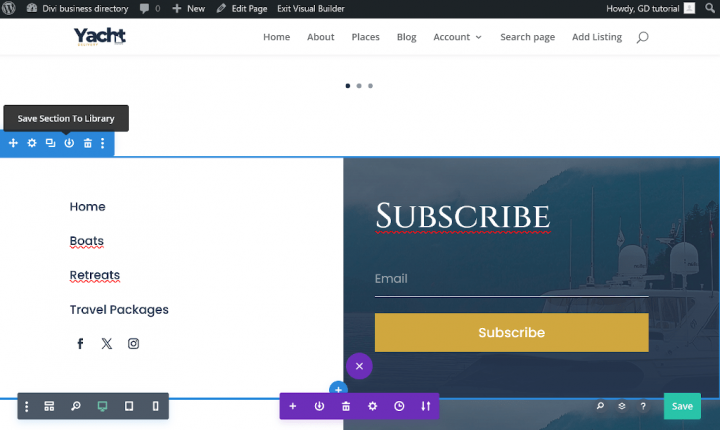
Click save Section to library icon, in the section name field, write “global-footer” and click save to library. After all, Save Your Homepage layout with the Save button In the lower-right corner of the screen.
Delete the section we saved in the Divi library and save the project again.
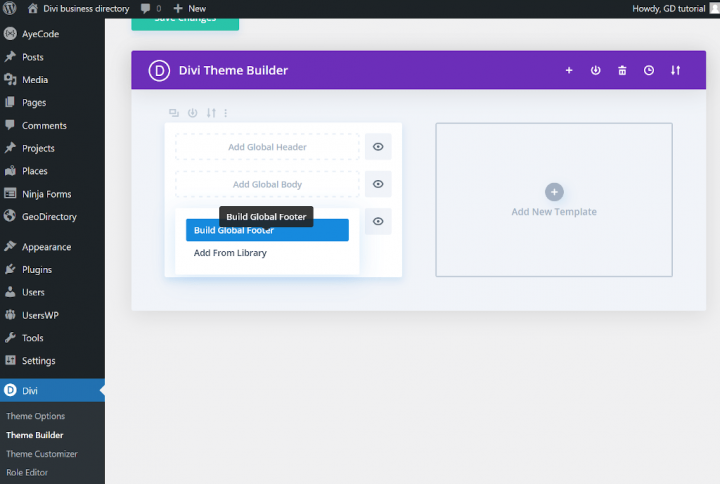
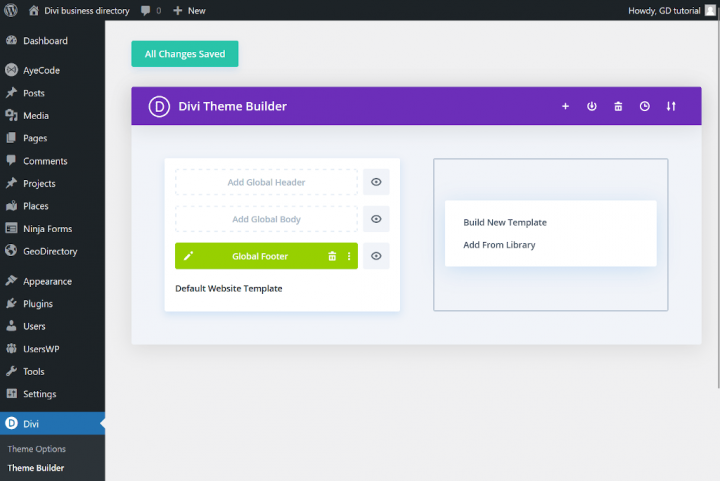
Go to the WordPress dashboard, then click on Divi > Theme Builder, click Add Global Footer and select Build Global Footer.
Insert a new section, click Add From Library, choose the section we created before and click Use This Section.
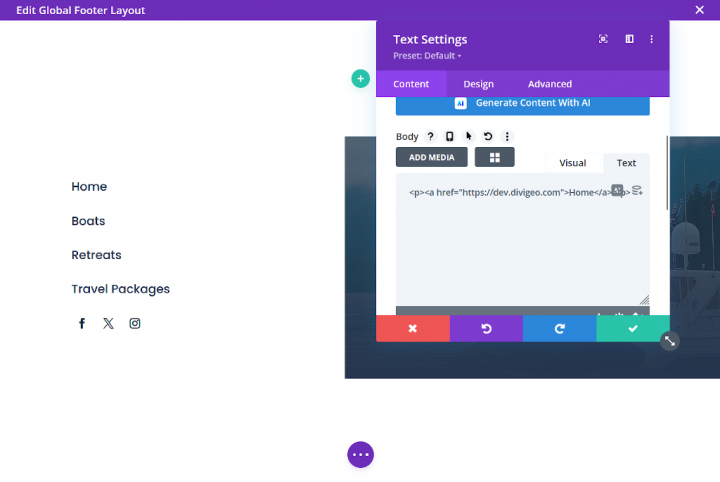
The global footer section is built with photo, four text modules and social icons modules.
Change the content and links of text modules. I will use text modules to re-present the categories of my business directory on the website for easier navigation.
Enter the appropriate links in the Social Media Follow module.
Delete the empty section and save the global footer, then click close in the upper-right corner of the screen.
Very important: when you return to the Divi theme Builder, click the Save Changes button.
The home page and global footer of the directory website are done.
Divi Directory Website Listings and Search page design
Now you need to design two pages that are essential for any directory.
The listings page (general archive, categories, tags), and the search results page.
GeoDirectory creates them by default, but in this tutorial, we will make minor changes to the default pages.
We have to add a map, as well as a Text Module with a dynamic title.
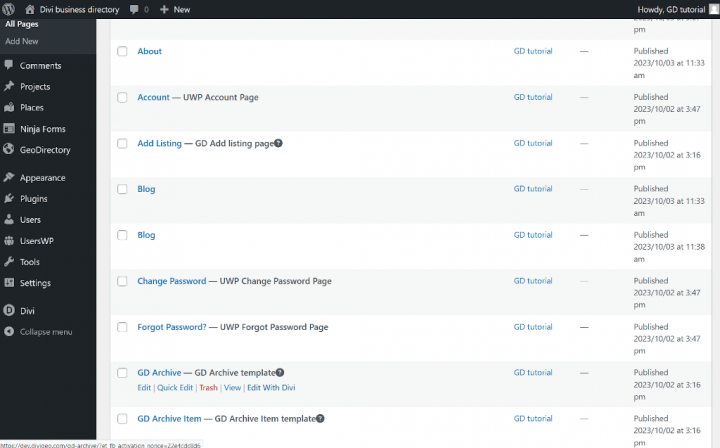
Go to the ‘All Pages’ tab in the WordPress dashboard, find the ‘GD Archive’ page, click ‘Edit With Divi’, and then edit the existing content.
Delete the text module, add the two code modules.
Now, use the shortcode generator in the same way you did for generating shortcodes for categories or recent listings.
From the dropdown list, select, copy and paste the following shortcodes in order:
GD > Map
GD > Notifications
GD > Search
GD > Loop Action
GD > Loop
GD > Loop paging
You can also paste the following shortcodes to code module.
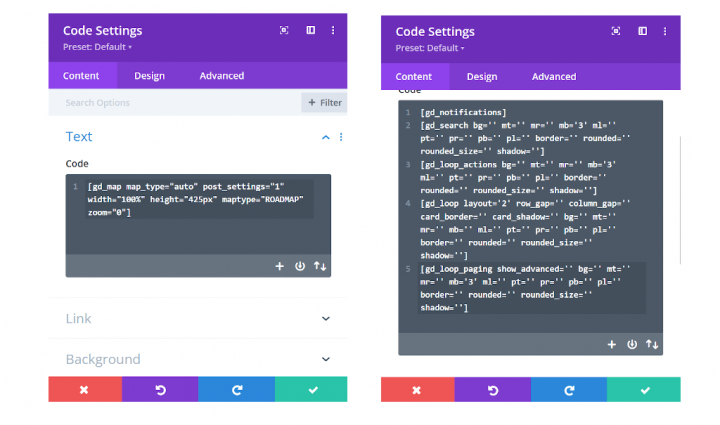
In the first code module, we need to add the shortcode responsible for the map:
[gd_map map_type="auto" post_settings="1" width="100%" height="425px" maptype="ROADMAP" zoom="0"]
Second code module:
[gd_map map_type="auto" post_settings="1" width="100%" height="425px" maptype="ROADMAP" zoom="0"] <br>
[gd_notifications]
[gd_search bg=” mt=” mr=” mb=’3′ ml=” pt=” pr=” pb=” pl=” border=” rounded=” rounded_size=” shadow=”]
[gd_loop_actions bg=” mt=” mr=” mb=’3′ ml=” pt=” pr=” pb=” pl=” border=” rounded=” rounded_size=” shadow=”]
[gd_loop layout=’2′ row_gap=” column_gap=” card_border=” card_shadow=” bg=” mt=” mr=” mb=” ml=” pt=” pr=” pb=” pl=” border=” rounded=” rounded_size=” shadow=”]
[gd_loop_paging show_advanced=” bg=” mt=” mr=” mb=’3′ ml=” pt=” pr=” pb=” pl=” border=” rounded=” rounded_size=” shadow=”]
Now, above the Divi code modules section, we need to add a new section with a Divi Heading Module.
To display the title of the archive pages, we will use Divi’s built-in option for displaying dynamic content.
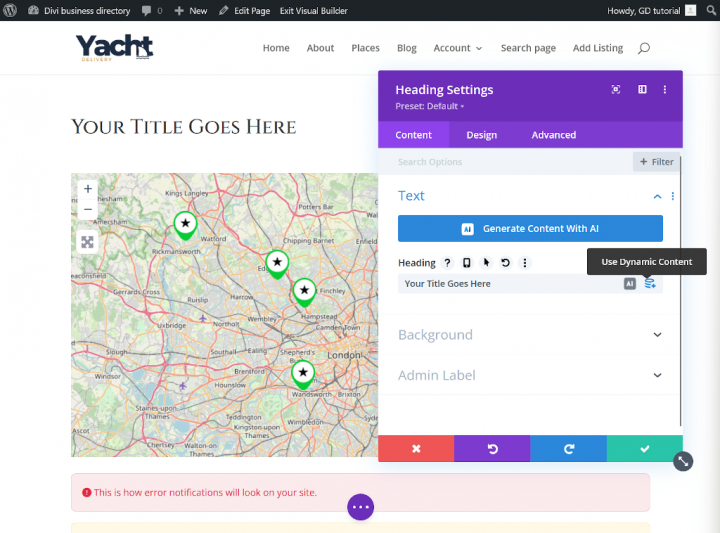
In the content tab, hover over the heading field and click Use Dynamic content on the right. Select Page/Archive Title from the drop-down list.
Click check mark and save Your GD Archive Divi layout.
Search page
For the search page, we repeat a similar process, but as with creating the footer, we will use the Divi Theme Builder.
From the WordPress dashboard, navigate to Divi > Theme Builder. Click Add new template and then Build New Template.
You’ll see the Template settings. Under the Use on tab, find the Other section and select GD Search Results Page and click Create Template.
You’ll see a new Template responsible for the GD Search page.
Add Custom Body click Add from library in Your Existing page tab Click on GD Archive Layout and then use this Layout.
Click on the pencil icon and edit the Custom body. You do not have to do anything, just save Layout and save changes in Divi Builder Theme.
Just one more step and your directory website built with Divi will be fully functional.
Single listing page
A single listing page is responsible for displaying a single entry in your directory website.
Similar to the GD archive and Gd Search page, the page template was created by the GD install wizard.
Go to pages in Your WordPress dashboard and edit with Divi GD Details page.
Delete content and add two columns row as shown in the image below.
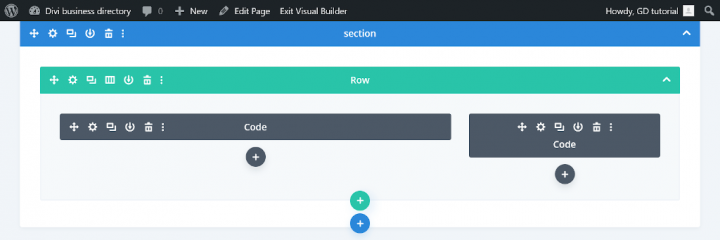
In the left code module, we will add shortcodes responsible for the post content and gallery.
In the right code module, we will add shortcodes that will be responsible for displaying post details such as phone number, address, social media links, and others.
You know how to use the shortcode generator, so generate, copy, and paste the following shortcodes. I have also prepared ready-to-copy shortcodes below.
Code module on the left
[gd_post_images title='' types='' fallback_types='' ajax_load='true' limit='' limit_show='' css_class='' type='slider' slideshow='true' controlnav='1' animation='slide' show_title='true' show_caption='true' image_size='' aspect='' cover='' link_to='' link_screenshot_to='' bg='' mt='' mr='' mb='' ml='' pt='' pr='' pb='' pl='' border='' rounded='' rounded_size='' shadow='' ]
[gd_single_taxonomies taxonomy=” prefix=” link_style=” link_color=” link_color_custom=” link_icon=’false’ mt=” mr=” mb=’2′ ml=” pt=” pr=” pb=” pl=” ]
[gd_single_tabs show_as_list=’false’ output=” tab_style=” disable_greedy=’false’ ]
[gd_single_next_prev bg=” mt=’4′ mr=” mb=’3′ ml=” pt=” pr=” pb=” pl=” border=” rounded=” rounded_size=” shadow=” ]
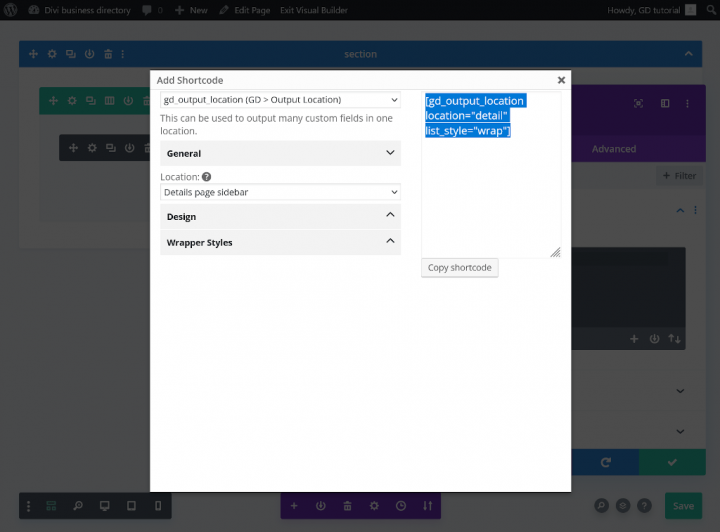
Code module on the right
[gd_output_location location="detail" list_style="wrap"]
Almost done!
Now, similar to when creating the GD archive page template, we need to add a Heading module that will be responsible for displaying the dynamic listing tittle.
Add a new Divi Heading module in the first column above the code module and set the Dynamic title as Page/Archive Title.
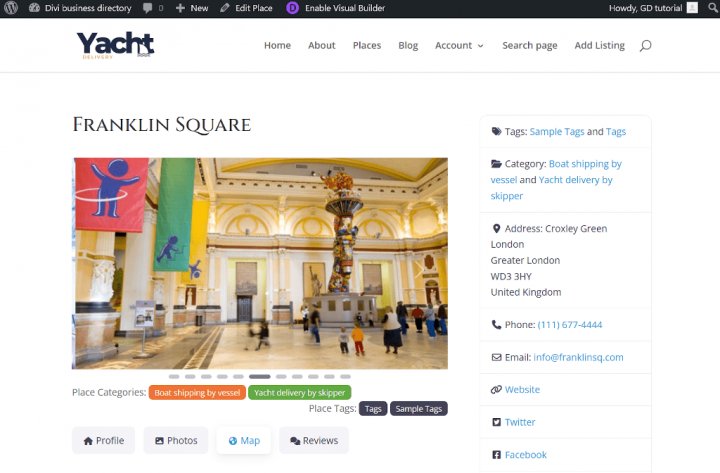
Click the check mark and save your layout. The single post page will look as follows.
Fine-tuning your Divi directory site
Your Divi directory website is almost ready, now we have set some options, tune up Your website.
Colors and Typography
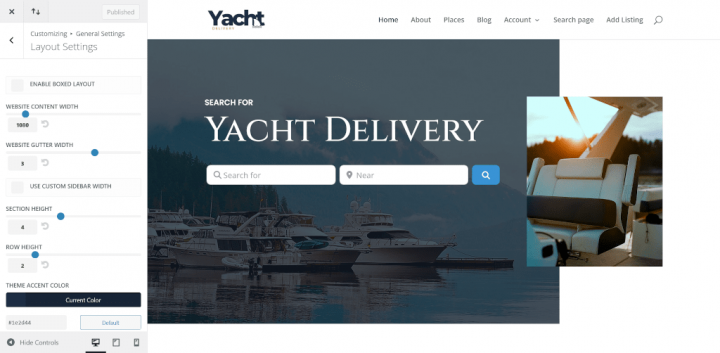
The main color I chose for this website is a shade of navy blue. Hex code: #1e2d44.
Go to Theme Customizer > General Settings > Layout settings and change Divi theme accent color to: #1e2d44.
Now we have to change GeoDirectory plugin primary color.
In the theme customizer, click on AyeCode UI and set the primary color to: #1e2d44.
Now we need to set the global font. Go to Theme Customizer > General Settings > Typography and change the Header font to Cinzel.
As you can see, the font of the headers generated by WpGeodirectory did not change to the Cenzel font.
Go to the Additional CSS tab in the Theme customizer and paste the following CSS code.
h1, .h1, h2, .h2, h3, .h3, h4, .h4, h5, .h5, h6, .h6 {
  font-family: 'Cinzel', Georgia, "Times New Roman", serif!important;
}
Change BootStrap Version
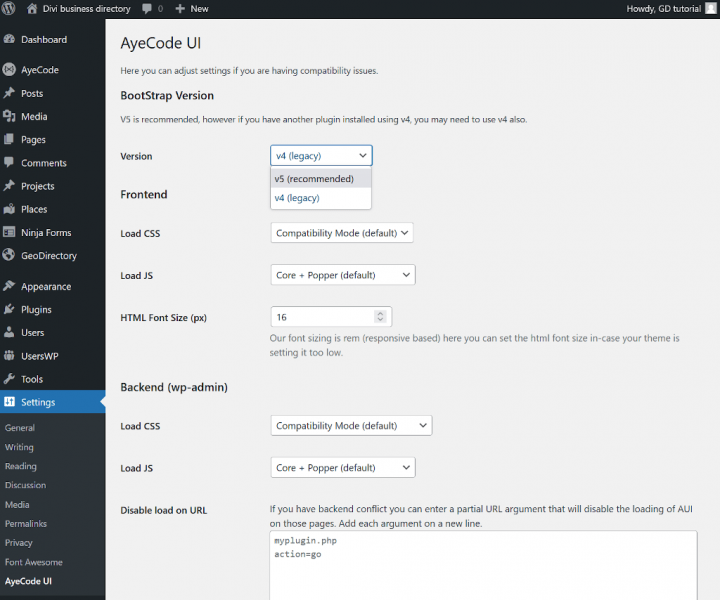
In the WordPress dashboard, click on Settings and AyeCode UI and change Version to BootStrap V5 and save.
Your Divi Directory website is done.
Maximize Your Divi Directory Potential with DiviGeo
This is a simple method to build a directory with GeoDirectory and Divi.
If you prefer not to tackle this project alone, or require something more sophisticated, don’t hesitate to reach out to me.
Visit my website, consider purchasing one of my pre-designed Divi Business GeoDirectory child theme DiviGeo, or hire me to create a unique website tailor-made for your needs.
Adding premium features to your Divi Directory Website
If you wish, now you can add premium features to your directory, such as:
- Paid Listings: with the GeoDirectory Listing Price Manager add-on, you can set prices for listing submission. For each price tier, you can enable/disable features such as: Restricting the number of pictures for free listings while allowing more pictures for paid listings. Allowing more or fewer tags and categories. Enabling or disabling specific custom fields. Submitting longer or shorter descriptions.
- Claim Listings: This is a fundamental feature for a directory, where the admin creates the database and invites business owners to take control of their free listings. The claim listing process may include forcing an upgrade to a paid listing to take over the listing’s ownership.
- Advertising: selling ads is another form of monetizing an online directory. If you have a lot of traffic, you can use Ads networks. Otherwise, you may sell ads directly, allowing businesses to add banners in specific areas of your website or allowing for listings to appear as ads, for example, on top of organic search results.
These are just three examples. However, a directory website offers many ways to make money online.
You can create a global marketplace of handcrafted items, or sell event tickets, or sell discount coupons.
Gain insights into the building process with these tips: Building a directory website: Tips and tricks.
The possibilities are Extensive.
Newsletter - Stay Updated!
Get the latest news, tips, and exclusive content directly in your inbox.