Creating a Directory Website with the Generatepress Theme

Here’s a step-by-step guide to building a Directory Website using the Generatepress theme and Generatepress blocks plugin:
- Install the Generatepress theme
- Install and setup GeoDirectory
- Install the GenerateBlocks plugin
- Design the Directory Website using the Generatepress theme and the Gutenberg Editor
Generatepress Theme in combination with the GeoDirectory Plugin and a GenerateBlocks Plugin, offers a robust and flexible solution for crafting a dynamic online directory.
This trio allows users to seamlessly integrate location-based features, customize layout designs, and incorporate interactive content blocks, ensuring an intuitive and engaging user experience.
With this integrated approach, web developers and designers can easily achieve a professional-grade directory site tailored to specific niche markets or broader community needs.
Let’s see how we can do that in detail.
In this tutorial, we will:
Installing Theme and Plugins.
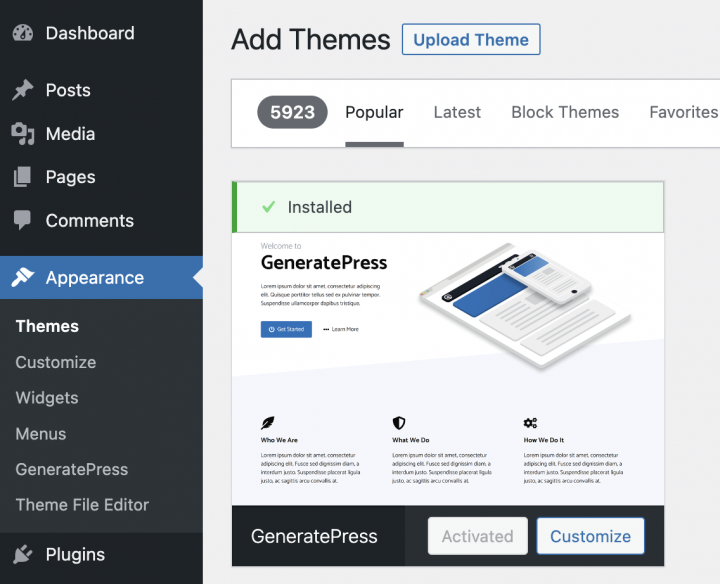
1. Install the Generatepress Theme
We need to install a Theme, and for this tutorial, you will install the Generatepress Theme.
Go to Appearance >> Themes
Select Add New, Install, and Activate the Generatepress Theme.
2. Install GenerateBlocks plugin
The default Gutenberg plugin is not enough to style a template so we will install the GenerateBlocks plugin.
This plugin provides customized GenerateBlocks which are better than the default blocks and will help you design the page templates.
Go to Plugins >> Add new.
Search for GenerateBlocks. Install it and Activate it.
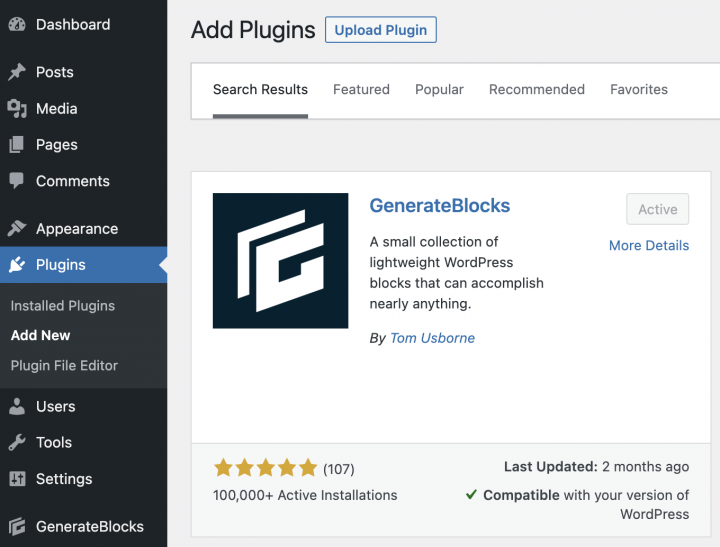
You can Skip all steps of the Setup Wizard.
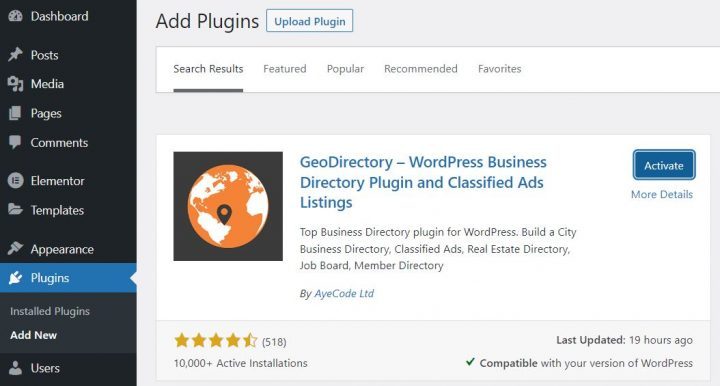
3. Install GeoDirectory
Finally, you need to install GeoDirectory.
Go to Plugins >> Add new, search GeoDirectory. Please install and activate it, and we finished installing the plugins.
4. GeoDirectory Install Wizard
For GeoDirectory, you will need to complete the Setup Wizard to configure the Google Maps API key and import a few dummy listings.
Choosing the Map System (Google Maps or OpenStreetMap)
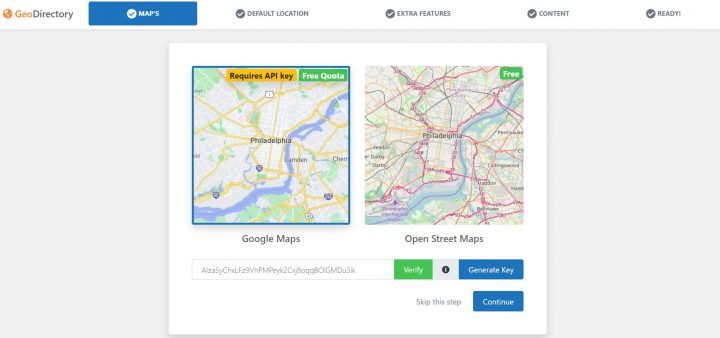
You can choose between two mapping systems on the wizard’s first step. Google Maps and Open Street Maps (which doesn’t require an API key).
In this tutorial, we select OpenStreetMaps.
In case you wish to select Google Maps, do the following extra steps.
Click on the Generate Key button and follow the steps of this doc to generate a valid API key.
The essential steps are:
- Enable the Keys.
- Create or select an existing project.
- Get the Key.
- Activate a billing account.
- Restrict the API key (so it can only be used from the URL of your website)
About point four: it is a requirement. However, you only get charged if you pass the threshold, which is $200/month.
This free credit is more than enough for 99% of directories.
Setting the default city
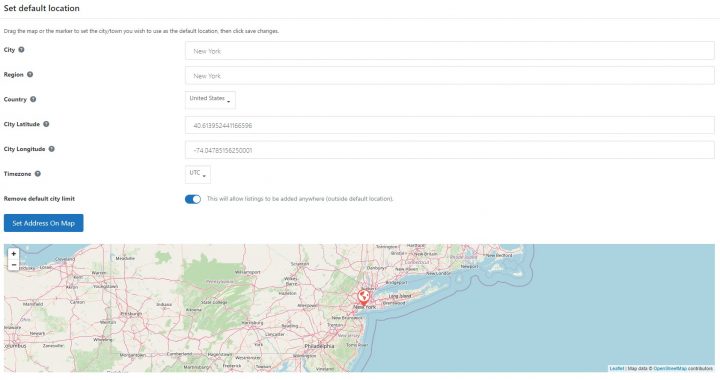
After that, you will set the default location. This is the city for which the directory is created.
We will set New York as the default city.
You can use whatever location you need.
If you need to add listings to more than one city, you will need the Location Manager add-on.
Adding extra features
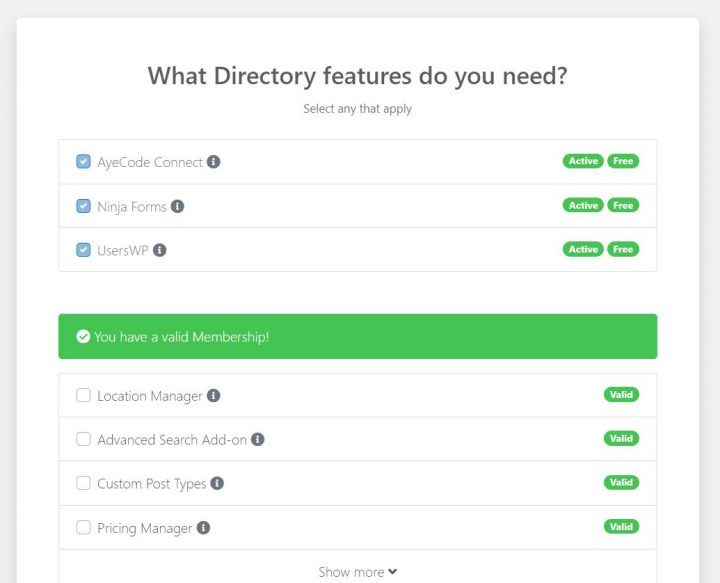
In this step, we will install our UsersWP, a user login plugin that lets users register and log into your website.
This is needed to allow users to add and edit their listings. It will also create user profiles where they can find their listings, reviews, and so on.
We will also install Ninja Forms so that all listings have a contact form that sends emails directly to the listing owners.
AyeCode Connect is not mandatory for this tutorial. It is mainly needed if you want to add GeoDirectory premium add-ons and install them directly from the WordPress Dashboard.
Adding Dummy Data
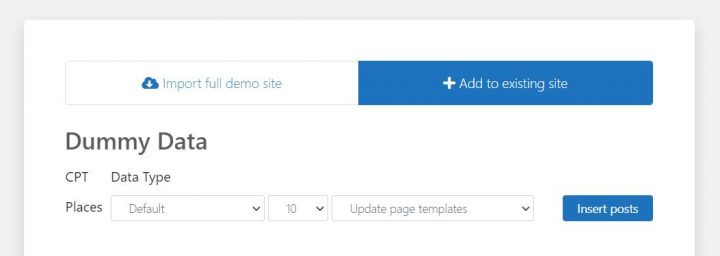
The last step to complete the installation wizard is adding some dummy listings. This will also add listing categories that you can edit later according to your needs.
You will not add sidebar widgets and menu items right now, as we will do that later.
Design the Generatepress Directory Website
Now that we installed the theme and the plugins and done the preliminary setup of GeoDirectory, we can start designing our Directory Website with the Generatepress Suite of tools.
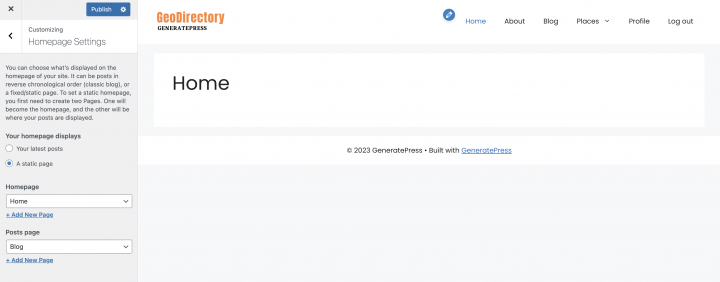
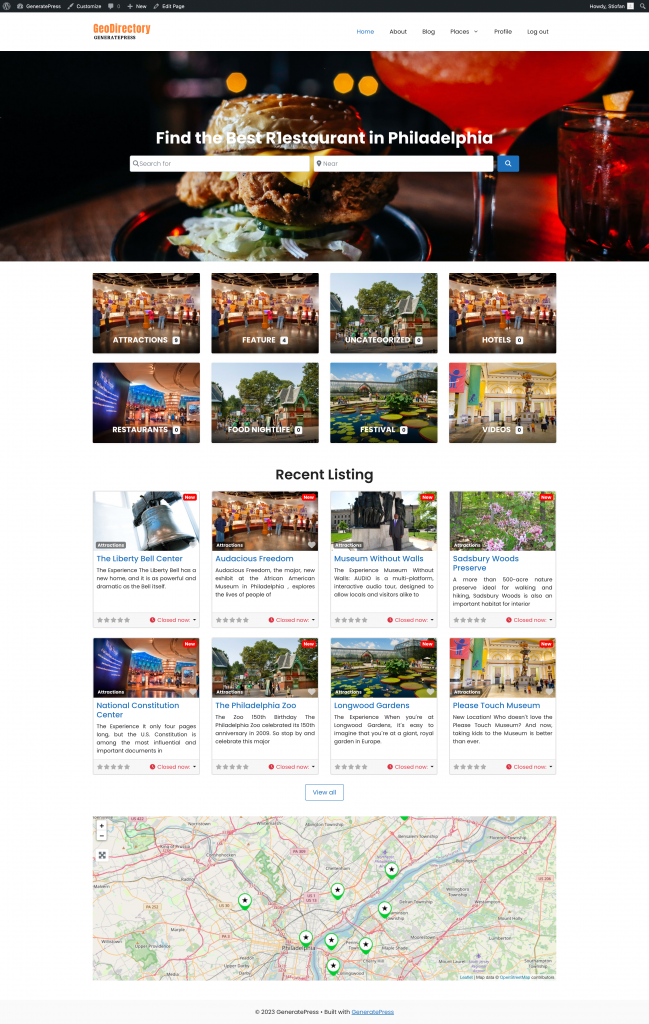
1. Generatepress Directory Home page design
You can create a new page or use one WordPress creates by default, like the Sample Page.
Go to Pages, edit the Sample page, and rename it Home or create a new page for this.
Next, go to Appearance > Customize > Homepage Settings and select your Home.
The Logo
First thing first, we will need a logo for our website.
You don’t need to invest in a designer to sketch the 1st version of your logo.
One of the biggest mistakes you can make when starting a new directory is investing too much time and money before testing the product market fit.
You can design a logo in five minutes with an app like Canva, which is cheap and surprisingly good.
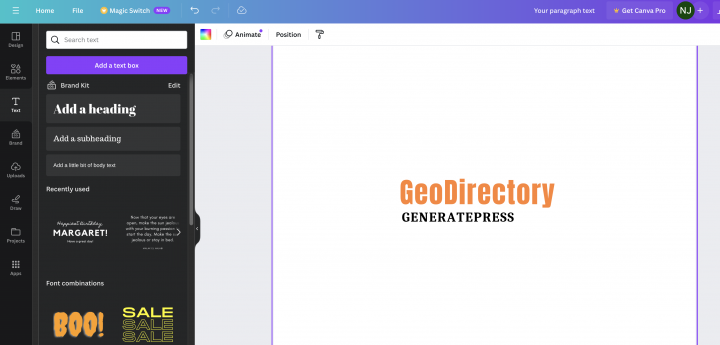
For an MVP (minimum viable product), a logo designed with Canva will be more than enough.
There are several logo templates to choose from, and it doesn’t matter if your initial logo is not as perfect and original as you believe it should be.
If your project gets traction, you can always invest in improving it or radically changing it later.
An average logo is never the leading cause of a failed project.
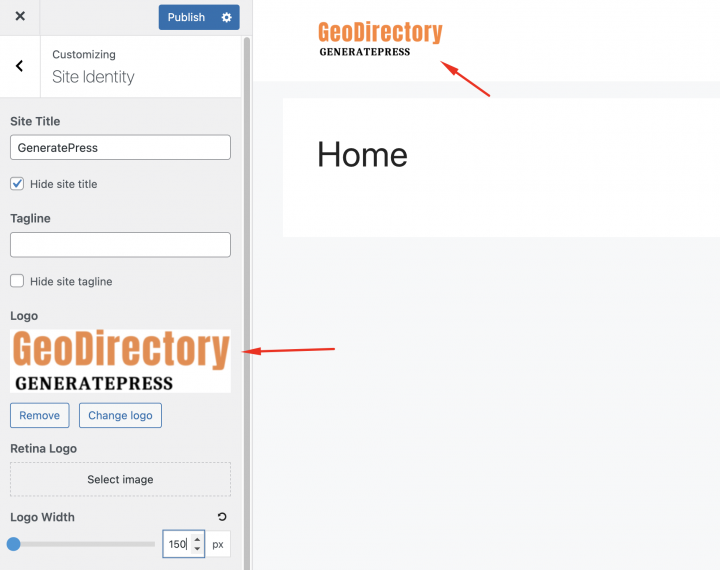
After designing your logo, go to Appearance > Customize > Header, click Logo > Select Logo, and upload your PNG file. Skip cropping (or crop the image as needed), in Logo Layout select the option Logo and click publish.
The Navigation Menu
After creating and adding the logo, go to Appearance > Menus, and create your menu.
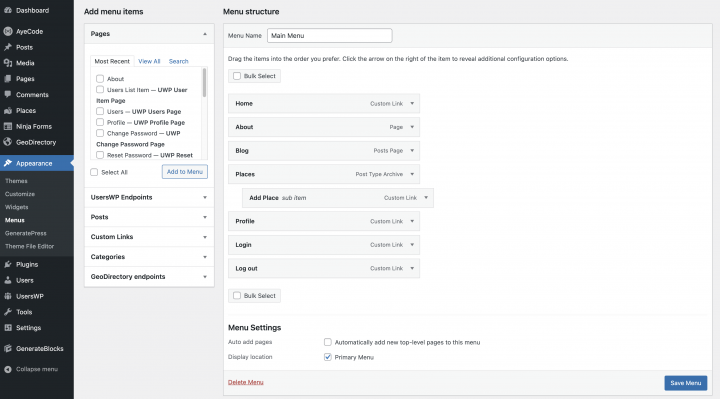
Add the links needed (from the left column to the right column) and save. In the Menu Settings > Display location section, you can check the “Main” option.
If you want, you can make the same menu appear on the footer or create another menu to appear there.
In this example, we’ll only have the header navigation menu.
We added seven main navigation links and a few sub-navigation links:
- Home
- About
- Blog
- Places and add places
- Profile
- Login
- Logout
The Login link (from UsersWP Endpoints) will only appear for Logged-out users, while the log-out, account, and profile links will only appear for logged-in users.
The Typography
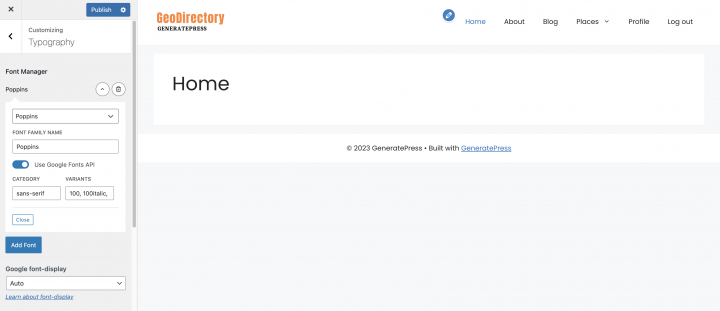
Now let’s define the Typography for the website text font and size. I am setting a global Font Family, Font Weight, and Font Size that will be applied to all site text.
we will go to the Appearance > Customiser > Typography > Body. we will set the Font Family: Poppines Category: sans-serif and Varient: 100, 100italic, 200, 200italic, 300, 300italic, regular, italic, 500, 500italic, 600, 600italic, 700, 700italic, 800, 800italic, 900, 900italic
The Content
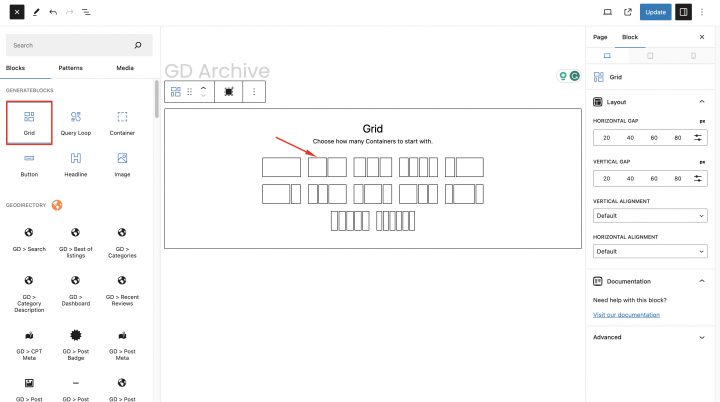
I will start building this page from scratch using the GenerateBlocks plugin.
we need a hero header on the homepage for that let’s add a Grid block provided by the GenerateBlocks plugin.
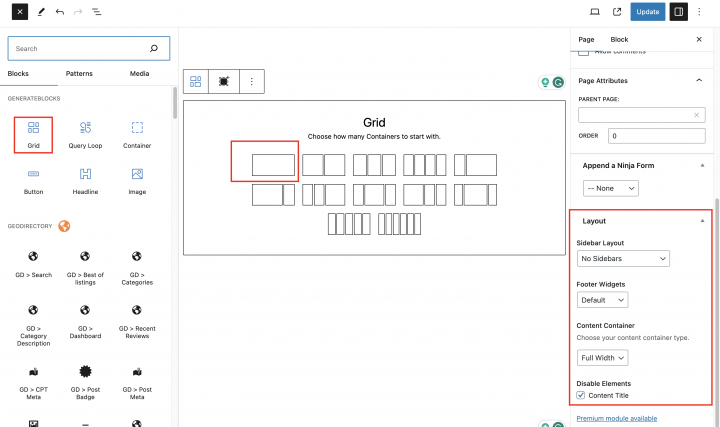
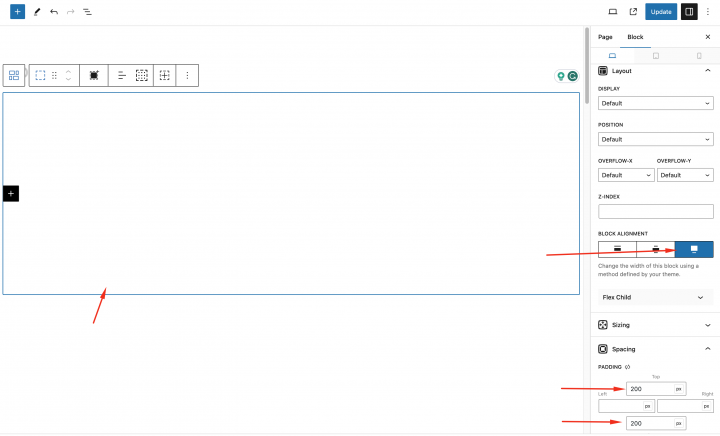
we will set block alignment to wide.
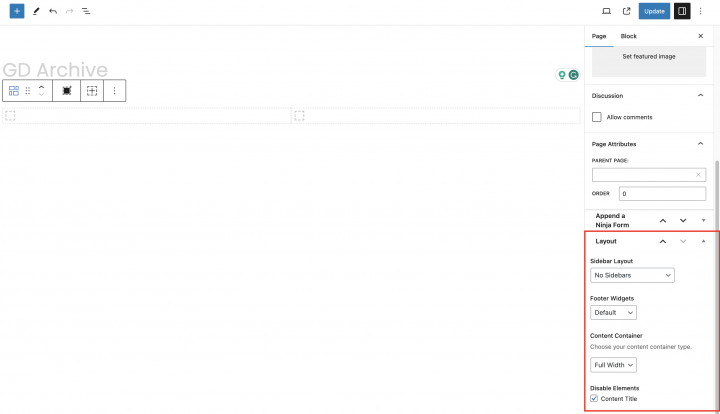
In the Grid setting set the Layout setting to
Sidebar Layout: No sidebars
Footer Widget: Default
Content Container: Full Width
Disable Element: Content Title
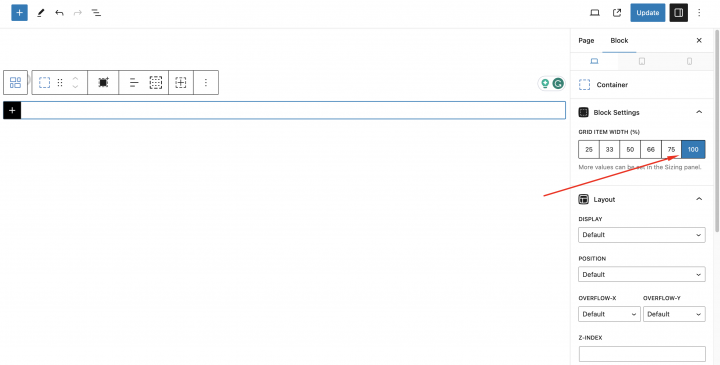
Grid Item Width: 100
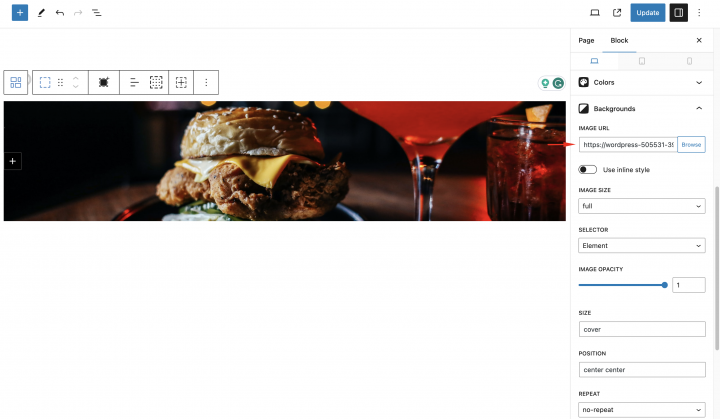
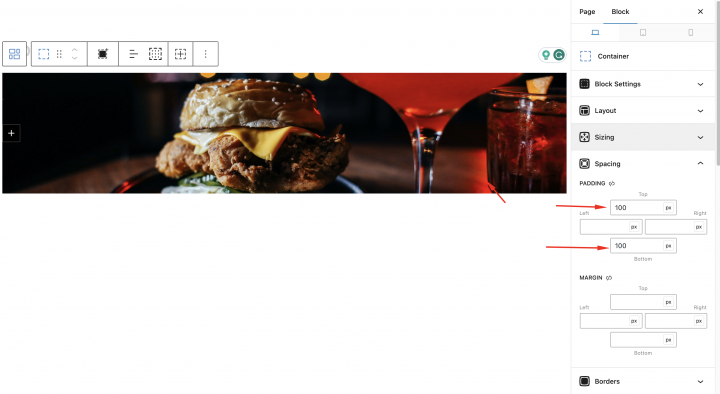
Next, check the block setting and set the Background image URL.
For the Hero Section, we need an image and we will download a free image from Pexels.com (Thanks, @rachel-claire).
On the spacing setting padding 100px on the Top and Bottom margins.
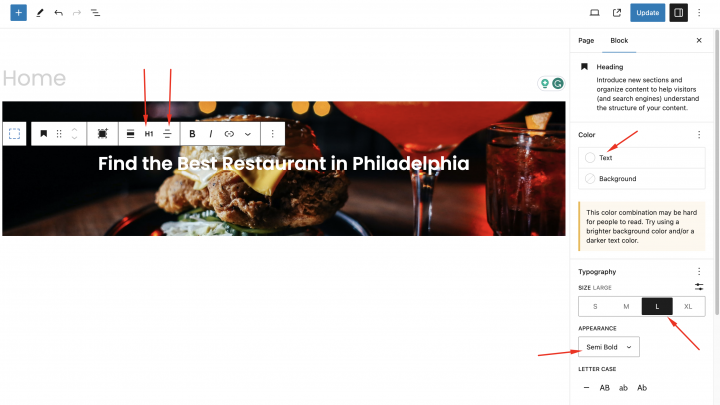
Now let’s add a header tag to add some text.
Text:: Find the best restaurants in Philadelphia
Size: Small
Appearance: Small Bold
Text Color: #FFFFFF
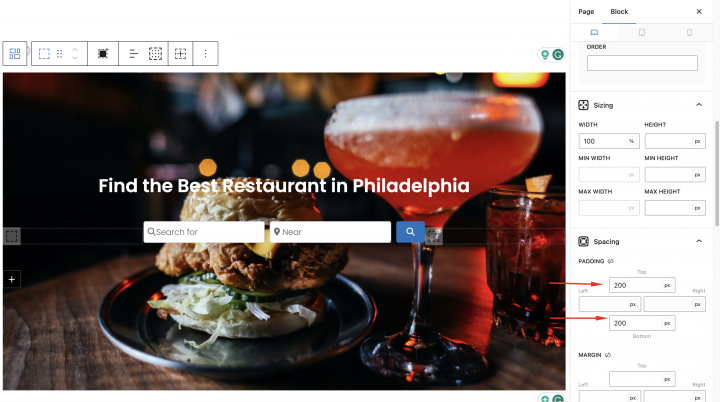
Inside the same Grid, we will add the GD > Search block with padding on top and bottom as 200px.
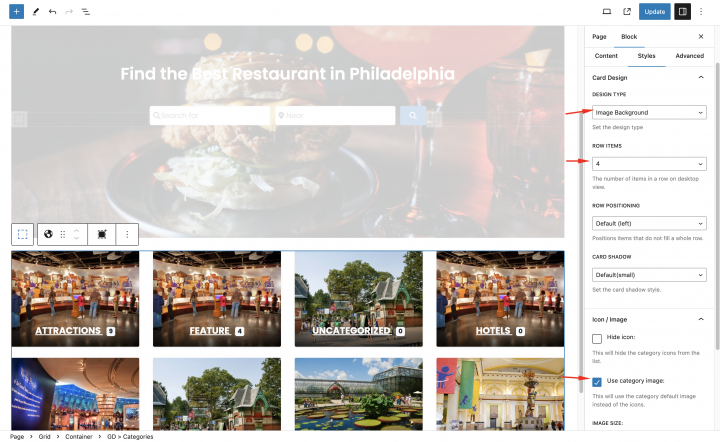
Now we will add an empty grid below the hero header and add the GD > Categories block in that grid.
Set block options to the following
Design type: Image Background
Row Items: 3
Enable Use Category Image
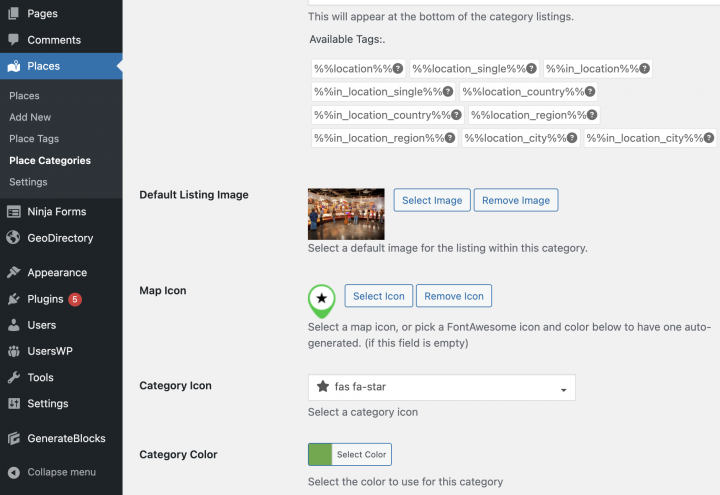
You can set the image to a category by editing the category from wp-admin -> places -> Place Categories.
Each category has an option to set a default image
There is no working setting I found in Generateblocks to make the grid into the content layout. we will add the home-container class to the Category parent grid.
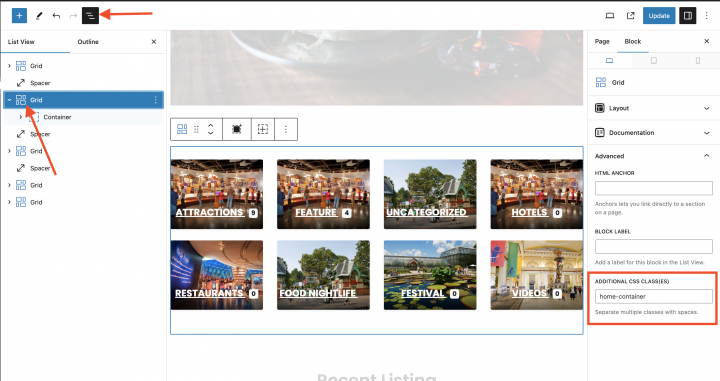
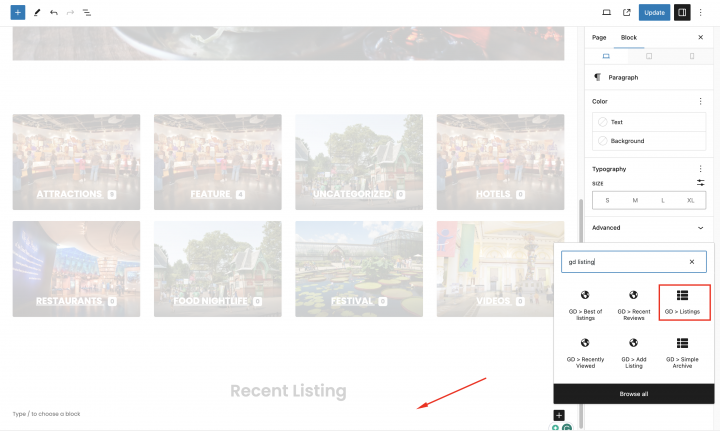
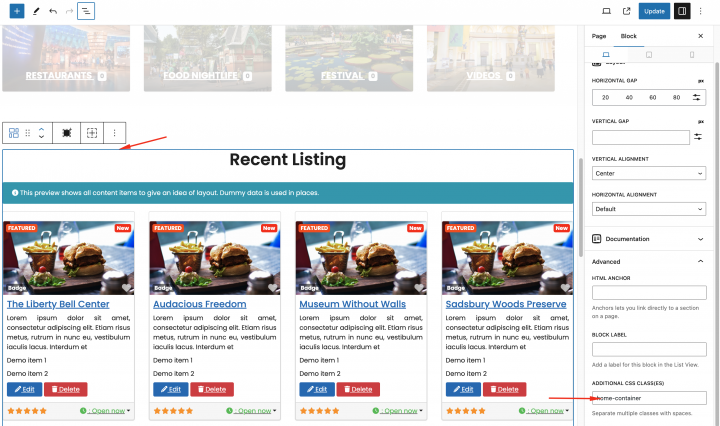
Below the hero section, add one more Grid by clicking on the plus icon and add the GD > Listings blocks there.
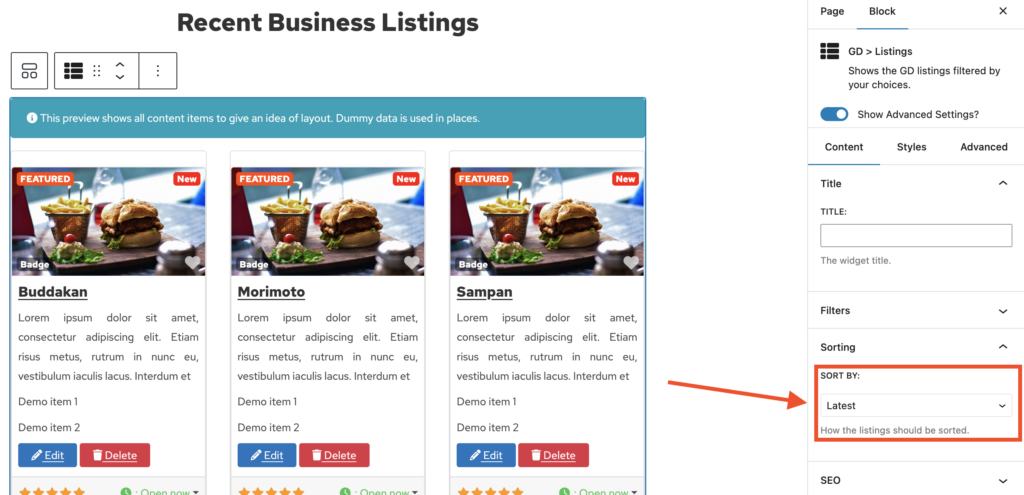
Now we will do some needed settings in this GD > Listings block. we will set sorting: recent
Similarly, like the category block, we will add the home-container class to the Recent Listings parent grid.
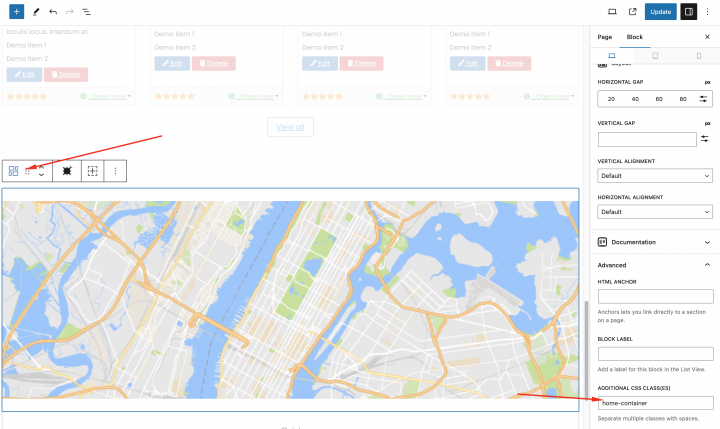
Now let’s add an empty Grid and add GD > Map block in it and keep the settings to default.
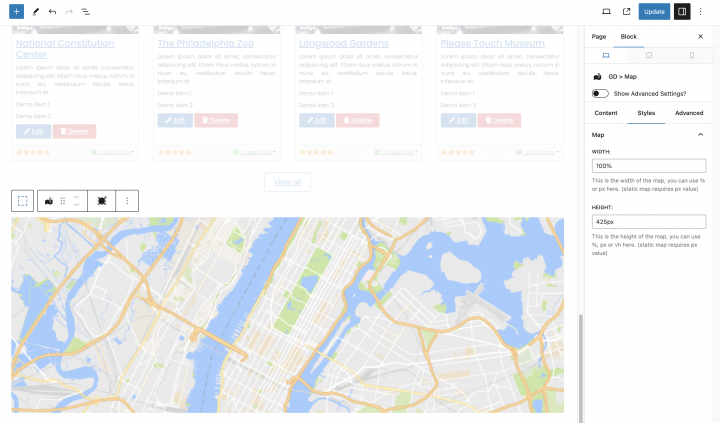
Similarly, like others, we will add the home-container class to the GD > map parent grid.
Finally, add the following CSS in the theme customizer from Appearance => Customize => Add CSS
.home-container{
	max-width:1200px;
	margin:auto;
}
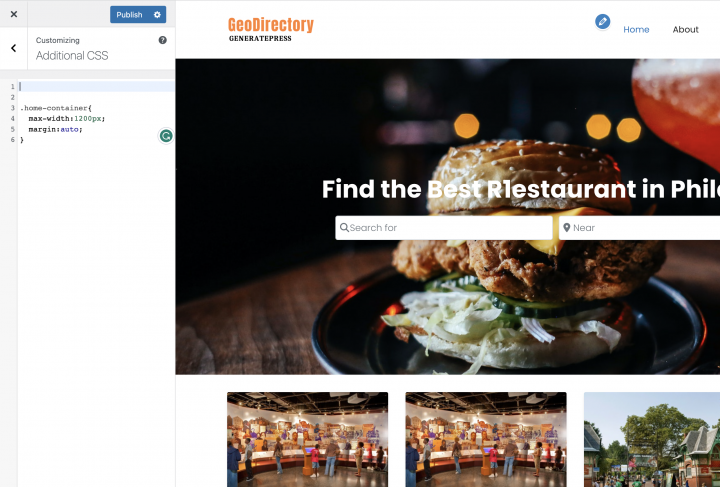
Congratulations! Your homepage is Completed.
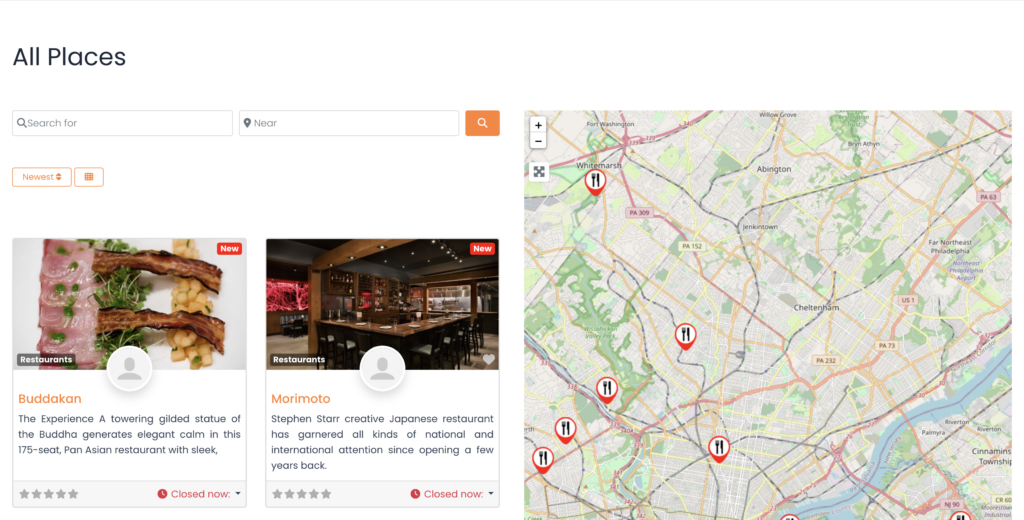
2. Generatepress Directory Website Listings and Search page design
Now you need to design two pages that are essential for any directory.
The listings page (general archive, categories, tags), and the search results page.
GeoDirectory creates them by default with a general layout. In this tutorial, we will customize the layout of these pages a bit.
The listing and search pages are mostly identical so we create it once and just copy the layout on the other page.
We decided the Listing page layout would be the listings on the left, and on the right, a sticky map showing the listings’ precise location.
This is very easy.
Listings page
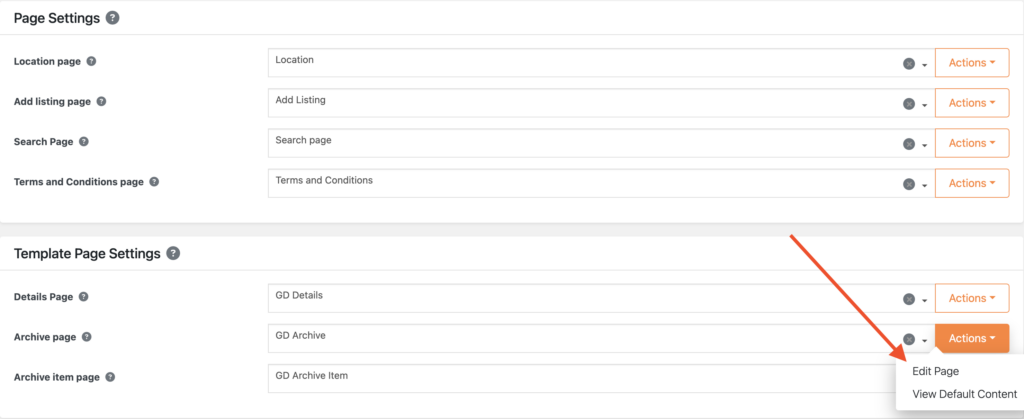
Go to Geodirectory > Settings > General > Pages > Click on edit GD Archive page template
Remove all the content from this GD Archive page template.
we will set the page setting to the following
Sidebar Layout: No Sidebar
Footer Widget: Default
Content Container: Full Width
Now add an empty Grid with two columns.
Now on the left container, we will drag GD Archive page-related widgets like GD > Loop Action, GD > Loop, GD > Loop Pagination, and GD > Search on top so the user can search from the Archive page.
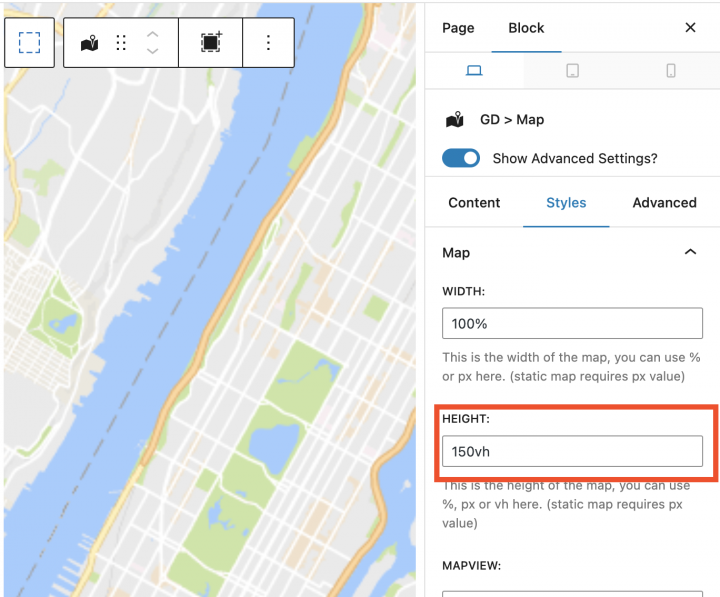
On the right column, we will drag the GD > Map block.
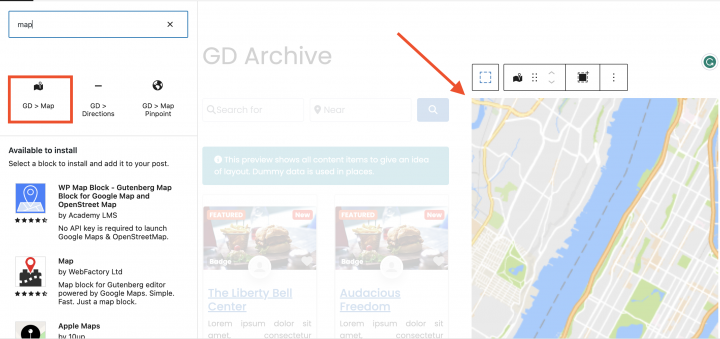
we will keep all the settings default for the GD > Map. let’s give it some height and I have decided to give it the height of 150vh.
In order to make the archive page layout full-width. we will add the following CSS in the theme customizer from Appearance => Customize => Add CSS
.geodir-archive .container.grid-container{
      max-width:100%;
}
.geodir-archive .wp-block-geodirectory-geodir-widget-loop .geodir-loop-container .geodir-listing-posts{
    overflow-y: scroll;
    max-height: 100vh;
}
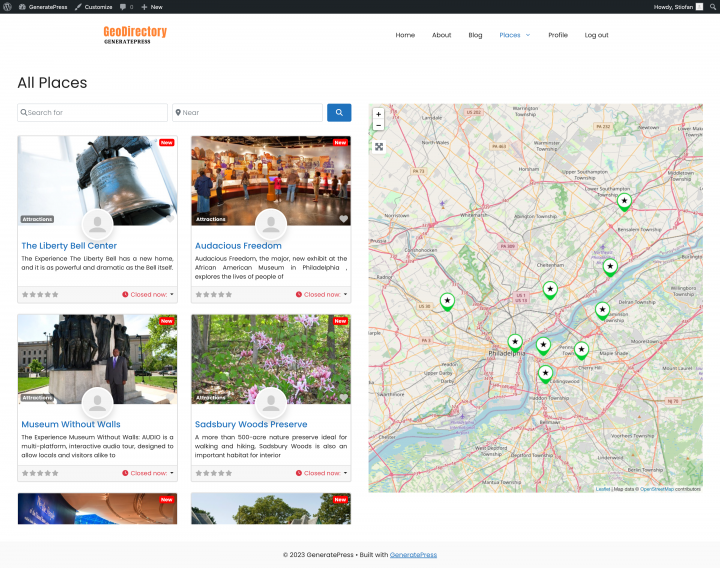
Now after this, the Listing Archive page is ready.
Another option is to use the GD > Simple Archive block as explained in this tutorial on how to Build a Directory Website with Elementor.
For the search page, we repeat the same process.
Search page
Go to Geodirectory > Settings > General > Pages > Click on edit GD Search page template
Remove all the content from this GD Search page template.
Copy all the content of the GD Archive page and paste it into the GD Search page.
So now our GD Search and Archive page is ready.
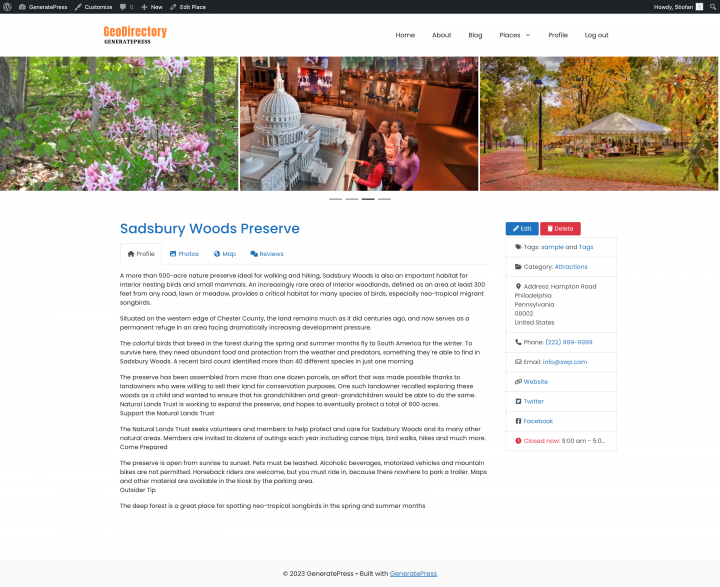
3. Generatepress Directory Website single Listing page design
Now to edit and customize the GD Detail page, You can go to Geodirectory > Settings > General > Pages > Click on edit GD Detail page template.
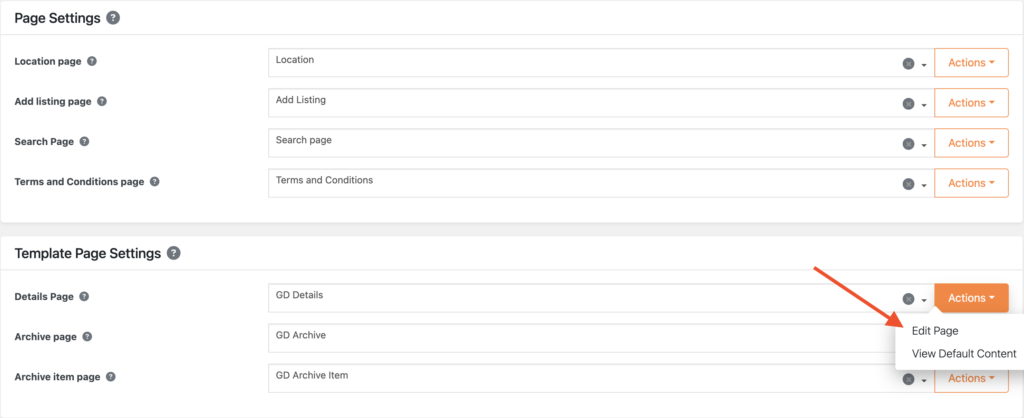
In this template, you will already find default content generated by Geodirectory.
we will remove all these default content and add a new Grid.
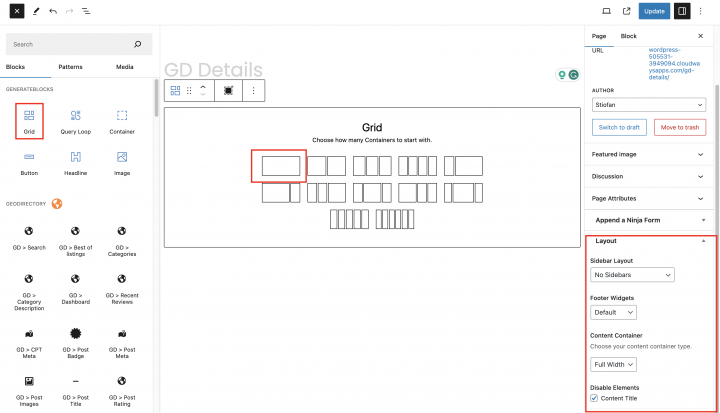
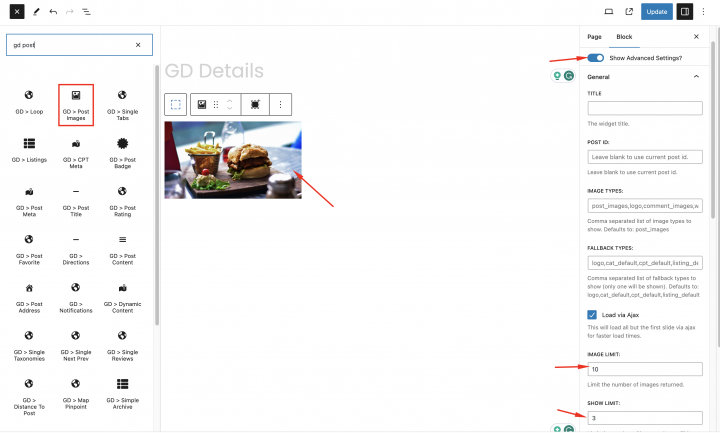
Let’s first add an image slider at the top of the Listing Detail page. we will drag the GD > Post Image block in this container with the following settings
Image Limit: 10
Show limit: 3
Output Type: Slider
Auto Start: Enable
Now we will add one more empty Grid block below it with a two-column layout.
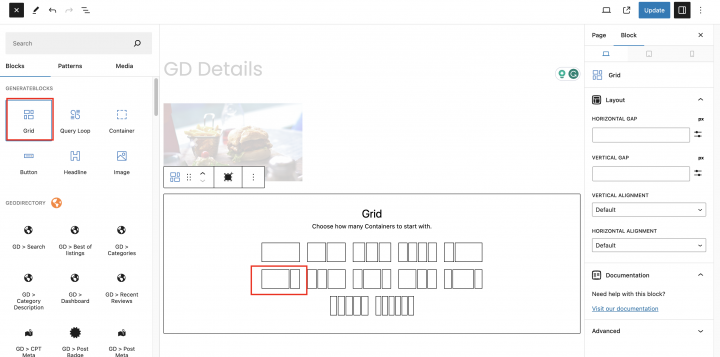
we will add a class (single-details-container ) to this Grid from the block settings.
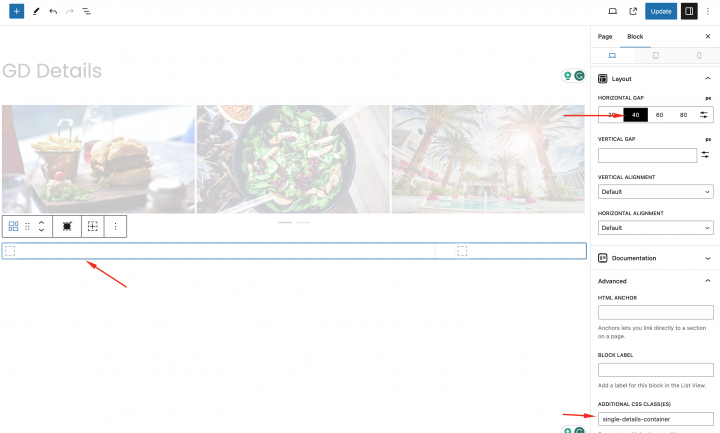
Now let’s add all required GD Detail page shortcodes on the left column one by one.
Which includes GD > Single Taxonomies, GD > Single Tabs, and GD > Single Next Prev.
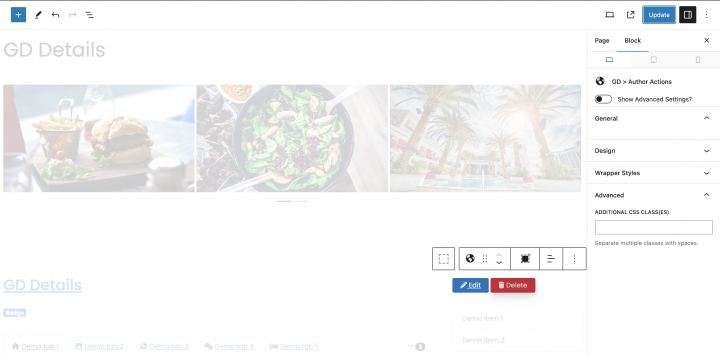
On the right column, we will add GD > Author Action and GD > Output Location block.
Finally, add the following CSS in the theme customizer from Appearance => Customize => Add CSS
.single-details-container {
    max-width: 1200px;
    margin: auto !important;
}
.single-gd_place .entry-content{
    margin:0px;
}
After doing it our Listing Detail page has been completed.
Adding Premium Features to your Generatepress Directory Website
If you wish, now you can add premium features to your directory, such as:
- Paid Listings: with the GeoDirectory Listing Price Manager add-on, you can set prices for listing submission. For each price tier, you can enable/disable features such as: Restricting the number of pictures for free listings while allowing more pictures for paid listings. Allowing more or fewer tags and categories. Enabling or disabling specific custom fields. Submitting longer or shorter descriptions.
- Claim Listings: This is a fundamental feature for a directory where the admin creates the database and invites business owners to take control of their free listings. The claim listing process may include forcing an upgrade to a paid listing to take over the listing’s ownership.
- Advertising: selling ads is another form of monetizing an online directory. If you have a lot of traffic, you can use Ads networks. Otherwise, you may sell ads directly, allowing businesses to add banners in specific areas of your website or allowing for listings to appear as ads, for example, on top of organic search results.
These are just three examples. However, a directory website offers many ways to make money online.
You can create a global marketplace of handcrafted items, sell event tickets, or sell discount coupons.
Elevate your website with these key strategies: Key strategies for creating a directory website.
The possibilities are limitless.
Newsletter - Stay Updated!
Get the latest news, tips, and exclusive content directly in your inbox.