Franchise Manager
Introduction
Applications
Installation
Configuration
Usage
Adding the main listing
Adding the branch listings
Introduction
The Franchise Manager allows users to submit listings for chains of businesses or franchises (branches) faster and allows directory owners to monetize those listings in a smarter way if combined with the Pricing Manager Addon.
After entering the main listing for a new chain, fields of the Add Listing form can be locked. This way you can pre-populate most fields but allow the address, telephone number and email address to be entered separately for all branches of the chain. When the main listing is edited, locked fields are edited for all branches too.
It is possible to browse the list of all franchises belonging to the same chain in a regular listings page too.
Applications
Here are a few examples to give you an idea how you could use the Franchise Manager:
| Main listing | Branch listings |
| Fast food chain | All locations |
| Brewer of special beer | All distributors |
| Rock band | All regular venues where the band plays |
| Dietician | All health centers visited regularly |
Installation
Installation is done by accessing the admin area of your website and then navigate to GD > Extensions > Franchise Manager > Install. You will need to have your license code ready. You can get that code from your GeoDirectory Account page.
Or you can upload the ZIP file you find at your GeoDirectory Account page in the plugin section of your WordPress admin area.
Configuration
Setup
Once you activated the Franchise Manager, you can allow your users to add franchises for each custom post type. Navigate to one of your custom post settings, for example Places > Settings > “General” tab > click on “Show Advanced” > and then tick “Enable Franchise?”
Activating the Franchise Manager will add three extra custom fields at Places > Settings > “Custom Fields” tab :
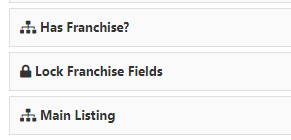
If you are not using the Pricing Manager, then a new option will be available in both the frontend and backend Add Listing form for that CPT:

Integration with the Pricing Manager addon
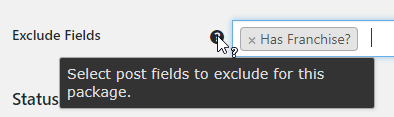
- If you are using the Pricing Manager, then you can disable the franchises option for selected price package.
- To do that, navigate to a price package, for example Places > Settings > “Packages” tab and exclude Has Franchise? from the package:

- If you do not disable to franchises option for a price package, you will have the option to add a price for each extra franchise at the Franchise Cost field.
Usage
Adding the main listing
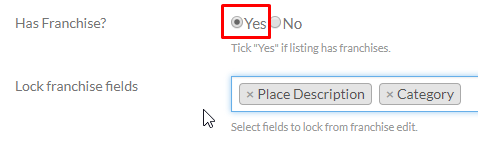
- When the user add their main listing, they can lock selected fields for all the branch listings.
- The locked fields will be auto-populated in any branch listing submitted, both in the frontend and the backend:

Adding the branch listings
Display the Add Franchise link on your details page with the GD Author Actions element. Please it in your sidebar.
It will look like this where it says Add Event, but adjusted to the CPT on your site:
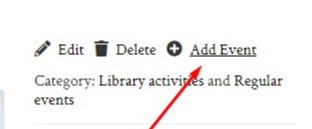
-
- Branch listings can only be submitted by the same user that added the main listing.
- Branch listings need to be added from the frontend by the same user or admin.
- The custom fields locked by the main listing owner cannot be edited in the branch listings.
- If the main listing owner updates a locked field in the main listing, the same custom field will be updated in all branch listings.
Example: a fast food chain has locked the special offer field, and can change that field on all branch listings to run a promotion in all the stores.