
Introduction
In a nutshell, with this addon a user can claim the listing posted on your website.
For Example:
- A random user submits the business KFC, under restaurants category.
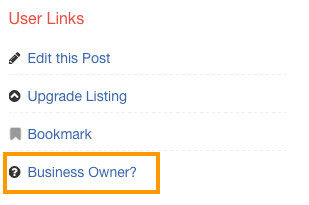
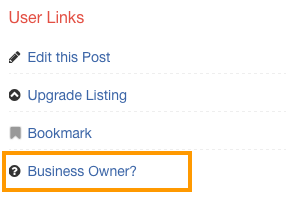
- Now an authorised person from KFC can claim this listing by clicking “Business owner?” link.
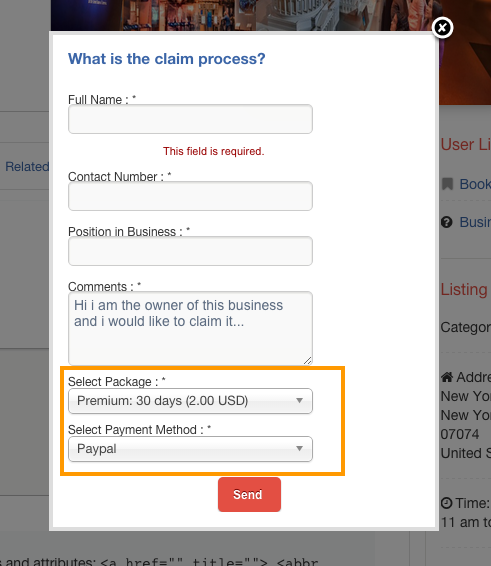
- He/She has to fill the information like Name, Contact Number, Position in Business and a message like “Hi i am the owner of this business and i would like to claim it…”.
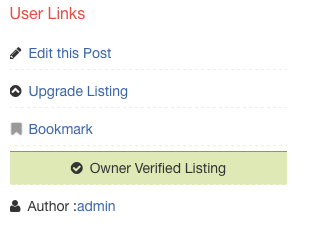
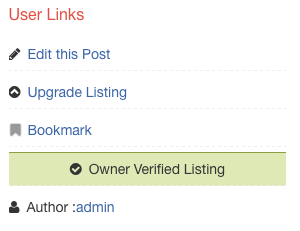
Once you approve the claim, the listing will be marked as Verified and a message will be displayed in listing page like Owner Verified Listing
Installation
- Visit wpgeodirectory.com ( Buy a subscription if Required )
- Navigate to My Account > Downloads ( Login if Required )
- Download Geodir Claim Listing zip file.
- Go to your WordPress site dashboard, Navigate to Plugins > Add New > Upload Plugin
- Browse and Upload the zip file you downloaded from wpgeodirectory.com
- Activate the plugin.
Dependencies
Some features of this plugin may depend on the following plugin(s).
- Prices and Payments ( Optional )
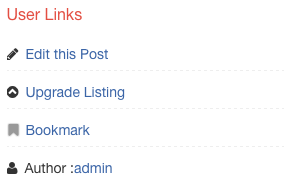
Before Business Claim
After Business Claim
Configuration
After plugin activation, you will be redirected to Listing Claims page.
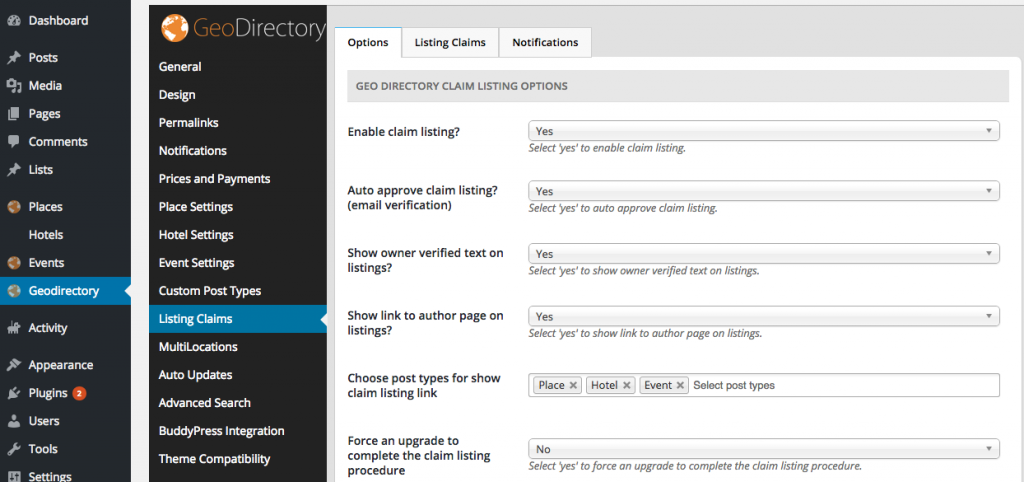
Options Tab
GeoDirectory Claim Listing Options
- Enable claim listing?
- Select ‘yes’ to enable claim listing.
- When set to No, claim listing will be disabled. However you can still view old listing claims by clicking Listing Claims tab.
- Auto approve claim listing? (email verification)
- Select ‘yes’ to auto approve claim listing.
- When set to Yes, a verification email will be sent to logged in user’s email address when the user submit Business Owner? form
- Verification Email content would look like this.
- Dear Client,Your request to become the owner of the below listing needs to be verified. By clicking the VERIFY link below you are stating you are legally associated with this business and have the owners consent to edit the listing. If you are not associated with this business and edit the listing with malicious intent you will be solely liable for any legal action or claims for damages. Thank you
- You can modify the email content by visiting this page. GeoDirectory > Listing Claims > Notifications Tab > Claim listing verification required
- Show owner verified text on listings?
- Select ‘yes’ to show owner verified text on listings.
- When set to No
- When set to Yes
- Show link to author page on listings?
- Select ‘yes’ to show link to author page on listings.
- When set to No
- When set to Yes
- Choose post types for show claim listing link
- Select post types
- For the selected post types Business Owner? link will be displayed on the listing detail page.
- Force an upgrade to complete the claim listing procedure
- Select ‘yes’ to force an upgrade to complete the claim listing procedure.
- Note: This option requires Prices and Payments addon. So make sure its active if you are planning to use this option. Otherwise this option will be useless.
- Note: Make sure you configured Prices and Payments addon properly.
- With prices and payments addon, the business claim popup looks like this.

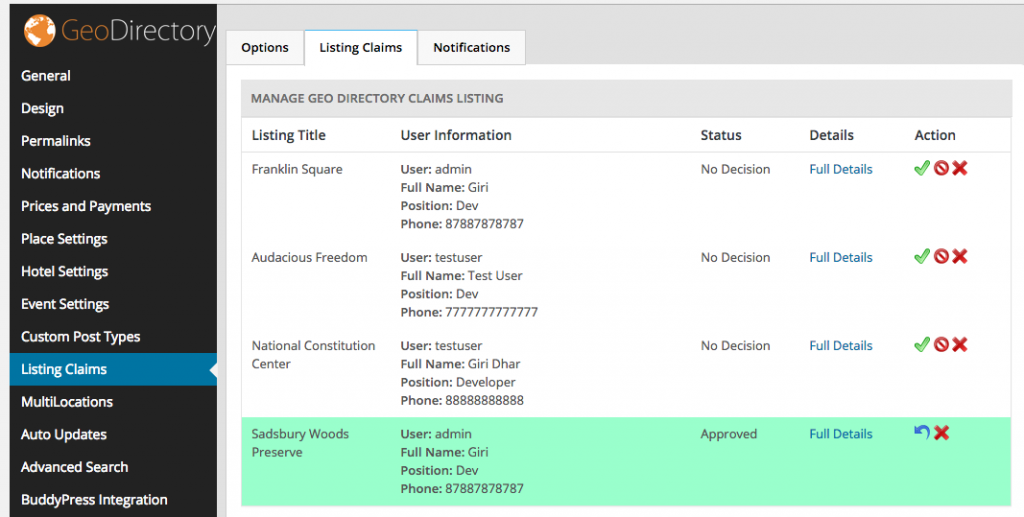
Listing Claims Tab
Full Details page
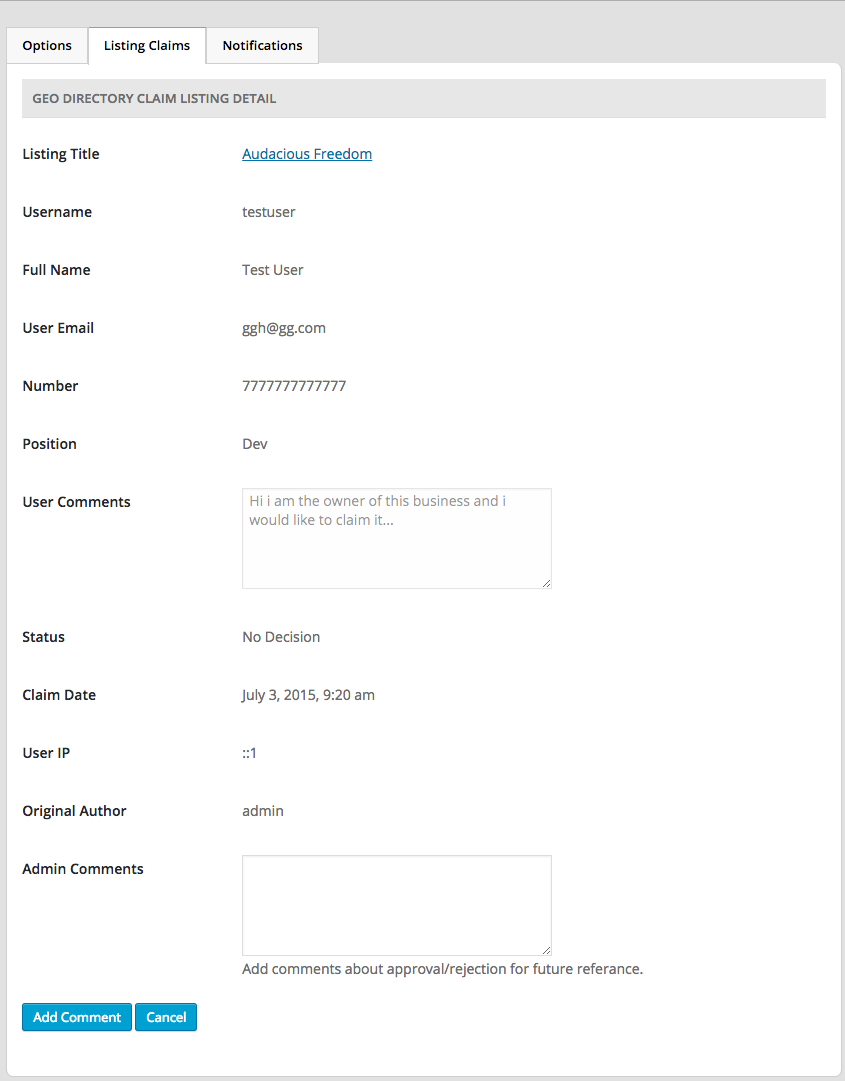
- Listing Title
- The Listing title for which the claim was made.
- Username
- Username of the Claimer.
- Full Name
- Full name of the Claimer
- User Email
- Email of the Claimer.
- Number
- Phone number of the Claimer.
- Position
- The Claimer’s position in his/her company. Ex: CEO, Marketing Manager etc.
- User Comments
- The Claimer’s message to the admin.
- Status
- The status of the claim. Possible values are
- No Decision
- Approved
- Rejected
- The status of the claim. Possible values are
- Claim Date
- The date when the claim was made.
- User IP
- The Claimer’s IP address.
- Original Author
- The username of the person who created the listing.
- Admin Comments
- Add comments about approval/rejection for future reference.
Notifications Tab
This is where you set Email Subject and Email Content of Claim Listing related emails.
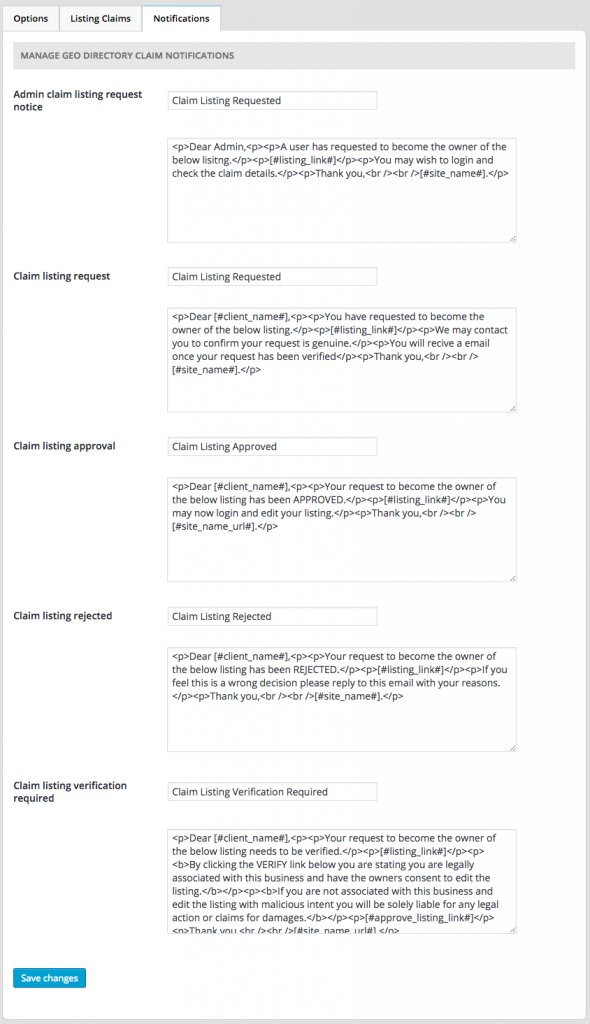
- Admin claim listing request notice
- This email will be sent to site Admin
- This email will be triggered, when a claim is requested.
- Default subject would be: Claim Listing Requested
- The email content would look like
Dear Admin,
A user has requested to become the owner of the below lisitng.
[#listing_link#]
You may wish to login and check the claim details.
Thank you,
[#site_name#].
- Claim listing request
- This email will be sent to the Claimer.
- This email will be triggered, when a claim is requested.
- Default subject would be: Claim Listing Requested
- The email content would look like
Dear [#client_name#],
You have requested to become the owner of the below listing.
[#listing_link#]
We may contact you to confirm your request is genuine.
You will recive a email once your request has been verified
Thank you,
[#site_name#].
- Claim listing approval
- This email will be sent to the Claimer.
- This email will be triggered, when a claim is approved by site admin.
- Default subject would be: Claim Listing Approved
- The email content would look like
Dear [#client_name#],
Your request to become the owner of the below listing has been APPROVED.
[#listing_link#]
You may now login and edit your listing.
Thank you,
[#site_name_url#].
- Claim Listing Rejected
- This email will be sent to the Claimer.
- This email will be triggered, when a claim is rejected by site admin.
- Default subject would be: Claim Listing Rejected
- The email content would look like
Dear [#client_name#],
Your request to become the owner of the below listing has been REJECTED.
[#listing_link#]
If you feel this is a wrong decision please reply to this email with your reasons.
Thank you,
[#site_name#].
- Claim Listing Verification Required
- This email will be sent to the Claimer.
- This email will be triggered, when a claim is requested and Auto approve claim listing? option set to Yes.
- Default subject would be: Claim Listing Verification Required
- The email content would look like
Dear [#client_name#],
Your request to become the owner of the below listing needs to be verified.
[#listing_link#]
By clicking the VERIFY link below you are stating you are legally associated with this business and have the owners consent to edit the listing.
If you are not associated with this business and edit the listing with malicious intent you will be solely liable for any legal action or claims for damages.
[#approve_listing_link#]
Thank you,
[#site_name_url#].
Testing Claim Manager for “Auto approval”
Testing claim functionality is done in multiple steps. This test uses the following settings:
- Geodirectory – Listing Claims – Enable claim listing? – Check
- Geodirectory – Listing Claims – Auto approve claim listing? (email verification) – Check
- Create user called “Owner” with a secondary email that is accessible (Owner email)
Admin:
- Navigate to the site and Login as Admin
- Create new listing “Owner Listing” – Set Owner Email as Listing Email
- Publish listing
Owner:
- Navigate to the site and Login as Owner (use a different browser, or open a new window in Chrome incognito with ctrl-shift-N)
- Navigate to the listing
- Click claim link to claim listing (‘Business Owner’ or ‘Claim’ if you are using Supreme)
- Complete the the form
- Submit form
- Check Owner Email for “Claim listing verification required” Notification
- Follow Link in Email to verify claim of the listing (link will only work if the Owner opens it and is able to login to the site.).
- Check Owner Email for “Claim listing approval” Notification
If you have done this process and do not have success, you can make a new support request as follows.
Make a new topic in the right forum: https://wpgeodirectory.com/support/forum/claim-listings-addon/claim-listings-addon-support/
Include the following information:
WP Login URL:
Listing URL (to be claimed by Owner):
WP Username for Owner:
WP Password for Owner:
WP Username for Admin:
WP Password for Admin: