On this page:
Introduction – Scenario – Preparation – User experience
Introduction
- You can create different Custom Post Types, but you can only have one Event Custom Post Type.
- This article explains how you can create different Event types, with the use of the Payments Manager.
- The options and idea explained below can also be used for other Custom Post Types.
Scenario
- We want our users to add Festivals and Markets, and Festival submissions can include the name of artists, and Market submissions can include details of the organisers.
- But we want to make it easy, so when they choose to add a Festival, they are not shown any Market specific fields.
Preparation
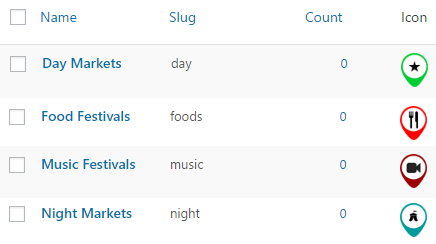
Categories
- Go to Events > Event Categories and add your categories:
Price packages
- Go to GD > Prices and Payments and create or edit Event price packages.
- We will create a Festivals and a Markets package:

- After creating the Festivals package, save it first.
- Then choose to edit again, and now you will be able to exclude all the Event categories that are not Festival categories:
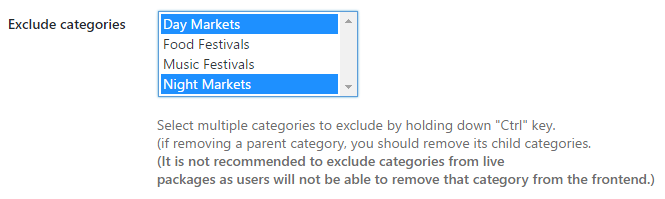
- Repeat for the Markets package.
Custom fields
- Go to GD > Event Settings and create an Artists custom field.
- Make sure to restrict the custom field to the Festival package only:
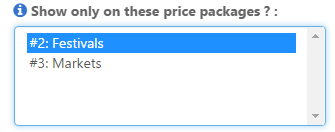
- Repeat for the Markets only custom field.
User experience
- Now you can link direct to the packages like this if you like:
- Festivals: yoursite.com/add-listing/?listing_type=gd_event&package_id=2
- Markets: yoursite.com/add-listing/?listing_type=gd_event&package_id=3
- And your users can also select from the Add Listing page:
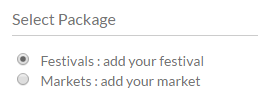
- If they choose the Festival package, then the festival categories will be the only ones available for selection:

- Only the Festival specific custom fields will be available too: