Introduction
Do you ever wanted to have your own website like Yelp? Don’t worry.. We have got you covered. GeoDirectory’s Whoop theme makes your GeoDirectory powered site look like a yelp clone as close as possible. Sounds cool eh..? Alright.. Its time to get our hands dirty. This documentation assumes that you have a fresh WordPress installation. Let’s get started.
Prerequisites
Before installing our theme, lets install its dependencies.
- GeoDirectory (Required)
- GeoDirectory Events (Optional)
- GeoDirectory Lists (Optional)
- Posts 2 Posts (Required for GeoDirectory Lists)
- BuddyPress (Optional)
- BuddyPress Integration ( Required )
- BuddyPress Follow (Optional)
- BuddyPress Compliments (Optional)
- Invite Anyone (Optional)
- bbPress (Optional)
IMPORTANT
If used with GD + BBpress + BuddyPress and possibly several add-ons, this is no tool for a shared hosting or the average VPS. Having a Directory, Forum and Social Network requires resources so make sure to use at least a High End VPS or a beefier Dedicated Server.
Permalinks Configuration
Navigate to Settings > Permalinks > Common Settings. Make sure Post name is selected.
GeoDirectory Installation
- Navigate to Plugins > Add New
- Search for GeoDirectory – Ultimate Business Directory
- Install it
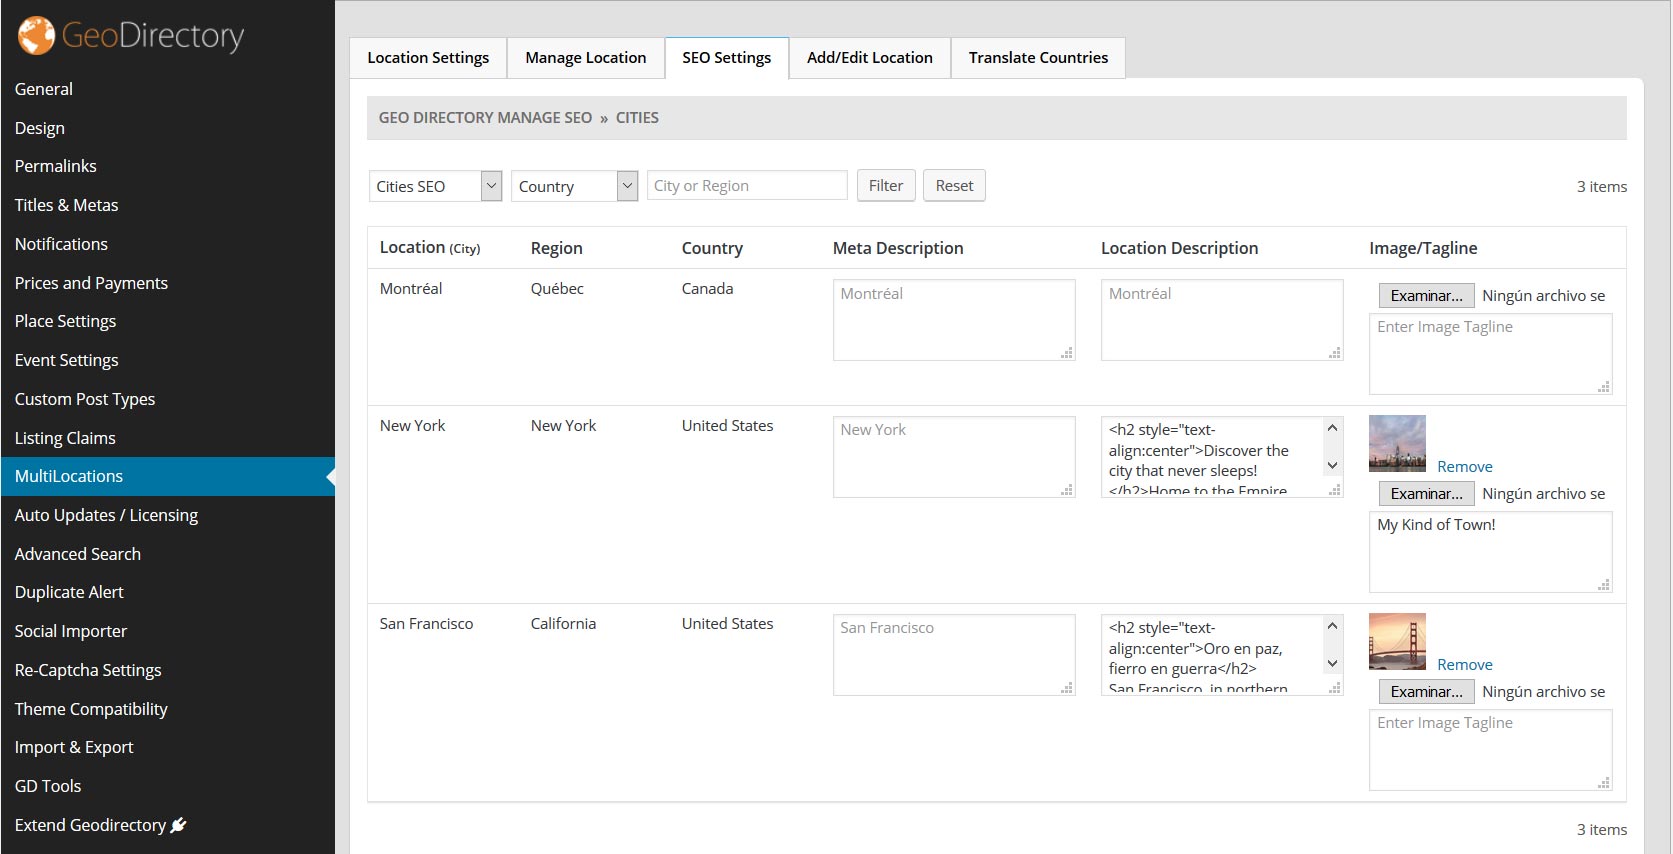
- GeoDirectory needs at least one location in order to work. So Set a default location first by following this tutorial. ( Tip: If you need multi locations, check our MultiLocations addon )
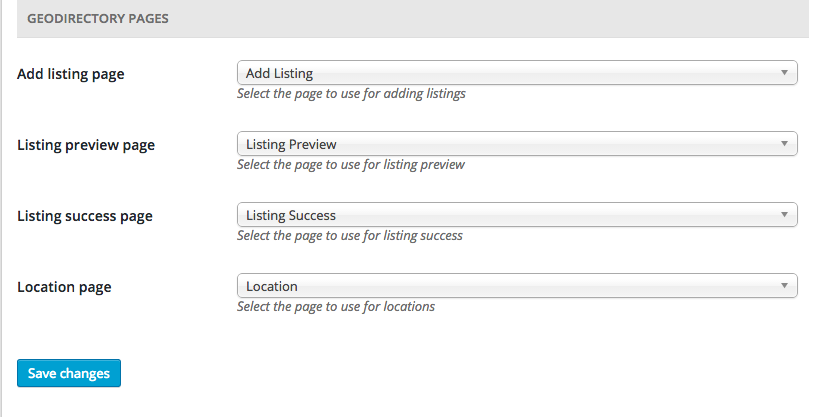
- You must set GeoDirectory Pages. Navigate to Geodirectory > Permalinks > Geodirectory Pages and set the pages
GeoDirectory Events Installation
- Visit wpgeodirectory.com ( Buy a subscription if Required )
- Navigate to My Account > Downloads ( Login if Required )
- Download Geodir Event Manager zip file.
- Go to your WordPress site dashboard, Navigate to Plugins > Add New > Upload Plugin
- Browse and Upload the zip file you downloaded from wpgeodirectory.com
- Activate the plugin.
GeoDirectory Lists Installation
- Visit wpgeodirectory.com ( Buy a subscription if Required )
- Navigate to My Account > Downloads ( Login if Required )
- Download Geodir List Manager zip file.
- Go to your WordPress site dashboard, Navigate to Plugins > Add New > Upload Plugin
- Browse and Upload the zip file you downloaded from wpgeodirectory.com
- Activate the plugin.
Posts 2 Posts Installation
- Navigate to Plugins > Add New
- Search for Posts 2 Posts
- Install it
BuddyPress Installation
- Navigate to Plugins > Add New
- Search for BuddyPress
- Install it
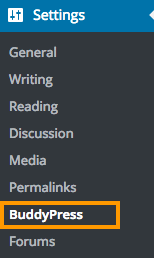
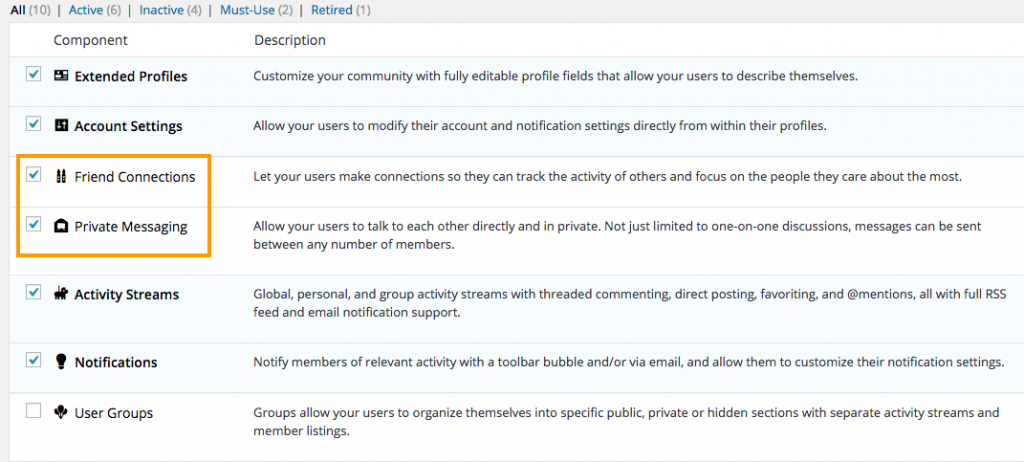
- After BuddyPress activation, navigate to Settings > BuddyPress and Enable the following components.
- Friend Connections
- Private Messaging
If BuddyPress pages not working, reset your Permalinks.
To reset your permalinks,
- Navigate to Settings > Permalinks > Common Settings.
- Select Default option and then save your settings.
- Now select Post name option and then save your settings again.
BuddyPress Integration Installation
- Visit wpgeodirectory.com ( Buy a subscription if Required )
- Navigate to My Account > Downloads ( Login if Required )
- Download Geodir Buddypress Integration zip file.
- Go to your WordPress site dashboard, Navigate to Plugins > Add New > Upload Plugin
- Browse and Upload the zip file you downloaded from wpgeodirectory.com
- Activate the plugin.
BuddyPress Follow Installation
- Navigate to Plugins > Add New
- Search for BuddyPress Follow
- Install it
BuddyPress Compliments Installation
- Navigate to Plugins > Add New
- Search for BuddyPress Compliments
- Install it
Invite Anyone Installation
- Navigate to Plugins > Add New
- Search for Invite Anyone
- Install it
bbPress Installation
- Navigate to Plugins > Add New
- Search for bbPress
- Install it
Heads Up!
If you are planning to use BuddyPress, please install it first before installing whoop theme, since whoop creates some BuddyPress custom fields while theme activation. If you don’t do that, you may have to deactivate and activate the theme again and when you do that, your widget settings might get lost.
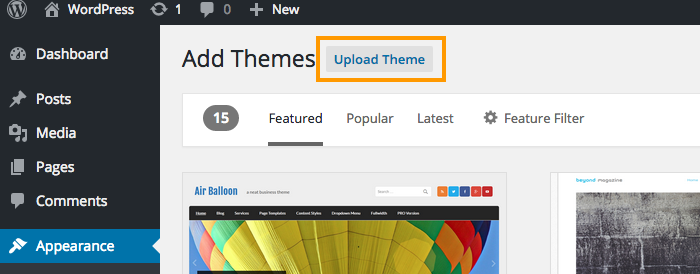
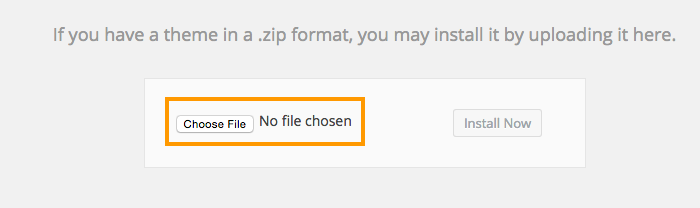
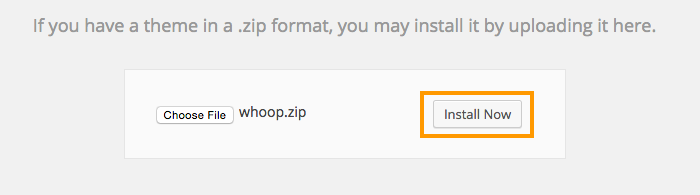
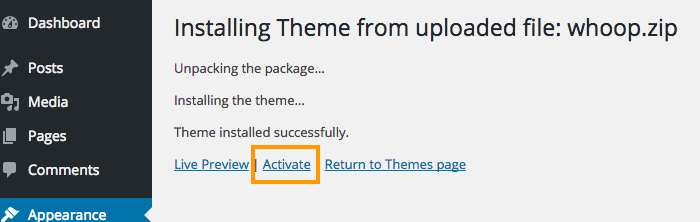
Theme Installation
Please follow this tutorial to install the theme.
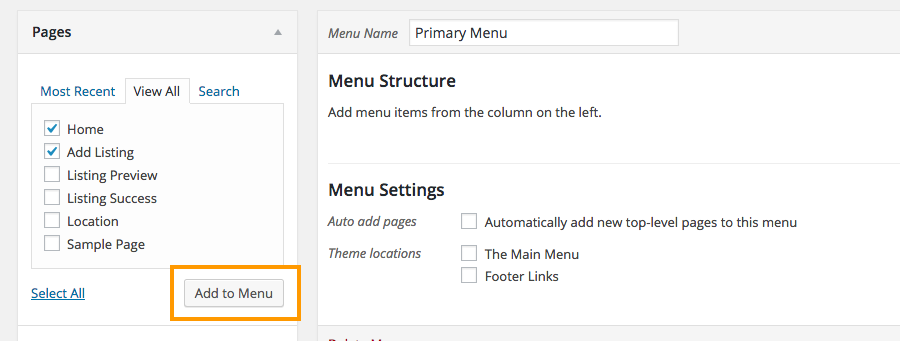
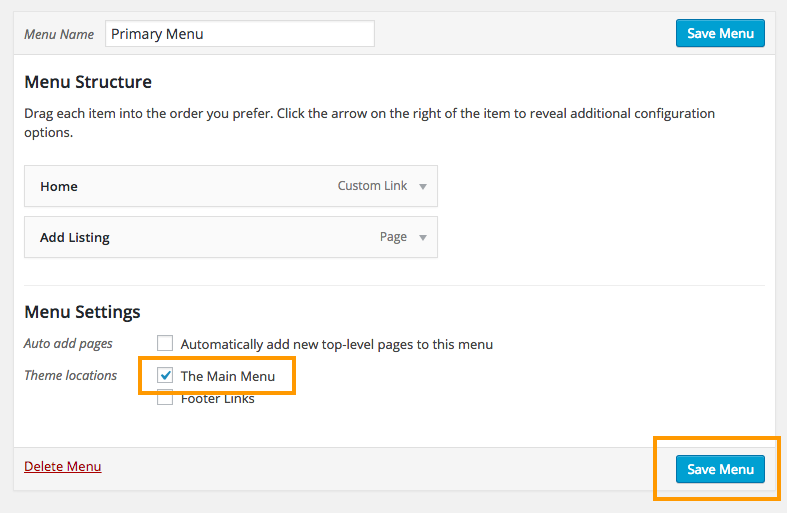
Menus
Whoop has 2 menu locations.
The Main Menu

Footer Links

For each menu location, please create a menu and assign to the location by following this tutorial.
Basic Configuration
Lets make sure we have some basic settings in order to make our theme work properly.
- Would you like to add Add listing ( Ex. Add Hotel ) and View Listing ( Ex. Hotels ) links to the Main Menu? If Yes Navigate to Geodirectory > Design > Navigation > Show geodirectory navigation in selected menu locations > Select The Main Menu
Header
If you have followed our instructions correctly so far, then your current header might look similar to this screenshot.

Upload your logo
We believe, you are interested in adding your logo. If this is the case, navigate to Whoop Options > Header Styling Options > Site Logo, then upload your logo there by clicking upload button. Recommended logo size would be 160px width and 60px height. Make sure you click Save Changes button after setting your logo.
If you refresh your home page, now the header might look like this.

Add search box
Ok Lets add the search box in header.
- Navigate to Appearance > Widgets
- Click on “GD > Search” widget. A popup will appear with a list of widget locations.
- Scroll to the bottom of the popup. You will see a widget location named GD Header Right. Click on it. Make sure its checked. Then click Add Widget button. Refer the following screenshot.

- Thats it. Now refresh your home page. Your header might look like this.

Voila. Header part completed. That wasn’t so hard. Was it?
Footer
Footer Widgets
- Navigate to Whoop Options > Footer Styling Options > Enable footer widget areas
- Select the number of footer widget you need.
In our case we selected 4. So the Footer has 4 widget locations.
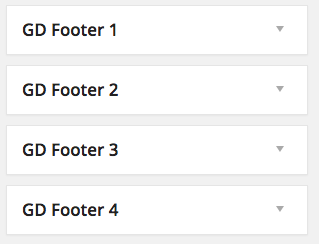
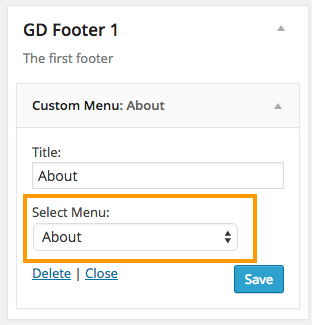
So we need 4 menu widgets for our footer.
- Create 4 new menus by following this tutorial But don’t set them to any menu location.
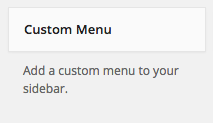
- You will see a widget called Custom Menu in Appearance > Widgets section.
- Add that Custom Menu widget in all 4 widget locations and select menu for each widget location.
- You final result might look like this.
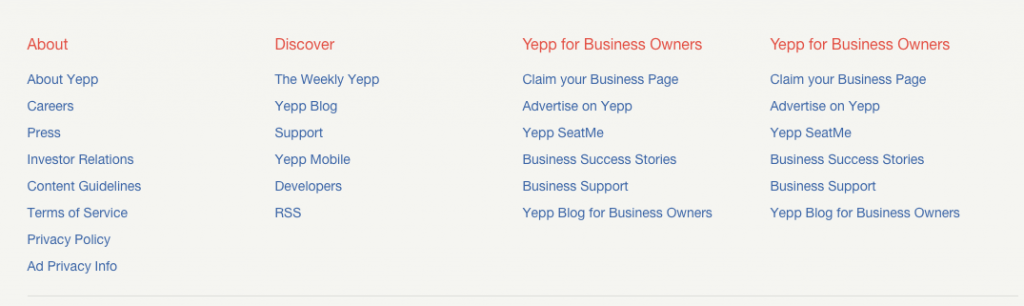
- Footer widget section completed.
Copyright Text
Most likely, you would like to change your copyright text. If this is the case Navigate to Whoop Options > Footer Styling Options > Copyright Text
In that textarea field, clear everything and then enter your new copyright text. You can copy and paste the following text and alter as you prefer.
Copyright © 2004–2015 Whoop Inc. Whoop, Whoop logo, Whoop burst and related marks are registered trademarks of Whoop.
The result might look like this.

Footer Links
If you assign any menu to Footer Links menu location, then it will be displayed on the right side of copyright area.

Add some listings
Navigate to Places > Add New to add some listings. Please add at least 10 listings. If you are in a hurry then navigate to Geodirectory > General > Dummy Data and then populate your site with some dummy data which can be deleted later.
Tip: By default GeoDirectory supports only one post type called Places. So if you are planning to add more post types like Hotels, Restaurants, Bars etc., then check our Custom Post Types addon.
After adding some listings, you home page might look like this.

bbPress data
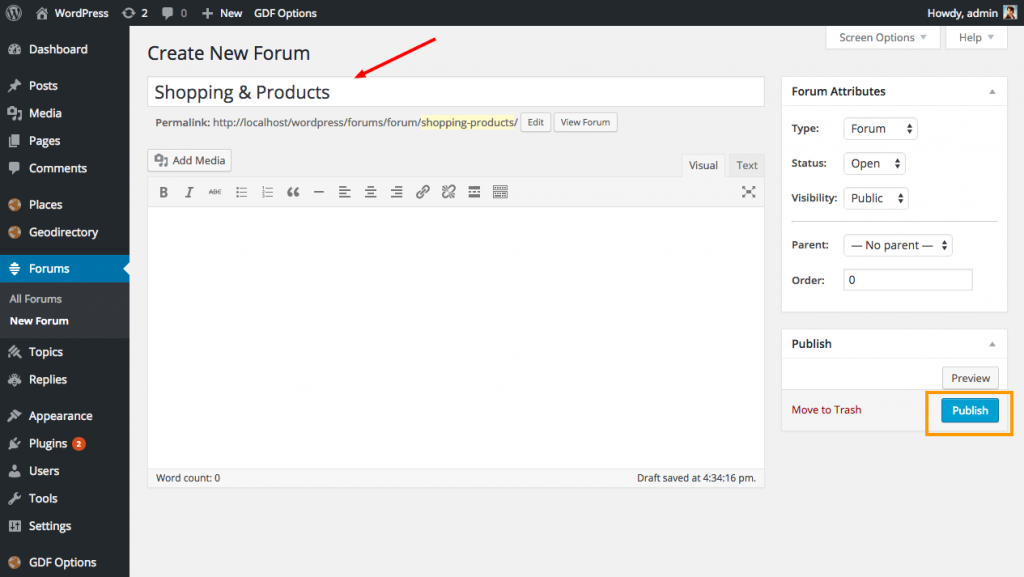
- Add some forums
- Add some topics by visiting yourdomainname.com/forums . Make sure you created some forums first.
- Add some replies to each topic.
Available Widgets
A number of widgets included in whoop. You can read more about each widget and its description by visiting this page.
Home Page
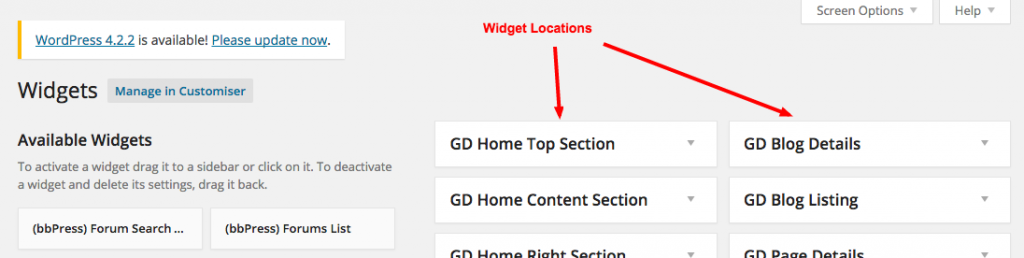
Navigate to Appearance > Widgets
Lets use some widgets to build our home page.
Before proceed, make sure you know about widget locations. Widget locations indicated using arrows on the following screenshot.
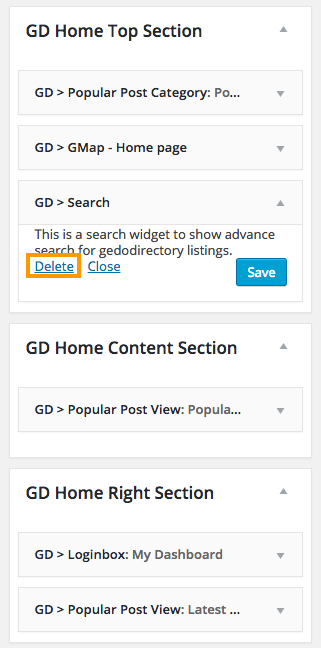
Remove Default widgets from home page
Expand the following widget locations and completely remove all widgets from them.
- GD Home Top Section
- GD Home Content Section
- GD Home Right Section
Check the following screenshot for example.
Once you remove everything, the home page might look like this.

Now lets add some widgets to the these locations.
- GD Home Content Section
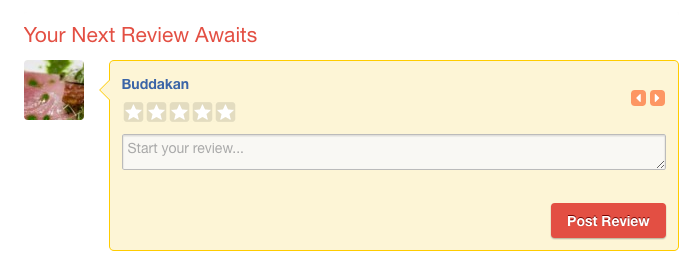
- Whoop > Your Next Review Awaits
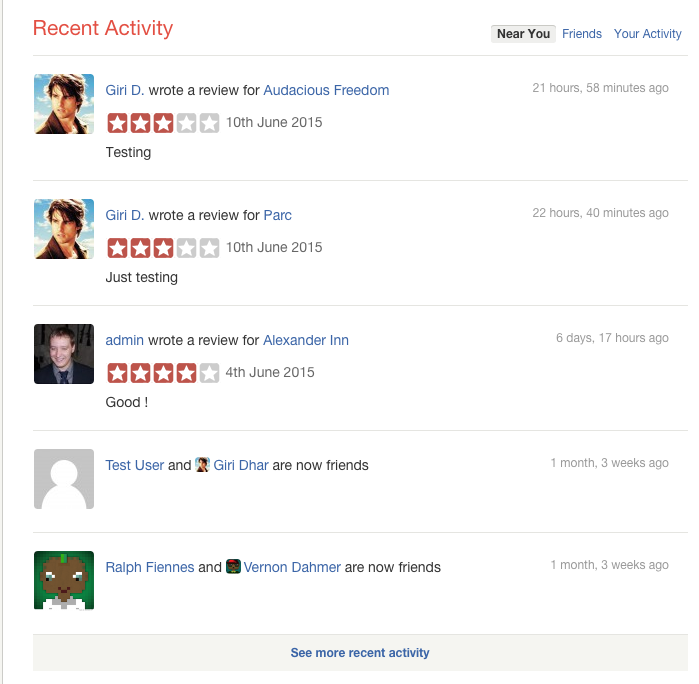
- Whoop > Recent Activity
- GD > Best of widget
- Set Tab Layout to Tabs on Left
- GD Home Right Section
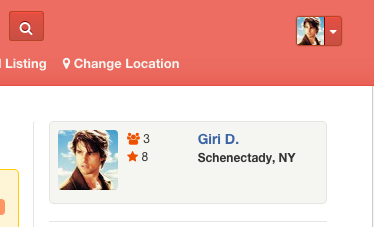
- Whoop > User Info
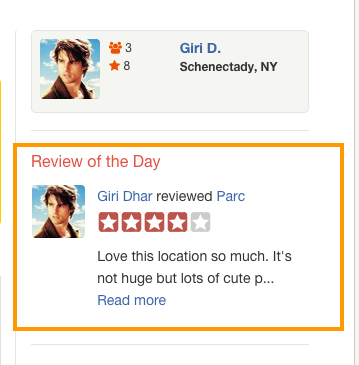
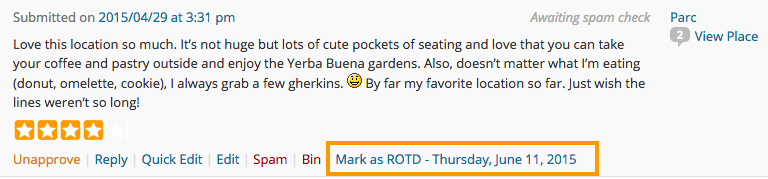
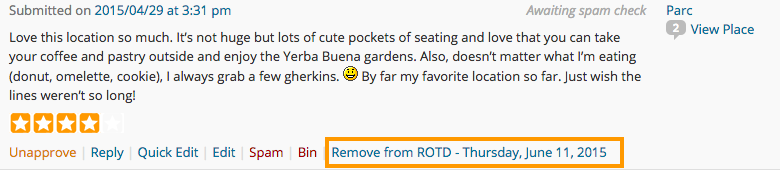
- Whoop > Review of the Day
- Whoop > Popular & Latest Events
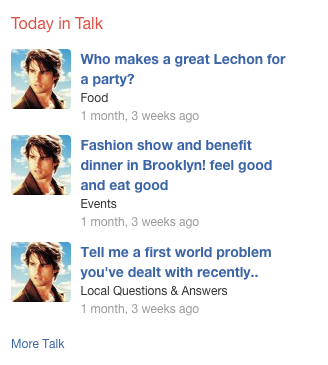
- Whoop > Today in Talk
- GD List > Fresh Lists

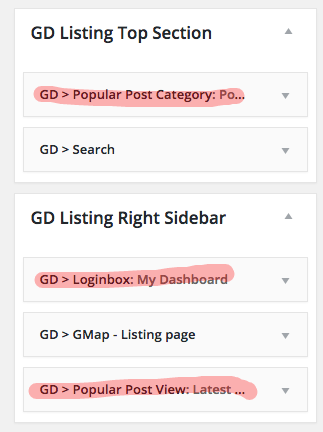
Listing Pages
Expand the following widget locations and remove only marked widgets from them.
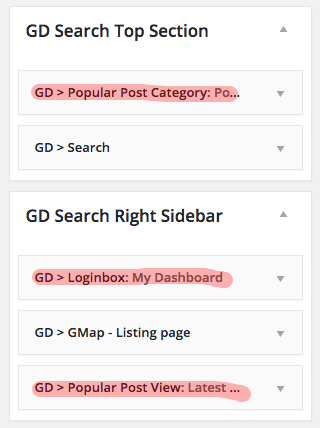
Search Pages
Lets keep the same listing page structure in search page too.
Expand the following widget locations and remove only marked widgets from them.
Listing Detail ( Single ) Pages
Lets remove all widgets from the following widget locations.
Expand the following widget locations and completely remove all widgets from them.
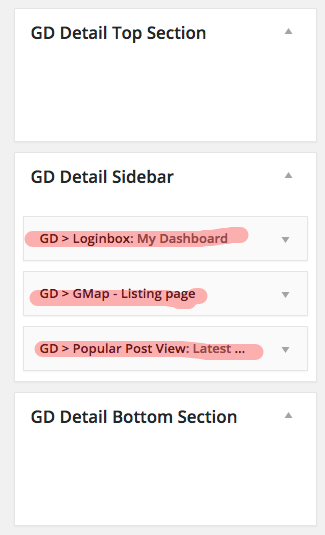
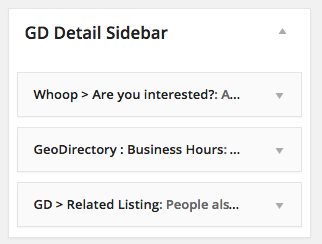
Now add the following widgets to GD Detail Sidebar
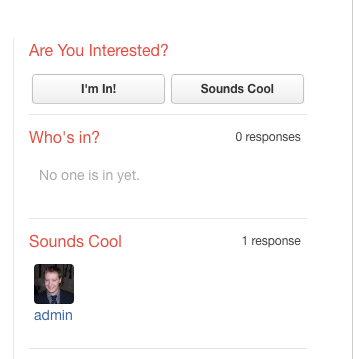
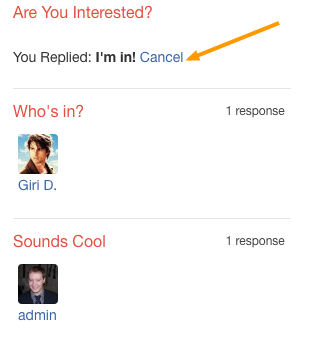
- Whoop > Are You Interested? ( GeoDirectory Events Required and will be displayed only on single event pages )
- GeoDirectory : Business Hours ( GD Business Hours Required : Note this was a third party plugin that is no longer available. GeoDirectory V2 will include Business Hours )
- GD > Related Listing
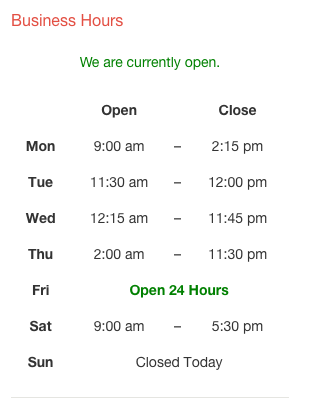
For GD Business Hours you can use the following settings.
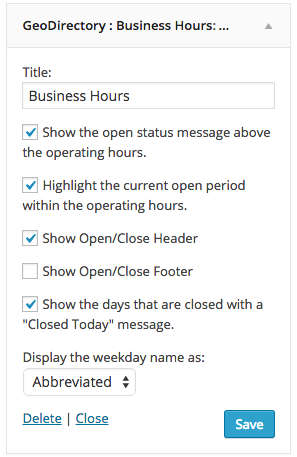
Note: GD Business Hour widget will be displayed only if you have filled the Business Hours information. This is how it look in sidebar.
You might wanna remove the following details from the sidebar. ( Note: They are not widgets )
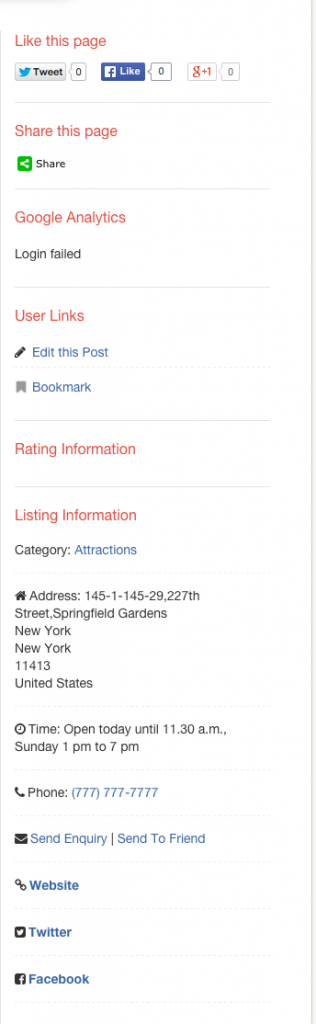
Its recommended to keep Listing Information and remove all other info boxes. But you can remove Listing Information box too if you prefer.
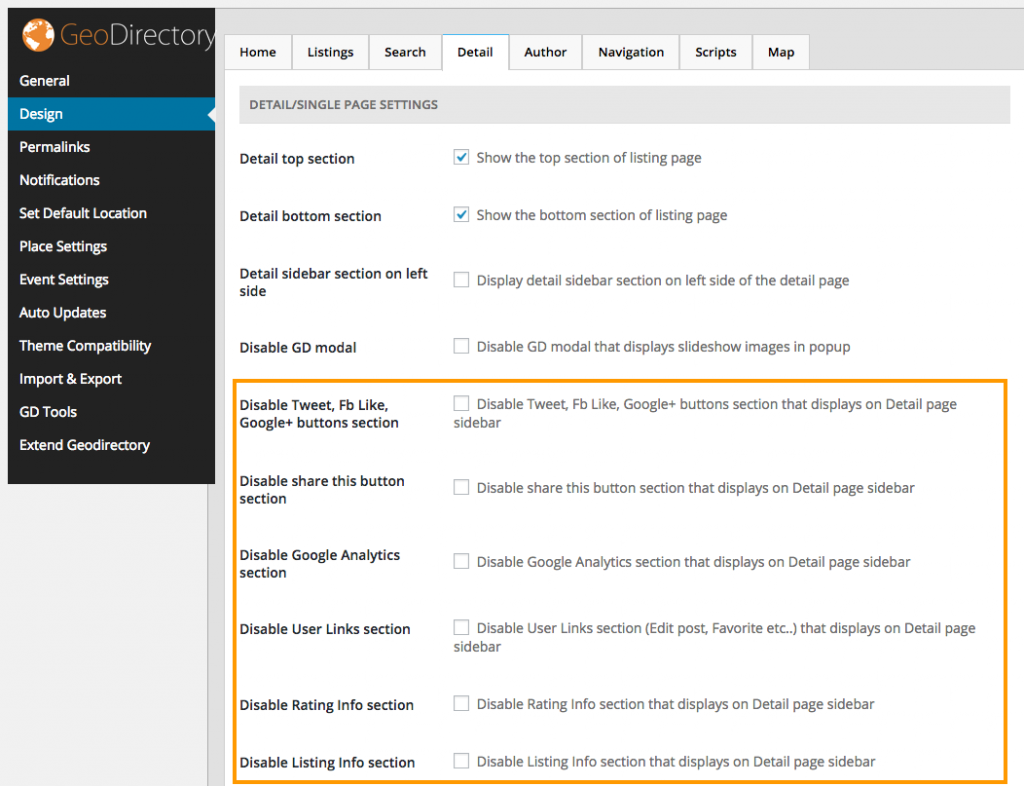
To remove those info boxes, Navigate to Geodirectory > Design > Detail and then Check the following checkboxes.
Event Pages
Event Listing Page
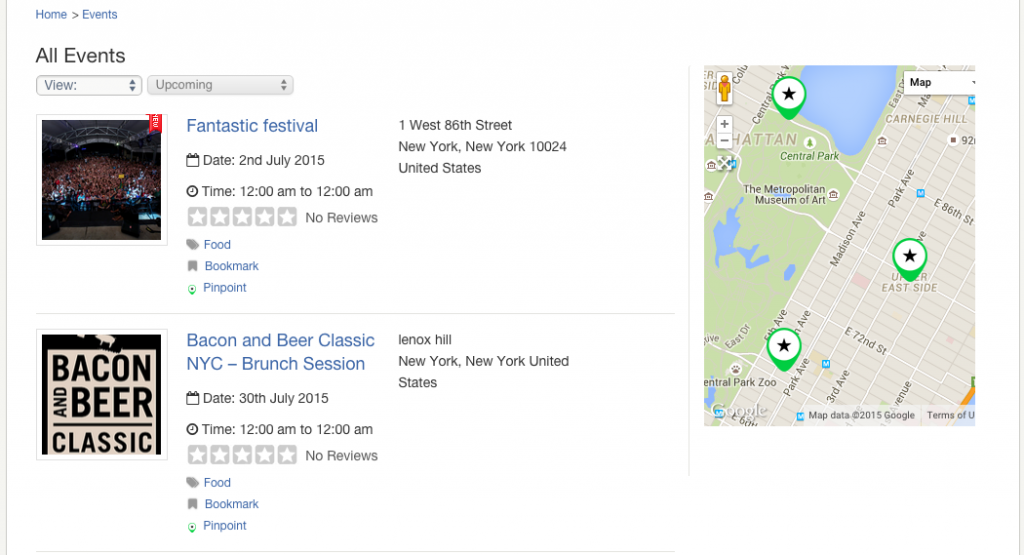
When you visit, yourdomain.com/events/ you can see normal event listing page, generated by GeoDirectory. Widgets used in this page comes from GD Listing Top Section, GD Listing Right Sidebar ( Scroll above and refer Listing Pages section )
Event Index Page
This page can be accessed by visiting this url.
yourdomain.com/events/?e_index=true

When GeoDirectory Events active, whoop registers the following widget locations.
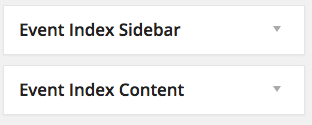
Just place the following widgets in those widget locations.
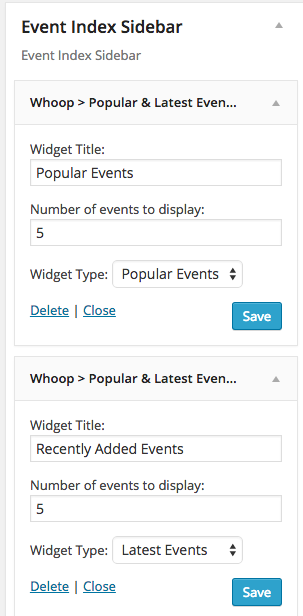
- Event Index Sidebar
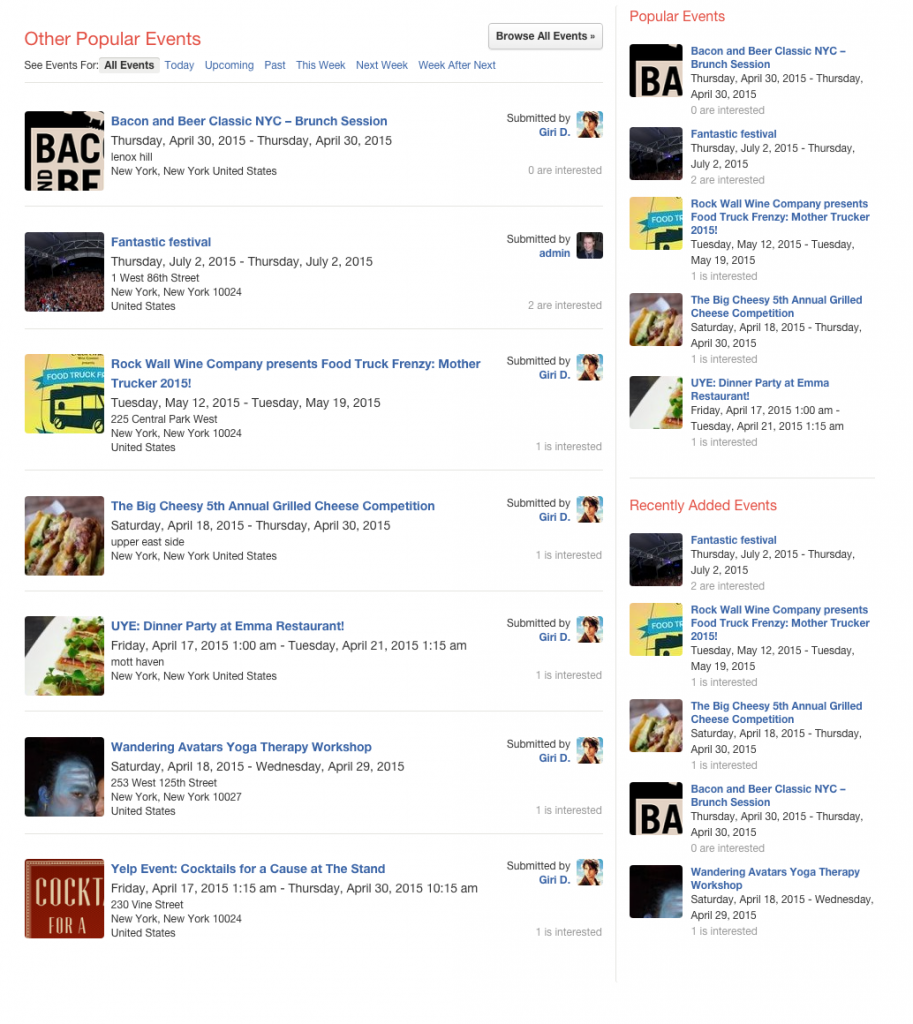
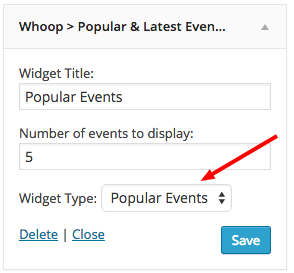
- Whoop > Popular & Latest Events ( Widget Type: Popular events )
- Whoop > Popular & Latest Events ( Widget Type: Latest events )
- Event Index Content
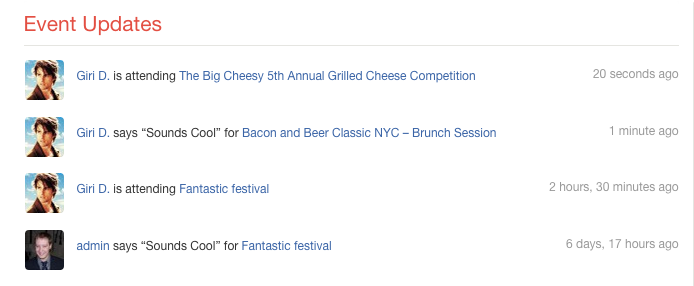
- Whoop > Event Updates
- Whoop > Popular & Latest Events ( Widget Type: Popular events )

BuddyPress Follow
No additional configuration required for BuddyPress follow. After plugin activation you can see two new tabs called Following, Followers in member profile page.
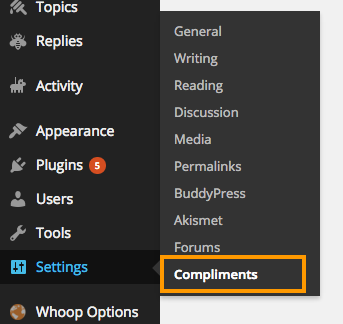
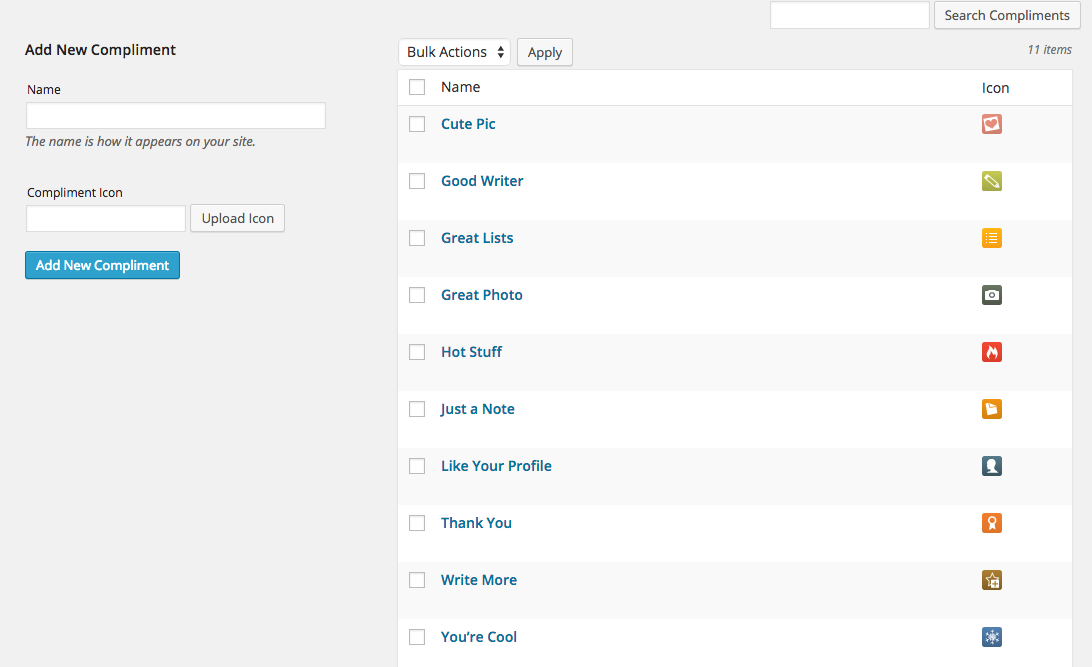
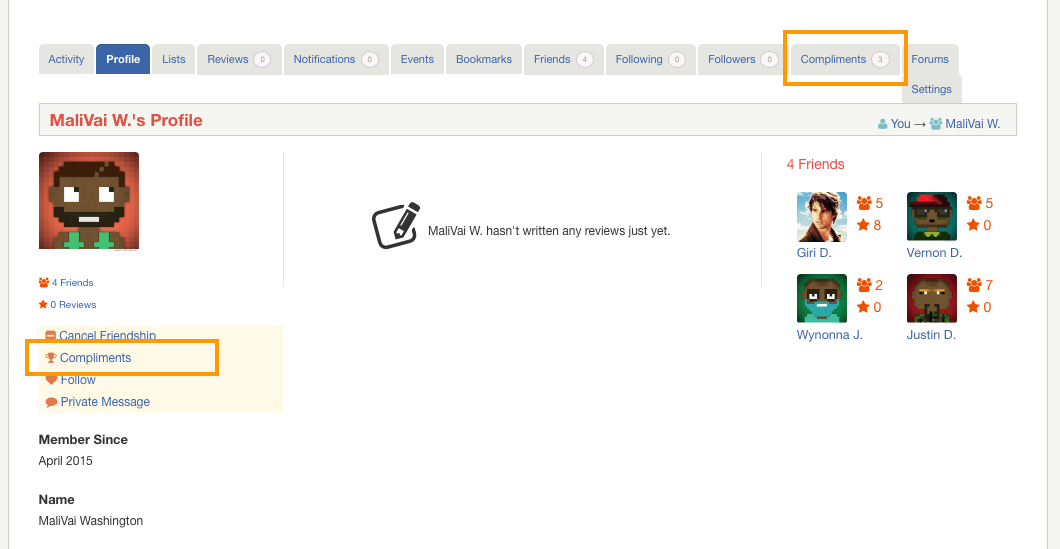
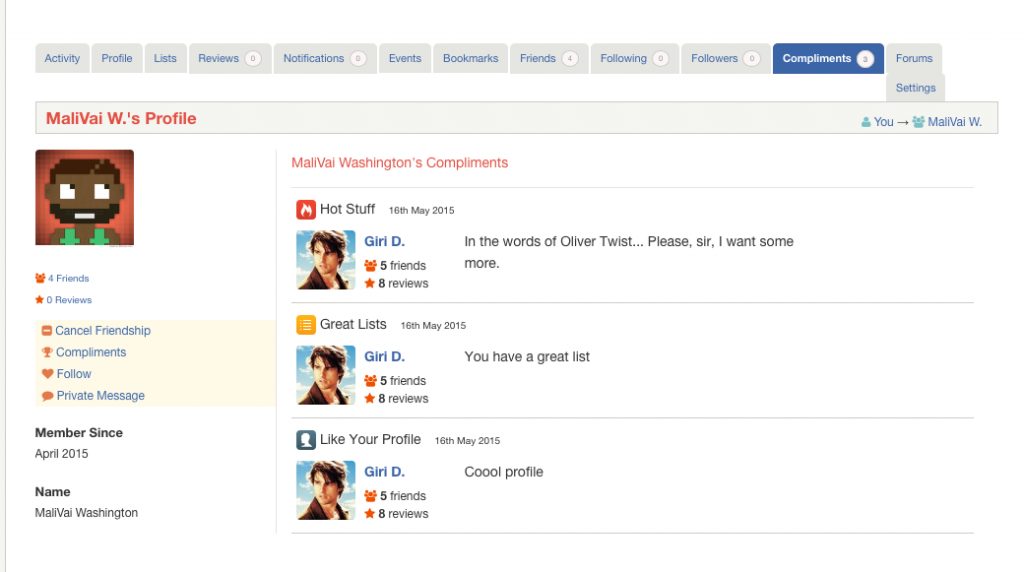
BuddyPress Compliments
To configure BuddyPress compliments, please follow this tutorial.
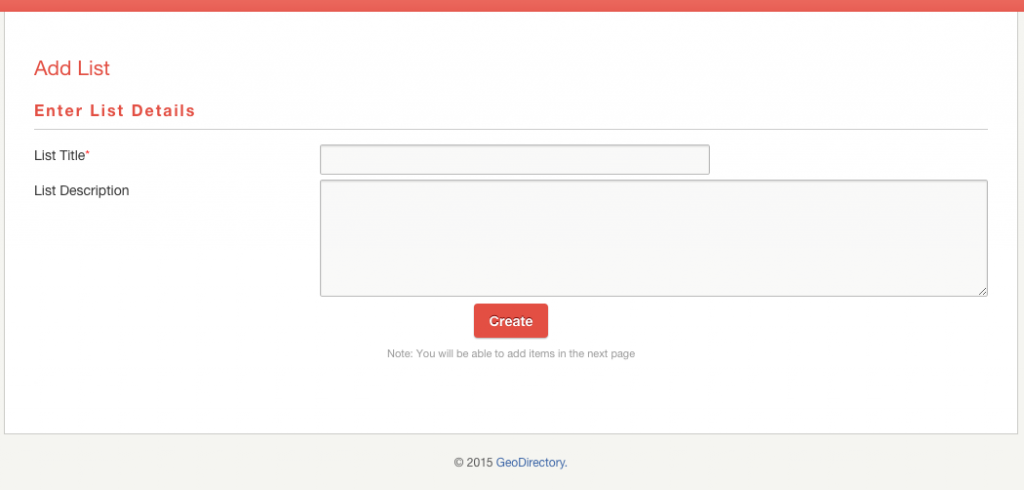
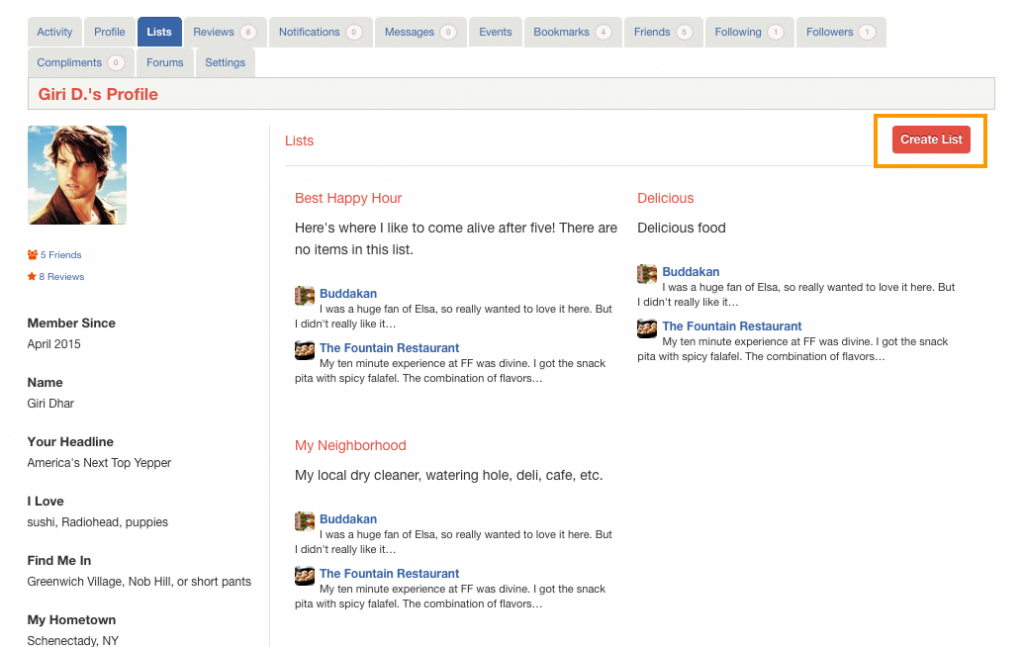
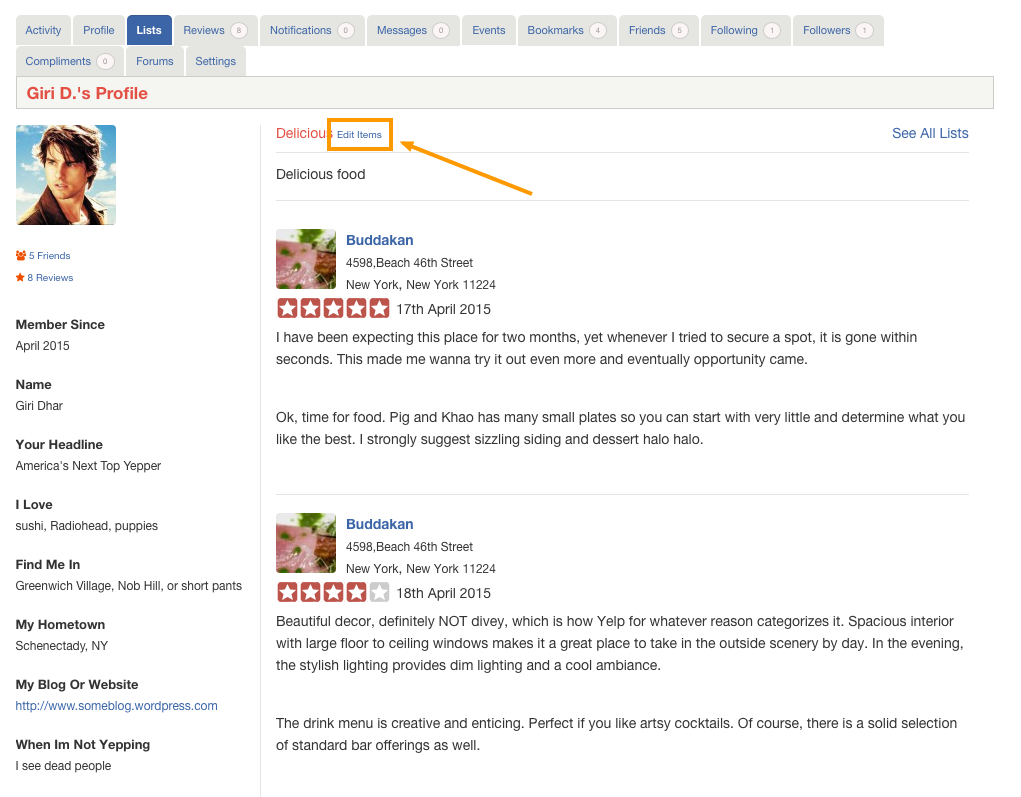
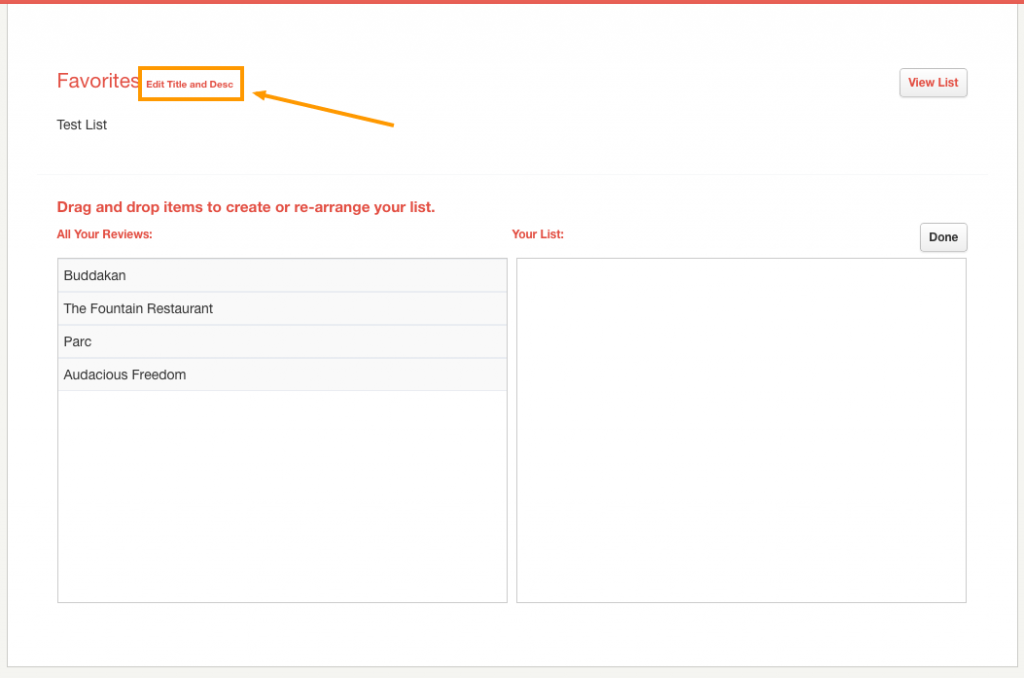
GeoDirectory Lists
To configure GeoDirectory Lists, follow this tutorial.
BuddyPress Profile Fields
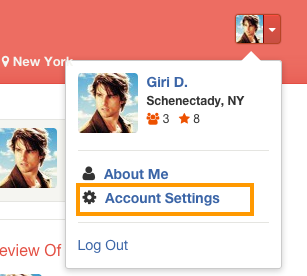
BuddyPress profile can be Edited from Account settings > Profile Info
Some profile fields are automatically created when you activate whoop theme. ( BuddyPress must be activated before activating whoop theme. So If you don’t see any profile fields, activate some other theme and then activate whoop again )
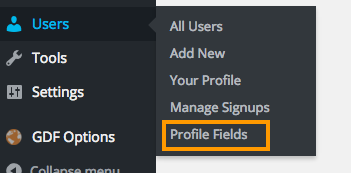
To add more fields or Delete existing fields, Navigate to Users > Profile Fields
- Don’t remove Name field, since its required
- Don’t rename Group
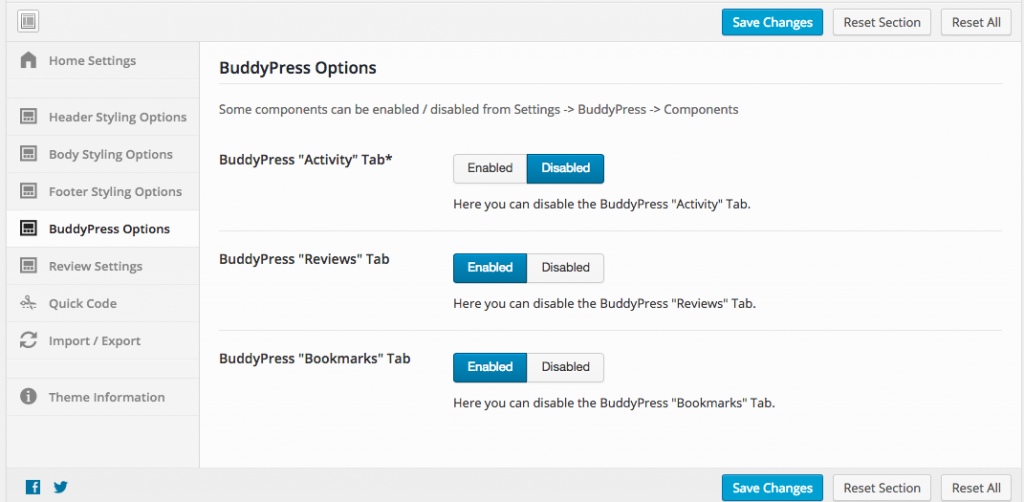
Hide tabs from BuddyPress
If you would like to hide some tabs on BuddyPress profile pages, Navigate to Whoop Options > BuddyPress Options
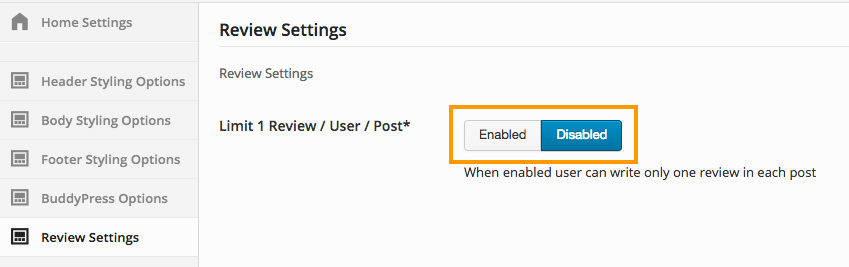
Limit 1 Review / User / Post
By default user can post unlimited number of reviews on a listing. If you would like to limit 1 review for each listing, then navigate too Whoop Options > Review Settings > Limit 1 Review / User / Post > Enabled
Whoop theme is one of the Geodirectory Framework themes. Each Geodirectory Framework theme is translated with the same textdomain for the language file.
The file should be located on the server at:
/wp-content/languages/themes
File should be named as in the following examples:
geodirectory_framework-en_US.mo / geodirectory_framework-en_US.po
geodirectory_framework-es_ES.mo / geodirectory_framework-es_ES.po
etc


