The World’s Most Advanced And Scalable WordPress Directory Plugin
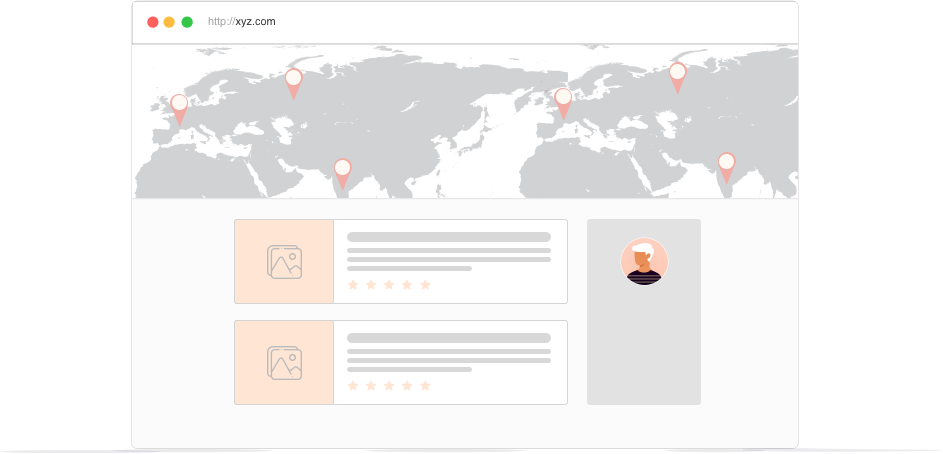
GeoDirectory is an enterprise-grade WordPress plugin for building scalable business directories, city guides, real estate listings, job boards, event sites, classifieds, and local discovery platforms. Unlike generic listing plugins, it uses custom database tables, not WordPress post meta, so sites perform well from small local portals to directories with hundreds of thousands or millions of listings. Core features include optimized search, maps, reviews, frontend submission, and an extensive add-on ecosystem for customization. Rated 4.8/5 across 700+ reviews on WordPress.org and Capterra.
Get GeoDirectoryWhat can i do with GeoDirectory?
How to build a directory website with Bricks Builder?
🚨 New Bricks Template Available! 🚨
We’ve just released an awesome Bricks Builder template to make building your GeoDirectory-powered directory site 100x easier and faster!
🎯 Live Demo: Check it out here
📥 Download & Tutorial: Grab the Bricks Directory template
💬 Join the conversation: Discuss it in our community forum
Give it a try and let us know what you think!
If instead you want to design your own tempalte, here’s a getting started guide to building a Directory Website using the Bricks builder and Geodirectory plugin:
- Install the Bricks theme
- Install and setup GeoDirectory
- Design the Directory Website using the Bricks Builder
Using the Bricks Builder alongside the GeoDirectory Plugin enables you to create an exceptionally sophisticated online directory.
This combination allows for effortless integration of location-based features, customization of aesthetics, and incorporation of dynamic content blocks, resulting in a user-friendly and engaging website experience.
However, in this tutorial, we will focus on simplicity and ease of use.
We will use the Bricks builder mainly with the GeoDirectory Shortcodes.
In the next few weeks, we will dig deeper and publish detailed tutorials on how to design each GD template mainly with Bricks Element and query loops (dynamic data).
In this tutorial, we will:
Installing Theme and Plugins.
1. Install the Bricks Theme
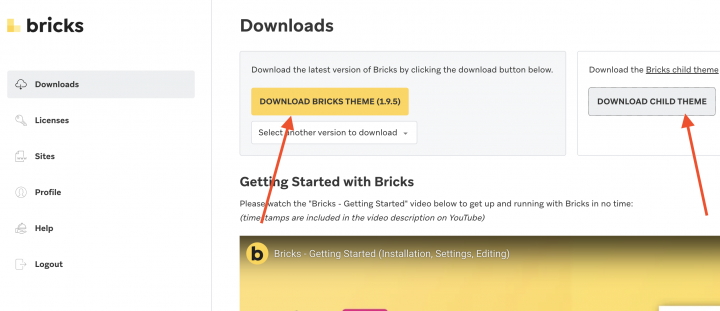
First, download the theme and child theme from the Bricks website.
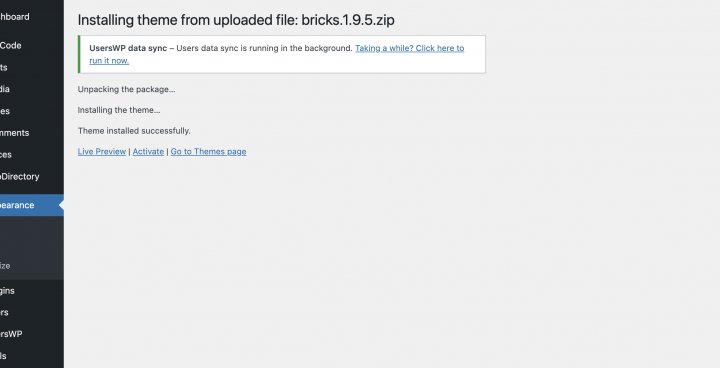
Install the theme in your WordPress website from WP-Admin >> Appearance >> Themes
Activate the theme license.
2. Install GeoDirectory
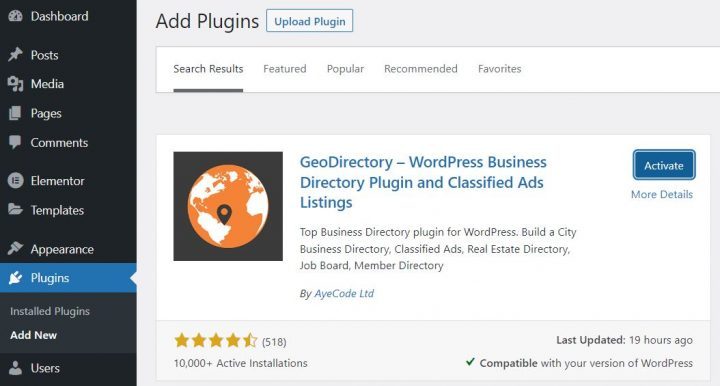
Finally, you need to install GeoDirectory.
Go to Plugins >> Add new, search GeoDirectory. Please install and activate it, and we finished installing the plugins.
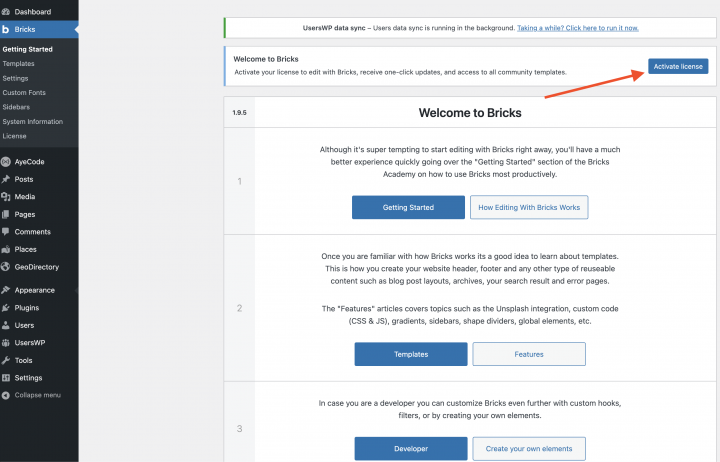
3. GeoDirectory Install Wizard
For GeoDirectory, you will need to complete the Setup Wizard to configure the Google Maps API key and import a few dummy listings.
Choosing the Map System (Google Maps or OpenStreetMap)
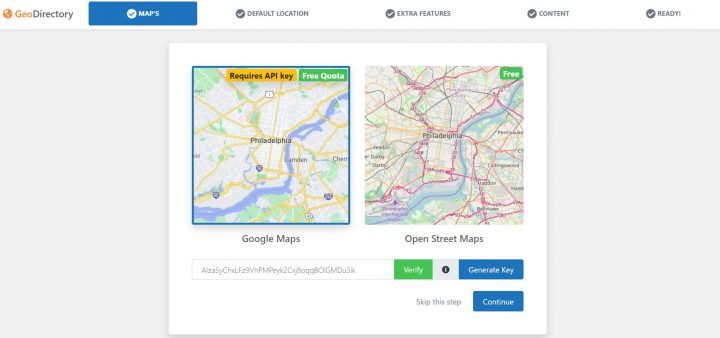
On the first step of the wizard, you get to pick between two mapping systems: Google Maps and OpenStreetMaps.
For this guide, we’re picking OpenStreetMaps.
If you want to use Google Maps instead, you’ll need to do a few extra things:
- Click on the “Generate Key” button and follow the instructions in this guide to make a valid API key.
- Here are the important steps:
- Turn on the Keys.
- Make a new project or choose one you already have.
- Get the Key.
- Set up a billing account.
- Restrict the API key (so it only works from your website’s URL).
Point four is a must-do, but you only pay if you go over $200 a month.
This free credit is more than enough for 99% of directories.
Setting the default city
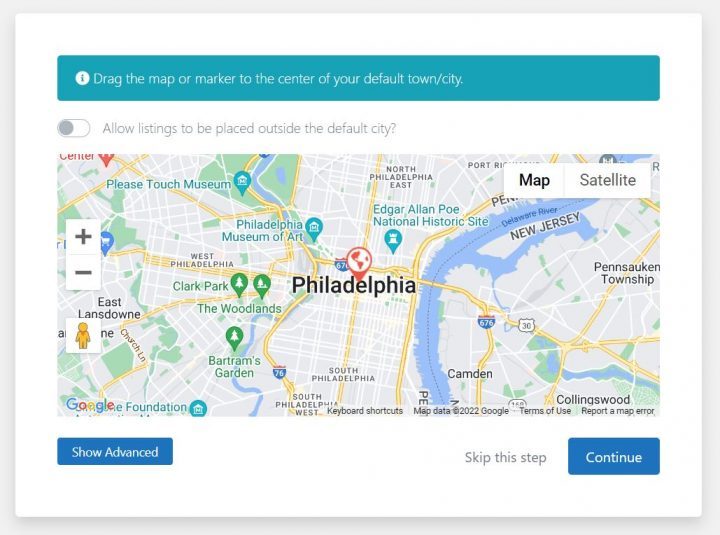
Next, you’ll choose the default location, which is the city the directory is all about.
We’re going with Philadelphia as the default city, but you can pick any place you want.
If you’re making a directory for multiple cities, you’ll need the Location Manager add-on.
Adding extra features
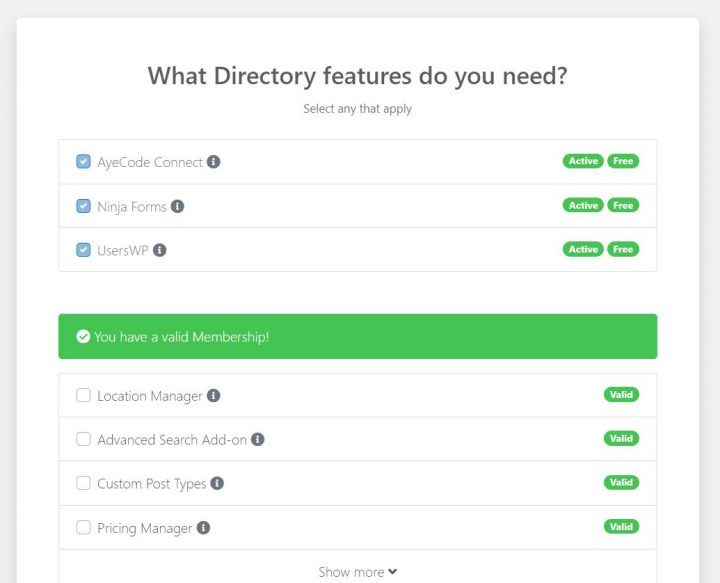
In this step, we will install our UsersWP, a user registration plugin that lets users register and log into your website.
This is needed to allow users to add and edit their listings. It will also create user profiles where they can find their listings, reviews, and so on.
We will also install Ninja Forms so that all listings have a contact form that sends emails directly to the listing owners.
You don’t have to use AyeCode Connect for this tutorial. It’s only necessary if you want to add premium GeoDirectory add-ons and install them right from your WordPress Dashboard.
Adding Dummy Data
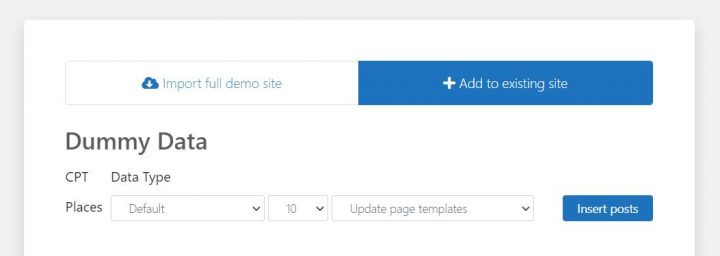
The final step in finishing the installation wizard is to put in some dummy listings. This also sets up categories for listings, which you can change later as you like.
Right now, we won’t add any sidebar widgets or menu items. We’ll take care of that later.
Design the Bricks Directory Website
Now that we installed the theme and the plugins and done the preliminary setup of GeoDirectory, we can start designing our Directory Website.
1. The Logo
First things first, we need a logo for our website.
You don’t have to hire a designer to create the first version of your logo.
One of the biggest mistakes you can make when starting a new directory is spending too much time and money before testing if people want it.
You can make a logo in just five minutes using an app like Canva, which is inexpensive and really good.
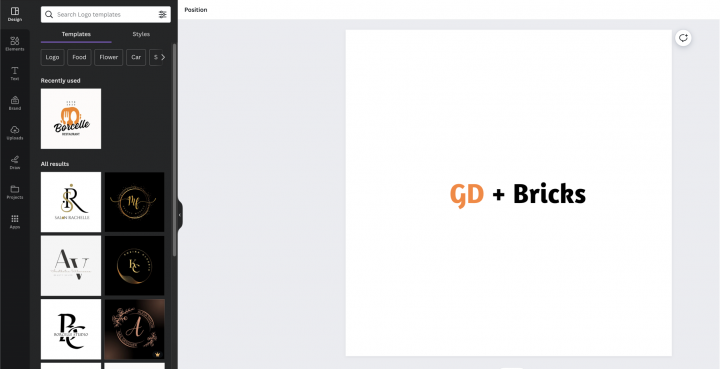
For a basic version of your product (called MVP, or minimum viable product), a logo made with Canva will do just fine.
There are lots of logo templates to pick from, and it’s okay if your first logo isn’t perfect or super unique.
If your project starts to do well, you can always work on improving or completely changing the logo later on.
A regular logo usually isn’t why a project fails. We’ll use this logo when we create the header for the website.
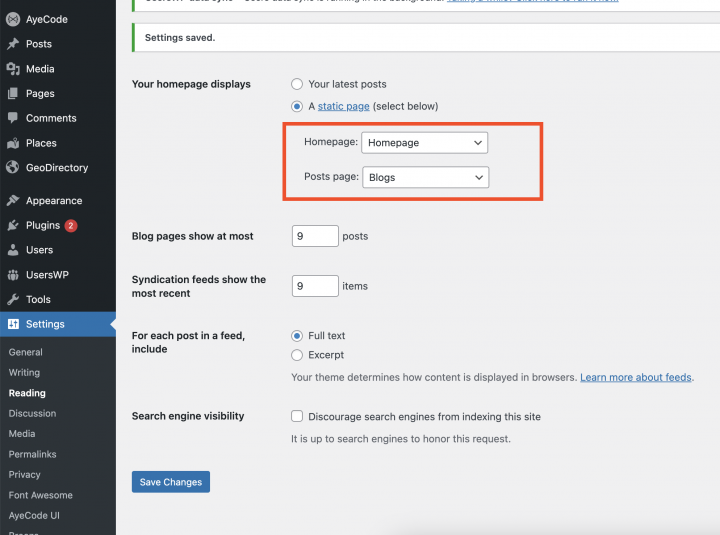
1. Bricks Directory Home page design
You can create a new page or use one WordPress creates by default, like the Sample Page.
Go to Pages, edit the Sample page, and rename it Home or create a new page for this.
You will have to set this page as the site Homepage for that go to wp-admin >> Settings >> Reading
Now let’s first set up the site Navigation menu.
The Navigation Menu
Go to Appearance > Menus, and create your menu.
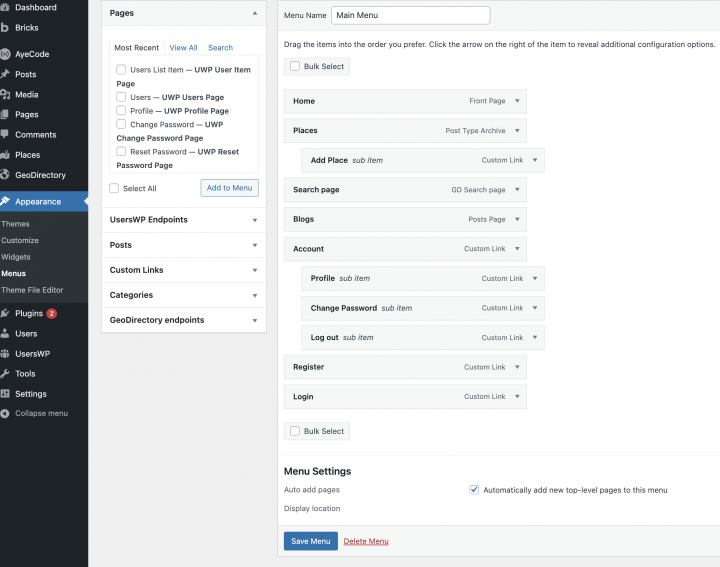
Add the links needed (from the left column to the right column) and save. In the Menu Settings > Display location section, you can check the “Header menu – Logged in user and Header menu – Logged out user” options.
If you want, you can make the same menu appear on the mobile or create another menu to appear there.
In this example, we’ll only have the header navigation menu.
We added seven main navigation links and a few sub-navigation links:
- Home
- Places and add places
- Search
- Blog
- Account
- Register & Login pages
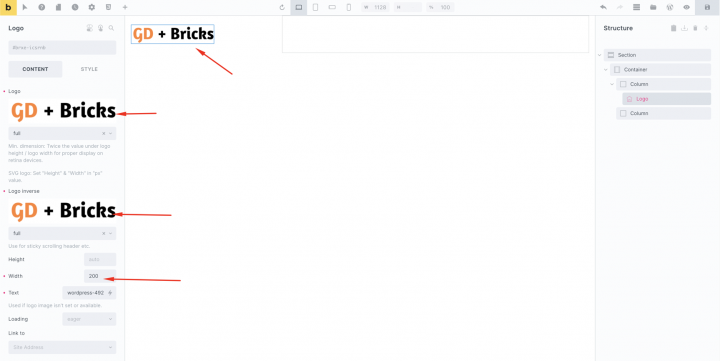
The Header
To set the site header go to wp-admin >> Bricks >> Templates >> Add New
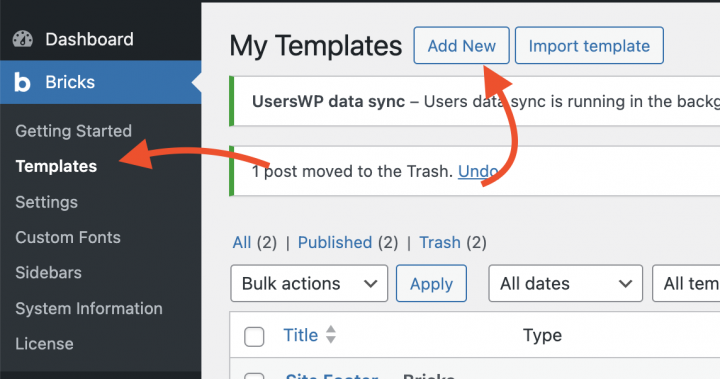
Create a Bricks template for the header.
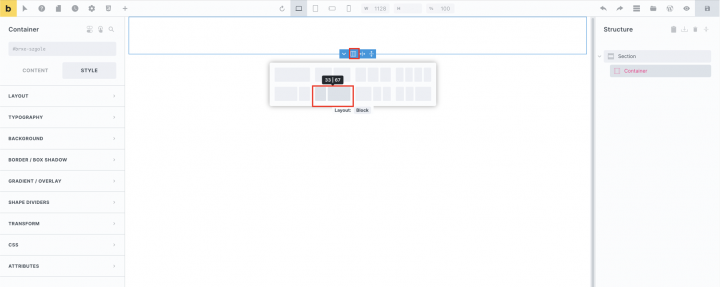
we will select a two-column layout with a 30::70 ratio.
In the left column drag the Logo block and upload the site logo in it.
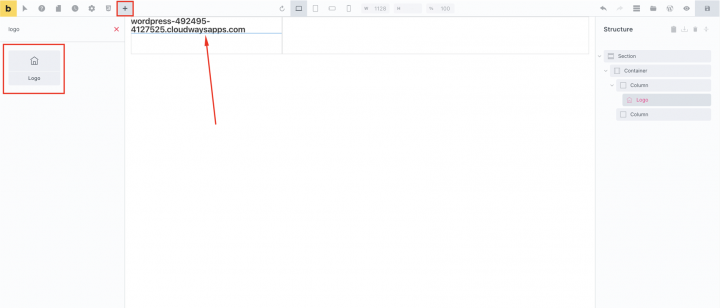
Let’s set the width:200px
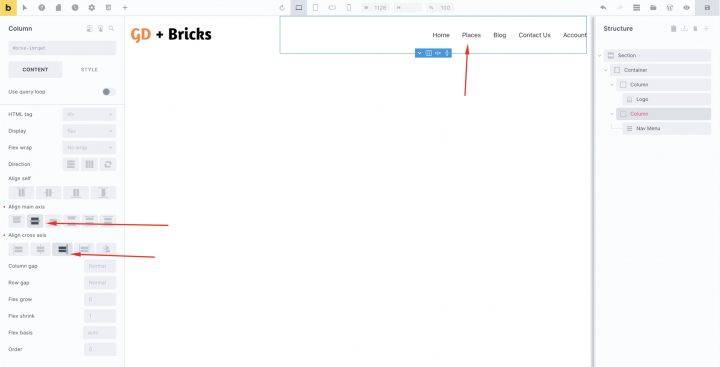
In the right column drag the Nav menu in the right column.
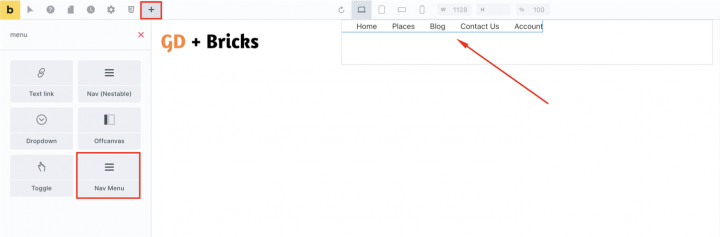
with settings like
Algin main axis: center
Align cross axis: Right
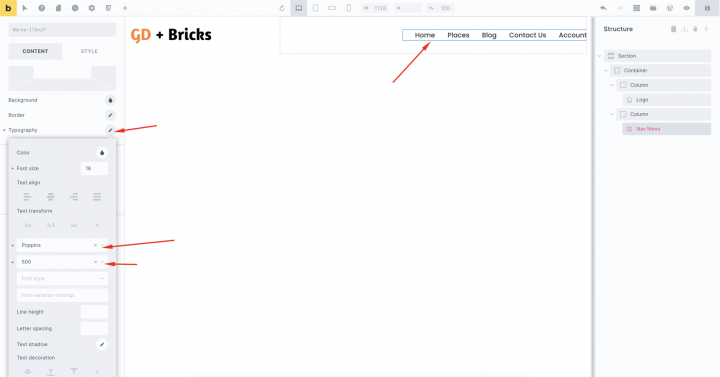
Typography
Text Transform: Poppins 500
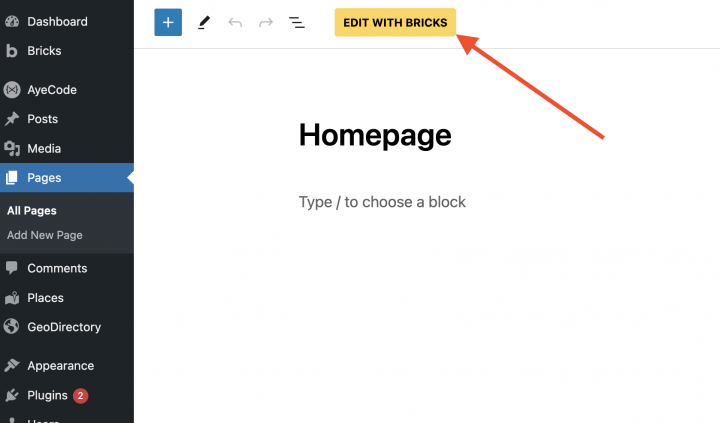
The Content
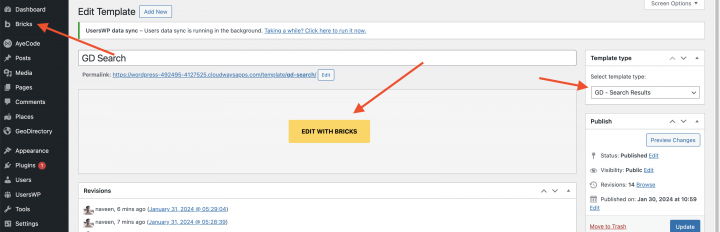
Now to design the homepage. we will edit the homepage by clicking on the edit with Bricks buttons.
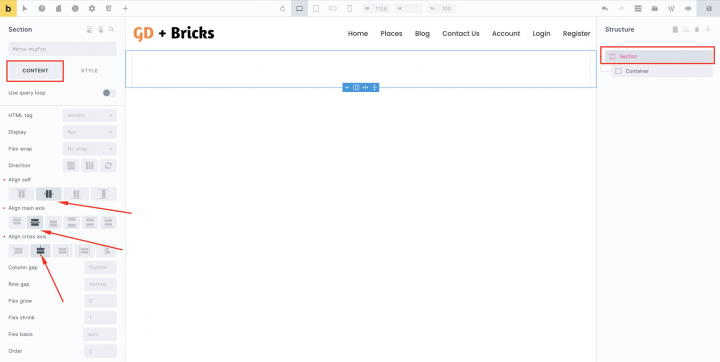
We will add an empty container with following settings
Align self: Center
Align Main Axes: Center
Align cross axis: Center
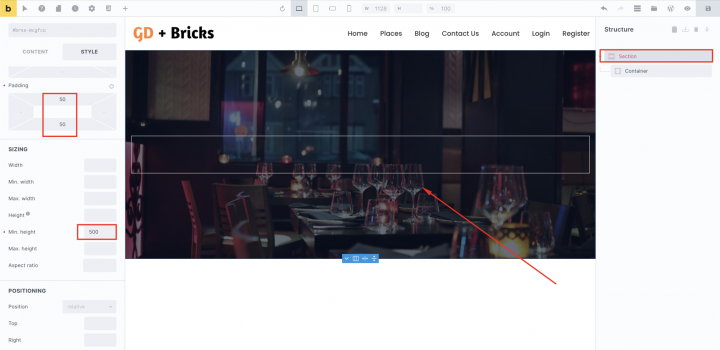
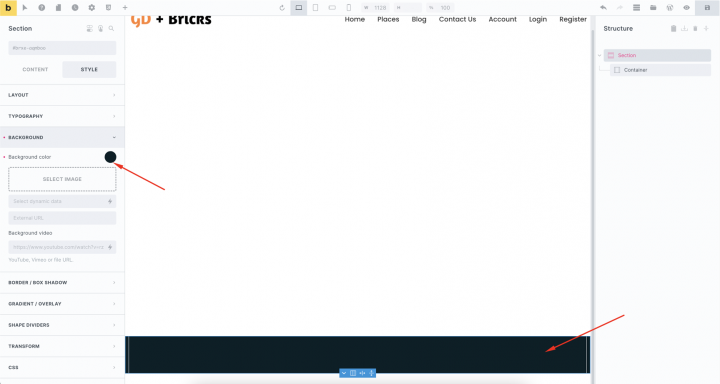
In the Style tab of section
Padding: 50px (Top) 50px( bottom)
min Height: 500
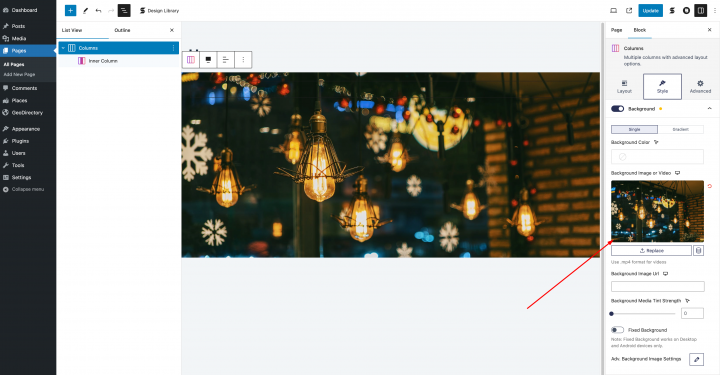
Upload Background Image
Background position: Center Center
Background repeat: Repeat
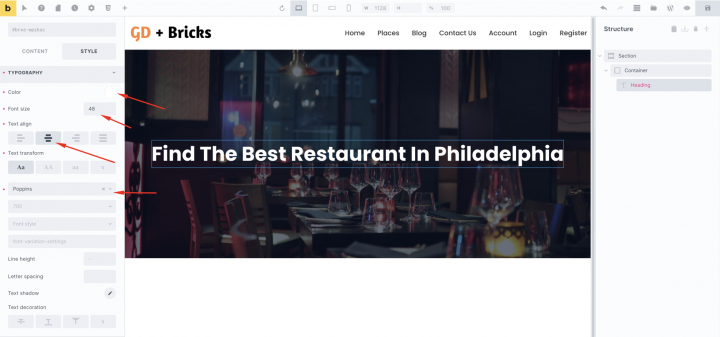
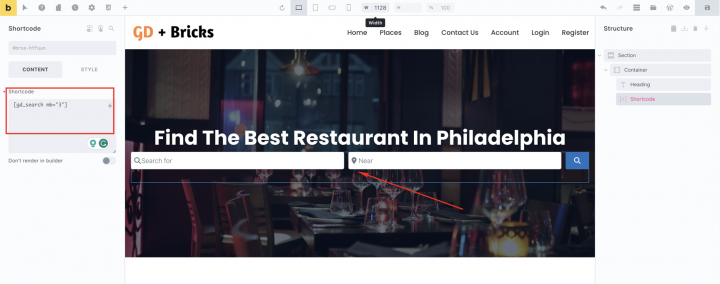
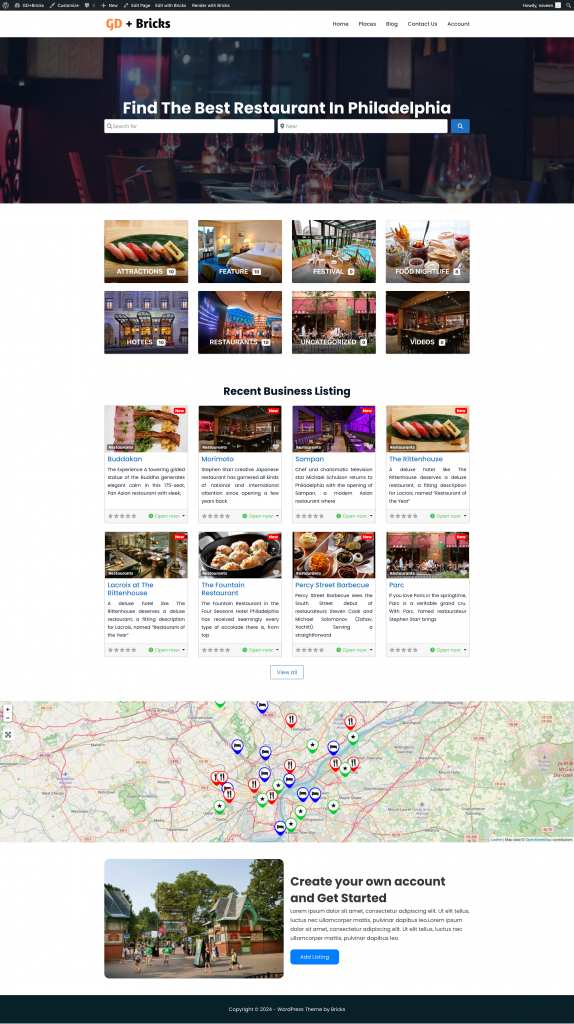
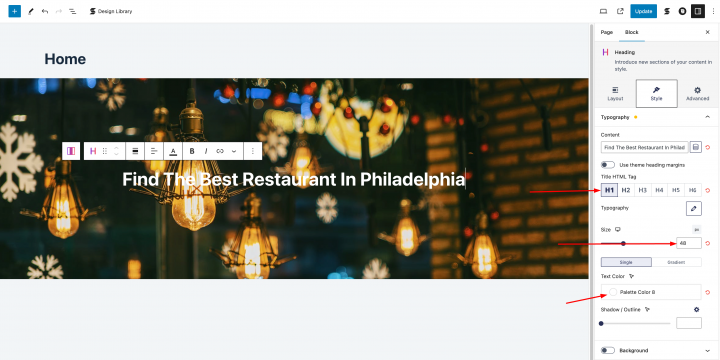
Now let’s add a heading tag over this container.
Text: Find The Best Restaurant In Philadelphia

Now in the style tab of the heading tag add the following settings.
Typography:
Font size: 48px
Text align: Center
Text transform: Captalize
Font: Poppins
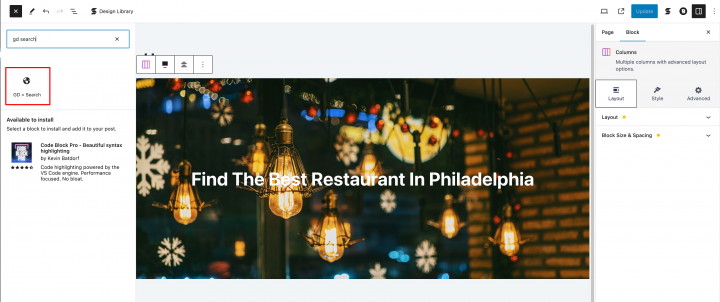
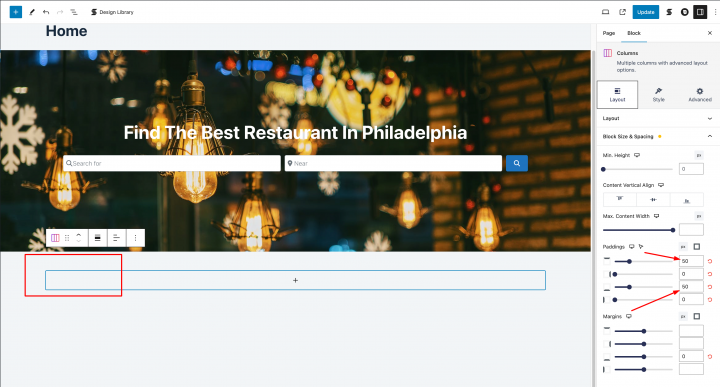
Now add a shortcode block below it and add the [gd_search mb=”3″] shortcode inside it.
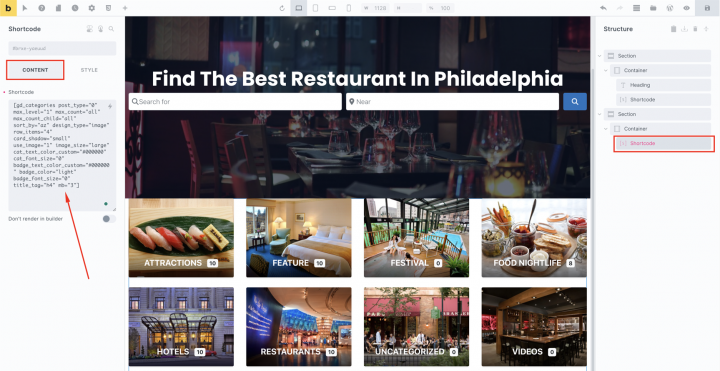
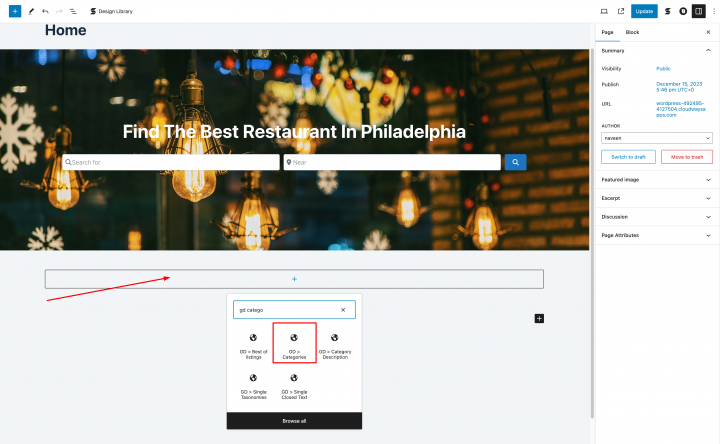
Now let’s add one more empty container and add a shortcode block in it with the following shortcode.
[gd_categories post_type="0" max_level="1" max_count="all" max_count_child="all" sort_by="az" design_type="image" row_items="4" card_shadow="small" use_image="1" image_size="large" cat_text_color_custom="#000000" cat_font_size="0" badge_text_color_custom="#000000" badge_color="light" badge_font_size="0" title_tag="h4" mb="3"]
In the style tab of the category container. Go to Layout > Margin
Padding Top: 50px
Padding Bottom: 50px
Padding Left: 50px
Padding Right: 50px
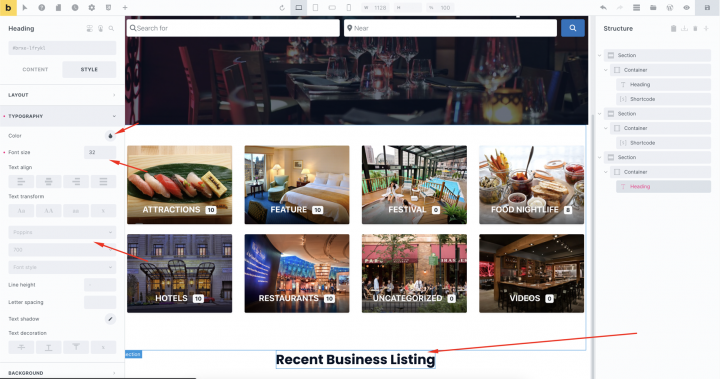
Now we will add a section to display Recent business.
let’s add one more empty section with a Header tag and
Text: Recent Business Listing

with the following typographical like
Font Size: 32px
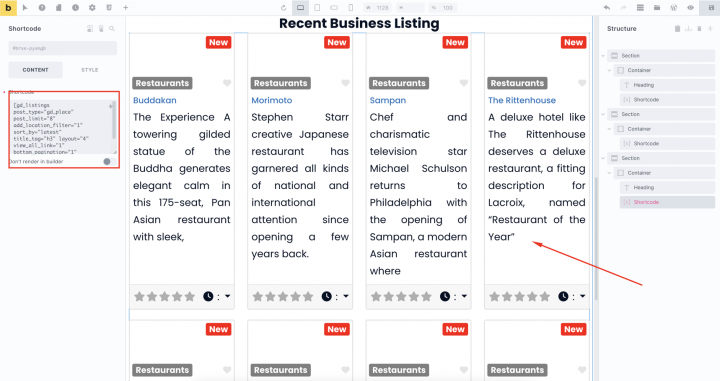
Now below it let’s add the following shortcode
[gd_listings post_type="gd_place" post_limit="8" add_location_filter="1" sort_by="latest" title_tag="h3" layout="4" view_all_link="1" bottom_pagination="1" slide_interval="5" mb="3"]
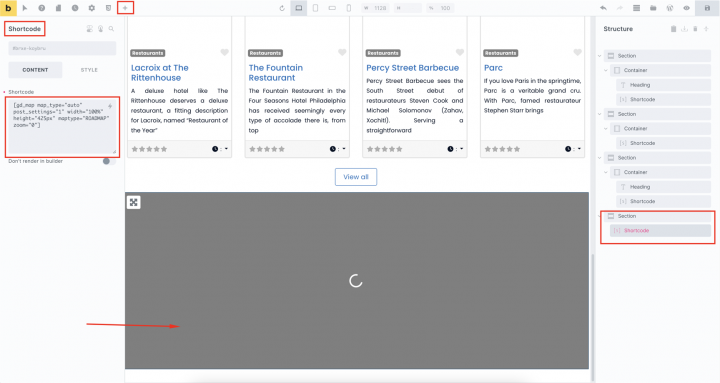
Now below it, we want to add a map that lists all the businesses.
For that, we will add an empty container and shortcode block inside it with the following shortcode.
with the following style for the container.
Padding top: 50px
Padding bottom: 50px
[gd_map map_type="auto" post_settings="1" width="100%" height="425px" maptype="ROADMAP" zoom="0"]
Now we want to add a CTA for that we will use a two-column layout.
With following settings
Direction: Horizontal(row)
Align self: Center
Align cross axis: Center
Column gap: 20
Row gap: 20
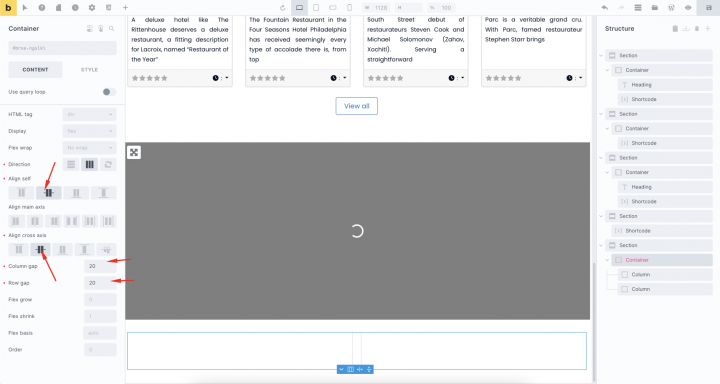
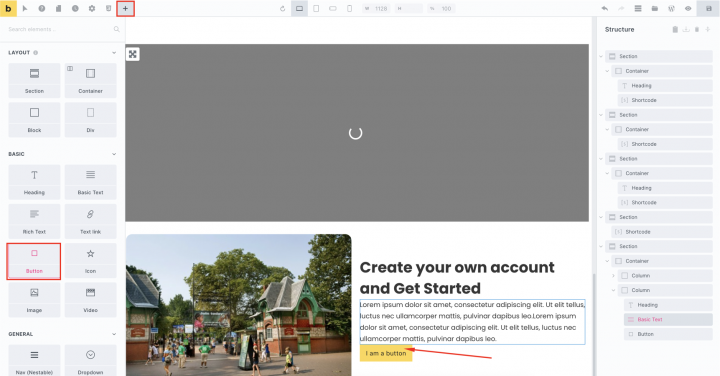
In the left column, we will drag an image and in the right column we will add some text and a button to add listing page.
The Footer
Now to design and create a footer go to wp-admin >> Bricks >> Templates >> Add New
and select the template tag as Footer and edit the template with Bricks.
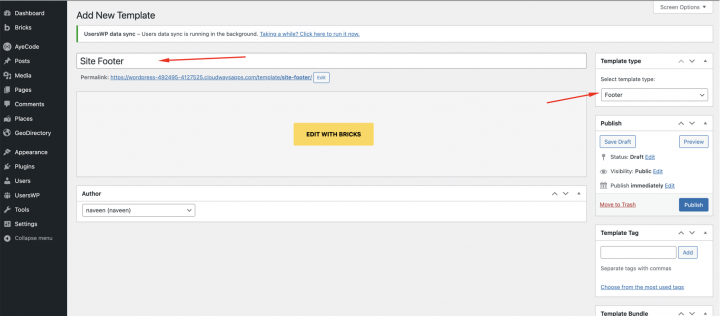
Now let’s add an empty container with the Background color: #072027
Add the basic text block with some text and style Text Align: Center
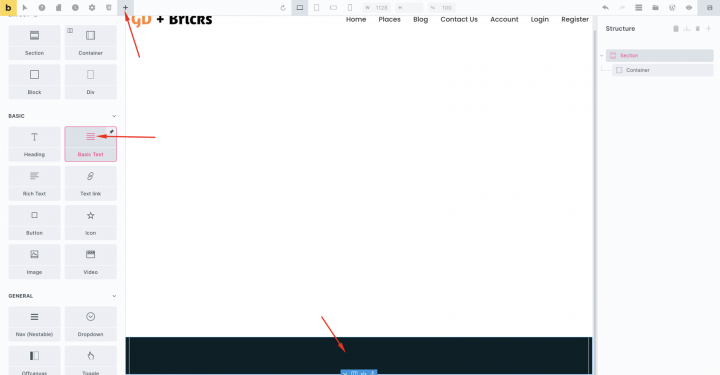
After this our homepage is ready.
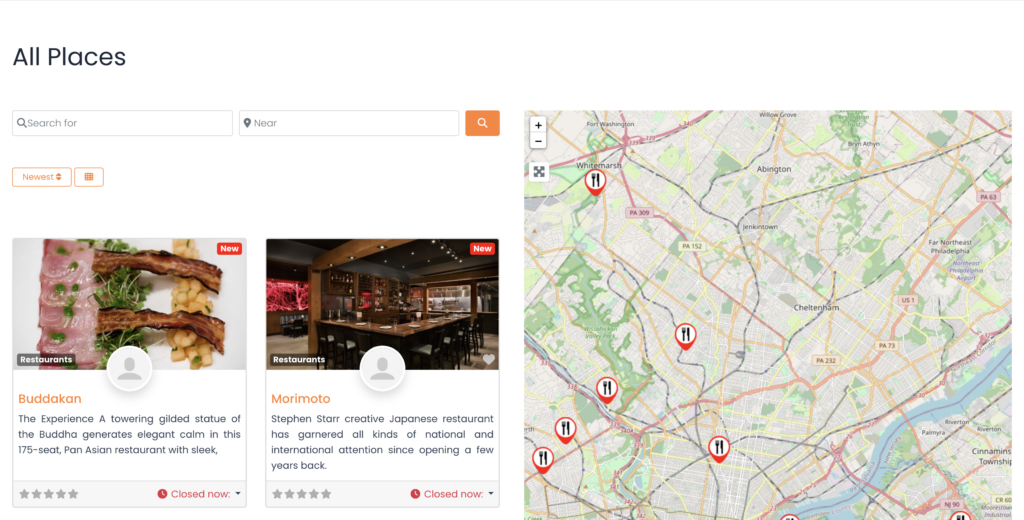
2. Bricks Directory Website Listings and Search page design
You have to make two important pages for a directory: one for listings (including an archive, categories, and tags) and another for search results.
GeoDirectory automatically sets them up with a basic design. This guide will help you tweak the look of these pages a little.
Since the listing and search pages are very similar, we’ll design them once and then use the same layout for both.
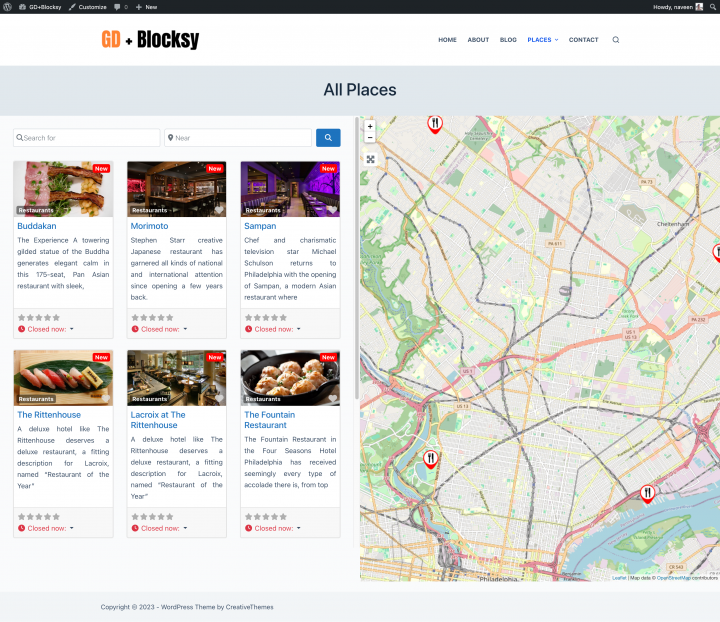
Our choice for the Listing page design is to have the listings on the left and a sticky map on the right, showing where each listing is located.
This is very easy.
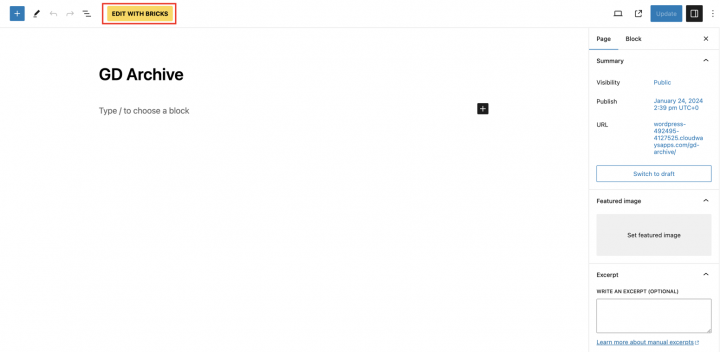
Go to Geodirectory > Settings > General > Pages > Click on edit GD Archive page template

Remove all the content from this GD Archive page template and edit it with Bricks Builder.
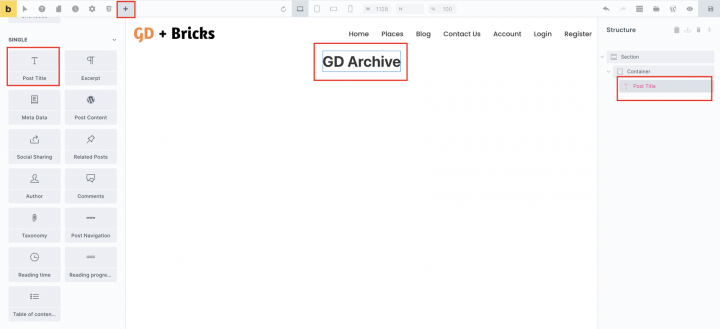
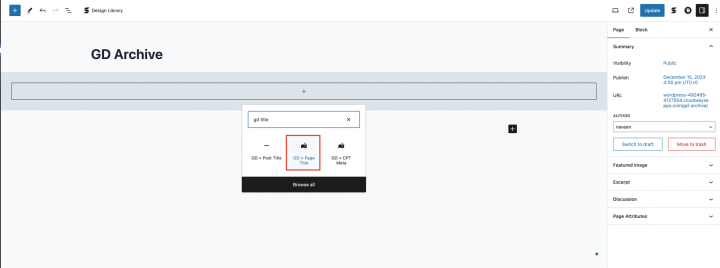
Now we will add an empty section and inside it drag the Post Title block.
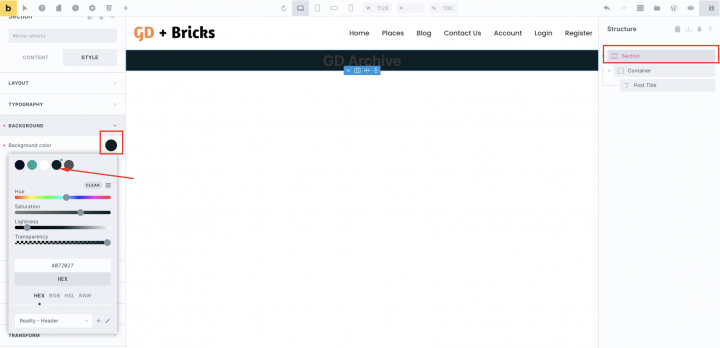
From the section style setting set
Background color: #072027
Padding: 30px 10px 30px 10px
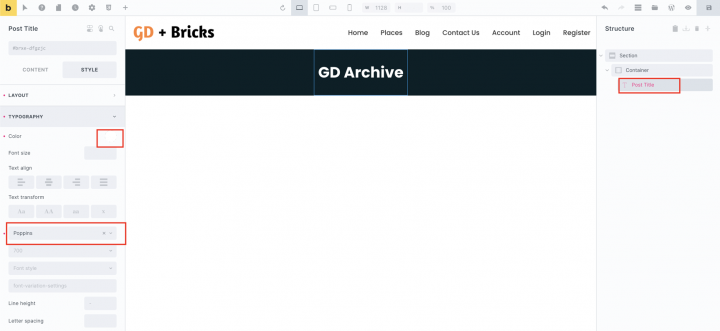
For the post-title block set the Typography setting to
Font: Poppins
Color: #fffff
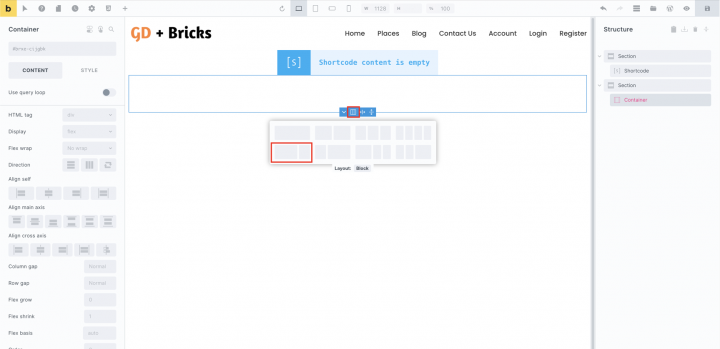
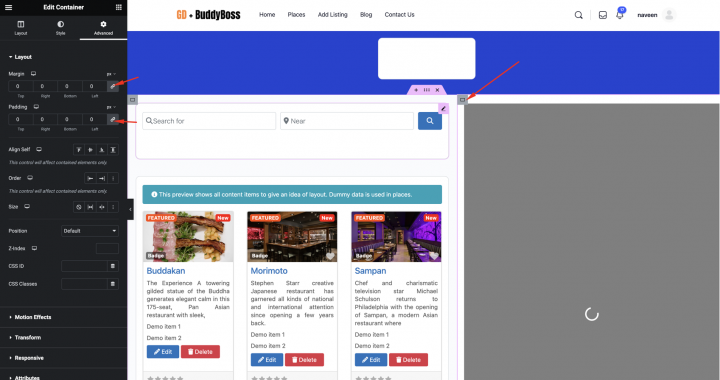
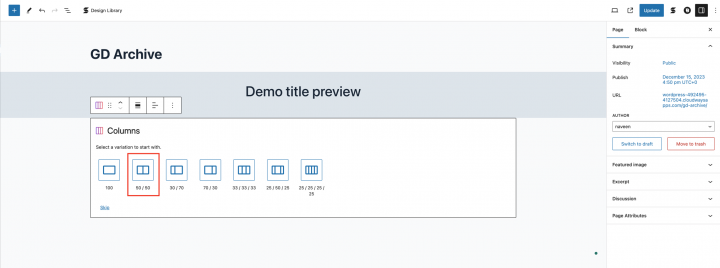
Now let’s add an empty section and two column container ( 50::50 ) in it.
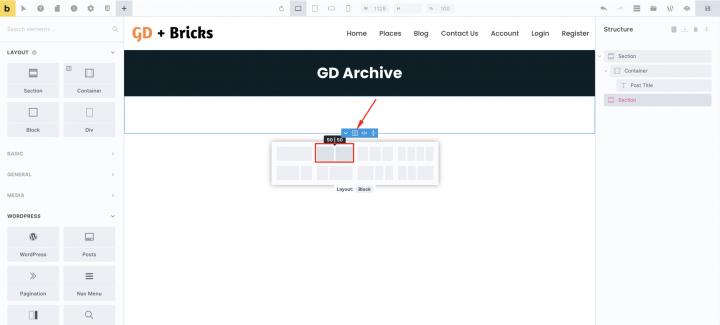
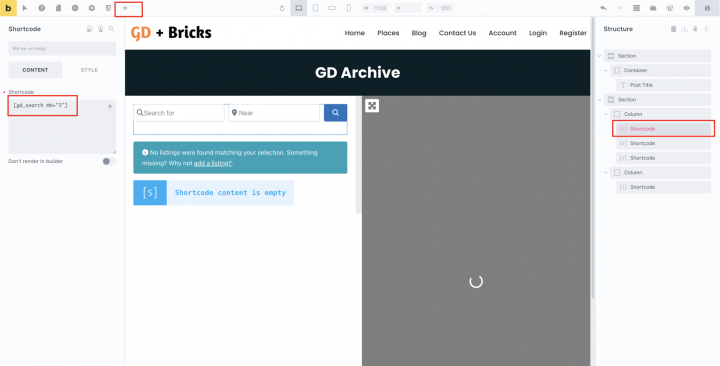
Next, on the left container, we will add shortcode blocks with the GD Archive page-related shortcodes like GD > Loop Action, GD > Loop, GD > Loop Pagination, and GD > Search on top so the user can search from the Archive page.
[gd_search bg=''  mt=''  mr=''  mb='3'  ml=''  pt=''  pr=''  pb=''  pl=''  border=''  rounded=''  rounded_size=''  shadow='' ]
[gd_loop_actions bg=''  mt=''  mr=''  mb='3'  ml=''  pt=''  pr=''  pb=''  pl=''  border=''  rounded=''  rounded_size=''  shadow='' ]
[gd_loop layout='2'  row_gap=''  column_gap=''  card_border=''  card_shadow=''  bg=''  mt=''  mr=''  mb=''  ml=''  pt=''  pr=''  pb=''  pl=''  border=''  rounded=''  rounded_size=''  shadow='' ]
[gd_loop_paging show_advanced=''  bg=''  mt=''  mr=''  mb='3'  ml=''  pt=''  pr=''  pb=''  pl=''  border=''  rounded=''  rounded_size=''  shadow='' ]
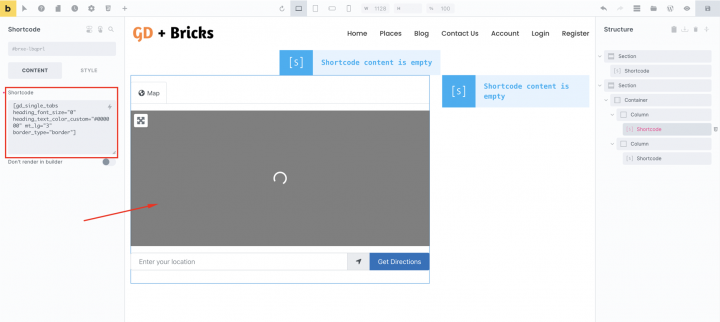
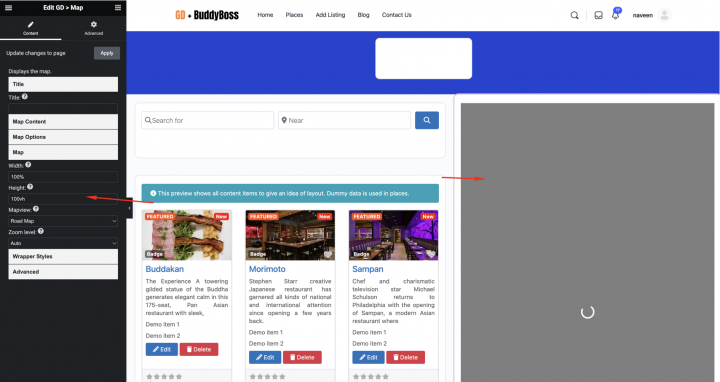
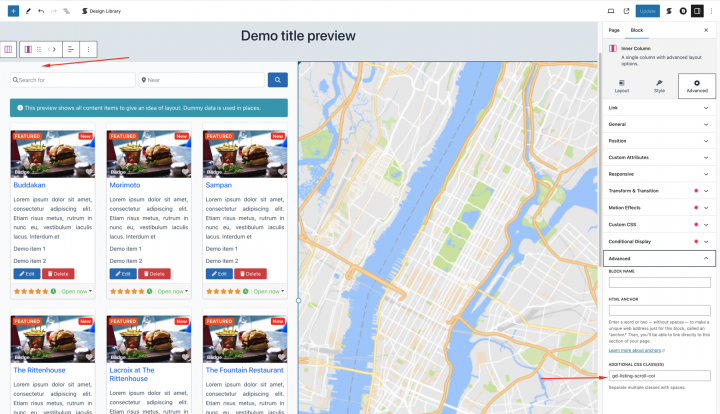
We will add a Shortcode block with the GD > Map shortcode on the right column with the following setting.
[gd_map map_type="auto" post_settings="1" width="100%" height="100vh" maptype="ROADMAP" zoom="0"]
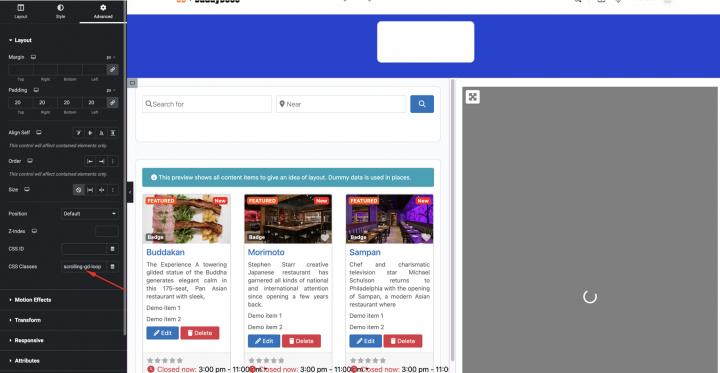
We will also add a class scrolling-gd-loop to the left column for scrolling touch. You can check the option marked in the below screenshot.
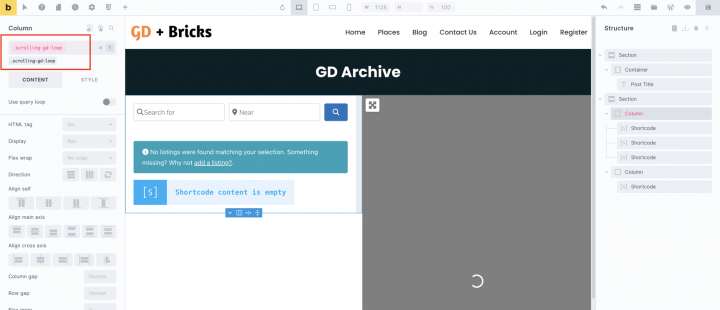
Let’s add the following style to the theme customizer.
.scrolling-gd-loop{
    overflow-y: scroll !important;
    max-height: 1000px;
}
Now after this, our Archive page is ready.
To create the search page layout.
We will create the GD Search page template from Bricks >> Templates >> Add New. Make sure to select Select template type: GD Search Results
Copy all the content of the GD Archive Bricks template and paste it into the GD Search page Bricks template.
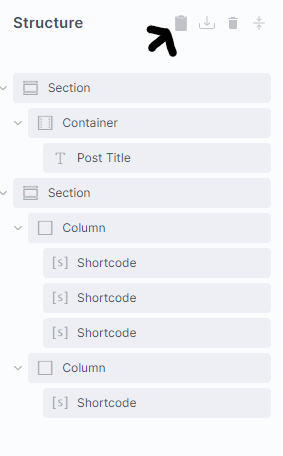
To do so, on the GD Archive Page, click the Copy (all) icon on the Bricks Builder right column (Structure)
Navigate to the Search Page, You can find the Search page from Geodirectory > Settings > General > Pages.
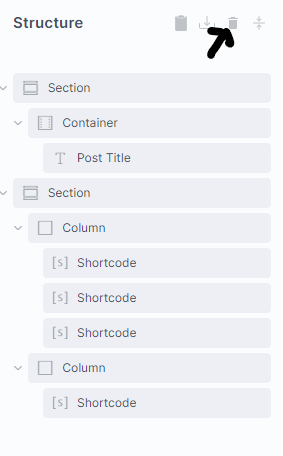
Edit it with Bricks. Click the Remove (all) icon on the Bricks Builder right column:
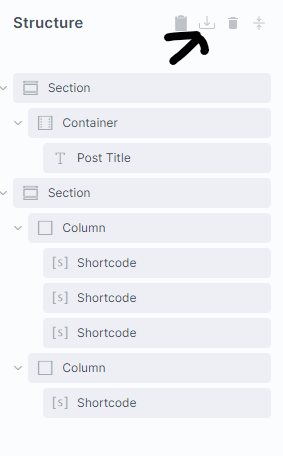
Finally, click the Paste (all) icon on the Bricks Builder right column:
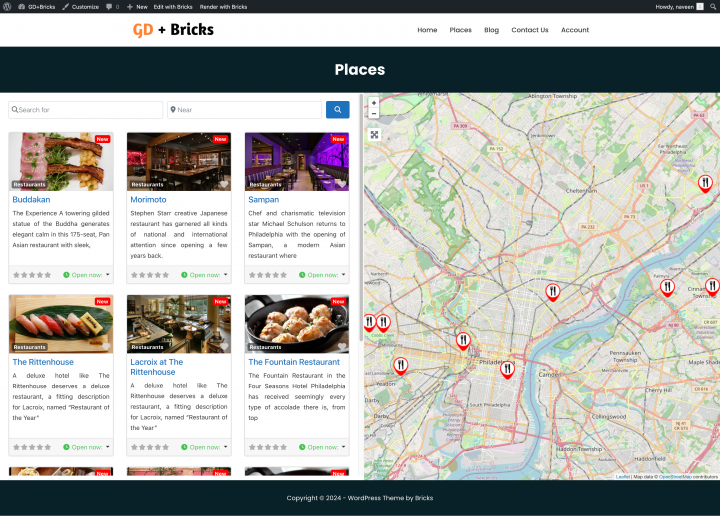
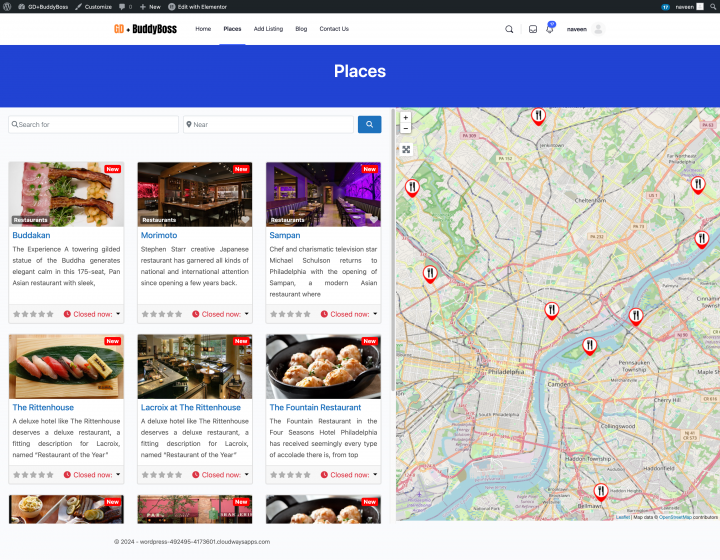
This will make the search page and the Archive page identical, full width, with the results on the left column and the fixed map on the right column.
For the search page, we also need to instruct Bricks to show this template on the individual page.
To do this we need to click on the Gear Icon > Template Settings > Conditions > Individual > Search Page (Title of your search Page).

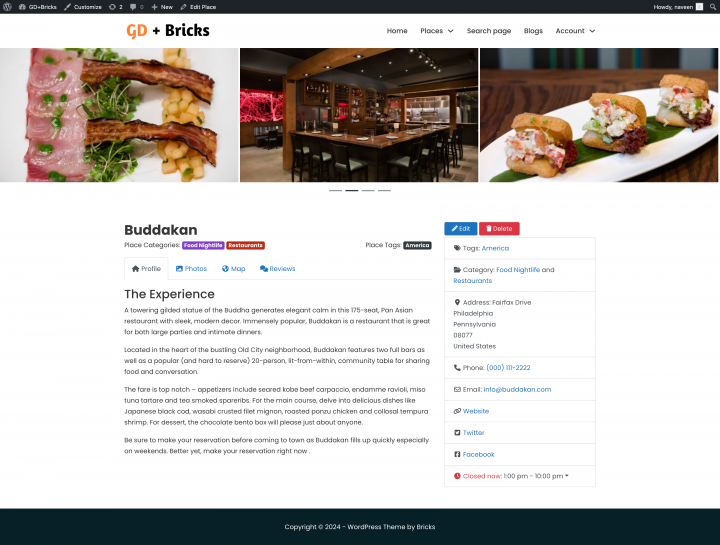
3. Bricks Directory Website single Listing page design
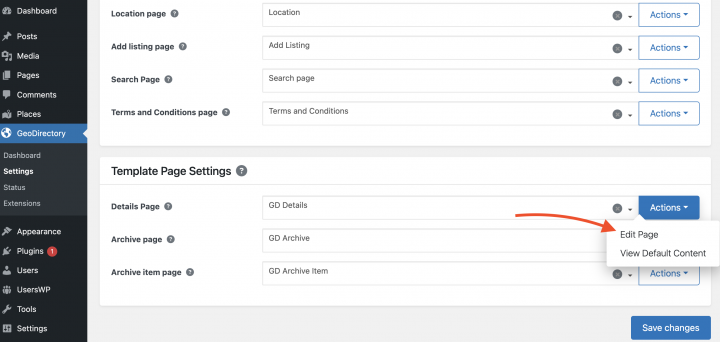
It’s time to create the detail page template. We will go and edit the GD Detail page template in Bricks.
You can go to Geodirectory > Settings > General > Pages > Click on edit GD Detail page template.
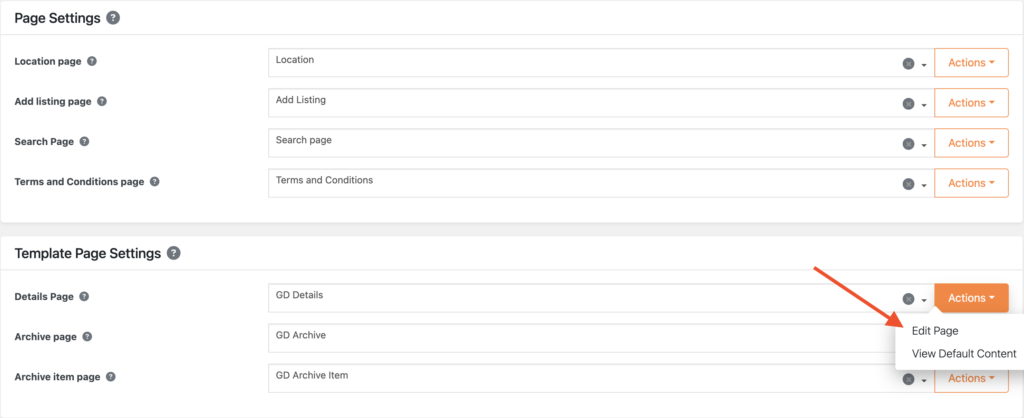
In this template, you will already find default content generated by Geodirectory.
we will remove all these default content and edit it using Bricks.

Let’s add an empty section and add a shortcode block inside it.

Let’s use the following shortcode to show the image slider.
[gd_post_images ajax_load="1" limit="10" limit_show="3" type="slider" slideshow="1" controlnav="1" animation="slide" image_size="large"]

Now with in an empty section let’s add a two-column container.
In the left container, we will add the following shortcodes.
Which includes GD > Post Title, GD > Single Taxonomies, and GD > Single Tabs.
[gd_page_title tag='h1'  no_wrap='false'  title_container='1'  strip_html=']
[gd_single_taxonomies taxonomy=''  prefix=''  link_style=''  link_color=''  link_color_custom=''  link_icon='false']
[gd_single_tabs heading_font_size="0" heading_text_color_custom="#000000" mt_lg="3" border_type="border"]
In the right column, we will add the
GD > Author Action, and GD > Output Location block.
[gd_author_actions hide_edit='false'  hide_delete='false'  author_page_only='false']
[gd_output_location location="detail" list_style="wrap"]
After doing it, our Listing Detail page is complete.
Adding Premium Features to your Bricks Directory Website
If you wish, now you can add premium features to your directory, such as:
- Paid Listings: with the GeoDirectory Listing Price Manager add-on, You can decide how much it costs to add a listing. For different price levels, you can choose what features are included or not. For example, you might allow more pictures for paid listings but limit them for free ones. You can also decide if certain custom fields are available or not, and if descriptions can be longer or shorter.
- Claim Listings: This feature is really important for a directory. Here’s how it works: the admin sets up the database and then invites business owners to manage their free listings. When a business owner wants to take control of a listing, they might need to upgrade to a paid listing first.
- Advertising: selling ads is another form of monetizing an online directory. If your website gets a lot of visitors, you can use ad networks. But if it doesn’t, you can sell ads directly. That means businesses can pay to put banners in certain parts of your site, or their listings can show up as ads, like at the top of search results.
These are just three examples. However, a directory website offers many ways to make money online.
You can create a global marketplace of handcrafted items, sell event tickets, or sell discount coupons.
For those embarking on their first project, here’s your guide: Building your own directory website.
This generic tutorial can be adapted to any theme or page builder.
The possibilities are limitless.
You know that running an online directory business can be incredibly rewarding — but it comes with its fair share of challenges.
One of the biggest hurdles you’ll face is driving traffic to your directory.
Wondering ‘why traffic is essential for your site’? Well, it’s a simple equation: no traffic, no monetization. But don’t stress; we’re here to guide you.
In this article, we will explore:
- Effective strategies to boost your directory website’s visitor count.
- Practical tips to attract users and potential customers.
- Insight into driving both organic and paid traffic to your platform.
- Actionable advice for optimizing your website for search engines.
P.S., while you’re putting in efforts to drive more traffic to your directory, it’s also essential to retain that traffic.
That’s where GeoDirectory comes in handy.
This WordPress plugin helps you create a functional yet user-friendly directory that keeps website visitors coming back for more.

Why Driving Traffic to a Directory is Essential?
Driving traffic to a directory website is essential for several reasons.
Here are a few major ones:
- Boosts Visibility: More traffic enhances a directory’s visibility, which is crucial for businesses seeking exposure.
- Increases Revenue Potential: Higher visitor numbers open up lucrative monetization opportunities for advertising and premium listings.
- User Trust and Reliability: High traffic volumes establish a directory as a trusted resource, attracting more users and listings.
- Facilitates Data Collection: With more visitors, a directory can gather valuable user data for service improvement and targeted marketing.
- Network Growth: As traffic grows, so does the network of businesses and users. This, in turn, makes your directory more valuable and diverse.
12 Proven Ways to Drive Traffic to a Directory
Generating traffic can be challenging, but with the right strategies, it’s achievable.
Here’s how you can effectively attract visitors:
- Search Engine Optimization
- Leverage Content Marketing
- Utilize Different Social Media Channels
- Stay Active on Forums or Communities
- Make Use of Video Marketing
- Strategic Email Outreach
- Try Pay-Per-Click (PPC) Advertising
- Optimize Directory for User-Friendly Navigation
- Submit Your Directory to Other Directories
- Build High-Quality Backlinks
- Expand Influence through Guest Blogging
- Engage Through Comments on Relevant Sites
Let’s dive deeper into each one of these strategies.
1. Search Engine Optimization
Optimizing a site for search engines is crucial to increase online visibility. For a directory website, this involves:
When it comes to keyword research:
- Understand Your Audience: Begin by understanding the needs, interests, and search behaviors of your target audience. This will guide you in identifying the keywords they are likely to use. For instance, if your directory targets young entrepreneurs, keywords might include “startup funding opportunities” or “affordable office spaces.”
- For a travel directory: “affordable family resorts in Florida.”
- For a food blog directory: “vegan dessert recipes.”
- For an educational directory: “best online MBA programs in Europe.”
- Use Keyword Research Tools Wisely: Tools like SEMrush, Ahrefs, and Ubersuggest provide insights into search volumes, keyword difficulty (prioritize low-KD terms), and related terms. Use these tools to find balance between high-traffic keywords and those with lower competition.
- Look at Competitors: Analyze competitors’ websites and directories to understand the keywords they are targeting. Tools like Moz’s Keyword Explorer can show you the keywords your competitors rank for.
- Leverage Long-Tail Keywords: Long-tail keywords, which are more specific and often longer phrases, can be less competitive and more targeted towards your niche. For example, instead of using “photography services,” use “wedding photography services in Miami.” Some more:
- For a real estate directory: “downtown studio apartments for rent in Austin.”
- For a fitness directory: “women’s beginner yoga classes in Seattle.”
- For a tech job directory: “entry-level software developer jobs in Silicon Valley.”
- Keyword Hacks and Strategies:
- Seasonal and Trend-Based Keywords: Incorporate seasonal or current trend-based keywords, like “summer travel destinations” or “2023 digital marketing strategies.”
- Local SEO: If your directory is location-based, include local keywords. For instance, “vintage clothing stores in Portland” can be a valuable keyword for a local fashion directory.
- The ‘Question’ Hack: Use tools like AnswerThePublic to find common questions people ask in your niche and use these as long-tail keywords. Questions like “How to find a reliable plumber in NYC?” can be golden for a services directory.
- Remember User Intent: Always align keywords with the user’s intent – whether they are looking to buy, learn, or find something. This ensures that your content not only attracts visitors but also meets their needs.
The most successful directory websites are willing to take the time to consult with search marketing professionals who can help them build a robust, well-rounded content strategy focused on their customers.
Technical SEO:
- Optimize Site Speed:
- Compress images and graphics to reduce load time without compromising quality.
- Minimize CSS and JavaScript, and optimize server response time for quicker site performance.
- Implement lazy loading, so elements load only as needed, reducing initial page load time.
- Specific Example: A photography portfolio directory can use image compression tools like TinyPNG to ensure fast loading of high-quality image galleries.
- Ensure Secure Connections:
- Implement HTTPS to provide a secure connection, crucial for protecting user data.
- Use SSL certificates to encrypt sensitive information, particularly for sites handling personal or financial data.
- Regularly update security protocols to safeguard against new vulnerabilities.
- Specific Example: An online marketplace directory can enhance user trust and security by using HTTPS, ensuring all customer transactions are securely encrypted.
- Create an XML Sitemap:
- Develop an XML sitemap to help search engines better crawl and index your website.
- Ensure the sitemap is updated regularly, especially when new pages are added.
- Submit your sitemap to search engines like Google via their respective Webmaster Tools.
- Specific Example: For a large e-commerce directory, an XML sitemap helps search engines navigate through and index thousands of product pages efficiently.
- Clean Website Architecture:
- Design a clear, logical site structure that makes navigation intuitive for users and search engines.
- Use breadcrumb navigation and a well-structured menu to enhance user experience and SEO.
- Keep URLs clean and descriptive, reflecting the site hierarchy.
- Specific Example: A job portal directory can benefit from a simplified navigation structure, allowing users to easily filter and find job listings in various industries and regions.
On-Page Optimization & Content Marketing:
- Strategic Keyword Integration & Engaging Content Creation:
- For a pet services directory: Use titles like “5 Best Dog Walking Services in Chicago” and include informative content about dog walking benefits.
- For a healthcare directory: Focus on keywords like “affordable dental clinics in Manhattan” and complement with articles like “Tips for Maintaining Dental Health.”
- For a local events directory: Integrate phrases such as “upcoming cultural events in San Francisco” and feature interviews with event organizers or attendees.
- Value-Adding Guides and Articles:
- For a car dealership directory: Craft articles like “The Ultimate Guide to Electric Cars in New Jersey,” focusing on eco-friendly vehicle options.
- For a wedding services directory: Produce content like “Top Wedding Planning Tips in Los Angeles” alongside listings of local wedding planners.
- For a freelancer directory: Offer resources such as “How to Choose a Freelancer for Your Business Project” to aid users in making informed decisions.
- Diverse and Regular Content Updates:
- For a gardening directory: Update with seasonal gardening tips, how-to guides on urban gardening, and video tutorials on plant care.
- For a sports equipment directory: Post regular reviews of the latest sports gear, athlete interviews, and training tips.
- For an educational resources directory: Feature a mix of webinars, expert talks, study tips blogs, and updates on educational trends.
- Responsive and Interactive Content for Mobile Users:
- For a restaurant review directory: Create mobile-friendly formats for displaying menus and reviews, and encourage user-generated content.
- For an online tutoring directory: Develop interactive and easily navigable profiles of tutors for mobile access.
- For an online retail directory: Ensure product galleries and shopping features are touch-optimized for mobile shoppers.
Pro Tip: Use tools like Google Analytics to track your directory SEO performance and refine your strategy accordingly.
2. Leverage Content Marketing
Content marketing can significantly boost traffic by providing value to your audience.
To do so effectively, follow these tips:
- Blog Posts: Write informative articles on topics relevant to your directory’s niche, like best local dining experiences or tips for choosing restaurants. Make sure to provide a unique take. The more unique, the higher the chance of ranking in Google Search Results Pages (SERPs).
- Infographics: Use infographics to present industry data or guides like trends in local businesses in a visually appealing format, making complex information easily digestible.
- E-books & Guides: Offer free, comprehensive guides or e-books as resources, providing substantial value to visitors and potential listers.
- Case Studies: Showcase success stories of businesses in your directory, highlighting their achievements to illustrate the benefits of being listed.
Pro Tip: Regularly update your content to keep it fresh and relevant, as search engines favor regularly updated directory websites.
3. Utilize Different Social Media Channels
Social media channels are powerful tools to engage with your audience and drive more traffic.
But the strategy itself, like the channel you choose, or what you post, or how you engage with users, will depend on your directory niche.
Here’s how to utilize these platforms for effective results:
Platform Selection:
- LinkedIn: Ideal for B2B directories, professional services, and career-oriented platforms.
- Specific Example: A job search directory could use LinkedIn to share industry insights, job hunting tips, and featured job listings.
- Instagram: Perfect for visually-driven niches like travel, fashion, food, and art.
- Specific Example: A travel directory could showcase beautiful destinations, travel tips, and user-generated content on Instagram.
- Facebook: Great for community-based directories, local services, and event listings.
- Specific Example: A local events directory can use Facebook to promote upcoming events in the community and engage with local audiences.
Consistent Posting:
- Regular Updates: Keeping your audience informed and engaged with frequent posts.
- Specific Example: A restaurant review directory could post daily about featured restaurants, special deals, or food trends.
- Content Calendar: Planning content in advance to maintain a consistent posting schedule.
- Specific Example: An online education directory might plan weekly posts about new courses, student success stories, and educational tips.
Engage with Followers:
- Active Interaction: Responding to comments, messages, and reviews to build a community.
- Specific Example: A healthcare services directory can engage by answering queries about services or health tips, and acknowledging patient feedback.
- User-Generated Content: Encouraging followers to share their experiences or contributions.
- Specific Example: A fitness directory could encourage users to post their workout achievements or health transformations.
Analytics & Adjustment:
- Performance Tracking: Using tools like Google Analytics or platform-specific insights to track engagement.
- Specific Example: An e-commerce directory can track which product posts receive the most engagement and adjust their content to feature more similar products.
- Strategy Refinement: Adjusting posting strategy based on analytics results.
- Specific Example: If a real estate directory notices higher engagement on virtual tour videos, they might focus more on creating and sharing similar content.
By tailoring their social media strategy to their specific niche and audience, directories can enhance their online presence, engage more effectively with their users, and adjust their strategies for better results over time.
Pro Tip: Utilize social media platforms management tools like Hootsuite or Buffer to schedule posts and track engagement metrics.
4. Stay Active on Forums or Communities
Stay Active on Forums or Communities
Participating in online forums and communities can be a highly effective way to drive more traffic to your directory website. For this, you may consider these approaches:
Identify Relevant Forums:
- Subreddits: Look for niche-specific subreddits where your target audience is likely to engage.
- Example: For a tech gadget directory, subreddits like r/gadgets or r/technology would be ideal.
- Industry-Related Forums: Join forums that cater to specific industries or interests.
- Example: For a business directory, forums like Small Business Forum or Warrior Forum can be valuable.
- Online Groups: Platforms like LinkedIn, Facebook, or Quora host a variety of groups for different interests.
- Example: For a travel directory, Facebook groups like “Travel Bloggers Around the World” or LinkedIn groups like “The Luxury Travel Community” are great options.
Provide Value:
- Answering Questions: Offer helpful and informed responses to questions in your niche.
- Ideas: If you’re in a health and wellness directory, answer questions on Quora about diet and exercise.

- Sharing Insights: Contribute your expertise or unique insights on trending topics.
- Ideas: Share insights on LinkedIn about emerging trends in digital marketing for a marketing services directory.
Build Relationships:
- Consistent Engagement: Regularly participate in discussions and offer assistance.
- Tip: For a local services directory, consistently help out in community forums or local Facebook groups with recommendations or advice.
- Show Authentic Interest: Engage in conversations beyond your direct niche to show genuine interest.
- Tip: For a real estate directory, engage in broader discussions about home improvement or property investment.
Share Updates:
- Relevant Directory Updates: Share updates or features of your directory that add value to the discussion.
- Example: For a job directory, share a new feature that helps match candidates with potential employers in a subreddit like r/jobs.
- Community-Focused Content: Share content that is directly relevant to the community’s interests.
- Example: For an educational directory, share a blog post about online learning tips in a relevant LinkedIn group.
By identifying the right forums, providing value through engagement, building relationships, and sharing pertinent updates, you can effectively elevate your directory’s presence and reputation in your specific niche.
Pro Tip: Be mindful of forum or community rules and regulations. Each platform may have its guidelines, and violating them can harm your reputation and lead to account suspension.
5. Make Use of Video Marketing
Video advertisement is a dynamic way to engage your audience and attract more traffic to your directory. For favorable results, you can try out the following steps:
Create Engaging Content:
- Informative Content: Produce videos that provide valuable information to your audience.
- Example for a Health & Wellness Directory: Create a series of “Myth vs. Fact” videos about nutrition and exercise.
- Entertaining Content: Develop videos that are fun and capture the audience’s attention.
- Example for a Travel Directory: Share engaging travel vlogs featuring hidden gems in popular destinations.
- Problem-Solving Content: Address common issues or questions that your audience might have.
- Example for a Home Services Directory: Offer DIY home repair tutorials, like fixing a leaky faucet.
Optimize for Search:
- Keyword-Targeted Titles and Descriptions: Use researched keywords in your video titles and descriptions.
- Example for an Educational Directory: Use titles like “10 Study Hacks for Effective Learning” with keywords like “study tips,” “effective learning,” etc.
- Tagging: Utilize relevant tags to improve the discoverability of your videos.
- Example for a Food & Recipe Directory: Tag videos with specific ingredients, cuisine types, and cooking methods.
Incorporate Persuasive Calls to Action:
- Clear CTAs in Videos: Direct viewers to visit your directory or perform specific actions.
- Example for a Job Search Directory: End videos with a CTA like “Find your dream job today – visit our website for more listings.”
- CTAs to Engage or Subscribe: Encourage viewers to interact with your content or subscribe for more.
- Example for a Fashion Directory: Use CTAs like “Subscribe for the latest fashion trends and exclusive deals.”
Interactive Elements:
- Clickable Links: Add links in your video or description for easy access to your directory.
- Example for an Event Planning Directory: Include links to featured events or ticketing pages.
- Polls or Q&A Sessions: Engage viewers with interactive polls or live Q&A sessions.
- Example for a Tech Gadget Directory: Host a live Q&A about the latest tech releases, allowing viewers to ask questions.
- Viewer Participation: Encourage viewers to comment or share their experiences related to your video content.
- Example for a Pet Care Directory: Invite viewers to share photos or stories of their pets in the comments.
By creating engaging content tailored to your directory’s niche, optimizing it for search, incorporating effective CTAs, and utilizing interactive elements, you can significantly enhance viewer engagement and drive traffic to your directory.
Pro Tip: Implement closed captions or subtitles in your videos. This, in turn, makes your content accessible to a broader audience, including those with hearing disabilities.
6. Strategic Email Outreach
According to Statista, there are over 4 million email users across the globe. Hence, it’s a good practice to reach out to potential directory users or listers through a well-crafted email campaign. For effective implementation, follow these tips:
Targeted Email Lists:
- Segmentation Based on Interest or Profession:
- Example for a Real Estate Directory: Segment your email list by real estate agents, property buyers, and sellers.
- Focus on Engaged Users:
- Example for an Online Course Directory: Build lists of users who have interacted with specific course categories or educators.
- Use Sign-up Opportunities:
- Example for a Business Services Directory: Offer a newsletter sign-up on your website for business tips and industry news.
Utilize A/B Testing:
- Experiment with Subject Lines:
- Example for a Travel Directory: Test subject lines like “Top 10 Hidden Travel Gems” vs. “Discover Unknown Travel Destinations.”
- Vary Email Layouts:
- Example for a Health & Fitness Directory: Compare a text-heavy email layout versus one with more images and infographics.
- Content Type Variations:
- Example for an Events Directory: Test sending event round-ups vs. individual event highlights to see which garners more engagement.
Optimize for Deliverability:
- Avoid Spam Triggers:
- Example for a Food Recipe Directory: Use natural language and avoid excessive use of terms like ‘free’, ‘guarantee’, or ‘special offer’.
- Maintain a Clean Email List:
- Example for a Job Portal Directory: Regularly clean your list to remove inactive subscribers and bounced email addresses.
- Authenticate Your Emails:
- Example for a Professional Services Directory: Use email authentication methods like SPF and DKIM to improve deliverability.
Value Proposition:
Clearly communicating how to claim listings or use your directory provides value, whether it’s increased exposure, networking opportunities, or access to exclusive content.
- Communicate Benefits Clearly:
- Example for a Business Networking Directory: Highlight the benefits of networking opportunities and exposure to potential clients.
- Tailor Value Propositions:
- Example for a Local Services Directory: Emphasize how being listed increases local visibility and attracts nearby customers.
- Include Testimonials or Success Stories:
- Example for an Education Resources Directory: Share success stories of educators or learners who benefited from using the directory.
Pro Tip: Integrate email marketing tools like Mailchimp or Campaign Monitor for better management, automation, and analysis of your email campaigns.
7. Try Pay-Per-Click (PPC) Advertising
Implementing Pay-Per-Click (PPC) advertising is an efficient way to drive targeted traffic to your directory. Here’s how to make the most of PPC:
- Select the Right Platforms: Choose platforms like Google Ads or Bing Ads based on where your target audience spends most of their time.
- Create Compelling Ads: Design ads that clearly highlight the benefits of your directory. Include strong call-to-actions (CTAs) to encourage clicks.
- Landing Page Optimization: Ensure your landing page is relevant, engaging, and provides a seamless user experience. This increases the likelihood of conversions post-click.
- Budget Management: Set a budget that aligns with your goals and adjust based on performance. Pay close attention to your cost-per-click and return on investment.
Pro Tip: Use ad extensions like sitelinks, callouts, and structured snippets. This way, you could not only provide more context to your advertisements but also increase their visibility and appeal on Google search result pages.
8. Optimize Directory for User-Friendly Navigation
Enhance your directory’s appeal and functionality by focusing on comprehensive, easy-to-navigate listings that cater to your audience’s needs. A well-structured directory with clear categories and search capabilities ensures a seamless user experience, encouraging longer visits and repeat usage.
Key considerations include:
Customization:
- Niche-Specific Features:
- Example for a Restaurant Directory: Include features like menu previews, dietary restriction filters, and reservation options.
- Adapt to Audience Preferences:
- Example for a B2B Services Directory: Offer customization options for businesses to display certifications, portfolio pieces, or client testimonials.
- Localization:
- Example for a Local Events Directory: Implement features for users to discover events based on their current location or preferred neighborhoods.
Search Optimization:
- Efficient Search Capabilities:
- Example for a Real Estate Directory: Use advanced filters for property types, price ranges, and amenities.
- Location-Based Search Options:
- Example for a Job Portal: Enable users to search for jobs based on proximity to their location or desired city/region.
- User-Friendly Search Interface:
- Example for a Healthcare Provider Directory: Simple and clear search fields for finding specialists, hospitals, or clinics by name, specialty, or location.
Use a platform like GeoDirectory to implement efficient search capabilities with filters and location-based search options for user convenience.
User Experience:
- Intuitive Design:
- Example for an E-commerce Product Directory: A clean layout with easy navigation to different categories and product comparisons.
- Responsive Across Devices:
- Example for a Travel and Accommodation Directory: Ensure the site is equally functional and appealing on smartphones, tablets, and desktops.
- Fast Loading Times:
- Example for an Online Education Directory: Optimize for quick loading of course listings and multimedia content.
Engagement Features:
- Review and Rating Systems:
- Example for a Local Services Directory: Allow users to rate and review services like plumbers, electricians, or landscapers.
- User Comments and Discussions:
- Example for a Tech Gadget Directory: Enable comment sections for users to discuss their experiences and tips on using different gadgets.
- Interactive Elements:
- Example for a Fitness and Wellness Directory: Incorporate options for users to ask questions, bookmark their favorite gyms or trainers, and participate in health challenges.
Pro Tip: Consider using the Blockstrap WP theme with its Directory Child Theme for user-friendly navigation and enhanced directory functionality. With this intuitive theme, you can create a site that captivates and retains users effectively.

9. Submit Your Directory to Other Directories
You can also drive more traffic to your business directory by submitting it to other established directories. Here’s how to get started:
- Targeted Research: Conduct thorough research to identify other websites and influential directories in your specific sector or niche, ensuring they align with your directory’s focus.
- Audience Relevance: Verify that these directories are relevant and cater to your target audience, maximizing the chances of attracting potential customers.
- Adherence to Guidelines: Adhere strictly to the submission criteria of each directory, ensuring your submission meets all their requirements.
- Content Quality Assurance: Ensure your directory is populated with high-quality and valuable content, increasing the likelihood of being accepted by other directories.
Pro Tip: Leverage tools like Ahrefs or SimilarWeb to gauge the traffic and authority of the directories you’re considering.
10. Build High-Quality Backlinks
No doubt, building high-quality backlinks is vital for boosting your directory’s visibility and search engine ranking. Here’s how you can achieve this:
Content Collaboration: Collaborating with relevant websites and bloggers can significantly enhance your directory’s visibility and credibility. It’s about creating mutually beneficial partnerships that provide value to both parties and their audiences.
- Partner with Websites and Bloggers: For a Travel Directory, collaborate with travel bloggers for destination guides.
- Guest Posting: For a Health and Wellness Directory, write guest posts for health blogs.
- Co-create Content: For a Business Services Directory, develop industry reports with business news websites.
Leverage Industry Forums: Participating in industry forums is an excellent way to showcase your expertise and subtly direct traffic to your directory. The key is to contribute meaningfully and become a trusted member of these communities.
- Active Participation: For a Tech Gadget Directory, contribute to forums like TechCrunch.
- Insightful Answers with Subtle Links: For a Home Improvement Directory, offer advice in DIY forums.
- Establish Authority: For an Educational Resources Directory, answer questions in educational forums.
Host Webinars or Podcasts: Hosting webinars or podcasts is a dynamic way to engage with your audience and bring attention to your directory. These platforms allow you to dive deep into topics, showcasing your expertise and expanding your reach.
- Create Informative Webinars: For a Real Estate Directory, host webinars on real estate investment.
- Podcasts with Guest Speakers: For an Entrepreneurship Directory, start a podcast discussing startup challenges.
- Cross-Promotion: For a Fitness Directory, invite fitness experts to podcasts.
Replace Broken Links: Replacing broken links is a strategic approach to backlink building. It involves identifying opportunities where your directory can provide value in place of a dead link, benefiting both the website owner and your directory.
- Identify Broken Links on Relevant Websites: For an E-commerce Directory, find broken product links on shopping guides.
- Offer Your Directory as a Replacement: For an Environmental Services Directory, find broken links in environmental blogs.
- Build Relationships with Website Owners: For a Local Business Directory, reach out to local bloggers.
Pro Tip: Prioritize quality over quantity in backlinks — aim to acquire backlinks only from reputable websites with high domain authority. Spammy backlinks would only hurt your directory’s credibility.
Boost your Directory Traffic with powerful, easy-to-acquire backlinks! Subscribe to our newsletter for an exclusive reveal of top website sources. Don’t miss this traffic-boosting secret – join now for game-changing insights!
11. Expand Influence through Guest Blogging
Do you know that guest blogging can increase 20% traffic of a website?
Therefore, it’s wise to try out this approach for driving traffic to your directory. Here’s how you can do so:
- Quality Content Creation: Write informative and engaging guest posts that deliver real value to readers, showcasing your expertise in the niche.
- Bio & Backlinks: Include a compelling author bio with a backlink to your directory, which can drive traffic back to your site.
- Networking Efforts: Foster relationships with blog owners and their communities to broaden your reach and establish credibility.
- Consistency in Contributions: Regularly contribute guest posts to maintain visibility and keep your audience engaged and interested.
Pro Tip: Implement a content calendar for guest blogging to ensure a consistent and strategic presence across various platforms, maximizing your outreach and impact.
12. Engage Through Comments on Relevant Sites
Engaging with your community through comments on relevant websites, forums, and blogs can significantly bring traffic to your directory.
This approach requires active participation and genuine interaction. Here’s how to make the most of it:
- Identify Platforms: Seek out and participate in websites, forums, and blogs where your target audience frequently engages. This could include industry-specific forums, blogs related to your niche, and discussion boards.
- Add Value with Comments: Focus on contributing meaningful and insightful comments. Avoid overt promotion of your directory; instead, provide useful information or perspectives that naturally lead readers to see you as a knowledgeable source in the niche.
- Engage in Discussions: Actively respond to other comments to initiate and foster meaningful discussions. This not only increases your visibility but also helps build relationships within the community.
- Subtle Link Inclusion: Where it’s appropriate and allowed by the platform’s rules include a link to your directory (internal linking). This should be done subtly and contextually so it feels like a natural extension of your comment.
Pro Tip: Create a unique signature for your comments that includes a subtle call-to-action or a catchy phrase related to your directory.
Now that you’ve learned how to drive traffic to directory websites, you can significantly generate traffic to your directory website business and monetize it effectively.
Build Your Online Directory Effortlessly With GeoDirectory
To wrap it all up, driving traffic to a directory is an ongoing process that requires dedication and a deep understanding of your target audience. By following the above-mentioned strategies, you can steadily increase traffic and ensure the long-term success of your directory.
Key Takeaways:
- Utilize SEO best practices for higher visibility.
- Leverage social media to engage and attract potential customers.
- Offer valuable content that meets user needs.
- Network with industry influencers for wider reach.
- Continuously analyze and adapt your strategies.
Now that you’re equipped with these strategies, it’s time to make the most of your directory.
GeoDirectory can help you in this journey by offering the essential tools and features you need to elevate your site.
With GeoDirectory, you can build a directory that’s functional, credible, and user-friendly.
And of course — these features are all crucial when it comes to boosting traffic to your website.
Frequently Asked Questions – (FAQs)
How do I drive digital traffic to my website immediately?
If you’re looking to boost website traffic right away, consider paid advertising (Google Ads, social media ads), influencer partnerships, or email marketing. Additionally, make quick SEO improvements and leverage social media for immediate organic growth.
How do you drive targeted traffic?
For precisely targeted traffic to your directory site, begin with careful audience research and segmentation. Then, you can proceed to follow the below-given steps:
- Employ strategic keyword placement
- Promote your content on relevant platforms
- Collaborate with relevant directory websites
How do you create content that drives traffic?
To drive traffic, create content that resonates with your target audience, incorporates relevant keywords for SEO, and offers real value. Promote it across multiple platforms and use analytics to refine your approach, ensuring it stays engaging and relevant.
If you have any questions about driving traffic to your directory, feel free to ask in the comments below. We’re here to help clarify any doubts you might have.
Follow these steps to create a Directory Website using the BuddyBoss and Geodirectory plugin:
- Install the BuddyBoss theme and the BuddyBoss Platform.
- Set up GeoDirectory.
- Install the Elementor plugin.
- Design your Directory Website using the BuddyBoss theme and the Elementor.
By combining BuddyBoss with the GeoDirectory Plugin and the Elementor Plugin, you’ll have a versatile platform for crafting a polished online directory along with social networking features.
Utilizing this combination and following the mentioned steps in this article. One can easily create a user-friendly Directory site with Social Networking features.
Let’s explore the details of how this can be accomplished.
In this tutorial, we will:
Installing Theme and Plugins.
1. Install the BuddyBoss Theme and the BuddyBoss Platform
We need to install a Theme, and for this tutorial, you will install the BuddyBoss Theme.
Go to buddyboss.com, buy and download the BuddyBoss theme and BuddyBoss platform.
Go to Appearance >> Themes
Select Add New, Install, and Activate the BuddyBoss Theme.
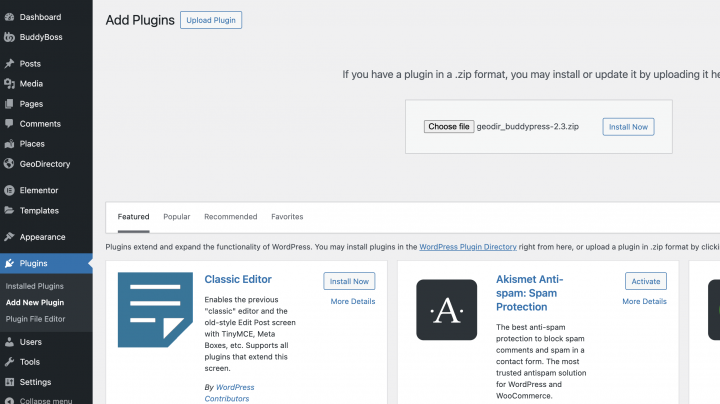
Go to Plugins >> Add New
Select Upload, Install, and Activate the BuddyBoss platform plugin.
Now let’s configure BuddyBoss.
Go to BuddyBoss >> Components
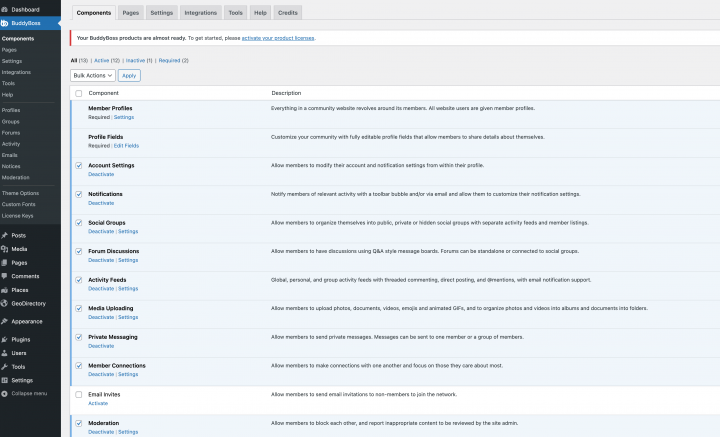
I am enabling all the components, you can decide based on your needs.
Now let’s set up a few required pages for BuddyBoss from the BuddyBoss >> Pages
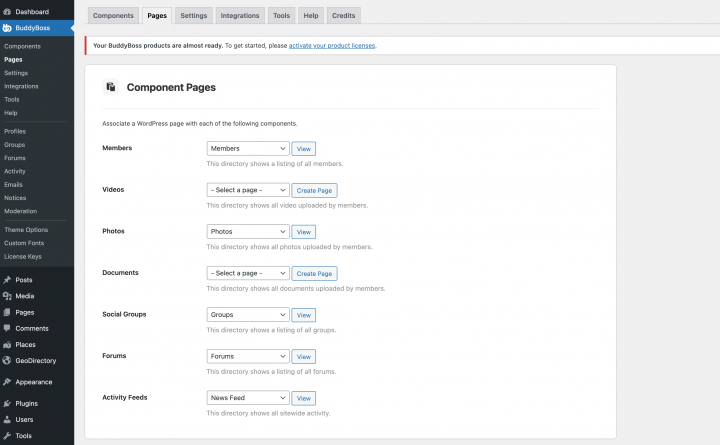
I will keep all settings to default but you can check them and make required changes if you want.
Now our site is ready with all Social networking features and BuddyBoss look and feel.
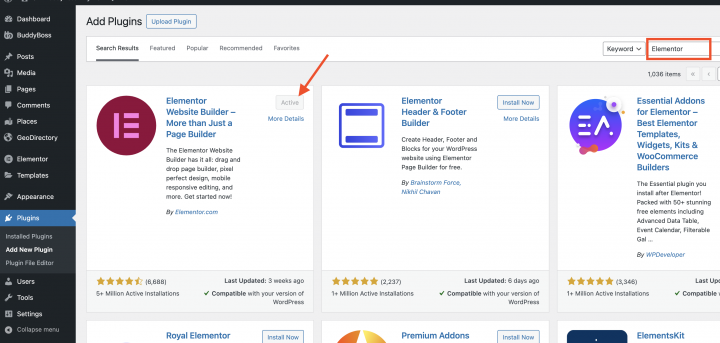
2. Install the Elementor plugin
To style the templates, we will install the Elementor plugin.
The Elementor plugin provides many customization features that are better than the default and will help you design the page templates.
There is an Elementor pro version that provides many features and Geodirectory is compatible with both of them.
We will use the Elementor free version for this Article.
Go to Plugins >> Add new.
Search for Elementor. Install it and Activate it.
3. Install GeoDirectory
Finally, you need to install GeoDirectory.
Go to Plugins >> Add new, search GeoDirectory. Please install and activate it, and we finished installing the plugins.
4. GeoDirectory Install Wizard
For GeoDirectory, you will need to complete the Setup Wizard to configure the Google Maps API key and import a few dummy listings.
Choosing the Map System (Google Maps or OpenStreetMap)
You can choose between two mapping systems on the wizard’s first step. Google Maps and Open Street Maps (which doesn’t require an API key).
In this tutorial, we select OpenStreetMaps.
In case you wish to select Google Maps, do the following extra steps.
Click on the Generate Key button and follow the steps of this doc to generate a valid API key.
The essential steps are:
- Enable the Keys.
- Create or select an existing project.
- Get the Key.
- Activate a billing account.
- Restrict the API key (so it can only be used from the URL of your website)
About point four: it is a requirement. However, you only get charged if you pass the threshold, which is $200/month.
This free credit is more than enough for 99% of directories.
Setting the default city
After that, you will set the default location. This is the city for which the directory is created.
We will set Philadelphia as the default city.
You can use whatever location you need.
If you need to add listings to more than one city, you will need the Location Manager add-on.
Adding extra features
In this step, we will install our UsersWP, a user registration plugin that lets users register and log into your website.
This is needed to allow users to add and edit their listings. It will also create user profiles where they can find their listings, reviews, and so on.
We will also install Ninja Forms so that all listings have a contact form that sends emails directly to the listing owners.
AyeCode Connect is not mandatory for this tutorial. It is mainly needed if you want to add GeoDirectory premium add-ons and install them directly from the WordPress Dashboard.
Adding Dummy Data
The last step to complete the installation wizard is adding some dummy listings. This will also add listing categories that you can edit later according to your needs.
You will not add sidebar widgets and menu items right now, as we will do that later.
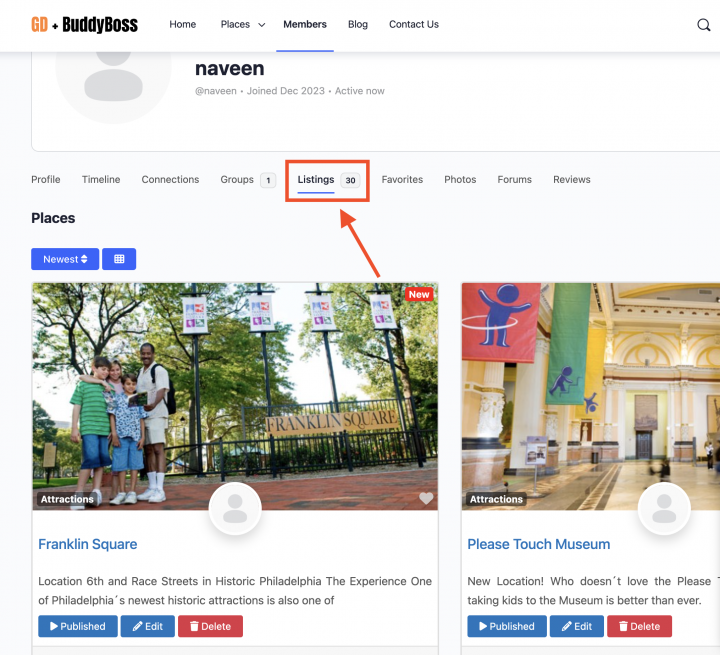
5. GeoDirectory BuddyBoss Integration
To connect BuddyBoss with Geodirectory. we need the GeoDirectory BuddyBoss Integration which works for both BuddyBoss and BuddyPress integration.
Download this addon from the Geodirectory dashboard, upload and install this plugin.
from the Geodiectory >> Settings >> BuddyPress tab enable all settings mentioned in the below screenshot.
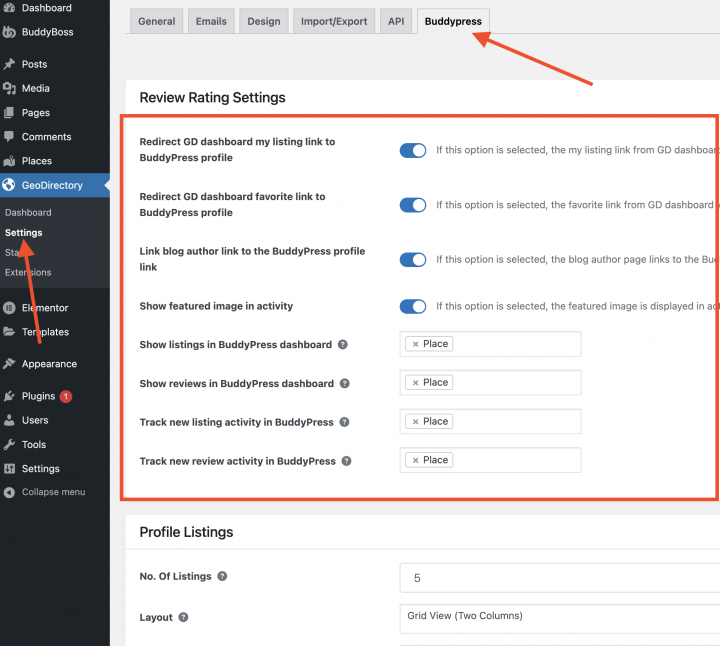
This plugin will allow users to maintain their listings from the BuddyBoss profile page.
Design the BuddyBoss Directory Website
Now that we installed the theme and the plugins and done the preliminary setup of GeoDirectory, we can start designing our Directory Website.
1. BuddyBoss Directory Home page design
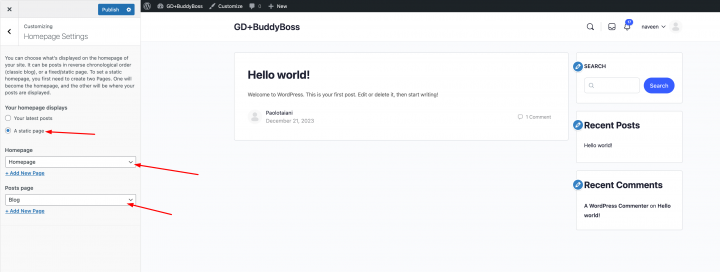
You can create a new page or use one WordPress creates by default, like the Sample Page.
Go to Pages, edit the Sample page, and rename it Home or create a new page for this.
Next, go to Appearance > Customize > Homepage Settings and select your Home.
The Logo
First thing first, we will need a logo for our website.
You don’t need to invest in a designer to sketch the 1st version of your logo.
One of the biggest mistakes you can make when starting a new directory is investing too much time and money before testing the product market fit.
You can design a logo in five minutes with an app like Canva, which is cheap and surprisingly good.
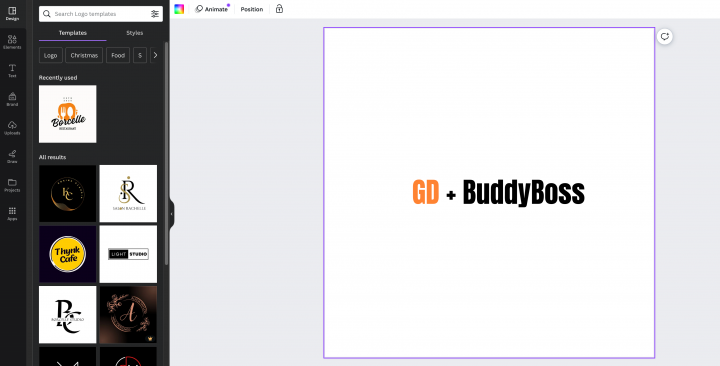
For an MVP (minimum viable product), a logo designed with Canva will be more than enough.
There are several logo templates to choose from, and it doesn’t matter if your initial logo is not as perfect and original as you believe it should be.
If your project gets traction, you can always invest in improving it or radically changing it later.
An average logo is never the leading cause of a failed project.
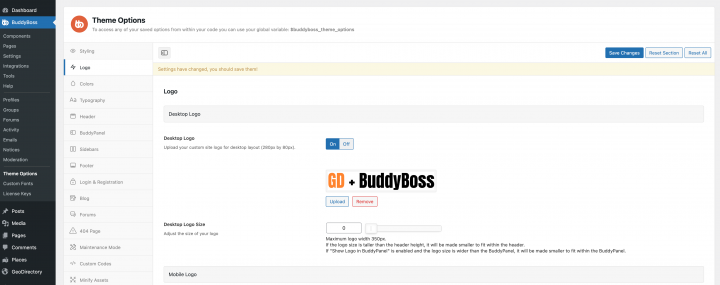
After designing your logo, go to BuddyBoss > Theme Options > Logo, and upload your PNG file.
Skip cropping (or crop the image as needed), in Logo Layout and click save change.
The Navigation Menu
After creating and adding the logo, go to Appearance > Menus, and create your menu.
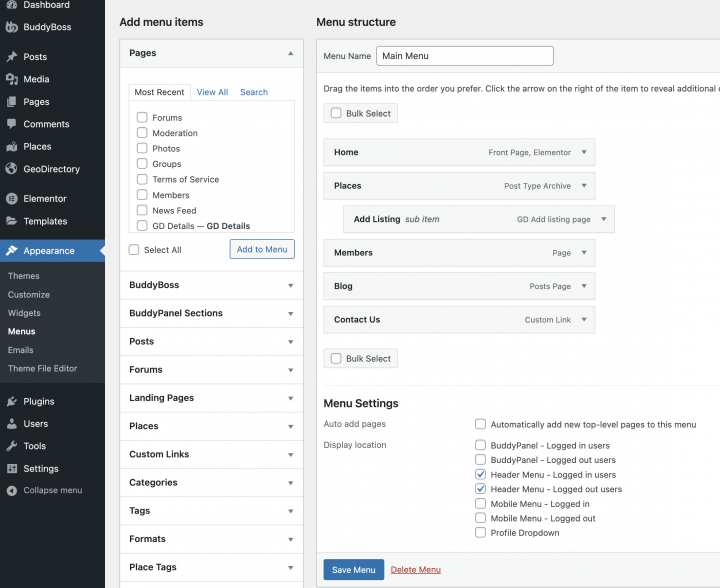
Add the links needed (from the left column to the right column) and save. In the Menu Settings > Display location section, you can check the “Header menu – Logged in user and Header menu – Logged out user” option.
If you want, you can make the same menu appear on the mobile or create another menu to appear there.
In this example, we’ll only have the header navigation menu.
We added seven main navigation links and a few sub-navigation links:
- Home
- Places and add places
- Members
- Blog
- Contact Us
The Content
I will start building this page from scratch using the Elementor plugin.
We already have an article on How to Create a Directory Website with Elementor.
In this article, we will add BuddyBoss to the mix.
We need a hero header on the homepage for that, To do this, go to Pages > Home and click Edit with Elementor.
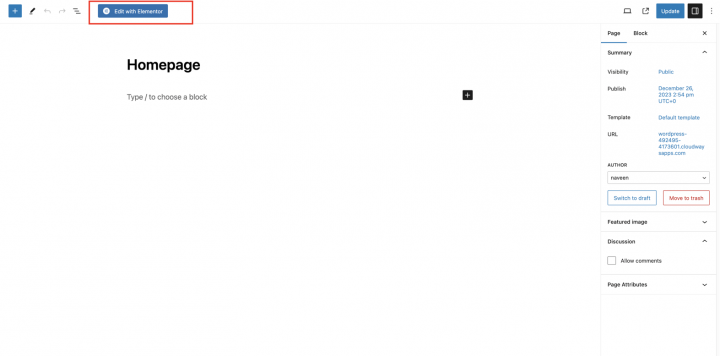
Add a section. (Click the plus button of the page builder where it says Drag widget here.)
Now you have a blank page with only one section of one column.
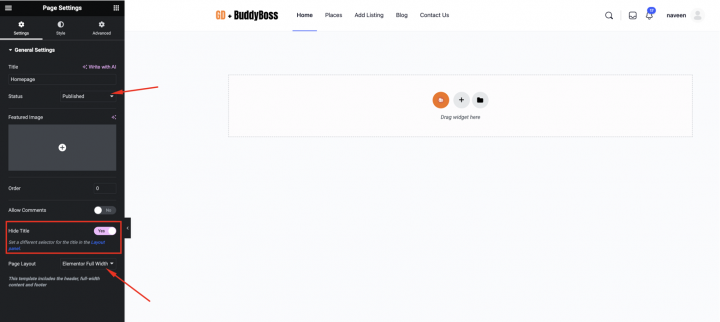
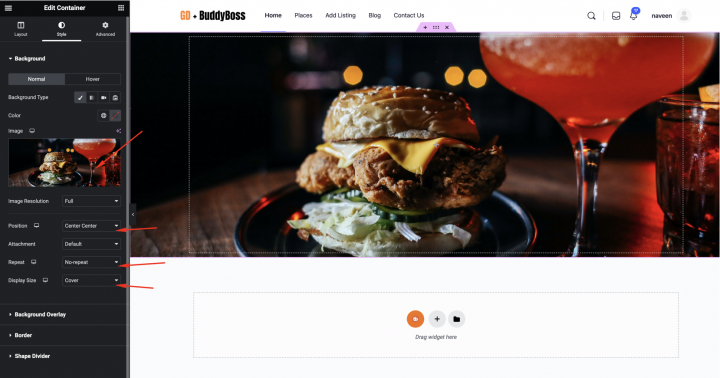
Let’s upload a background image from the container style section and also a few settings like
Position: Center Center
Repeat: No Repeat
Display Size: Cover
Background overlay: #000000
Opacity: 0.51
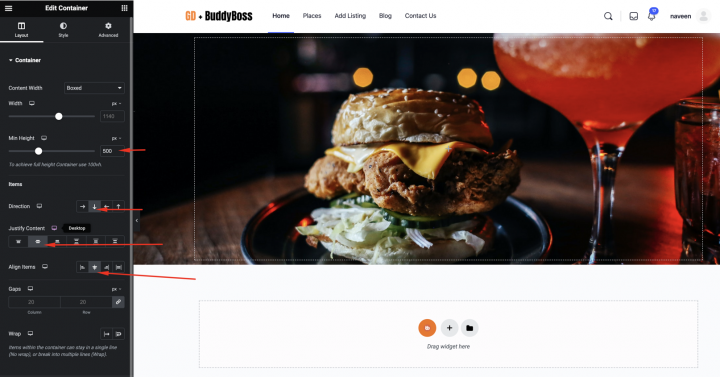
In the layout section of the container, we will have the following settings
Min Height: 500
Direction: Column vertical
Justify center: center
Align Item: Center
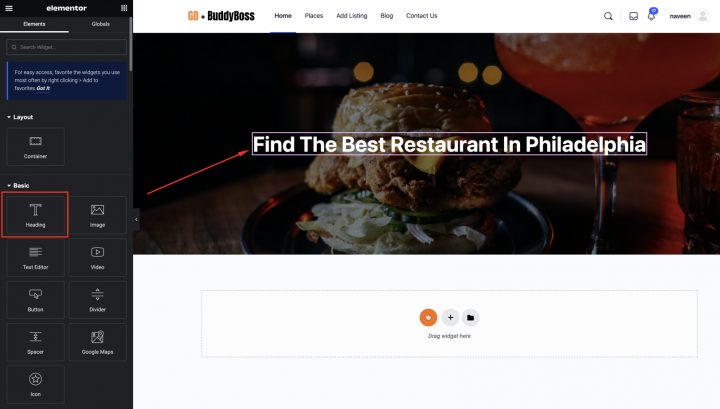
Then let’s add a header tag on top of it with the Text: Find The Best Restaurant In Philadelphia and the following settings
HTML Tag: H1
Alignment: Center
Text Color: #ffffff
Typography Size: 48px
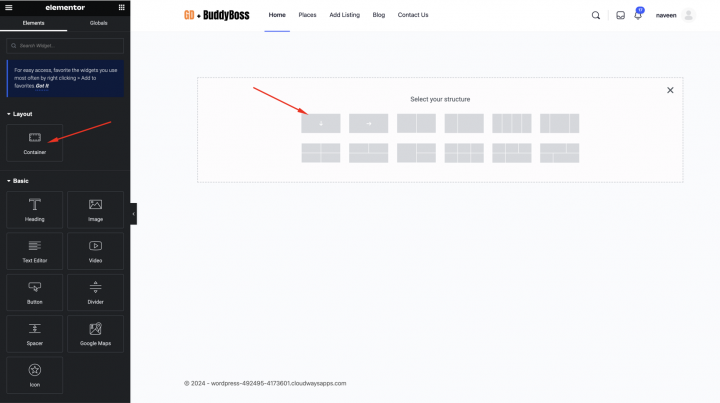
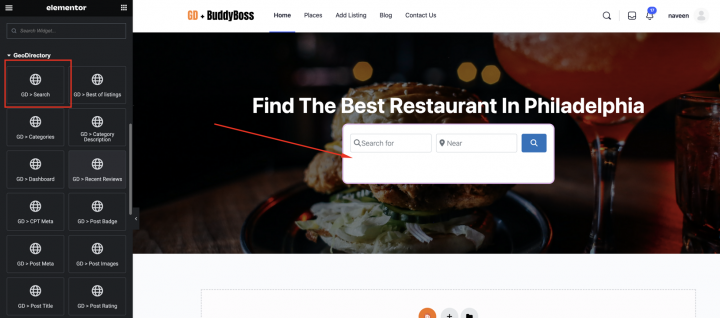
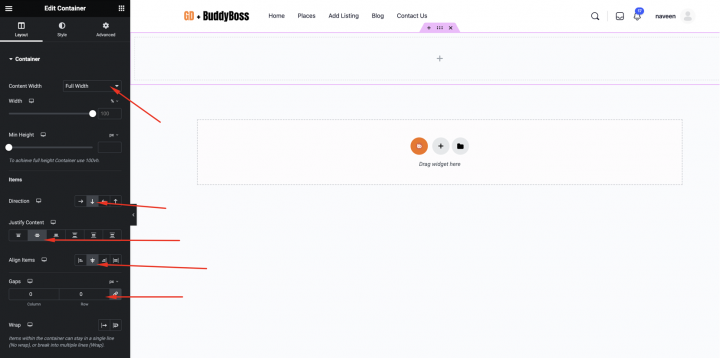
Next, let’s draft the GD > Search block and blow it with default settings. In advance tab make width: Full Width(100%)
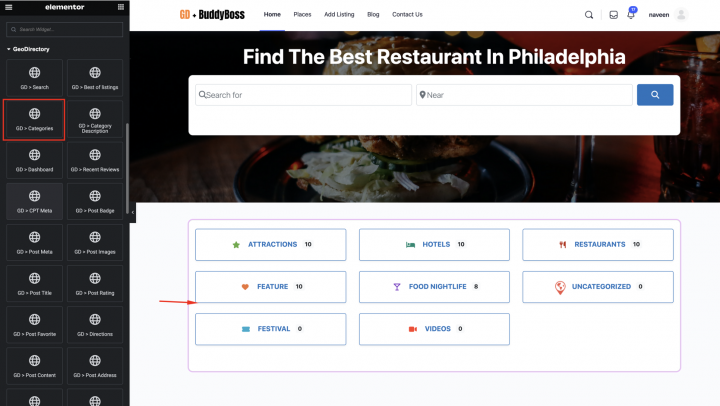
Let’s add one more empty container below it and drag GD > Categories block to display lists of categories.
Set the GD > Categories block settings to the following
Design type: Image Background
Row Items: 4
Enable the Use Category Image option
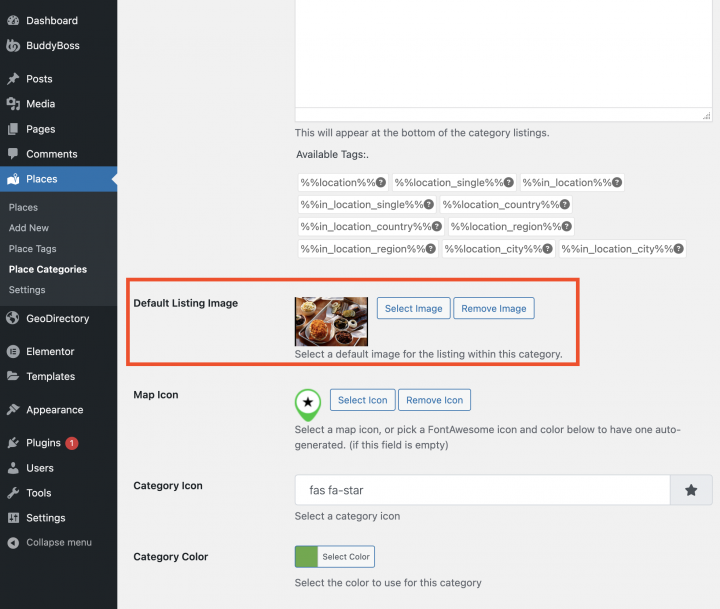
You can set the image to a category by editing the category from wp-admin -> places -> Place Categories.
Each category has an option to set a default image
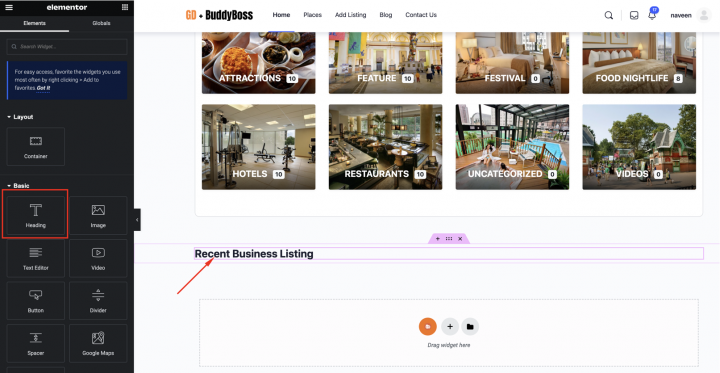
Now, we will add an empty container with a Heading tag and
Text: Recent Business Listing
Alignment: Center
Typography Size: 38px
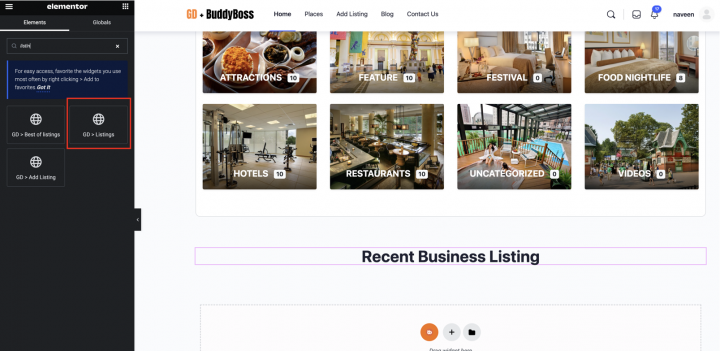
Let’s add GD > Listings block blow it with the following settings
Sorting: recent
Grid: 4
Below, within an empty container drag the GD > Map shortcode.
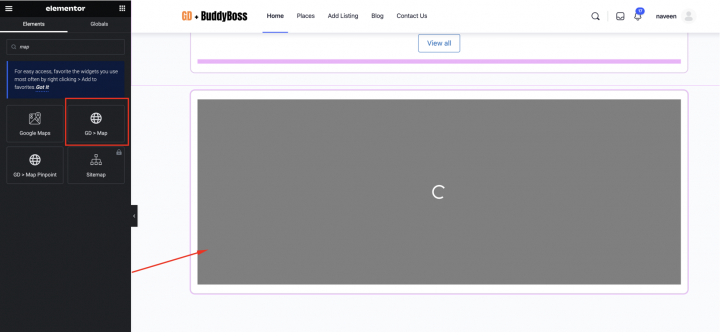
With the following settings in the Elementor container
Content width: full width
Gap: 0
Margin: Top bottom 50px
Padding: 0px
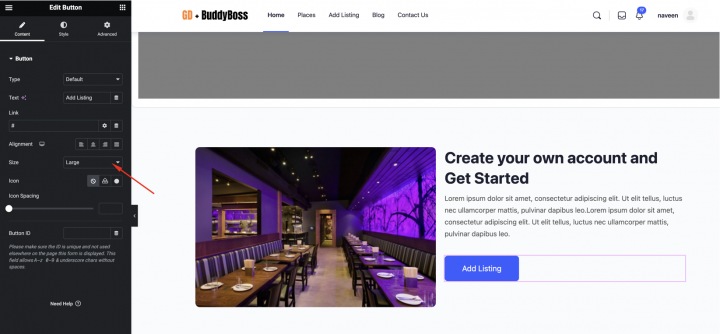
Finally, we will add a CTA for redirecting users to the add listing page.
Add an empty container with two-column layout.
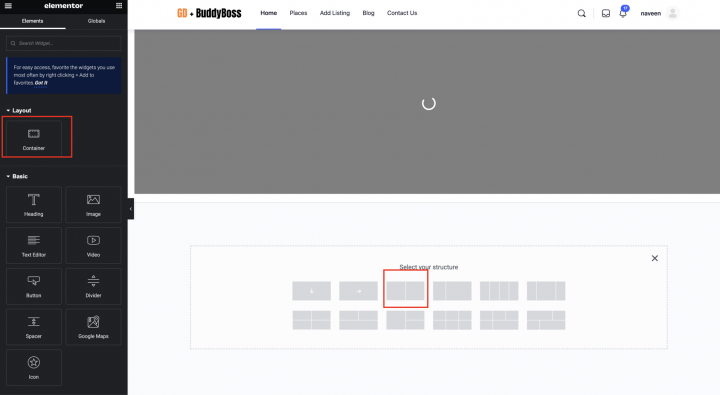
In the left container add an image box.
In the right container, we will drag the heading, text, and button to make it look like the below
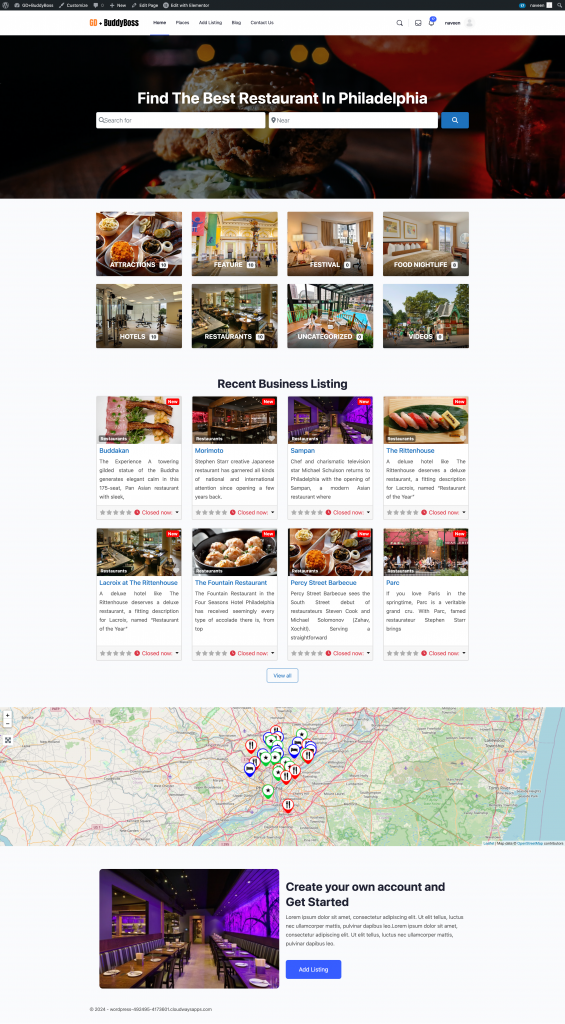
After this, our Homepage is ready.
2. BuddyBoss Directory Website Listings and Search page design
You have to make two important pages for a directory: one for listings (including an archive, categories, and tags) and another for search results.
GeoDirectory automatically sets them up with a basic design. This guide will help you tweak the look of these pages a little.
Since the listing and search pages are very similar, we’ll design them once and then use the same layout for both.
Our choice for the Listing page design is to have the listings on the left and a sticky map on the right, showing where each listing is located.
This is very easy.
Go to Geodirectory > Settings > General > Pages > Click on edit GD Archive page template
Remove all the content from this GD Archive page template and edit it with Elementor.
From page settings set page layout to Elementor Full width.
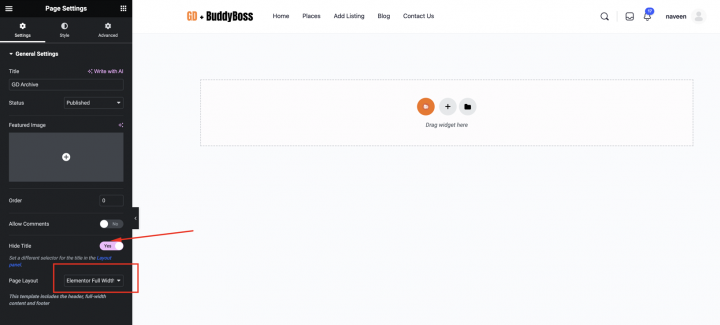
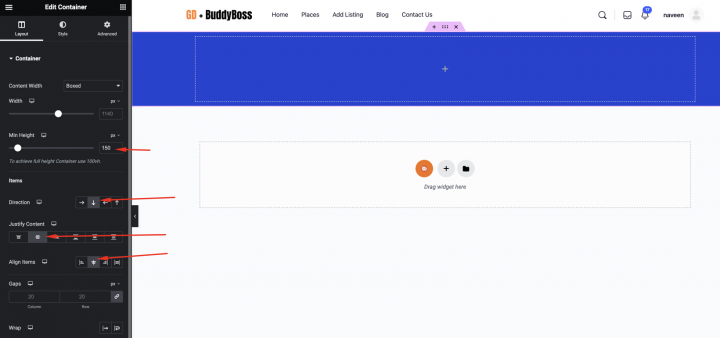
Now let’s add an empty container with the following settings
Direction: Column vertical
Justify center: center
Align Item: Center
Background color: #2143D3
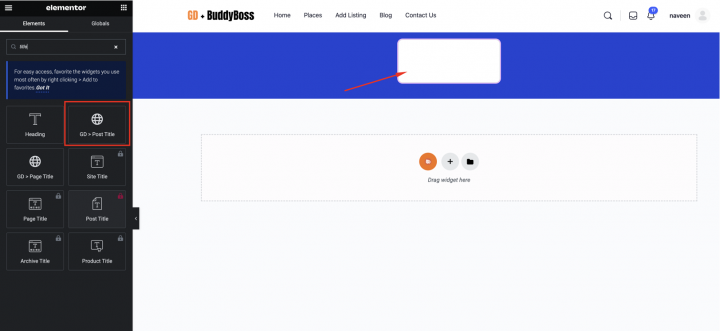
Now let’s drag the GD > page title block over it.
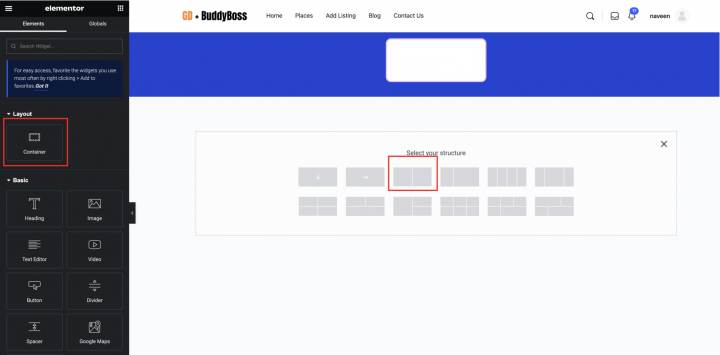
Now let’s add a two-column layout with the following settings.
Content width: full width
Gap: 0
Next, on the left container, we will add GD Archive page-related blocks like GD > Loop Action, GD > Loop, GD > Loop Pagination, and GD > Search on top so the user can search from the Archive page.
We will also add a class scrolling-gd-loop to this column for scrolling touch.
On the right column, we will drag the GD > Map block with the following setting.
Column setting
Padding: 0px
Margin: 0px
the GD > Map shortcode settings to default and
Height: 100%
Width: 100vh
Let’s add the following style to the theme customizer.
.scrolling-gd-loop{
    overflow-y: scroll !important;
    max-height: 1000px;
}
Now after this, our Archive page is ready.
To create the search page layout.
Copy all the content of the GD Archive Elementor template and paste it into the GD Search page Elementor template.
You can find the Search page from Geodirectory > Settings > General > Pages.
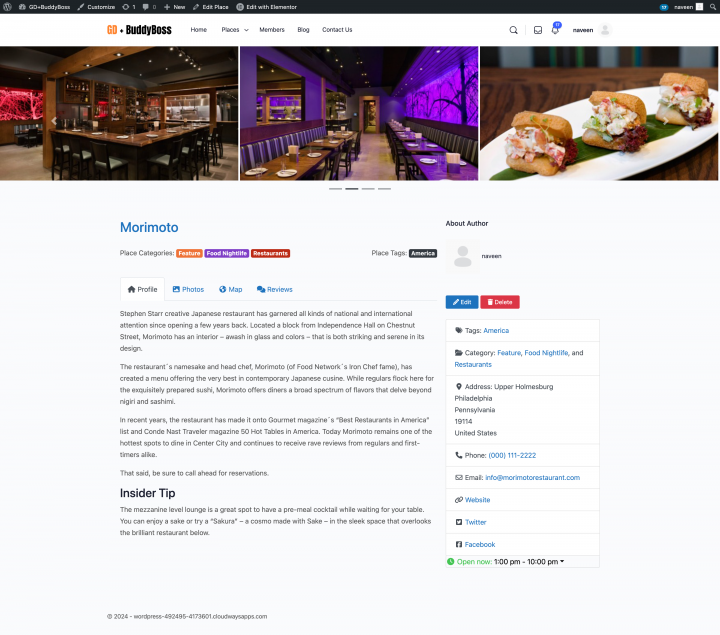
3. BuddyBoss Directory Website single Listing page design
It’s time to create the detail page template. We will go and edit the GD Detail page template in Elementor.
You can go to Geodirectory > Settings > General > Pages > Click on edit GD Detail page template.
In this template, you will already find default content generated by Geodirectory.
we will remove all these default content and edit it using Elementor.
Let’s add an empty container
Content width: full width
Gap: 0
Margin: Top bottom 50px
Padding: 0px
Direction: Column vertcal
Justify center: center
Align Item: Center
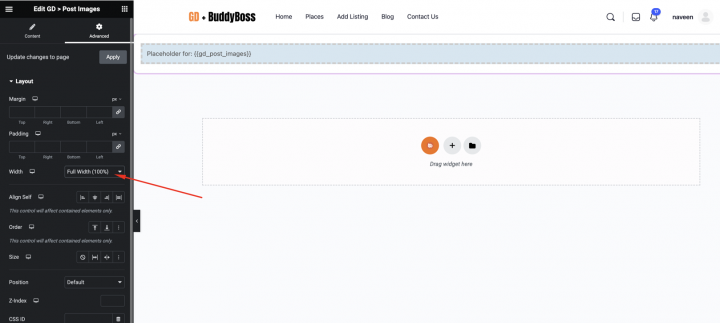
Let’s now drag the Gd > Post Images shortcode inside it with the following settings.
Image Limit: 10
Show limit: 3
Output Type: Slider
Auto Start: Enable
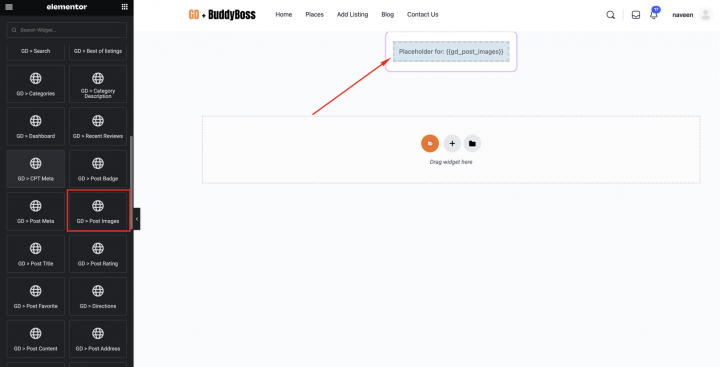
Make sure the container width: full width( 100%)
Let’s add a two-column column layout.
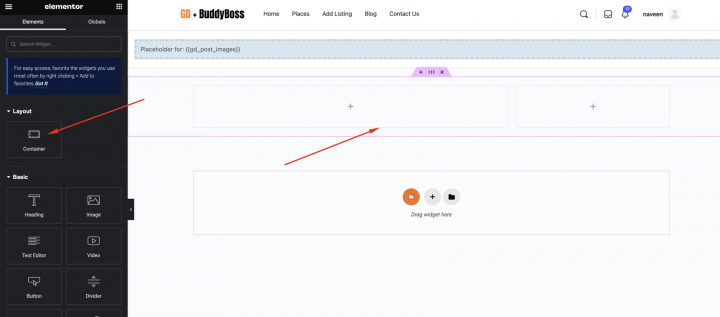
On the left column one by one.
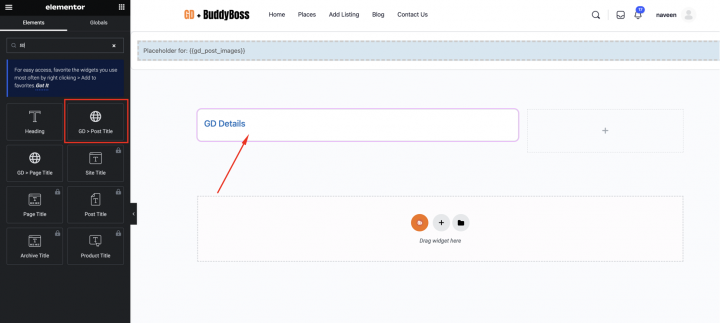
Which includes GD > Post Title, GD > Single Taxonomies, and GD > Single Tabs.
On the right column, we will add the (BB) Post Author, GD > Author Action, and GD > Output Location block.
After doing it, our Listing Detail page is complete.
Adding Premium Features to your BuddyBoss Directory Website
If you wish, now you can add premium features to your directory, such as:
- Paid Listings: with the GeoDirectory Listing Price Manager add-on, you can set prices for listing submission. For each price tier, you can enable/disable features such as Restricting the number of pictures for free listings while allowing more images for paid listings and more or fewer tags and categories. Enabling or disabling specific custom fields. Submitting longer or shorter descriptions.
- Claim Listings: This is a fundamental feature for a directory where the admin creates the database and invites business owners to take control of their free listings. The claim listing process may include forcing an upgrade to a paid listing to take over the listing’s ownership.
- Advertising: selling ads is another form of monetizing an online directory. If you have a lot of traffic, you can use Ads networks. Otherwise, you may sell ads directly, allowing businesses to add banners in specific areas of your website or allowing for listings to appear as ads, for example, on top of organic search results.
These are just three examples. However, a directory website offers many ways to make money online.
You can create a global marketplace of handcrafted items, sell event tickets, or sell discount coupons.
Discover the necessary steps for your next online venture here: Steps to create a successful directory website.
This generic tutorial can be adapted to any theme or page builder.
The possibilities are limitless.
Here’s a step-by-step guide to building a Directory Website using the Blocksy theme and Stackable – Page Builder Gutenberg Blocks plugin:
- Install the Blocksy theme
- Install the Stackable – Page Builder Gutenberg Blocks plugin
- Install and setup GeoDirectory
- Design the Directory Website using the Blocksy theme and the Stackable – Page Builder Gutenberg Blocks plugin
The Blocksy Theme, combined with the GeoDirectory Plugin and Stackable – Page Builder Gutenberg Blocks Plugin, creates a versatile and advanced platform for building a sophisticated online directory.
This integration allows users to seamlessly integrate location-based features, customize layout options, and introduce dynamic content blocks, ensuring a user-friendly and engaging interface.
This integrated system enables web developers and designers to create a premier directory website tailored to specific industry needs or broader community requirements.
Let’s explore the details of how to accomplish this.
In this tutorial, we will:
Installing Theme and Plugins.
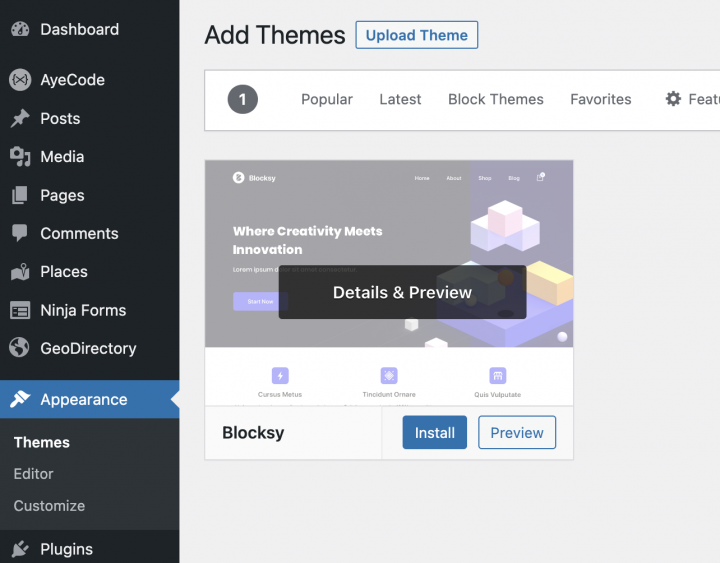
1. Install the Blocksy Theme
We need to install a Theme, and for this tutorial, you will install the Blocksy Theme.
Go to Appearance >> Themes
Select Add New, Install, and Activate the Blocksy Theme.
2. Install the Stackable – Page Builder Gutenberg Blocks plugin
The default Gutenberg plugin is not enough to style a template so we will install the Stackable – Page Builder Gutenberg Blocks plugin.
This plugin provides customized blocks that are better than the default and will help you design the page templates.
Go to Plugins >> Add new.
Search for Stackable – Page Builder Gutenberg Blocks. Install it and Activate it.
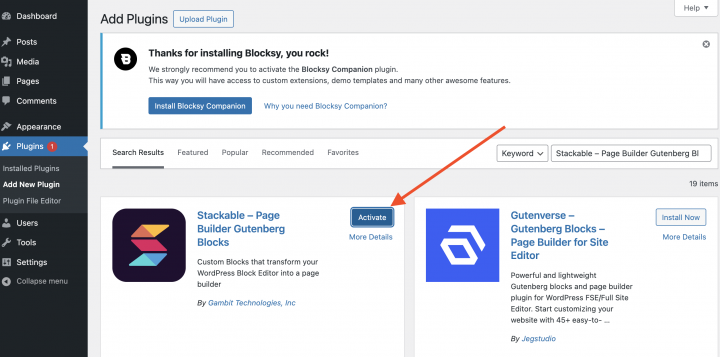
You can Skip all steps of the Setup Wizard.
3. Install GeoDirectory
Finally, you need to install GeoDirectory.
Go to Plugins >> Add new, search GeoDirectory. Please install and activate it, and we finished installing the plugins.
4. GeoDirectory Install Wizard
For GeoDirectory, you will need to complete the Setup Wizard to configure the Google Maps API key and import a few dummy listings.
Choosing the Map System (Google Maps or OpenStreetMap)
You can choose between two mapping systems on the wizard’s first step. Google Maps and Open Street Maps (which doesn’t require an API key).
In this tutorial, we select OpenStreetMaps.
In case you wish to select Google Maps, do the following extra steps.
Click on the Generate Key button and follow the steps of this doc to generate a valid API key.
The essential steps are:
- Enable the Keys.
- Create or select an existing project.
- Get the Key.
- Activate a billing account.
- Restrict the API key (so it can only be used from the URL of your website)
About point four: it is a requirement. However, you only get charged if you pass the threshold, which is $200/month.
This free credit is more than enough for 99% of directories.
Setting the default city
After that, you will set the default location. This is the city for which the directory is created.
We will set Philadelphia as the default city.
You can use whatever location you need.
If you need to add listings to more than one city, you will need the Location Manager add-on.
Adding extra features
In this step, we will install our UsersWP, a user registration plugin that lets users register and log into your website.
This is needed to allow users to add and edit their listings. It will also create user profiles where they can find their listings, reviews, and so on.
We will also install Ninja Forms so that all listings have a contact form that sends emails directly to the listing owners.
AyeCode Connect is not mandatory for this tutorial. It is mainly needed if you want to add GeoDirectory premium add-ons and install them directly from the WordPress Dashboard.
Adding Dummy Data
The last step to complete the installation wizard is adding some dummy listings. This will also add listing categories that you can edit later according to your needs.
You will not add sidebar widgets and menu items right now, as we will do that later.
Design the Blocksy Directory Website
Now that we have installed the plugins and done the preliminary setup of GeoDirectory, we can start designing our Directory Website with the Blocksy theme and Stackable – Page Builder Gutenberg Blocks plugin.
1. Design The Website Logo
First things first: we will need a logo for our website.
You don’t need to invest in a designer to sketch the 1st version of your logo.
One of the biggest mistakes you can make when starting a new directory is investing too much time and money before testing the product market fit.
You can design a logo in five minutes with an app like Canva, which is cheap and surprisingly good.
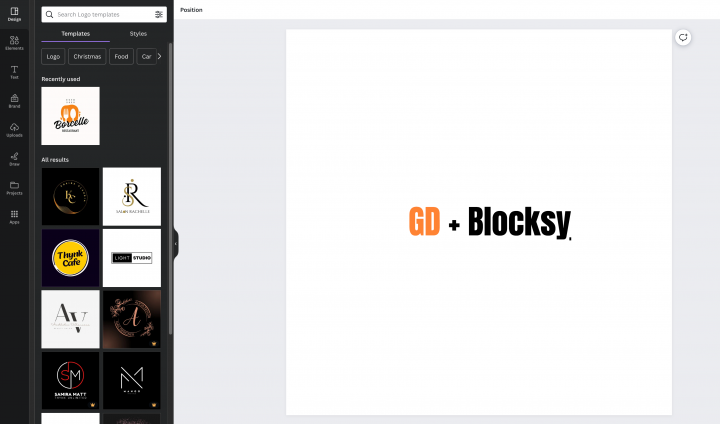
For an MVP (minimum viable product), a logo designed with Canva will be more than enough.
There are several logo templates to choose from, and it doesn’t matter if your initial logo is not as perfect and original as you believe it should be.
If your project gets traction, you can always invest in improving it or radically changing it later.
An average logo is never the leading cause of a failed project.
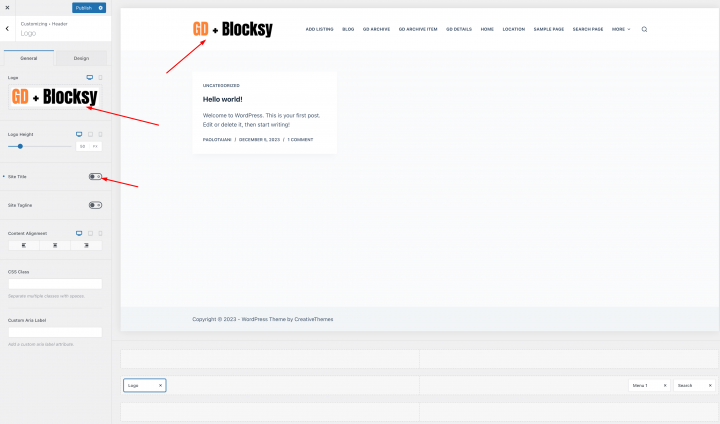
After designing your logo, go to Appearance > Customize > Header, click the Change logo link, and upload your PNG file. Skip cropping (or crop the image as needed), in Logo Layout select the option Logo and click publish.
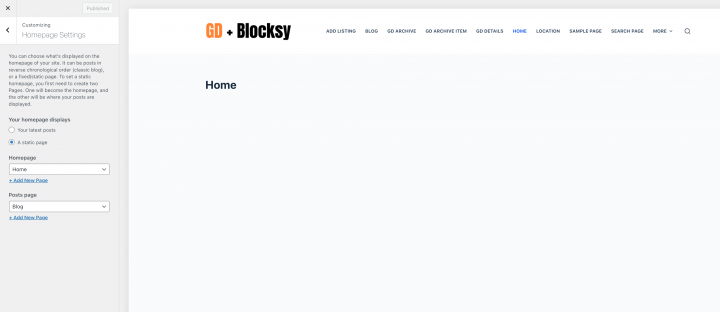
2. Blocksy Directory Home page design
You can create a new page or use one WordPress makes by default, like the Sample Page.
Go to Pages, edit the Sample page, and rename it Home or create a new page for this.
Next, go to Appearance > Customize > Homepage Settings and select your Home.
The Navigation Menu
After creating and adding the logo, go to Appearance > Menus, and create your menu.
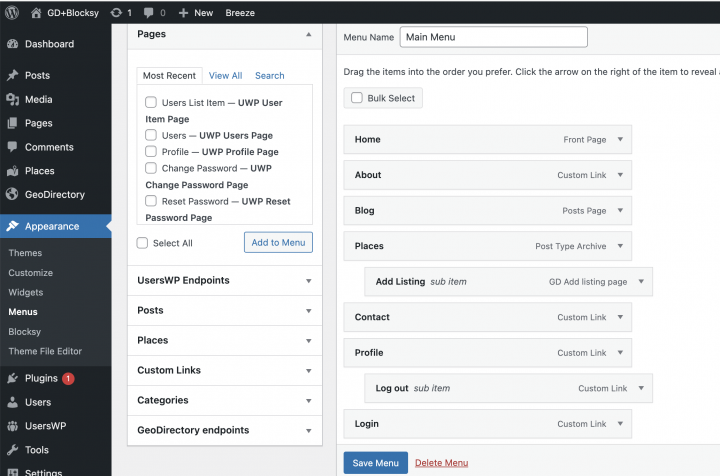
Add the links needed (from the left column to the right column) and save. In the Menu Settings > Display location section, you can check the “Main” option.
If you want, you can make the same menu appear on the footer or create another menu to appear there.
In this example, we’ll only have the header navigation menu.
We added seven main navigation links and a few sub-navigation links:
- Home
- About
- Blog
- Places and add places
- Profile
- Login
- Logout
The Login link (from UsersWP Endpoints) will only appear for Logged-out users, while the log-out, account, and profile links will only appear for logged-in users.
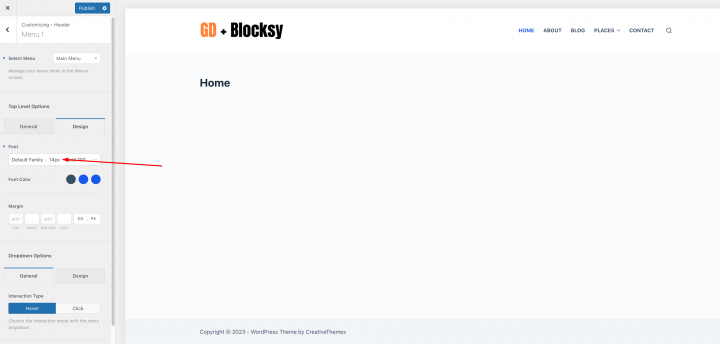
Set the menu settings to Font: Default Font / 14px / Bold 700
The Content
I will start building this page from scratch using the Stackable – Page Builder Gutenberg Blocks plugin.
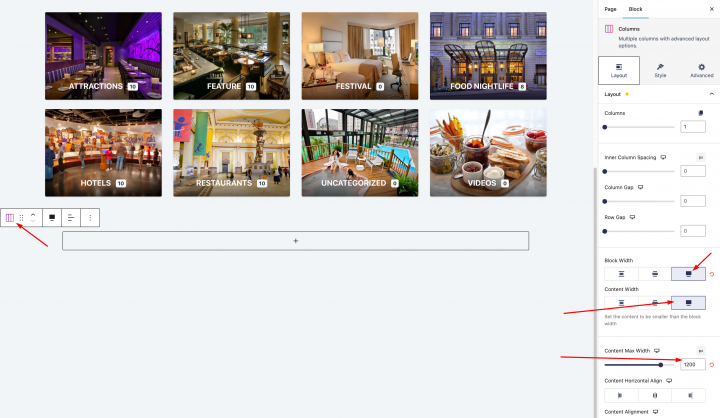
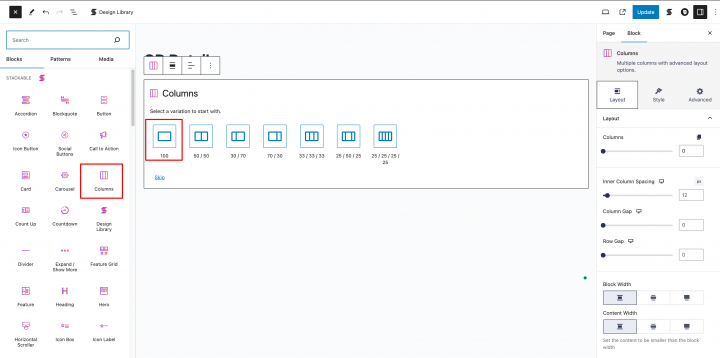
We need a hero header on the homepage for that, let’s add a column block provided by the Stackable – Page Builder Gutenberg Blocks plugin.
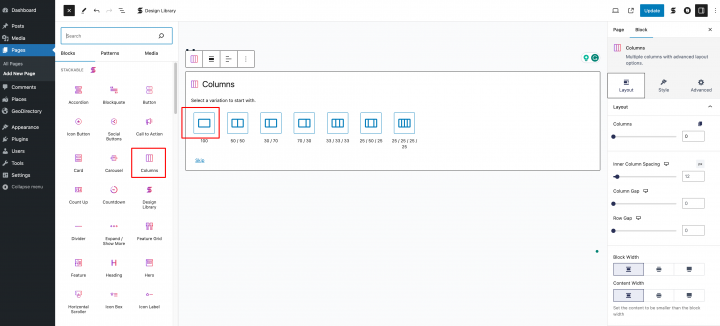
In Column layout setting
Block Width: Align Full
Content Width: Align Full
Content Max Width: 1200px
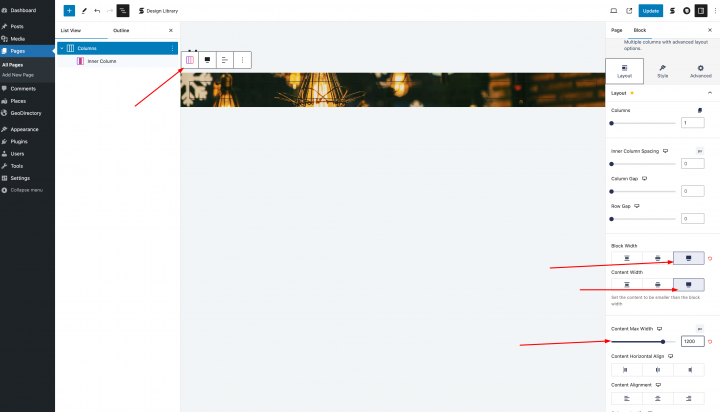
Next, check the block setting and set the Background image.
For the Hero Section, we will need an image, and we will download a free image from Pexels.com (Thanks, @rachel-claire).
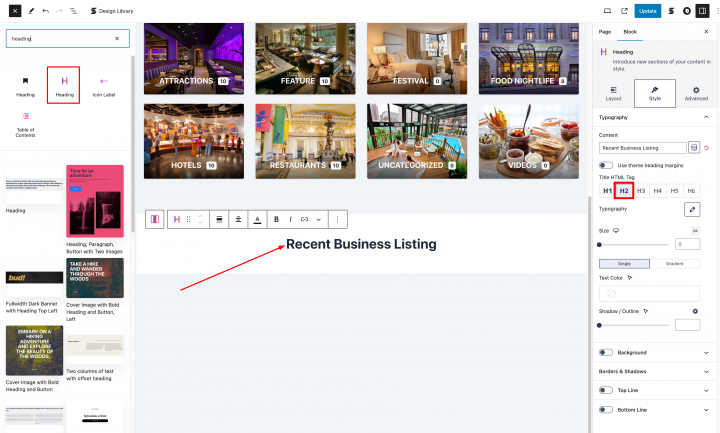
Now let’s add a heading block over image with
Content: Find The Best Restaurant in Philadelphia
Title HTML tag: H1
Size: 48
Text Color: #000000
Now we will also add the GD > Search block below it.
Now let’s add one more empty column with padding 50px from top and bottom.
we will drag the GD > Categories block inside it to display list of categories.
Now let’s add one more empty container with following settings.
Block Width: Align Full
Content Width: Align Full
Content Max Width: 1200px
Color: #00000
Now, let’s proceed to add the third section to our website. we will call it “Recent Business Listing“.
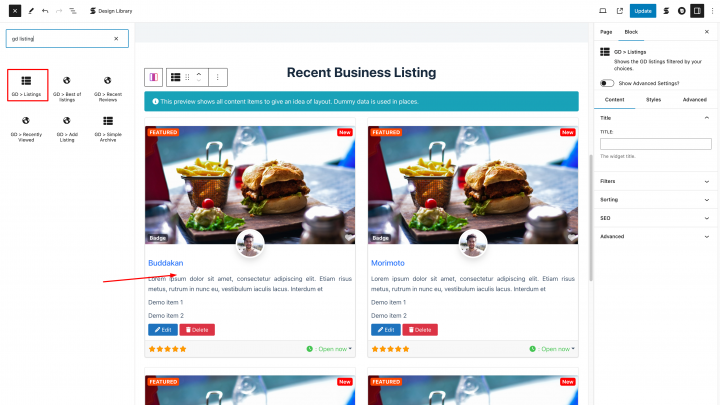
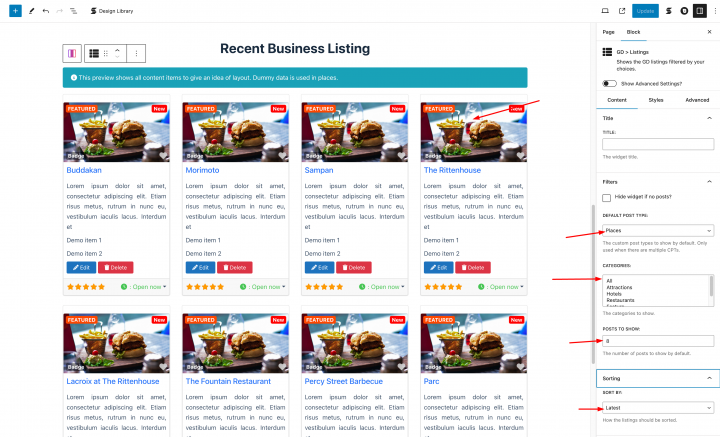
Add a GD > Listing block by clicking on the plus icon and then accessing the block settings. Make sure to enable the Show Advanced Settings option.
In the block Style tab, please update the Layout: Grid View (Four Columns).
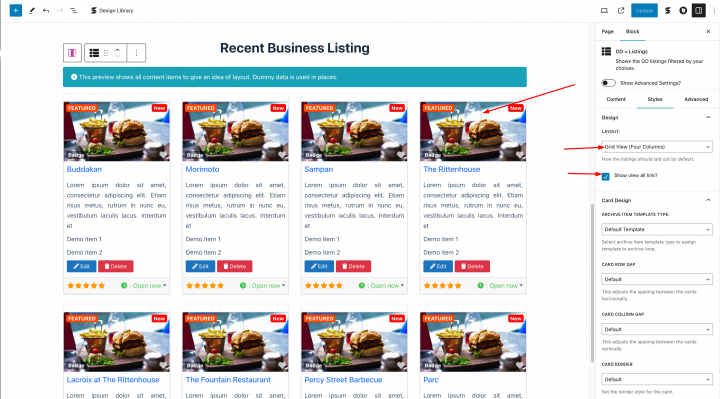
Change the number of posts to show: 8 and ensure that you check the Enable location filter option and set the Sort By: Latest.
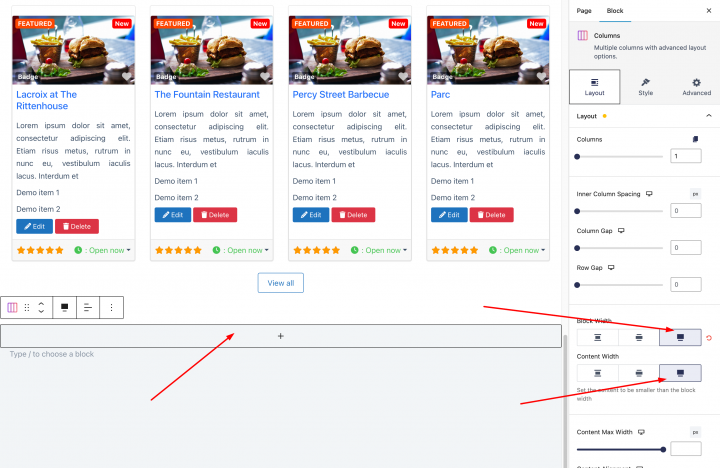
Now let’s add one more empty container with following settings.
Block Width: Align Full
Content Width: Align Full
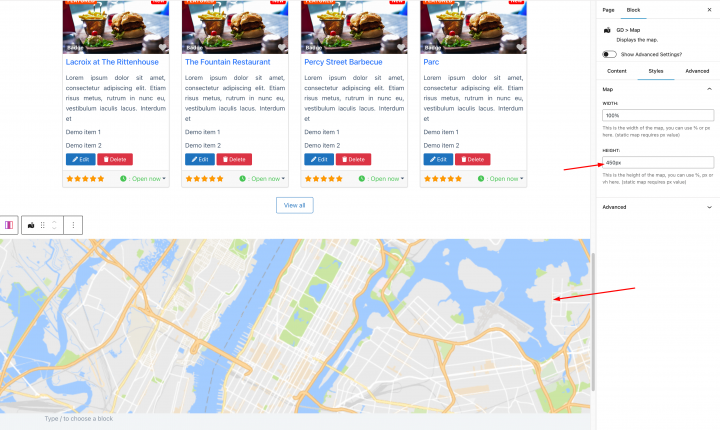
Add the GD > Map block to it and keep the settings to
Width: 100%
Height: 450px
At last we will add a CTA. we will use one of predefind template
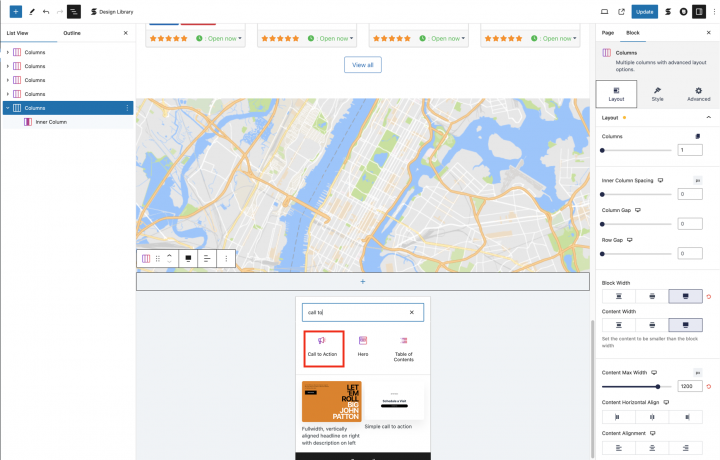
Make sure to use following setting
Block Width: Align Full
Content Width: Align Full
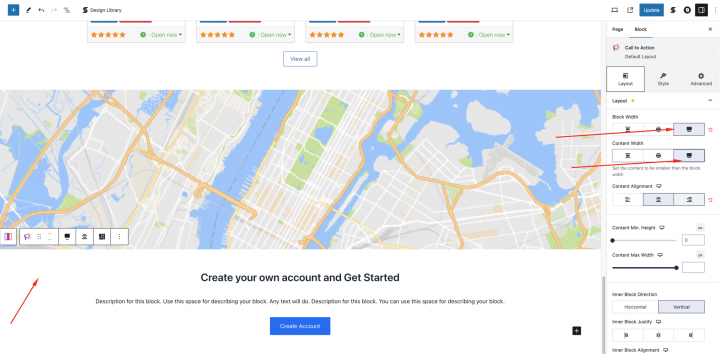
Congratulations! Your homepage is Completed.

3. Blocksy Directory Website Listings and Search page design
Listings page
Now you need to design two pages that are essential for any directory.
The listings page (general archive, categories, tags), and the search results page.
GeoDirectory creates them by default with a general layout. In this tutorial, we will customize the layout of these pages a bit.
The listing and search pages are mostly identical so we create it once and just copy the layout on the other page.
We decided the Listing page layout would be the listings on the left, and on the right, a sticky map showing the listings’ precise location.
This is very easy.
Go to Geodirectory > Settings > General > Pages > Click on edit GD Archive page template
Remove all the content from this GD Archive page template.
Let’s add an empty column with following setting
Block Width: Align Full
Content Width: Align Full
Content Max Width: 1200px
Color: #00000
Padding: 30px
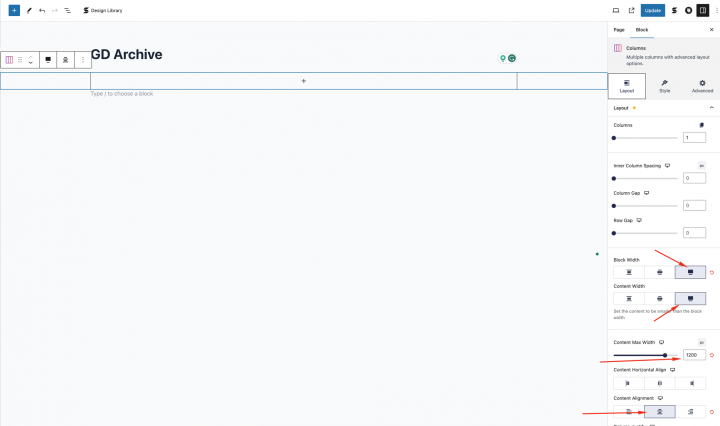
Let’s add the GD > post title shortcode in it.
Now, add a Column block with a 50:50 layout.
Now on the left container, we will drag GD Archive page-related widgets like GD > Loop Action, GD > Loop, GD > Loop Pagination, and GD > Search on top so the user can search from the Archive page.
In the right column, drag the GD > Map block, and we’ll leave all the settings at their default settings. However, we’ll set the height of the GD > Map block to 100vh.
To give it a final touch we will add the following CSS in the theme customizer from Appearance => Customize => Add CSS
.geodir-archive .gd-archive-left-container{
    overflow-Y: scroll;
    max-height: 100%;
	  height:100vh;
		padding-right:15px;
}

.breakdance .bde-column-111-108.bde-column{
	overflow:hidden;
}
After this, the Listing Archive page is now ready.
For the search page, we repeat the same process.
Search page
Go to Geodirectory > Settings > General > Pages > Click on edit GD Search page template
Remove all the content from this GD Search page template.
Copy all the content of the GD Archive page and paste it into the GD Search page.
Finally, you will need this CSS to make the Search Page Full Width.
.geodir-page-search #main article {
max-width: 100%;
}
So now our GD Search and Archive pages are ready.
4. Blocksy Directory Website single Listing page design
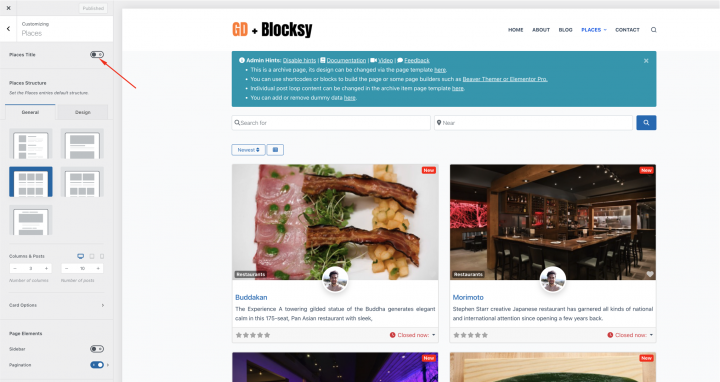
First thing we will disable the default title from Appearance > Customize > Places > Single Place and disable title as mentioned below.

Now to edit and customize the GD Detail page, You can go to Geodirectory > Settings > General > Pages > Click on edit GD Detail page template.
In this template, you will already find default content generated by Geodirectory.
we will remove all these default content and add a new column block.
First, let’s add an image slider at the top of the Listing Details page.
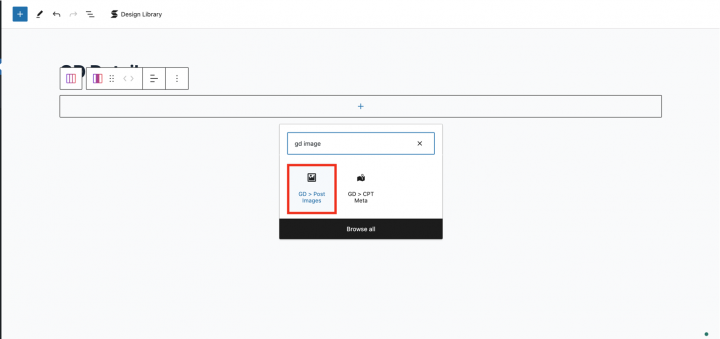
we will drag the GD > Post Image block in this container with the following settings
Image Limit: 10
Show limit: 3
Output Type: Slider
Auto Start: Enable

Now we will add one more Section block below it with a 70/20 layout.
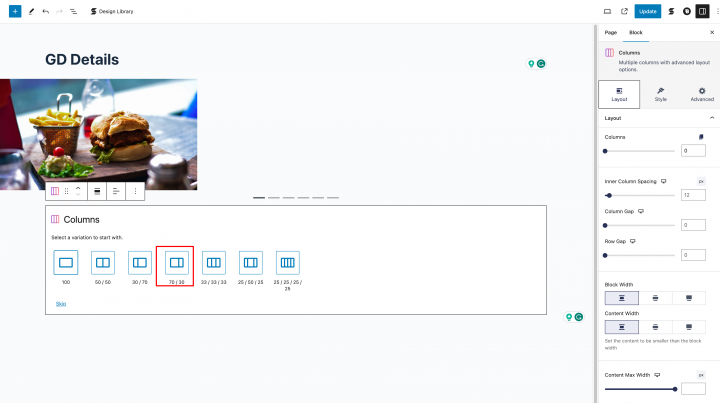
Now let’s add all the required GD Detail page shortcodes on the left column one by one.
Which includes GD > Post Title, GD > Single Taxonomies, and GD > Single Tabs.
On the right column, we will add GD > Author Action and GD > Output Location block.
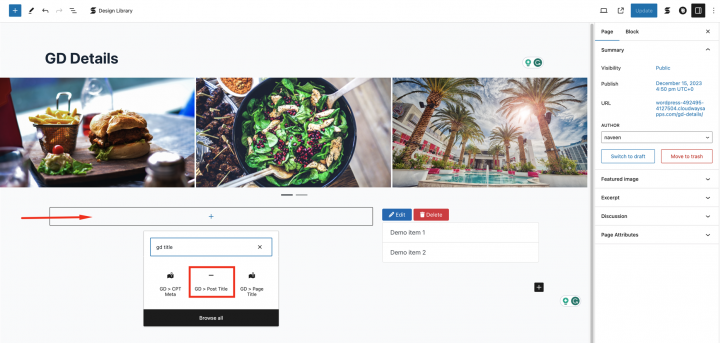
After this, our Listing Details page has been completed.
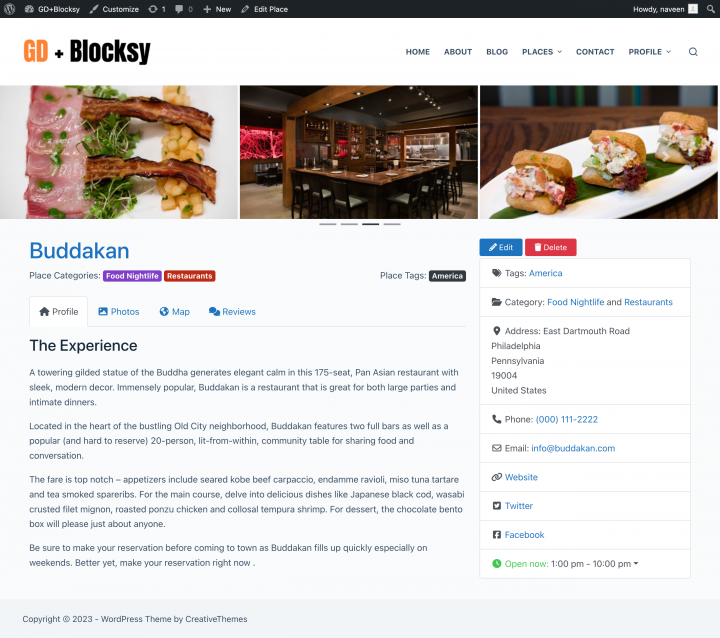
Adding Premium Features to your BlocksyDirectory Website
If you wish, now you can add premium features to your directory, such as:
- Paid Listings: with the GeoDirectory Listing Price Manager add-on, you can set prices for listing submission. For each price tier, you can enable/disable features such as: Restricting the number of pictures for free listings while allowing more pictures for paid listings. Allowing more or fewer tags and categories. Enabling or disabling specific custom fields. Submitting longer or shorter descriptions.
- Claim Listings: This is a fundamental feature for a directory where the admin creates the database and invites business owners to take control of their free listings. The claim listing process may include forcing an upgrade to a paid listing to take over the listing’s ownership.
- Advertising: selling ads is another form of monetizing an online directory. If you have a lot of traffic, you can use Ads networks. Otherwise, you may sell ads directly, allowing businesses to add banners in specific areas of your website or allowing for listings to appear as ads, for example, on top of organic search results.
These are just three examples. However, a directory website offers many ways to make money online.
If you’re considering starting an online business, creating a directory website might be the easiest way to begin.
Unlock the secrets to an online directory with this guide: Guide to creating a directory website.

Whether you’re running a law firm or keen on uniting the legal industry under one digital roof, mastering how to create a lawyer directory website is a key step.
It’s about forging a pathway between legal professionals and prospective clients.
Imagine creating a platform that connects clients directly to the legal assistance they need.
In this comprehensive guide, you’ll unearth:
- Tailored steps for creating a lawyer-specific directory, addressing the unique needs of law firm directories.
- Vital guidelines to launch a user-friendly and efficient lawyer directory website, a cornerstone for connecting the legal industry.
- Strategic best practices to ensure your directory doesn’t just exist but thrives, becoming a go-to resource for prospective clients.
- Innovative software solutions and tools essential for building an impactful lawyer directory.
P.S. If you’re seeking directory plugins that align seamlessly with these goals, GeoDirectory might be your ace in the hole.
It’s your ally in creating a network that not only lists but connects and empowers.
See how GeoDirectory can elevate your directory from a simple list to a vital resource.
Why Should You Create Legal Directories?
In a world where the demand for legal services is ever-increasing, lawyer directories provide a streamlined pathway for clients to find the help they need.
They elevate law firms’ online visibility, turning the internet into a powerful ally for both lawyers and those seeking legal assistance.
Here’s why creating a legal directory is a smart move:
- Boost Law Firm’s Online Visibility: Law firms and individual lawyers gain significantly from being listed in lawyer directories. It’s a digital age shortcut to being found.
- Simplifies Client Access: For clients, navigating the legal world becomes less daunting. Free lawyer directory listings offer an accessible gateway to legal help.
- Enhances Credibility: Being part of well-regarded lawyer directories adds a layer of credibility. It signals that a lawyer or firm is recognized and trustworthy within the legal community.
Examples of Best Lawyer Directories:
- FindLaw: Renowned for its comprehensive lawyer listings and rich resource of legal information.
- Avvo: Offers detailed law firm profiles, ratings, and client reviews, making it one of the best legal directories for user experience.
- Justia: Known for its free lawyer directory listings and extensive legal resources, aiding both lawyers and those in need of legal services.
These directories exemplify how combining lawyer listings with user-friendly features can create hubs that not only serve the legal community but also empower those seeking justice and legal representation.
The Setup: Creating Your Law Directory
Step 1: Choosing the Right Theme for Your Legal Directory Website
The first step in establishing an effective lawyer directory site is picking the ideal theme.
A theme sets the stage for your website’s look and feel, impacting how users interact with your directory.
For a legal directory, the theme needs to be professional, intuitive, and accessible, ensuring it aligns with the seriousness and credibility of the legal system and the law firms featured.
Why the Right Theme Matters:
- Professional Appearance: The legal profession is built on trust and expertise. Your theme should mirror these qualities with a clean, sophisticated design, enhancing law firms’ online visibility.
- User Experience: Smooth navigation is key. The theme should enable users to effortlessly search for lawyers, view law firm profiles, and access legal services. This ease of use encourages potential clients to contact lawyers directly.
- Customizability: The law directory niche has diverse requirements. A versatile theme enables the customization of layouts, colors, and functionalities to meet specific needs, ensuring that information remains up-to-date and relevant.
GeoDirectory offers a range of Directory themes, from a free directory theme to advanced premium options (priced between $19 and $39). These themes are not just visually striking but are also optimized for performance, ensuring your lawyer directory remains a dynamic and efficient tool for the legal community.
Step 2: Setting Domain and Hosting for Your Legal Directory
After selecting your theme, the next crucial step for launching your attorney directory is choosing the right domain and hosting.
Your domain name is your online identity, crucial for search engine optimization and ensuring that clients searching for legal services find you easily.
Hosting Options for a WordPress Website:
- BluehostCloudways: is the hosting provider recommended for GeoDirectory, ideal for hosting legal directories.
- SiteGround: Offers excellent customer support and optimized performance for WordPress sites.
- WP Engine: A premium choice known for high-speed and robust security features.
Tips for Domain and Hosting:
- Select a domain that accurately represents your directory’s focus on connecting users with qualified lawyers.
- Ensure your hosting provider boosts SEO and enhances the law firm’s visibility in search engines.
- Your hosting should support your directory’s growth from a single listing page to a comprehensive free legal directory.
Step 3: Install and Configure GeoDirectory
Once your domain and hosting are set, the next step is to install and configure GeoDirectory, a leading directory plugin, for your legal directories. This intuitive multi-directory plugin is ideal for building a professional and efficient law directory site.
Installing GeoDirectory:
- From your WordPress Dashboard, navigate to Plugins > Add New.
- In the search field, type “GeoDirectory” and press Enter.
- Find “GeoDirectory – Business Directory Plugin” and click the “Install” button.
- Once installed, click the “Activate” button.

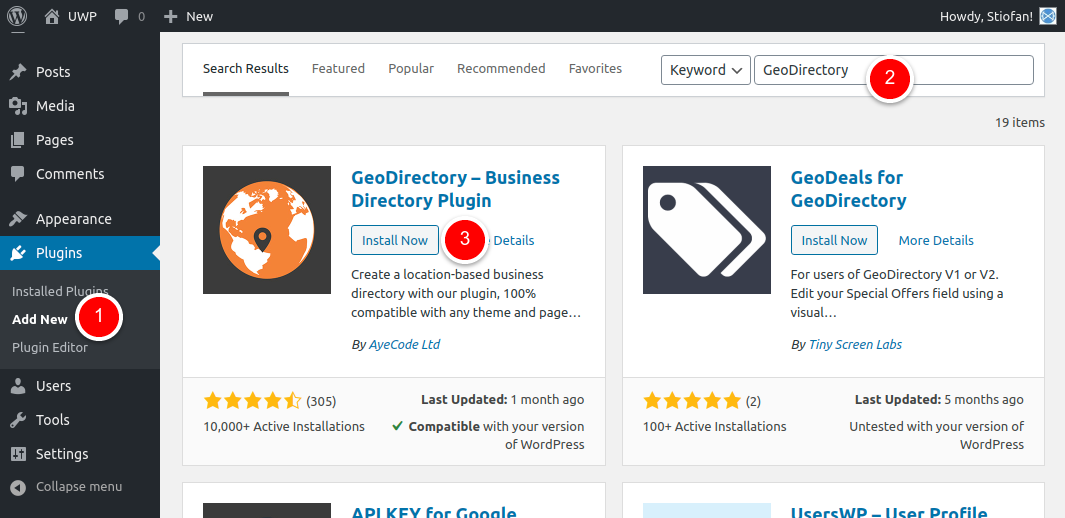
Configuring GeoDirectory for Attorney Directories:
GeoDirectory is not just a free directory builder but an intuitive directory plugin loaded with features tailored for law firms. Key features include:
- Custom Fields and Categories: Tailor your listings to include specific information relevant to law firms and attorneys.
- Location-Based Searches: Enable clients to find lawyers nearby, making it easier for those in need to connect with legal help.
- User Reviews and Ratings: Allow clients to leave feedback, enhancing the credibility of listings.
Step 4: Customize Categories for an Organized Legal Directory
As a law directory owner, organizing your listings is crucial to creating a user-friendly database that serves as a reliable resource for those seeking legal assistance.
Customizing categories in your local attorney directory is key to ensuring that it reflects the diverse areas of law practice and makes it easier for potential clients to find the right law firm based on location, practice area, etc.
Configuring Categories in GeoDirectory:
In your WordPress dashboard, go to CPT > CPT Categories.

Focus on legal fields such as ‘Family Law’, ‘Criminal Defense’, or ‘Corporate Law’. Use descriptive, plural terms for clarity. Here’s an example

- Slug: This forms part of the URL. For example, ‘family-law’, ‘criminal-defense’.
- Parent Category: Organize your directory by creating subcategories under broader areas. For instance, under ‘Criminal Defense’, you could have ‘DUI’, ‘Theft’, or ‘Assault’.
- Description: Provide a brief overview of the category, helping users understand what types of law firms or free legal guides they can find in it.
- Category Top Description: This introductory text appears at the top of the category’s page, offering essential insights or information.
- Default Listing Image: Choose an image that visually represents each category, like a gavel for ‘Criminal Defense’.
- Map Icon: For location-based searches, select a map icon that represents each category on the directory’s maps.
- Category Icon: Pick a distinct icon for each category to enhance visual navigation.
- Category Color: Assign colors for easy identification and to aid in visual categorization.
- Schema Type: If applicable, select a schema type to improve how search engines interpret and display your category’s content.
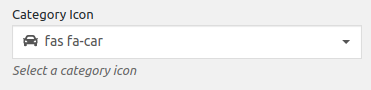

By customizing categories, you transform your law directory site into a more organized, navigable, and comprehensive platform for multiple legal directories.
This not only enhances user experience but also increases the likelihood of attracting more clients to the listed law firms.
Step 5: Personalize Legal Form Fields for Your Directory
Personalizing the legal forms on your directory is essential for capturing up-to-date details and specific information pertinent to law firms and legal issues.
As a law directory owner, customizing these fields in your GeoDirectory setup ensures that each firm’s profile accurately mirrors its professional reputation and expertise.
Setting Up Custom Fields in GeoDirectory:
- In your WordPress dashboard, navigate to CPT > Settings > Custom Fields.
- The interface is divided into two sections. On the left, under ‘Add New CPT Form Field’, you can create new fields. The right panel, ‘Add New CPT Listing Form’, shows existing fields.
- You have the option to choose from ‘Standard Fields’, ‘Predefined Fields’, or use the ‘Custom Fields’ area for tailored requirements.
- To add a new field, pick your choice from the left panel. It will then appear in the right panel, similar to the WordPress Widget Manager interface.
- After customizing your field, click ‘Save’. Ensure the ‘Is Active?’ option is checked to make the field visible on your directory.

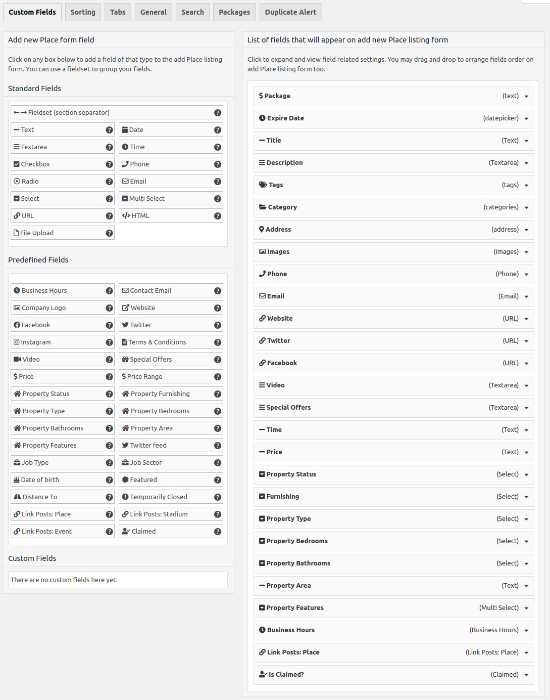
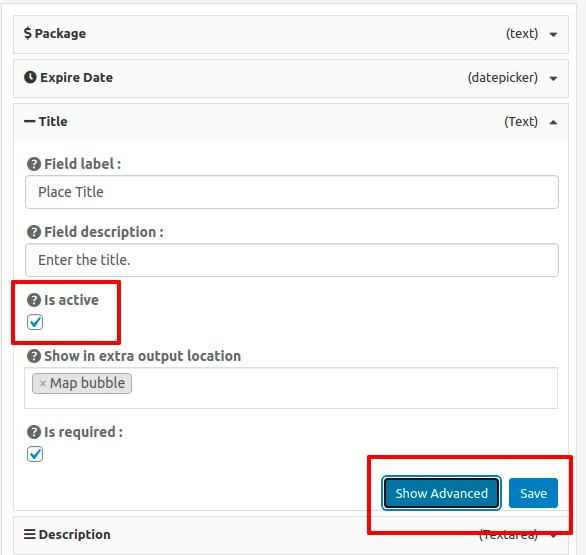
Custom Field Ideas for Legal Directories:
- Areas of Practice: List as many categories as necessary to cover various legal specialties.
- Years of Experience: Highlight the tenure of law firms or individual attorneys.
- Notable Cases: Allow firms to showcase significant cases they’ve handled.
- Online Reviews Integration: Link to or display online reviews to build trust.
By personalizing these fields, you’re not just keeping your free legal directories informative; you’re making them a comprehensive resource for users seeking legal assistance.
Optional Step: Add Advanced Plugin Addons to Your Legal Directory
Enhancing your brand-new legal directory website with advanced plugin add-ons can significantly elevate its functionality and user experience.
One such addon for GeoDirectory is the Claim Listings extension, a powerful feature that allows attorneys and law businesses to claim their listings, verifying their ownership and adding credibility to their profiles.
Features of the Claim Listings Extension:
- Claim Button: Easy-to-use claim button that can be placed using a shortcode, widget, or Gutenberg block.
- Frontend Lightbox Popup Claim Form: Streamlines the claim process with a user-friendly interface.
- Ninja Forms Integration: Create claim forms quickly and easily, free of charge.
- Undo Claims: Revert accidental approvals or address false claims.
- Email Notifications: Keeps both directory owners and business owners informed about claim status.
- Verified Listing Badge: Showcase verified profiles with a special badge, enhancing trust and reliability.
Configuring the Claim Listings Extension:
- After installation and activation, access the settings at GeoDirectory > Settings > Claim Listings.
- To enable auto-approval of claims, adjust the settings in GeoDirectory > Settings > Claim Listings > Settings.
- Add the “Is Claimed?” custom field to your forms by navigating to CPT > Settings > Form Builder and moving the “Is Claimed?” field to the available fields section.
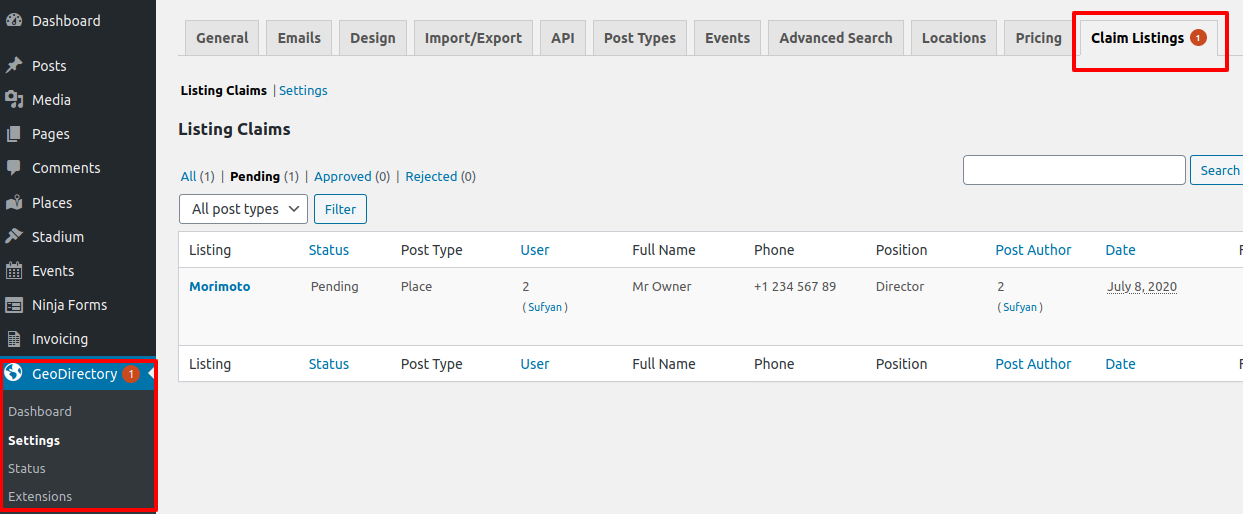
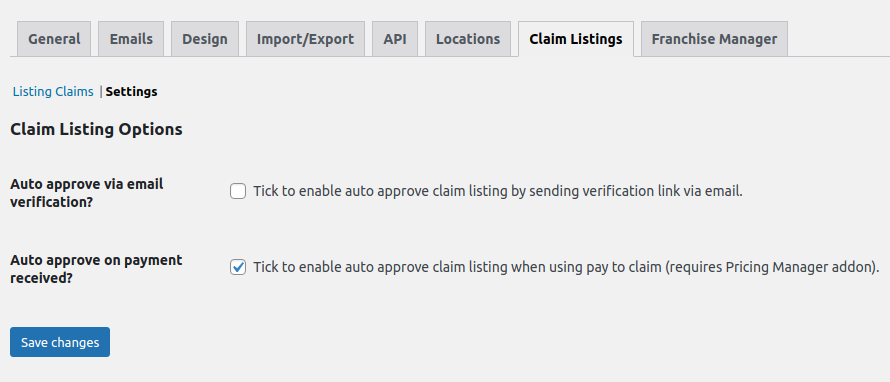
By incorporating this addon, your legal directory not only becomes a more reliable resource for clients but also offers legal organizations and attorneys a platform to enhance their visibility and professional reputation.
Elevate Your Legal Directory with GeoDirectory
You’ve just navigated the roadmap to creating a standout legal directory website.
From selecting the ideal theme to incorporating advanced features, you’re now equipped with the knowledge to launch a successful platform.
Remember, your directory can be more than a list; it can be a vital bridge in the legal community.
Key Takeaways:
- Select a theme that mirrors legal professionalism.
- Secure a domain and hosting that boosts SEO.
- Install and configure GeoDirectory for optimal functionality.
- Customize categories for better organization.
- Personalize legal form fields for detailed listings.
- Consider advanced addons for enhanced features.
With GeoDirectory, transforming your concept of a legal directory into a dynamic, user-friendly platform is not just possible; it’s a journey we’re excited to embark on with you.
GeoDirectory offers the tools and flexibility you need to create a directory that not only lists legal professionals but truly connects them with those in need.
Start building your lawyer directory today and watch as it becomes an indispensable resource in the legal landscape.

Here’s an easy-to-understand guide on how to develop a Directory Website using the Avada theme and Avada Builder plugin:
- Install the Avada theme
- Install and setup GeoDirectory
- Design the Directory Website using the Avada Builder
The Avada Theme, when used with the GeoDirectory Plugin and Avada Builder Plugin, is an excellent way to create a flexible online directory.
This combination enables easy addition of location-based features, customization of the layout, and inclusion of dynamic content for a user-friendly experience.
It allows web developers and designers to build a high-quality directory website tailored for specific industries or broader community needs.
Let’s delve into the details of how to accomplish this.
In this tutorial, we will:
Installing Theme and Plugins.
1. Install the Avada Theme
Avada is a versatile and popular WordPress theme known for its flexibility and powerful features.
It is a multipurpose theme that can be customized to create a wide range of websites with a user-friendly drag-and-drop builder, allowing users to easily design and customize their websites without the need for coding.
To purchase the Avada theme and explore its extensive features, you can visit the official ThemeForest marketplace: Avada Theme Purchase Link.
You can follow this video to set up the Avada theme.
2. Install GeoDirectory
Finally, you need to install GeoDirectory.
Go to Plugins >> Add new, search GeoDirectory. Please install and activate it. We finished installing the plugins.
3. GeoDirectory Install Wizard
For the GeoDirectory plugin, you should complete the Setup Wizard to configure the Google Maps API key and import a few dummy listings.
Choosing the Map System (Google Maps or OpenStreetMap)
You can choose between two mapping systems on the wizard’s first step: Google Maps and OpenStreetMaps (which doesn’t require an API key).
In this tutorial, we select OpenStreetMaps.
If you wish to select Google Maps, do the following extra steps.
Click on the Generate Key button and follow the steps of this doc to generate a valid API key.
The essential steps are:
- Enable the Keys.
- Create or select an existing project.
- Get the Key.
- Activate a billing account.
- Restrict the API key (so it can only be used from the URL of your website)
About point four: it is a requirement. However, you only get charged if you pass the threshold of $200/month.
This free credit is more than enough for 99% of directories.
Setting the default city
After that, you will set the default location. This is the city for which the directory is created.
We will set Philadelphia as the default city.
You can use whatever location you need.
If you need to add listings to multiple cities, you will need the Location Manager add-on.
Adding extra features
In this step, we will install our UsersWP, a user registration and login plugin that lets users register and log into your website.
This is needed to allow users to add and edit their listings. It will also create user profiles where they can find their listings, reviews, and so on.
We will also install Ninja Forms so that all listings have a contact form that sends emails directly to the listing owners.
AyeCode Connect is not mandatory for this tutorial. It is mainly needed if you want to add GeoDirectory premium add-ons and install them directly from the WordPress Dashboard.
Adding Dummy Data
The last step to complete the installation wizard is adding some dummy listings. This will also add listing categories that you can edit later according to your needs.
You will not add sidebar widgets and menu items right now; we will do that later.
Design the Avada Directory Website
Now that we have installed the theme and the plugins and done the preliminary setup of GeoDirectory, we can start designing our Directory Website with the Avada Suite of tools.
1. Design The Website Logo
First things first: we will need a logo for our website.
You don’t need to invest in a designer to sketch the 1st version of your logo.
One of the biggest mistakes you can make when starting a new directory is investing too much time and money before testing the product market fit.
You can design a logo in five minutes with an app like Canva, which is cheap and surprisingly good.
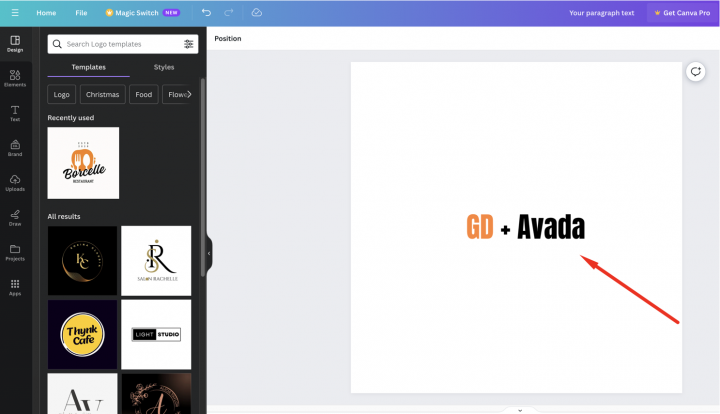
For an MVP (minimum viable product), a logo designed with Canva will be more than enough.
There are several logo templates to choose from, and it doesn’t matter if your initial logo is not as perfect and original as you believe it should be.
If your project gets traction, you can always invest in improving it or radically changing it later.
An average logo is never the leading cause of a failed project.
2. Avada Directory Home page design
You can create a new page or use one WordPress makes by default, like the Sample Page.
Go to Pages, edit the Sample page, and rename it Home or create a new page for this.
Next, go to Appearance > Customize > Homepage Settings and select your Home.
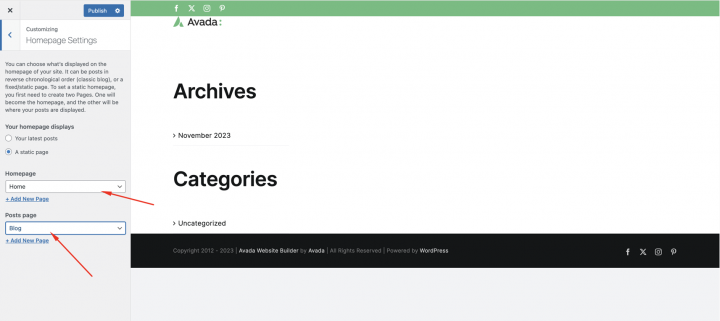
The Navigation Menu
After creating and adding the logo, go to Appearance > Menus and create your menu.
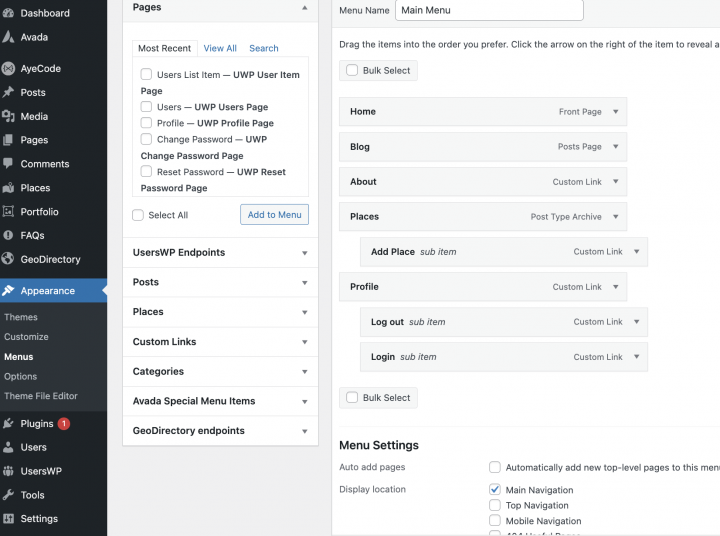
Add the links needed (from the left to the right column) and save.
In the Menu Settings > Display location section, you can check the “Main Navigation” option.
If you want, you can make the same menu appear on the footer or create another menu to appear there.
In this example, we’ll only have the header navigation menu.
We added seven main navigation links and a few sub-navigation links:
- Home
- About
- Blog
- Places and add places
- Profile
- Login
- Logout
The Login link (from UsersWP Endpoints) will only appear for Logged-out users, while the log-out, account, and profile links will only appear for logged-in users.
Create Header Layout
Now let’s create a site header layout using Avada builder.
So we will go to Avada > Layout and select the header from Global Layout.

Click on the Create New Layout button.
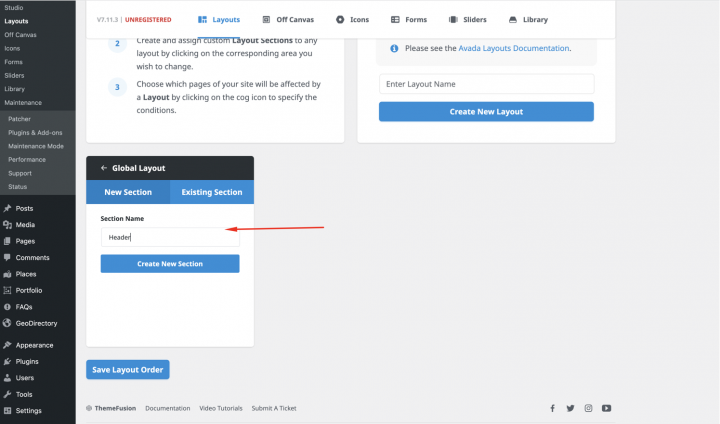
Now let’s click on the Live Builder button.
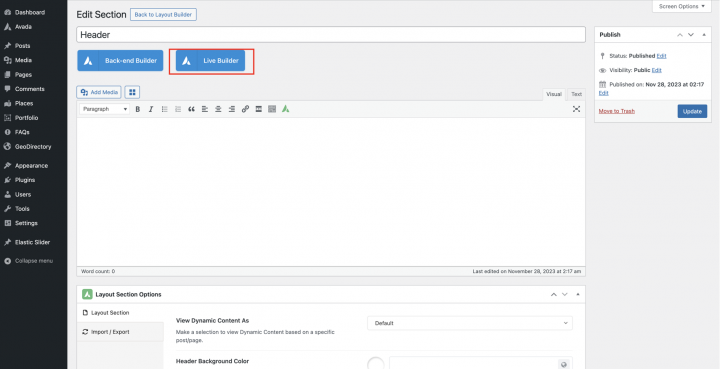
It will open the Avada Builder Library in front of us.
You will see many prebuilt templates for different sections.
In this example, we will select a prebuilt Header Layout from the studio section.
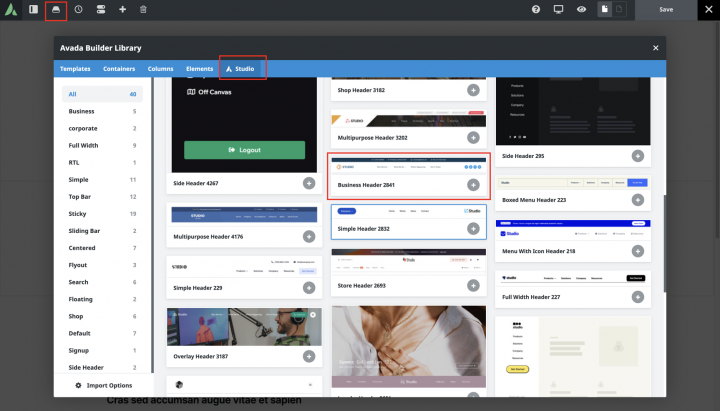
Now we will replace our Logo by clicking on the logo section of the prebuilt Header.
We will set the Image Max Width to 150px from the logo setting.
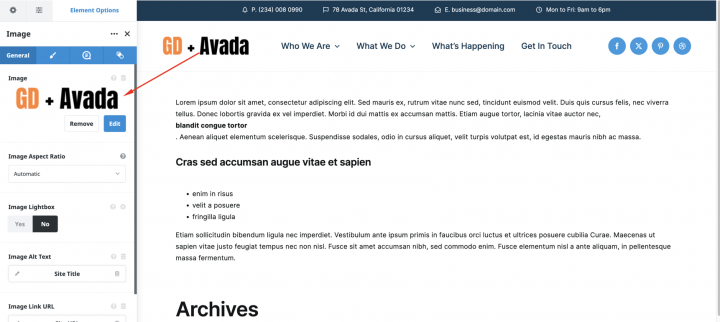
From the header menu, we will select or change the menu we want to show in the site header.
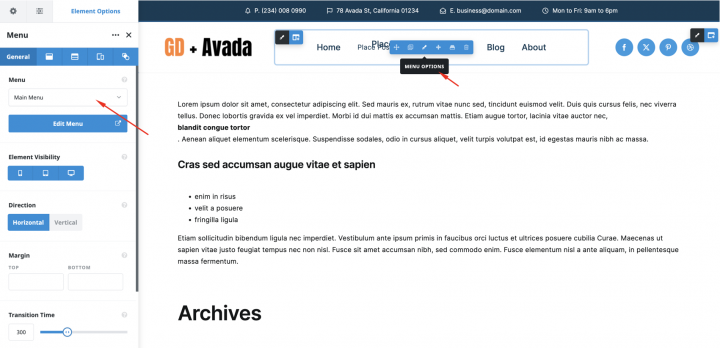
we will make some style and Alignment changes as mentioned in the below screenshot.
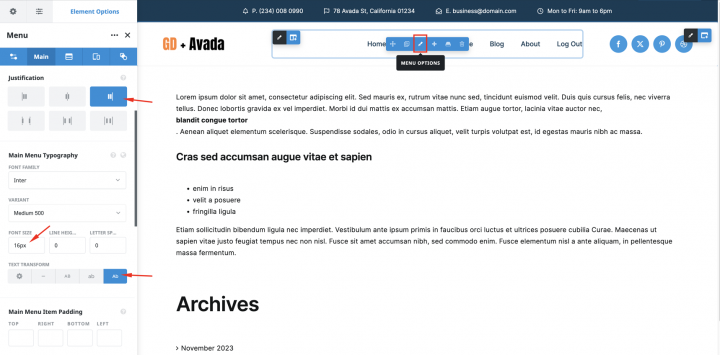
Our site Header is ready now. Let’s focus on homepage content now.
The Content
We will edit the Home page in Live Builder.
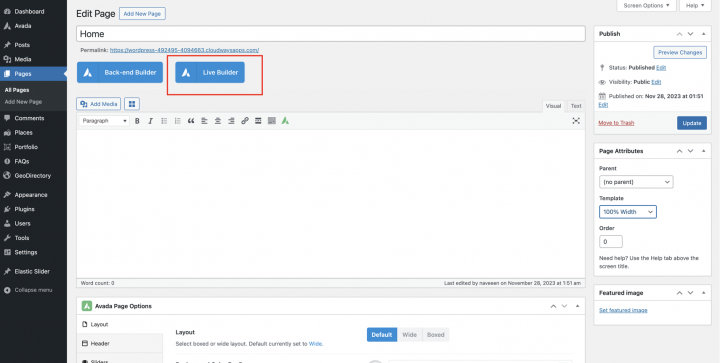
Let’s add an empty container to it with the following settings
Interior Content Width: 100%
Height: Minimum Height
Minimum Height: 500
Row Alignment: Stretch
Column Alignment: Center
Column Justification: Center
From the Background setting, we will add an image.
Background Position: Center Center
Background Repeat: No Repeat
Background Size: Center
Pattern: Dot
Pattern Color: rgba(0,0,0,0.41)
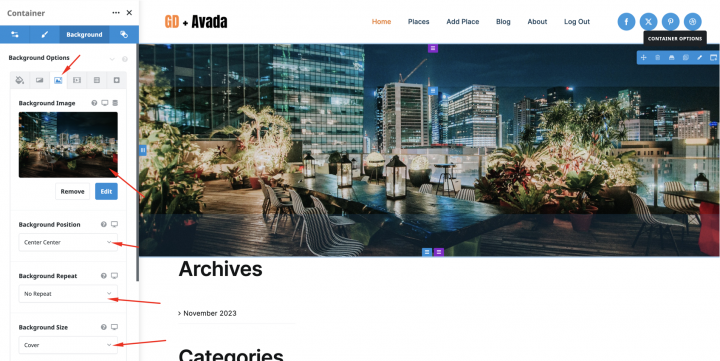
Now let’s add a Header title tag on top of the image with
Text: Find The Best Restaurant In Philadelphia
Typography:
Font Family: Inter
Variant: Bolt 700
Font Size: 42px
Font Color: #ffffff
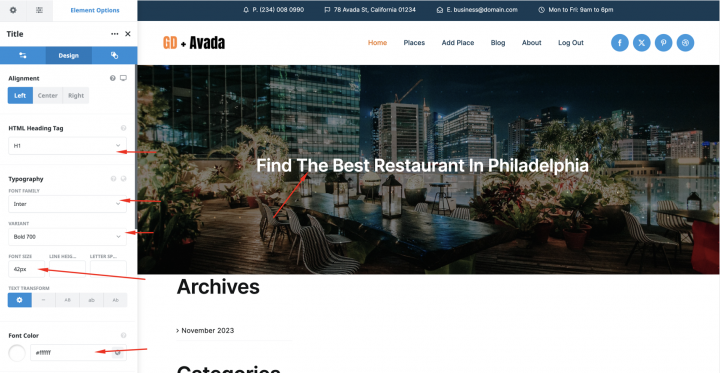
Now let’s add the GD > Search block and keep it with default settings.
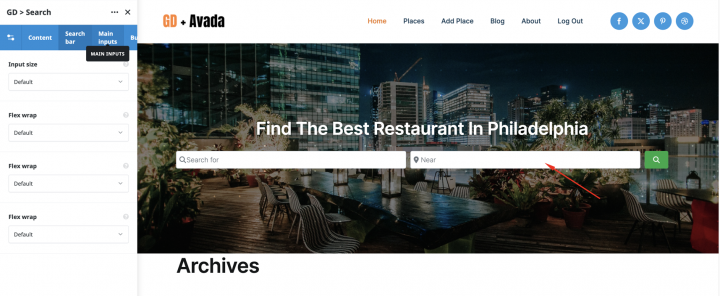
Now let’s add an empty container with the GD > Category block inside.
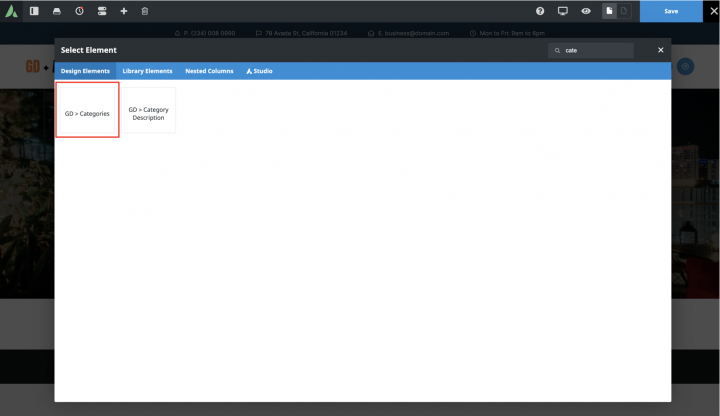
Design type: Icon Left
Row Items: 4
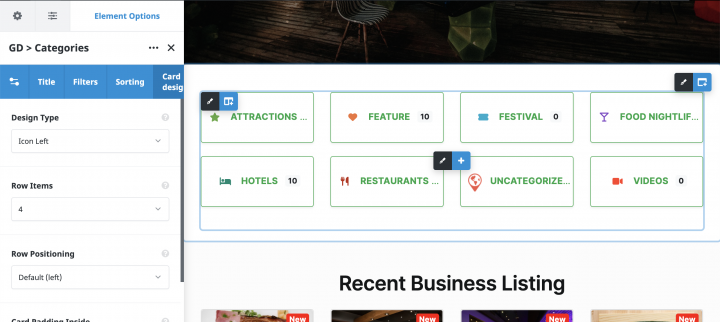
Now let’s add one more empty container with the GD > Listing block inside it with the following settings.
Sorting: recent
Grid: 4
Post o show: 8

Now let’s add an empty container with the following settings.
Interior Content Width: 100% Width
Height: Auto
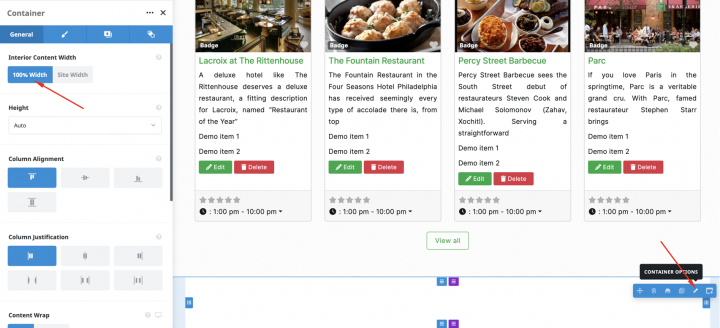
Content Spacing: Left, Right 0px
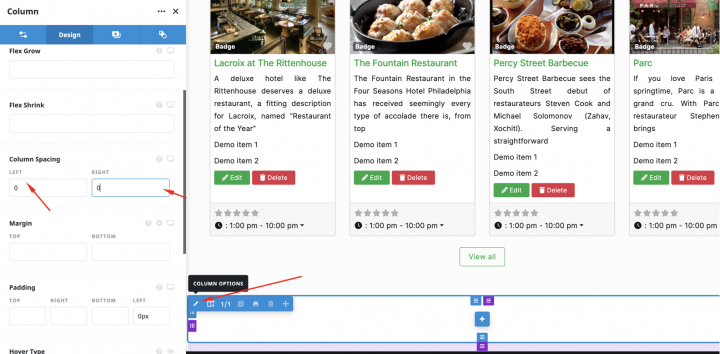
Now we will add a GD > Map inside it.
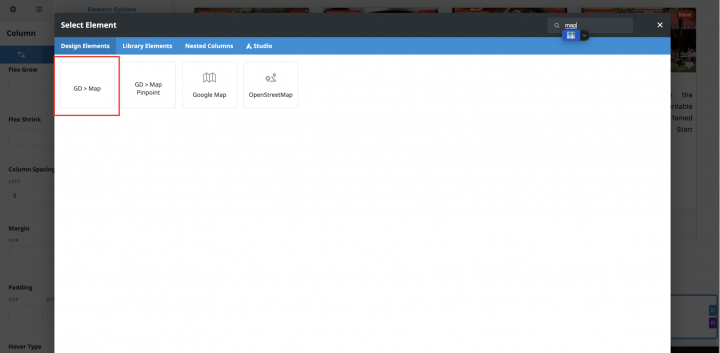
At last, it’s time to add a CTA section. we will add an empty container.
we will add a Heading tag to it.
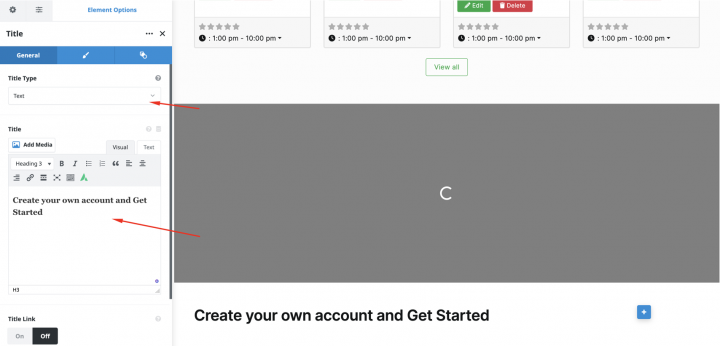
With following settings
Alignment: Left
HTML Heading Tag: H3
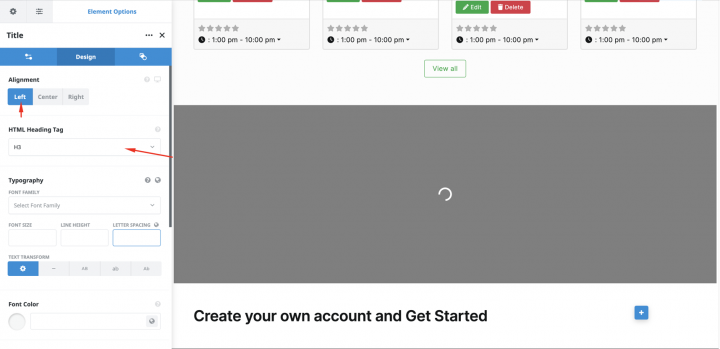
Now let’s add a button block to it with a link to the Add listing page.
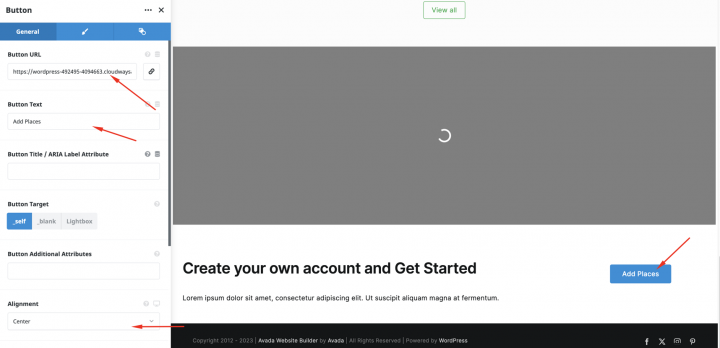
Create Footer Layout
Finally, we will create a global footer layout. In a similar manner as we did for the header section.
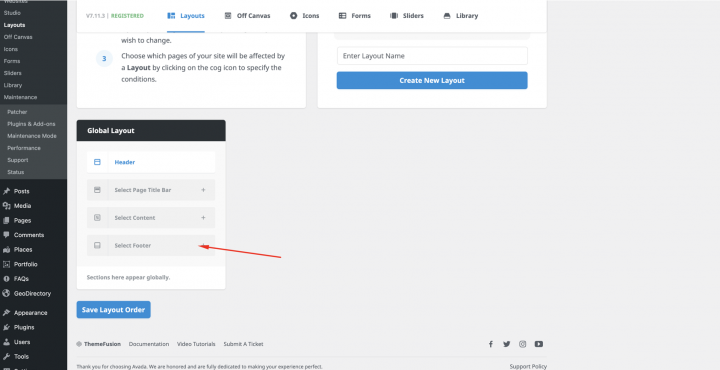
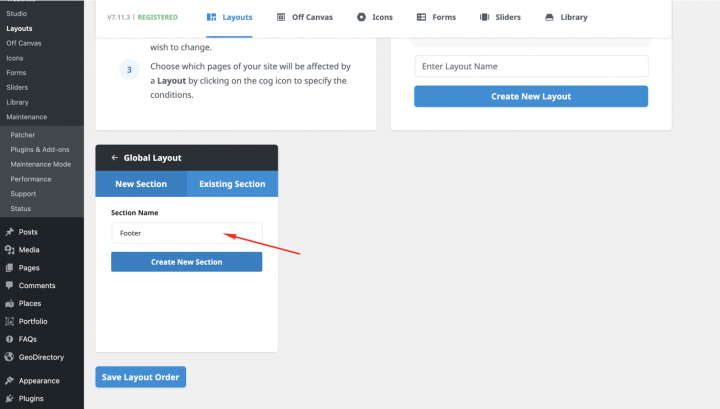
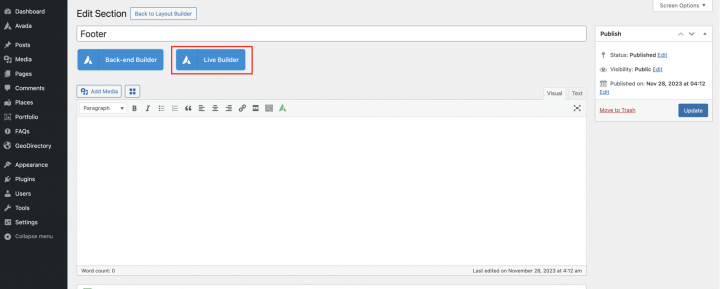
In this example, we will use a prebuilt Footer layout.
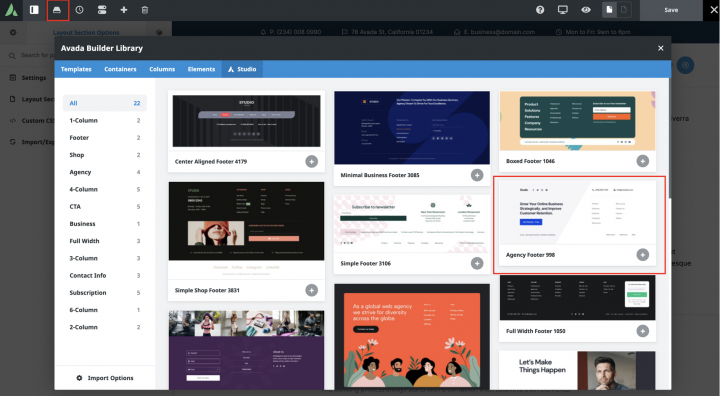
You can make the changes to this footer layout. For now, I am keeping it to default.
After this last step, our homepage is ready.
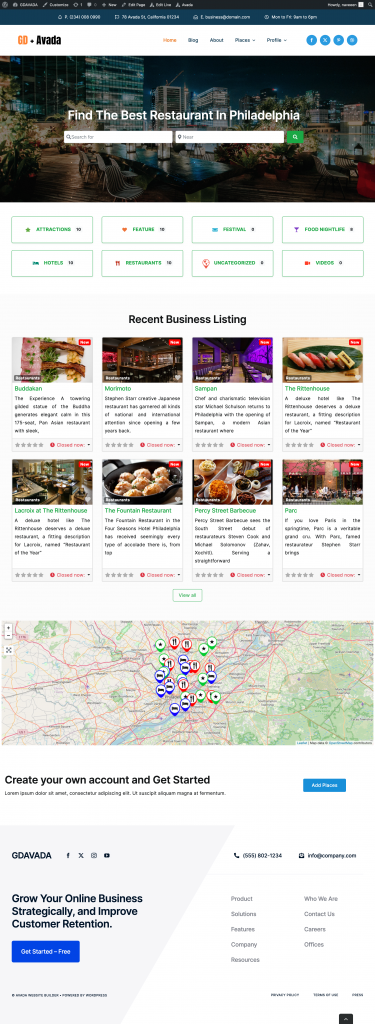
3. Avada Directory Website Listings and Search page design
Now, you need to design two essential pages for any directory.
The listings page (general archive, categories, tags) and the search results page.
GeoDirectory creates them by default with a general layout. In this tutorial, we will create and customize the layout of these pages using Avada Builder.
The listing and search pages are mostly identical so we create it once and just copy the layout on the other page.
We decided the Listing page layout would be the listings on the left, and on the right, a sticky map showing the listings’ precise location.
This is very easy.
Listings page
Go to Geodirectory > Settings > General > Pages > Click on edit GD Archive page template
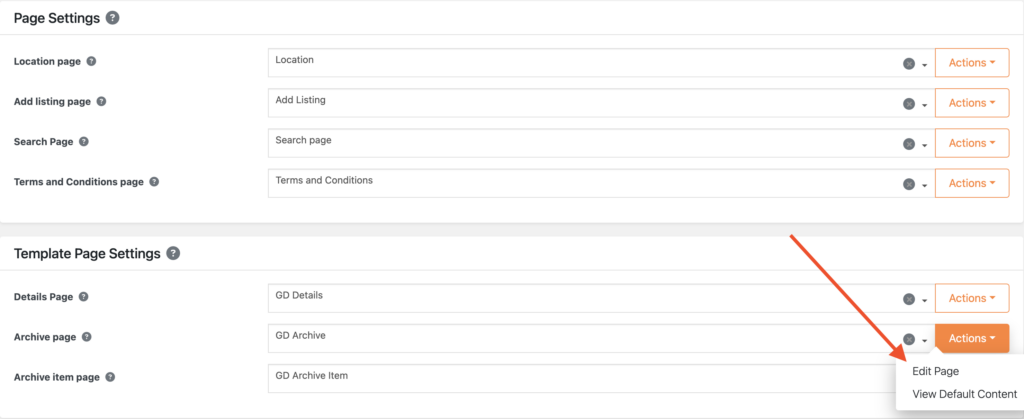
Remove all the content from this GD Archive page template.
Now edit the page using the Live builder.
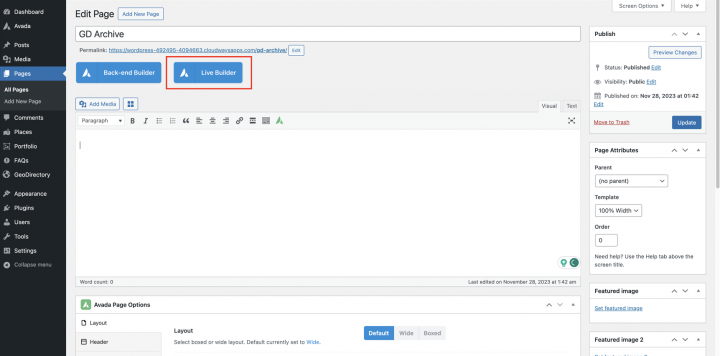
We will add an empty container with content padding 0 from the Top and Bottom.
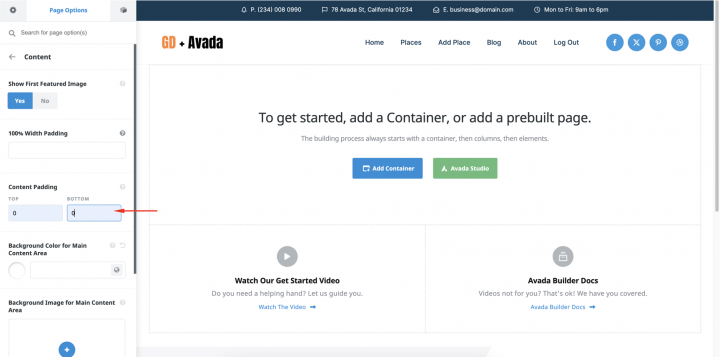
Now lets add a column inside and we will drag GD > Page title inside it.
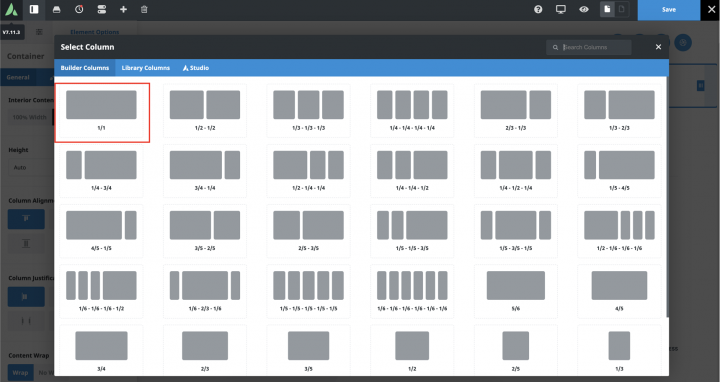
Let’s set
backgrond color: #f6f6f9
Padding: 50px 0px 50px 0px
Container Link Color: #efefef
Now lets add a two column container.
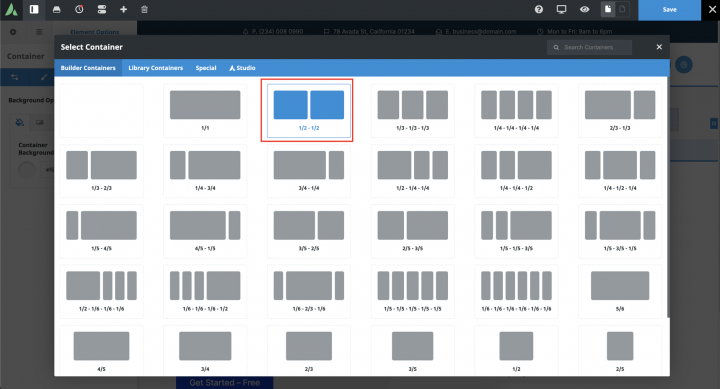
Next, on the left container, we will add GD Archive page-related blocks like GD > Loop Action, GD > Loop, GD > Loop Pagination, and GD > Search on top so the user can search from the Archive page.
On the right column, we will drag the GD > Map block.

Let’s set the map
Height: 150vh
Padding: 30px 0px 30px 0px
and lets keep settings to default.
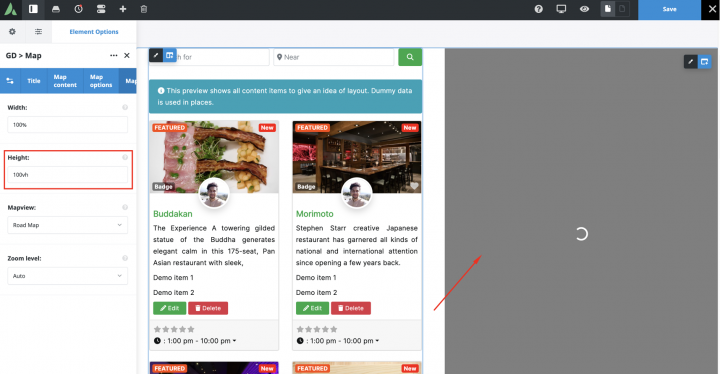
we will add the gd-loop-column class to the left column.

we will add the following CSS snippet in the theme customizer.
.gd-loop-column .fusion-column-wrapper{
    overflow-y: scroll;
    padding-right: 17px;
    max-height: 960px;
}
Our Archive page is ready.
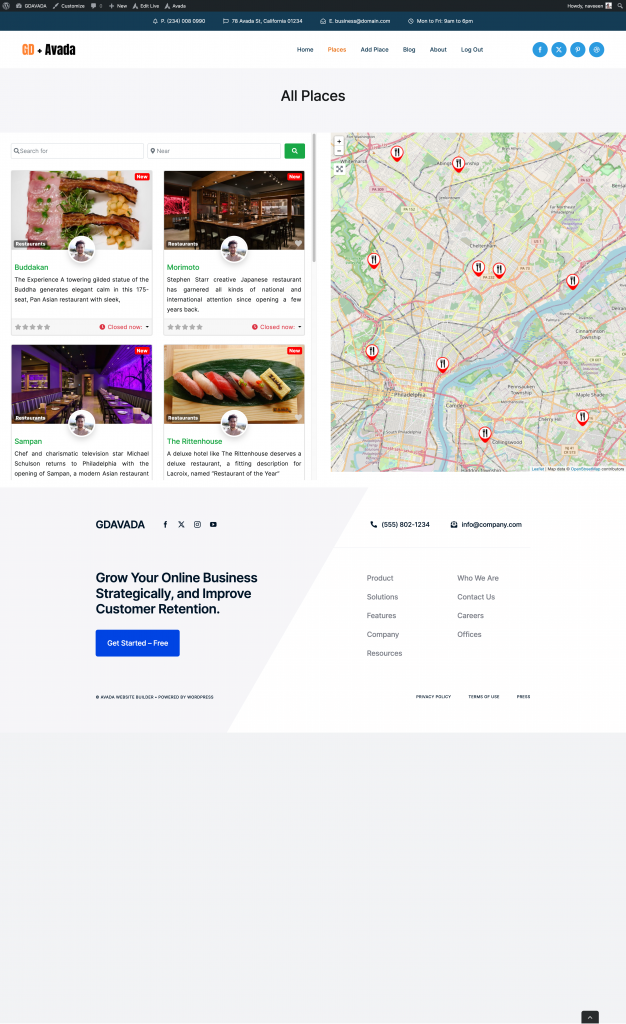
To create the search page layout.
We will assign the Global header and Footer to this layout.
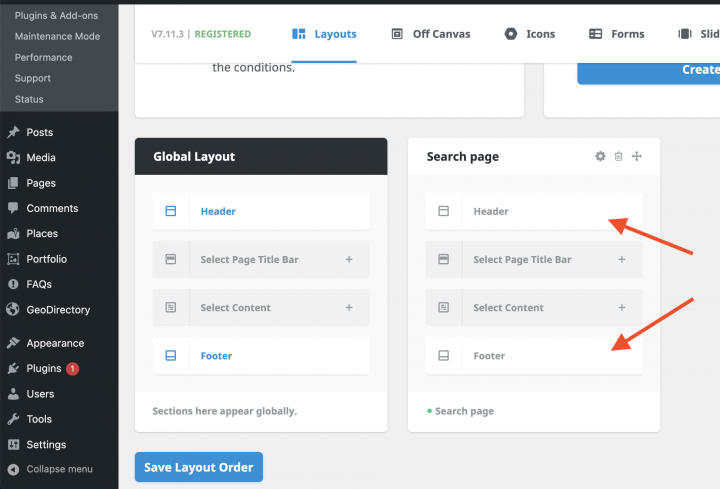
we will go to Avada > Layouts
we will add this and assign this layout to the search page.
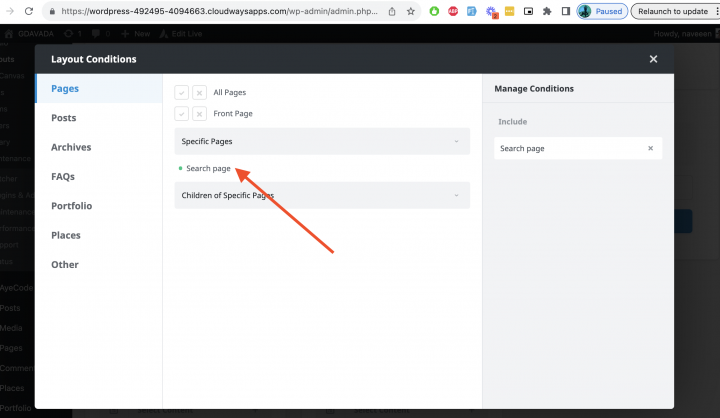
In the Search page now create a search content template

and copy all the sections from the GD > Archive page to this search page.
After this our search page template is ready.
4. Avada Directory Website single Listing page design
Now it’s time to create the detail page template. We will go and edit the GD Detail page template in Avada Builder.
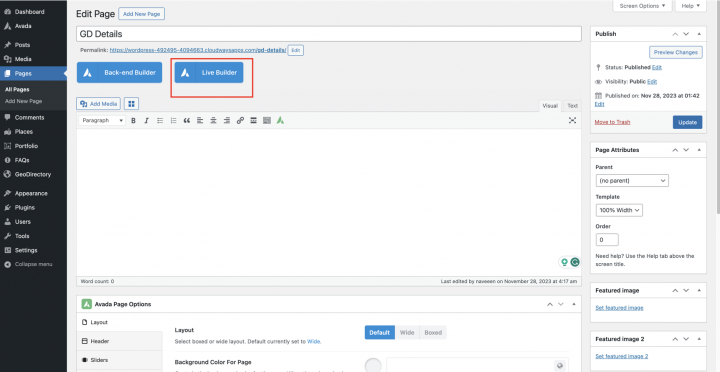
We will add an empty container with
Interior Content Width: 100% Width
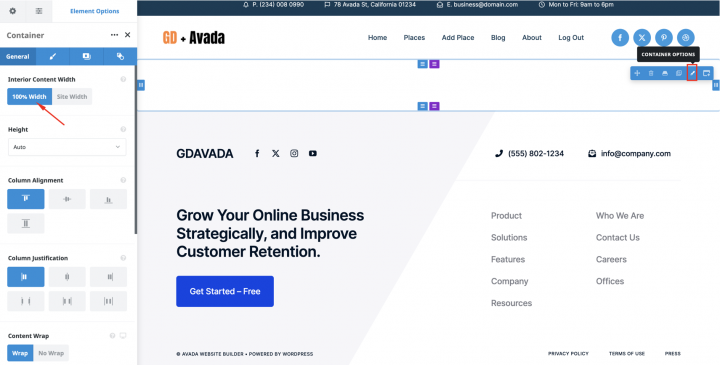
We will add GD > Post images block in it with the following settings.
Image Limit: 10
Show limit: 3
Output Type: Slider
Auto Start: Enable
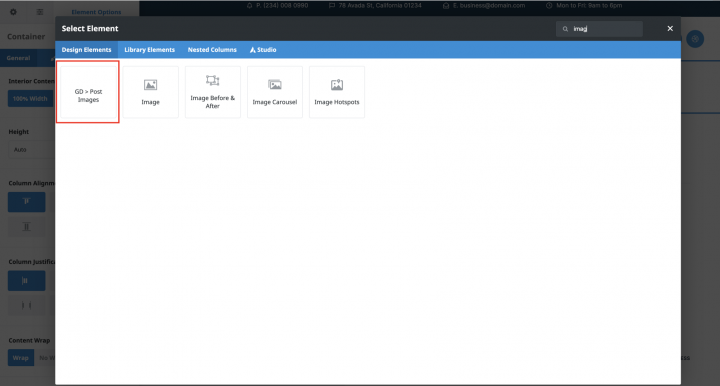
In the GD Details page make sure to disable Show first featured image.
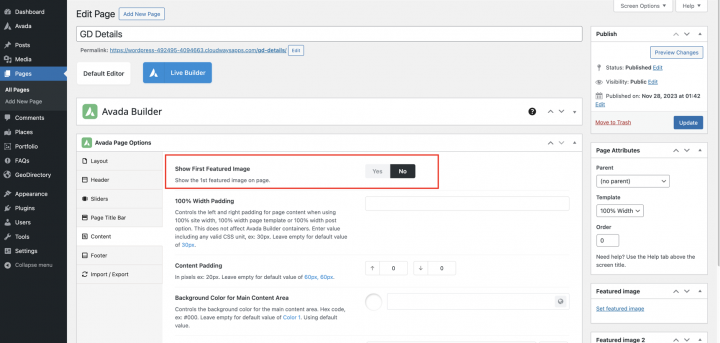
Now again we will add a container with a two-column layout like below.
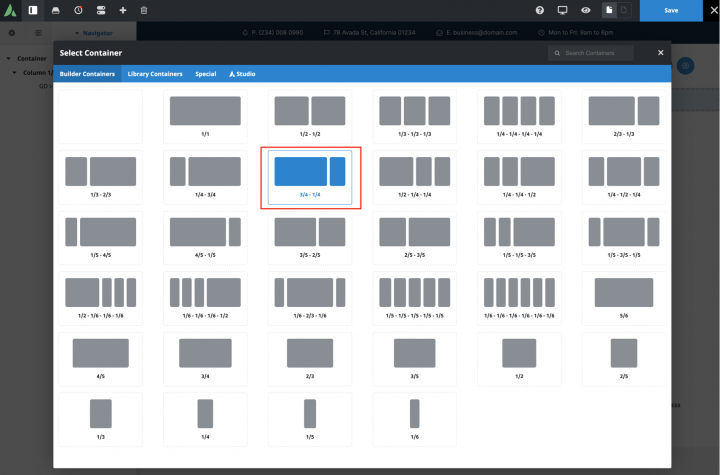
Now, let’s individually add all required GD Detail page blocks on the left column.
Which includes GD > post Title, GD > Single Taxonomies, GD > Single Tabs, and GD > Single Next Prev.
We will add the GD > Author Action and GD > Output Location block on the right column.
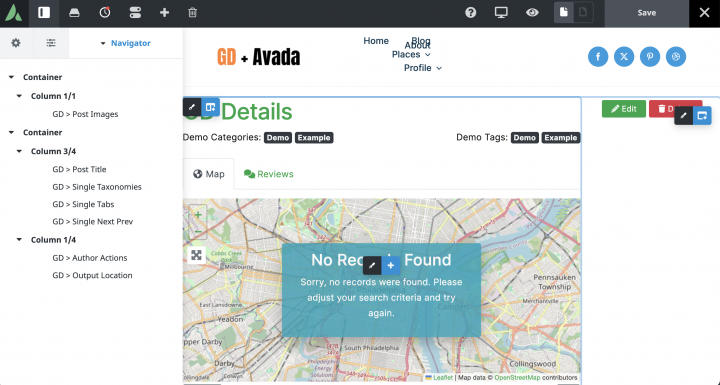
After doing it, our Listing Detail page is complete.
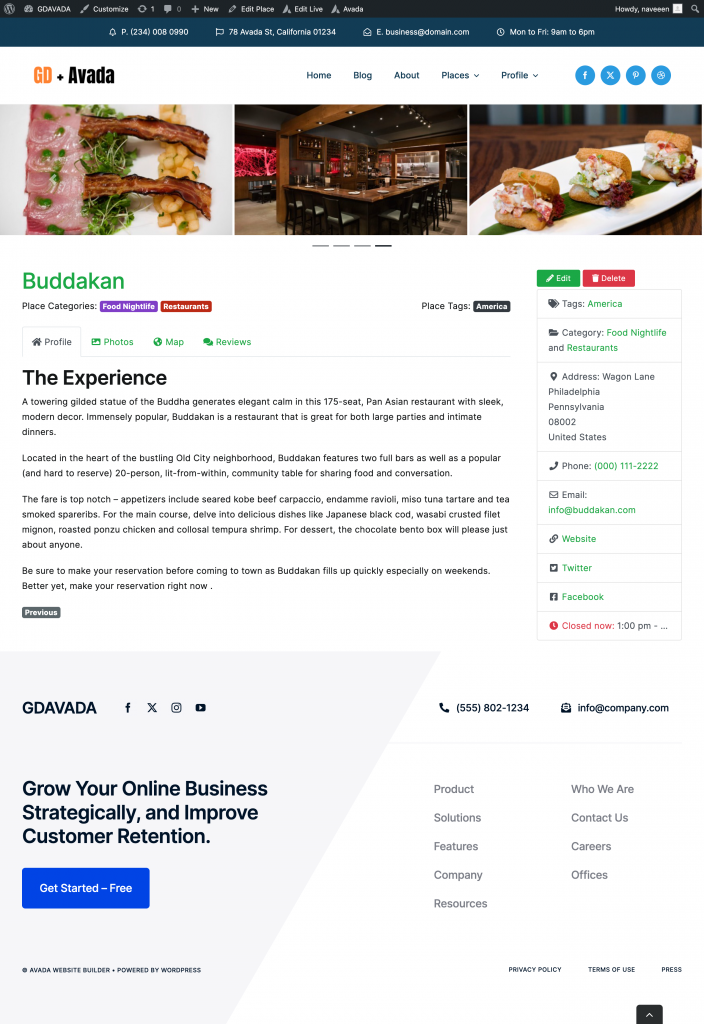
Adding Premium Features to your Avada Directory Website
If you wish, now you can add premium features to your directory, such as:
- Paid Listings: with the GeoDirectory Listing Price Manager add-on, you can set prices for listing submission. For each price tier, you can enable/disable features such as Restricting the number of pictures for free listings while allowing more images for paid listings and more or fewer tags and categories. Enabling or disabling specific custom fields. Submitting longer or shorter descriptions.
- Claim Listings: This is a fundamental feature for a directory where the admin creates the database and invites business owners to take control of their free listings. The claim listing process may include forcing an upgrade to a paid listing to take over the listing’s ownership.
- Advertising: selling ads is another form of monetizing an online directory. If you have a lot of traffic, you can use Ads networks. Otherwise, you may sell ads directly, allowing businesses to add banners in specific areas of your website or allowing for listings to appear as ads, for example, on top of organic search results.
These are just three examples. However, a directory website offers many ways to make money online.
You can create a global marketplace of handcrafted items, sell event tickets, or sell discount coupons.
Newcomers, start your journey here: Launching a directory website: A beginner’s guide.
This generic tutorial can be adapted to any theme or page builder.
The possibilities are limitless.
Diving into the world of online business directory niches can feel like a deep-sea exploration – there’s more beneath the surface than meets the eye.
Especially when it comes to niche-specific directories, where the real treasure lies.
Have you ever wondered why some directories seem to have a magnetic pull on their target audience, effortlessly drawing in high-quality leads and conversions?
It’s all about tapping into the right niche.
This article reveals the 11 best online business directory niches that could be your golden ticket to entrepreneurial success.
You’ll find:
- A curated list of online business directories meticulously organized by niche.
- Insider knowledge on choosing the perfect niche-specific directories.
- Expert advice on building your own niche-focused online business directory.
- Pro tips for optimizing your directory to attract the right crowd and boost traffic.
And guess what? With GeoDirectory, setting up a niche-specific online business directory on WordPress is a breeze.
If you’re looking for a tool that makes creating city directories, job boards, or classifieds websites as easy as pie, GeoDirectory is your go-to.
Stay tuned to discover how this tool can be a game-changer for your local business directory venture.
What are online business directory niches?
Online business directory niches are specialized listings that focus on specific industries, professions, or interests.
They provide targeted information and resources relevant to specific sectors, such as healthcare, legal services, local artisans, or eco-friendly businesses.
These directories enable users to quickly locate businesses and services within a specific niche, thereby enhancing visibility for listed companies and helping consumers make informed choices.
You can create your business directory focused on a specific thing and collect monthly profits from ads, premium listings, referrals, and other business directory monetization options.
1. Health and Wellness Directories
The health and wellness sector is booming, with an increasing number of people seeking products and services that promote a healthy lifestyle.
An online directory in this niche can become a vital resource for individuals seeking wellness solutions, ranging from fitness centers to holistic health practitioners.
Why This Niche? In an era where health is a top priority, directories focused on wellness services and products meet a vital need.
They connect health-conscious consumers with the resources they need to maintain their well-being, making them a valuable asset for businesses in this sector.
Maximizing the Directory’s Potential
- Emphasize Expertise: Highlight listed businesses’ qualifications, specializations, and achievements to establish credibility and showcase their expertise in the health and wellness sector.
- Content is King: Regularly update the directory with health tips, wellness trends, and engaging blogs, leveraging current topics to keep users informed and encourage repeat visits.
- Build Community through Reviews: Actively encourage user reviews and prominently feature them, fostering a sense of community and trust, and enhancing the directory’s reliability in the eyes of new users.
- Interactive Features: Enhance user engagement by incorporating interactive tools, such as symptom checkers or wellness calculators, to provide a practical and informative experience.
Pro Tip: Boost user engagement in your health and wellness directory with the Saved Search Notifications add-on. It allows users to receive updates on new listings that match their health interests, keeping them connected and informed.
Successful Examples
- Wellness Hub offers a comprehensive list of wellness retreats and holistic health practitioners and is renowned for its detailed service descriptions and user reviews.
The platform is renowned for its detailed service descriptions and user reviews, offering individuals valuable insights into various wellness offerings.
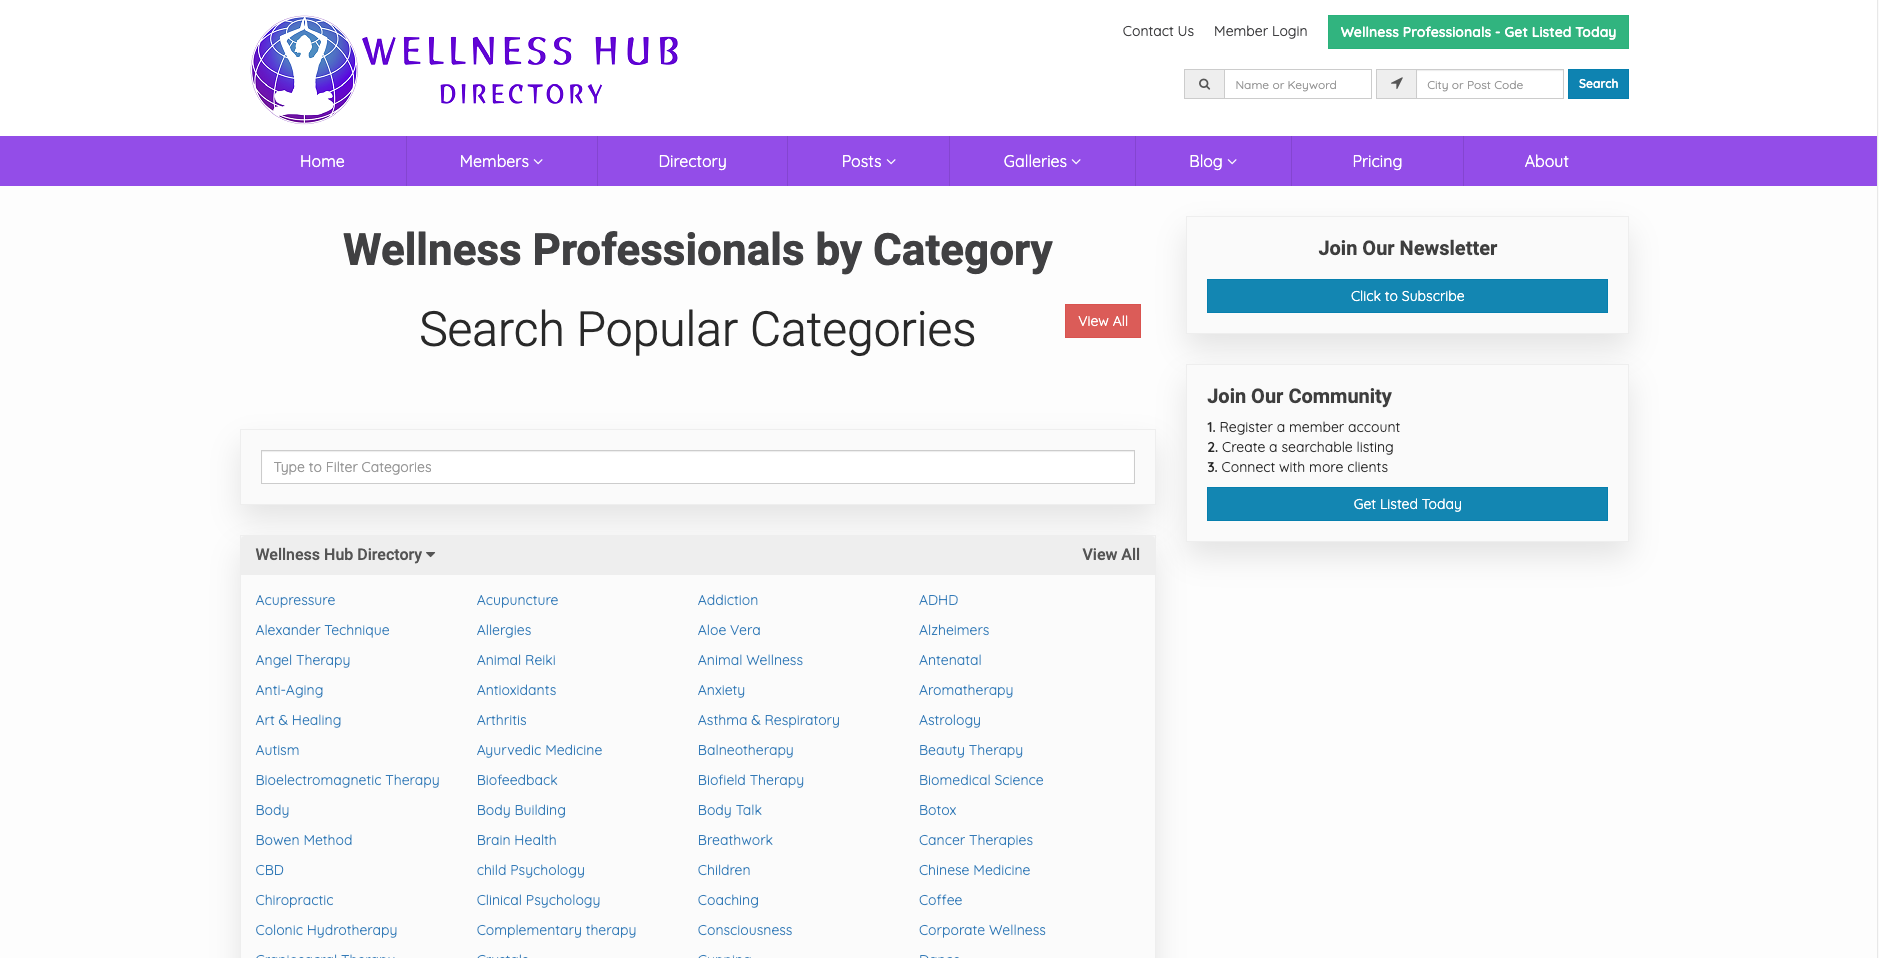
- ExRx specializes in local gyms and fitness centers, offering advanced filters for services such as personal training and group classes.
The platform’s focus on local gyms and fitness centers provides individuals a valuable resource for discovering fitness facilities that align with their specific preferences and requirements.
2. Pet Services Directories
The love for pets never fades, making pet service directories a lucrative niche.
From grooming to pet-friendly cafes, these directories cater to a passionate and ever-growing community of pet owners.
Why This Niche? Pet owners constantly seek the best for their furry friends, making a pet services directory a vital resource.
This niche is lucrative due to the dedicated and often affluent nature of its audience, which seeks the highest quality services for their pets.
Maximizing the Directory’s Potential
- Diverse Offerings: Feature a wide array of pet-related services, including grooming, veterinary care, pet-friendly dining, and pet supply stores to cater to all aspects of pet care.
- Emergency Services: Dedicate a section specifically for emergency pet services, such as 24/7 veterinary clinics, offering quick access for urgent care needs.
- Geo-Targeting: Implement location-based search functions to enable pet owners to easily find and access nearby services, enhancing the convenience and practicality of the directory.
- User Engagement: Increase engagement and repeat visits by hosting pet-related events, online forums, or discussions, creating a community space for pet owners to connect and share experiences.
Pro Tip: Utilize the Location Manager add-on to enhance your pet services directory. It helps users find services in specific regions, making the search more convenient and precise.
Successful Examples
- The AKC’s Working Group directory provides information about dogs that are quick to learn, intelligent, strong, watchful, and alert.
These dogs are bred to assist humans and excel at jobs such as guarding property, pulling sleds, and performing water rescues. - The Puppy Spot is a comprehensive resource that provides information about dog breeds, training tips, health advice, and other essential aspects of dog care.
It serves as a valuable platform for dog owners to access reliable information and guidance, ensuring the well-being and happiness of their canine companions.
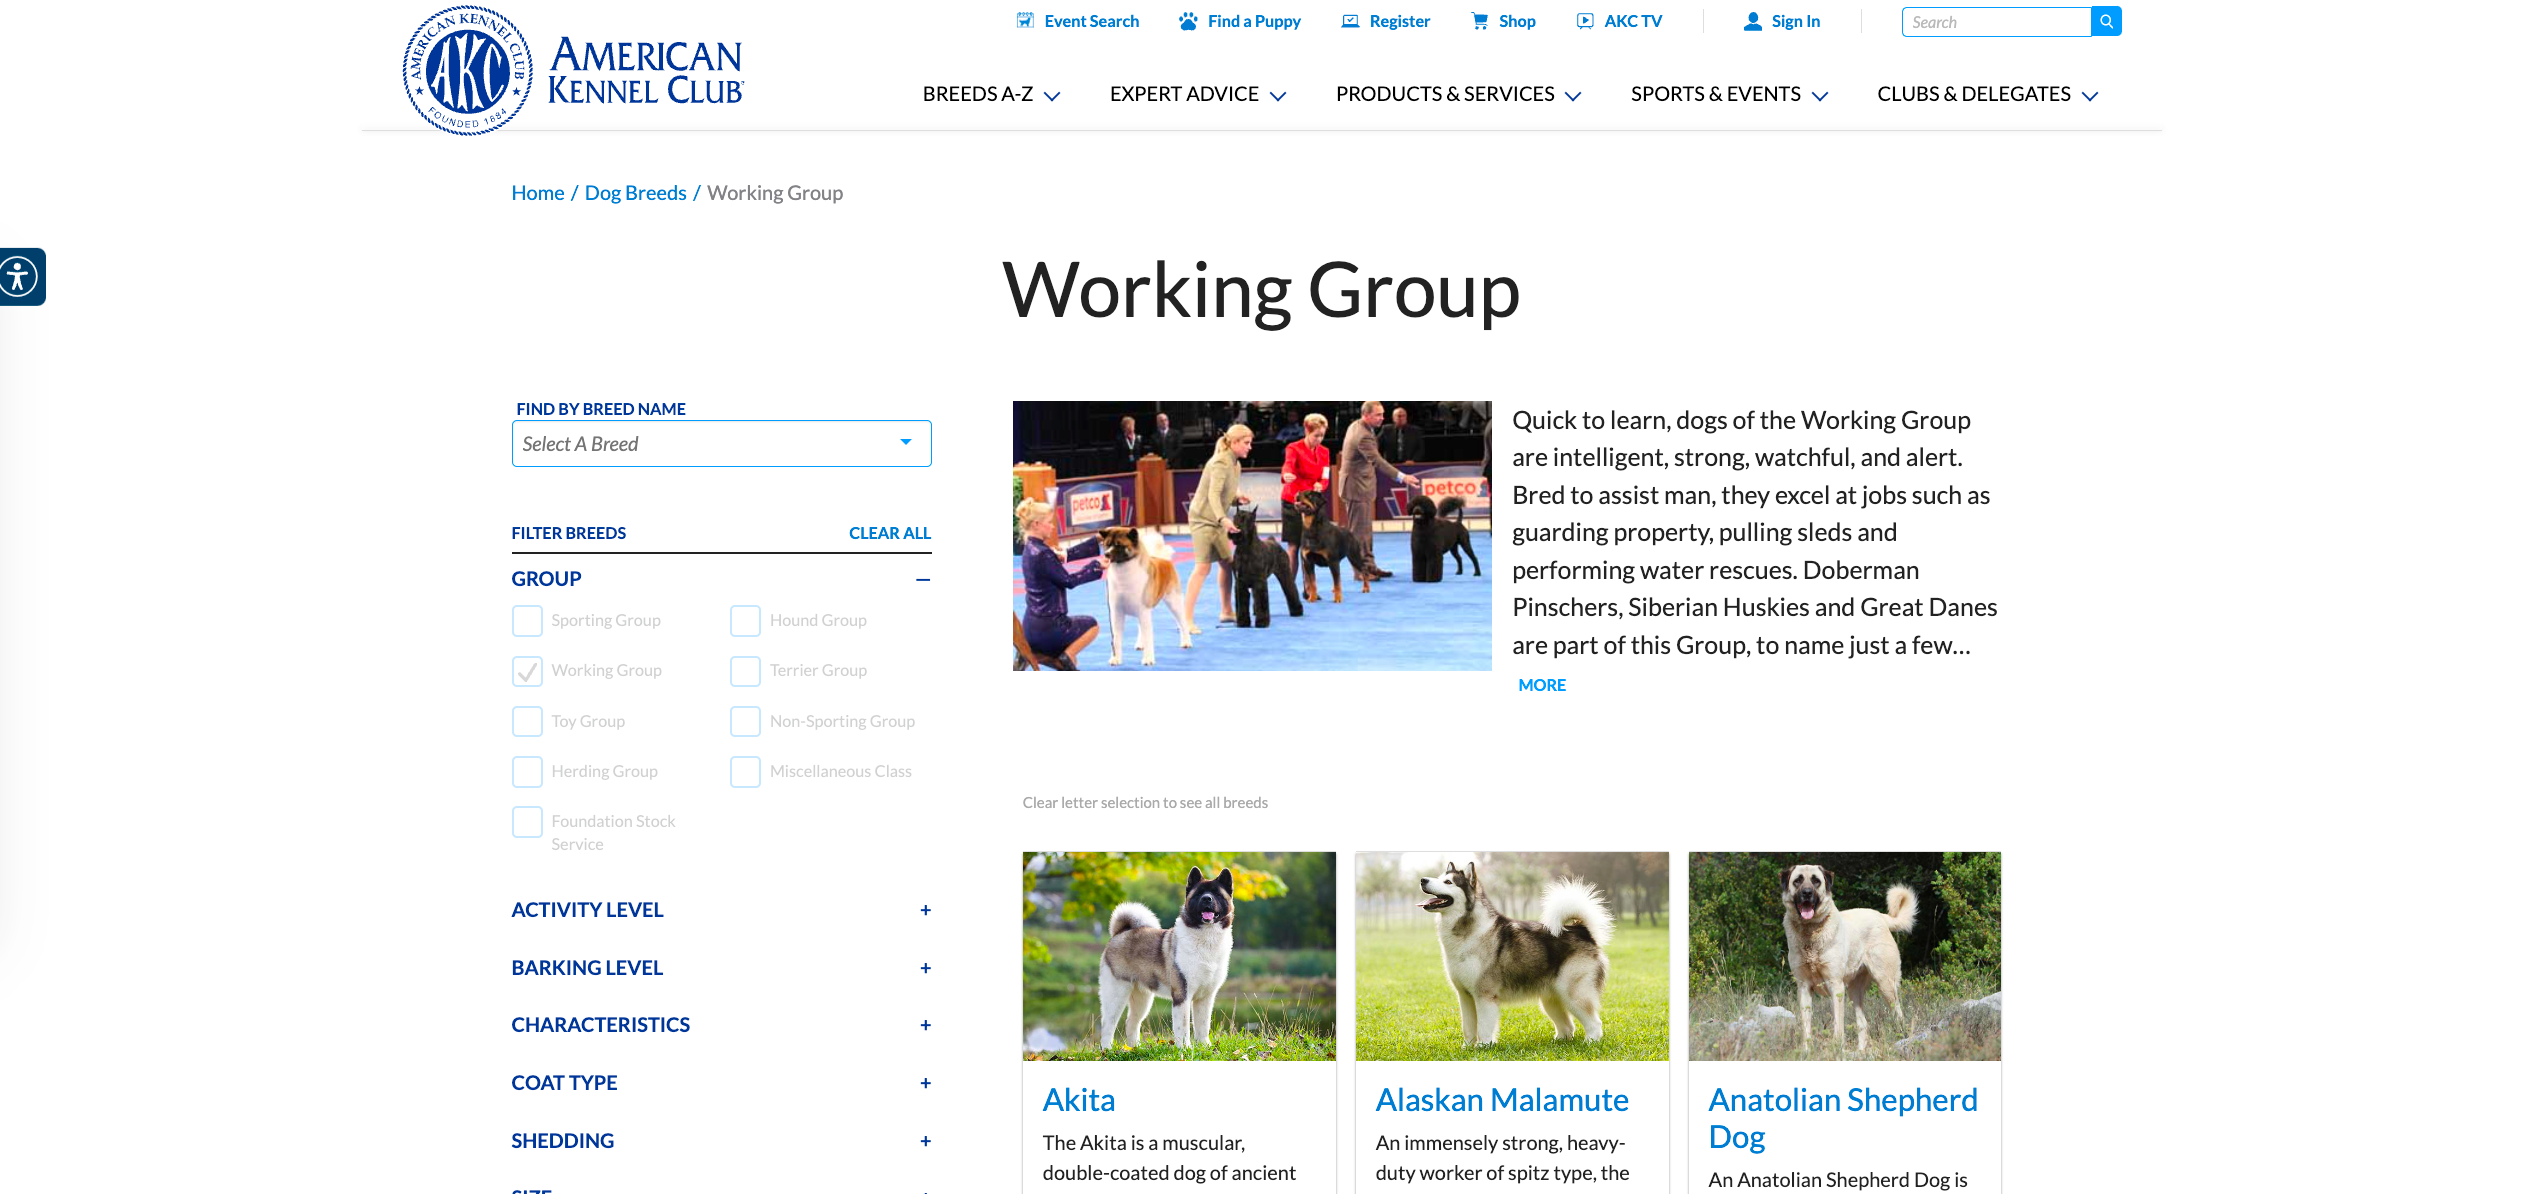
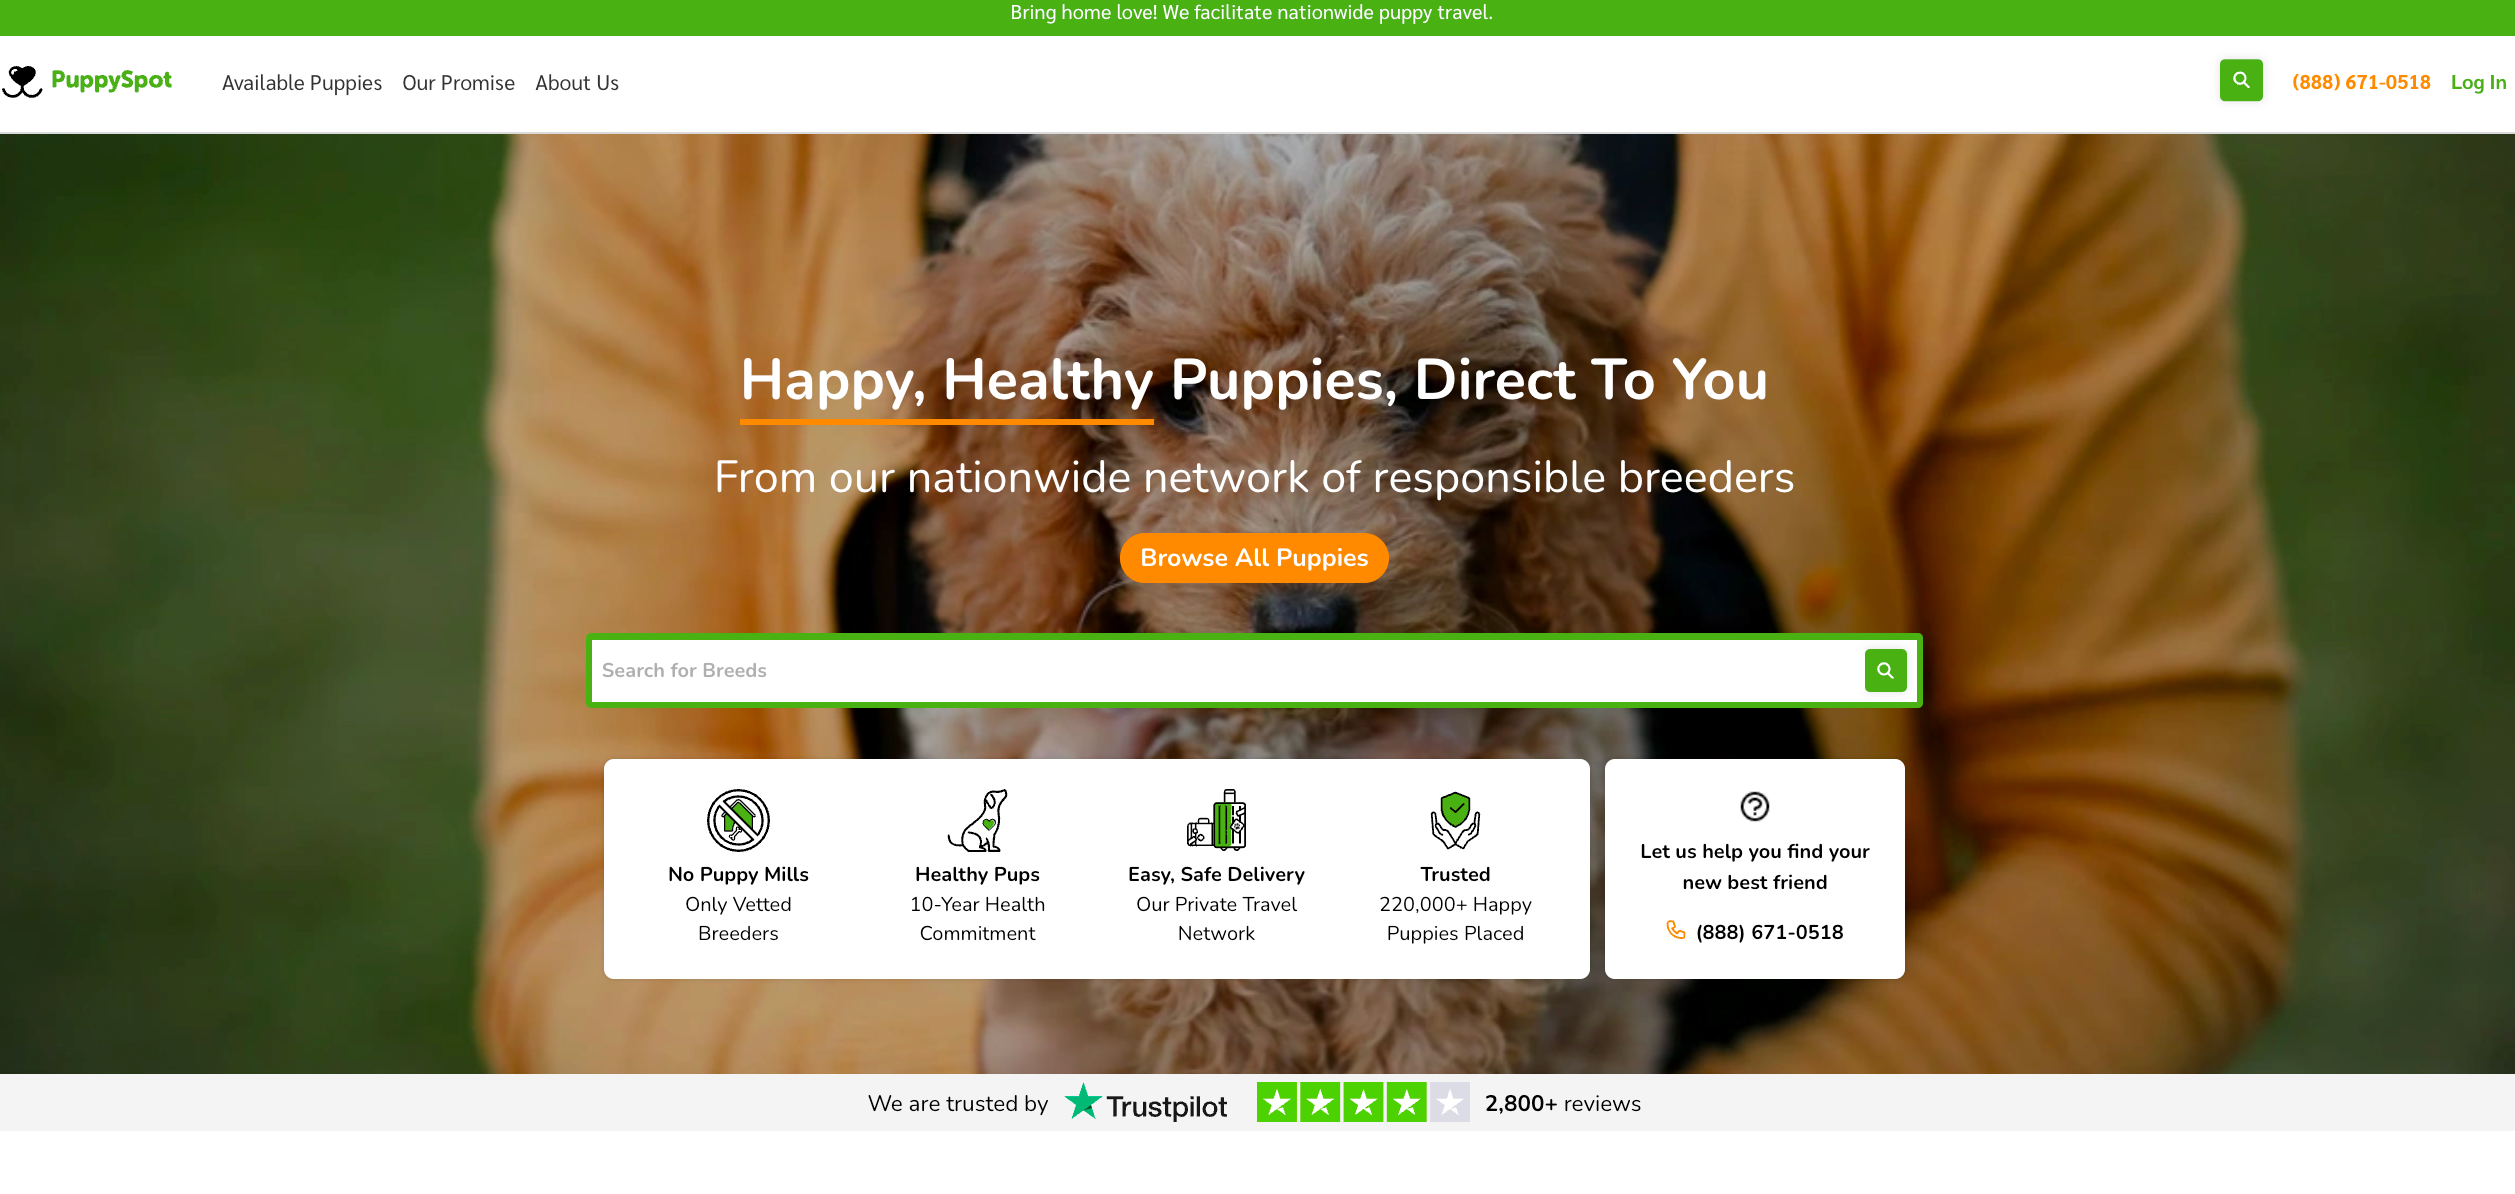
3. Local Artisans and Craftsmen Directories
In a world where unique and handmade items are increasingly cherished, directories dedicated to local artisans and craftsmen fill a significant gap.
These directories connect local creators with a broader audience, showcasing unique skills and products that can’t be found in mainstream markets.
Why This Niche? These directories capitalize on the growing demand for artisanal and locally made products. They offer a platform for small-scale artisans and craftsmen to reach a wider audience, appealing to consumers who value originality and craftsmanship.
Maximizing the Directory’s Potential
- Spotlight on Artisans: Create in-depth profiles for artisans, featuring their unique stories, crafting techniques, and inspirations. This builds a personal connection and educates users about the artistry behind each product. On your free business listing site, highlight the artisan’s journey, their local or cultural significance, and any awards or recognitions they’ve received to add depth and context.
- Visual Impact: Utilize high-quality images and videos to vividly showcase the craftsmanship, colors, and textures of handmade products. Include a behind-the-scenes look into the crafting process, which can increase user engagement by up to 30% (based on industry engagement statistics). This approach brings the products to life, emphasizing their quality and uniqueness.
- Events and Workshops: Actively promote and update users about local craft fairs, workshops, and exhibitions. This not only supports local businesses but also fosters a sense of community. Provide details such as dates, locations, and featured activities, and consider including user testimonials or highlights from past events to illustrate the vibrant and interactive nature of these gatherings.
- E-commerce Integration: Enhance the user experience by providing seamless e-commerce options, allowing users to purchase artisan products directly from their profiles. Highlight unique selling points, such as the exclusivity of items, limited-edition pieces, or customizable options. To further convenience, integrate features such as one-click checkouts, multiple payment options, and a clear return policy.
Pro Tip: Showcase diverse artisan talents using the Custom Post Types add-on. This feature allows for specialized listings, giving each artisan a unique presence.
Successful Examples
- Artisan Guide is a directory created exclusively for artisans, galleries, art organizations, and artisan shoppers. It provides a platform for artisans and creatives to showcase their work and connect with potential customers.
- My Artisan Finder excels in integrating e-commerce functionalities, allowing customers to purchase unique handmade items directly. This directory is designed to facilitate the discovery and support of local artisans and their amazing creations, making it a valuable resource for individuals interested in supporting local craftsmanship.
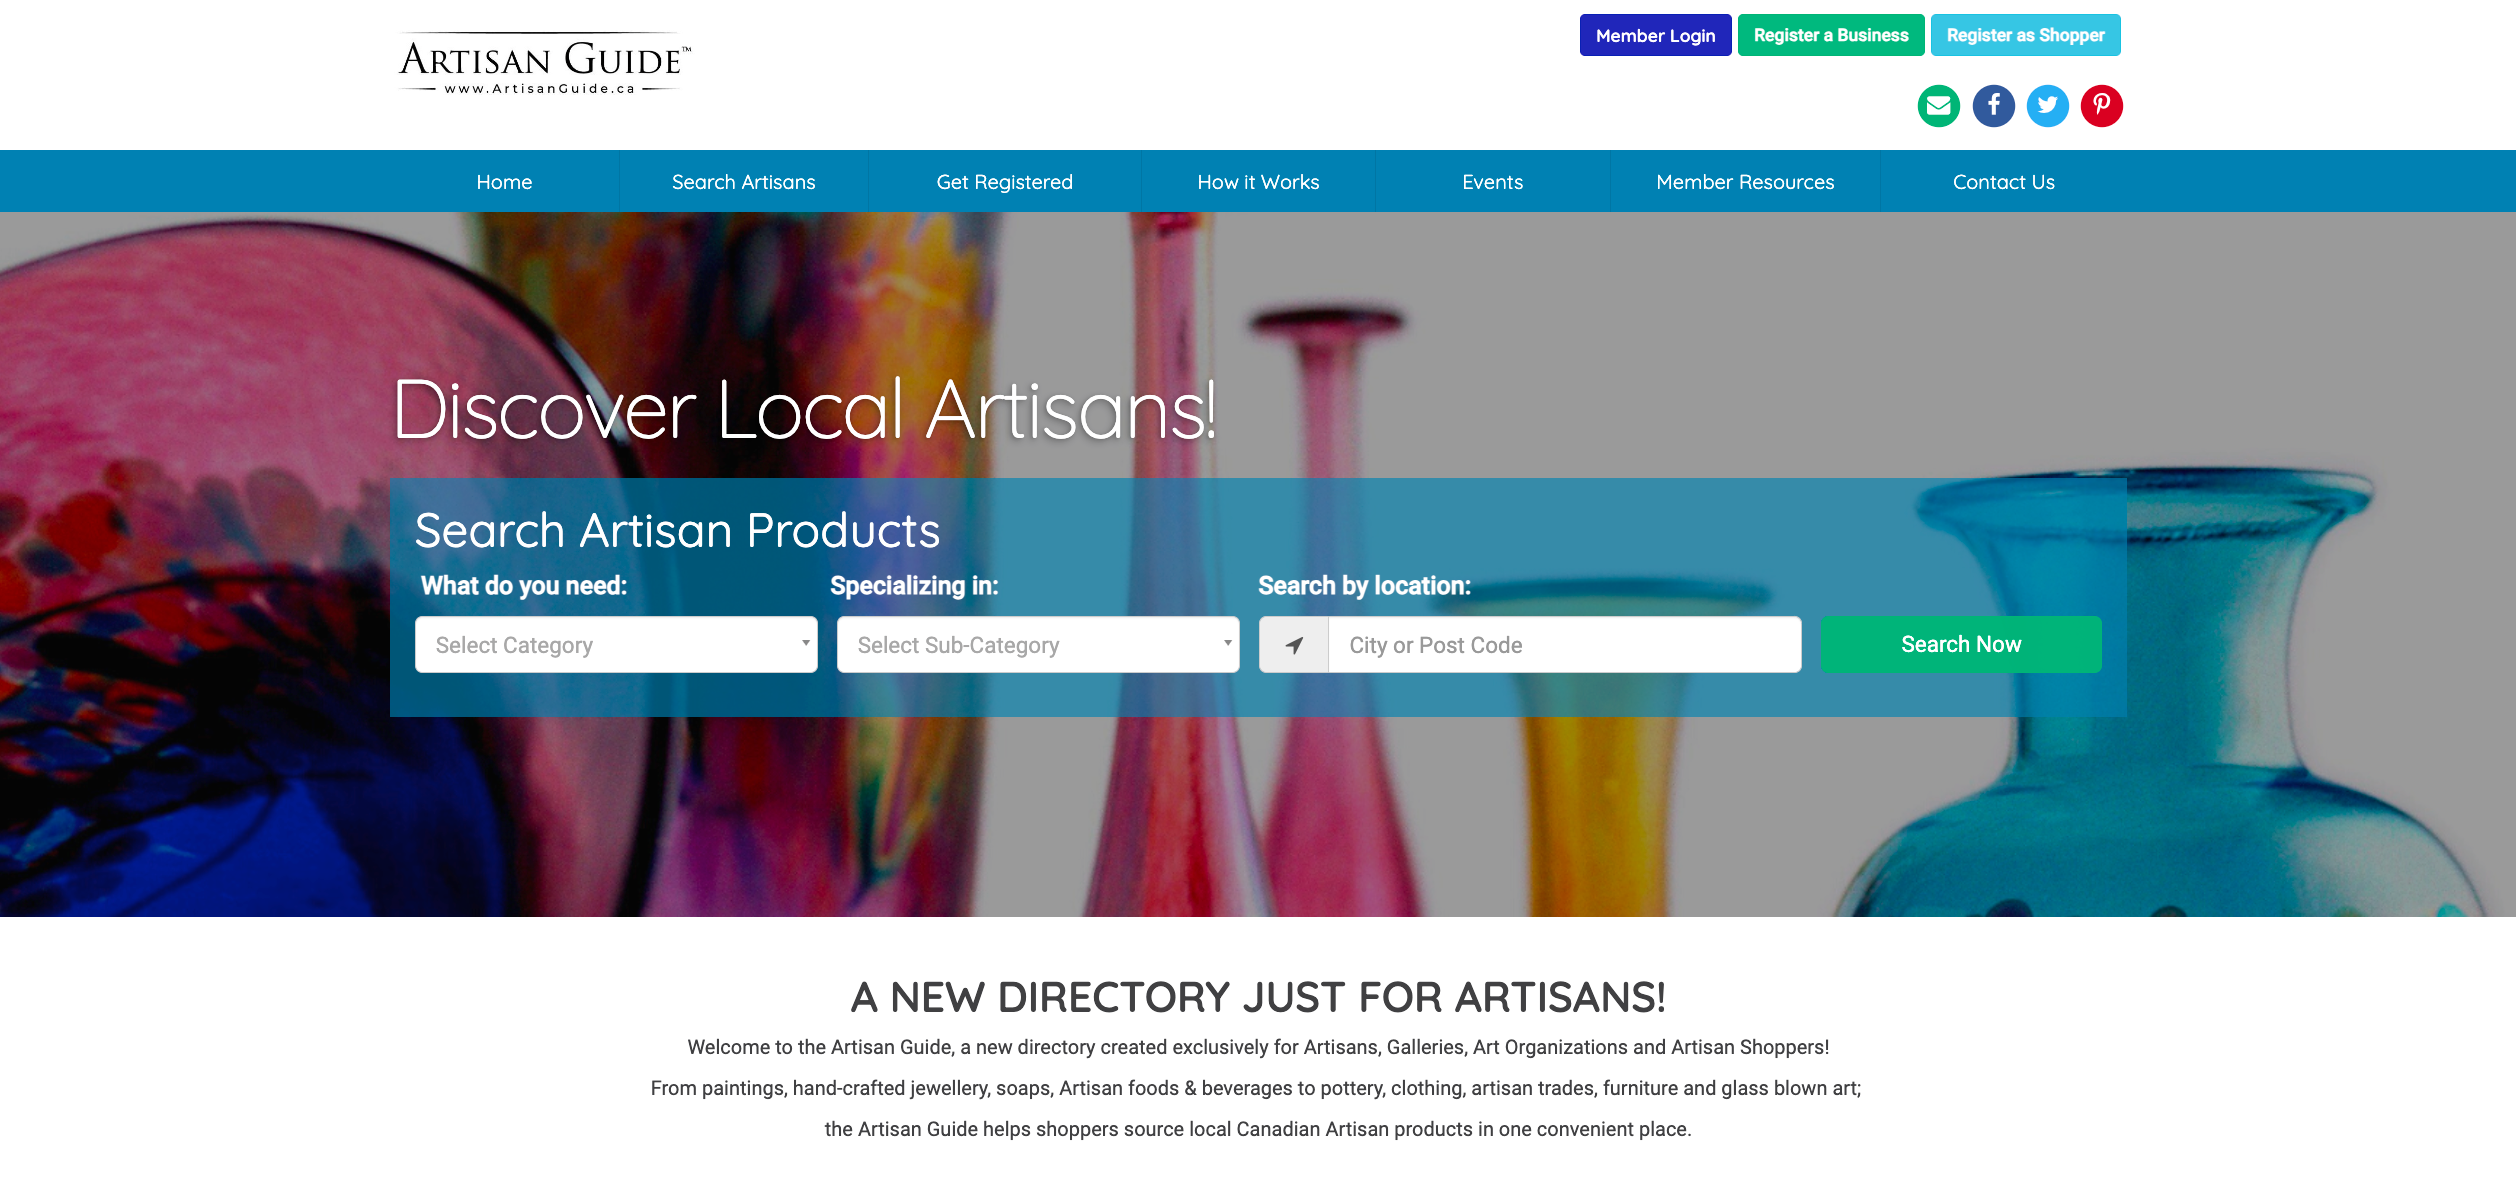
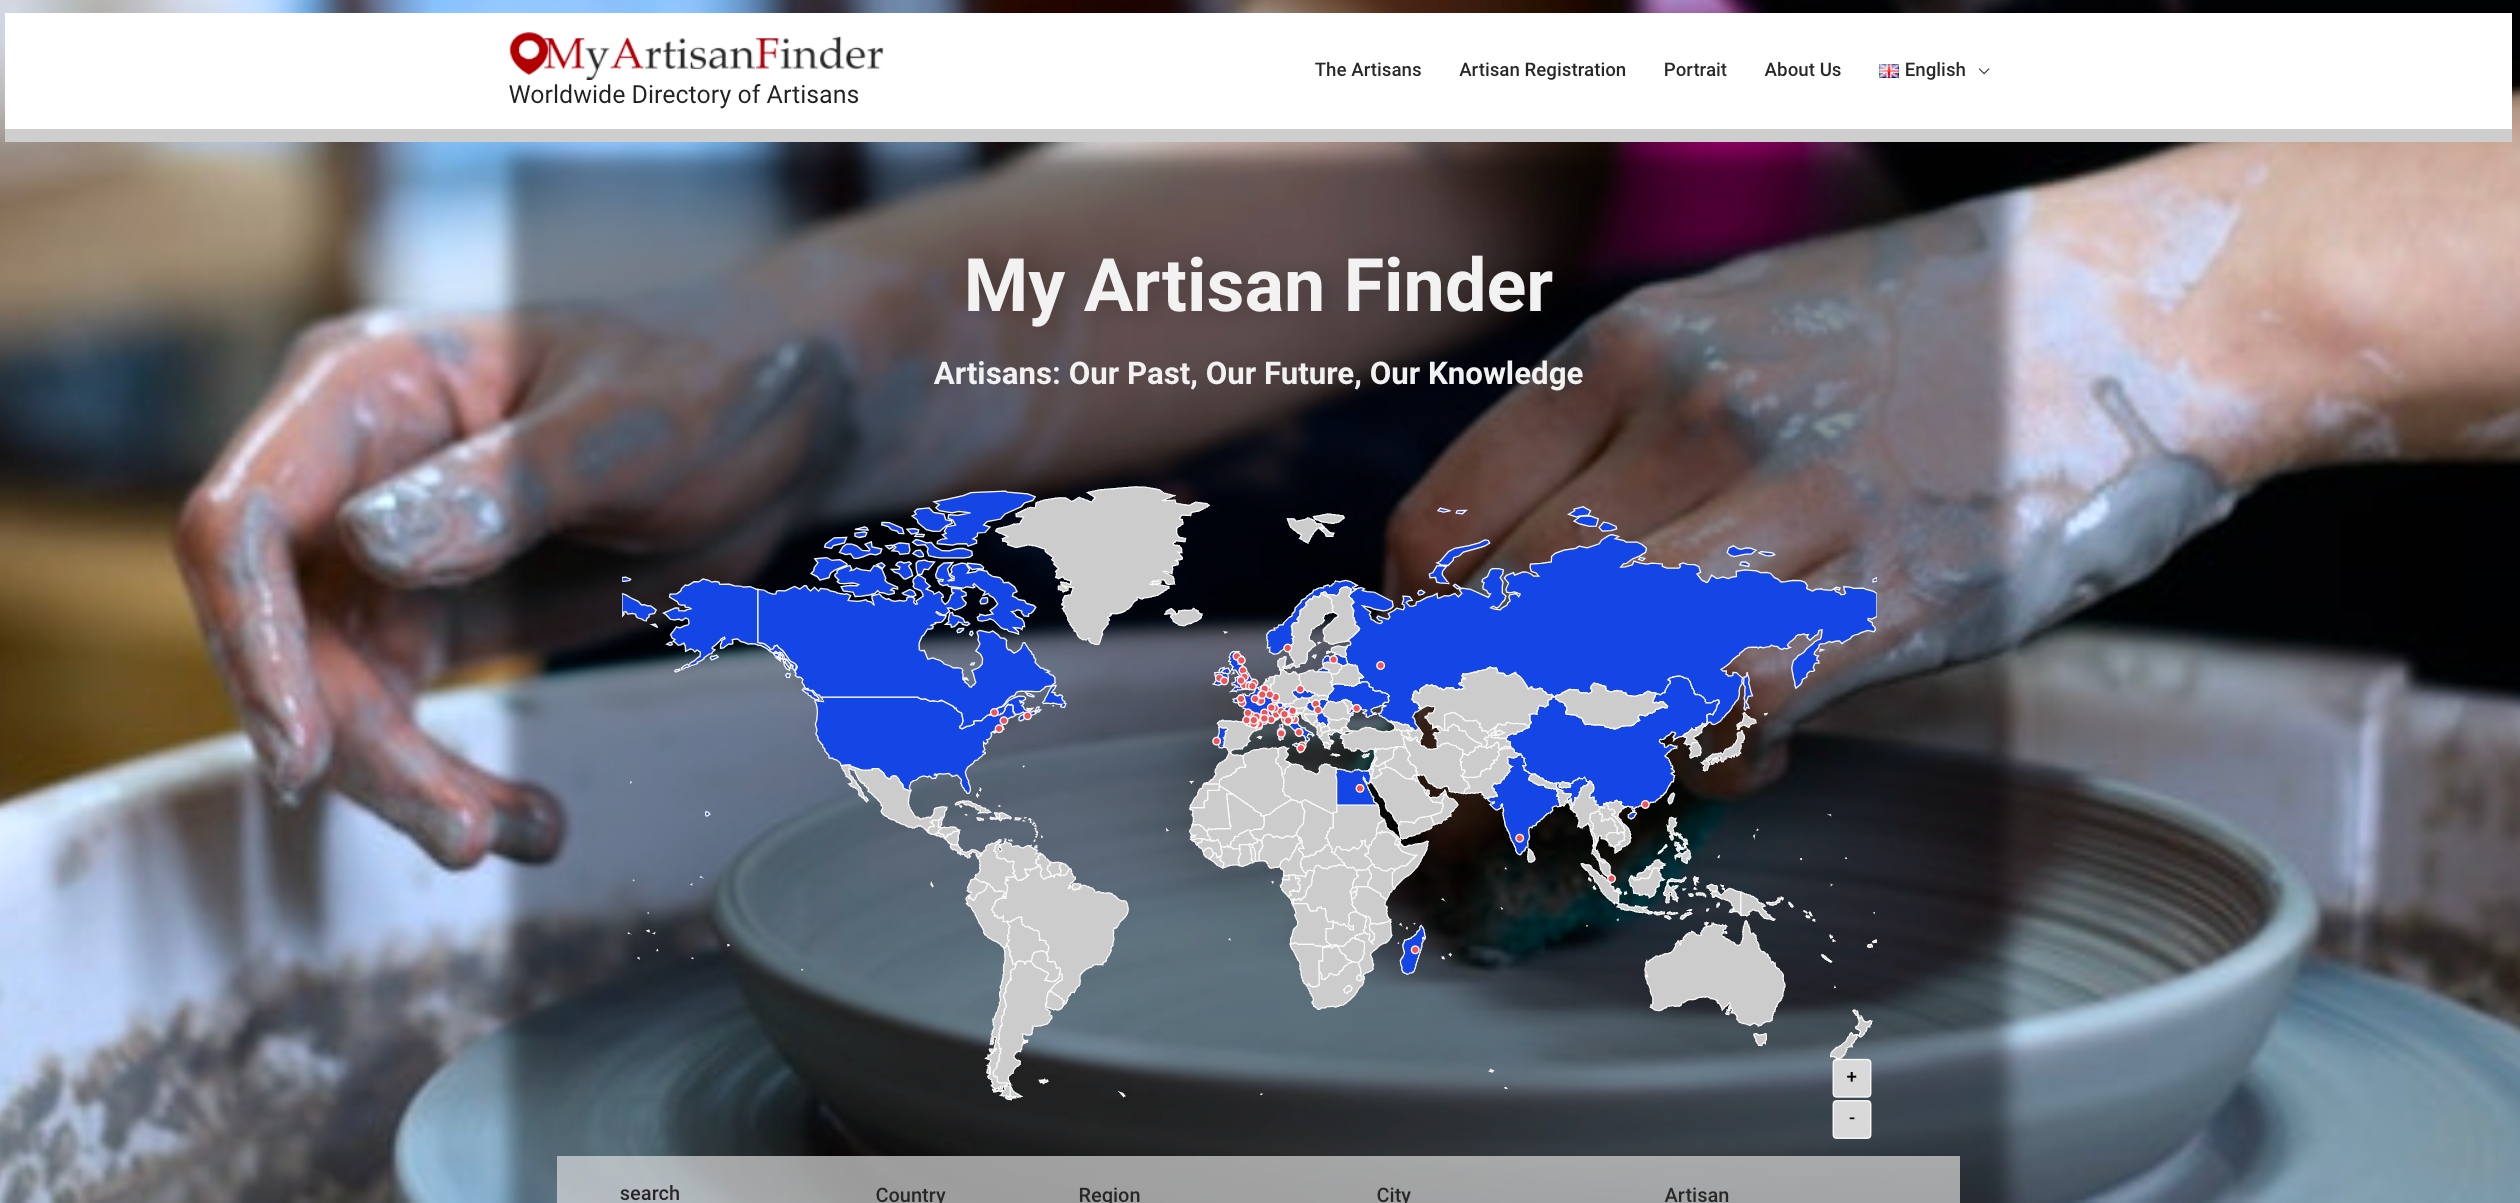
4. Green and Sustainable Businesses Directories
With sustainability becoming a critical concern, directories focusing on green and eco-friendly businesses are more relevant than ever.
These directories are essential for consumers who prioritize environmental responsibility in their purchasing decisions.
Why This Niche? Sustainable business directories cater to the growing demand for eco-friendly products and services.
They provide a platform for green businesses to gain visibility and for consumers to make more environmentally conscious choices.
Maximizing the Directory’s Potential
- Highlight Sustainability: Emphasize the eco-friendly aspects of businesses by detailing their sustainable practices, such as renewable energy use or zero-waste policies. Enhance listings with interactive infographics or success stories that demonstrate their environmental impact.
- Educational Content: Include in-depth articles and resources about sustainability, such as how to reduce carbon footprints, and support them with statistics, including the fact that businesses adopting sustainable practices see a 20% increase in customer loyalty.
- Community Initiatives: Showcase businesses’ involvement in community-based environmental projects, like local clean-up drives, with updates and stories highlighting their direct ecological impact.
- Certification Badges: Display recognized eco-certifications or badges on business profiles, providing brief explanations of what these certifications mean, such as the significance of the Energy Star label, to build trust and authenticity.
Pro Tip: Create a vibrant community around sustainability with the BuddyPress Integration add-on. This feature allows users to interact and share eco-friendly practices, enriching the directory experience.
Successful Examples
- EcoHubMap Eco-Friendly Directory is an online platform that brings together environmental organizations and eco-friendly businesses worldwide in one place. This directory is valuable for consumers who want to support sustainable businesses and make informed choices.
- GreenPages offers a blend of educational content and a wide range of sustainable business listings, enhancing its credibility and user engagement. It provides a comprehensive collection of eco-friendly businesses, making it easier for individuals to find and support environmentally responsible companies.

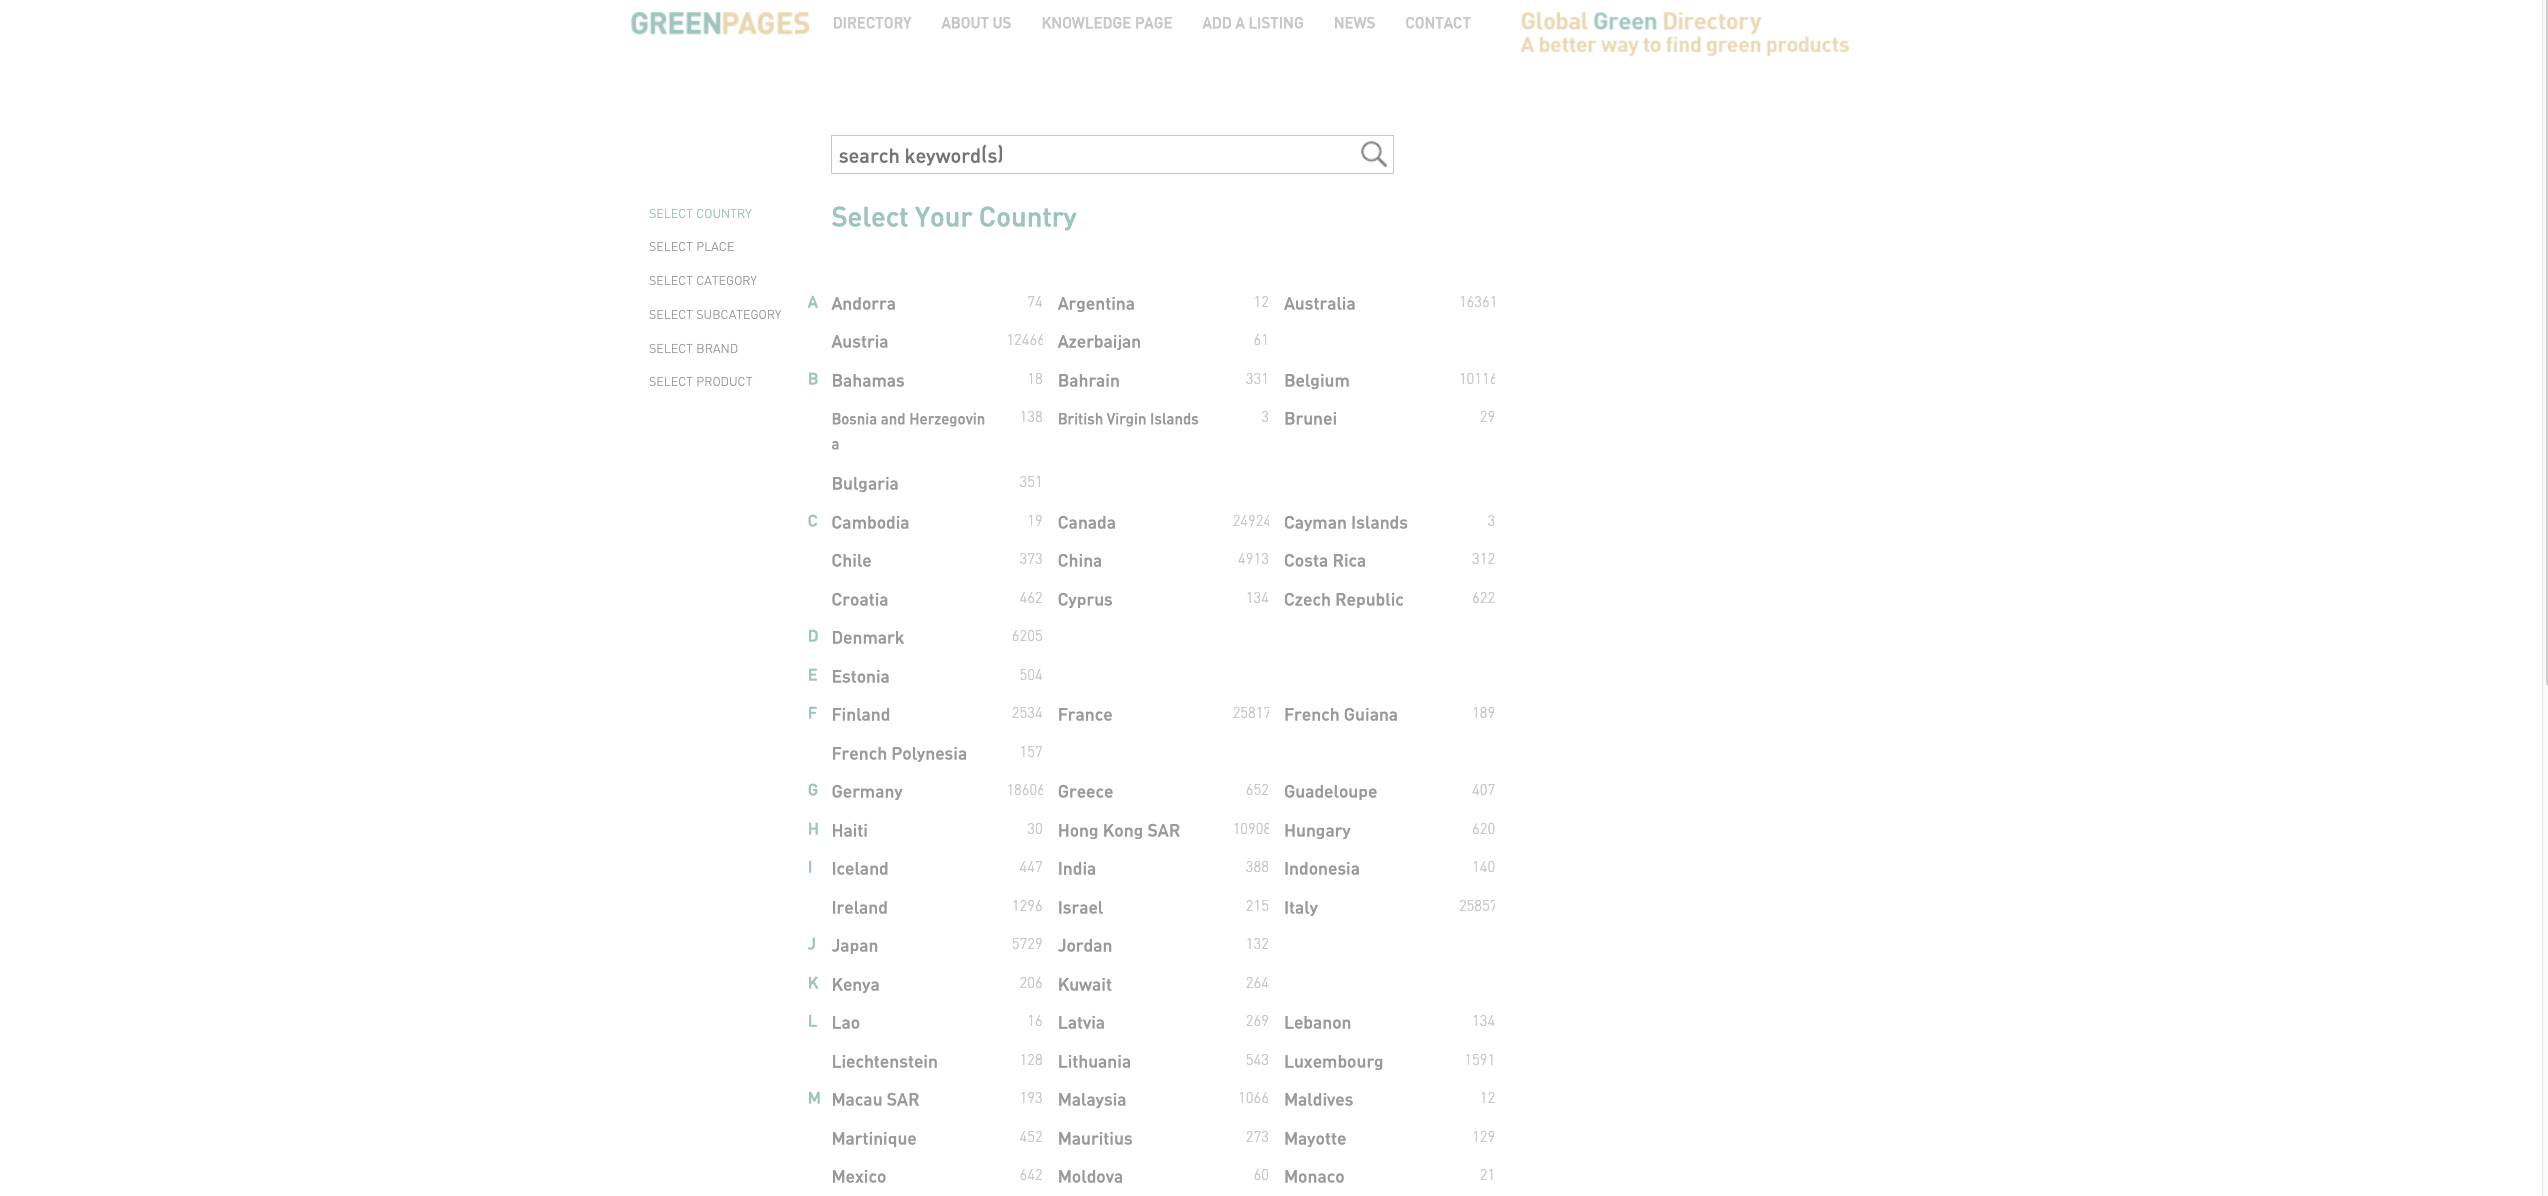
5. Home Improvement and Renovation Directories
The home improvement and renovation sector is booming, with homeowners constantly seeking professionals to bring their dream homes to life.
Directories in this niche serve as a crucial bridge, connecting homeowners with skilled tradespeople and renovation experts.
Why This Niche? These directories cater to the ever-present needs for home maintenance, renovation, and decoration.
They provide a platform where homeowners can easily find reliable and skilled professionals, from plumbers to interior designers, all in one place.
Maximizing the Directory’s Potential
- Detailed Service Listings: Include comprehensive profiles for each professional, detailing their services, experience, and areas of expertise.
- Before and After Galleries: Showcase transformation stories through before-and-after images, highlighting the impact of these services.
- User Testimonials and Ratings: Encourage customers to leave reviews and ratings, building credibility and trust.
- DIY Tips and Ideas: Offer a section with home improvement tips and design ideas to engage users and encourage repeat visits.
Pro Tip: Monetize your home improvement directory effectively with the Pricing Manager add-on. It offers flexible options for businesses to pay for premium features, adding value to your platform.
Successful Examples
- HomeAdvisor is recognized for its extensive listings of home products and user-friendly interface, facilitating easy searches for local professionals.
The platform empowers homeowners to make educated hiring decisions through its ratings and reviews system.
Homeowners can provide an overall rating for the professional they hired and share comments to describe additional details about the service provider. - HiPages gained popularity due to its inspiring before-and-after galleries and comprehensive reviews, which helped users make informed decisions.
The platform offers a wealth of information through before-and-after galleries, enabling users to visualize the quality of work provided by various professionals.
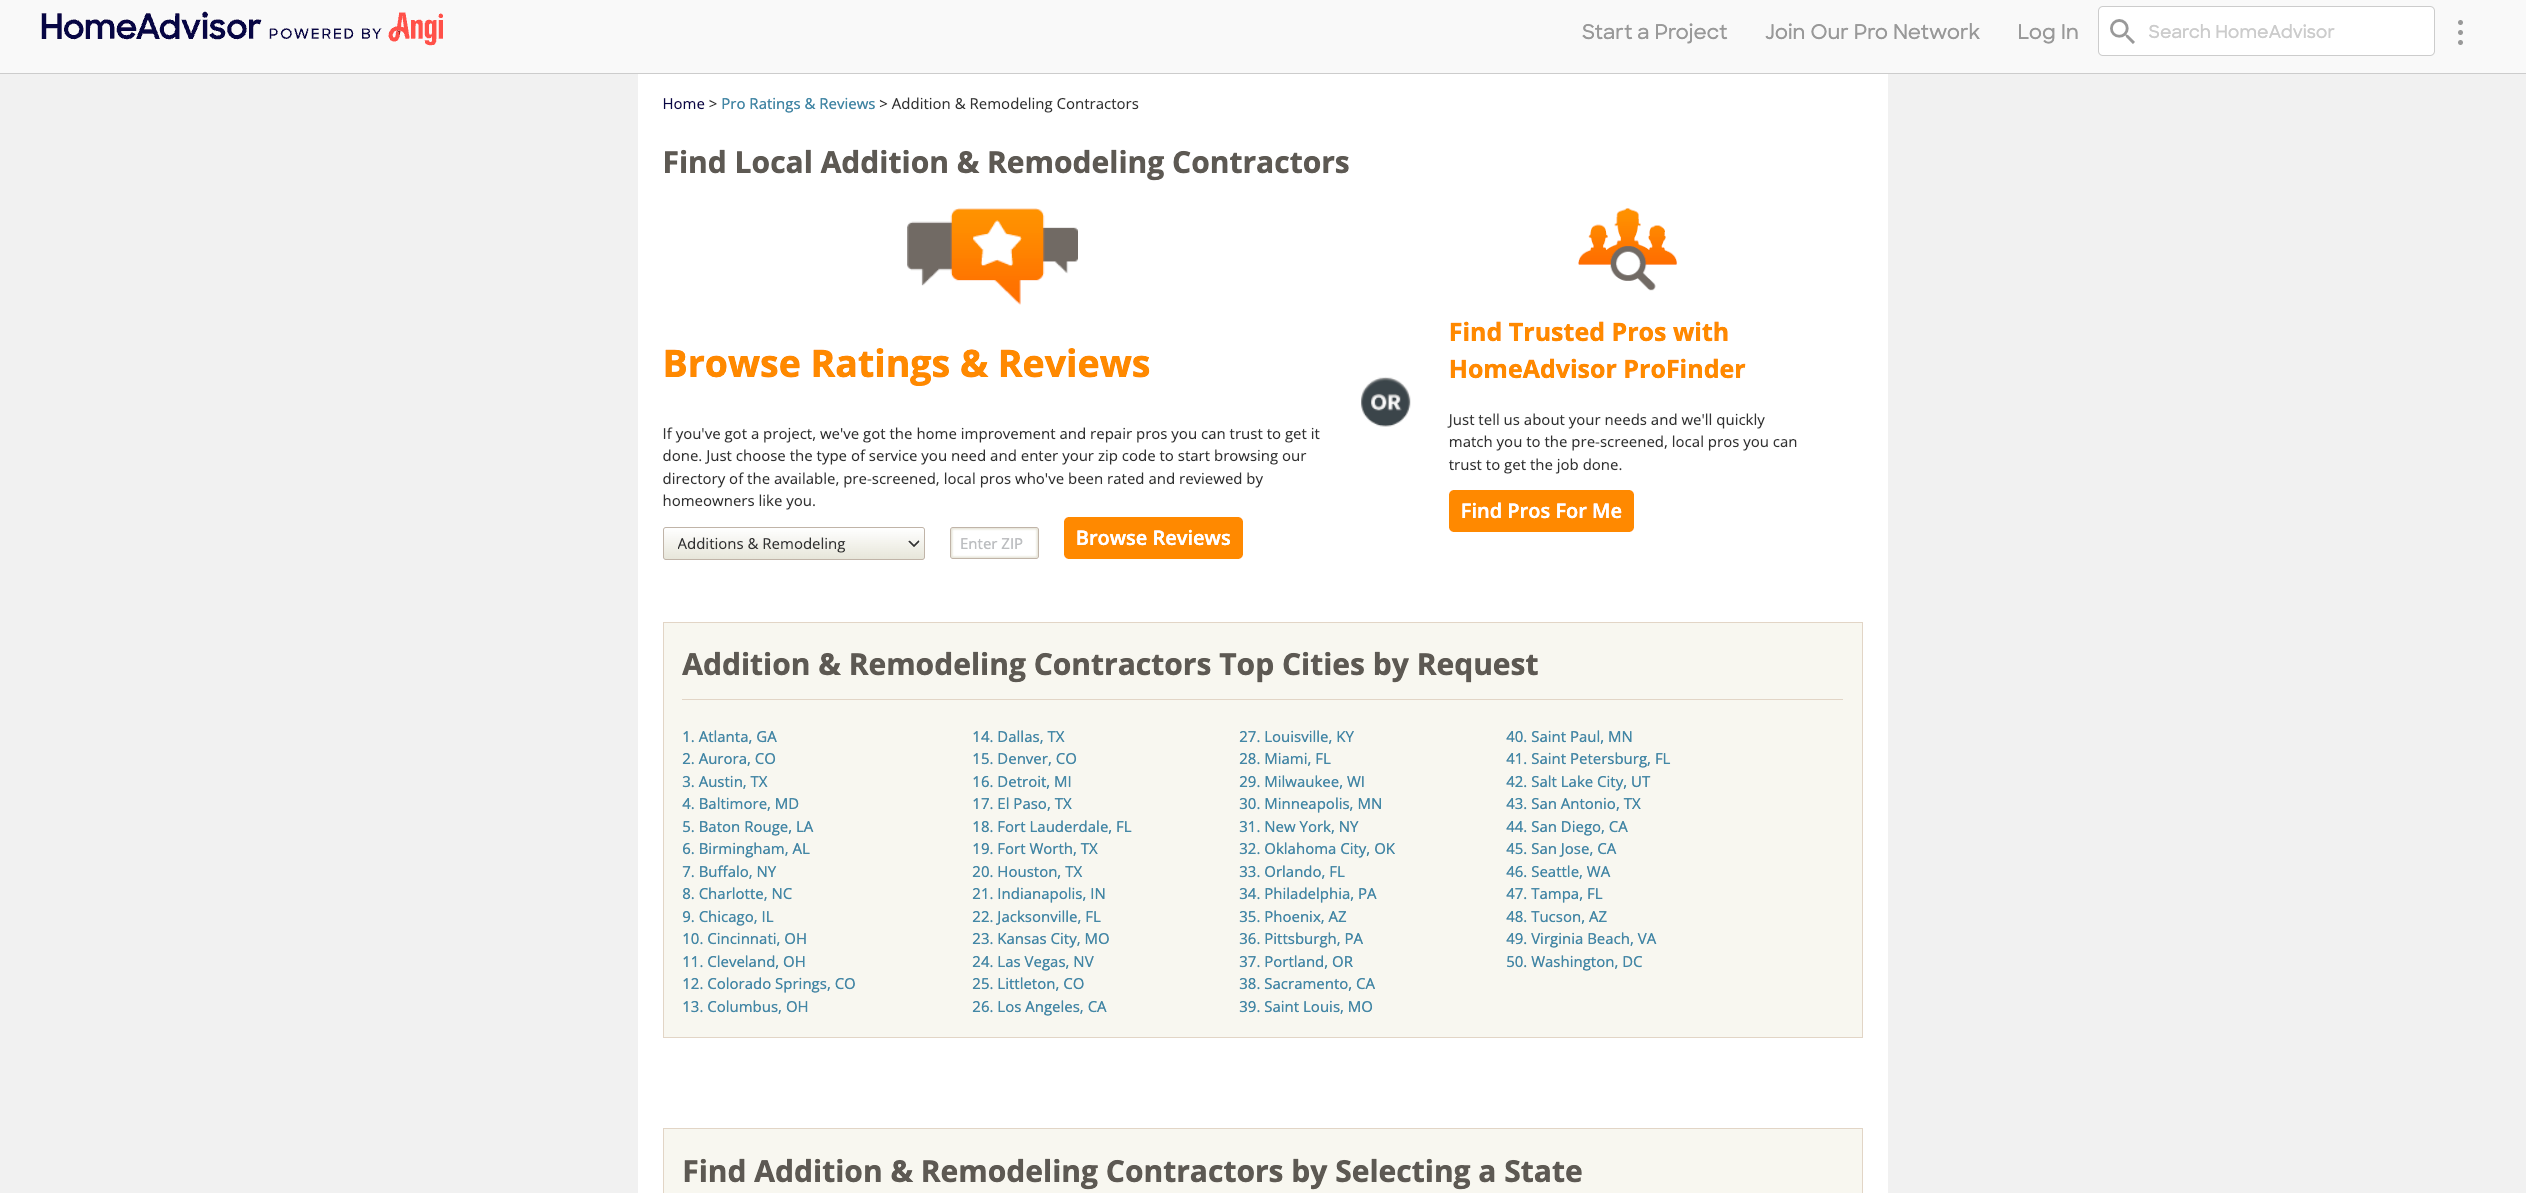
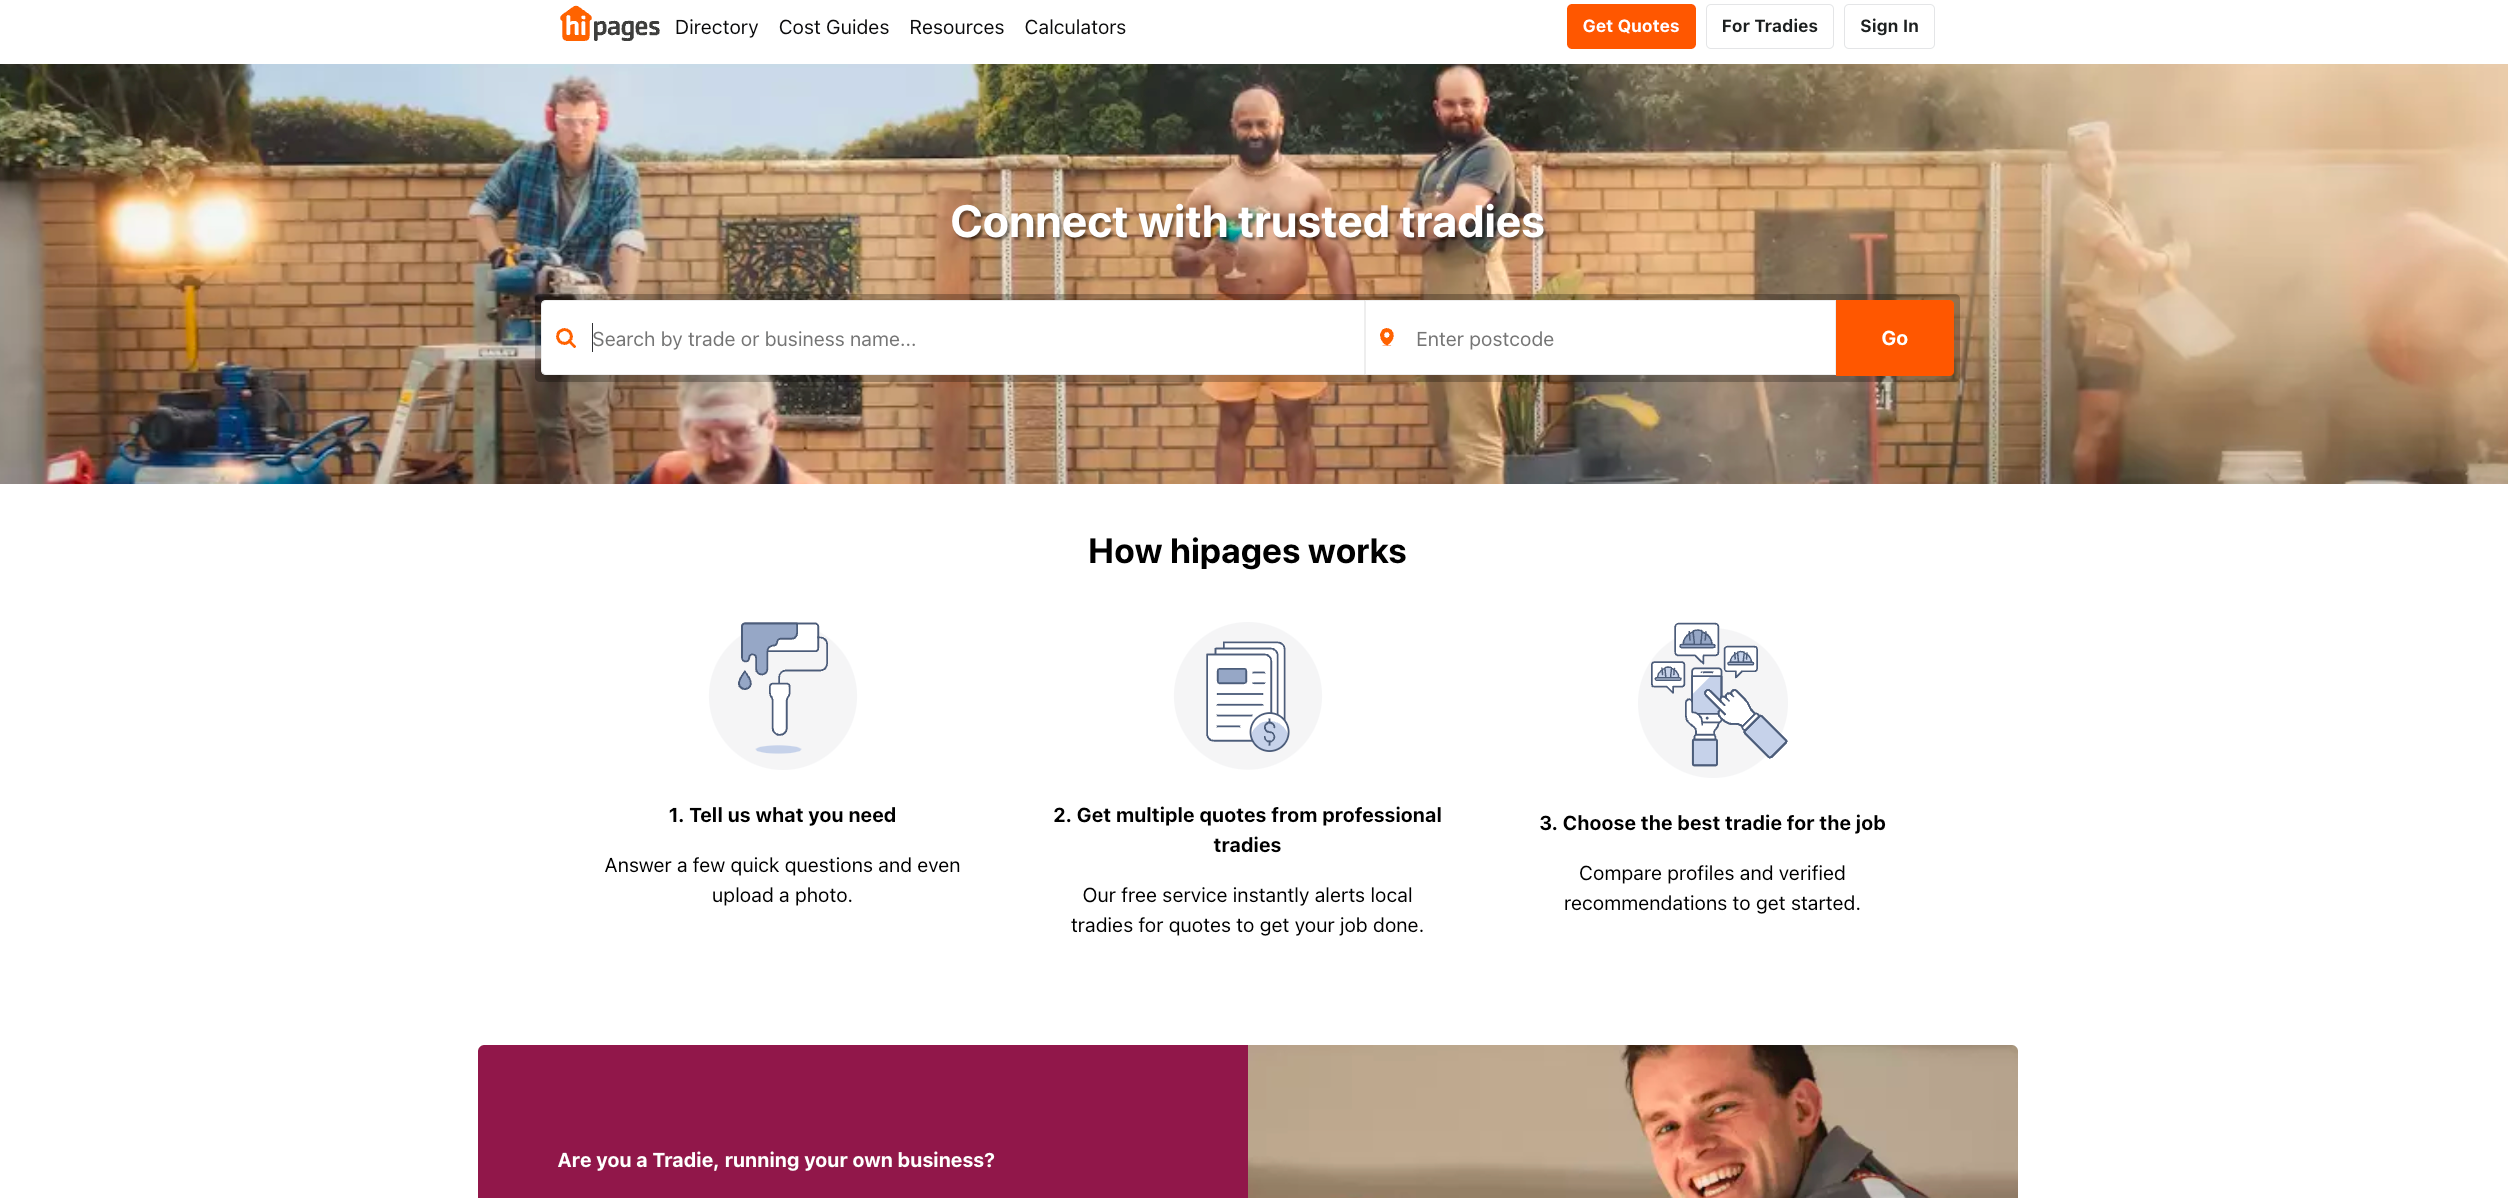
6. Educational and Learning Resources Directories
In an era of lifelong learning, directory websites focusing on educational resources and learning opportunities are increasingly sought after.
These directories offer a centralized platform for discovering courses, workshops, tutors, and educational resources.
Why This Niche? With the rise of online learning and continuous professional development, these directories fulfill a critical need for accessible education and skill enhancement.
They cater to students, professionals, and lifelong learners seeking quality educational resources.
Maximizing the Directory’s Potential
- Diverse Learning Options: List various educational resources, including online courses, local workshops, and private tutors.
- User Reviews and Ratings: Feature reviews from learners to provide insights into the quality of the educational offerings.
- Custom Search Filters: Implement filters for course type, level, and subject area to help users find exactly what they want.
- Learning Path Suggestions: Provide guidance on potential learning paths or career progression routes that utilize the directory’s resources.
Pro Tip: Keep your users updated on new learning opportunities with the Saved Search Notifications add-on. It alerts them about new resources or courses that align with their interests.
Successful Examples
- Learning Directory features over 250 free online learning resources and websites curated by teachers and parents worldwide.
It covers a wide range of subjects, including mathematics, science, languages, the arts, and more.
The directory provides a diverse range of resources to support learning across various disciplines, making it a valuable resource for students, educators, and parents seeking educational materials and tools. - Internet Public Library is a user-friendly website and a comprehensive database of schools, colleges, and e-learning resources.
It provides valuable information for individuals seeking educational institutions and e-learning opportunities.
The directory provides a comprehensive range of resources to support diverse educational needs, making it a valuable resource for students, parents, and educators.
7. Event and Wedding Planning Directories
Event and wedding planning is a niche where precision meets creativity.
Directories in this sector are invaluable for those planning anything from a corporate event to a dream wedding, offering a curated list of venues, caterers, decorators, and more.
Why This Niche? With the increasing demand for personalized and memorable events, these directories cater to a market seeking specialized services.
They provide a one-stop solution for event planners and couples, connecting them with various service providers to make their events unforgettable.
Maximizing the Directory’s Potential
- Comprehensive Service Categories: List a wide array of services, including venues, florists, photographers, and catering services.
- User Experience Stories: Feature real-life stories and client testimonials to add a personal touch and build trust.
- Interactive Planning Tools: Implement tools like budget calculators or seating chart creators to enhance user engagement.
- Vendor Highlights: Regularly spotlight different vendors, showcasing their unique offerings and recent projects.
Pro Tip: Enhance your event and wedding planning directory with the Events add-on from GeoDirectory. This feature specializes in event-centric listings, making it easier for users to find and engage with various events, from corporate gatherings to dream weddings.
Successful Examples
- Eventective is an online directory that offers an extensive listing of event and wedding planners in various locations, including Cincinnati, Ohio.
The directory encompasses a diverse array of planners, ranging from full-service event planners to those specializing in specific event types.
Users can navigate the directory to discover planners that align with their specific requirements and budget. - Wedding Wire is an online directory with a list of Cincinnati’s best wedding planners.
The directory features planners specializing in a range of services, from comprehensive planning to day-of coordination.
Users can browse through the directory to find planners that meet their needs and budget. The directory also includes reviews and ratings from previous clients, making it easier for users to make informed decisions.


8. Culinary and Foodie Directories
For food enthusiasts and culinary explorers, directories focusing on dining experiences, cooking classes, and gourmet food suppliers offer a delightful journey.
These directories are more than just listings; they serve as gateways to gastronomic adventures.
Why This Niche? In a world where culinary experiences are highly sought after, these directories fulfill the appetite for discovering new tastes and culinary skills.
They cater to foodies, home chefs, and anyone looking to explore the world of food and drink.
Maximizing the Directory’s Potential
- Diverse Dining Options: Include a range of dining experiences, from high-end restaurants to local hidden gems.
- Cooking Class Listings: Offer listings for cooking classes and culinary workshops, appealing to aspiring chefs and food enthusiasts.
- Foodie Reviews and Ratings: Encourage and showcase user reviews to provide genuine insights into dining experiences.
- Gourmet Supplier Profiles: Feature profiles of gourmet food suppliers, providing a resource for quality ingredients and unique products.
Pro Tip: Use the Advanced Search Add-on to allow food enthusiasts to find exactly what they’re craving. This feature adds detailed search filters for cuisine types, dining experiences, and culinary classes.
Successful Examples
- SkipTheDishes is a popular platform celebrated for its diverse selection of dining experiences and user reviews, making it a go-to for food enthusiasts.
Despite some negative reviews, SkipTheDishes has gained recognition for its wide range of food delivery options, offering convenience and variety to its users.
The platform’s extensive reach across all ten provinces in Canada, combined with its continuous expansion into new cities and towns nationwide, contributes to its appeal as a convenient and accessible food delivery service. - The Food Directory is a platform that showcases the world’s best food businesses, events, and jobs. It caters to food enthusiasts and individuals seeking high-quality dining experiences.
The platform features handpicked places curated by its team, offering a selection of top restaurants, wineries, bars, and more.
The Food Directory is designed for foodies who appreciate exceptional culinary experiences and seek recommendations from individuals with discerning tastes.
9. Technology and Innovation Directories
In the fast-paced world of technology and innovation, directories focusing on this sector are crucial for connecting cutting-edge businesses, start-ups, and tech enthusiasts.
These directories are more than mere listings; they’re catalysts for collaboration and growth in the tech community.
Why This Niche? As technology continues to drive global change, directories in this niche offer an essential platform for tech companies, innovators, and consumers. They facilitate connections between those offering and seeking the latest technological advancements, from software development to emerging tech trends.
Maximizing the Directory’s Potential
- Diverse Tech Categories: Feature a wide range of technology sectors, including software, hardware, AI, and emerging tech.
- Start-Up Spotlights: Regularly highlight innovative start-ups, offering them visibility and networking opportunities.
- Tech Events and Conferences: Include information on upcoming tech events, webinars, and conferences for networking and knowledge sharing.
- Interactive Tech Forums: Foster community engagement with forums or discussion boards where tech enthusiasts can connect and share ideas.
Pro Tip: Implement the Custom Post Types add-on to manage diverse listings in your tech directory, from startups to established tech companies. This enhances directory organization and user navigation.
Successful Examples
- TechFinitive is recognized for its comprehensive directory of technology companies and start-ups, complemented by an active community forum for tech discussions.
TechFinitive’s hardware section focuses on devices that enhance business productivity, while its “Collaborate” section provides in-depth explanations on collaboration-related topics, particularly around hybrid work. - Ti Tech Directory is a thriving online directory that features a list of the world’s leading tech companies.
The directory provides a platform for users to discover, compare, and connect with technology companies.
The Ti Tech Directory is designed to help users make more informed decisions by providing access to a comprehensive list of technology companies.

10. Real Estate and Property Listings Directories
The real estate market, ever-evolving and dynamic, makes property listing directories a highly sought-after resource.
These directories cater to potential homebuyers, renters, and real estate professionals, providing comprehensive listings and valuable market insights.
Why This Niche? With the complexities of the real estate market, these directories provide a centralized platform for property listings, market trends, and real estate services.
They are essential tools for those navigating the property buying, selling, or renting processes.
Maximizing the Directory’s Potential
- Wide Range of Listings: Includes various property types catering to diverse needs, from residential to commercial.
- Market Trend Insights: Regularly update real estate market trends and insights to add value for users.
- Agent and Broker Profiles: Feature detailed profiles of real estate agents and brokers, enhancing trust and credibility.
- Virtual Tours and Galleries: Offer virtual property tours and high-quality image galleries to enhance the online property viewing experience.
Pro Tip: Leverage the Marker Cluster add-on to simplify map visuals in your real estate directory. This helps in decluttering maps and improving user experience when searching for properties.
Successful Examples
- Trulia is recognized for its extensive property listings and user-friendly interface, making property searches efficient and straightforward.
The platform’s intuitive interface and comprehensive property listings make it easy for users to find properties that match their preferences.
Trulia’s commitment to providing a seamless and user-friendly experience extends to its mobile app, allowing users to access property listings and real estate resources on the go. - Zillow gained popularity with its in-depth market insights and comprehensive agent profiles, offering a holistic real estate directory experience.
Zillow’s success is attributed to its comprehensive directory of real estate agents and user-friendly interface, making it a valuable resource for individuals seeking to stay up-to-date with the latest real estate trends and insights.
11. Fitness and Sports Facilities Directories
In a world where fitness and sports play a vital role in many people’s lives, directories dedicated to fitness and sports facilities serve as essential guides.
They connect individuals with gyms, sports clubs, and fitness centers, catering to a wide range of athletic and wellness needs.
Why This Niche? With the growing focus on health and wellness, these directories meet a critical need by providing easy access to various fitness and sports facilities.
They are a go-to resource for fitness enthusiasts, athletes, and anyone looking to engage in physical activities or sports.
Maximizing the Directory’s Potential
- Comprehensive Facility Listings: Include a diverse range of fitness and sports facilities, from local gyms to specialized sports clubs.
- Detailed Facility Features: Provide in-depth information about the facilities, including equipment, classes, and amenities.
- Member Reviews and Ratings: Encourage users to share their experiences and ratings, thereby building credibility and helping others make informed decisions.
- Health and Fitness Blog: Incorporate a blog section featuring fitness tips, health advice, and sports news to keep users engaged and coming back.
Pro Tip: Boost user engagement with the Saved Search Notifications add-on. It allows fitness enthusiasts to get alerts about new facilities or sports events matching their interests.
Successful Examples
- Ft. Gregg-Adams US Army MWR Sports & Fitness Directory provides information about the sports and fitness facilities available at Ft. Gregg-Adams, Virginia.
This directory offers a comprehensive list of sports and fitness facilities, including the Army Logistics University Recreation Facility and the Clark Fitness Center, catering to the fitness and recreational needs of military personnel and their families stationed at Ft. Gregg-Adams. - Athletic Business Buyer’s Guide is a comprehensive resource for facility and equipment needs related to sports and fitness.
This directory offers a wide range of categories, catering to the diverse requirements of individuals and organizations involved in the sports and fitness industry.
It serves as a valuable tool for individuals seeking to explore various options for fitness facilities and equipment.

Leveraging a tool like GeoDirectory can significantly enhance the functionality and user experience of these niche directories.
With GeoDirectory, you can easily manage facility listings, implement advanced search functionalities, and integrate maps for a localized search experience.
This not only simplifies the setup process for successful directory websites but also enriches the overall user experience, effectively connecting individuals with the fitness and sports facilities that best suit their needs.
How to Pick The Right Business Niche For Your Directory
Navigating the maze of niche-specific directories might feel overwhelming. Don’t worry. We’ve got your back. Here’s how to pinpoint the perfect directory that aligns with your business goals and audience needs.
Understand Your Audience
Step into your target audience’s world. What makes them tick? Here’s how:
- Demographics Dive: If you’re in the pet services niche, your audience might be pet owners. Age, lifestyle, and location matter. For example, a business directory website focusing on luxury pet services might appeal more to an affluent demographic.
- Solve Their Problems: Identify common pain points. If you’re in the health and wellness niche, look for directories that offer solutions to these issues, like directories that list holistic health practitioners.
- Align with Interests: If your audience is environmentally conscious, a green business directory might be your gold mine. For instance, a directory like ‘EcoChoice’ aligns perfectly with individuals seeking eco-friendly products.
- Engagement Metrics: Check how engaged the audience is in a directory. Are there reviews, comments, or active discussions? High engagement equals high interest.
Analyze Market Demand
Dive into the market trends. Here’s what to look for:
- Trending Topics: Use tools like Google Trends to identify rising interests. If ‘sustainable homes’ is trending, a real estate directory focusing on eco-friendly dwellings could be a winner.
- Gap Identification: Spot market gaps. Perhaps there’s a surge in interest in gluten-free bakeries, but not enough directories listing them. That’s an opportunity.
- Demand vs. Supply: Assess if the directory is oversaturated or if there’s room for your business. A niche with fewer high-quality listings might offer more visibility.
- Case Studies: Look for success stories. For instance, a business thriving in a tech innovation directory could inspire your choice if you’re in the tech sector.
Check for Quality and Credibility
The directory’s reputation is key. Here’s how to gauge it:
- User Reviews and Feedback: Check what users say about the directory. Positive reviews and high ratings indicate trust.
- Professional Appearance: A directory with a sleek, professional design speaks volumes. It reflects on your business as well.
- Up-to-Date Listings: Ensure the directory is regularly updated with its listings. A directory with outdated info won’t help your visibility.
- Authority Links: Look for directories that are linked by authoritative websites. This indicates credibility. For example, a fitness directory linked by a well-known fitness magazine holds more weight.
Assess the Competition
Understanding your competitors can provide valuable insights:
- Competitor Analysis: View the list of your top competitors. If they’re in ‘Local Artisan Finder’, maybe you should be too.
- Unique Offerings: Look for what competitors do not offer in a directory. Can you fill that gap?
- Directory Exclusivity: Some directories might be exclusive or offer premium listings. Weigh the benefits of these features.
- Market Positioning: Analyze how competitors position themselves in these directories. It can help shape your own directory strategy.
Leverage GeoDirectory
GeoDirectory simplifies your directory integration. Here’s how:
- Easy Setup: With GeoDirectory, you can get your business listed smoothly and efficiently.
- Customizable Features: Tailor your listing to stand out. Highlight what makes your business unique.
- Advanced Search Functionality: GeoDirectory’s search tools make it easy for potential customers to find your business.
- Analytics Insights: Utilize GeoDirectory’s analytics to understand how your listing is performing and make informed adjustments.
Remember, choosing the correct niche-specific directory isn’t just about being visible; it’s also about being found.
It’s about being visible in the right place. Follow these steps, and you’re not just choosing a directory; you’re choosing a path to success.
Building Your Own Niche-Focused Online Business Directory
Building a niche-focused online business directory is a strategic move that can set your platform apart. Here’s a step-by-step guide using GeoDirectory to ensure your directory stands out in the digital landscape.
1. Essential Tools and Resources
To get started, you’ll need:
- Website Builder: Opt for WordPress for its user-friendly interface and extensive customization options.
- Directory Plugin: GeoDirectory is your go-to solution for robust features, including member profiles and interactive maps.
- Membership Management: UsersWP helps manage member accounts and subscriptions.
- Contact Forms: Ninja Forms or Blockstrap’s Contact Form Block for customized forms.
- Payment Gateway: Integrate PayPal or Stripe for seamless transactions.
- SEO Plugin: Optimize your site with Yoast SEO or RankMath.
- Analytics: Track performance with Google Analytics.
2. Selecting the Right Theme
Pick a theme that aligns with your directory’s focus:
- GeoDirectory offers attractive, customizable themes, suitable for single or multi-city directories. The latest WordPress Directory Theme integrates well with Google Maps and has predefined listing types.
3. Domain Registration and Hosting
Secure a domain and hosting service:
- We recommend Cloudways for its affordability and efficiency. Choose a domain name that reflects your directory’s identity.
4. Installing GeoDirectory and Configuration
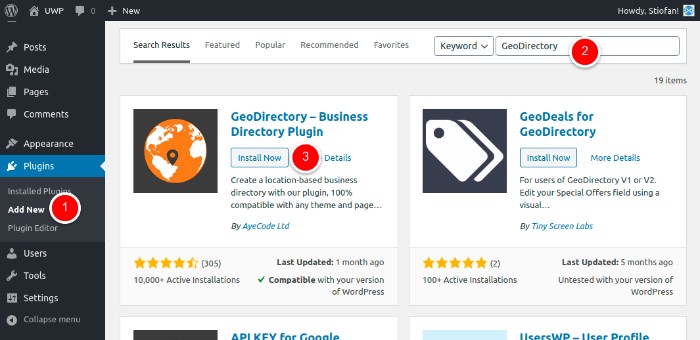
Set up GeoDirectory for comprehensive directory management:
- Install the plugin via the WordPress Dashboard.
- Utilize its features for efficient business listing management, event organization, and creating detailed member profiles.
- Enable reviews and ratings for quality control and user engagement.
- Spotlight chamber facilities and amenities for comprehensive resource listings.
Creating Categories

- Identify Relevant Categories: Begin by determining the primary categories that encompass the businesses in your directory, such as retail, healthcare, or technology.
- Subcategories: Break down these main categories into subcategories. For example, under retail, you could have categories such as clothing, electronics, or home goods.
- Specializations or Attributes: Consider additional categories based on specialized services or unique attributes, like eco-friendly or women-owned businesses.
- User-Friendly Design: Ensure your category structure is intuitive, with clear labels and a logical hierarchy.
Form Submission Fields for Businesses

- Adjust Form Fields: In GeoDirectory, go to ‘CPT > Settings > Custom Fields’ to adjust the form fields.
- Standard and Predefined Fields: Utilize GeoDirectory’s ‘Standard Fields’, ‘Predefined Fields’, and a ‘Custom Fields’ area for tailored form fields.
- Field Customization Suggestions:
- Membership Type Field: Include options to identify types of memberships.
- Business Sector Field: Allow businesses to designate their industry sector.
- Events and Activities Field: Enable businesses to share event or activity information.
- Services and Amenities Field: Highlight services and amenities offered.
- Business Profiles Field: Provide an area for detailed business profiles.


5. Tailoring to Your Niche
Once the basic setup is complete, tailor your directory to your specific niche:
- Customize Categories: Depending on your niche, create categories that resonate with your audience. For a fitness directory, categories might include gyms, yoga studios, and nutritionists.
- Engage with Quality Content: Regularly update your directory with relevant blogs, news, or articles. This keeps users engaged and returning.
- Community Building: Encourage user interaction through forums or discussion boards.
- Leverage Local SEO: Optimize for local search to enhance visibility in your niche market.
6. Utilizing GeoDirectory’s Features
Make the most of GeoDirectory’s functionalities:
- Interactive Maps: Integrate maps for easy location-based searches.
- Advanced Search Functionality: Provide users with a seamless search experience through filters and categories.
- Responsive Design: Ensure your directory is optimized for mobile devices.
- Analytics and Reporting: Utilize GeoDirectory’s analytics to gain valuable insights and refine strategies for improved performance.
By following these steps and leveraging the power of GeoDirectory, you can build a niche-focused online business directory that attracts and retains a targeted audience, driving growth and success in your chosen niche.
Pro Tips for Your Niche-Focused Online Business Directory
Creating your own niche-focused online business directory isn’t just a smart move; it’s a strategic one.
Here are a few expert tips to help you build a directory that not only attracts businesses but also engages users effectively.
Start with a Clear Concept
Your directory needs a strong foundation. Here’s how to build it:
- Identify Your Niche: Choose a niche you’re passionate about. For instance, if you’re a fitness enthusiast, a directory for fitness centers and personal trainers could be your sweet spot.
- Research Market Needs: Understand what’s missing in your chosen niche. Perhaps there’s a need for a comprehensive directory of local artisans in your area.
- Define Your Unique Selling Proposition (USP): What will make your directory stand out? Perhaps it’s exclusive listings or unique features, such as video tours, for real estate directories.
Design for User Experience
The user experience can make or break your directory. Consider these points:
- Intuitive Navigation: Ensure users can easily find what they’re looking for. Clear categories and a search bar are essentials.
- Mobile Optimization: With most users accessing your directory on mobile devices, it must be optimized for mobile use. Think responsive design and fast load times.
- Visual Appeal: Aesthetics matter. A clean, modern design can enhance user engagement.
- User Feedback Mechanism: Implement a system to gather user feedback, enabling continuous improvement of the directory.
Leverage the Right Technology
Choose technology that simplifies and empowers. Here’s what to focus on:
- Robust Platform: Consider using a platform like WordPress, combined with a powerful plugin like GeoDirectory, for enhanced functionality and scalability.
- SEO Optimization Tools: Ensure your directory is SEO-friendly to increase visibility. Utilize plugins and tools to optimize content, meta tags, and URLs.
- Analytics Tracking: Integrate analytics tools to monitor user behavior and directory performance.
Develop a Marketing Strategy
Your directory needs to be seen. Here’s how to get the word out:
- Content Marketing Efforts: Create valuable content related to your niche. For a culinary directory, you could blog about food trends and restaurant reviews.
- Social Media Presence: Utilize social media platforms to reach your target audience. Share snippets, success stories, or featured listings.
- Partnerships and Collaborations: Collaborate with businesses in your directory for cross-promotion. It’s a win-win.
- Email Marketing: Build an email list to keep users updated with new listings, features, or industry news.
Offer Value-Added Services
Go beyond basic listings to attract and retain businesses:
- Premium Listings: Offer premium listing options with additional features, such as top placement or enhanced profiles.
- Advertising Opportunities: Provide advertising spaces for businesses to promote their services.
- Market Insights: Share industry trends and market insights relevant to your niche, adding value for businesses.
- Networking Events: Host virtual or physical events to facilitate networking within your niche community.
Building a niche-focused online business directory is an exciting journey. With the right approach, technology like GeoDirectory, combined with a focus on user experience, can create a valuable resource that benefits both businesses and consumers in your niche. Dive in! The digital directory world awaits.
Make Your Niche Directory Shine with GeoDirectory
You’ve journeyed through the landscape of niche directories, equipped with valuable insights and effective strategies. Now, you’re ready to make your mark in the digital world of directories. Before you set off, let’s recap the essentials:
- Identify and understand your target audience.
- Analyze market demand and choose a niche wisely.
- Ensure the directory’s quality and credibility.
- Assess your competition and find your unique edge.
- Use GeoDirectory for seamless integration and management.
In the realm of niche directories, standing out is key, and GeoDirectory is your secret weapon.
This powerful tool transforms the complex task of directory creation into a smooth, enjoyable process.
Whether you’re listing local artisans, tech innovators, or health experts, GeoDirectory helps you build a directory that’s not just functional but also impactful.
It’s more than a plugin; it’s your partner in navigating the vibrant world of niche directories. Ready to start your directory adventure? GeoDirectory is the compass you need.
Here’s an easy-to-understand guide on how to make a Directory Website using the Breakdance Website Builder plugin:
- Install the Breakdance plugin
- Install and setup GeoDirectory
- Design the Directory Website using the Breakdance plugin
The Breakdance Plugin, when used with the GeoDirectory Plugin, is an excellent way to create a flexible online directory. With this combination, you can easily add location-based features, customize the layout, and include dynamic content for a user-friendly experience.
This system allows web developers and designers to build a high-quality directory website for specific industries or broader community needs.
Let’s look at the details of how to do this.
In this tutorial, we will:
Installing and setting up Plugins.
1. Install the Breakdance Plugin
You can buy the Breakdance plugin from the breakdance.com. You will get a plugin zip. To install it go to Plugins >> Add new >> Click Upload plugin

Now after installation, we will disable the WordPress theme from the Breakdance >> settings >> Theme >> Disable theme
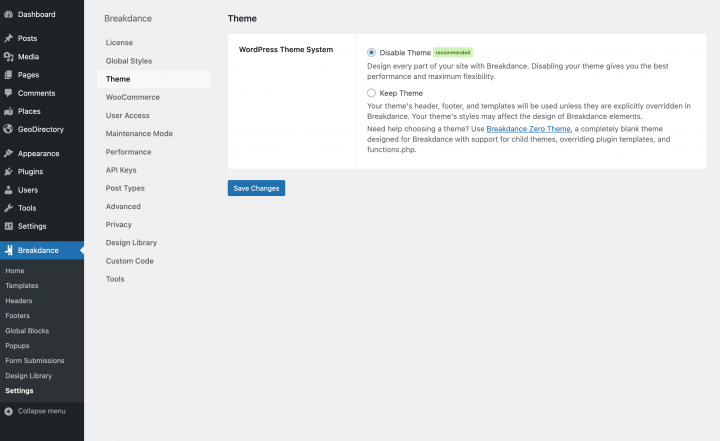
2. Install GeoDirectory
Finally, you need to install GeoDirectory.
Go to Plugins >> Add new, search GeoDirectory. Please install and activate it. We finished installing the plugins.
3. GeoDirectory Install Wizard
For the GeoDirectory plugin, you should complete the Setup Wizard to configure the Google Maps API key and import a few dummy listings.
Choosing the Map System (Google Maps or OpenStreetMap)
You can choose between two mapping systems on the wizard’s first step: Google Maps and OpenStreetMaps (which doesn’t require an API key).
In this tutorial, we select OpenStreetMaps.
If you wish to select Google Maps, do the following extra steps.
Click on the Generate Key button and follow the steps of this doc to generate a valid API key.
The essential steps are:
- Enable the Keys.
- Create or select an existing project.
- Get the Key.
- Activate a billing account.
- Restrict the API key (so it can only be used from the URL of your website)
About point four: it is a requirement. However, you only get charged if you pass the threshold of $200/month.
This free credit is more than enough for 99% of directories.
Setting the default city
After that, you will set the default location. This is the city for which the directory is created.
We will set Philadelphia as the default city.
You can use whatever location you need.
If you need to add listings to multiple cities, you will need the Location Manager add-on.
Adding extra features
In this step, we will install our UsersWP, a user management plugin that lets users register and log into your website.
This is needed to allow users to add and edit their listings. It will also create user profiles where they can find their listings, reviews, and so on.
We will also install Ninja Forms so that all listings have a contact form that sends emails directly to the listing owners.
AyeCode Connect is not mandatory for this tutorial. It is mainly needed if you want to add GeoDirectory premium add-ons and install them directly from the WordPress Dashboard.
Adding Dummy Data
The last step to complete the installation wizard is adding some dummy listings. This will also add listing categories that you can edit later according to your needs.
You will not add sidebar widgets and menu items right now; we will do that later.
Design the Breakdance Directory Website
Now that we have installed the plugins and done the preliminary setup of GeoDirectory, we can start designing our Directory Website with the Breakdance Suite of tools.
1. Design The Website Logo
First things first: we will need a logo for our website.
You don’t need to invest in a designer to sketch the 1st version of your logo.
One of the biggest mistakes you can make when starting a new directory is investing too much time and money before testing the product market fit.
You can design a logo in five minutes with an app like Canva, which is cheap and surprisingly good.
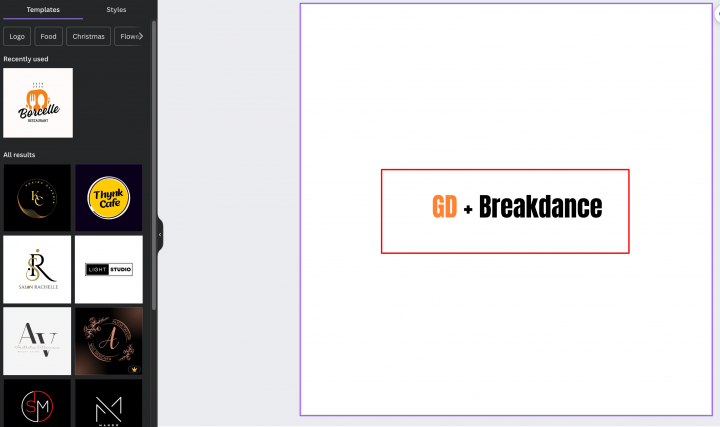
For an MVP (minimum viable product), a logo designed with Canva will be more than enough.
There are several logo templates to choose from, and it doesn’t matter if your initial logo is not as perfect and original as you believe it should be.
If your project gets traction, you can always invest in improving it or radically changing it later.
An average logo is never the leading cause of a failed project.
2. Breakdance Directory Home page design
You can create a new page or use one WordPress makes by default, like the Sample Page.
Go to Pages, edit the Sample page, and rename it Home or create a new page for this.
Next, go to Appearance > Customize > Homepage Settings and select your Home.
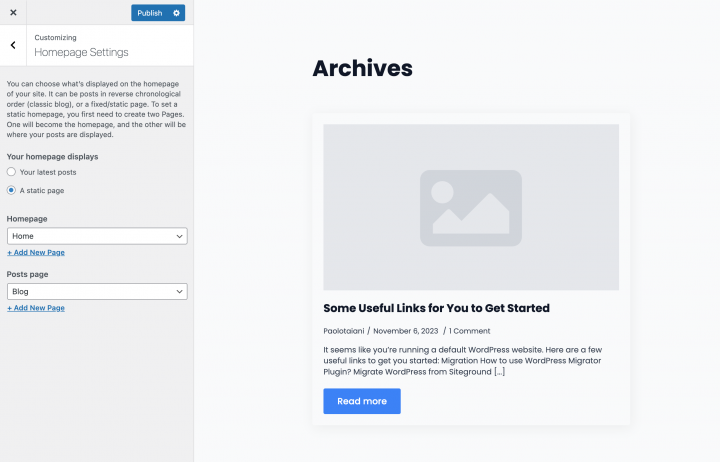
The Navigation Menu
After creating and adding the logo, go to Appearance >> Menus and create your menu.
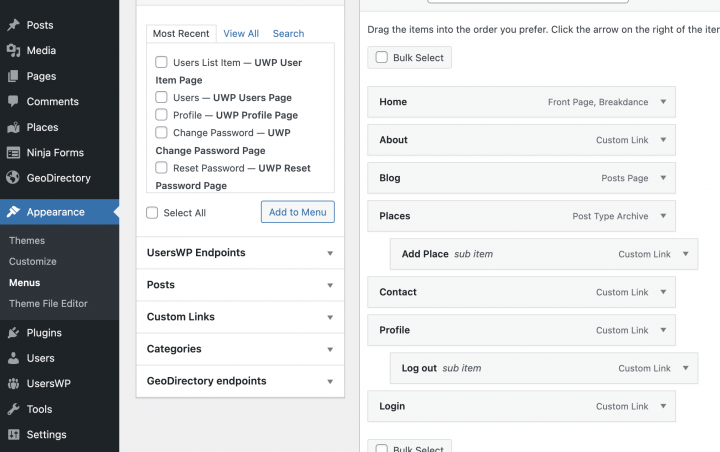
Add the links needed (from the left to the right column) and save.
In the Menu Settings > Display location section, you can check the “Main” option.
If you want, you can make the same menu appear on the footer or create another menu to appear there.
In this example, we’ll only have the header navigation menu.
We added seven main navigation links and a few sub-navigation links:
- Home
- About
- Blog
- Places and add places
- Profile
- Login
- Logout
The Login link (from UsersWP Endpoints) will only appear for Logged-out users, while the log-out, account, and profile links will only appear for logged-in users.
The Typography
Let’s set global Typography settings from the Breakdance >> settings >> Global Styles >> Launch Breakdance
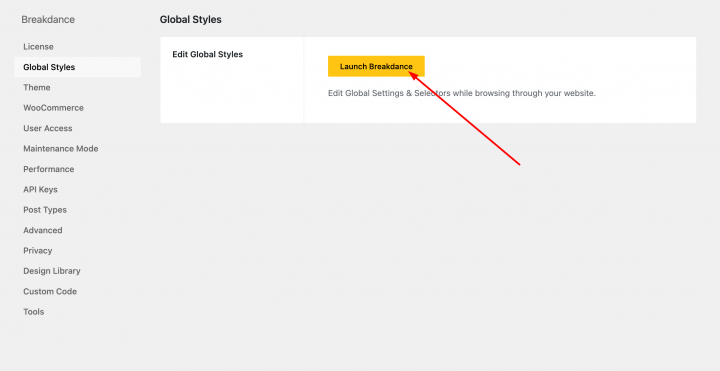
following are the Typography settings
Heading font: Poppins
Body Font: Poppins
Base size: 16px
Ratio: 1.2
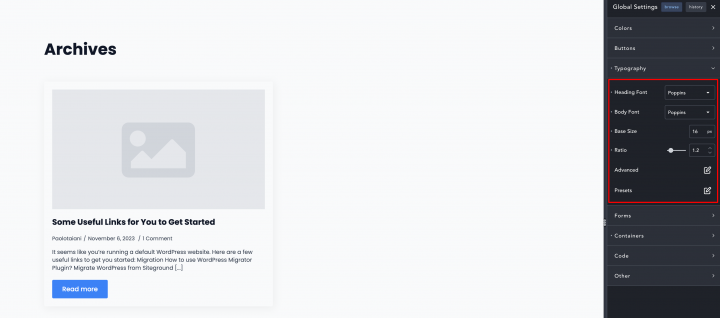
Setup Header
Let’s set the site Header for that let’s go to Breakdance >> Header and click Add header.

here we will give a title to the header and we will select
Location: Everywhere
Priority: 1
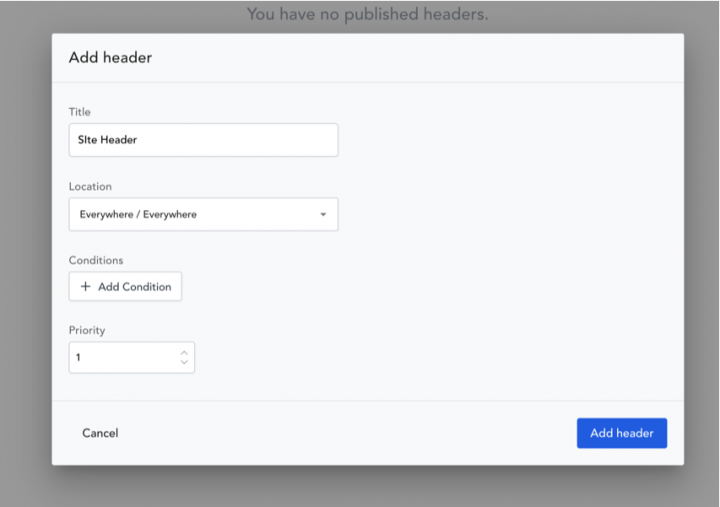
Now Click the Add New button at the top left corner. You can create a header using these available block elements or you can click Library and use already-built header templates.
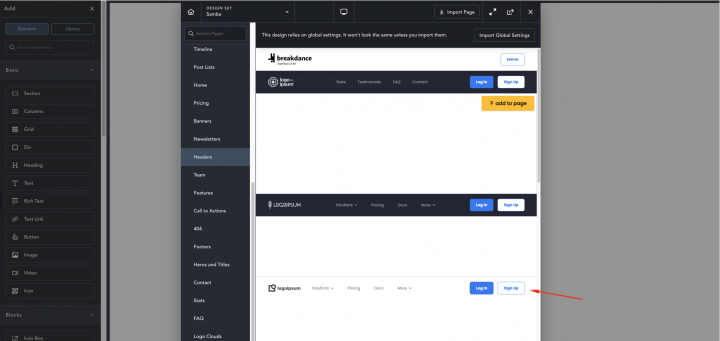
I am using one of the existing header templates from the library and I have uploaded the Logo and selected a menu there.
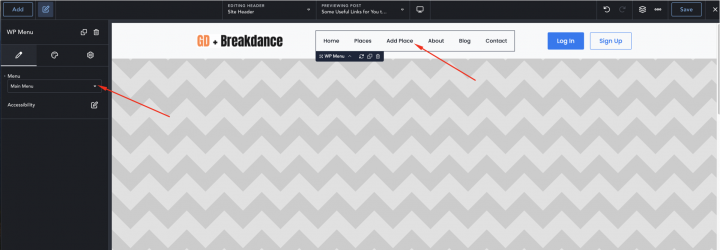
Now that our header is ready, we will come to the homepage content.
The Content
I will start building this page from scratch using the Breakdance plugin.
We need a hero header on the homepage for that.
Let’s first edit the Homepage in Breakdance by clicking on Edit in Breakdance button.
we will drag an empty section by Clicking on the Add button on the Top left.
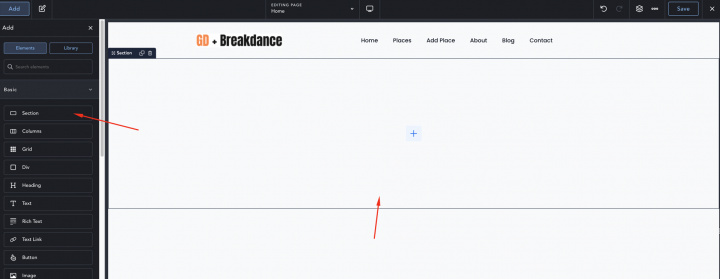
From the section style tab set
Align: Center
Background Type: Image
Image Size: Full
Size: Cover
Repeat: no-repeat
Position: Center
Attachment: Scroll
Unset image At: Desktop
Height: Custom
Custom Height: 400px
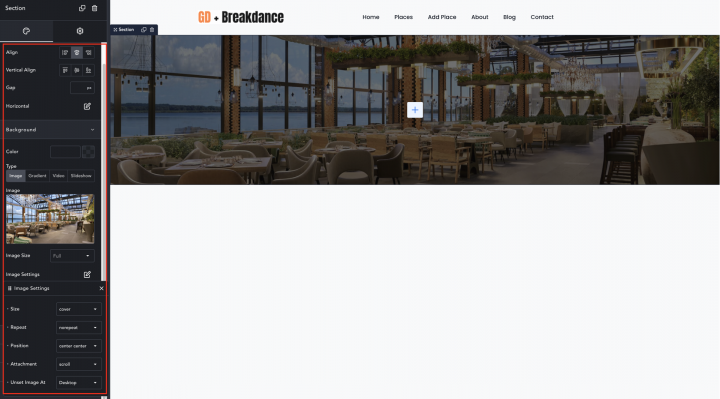
Now let’s drag a Heading element with the following setting.
Text: Find The Best Restaurant In Philadelphia
Color: #FFFFFFFF
Font Size: 48
Font Weight: 600

we will add a shortcode block with the [gd_search] shortcode below it.
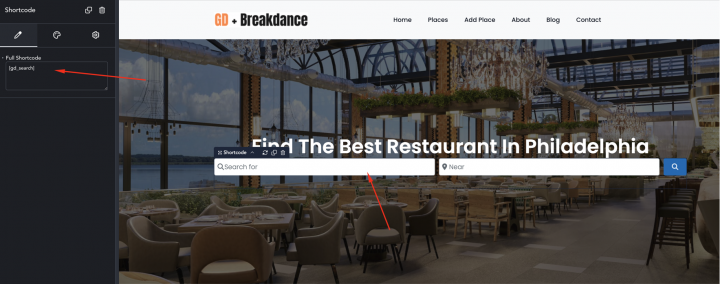
Now let’s add one more empty container below it with the following shortcode to display lists of categories.
[gd_categories post_type="0" max_level="1" max_count="all" max_count_child="all" sort_by="az" design_type="image" row_items="4" card_shadow="small" use_image="1" image_size="large" cat_text_color_custom="#000000" cat_font_size="0" badge_text_color_custom="#000000" badge_color="light" badge_font_size="0" title_tag="h4" mb="3" rounded="rounded"]
we will give padding of 50px on Top and Bottom.
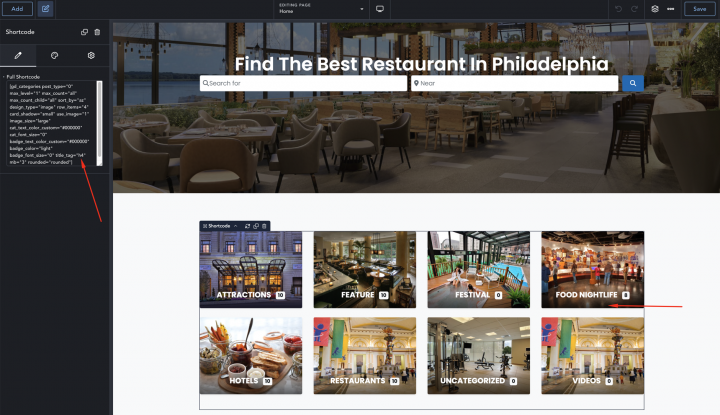
Now we need a recent listing section. we will add a shortcode element with the following shortcode.
[gd_listings post_type="gd_place" post_limit="6" add_location_filter="1" sort_by="latest" title_tag="h3" layout="3" view_all_link="1" bottom_pagination="1" slide_interval="5" mb="3" rounded="rounded"]
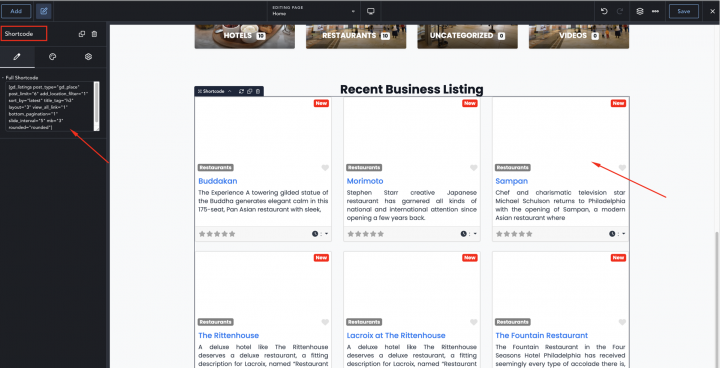
Now let’s add one more shortcode to display the listing map.
[gd_map map_type="auto" post_settings="1"
width="100%" height="425px"
maptype="ROADMAP" zoom="0"]
In the end, we need a CTA for that I am using an existing CTA template.
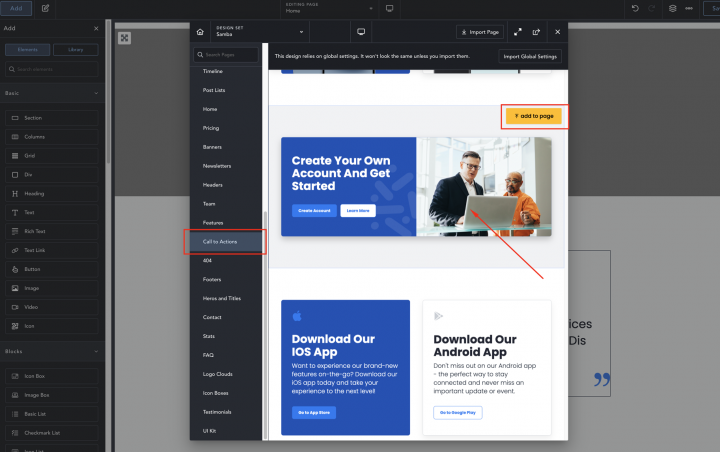
Setup Footer
Now at the end let’s set up the site Footer and let’s go to Breakdance >> Footer and click Add Footer.
we can create a Footer from scratch or we can use any of the existing ones. I am using an existing Footer Template. we can easily customize these Footer menus based on our needs.
For now, I am keeping it as it is.
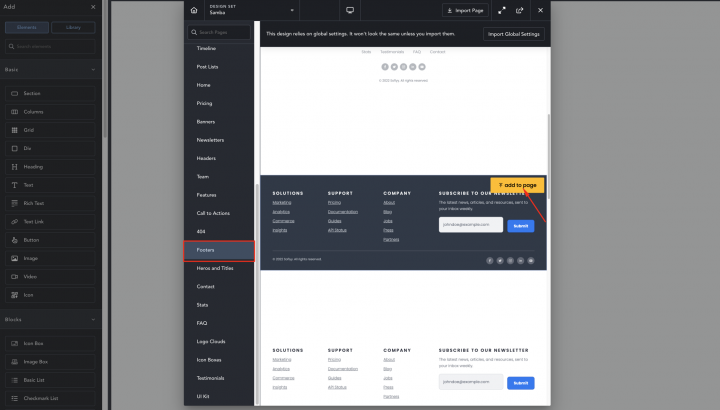
Congratulations! Your homepage is Completed.
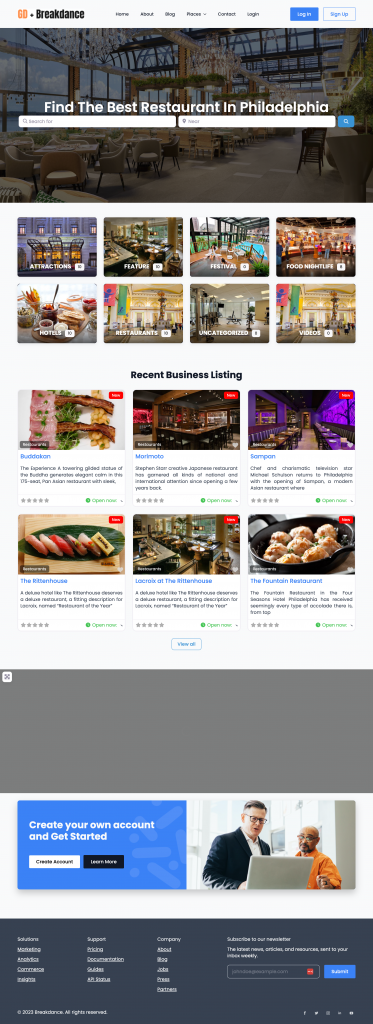
2. Breakdance Directory Website Listings and Search page design
Listings page
Now you need to design two pages that are essential for any directory.
The listings page (general archive, categories, tags), and the search results page.
GeoDirectory creates them by default with a general layout. In this tutorial, we will create and customize the layout of these pages using Breakdance Builder.
Let’s go to the Breakdance >> Templates >> Add Template
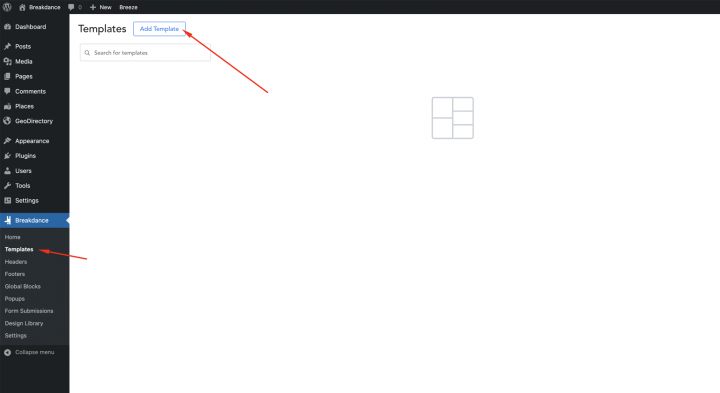
In the next option, we will select the below settings and click the Add Template button.
Location: Archive/Post Type Archive
Condition: Post Type = Places
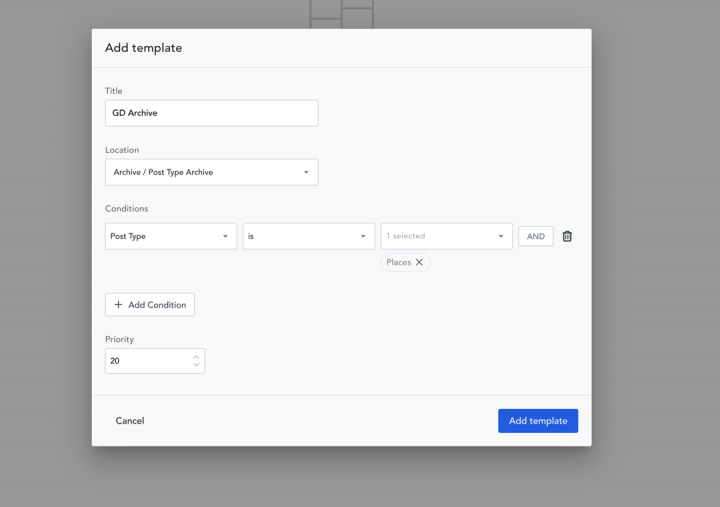
In the template, we will add an empty section and add the following settings for the section block.
Layout
Align: Center
Vertical Align: Center
Background:
Color: F5F8FFFF
Type: Gradient
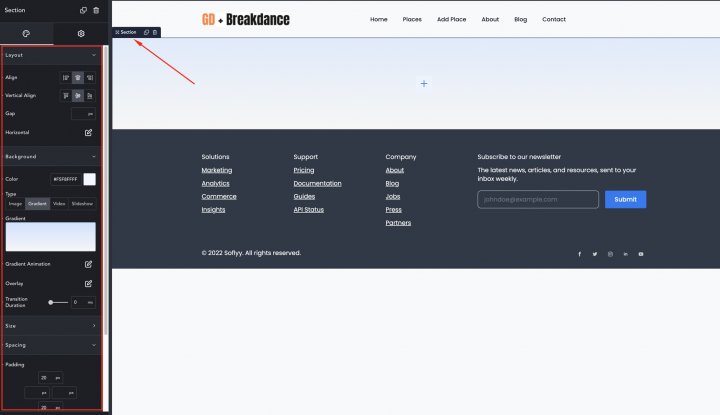
Now let’s add the Archive Title block inside it.
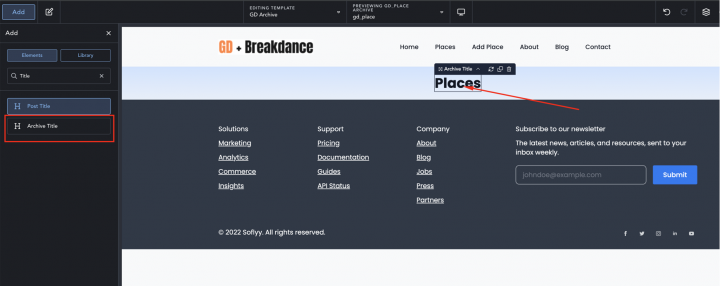
Now you have two options and we’ll show you both:
The easier way to do this is with a single column and using the shortcode: [gd_simple_archive layout=”2″ height=”100vh” maptype=”ROADMAP” marker_cluster=”1″]
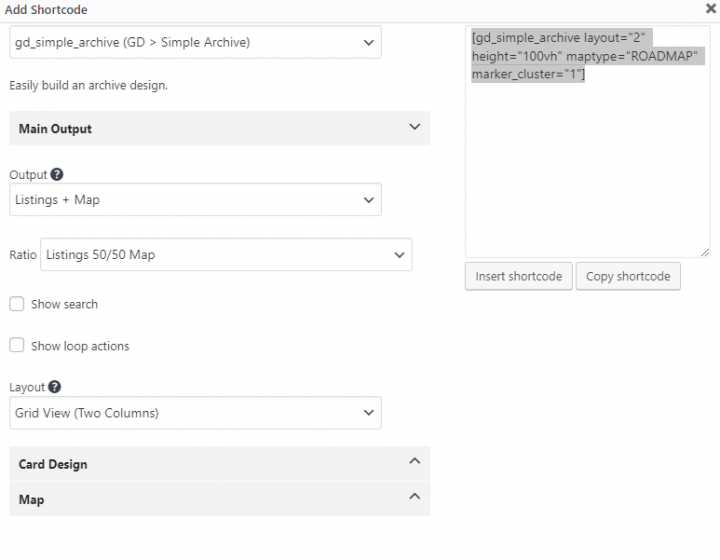
2) If you want to have full control of the design, we will need to add a column block with a two-column layout instead.
In the setting we will use Width: Full
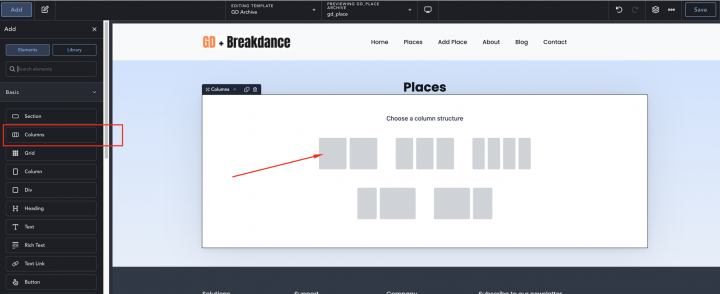
Now we will drag the shortcode container and use the required shortcode inside it.
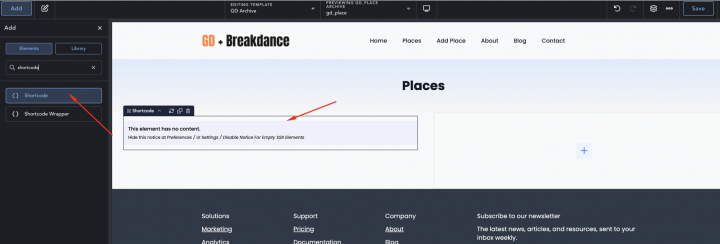
Now on the left container, we will use the GD Archive page-related widgets like GD > Loop Action, GD > Loop, GD > Loop Pagination, and GD > Search on top so the user can search from the Archive page.
[gd_search mb="3"]
[gd_loop_actions]
[gd_loop layout='2']
[gd_loop_paging]
In the right column, use the GD > Map block, and we’ll leave all the settings at their default settings. However, we’ll set the height of the GD > Map block to 100vh.
[gd_map map_type="auto" post_settings="1" scrollwheel="1" width="100%" height="100vh" maptype="ROADMAP" zoom="0"]
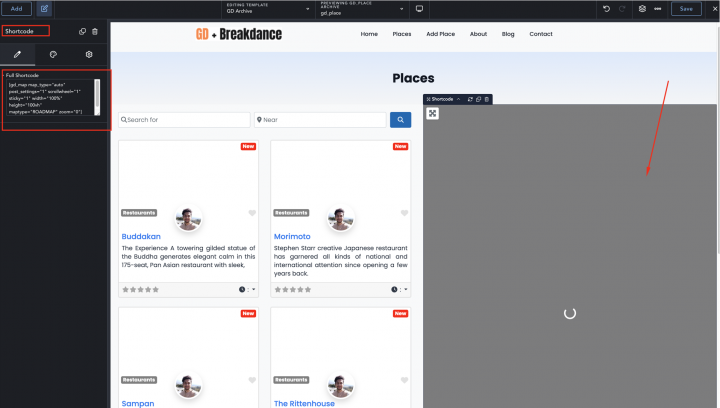
Now we will add the following gd-archive-left-container class to the left section.
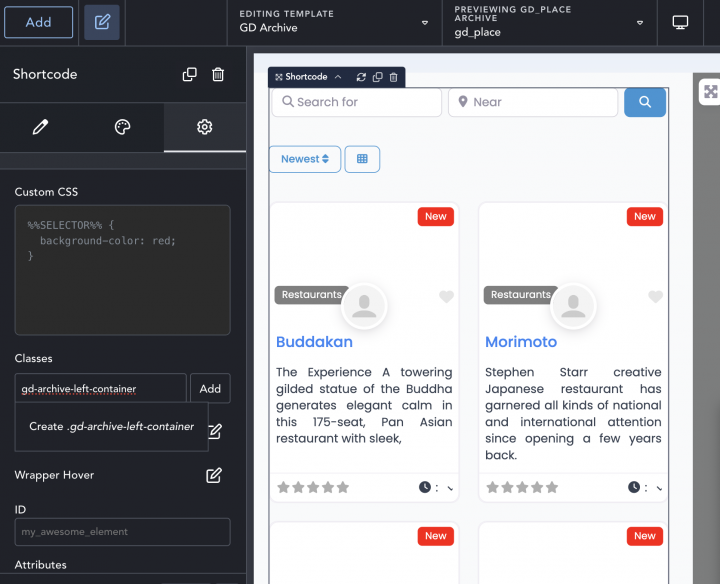
In the left column, we will add the following class gd-archive-left-column.
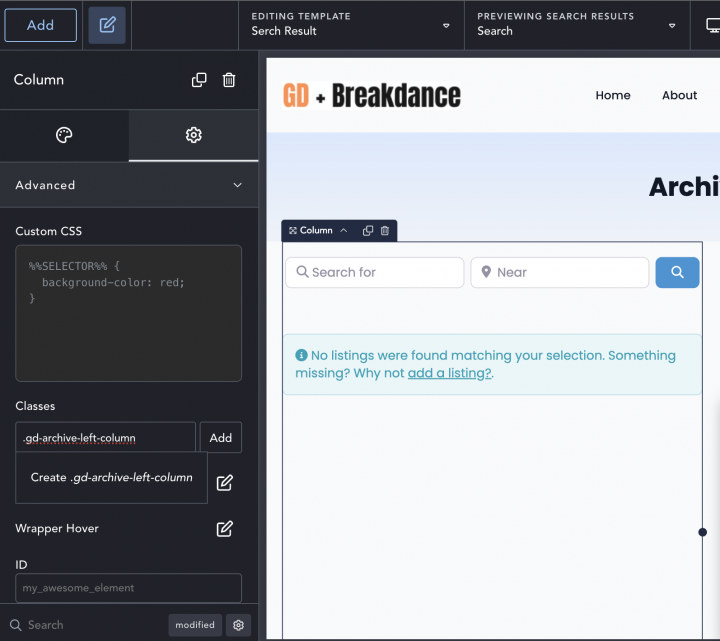
To give it a final touch we will add the following CSS in the theme customizer from Appearance => Customize => Add CSS
.geodir-archive .gd-archive-left-container{
    overflow-Y: scroll;
    max-height: 100%;
    height:100vh;
    padding-right:15px;
}

.gd-archive-left-column{
	overflow:hidden;
}
After this, the Listing Archive page is now ready.
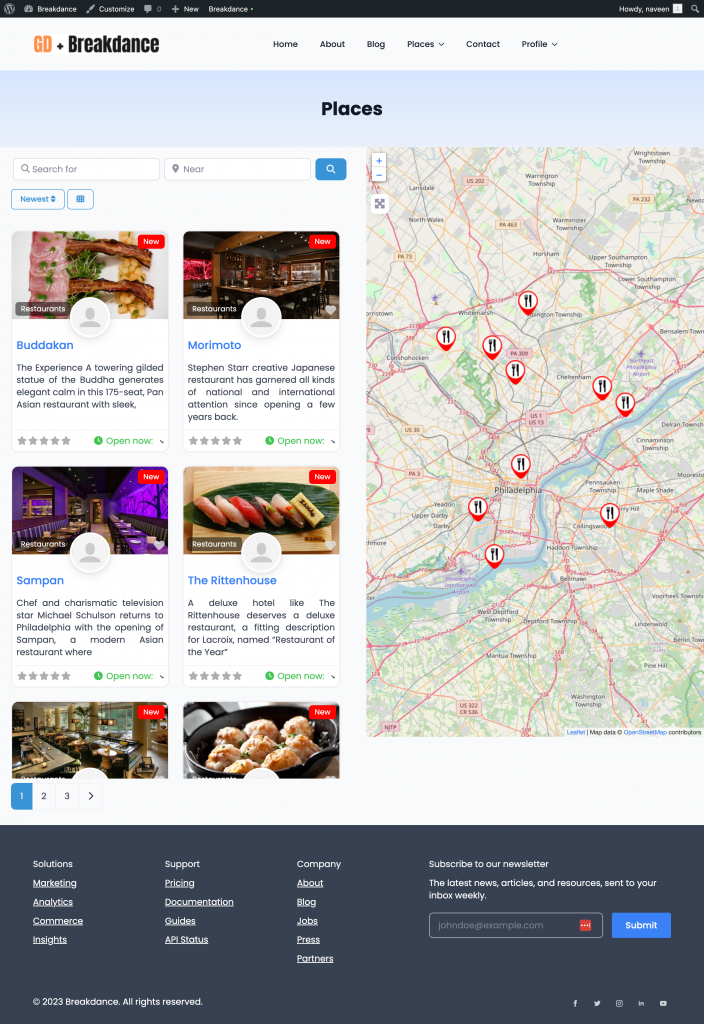
Search page
Now we will create a template for the Geodirectory Search page so Let’s go to the Breakdance >> Templates >> Add Template >> Search Results
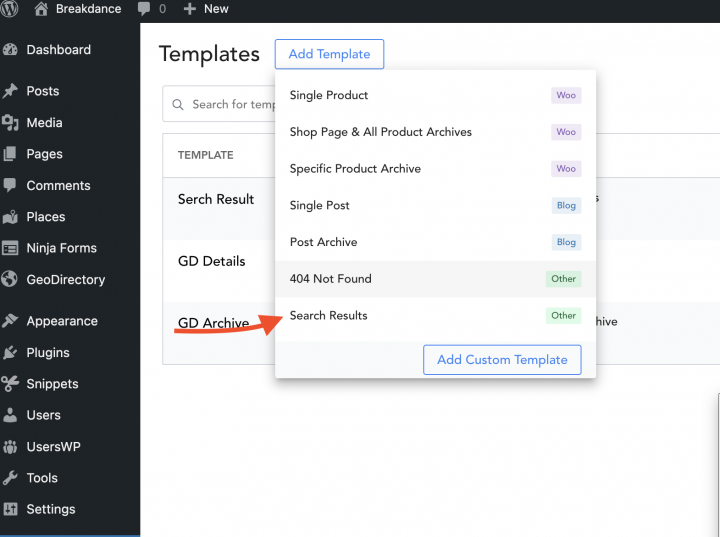
Now we will copy all the content of the GD Archive template to the GD Search template.
So now our GD Search and Archive page templates are ready.
4. Breakdance Directory Website single Listing page design
Let’s go to the Breakdance >> Templates >> Add Template
In the next option, we will select the below settings and click the Add Template button.
Location: Single/Places
Condition: Post Type = Places
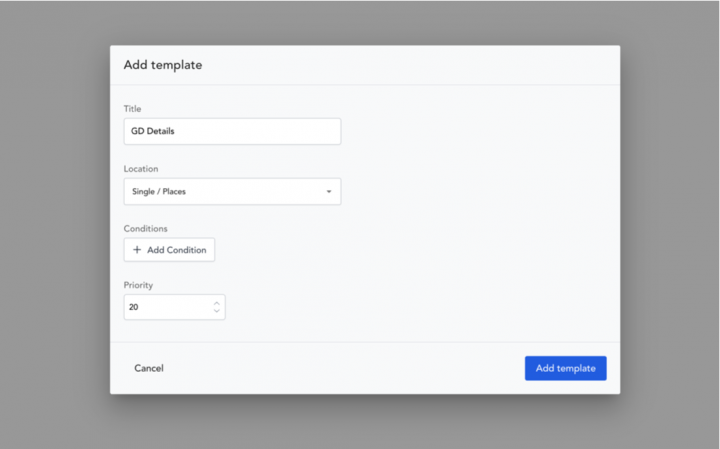
We will add an empty section with 0 padding from all sides.
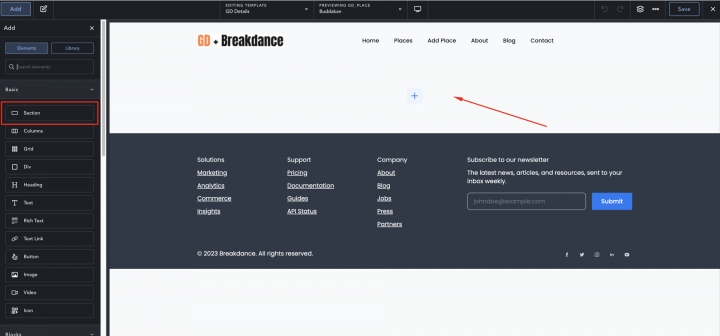
we will add the following shortcode to show an image slider.
[gd_post_images ajax_load="1" limit="10" limit_show="3" type="slider" slideshow="1" controlnav="1" animation="slide"]
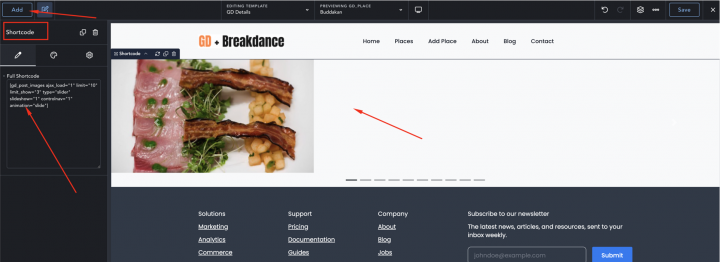
Now let’s add one more section and a two-column layout inside it.
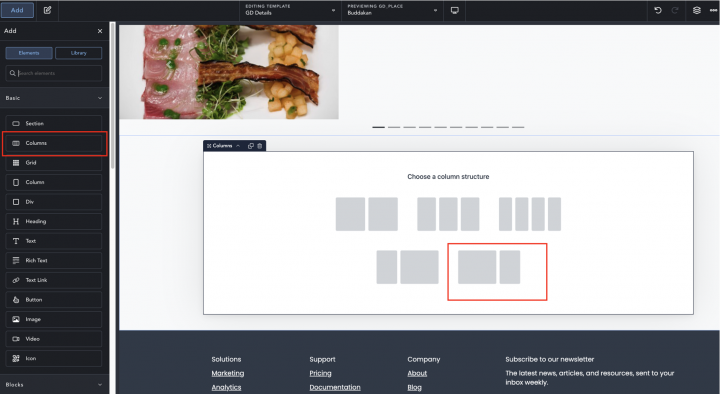
Now let’s add all the required GD Detail page shortcodes on the left column one by one.
Which includes GD > Post Title, GD > Single Taxonomies, and GD > Single Tabs.
[gd_single_taxonomies taxonomy=''  prefix=''  link_style=''  link_color=''  link_color_custom=''  link_icon='false'  mt=''  mr=''  mb='2'  ml=''  pt=''  pr=''  pb=''  pl='' ]
[gd_single_tabs heading_font_size="0" heading_text_color="primary" heading_text_color_custom="#000000" mt_lg="3" border_type="border"]
[gd_single_next_prev bg=''  mt='4'  mr=''  mb='3'  ml=''  pt=''  pr=''  pb=''  pl=''  border=''  rounded=''  rounded_size=''  shadow='' ]
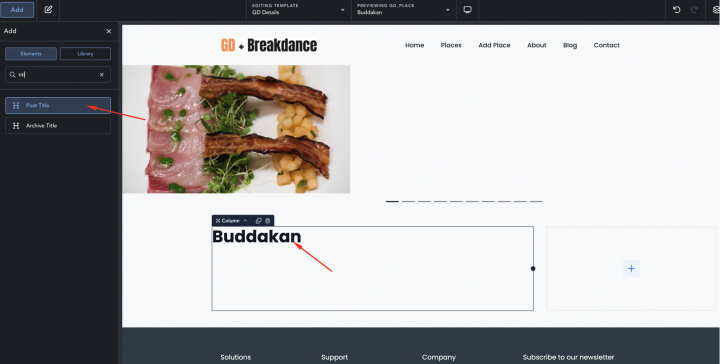
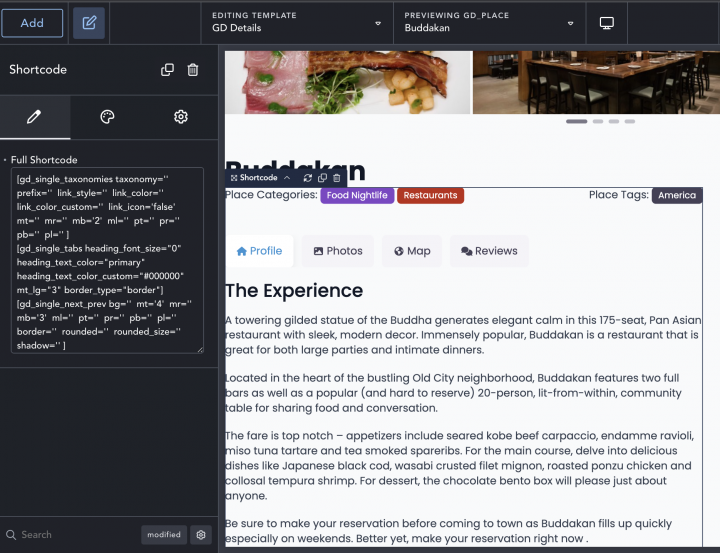
On the right column, we will add GD > Author Action and GD > Output Location block.
[gd_author_actions hide_edit='false'  hide_delete='false'  author_page_only='false'  display=''  size=''  alignment=''  color='primary'  text_color='white'  btn_mt='1'  btn_mr=''  btn_mb='1'  btn_ml=''  bg=''  mt=''  mr=''  mb=''  ml=''  pt=''  pr=''  pb=''  pl=''  border=''  rounded=''  rounded_size=''  shadow='' ]
[gd_output_location location="detail" list_style="wrap"]
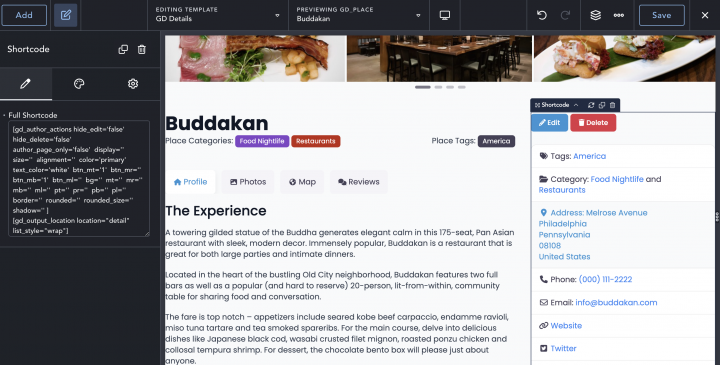
Adding Premium Features to your Breakdance Directory Website
If you wish, now you can add premium features to your directory, such as:
- Paid Listings: with the GeoDirectory Listing Price Manager add-on, you can set prices for listing submission. For each price tier, you can enable/disable features such as: Restricting the number of pictures for free listings while allowing more pictures for paid listings. Allowing more or fewer tags and categories. Enabling or disabling specific custom fields. Submitting longer or shorter descriptions.
- Claim Listings: This is a fundamental feature for a directory where the admin creates the database and invites business owners to take control of their free listings. The claim listing process may include forcing an upgrade to a paid listing to take over the listing’s ownership.
- Advertising: selling ads is another form of monetizing an online directory. If you have a lot of traffic, you can use Ads networks. Otherwise, you may sell ads directly, allowing businesses to add banners in specific areas of your website or allowing for listings to appear as ads, for example, on top of organic search results.
These are just three examples. However, a directory website offers many ways to make money online.
You can create a global marketplace of handcrafted items, sell event tickets, or sell discount coupons.
Learn the fundamental aspects with this essential guide: The essentials of creating a directory website.
The possibilities are endless.
Should You Build a Neighborhood Directory Website?
In today’s fast-paced world, fostering strong and connected communities is more important than ever.
A neighborhood directory can be a powerful tool for achieving this goal.
A neighborhood directory enhances communication and fosters a sense of belonging by providing residents with valuable information about their neighbors, local businesses, and community services.
In this article, we will guide you through building a neighborhood directory, empowering you to create a valuable resource that brings neighbors closer and supports local businesses.
Let’s embark on this journey together and unlock the full potential of your community.
Why a neighborhood directory is worth it
- Community Connectivity: A neighborhood directory fosters a sense of community by providing contact information, facilitating interactions, and promoting neighborly support.
- Communication and Collaboration: It serves as a central hub for exchanging information, coordinating events, and addressing community concerns, enhancing communication and collaboration among residents.
- Resource and Recommendation Hub: The directory offers a valuable resource for residents, providing information about local businesses, services, and amenities, supporting the local economy, and improving quality of life.
- Safety and Security: In times of emergency, a neighborhood directory enables quick communication and assistance among neighbors, enhancing safety and security within the community.
- Sense of Belonging: By promoting social integration and participation, the directory cultivates a strong sense of belonging, contributing to overall well-being and satisfaction within the neighborhood.
Print vs online directories: Why we recommend online
When it comes to creating a neighborhood directory, having an online version is the most efficient and cost-effective solution.
- Real-time Updates: Online directories provide instant updates, while print directories require reprints or supplements for changes.
- Accessibility and Convenience: Online directories offer 24/7 access from any device, unlike print directories that rely on physical copies.
- Enhanced User Experience: Online directories feature interactive elements and easy navigation, unlike print directories’ static format.
- Cost and Environmental Considerations: Online directories eliminate printing costs and reduce paper waste, unlike print directories that require physical resources.
- Privacy and Security: Online directories offer privacy controls for sensitive information, whereas print directories have limited control over physical distribution.
So, what is the best tool to create an online neighborhood directory?
The best way is using WordPress, the world’s most popular website-building tool.
They offer a vast array of templates and plugins that make it incredibly easy to create an online directory for your neighborhood.
In this guide, for example, we’ll show you how to build a neighborhood directory with the easy-to-use GeoDirectory plugin, the leading directory builder for WordPress users everywhere.
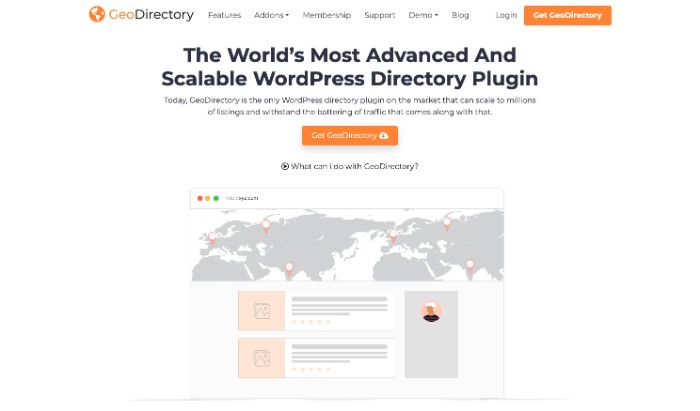
1. Ask: Why do you need a neighborhood directory?
When identifying the purpose and goals of your neighborhood directory, consider the specific features that would align with those objectives:
- Enhancing Community Communication: If your goal is to improve communication, consider incorporating features such as resident profiles, where neighbors can share their contact information and interests. The UsersWp plugin (WordPress User Registration Plugin) is a great integration to your directory builder that enables residents to connect, organize events, or collaborate on community initiatives. Additionally, having a discussion board or community forums encourages dialogue and information exchange among residents.
- Supporting Local Businesses: If promoting local businesses is a primary objective, allow local enterprises to showcase their offerings, contact details, and customer reviews in a dedicated section for business listings. Adding an events calendar can also provide opportunities for businesses to advertise special promotions or events within the community.
- Sharing Important Community Information: If your focus is on sharing community information, ensure the directory has a section for news and announcements. This can serve as a platform for posting updates, neighborhood projects, and development plans. Additionally, a classified ads section can allow residents to post ads, service recommendations, or real estate listings , further facilitating information sharing.
- Improving Neighborhood Safety: For enhancing safety, consider including a safety and emergency resources section. This can provide essential contact numbers, safety tips, and neighborhood watch information. Integration with a reporting system for suspicious activities or a platform to share safety-related information can also be beneficial.
- Promoting Social Engagement: To promote social engagement, feature an events calendar where residents can find and participate in community gatherings, workshops, or shared interest groups. Incorporating volunteer opportunities within the directory can also encourage residents to contribute to social causes and engage in community service.
By aligning the features of your online directory with the purpose and goals identified, you can create a comprehensive and tailored resource that addresses the specific needs and objectives of your community.
2. What to include in a neighborhood directory: Your options
Resident Contact Details
- Names of residents
- Addresses or general location information
- Phone numbers or preferred methods of contact
- Email addresses (if desired)
Business Listings
- Names and descriptions of local businesses
- Contact information (phone numbers, websites, emails)
- Addresses or locations
- Operating hours
- Special promotions or discounts (if applicable)
Amenities and Services
- Information about community amenities (parks, playgrounds, swimming pools)
- Service providers (plumbers, electricians, handymen)
- Healthcare facilities (hospitals, clinics, pharmacies)
- Educational institutions (schools, tutoring centers)
- Religious organizations (churches, mosques, synagogues)
Community Events and Activities
- Upcoming events (festivals, fundraisers, block parties)
- Regularly scheduled activities (book clubs, fitness classes, workshops)
- Event descriptions, dates, times, and locations
Emergency Contacts and Safety Information:
- Local emergency services (police, fire department, ambulance)
- Neighborhood watch information
- Important phone numbers (poison control, non-emergency services)
A Neighborhood Job Board:
This Job Board could cover “shovel snow from my driveway” or “Cut my lawn” jobs for kids to legitimate Job Listings for local businesses.
Community Resources:
- Local government offices and representatives
- Public transportation information
- Waste management guidelines
- Recycling centers or programs
Neighborhood Association or Council Information:
- Details about neighborhood associations or councils
- Board members or representatives
- Meeting schedules and locations
Remember, the specific information included in the neighborhood directory should be based on the needs and preferences of the community.
Regular updates and maintenance are crucial to ensure the directory remains accurate and useful to residents.
3. How to gather information for your neighborhood directory
- Conduct surveys or questionnaires: Design online or paper surveys to capture residents’ information and preferences. Offer incentives or prizes to encourage participation.
- Organize neighborhood social events: Host community gatherings, block parties, or potluck dinners. Create an information booth where residents can provide their contact details and learn about the directory’s purpose.
- Create an online submission form: Develop a simple form on your neighborhood’s website or social media platforms where residents can voluntarily submit their contact information and business details.
- Collaborate with local schools or community centers: Partner with educational institutions or community centers to collect information from families and businesses during school or community events.
- Utilize social media platforms: Create online groups or forums dedicated to the directory. Run targeted online campaigns promoting the directory and encouraging residents to submit their information.
- Engage with local organizations: Work with homeowners’ associations, neighborhood watch groups, local businesses, libraries, healthcare providers, and community services to gather information and ensure comprehensive coverage.
4. Install GeoDirectory & Configure Your Settings
Assuming you already have WordPress installed, you’re ready to begin setting up your directory. Installing GeoDirectory is simple and straightforward, just like any other WordPress plugin.
- From the Dashboard, go to Plugins > Add New.
- Search for the appropriate neighborhood directory plugin (e.g., “Neighborhood Directory Plugin”).
- Click on “Install” for the desired plugin.
- After installation, click “Activate” to activate the plugin.
General Settings
- Establish directory permalinks for SEO optimization, improving the visibility of your neighborhood directory in search engines.
- Fine-tune search functionality to ensure accurate and efficient search results for residents.
- Set terms and conditions for listing submissions, tailored to the specific guidelines and requirements of your neighborhood community.
- Enable security features like a captcha to prevent spam and maintain the integrity of your directory’s content.
Listing Preferences
- Specify the number of items displayed per page, considering the optimal browsing experience for residents in your neighborhood.
- Determine the duration of each listing, aligning with the frequency of updates or changes typically observed within the neighborhood.
- Define the sorting order of items to prioritize specific categories or businesses relevant to your neighborhood.
- Include a contact form for each listing, facilitating easy communication between residents and local businesses.
Email Settings
- Decide whether to publicly display owner emails and customize the format of displayed email addresses based on privacy preferences.
- Configure email notification settings to keep residents informed about updates, events, or important announcements related to the neighborhood.
- Personalize the appearance of email communications to maintain consistency with your neighborhood directory’s branding.
Payment Configuration
- Establish payment policies if you plan to monetize your directory, setting up fees for listings based on the value provided to local businesses.
- Enable recurring payment options for convenience and continuity, allowing businesses to maintain their presence in the neighborhood directory.
Appearance Customization
- Adjust the visual aspects of your directory to reflect the unique character and aesthetics of your neighborhood.
- Personalize the appearance of the listing submission button, ensuring it is visually appealing and encourages engagement.
- Configure options for searching, viewing, and managing listings to provide a seamless and intuitive user experience.
Licenses and Upgrades
- If you have been using the free version of the plugin, consider upgrading to a premium version for additional features and support.
- Access a comprehensive knowledge base for further guidance and information specific to your neighborhood directory.
By customizing these settings, you can create a neighborhood directory that is tailored to the unique needs, preferences, and characteristics of your community, enhancing connectivity, supporting local businesses, and providing a valuable resource for residents.
5. Personalize Submission Form Fields
- Access the ‘CPT > Settings > Custom Fields’ section in your WordPress dashboard.
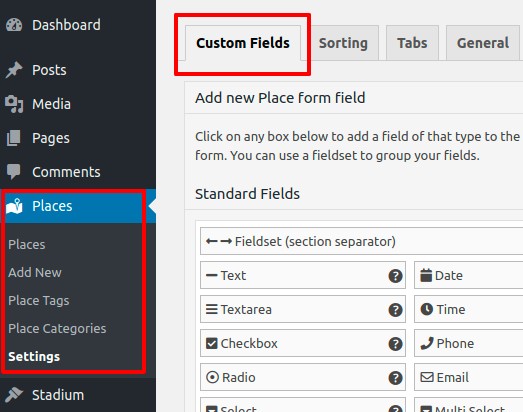
- The interface is divided into two sections: ‘Add New CPT Form Field’ on the left for creating new fields, and the right panel displays the existing fields on the ‘Add New CPT Listing Form’.

- Choose from ‘Standard Fields’, ‘Predefined Fields’, or the ‘Custom Fields’ area to incorporate your own custom fields through custom code.
- To add a new custom field, click on the desired field in the left panel, and it will be added to the right panel, similar to the WordPress Widget Manager interface.

- Customize your field and click ‘Save’. Ensure the ‘Is Active?’ option is checked before saving to make the custom field visible on your site.
Some ideas for your neighborhood directory:
- Add a ‘Neighborhood’ Field: Include a dropdown menu for visitors to find businesses in specific parts of the neighborhood.
- Customize ‘Categories’ Field: Personalize categories to reflect relevant options for your neighborhood, such as ‘Restaurants’, ‘Parks’, ‘Shopping’, or ‘Hospitals’.
- Include a ‘Business Hours’ Field: Provide operating hours for listed businesses or services.
- Integrate a ‘Parking Available’ Checkbox: Indicate whether a location has parking to address parking concerns in the neighborhood.
- Add ‘Public Transport Links’ Field: Allow users to input information about nearby public transportation options.
- Create a ‘Special Features’ Field: Provide a text box for listers to highlight unique attributes or services their business offers.
6. Creating Your Categories
By grouping listings into relevant categories such as restaurants, parks, or local services, residents can easily navigate the directory and find the information they need.
Moreover, categories provide opportunities for targeted advertising, marketing, and promotion within the neighborhood, benefiting both businesses and residents.
- Go to your WordPress dashboard and select ‘CPT > CPT Categories’.
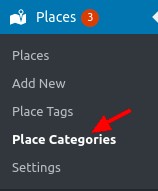
- Use the form on the left side of the page to create a new category.
- Input the category name, preferably in plural form, and define the category slug for the URL.
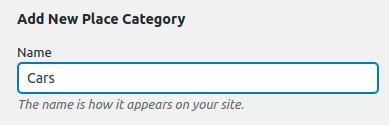
- Optionally, assign the new category as a subcategory under a parent category.
- Include a brief description and a category top description.
- Choose a default listing image and select map and category icons if desired.
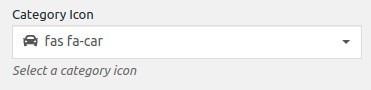
- Assign a color to the category, which is used for the map icon and other settings on the site.

- Set a suitable schema type if available to inform search engines about the data expected.
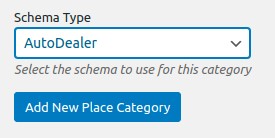
Submit the new category, and it will be available when adding new listings to your neighborhood directory.
7. Promoting your Neighborhood Directory
So, you’ve created your awesome neighborhood directory, and now it’s time to spread the word and engage the community.
Here are some practical and conversational strategies to promote your directory and make it a thriving hub for residents and local businesses:
Spread the Word Locally
- Pin up eye-catching posters or distribute flyers in community centers, libraries, and local businesses. Let everyone know about the directory and its benefits.
- Collaborate with local businesses by asking them to promote the directory on their social media platforms or include information in their customer newsletters.
- Connect with influential individuals in your neighborhood, like local influencers or community leaders, who can help generate buzz and support for your directory.
Leverage Social Media
- Create social media accounts dedicated to your neighborhood directory. Share engaging content regularly, such as featured listings, upcoming events, and stories about local businesses.
- Encourage residents, local businesses, and community organizations to follow and share your social media posts to reach a wider audience.
- Consider running targeted social media ads to specifically target residents within your neighborhood and neighboring communities.
Collaborate with Neighborhood Associations and Groups
- Partner with homeowners’ associations, neighborhood watch groups, and other community organizations. They can help promote the directory through their communication channels and events.
- Offer to give guest presentations or write articles during their meetings or events. Showcase how the directory benefits the community and provide tips on how to make the most of it.
Host Neighborhood Events
- Bring the directory to life by organizing neighborhood events around it. Think local business fairs, community festivals, or networking gatherings.
- Emphasize the directory’s features and encourage residents to participate. This way, they can discover new local businesses and connect with their neighbors, fostering a sense of community.
Encourage User-Generated Content
- Make it interactive! Allow residents to leave reviews, ratings, or recommendations for listed businesses and services. This creates a sense of involvement and community engagement.
- Run fun contests or campaigns where residents can share their favorite directory listings or success stories. Offer prizes to incentivize participation and generate user-generated content.
Collaborate with Local Media
- Get the word out by reaching out to local newspapers, radio stations, or community newsletters. Share stories about the directory’s impact, success stories, or unique features.
- Offer interviews or press releases to gain media coverage and increase awareness within the neighborhood.
Optimize for Local SEO
- Help residents easily find your directory online by optimizing it for local search engine optimization (SEO). Include relevant keywords, location-specific meta tags, and accurate business information.
- Create neighborhood-specific landing pages and provide valuable content related to the community. This helps attract organic traffic and boosts your directory’s visibility.
Seek Feedback and Continuously Improve
- Be open to feedback from residents, local businesses, and directory users. Ask for their thoughts and suggestions to understand their needs better.
- Actively respond to feedback and make necessary updates or enhancements to improve the user experience and keep the directory relevant and valuable.
By implementing these conversational strategies, you’ll create a buzz around your neighborhood directory, engage residents and local businesses, and make it a go-to resource for everything happening in your vibrant community. Let’s make it happen together!
Ready to give your neighborhood the best directory it’s ever seen?
You made it to the end – congrats!
Crafting a directory that brings neighbors closer, supports local businesses, and fosters a sense of community is now within your reach.
Following the steps outlined in this guide, you’ll have the tools to build a comprehensive and user-friendly platform that becomes an invaluable resource for residents and businesses.
Get ready to embark on this journey and witness the positive impact your exceptional directory will have on your neighborhood.
Let’s create an extraordinary resource that connects neighbors and contributes to the growth and vitality of your community.

Here’s an easy-to-understand guide on how to make a Directory Website using the Beaver Builder theme and Beaver Builder plugin:
- Install the Beaver Builder theme
- Install and setup GeoDirectory
- Install the Beaver Builder plugin & Beaver Themer
- Design the Directory Website using the Beaver Builder plugin
The Beaver Builder Theme, when used with the GeoDirectory Plugin and Beaver Builder Plugin, is an excellent way to create a flexible online directory. With this combination, you can easily add location-based features, customize the layout, and include dynamic content for a user-friendly experience.
This system allows web developers and designers to build a high-quality directory website for specific industries or broader community needs.
Let’s look at the details of how to do this.
In this tutorial, we will:
Installing Theme and Plugins.
1. Install the Beaver Builder Theme
We need to install a Theme, and for this tutorial, you will install the Beaver Builder Theme.
Go to https://www.wpbeaverbuilder.com and purchase the Beaver Builder Pro Plugin, including the Beaver themes & Beaver Themer plugin.
Download these products from the My Account page.
Go to Appearance >> Themes.
Select Add New, Install the Beaver Theme and Child theme, and Activate the Child Beaver Theme.
2. Install the Beaver Builder Pro & Beaver Themer plugin
Beaver Builder Pro and Beaver Themer are powerful WordPress plugins designed to enhance the website building and customization experience.
Go to Plugins >> Add new >> Click Upload plugin
Upload the plugin zip file and Activate both the plugins one by one.

You can Skip all steps of the Setup Wizard.
3. Install GeoDirectory
Finally, you need to install GeoDirectory.
Go to Plugins >> Add new, search GeoDirectory. Please install and activate it. We finished installing the plugins.
4. GeoDirectory Install Wizard
For the GeoDirectory plugin, you should complete the Setup Wizard to configure the Google Maps API key and import a few dummy listings.
Choosing the Map System (Google Maps or OpenStreetMap)
You can choose between two mapping systems on the wizard’s first step: Google Maps and OpenStreetMaps (which doesn’t require an API key).
In this tutorial, we select OpenStreetMaps.
If you wish to select Google Maps, do the following extra steps.
Click on the Generate Key button and follow the steps of this doc to generate a valid API key.
The essential steps are:
- Enable the Keys.
- Create or select an existing project.
- Get the Key.
- Activate a billing account.
- Restrict the API key (so it can only be used from the URL of your website)
About point four: it is a requirement. However, you only get charged if you pass the threshold of $200/month.
This free credit is more than enough for 99% of directories.
Setting the default city
After that, you will set the default location. This is the city for which the directory is created.
We will set Philadelphia as the default city.
You can use whatever location you need.
If you need to add listings to multiple cities, you will need the Location Manager add-on.
Adding extra features
In this step, we will install our UsersWP, a user registration and login plugin that lets users register and log into your website.
This is needed to allow users to add and edit their listings. It will also create user profiles where they can find their listings, reviews, and so on.
We will also install Ninja Forms so that all listings have a contact form that sends emails directly to the listing owners.
AyeCode Connect is not mandatory for this tutorial. It is mainly needed if you want to add GeoDirectory premium add-ons and install them directly from the WordPress Dashboard.
Adding Dummy Data
The last step to complete the installation wizard is adding some dummy listings. This will also add listing categories that you can edit later according to your needs.
You will not add sidebar widgets and menu items right now; we will do that later.
Design the Beaver Builder Directory Website
Now that we have installed the theme and the plugins and done the preliminary setup of GeoDirectory, we can start designing our Directory Website with the Beaver Builder Suite of tools.
1. Design The Website Logo
First things first: we will need a logo for our website.
You don’t need to invest in a designer to sketch the 1st version of your logo.
One of the biggest mistakes you can make when starting a new directory is investing too much time and money before testing the product market fit.
You can design a logo in five minutes with an app like Canva, which is cheap and surprisingly good.
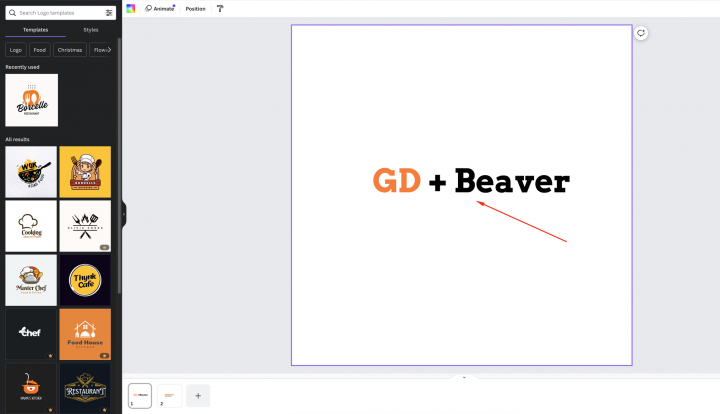
For an MVP (minimum viable product), a logo designed with Canva will be more than enough.
There are several logo templates to choose from, and it doesn’t matter if your initial logo is not as perfect and original as you believe it should be.
If your project gets traction, you can always invest in improving it or radically changing it later.
An average logo is never the leading cause of a failed project.
2. Beaver Builder Directory Home page design
You can create a new page or use one WordPress makes by default, like the Sample Page.
Go to Pages, edit the Sample page, and rename it Home or create a new page for this.
Next, go to Appearance > Customize > Homepage Settings and select your Home.

Now set the logo from Appearance>> Customize >> Header >> Header Logo
set. Logo Type: Header and Upload Logo image.

The Navigation Menu
After creating and adding the logo, go to Appearance > Menus and create your menu.
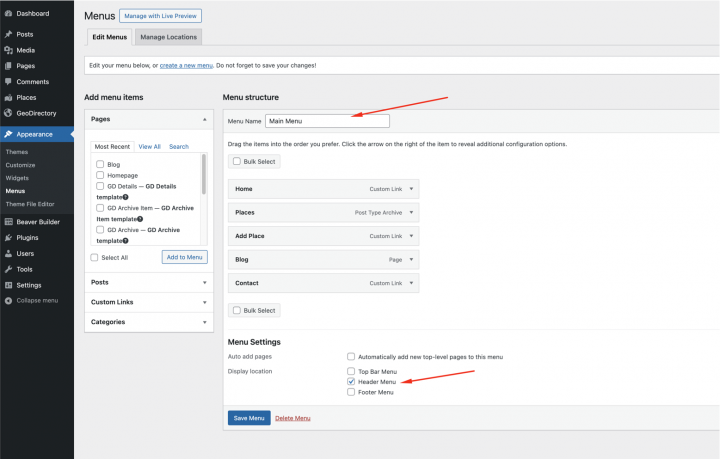
Add the links needed (from the left to the right column) and save.
In the Menu Settings > Display location section, you can check the “Main” option.
If you want, you can make the same menu appear on the footer or create another menu to appear there.
In this example, we’ll only have the header navigation menu.
We added seven main navigation links and a few sub-navigation links:
- Home
- About
- Blog
- Places and add places
- Profile
- Login
- Logout
The Login link (from UsersWP Endpoints) will only appear for Logged-out users, while the log-out, account, and profile links will only appear for logged-in users.
The Typography
Now let’s define the Typography for the website text font and size. I am setting a global Font Family, Font Weight, and Font Size that will be applied to all site text.
we will go to the Appearance > Customiser > General > Layout. we will set the following settings
Width: Full Width
Content Width: 1200
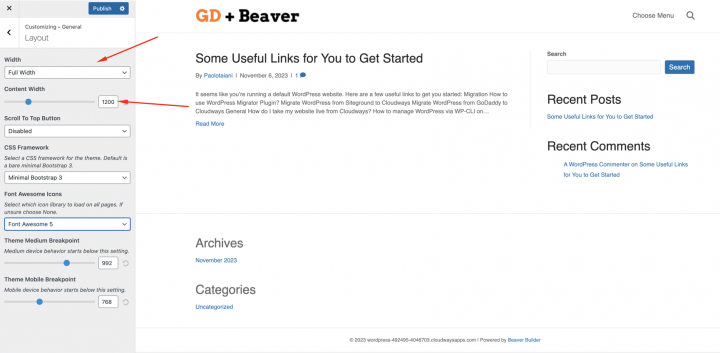
we will go to the Appearance > Customiser > General > Text.
Font Family: Outfit
Font Weight: Light
Font Size: 18
Line Height: 1.45
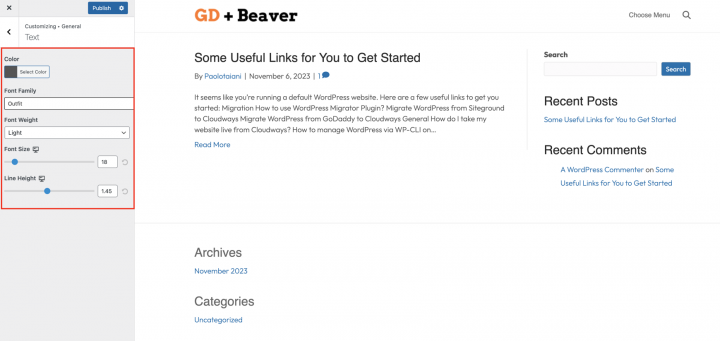
The Content
I will start building this page from scratch using the Beaver Builder plugin.
We need a hero header on the homepage for that.
Let’s first edit the Homepage in Beaver Builder by clicking on Launch Beaver Builder.
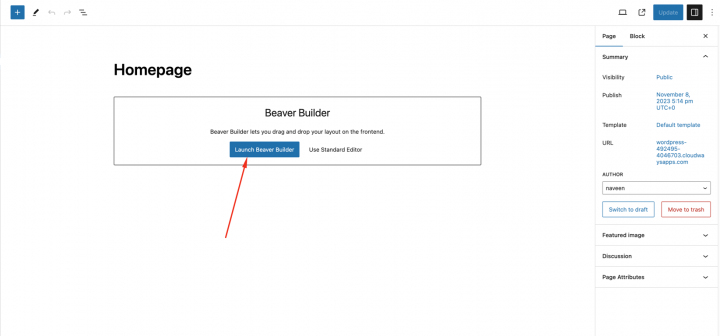
Now drag a row container by Clicking on the plus icon on the Top right.
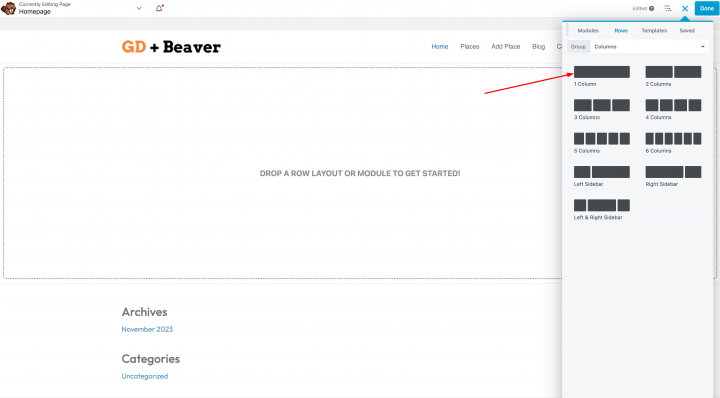
From the Row style tab set
Width: Full Width
Content Width: Fixed
Minimum Height: 600px
Background Type: Photo
Background Photo Source: Media Library
Position: Center
Scale: Fill
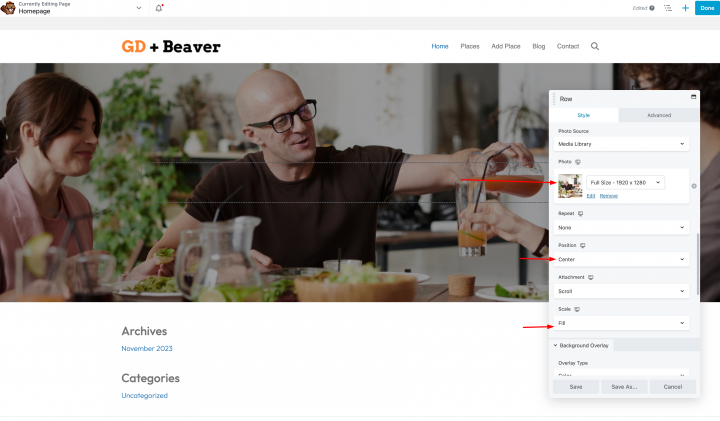
Let’s now drag a header and the GD > Seach Block over the top of this row.
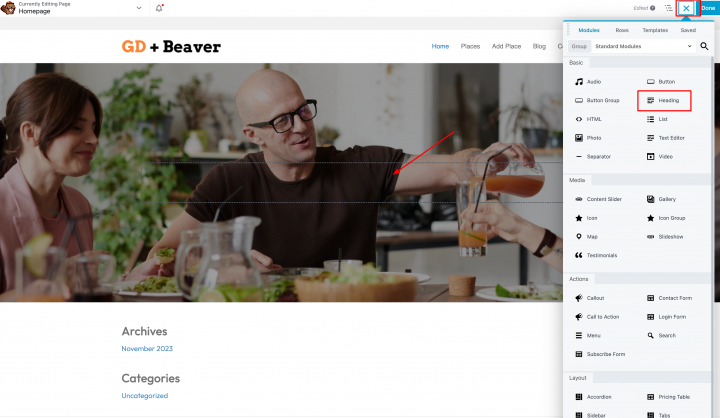
Let’s now add one empty row container, and we will add a GD > Categories block inside of it.
Set the GD > Categories block settings to the following
Design type: Image Background
Row Items: 4
Enable the Use Category Image option
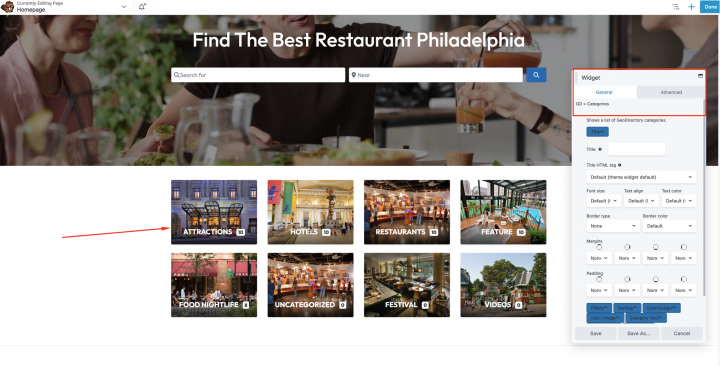
You can set the image to a category by editing the category from wp-admin -> places -> Place Categories.
Each category has an option to set a default image
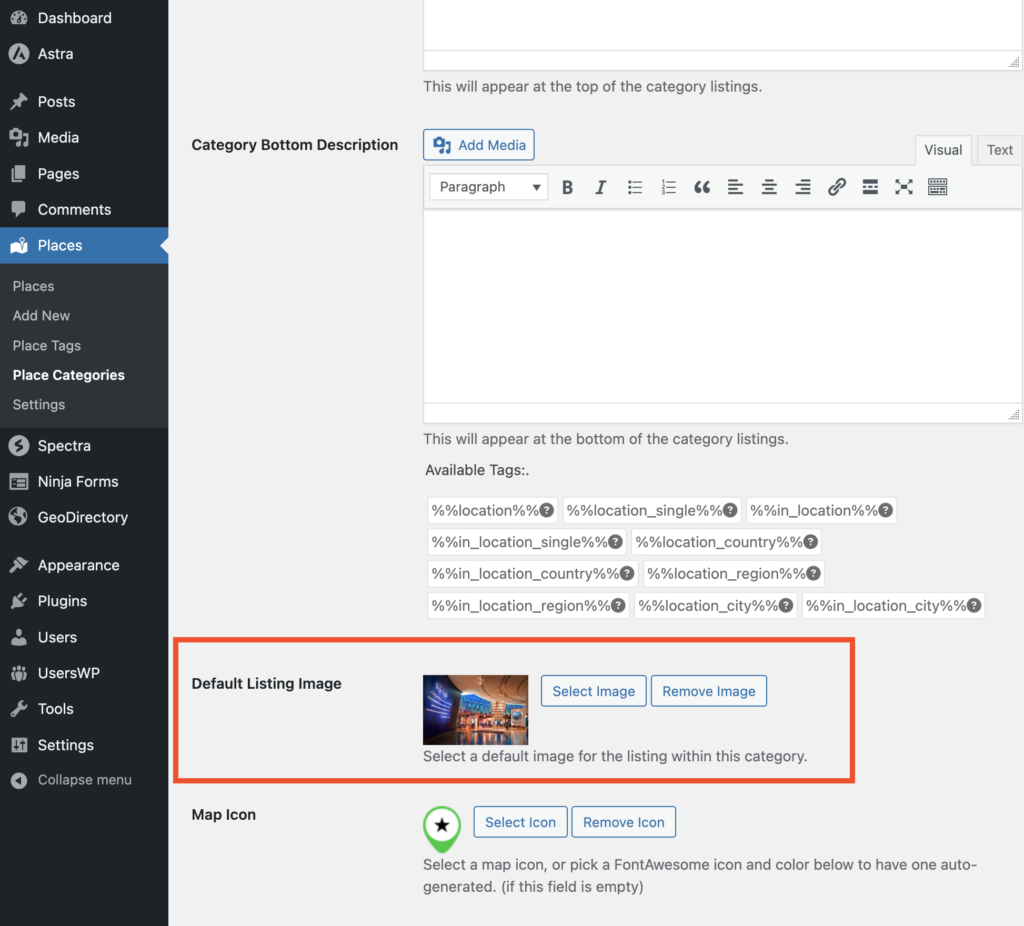
Now, we will add an empty row with 1 column layout.
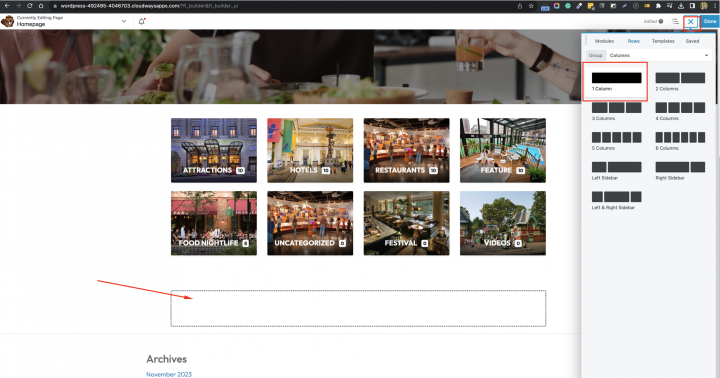
with following settings
Color: rgba(234,240,255,0.64)
Width: Full Width
Content width: Fixed
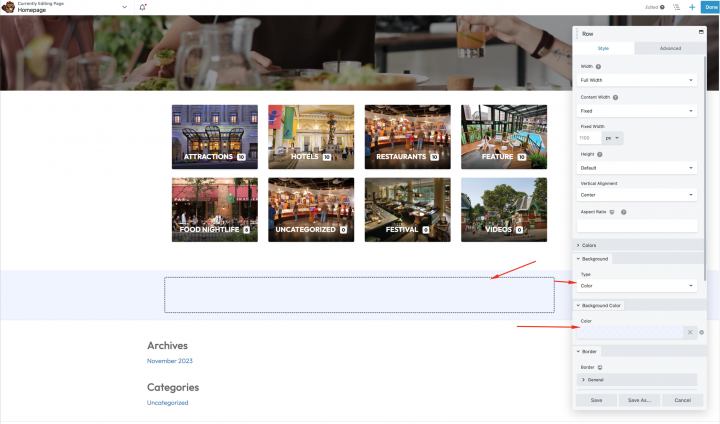
Now, we will add a header element
Text: Recent Business Listing
Size: 42
Align: Center
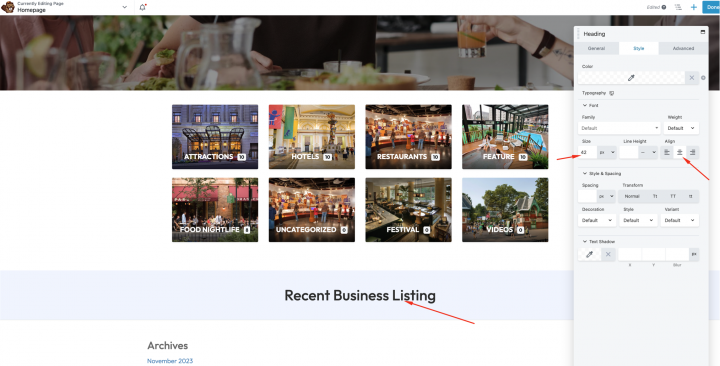
Next, we will edit some settings in this GD > Listings block.
We will set: Sorting: recent
Grid: 4

We will add a row container with the following settings.
Width: Full Width
Content Width: Full Width
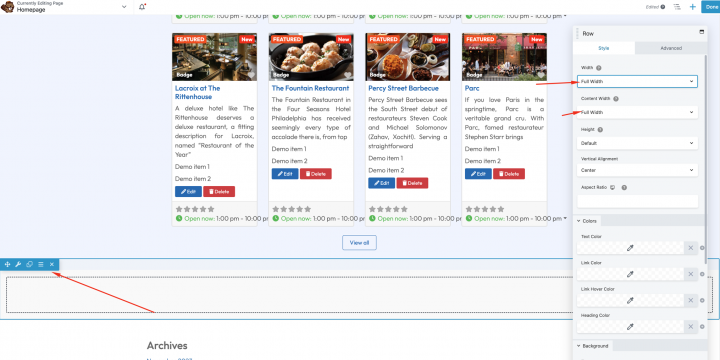
Add the GD > Map block inside of it and keep the settings to default.
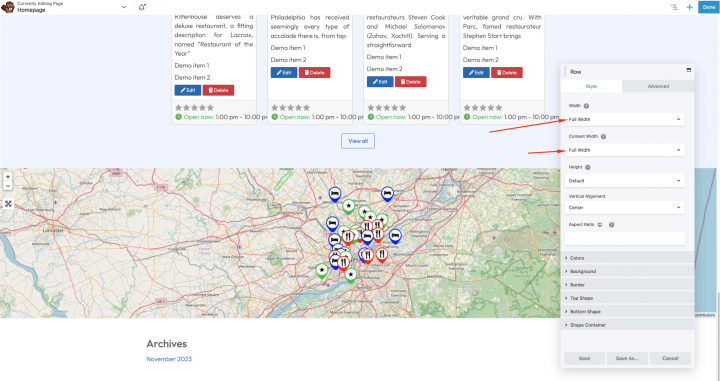
Now, at last, we need a CTA at the bottom.
We will add an empty row with a two-column layout and the following settings.
Width: Full Width
Content Width: Fixed
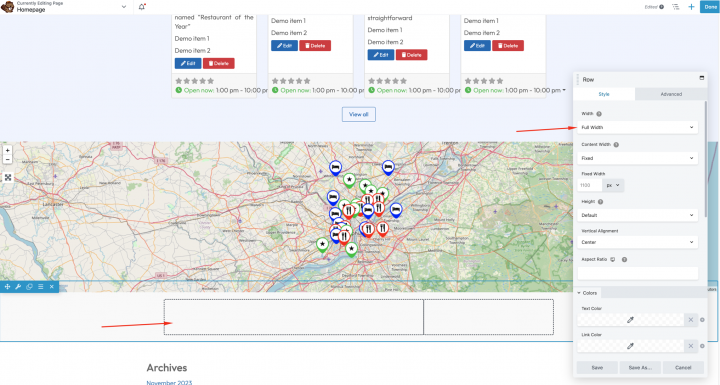
Let’s now add a heading and content in the left column, and in the right column, we will add a button to send users to the add listing page.
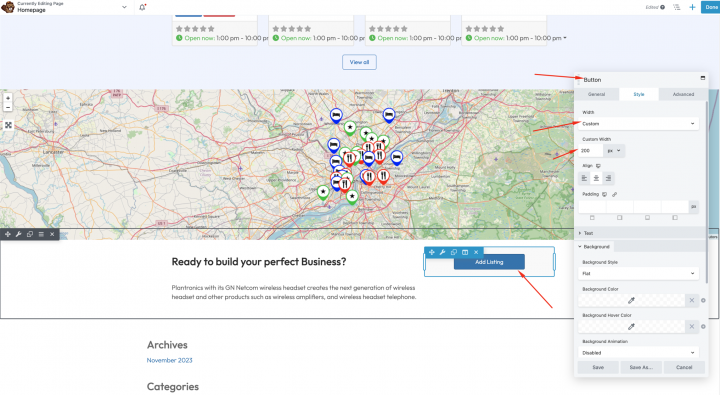
Congratulations! Your homepage is Completed.
3. Beaver Builder Directory Website Listings and Search page design
Now, you need to design two essential pages for any directory.
The listings page (general archive, categories, tags) and the search results page.
GeoDirectory creates them by default with a general layout. In this tutorial, we will customize the design of these pages a bit.
The listing and search pages are mostly identical, so we create it once and copy the layout on the other page.
We decided the Listing page layout would be the listings on the left and on the right, a sticky map showing the listings’ precise location.
This is very easy.
Listings page
Go to Beaver Builder > Themer Layout > Add new and select
Title: GD Archive
Type: Themer Layout
Layout: Archive
Click on the Add Theme Layout button
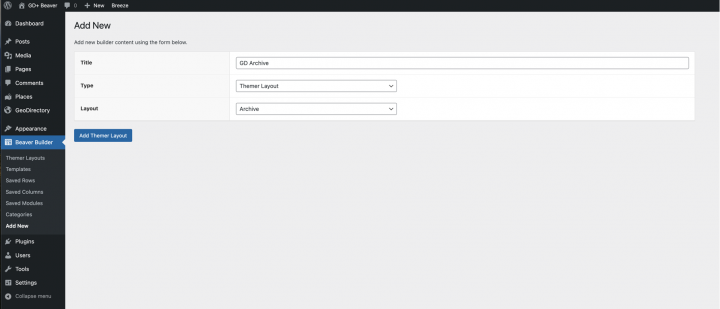
On the next page, select Location: Place Archive.

After saving these settings, click on Launch Beaver Builder. We will add an empty row with 1 column layout.
Width: Full Width
Background color: #577196
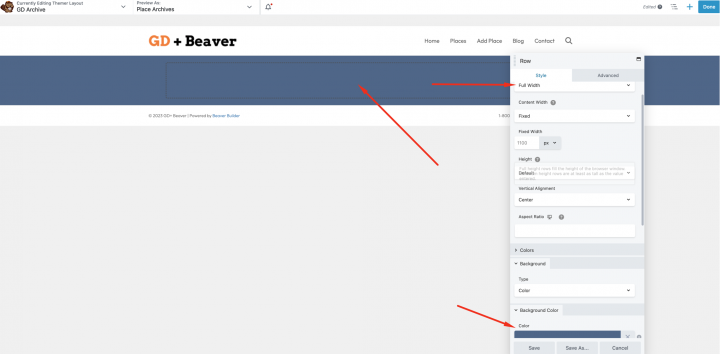
We will add an Archive title to it.
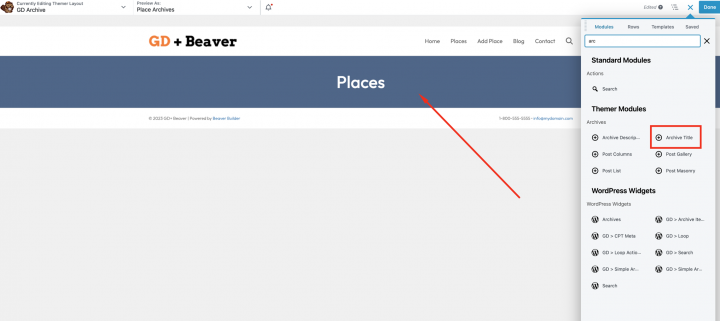
Now, let’s add a row with a two-column layout.
Width: Full Width
Content Width: Full Width
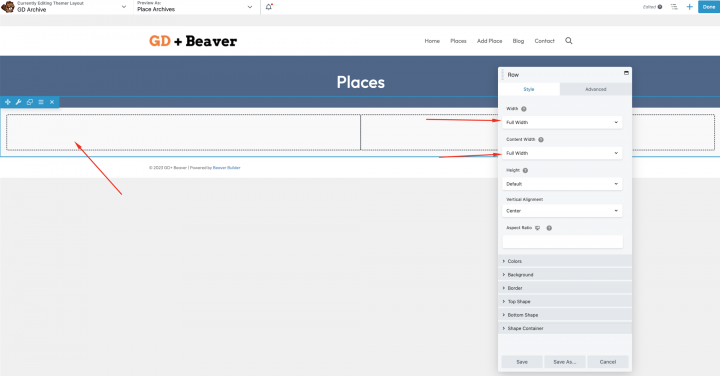
Next, on the left container, we will drag GD Archive page-related widgets like GD > Loop Action, GD > Loop, GD > Loop Pagination, and GD > Search on top so the user can search from the Archive page.
On the right column, we will drag the GD > Map block.
We will keep all the settings default for the GD > Map. Let’s give it some height, and I have decided to give it a height of 100vh.

Add the following style in the theme customizer from Appearance => Customize => Add CSS.
.geodir-archive .geodir-listings .geodir_location_listing{
    overflow-y: scroll;
    max-height: 100vh;
    padding-right: 15px;
}
After this, the Listing Archive page is ready.
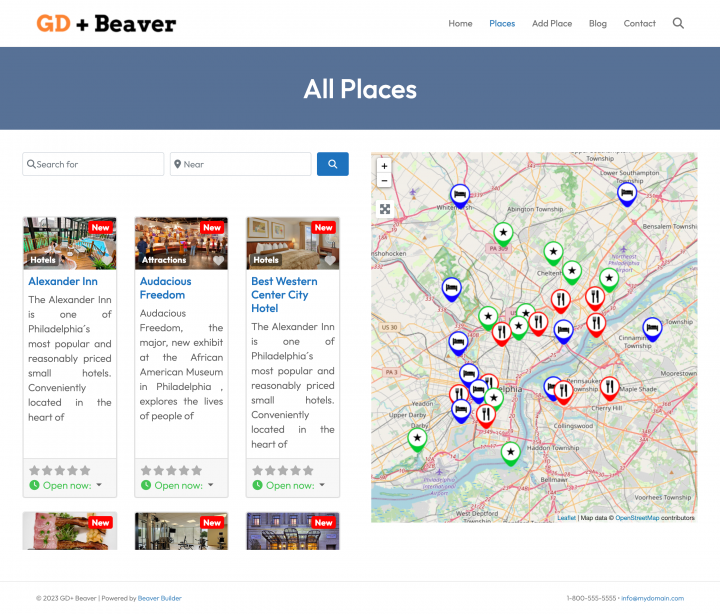
Another option is to use the GD > Simple Archive block, as explained in this tutorial on building a Directory Website with Elementor.
For the search page, we repeat the same process.
Search page
Go to Beaver Builder > Themer Layout > Add new and select
Title: GD Search
Type: Themer Layout
Click on the Add Theme Layout button
Copy all the content of the GD Archive Themer Layout template and paste it into the GD Search Themer Layout template.
Now Go to Geodirectory > Settings > General > Pages and in the Search Page Themer Layout select GD Search

So now our GD Search and Archive pages are ready.
4. Beaver Builder Directory Website single Listing page design
Go to Beaver Builder > Themer Layout > Add new and select
Title: GD Details
Type: Themer Layout
Layout: Singular
Click on the Add Themer Layout button.
On the next page, select Location: All places

After saving these settings, click on Launch Beaver Builder. We will add an empty row with 1 column layout.
Width: Full Width
Content Width: Full Width
Padding: 0

First, add an image slider at the top of the Listing Detail page.
We will drag the GD > Post Image block in this container with the following settings
Image Limit: 10
Show limit: 3
Output Type: Slider
Auto Start: Enable

Now let’s add a row with two columns layout.
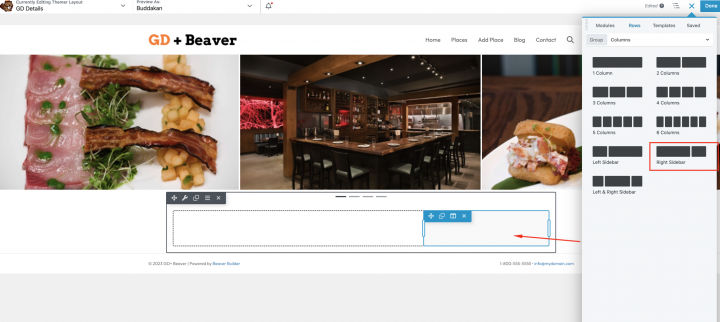
Now, let’s individually add all required GD Detail page shortcodes on the left column.
Which includes GD > post Title, GD > Single Taxonomies, GD > Single Tabs, and GD > Single Next Prev.
We will add GD > Author Action and GD > Output Location block on the right column.
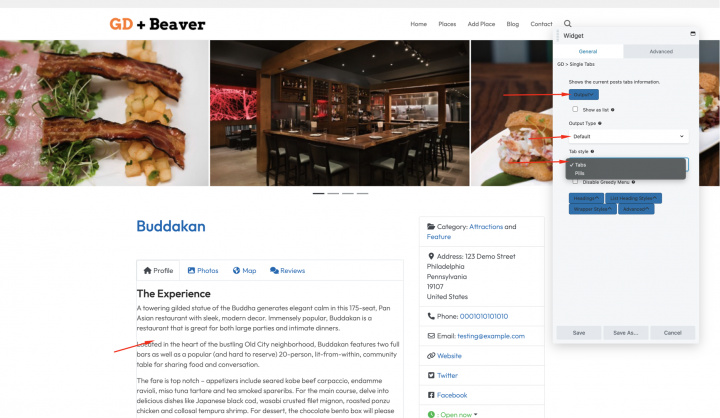
After doing it,, our Listing Detail page is complete.
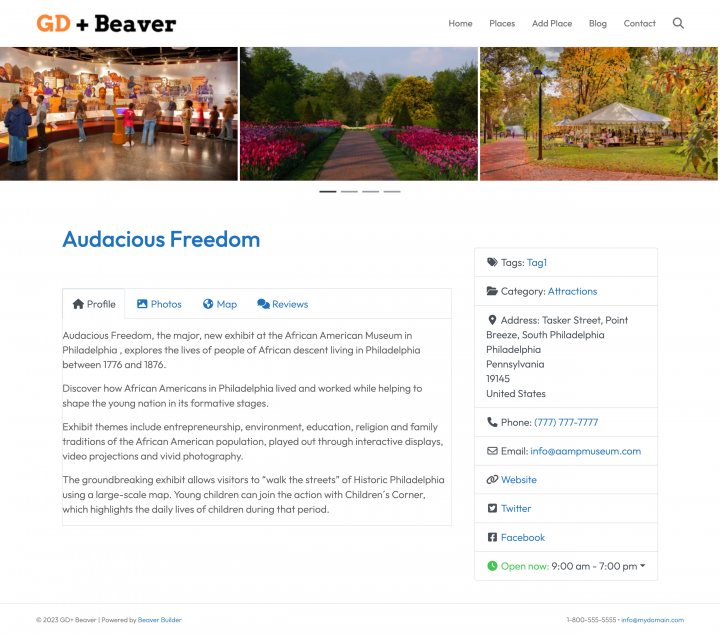
Adding Premium Features to your Beaver Builder Directory Website
If you wish, now you can add premium features to your directory, such as:
- Paid Listings: with the GeoDirectory Listing Price Manager add-on, you can set prices for listing submission. For each price tier, you can enable/disable features such as Restricting the number of pictures for free listings while allowing more images for paid listings and more or fewer tags and categories. Enabling or disabling specific custom fields. Submitting longer or shorter descriptions.
- Claim Listings: This is a fundamental feature for a directory where the admin creates the database and invites business owners to take control of their free listings. The claim listing process may include forcing an upgrade to a paid listing to take over the listing’s ownership.
- Advertising: selling ads is another form of monetizing an online directory. If you have a lot of traffic, you can use Ads networks. Otherwise, you may sell ads directly, allowing businesses to add banners in specific areas of your website or allowing for listings to appear as ads, for example, on top of organic search results.
These are just three examples. However, a directory website offers many ways to make money online.
You can create a global marketplace of handcrafted items, sell event tickets, or sell discount coupons.
Follow this tutorial for a step-by-step approach: Tutorial: How to create a directory website.
This generic tutorial can be adapted to any theme or page builder.
The possibilities are limitless.