The World’s Most Advanced And Scalable WordPress Directory Plugin
GeoDirectory is an enterprise-grade WordPress plugin for building scalable business directories, city guides, real estate listings, job boards, event sites, classifieds, and local discovery platforms. Unlike generic listing plugins, it uses custom database tables, not WordPress post meta, so sites perform well from small local portals to directories with hundreds of thousands or millions of listings. Core features include optimized search, maps, reviews, frontend submission, and an extensive add-on ecosystem for customization. Rated 4.8/5 across 700+ reviews on WordPress.org and Capterra.
Get GeoDirectoryWhat can i do with GeoDirectory?
Imagine spending hours manually typing every detail about each student or staff in a spreadsheet. Wouldn’t it be great to have an easier way to do it?
With WordPress, you can create a comprehensive online school directory that’s easy to use and looks professional. Here’s a step-by-step guide on building an online school directory in WordPress with one of the best directory builder plugins on the market: GeoDirectory.
Ready? Let’s go.
What is a school directory?
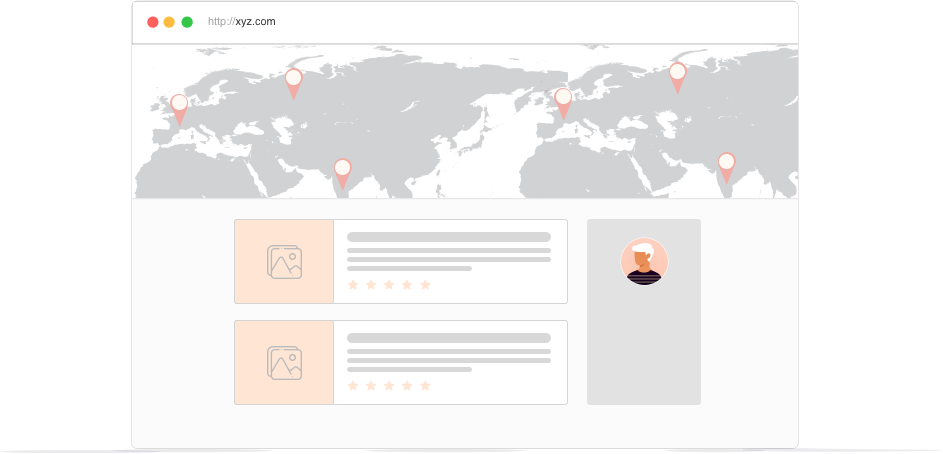
A school directory is a list of all the students and staff in your school, their contact information, photos, and other relevant details. It’s like a virtual yearbook that makes it easier for students to stay connected with one another.
Why might a school directory come in handy?
- Quick Contact Info: It’s a one-stop shop for finding contact details of students, parents, teachers, and staff. No more digging through multiple sources to get in touch with the right person.
- Seamless Communication: With a directory, schools can ensure smooth communication among everyone involved. Important updates, announcements, and notifications reach the right people promptly.
- Collaboration Made Easy: Finding and reaching out to fellow teachers, students, and staff becomes a breeze. It encourages teamwork, resource sharing, and coordination for projects and extracurricular activities.
- Parent Participation: Parents can stay informed and actively engage in their child’s education. They can easily connect with teachers, administrators, and other parents, fostering a solid home-school partnership.
- Substitute Teacher Support: When regular teachers are absent, substitute teachers can refer to the directory for classroom locations, contacts, and quick familiarity with staff members they need to communicate with.
- Networking Opportunities: The directory acts as a networking tool, helping individuals connect with others with similar interests or expertise. Teachers, parents, and students can find and collaborate with like-minded people.
- Alumni Connections: Alumni directories within the school directory facilitate connections between former students and the school community. It keeps alumni engaged, enables knowledge sharing, and allows potential contributions to the school.
- Subject-Specific Resources: You can have department-specific directories for students and faculty, making it easy to access subject-related resources, contact details, and specific academic information.
- Privacy and Security: While directories provide information, they also ensure privacy and security by controlling access to sensitive data, making sure only authorized individuals can access the directory.
- Building a Strong Community: Ultimately, a school directory brings everyone together. It encourages communication, collaboration, and engagement among students, parents, teachers, and staff. It creates a supportive and connected environment.
What to include in a school directory
- School Contact Details: Provide the school’s official contact information, including the address, phone number, and email address.
- Administrative Staff: List the names, titles, and contact details of the principal, vice-principal, and other administrative personnel.
- Teachers and Faculty: Include a directory of teachers and faculty members, their names, subjects taught, and email addresses. Optionally, you can add their office locations or availability hours.
- Support Staff: Include contact information for support staff members such as guidance counselors, librarians, nurses, and IT technicians.
- Student Directory (Optional): If permitted and appropriate, you can include a student directory with basic information like student names, grade levels, and classroom assignments. Ensure that privacy regulations and consent are respected.
- Department Listings: If applicable, create separate sections or listings for various departments such as science, mathematics, arts, athletics, etc. Include contact details of department heads and faculty members.
- School Calendar: Incorporate a calendar highlighting important dates, events, holidays, and academic schedules.
- Resources and Services: Provide information on resources available within the school, such as the library, counseling services, extracurricular activities, clubs, and academic support programs.
- Parent-Teacher Association (PTA): Include contact details for the PTA or parent association, enabling parents to connect with fellow parents and engage in school-related activities.
- Emergency Contacts: For quick reference, list emergency numbers, school security, and relevant safety protocols.
Ensure that the directory is regularly updated to maintain accuracy and relevancy. Additionally, adhering to privacy guidelines and obtaining necessary consent when including personal information in the directory is essential.
Step 1: Choosing the Right Theme for Your School Directory
The perfect theme is essential when creating a school directory site with WordPress. GeoDirectory offers a range of beautiful and customizable themes with free and premium options ($19 to $39).
These themes are designed for single or multi-city directories and seamlessly integrate with Google Maps. They provide predefined listing types for various school features and events, ensuring a user-friendly experience for listing submissions.
Step 2: Setting Up Your Domain and Hosting
You’ll need a domain and hosting service to bring your school directory website to life. Choose a domain name that reflects your school’s identity and purpose. Opt for simplicity, incorporating your school or region’s name.
Regarding hosting, we recommend Cloudways and its Vultr High-Frequency 1GB plan, which costs only $15 per month and is an excellent choice for 99% of Chamber of Commerce Directories. It offers reliable services for storing your site’s data and making it accessible online.
Step 3: Install GeoDirectory & Configure Your Settings
After securing your domain and hosting, the next step is to install the GeoDirectory plugin. This plugin is essential for creating a functional school directory, offering a range of tools to manage staff and faculty profiles, event management, and school facilities and amenities.
Here’s how to install the GeoDirectory plugin:
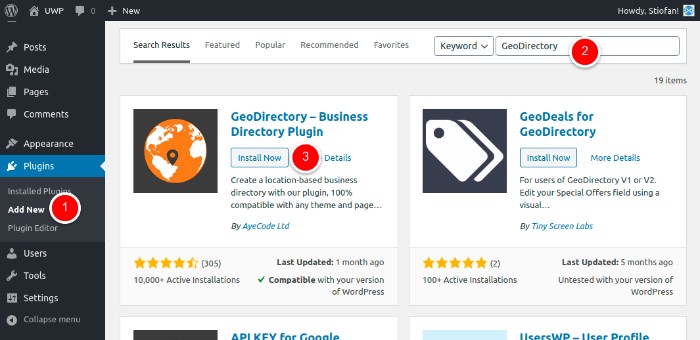
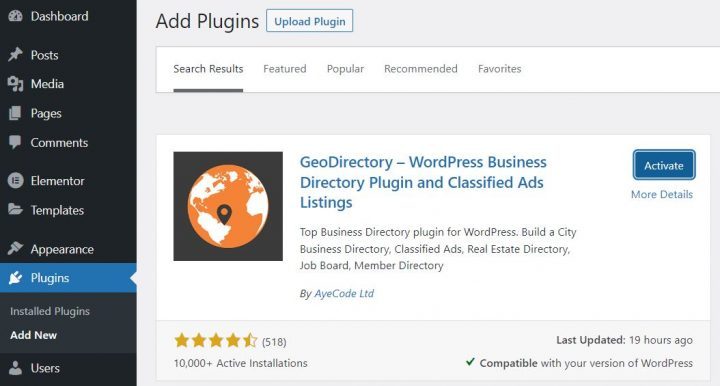
- From your Dashboard, navigate to Plugins > Add New.
- In the search field, enter “GeoDirectory” and click Enter.
- Look for the “GeoDirectory – Business Directory Plugin” and select the “Install” button.
- Once the installation is complete, click on the “Activate” button.

Next, you’ll want to tap into the vast array of features specifically designed to meet the needs of school directories:
- Easy Listing Management: With GeoDirectory, you can manage and organize listings for different departments, classes, clubs, or school facilities. Keep track of relevant details such as contact information, descriptions, and photos.
- Events Management: Organize and promote school events, including parent-teacher meetings, performances, workshops, or sports tournaments. GeoDirectory allows you to create event listings with dates, locations, and descriptions.
- Staff and Faculty Profiles: Showcase your school’s dedicated teachers and staff by creating profiles highlighting their qualifications, areas of expertise, and contact information. This helps students and parents connect with the right educators easily.
- Parent Reviews and Ratings: Enable parents to share feedback and rate their experiences with various aspects of the school, such as classes, extracurricular activities, or support services. This valuable feedback can assist other parents in making informed decisions.
- School Facilities and Amenities: Highlight the different facilities and amenities available within the school, such as libraries, sports facilities, laboratories, or cafeterias. GeoDirectory allows you to create listings for each facility, providing essential details and photos.
Step 4: Personalize Submission Form Fields
Here’s how you can tailor the form fields in GeoDirectory for your school directory:
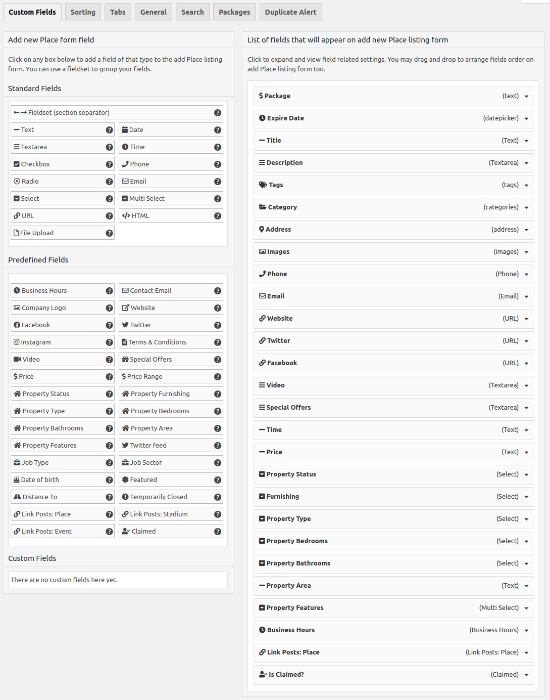
- Access the WordPress dashboard and navigate to ‘CPT > Settings > Custom Fields’.
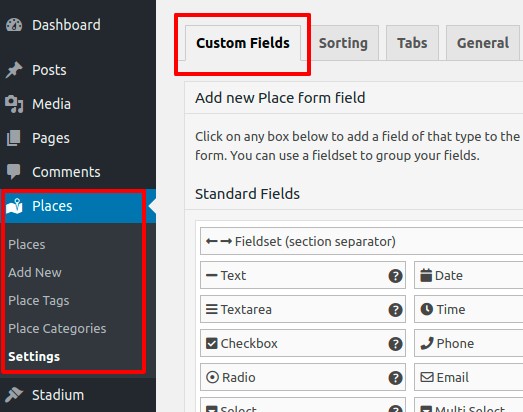
- In the interface, you’ll find two sections. On the left, ‘Add New CPT Form Field’ allows you to create new fields. The ‘Add New CPT Listing Form’ on the right displays the currently available fields.

- You can choose from ‘Standard Fields’, ‘Predefined Fields’, or utilize the ‘Custom Fields’ area to incorporate your custom fields through custom code specifically designed for your school directory needs.
- To add a new custom field, select your desired field from the left panel, which will be added to the right panel. The process is similar to using the WordPress Widget Manager interface.

- Once you’ve customized the field, click ‘Save’. Remember to check the ‘Is Active?’ option to ensure the field is visible on your school directory website.
Consider these customization ideas for your school directory:
- Additional Field for Grade Levels: Include a dropdown menu or checkboxes to specify the grade levels associated with each listing, helping users find relevant resources for specific grade levels.
- Subject or Department Field: Add a field to specify the subject or department related to each listing, allowing users to search and filter resources by subject or department.
- Extracurricular Activities Field: Include a field where schools can provide information about various extracurricular activities, such as sports teams, clubs, music groups, and more.
- Facilities and Amenities Field: Create a field to highlight the facilities and amenities available within the school, such as libraries, science labs, sports facilities, playgrounds, and cafeteria.
- Staff Profiles Field: Provide a section where schools can showcase profiles of teachers and staff members, including their qualifications, areas of expertise, and contact information.
By customizing the form fields in GeoDirectory to suit your school directory’s unique needs, you can create a comprehensive and tailored platform that effectively presents your school’s offerings, resources, and staff information to students, parents, and the school community.
Step 5: Creating Your Categories
Creating a well-structured category system is essential for maintaining organization and usability in a school directory website with many listings.
GeoDirectory themes can establish hierarchical categories, including parent and subcategories, tailored specifically for school directories.
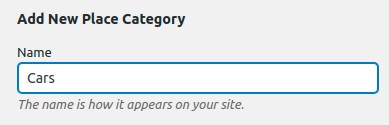
To begin, follow these steps within your WordPress dashboard by selecting ‘CPT > CPT Categories’:

- Name: Enter the category name you want to create, such as ‘Subjects,’ ‘Extracurricular Activities,’ or ‘Facilities.’ It’s recommended to use descriptive plural terms. This field is required. Here’s an example below:
- Slug: Define the category slug, which is part of the URL leading to the category’s page. For example, ‘subjects,’ ‘activities,’ or ‘facilities’.
- Parent Category: If applicable, position your new category as a subcategory under a parent category. This helps to organize listings hierarchically. For instance, ‘Sports’ could be a parent category, with ‘Football,’ ‘Basketball,’ and ‘Swimming’ as subcategories.
- Description: Optionally, provide a brief description of the category, offering additional context or details about the listings it encompasses.
- Category Top Description: This text will appear at the top of the category’s listings page, serving as an introduction or providing essential information related to that specific category.
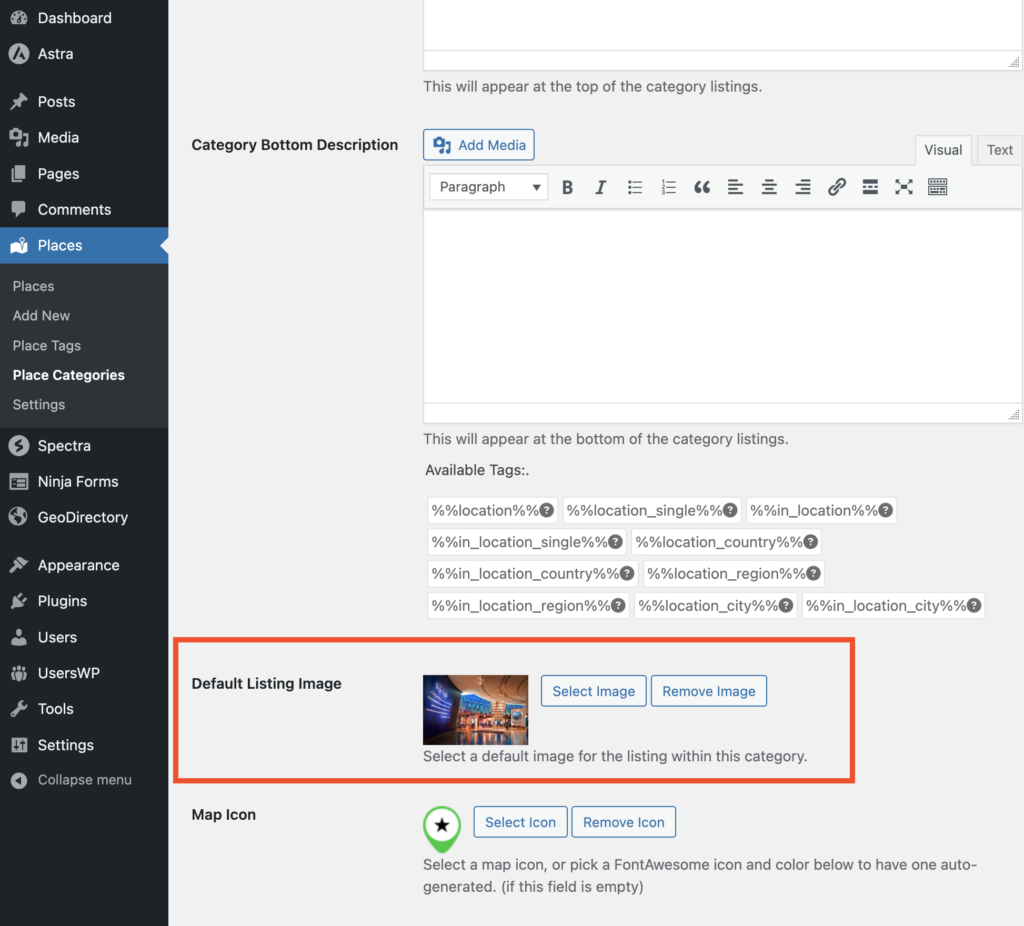
- Default Listing Image: Choose a default image representing listings within this category. It could be an icon, photo, or graphic that visually represents the nature of the category.
- If desired, select a map icon from your media files to represent this category visually on any maps displayed in the directory.
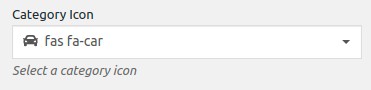
- Category Icon: Set a category icon that represents the category visually. This icon can be utilized within the directory for easy recognition and navigation.

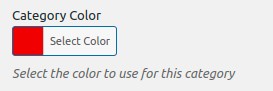
- Category Color: Choose a color that corresponds to the category, providing visual differentiation and aiding in categorization throughout the directory.

- Schema Type: If a suitable schema type is available for your category, select it. This helps search engines understand the data within the category and may enhance search result display.

Once you’ve filled in these fields, save your new category. It will now be available when adding new listings to your school directory. By structuring categories effectively, you’ll enhance the organization and usability of your school directory, making it easier for users to navigate and find relevant information.
How to get people to use your school directory
Now that you know how to build an online school directory, it’s time to encourage sign-ups and engagement. Here are some ways you can do that:
- Student Ambassadors: Recruit enthusiastic student ambassadors to promote the school directory among their peers. These ambassadors can share the benefits, demonstrate how to sign up, and organize engaging activities or contests to incentivize student participation.
- In-Class Presentations: Collaborate with teachers to allocate time for in-class presentations about the school directory. Explain its advantages, demonstrate the registration process, and answer students’ questions. Make it interactive and emphasize how the directory can benefit them.
- Exclusive Student Features: Offer exclusive features within the directory tailored explicitly to students, such as a platform to connect with classmates for group projects, access to academic resources, or a forum to share interests and hobbies. Highlight these features to make the directory more appealing to students.
- Staff Engagement: Engage staff members by highlighting the benefits of the directory in staff meetings or professional development sessions. Demonstrate how it can streamline communication, facilitate collaboration, and provide convenient resource access.
- Contests and Incentives: Organize contests or incentives exclusive to students and staff who sign up on the directory. For example, offer prizes for the most active users, encourage participation in surveys or feedback sessions, or reward staff members who consistently update their profiles with special recognition.
- Integration with School Activities: Integrate the directory into school activities and events. For instance, during orientation days or parent-teacher meetings, have a dedicated booth or station where students and staff can sign up and explore the directory’s features.
- Student Portfolios: Position the directory as a platform for students to showcase their achievements, projects, or portfolios. Emphasize how it can be a digital record of their educational journey and support college or job applications.
- Collaboration Opportunities: Highlight how the directory can foster collaboration among students and staff. Showcase its features that enable group discussions, shared document repositories, or project management tools to encourage sign-ups.
- Peer Recommendations: Encourage students and staff who have already signed up to share their positive experiences with their peers. Word-of-mouth recommendations from trusted school community members can be influential in driving sign-ups.
- Simple Registration Process: Ensure the registration process is simple, user-friendly, and age-appropriate. Minimize the required fields and offer assistance or tutorials to help students and staff complete the sign-up process effortlessly.
Tailoring these strategies to students and staff members’ specific needs and preferences will increase the likelihood of sign-ups and create an engaged school directory community.
Ready to give your school an online presence?
Building an online school directory in WordPress offers a transformative solution for enhancing communication, collaboration, and community engagement within educational institutions.
By following the steps outlined in this article, you can create a comprehensive directory that connects students, parents, teachers, and staff in a user-friendly and efficient manner. Every aspect of theme selection to customization and strategic sign-up incentives contributes to a thriving digital hub that strengthens the educational ecosystem.
Start connecting, collaborating, and transforming your educational environment today!
Picture this: a thriving ecosystem where businesses flourish, professionals connect, and local economies thrive.
At the heart of this success lies a Chamber of Commerce Directory.
A dynamic tool that ignites collaboration and fuels economic growth.
In this article, we present a comprehensive guide to building your own powerful hub, seamlessly connecting businesses and professionals within your community.
Whether you represent a Chamber of Commerce, aspire to join a directory, or have bold entrepreneurial ambitions, this step-by-step guide equips you with the knowledge and strategies needed to construct a robust Chamber of Commerce Directory.
Ready? Let’s go.
What is a chamber of commerce directory?
First, a chamber of commerce can be a voluntary or mandatory association that brings together business firms from various trades and industries.
So, a chamber of commerce directory is an online platform that lists all the members of these chambers, giving you a comprehensive overview of your local business landscape.
By unifying members through a searchable directory, you can make it easier for local businesses and customers to find each other.
Whether they’re looking for partners, suppliers or services within their community, your directory can make it happen.
What do I need to get started?
To kickstart your Chamber of Commerce Directory, you’ll need a few essential tools and resources.
Here’s a handy list to get you started:
- Website Builder: Let’s go with WordPress! It’s a popular website creation choice thanks to its user-friendly interface and flexibility. You’ll find plenty of customization options and a vast library of plugins to make your directory shine.
- Directory Plugin: Speaking of Directory plugin, GeoDirectory is your go-to directory builder. It offers robust features like member profiles, search functionality, interactive maps, and more. It’ll be the backbone of your directory management.
- Membership Management: Consider using UsersWP. This plugin make it a breeze to handle member accounts, subscriptions, and access control based on membership levels (subscriptions, and access control coming soon). They keep your directory organized and secure.
- Contact Forms: We recommend Ninja Forms or if you are using our Block Theme called Blockstrap, its internal Contact Form Block. These tools help you create customized contact forms, making it easy for members and visitors to connect with you or the listing owners. Stay accessible and responsive to inquiries.
- Payment Gateway: Get paid hassle-free by integrating PayPal or Stripe. These trusted payment gateways handle secure transactions, allowing you to collect membership fees and process payments seamlessly.
- SEO Plugin: Boost your directory’s visibility with Yoast SEO or Rankmath. These plugins help you optimize your website for search engines, allowing potential members to find you more quickly and improving your overall ranking.
- Analytics: Gain insights into your directory’s performance with Google Analytics. It’s a powerful tool for tracking website traffic, visitor behavior, and engagement. Stay informed and make data-driven decisions.
Remember, this is just a starting point! Depending on your specific needs and goals, there are countless additional plugins and resources available to enhance further and customize your Chamber of Commerce Directory.
The Setup: Creating your Chamber of Commerce Directory
Step 1: Selecting a theme
Choosing an appropriate theme is crucial for a WordPress Chamber of Commerce Directory site. GeoDirectory has various attractive, fully customizable themes, both free and premium ($19 to $39).
The newest is the free WordPress Directory Theme. A full site editing block theme.
It is tailored for single or multi-city directories, effortlessly integrates with Google Maps, and offers predefined listing types for business aspects and events, simplifying submissions.
Step 2: Set up domain registration and hosting
To activate your Chamber of Commerce directory website, secure a domain and hosting service. At GeoDirectory,We recommend Cloudways and its Vultr High-Frequency 1GB plan which costs only $15 per month and is an excellent choice for 99% of Chamber of Commerce Directories.
Pick a simple domain name representing your Chamber of Commerce’s identity.
Step 3: Install GeoDirectory & Configure Your Settings
After establishing your domain and hosting, the subsequent step is to install the GeoDirectory plugin.
This plugin is indispensable for setting up a fully operational chamber of commerce directory, providing tools to manage member profiles, event scheduling, and chamber facilities and services.
Here’s how to install the GeoDirectory plugin:
- From your Dashboard, go to Plugins > Add New.
- In the search box, type “GeoDirectory” and press Enter.
- Search for the “GeoDirectory – Business Directory Plugin” and press the “Install” button.
- After the installation concludes, click the “Activate” button.
Next, you’ll want to use all the features tailored for a chamber of commerce directory:
- Efficient Business Listing Management: With GeoDirectory, effortlessly manage and organize business listings, complete with contact information, descriptions, and photos. This feature allows for easy access and referencing of all registered businesses within the chamber.
- Event Management: Organize, manage, and promote chamber events such as business mixers, workshops, or local expos. GeoDirectory lets you create detailed event listings with dates, locations, and descriptions, helping ensure your chamber community is well-informed.
- Member and Business Profiles: Highlight the unique offerings and skills of your chamber members by creating comprehensive profiles. These can include details such as their business specialties, areas of expertise, and contact information, facilitating networking within the chamber.
- Reviews and Ratings: Enable businesses to share feedback and rate their experiences with various aspects of the chamber, including events, services, and networking opportunities. This feature helps ensure quality control and can assist others in making informed decisions about participation.
- Chamber Facilities and Amenities: Spotlight the resources available through the chamber, such as meeting rooms, event spaces, and business support services. GeoDirectory allows you to create detailed listings for each resource, ensuring your members know the full range of benefits.
How will you categorize the businesses in the chamber of commerce?
When building your Chamber of Commerce Directory, effectively categorizing businesses is crucial for seamless navigation and an optimal user experience.
Follow these steps to categorize the businesses in your directory:
- Identify Relevant Categories: Determine the main categories that will encompass the businesses in your directory. Consider industry sectors such as retail, hospitality, healthcare, professional services, manufacturing, technology, construction, and food services. These overarching categories will serve as the foundation for organizing your directory.
- Subcategories: Break down the main categories into relevant subcategories. For instance, under the retail category, you might have subcategories like clothing, electronics, home goods, sports equipment, and beauty products. Under professional services, you could have subcategories like legal services, accounting, marketing, and consulting. This helps users quickly locate businesses within their desired industry.
- Specializations or Attributes: Consider including additional categories or subcategories based on specialized services or unique attributes. Examples could include eco-friendly businesses, women-owned businesses, minority-owned businesses, locally sourced products, or businesses catering to specific customer needs, such as pet-friendly establishments, vegan options, or accessibility services. This allows users to discover businesses with specific qualities or specialties.
- User-Friendly Design: Ensure your category structure is intuitive and easy to understand. Use clear labels and logical hierarchies, and consider implementing a search function to enhance navigation. Make it effortless for users to find the services they need within your directory.
Creating categories on GeoDirectory
GeoDirectory allows you to set up hierarchical categories, including primary categories and subcategories, explicitly designed for chamber directories.
To start, navigate through your WordPress dashboard and select ‘CPT > CPT Categories’:

Name: Input the name of the category you wish to create, such as ‘Industries’, ‘Events’, or ‘Services’. Descriptive plural terms are recommended. This field is obligatory. For example:

- Slug: Identify the category slug, which will form part of the URL leading to the category’s page. For example, ‘industries’, ‘events’, or ‘services’.
- Parent Category: If suitable, position your new category as a subcategory under a main category. This aids in hierarchical organization of listings. For instance, ‘Restaurants‘ could be a primary category, with ‘Italian’, ‘Asian’, and ‘Mexican’ as subcategories.
- Description: Optionally, offer a concise description of the category, providing further context or details about the listings it covers.
- Category Top Description: This text will be displayed at the top of the category’s listings page, introducing or delivering important information about that specific category.
- Default Listing Image: Pick a default image representing listings within this category. It could be an icon, photo, or graphic that visually symbolizes the nature of the category.
- Map Icon: If you wish, select a map icon from your media files to visually denote this category on any maps shown in the directory.
- Category Icon: Assign a category icon that visually symbolizes the category. This icon can be used within the directory for easy recognition and navigation.
- Category Color: Choose a color that matches the category, offering visual differentiation and assisting in categorization throughout the directory.
- Schema Type: If a suitable schema type is available for your category, select it. This aids search engines in comprehending the data within the category and may improve search result display.

After filling in these fields, save your new category. It will now be accessible when adding new listings to your chamber directory. By effectively structuring categories, you’ll improve the organization and usability of your chamber directory, simplifying navigation and information retrieval for users.
Personalize the form submission fields for businesses to register
Here’s how you can adjust the form fields in GeoDirectory to suit your chamber of commerce directory:
First, enter the WordPress dashboard and go to ‘CPT > Settings > Custom Fields’.

Within the interface, there are two sections. The left one, ‘Add New CPT Form Field’, lets you generate new fields. On the right, ‘Add New CPT Listing Form’ shows the currently available fields.
GeoDirectory provides ‘Standard Fields’, ‘Predefined Fields’, and a ‘Custom Fields’ area to integrate your custom fields through custom code, precisely designed for chamber directory needs. To add a new custom field, select your desired field from the left panel, which will appear in the right panel. This is similar to using the WordPress Widget Manager interface.
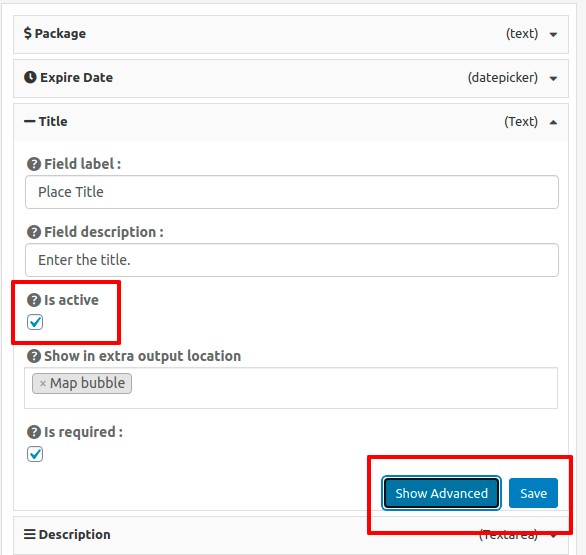
After adjusting the field, click ‘Save’. Make sure to mark the ‘Is Active?’ option to make the field visible on your chamber directory website.
Consider these customization suggestions for your chamber directory:
- Membership Type Field: Include a dropdown menu or checkboxes to identify the types of memberships associated with each listing, aiding users in finding pertinent resources.
- Business Sector Field: Add a field to designate the business sector related to each listing, enabling users to search and filter resources by industry.
- Events and Activities Field: Incorporate a field where businesses can share information about events or networking activities they participate in.
- Services and Amenities Field: Construct a field to spotlight the services and amenities offered by the chamber or by the businesses, such as meeting rooms, networking events, or business support services.
- Business Profiles Field: Provide an area where businesses can display profiles, including their specializations, areas of expertise, and contact information.
By tailoring the form fields in GeoDirectory to meet your chamber directory’s specific needs, you can construct a detailed and customized platform that effectively displays your chamber’s offerings, resources, and business information to members, potential members, and the community.
Make it easy for locals to find businesses.
You should also ensure that you have advanced search tools that make it easy for locals to find businesses.
- For example, you can integrate a search bar on your directory page that allows users to filter their search results by location, city, or zip code. This way, they don’t have to manually scroll through the entire list of businesses in your chamber of commerce.
- You can also add filters such as business type, services offered, and hours of operation. These filters make it easier for users to find the businesses they need quickly and conveniently.
- You can also integrate a map feature with an embedded Google Map so that users can easily search for businesses based on their locations. This allows them to narrow down their search results by visualizing where the businesses are located.
- Don’t forget featured listings! This is a great way to showcase top-tier businesses in your chamber of commerce or with unique offerings that would benefit members or potential members. You can offer additional benefits to these featured businesses, such as higher visibility on search results and priority for the proper customization. Your chamber directory can become a powerful resource for businesses in your community.
With the proper customization and search tools, you can create an easy-to-use chamber directory that makes it simple for locals to find businesses in their area.
How do you get people to signup and use your Chamber of commerce directory
1. “The Local Expert” Webinar Series
Host a series of webinars showcasing local businesses listed on the directory. This not only provides valuable insights to attendees but also shows the diverse range of businesses featured in the directory. Encourage sign-ups during these sessions by offering exclusive access to webinar recordings or supplemental materials.
2. The “Directory Challenge” Game
Create an interactive game or challenge that requires users to sign up and use the directory to find answers. For example, a virtual scavenger hunt through the directory or a ‘guess the business’ trivia game. Reward the winners with discounts or free consultations with businesses in the directory.
3. Social Media Directory Highlights
Regularly spotlight businesses from the directory on your social media channels. Use creative formats like Instagram stories, Facebook Live interviews, or TikTok challenges. This not only increases visibility for the featured businesses but also promotes the diversity and value of the directory.
4. “Member of the Month” Feature
Recognize and promote an active directory member each month. Feature their story on your website, newsletters, and social media. This could motivate others to sign up and engage more with the directory to gain similar recognition.
5. Engage Influencers
Partner with local influencers who can authentically promote the value of the directory to their followers. An influencer could host a live “day in the life” tour of different businesses they visit from the directory or share their favorite picks.
6. Exclusive Deals & Flash Sales
Collaborate with businesses in the directory to offer time-limited deals or flash sales exclusively for directory users. Promote these sales heavily on social media channels and email newsletters to drive sign-ups.
7. Easy Peasy Sign-up Process
Create a simple and quick sign-up tutorial video. Post this on your website and social media channels, highlighting the ease of use and value of the directory.
8. Partner with Local Events
Work with local festivals, sports events, or other gatherings to promote the directory. Perhaps directory members can offer special promotions during these events, or you could host a directory signup booth.
These creative strategies, when implemented effectively, will generate excitement and boost engagement, resulting in more sign-ups and active users for your Chamber of Commerce directory.
Ready to build your chamber of commerce directory?
All in all, a well-curated and actively engaged Chamber of Commerce directory can serve as an invaluable asset to your local business community.
Implementing creative strategies such as webinars, interactive games, social media promotion, and collaboration with local influencers and events will significantly boost sign-ups and usage.
Remember, the key to a thriving directory lies in continually innovating and tailoring your engagement efforts to the unique needs and interests of your audience.
Here’s to a thriving and vibrant Chamber of Commerce directory that serves as a valuable hub for local businesses and consumers alike.
Here’s a step-by-step guide to building a Directory Website using the Neve theme and Otter blocks plugin:
- Install the Neve theme
- Install and setup GeoDirectory
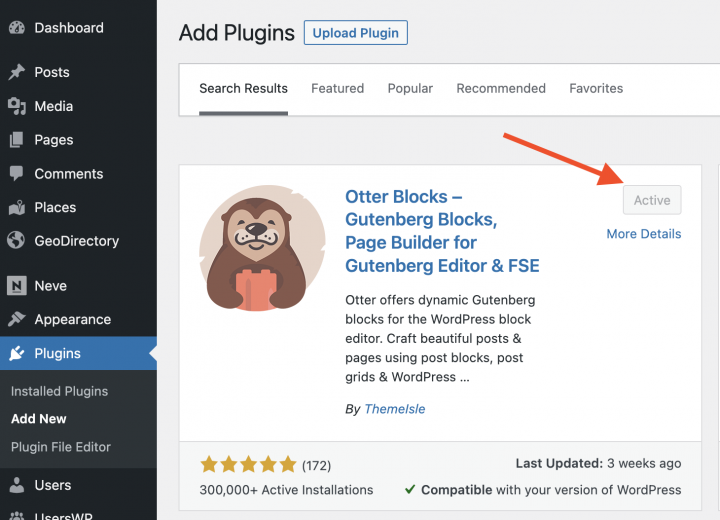
- Install the Otter plugin
- Design the Directory Website using the Neve theme and the Gutenberg Editor
The Neve Theme, when used alongside the GeoDirectory Plugin and the Otter Plugin, provides a comprehensive and adaptable platform for developing a sophisticated online directory.
Utilizing this combination, users can effortlessly incorporate location-centric functionalities, refine layout configurations, and add dynamic content blocks, guaranteeing a user-friendly and immersive interface.
This cohesive system empowers web developers and designers to construct a top-tier directory website that caters to specific industry demands or wider community requirements.
Let’s delve into the specifics of how this can be achieved.
In this tutorial, we will:
Installing Theme and Plugins.
1. Install the Neve Theme
We need to install a Theme, and for this tutorial, you will install the Neve Theme.
Go to Appearance >> Themes
Select Add New, Install, and Activate the Neve Theme.

2. Install the Otter plugin
The default Gutenberg plugin is not enough to style a template so we will install the Otter plugin.
This plugin provides customized blocks that are better than the default and will help you design the page templates.
Go to Plugins >> Add new.
Search for Otter. Install it and Activate it.
You can Skip all steps of the Setup Wizard.
3. Install GeoDirectory
Finally, you need to install GeoDirectory.
Go to Plugins >> Add new, search GeoDirectory. Please install and activate it, and we finished installing the plugins.
4. GeoDirectory Install Wizard
For GeoDirectory, you will need to complete the Setup Wizard to configure the Google Maps API key and import a few dummy listings.
Choosing the Map System (Google Maps or OpenStreetMap)
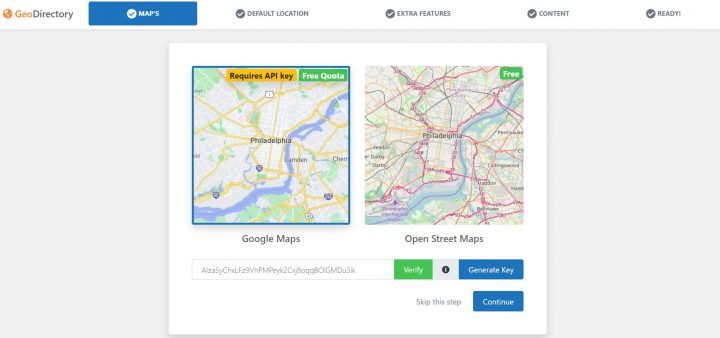
You can choose between two mapping systems on the wizard’s first step. Google Maps and Open Street Maps (which doesn’t require an API key).
In this tutorial, we select OpenStreetMaps.
In case you wish to select Google Maps, do the following extra steps.
Click on the Generate Key button and follow the steps of this doc to generate a valid API key.
The essential steps are:
- Enable the Keys.
- Create or select an existing project.
- Get the Key.
- Activate a billing account.
- Restrict the API key (so it can only be used from the URL of your website)
About point four: it is a requirement. However, you only get charged if you pass the threshold, which is $200/month.
This free credit is more than enough for 99% of directories.
Setting the default city

After that, you will set the default location. This is the city for which the directory is created.
We will set Philadelphia as the default city.
You can use whatever location you need.
If you need to add listings to more than one city, you will need the Location Manager add-on.
Adding extra features

In this step, we will install our UsersWP, a user registration plugin that lets users register and log into your website.
This is needed to allow users to add and edit their listings. It will also create user profiles where they can find their listings, reviews, and so on.
We will also install Ninja Forms so that all listings have a contact form that sends emails directly to the listing owners.
AyeCode Connect is not mandatory for this tutorial. It is mainly needed if you want to add GeoDirectory premium add-ons and install them directly from the WordPress Dashboard.
Adding Dummy Data

The last step to complete the installation wizard is adding some dummy listings. This will also add listing categories that you can edit later according to your needs.
You will not add sidebar widgets and menu items right now, as we will do that later.
Design the Neve Directory Website
Now that we installed the theme and the plugins and done the preliminary setup of GeoDirectory, we can start designing our Directory Website with the Neve Suite of tools.
1. Neve Directory Home page design
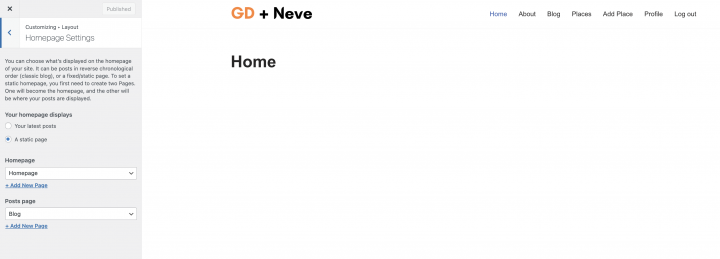
You can create a new page or use one WordPress creates by default, like the Sample Page.
Go to Pages, edit the Sample page, and rename it Home or create a new page for this.
Next, go to Appearance > Customize > Homepage Settings and select your Home.
The Logo
First thing first, we will need a logo for our website.
You don’t need to invest in a designer to sketch the 1st version of your logo.
One of the biggest mistakes you can make when starting a new directory is investing too much time and money before testing the product market fit.
You can design a logo in five minutes with an app like Canva, which is cheap and surprisingly good.
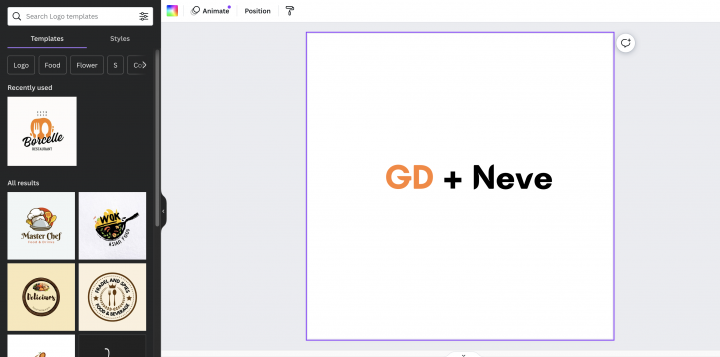
For an MVP (minimum viable product), a logo designed with Canva will be more than enough.
There are several logo templates to choose from, and it doesn’t matter if your initial logo is not as perfect and original as you believe it should be.
If your project gets traction, you can always invest in improving it or radically changing it later.
An average logo is never the leading cause of a failed project.
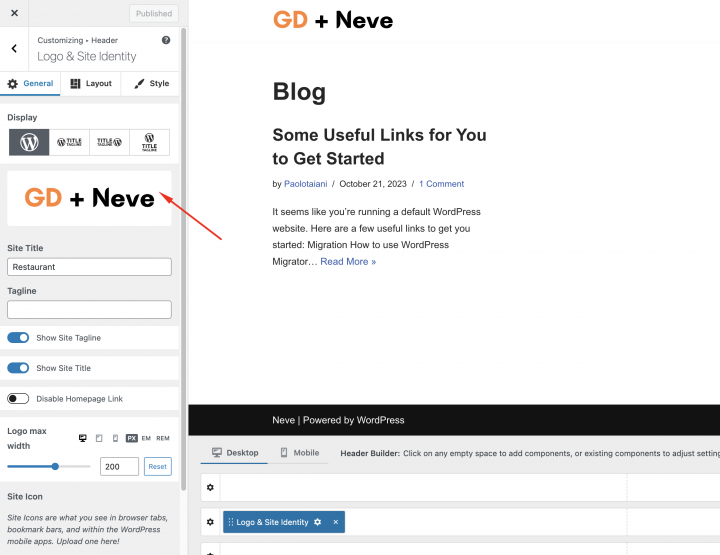
After designing your logo, go to Appearance > Customize > Header, click the Change logo link, and upload your PNG file. Skip cropping (or crop the image as needed), in Logo Layout select the option Logo and click publish.
The Navigation Menu
After creating and adding the logo, go to Appearance > Menus, and create your menu.
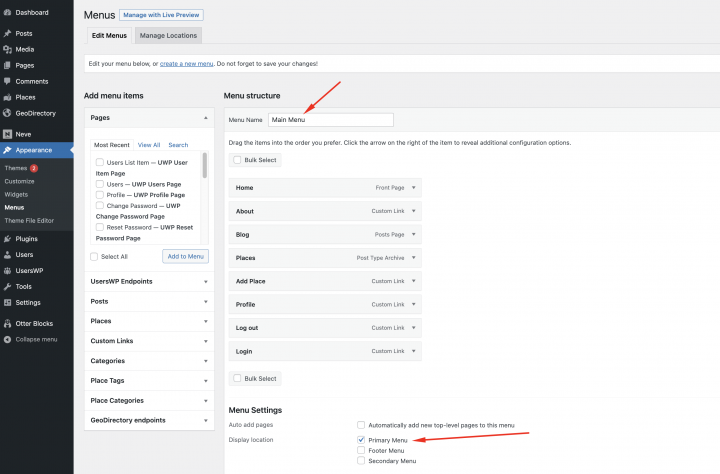
Add the links needed (from the left column to the right column) and save. In the Menu Settings > Display location section, you can check the “Main” option.
If you want, you can make the same menu appear on the footer or create another menu to appear there.
In this example, we’ll only have the header navigation menu.
We added seven main navigation links and a few sub-navigation links:
- Home
- About
- Blog
- Places and add places
- Profile
- Login
- Logout
The Login link (from UsersWP Endpoints) will only appear for Logged-out users, while the log-out, account, and profile links will only appear for logged-in users.
The Typography
Now let’s define the Typography for the website text font and size. I am setting a global Font Family, Font Weight, and Font Size that will be applied to all site text.
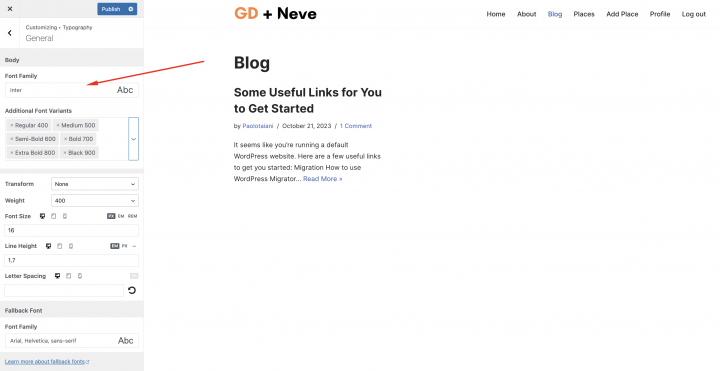
we will go to the Appearance > Customiser > Typography > General > Body. we will set the
Font Family: Inter
Additional Font Varients: Regular 400, Medium 500, Semi-Bold 600, Bold 700, Extra Bold 800, Black 900
Transform: None
Weight: 400
Font Size: 16
Line Height: 1.7
Font Family: Arial, Helvetica, sans-serif
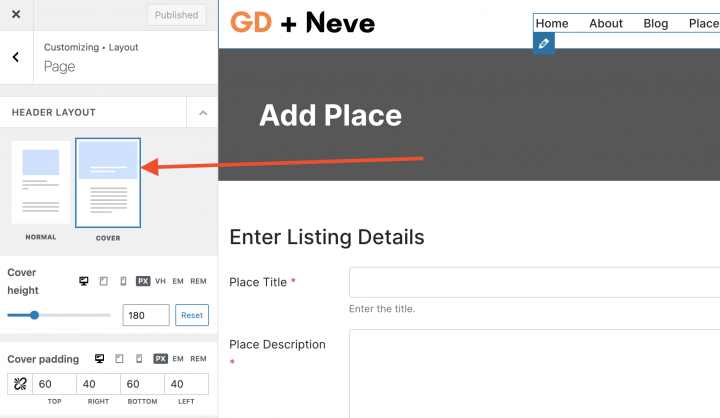
From Appearance > Layout > Pages set the Header Layout: Cover
The Content
I will start building this page from scratch using the Otter plugin.
We need a hero header on the homepage for that, let’s add a Row block provided by WordPress.
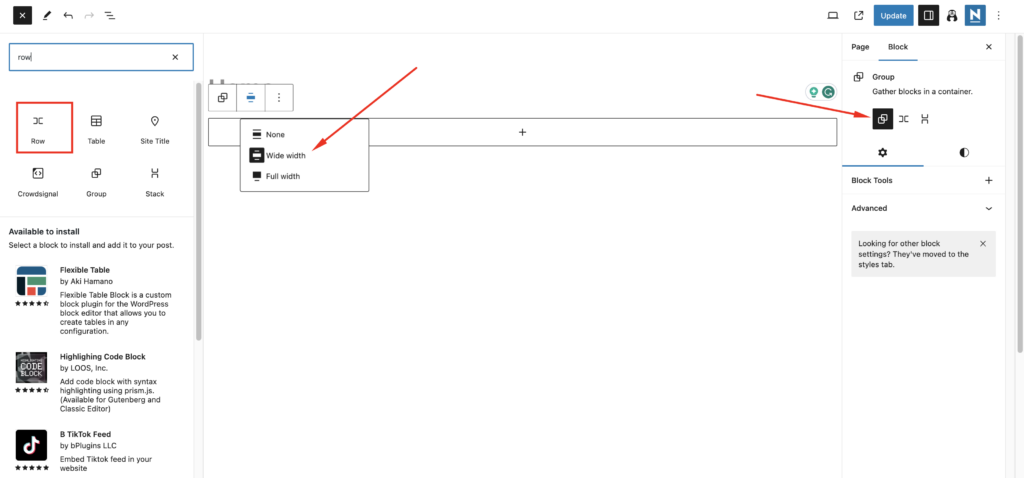
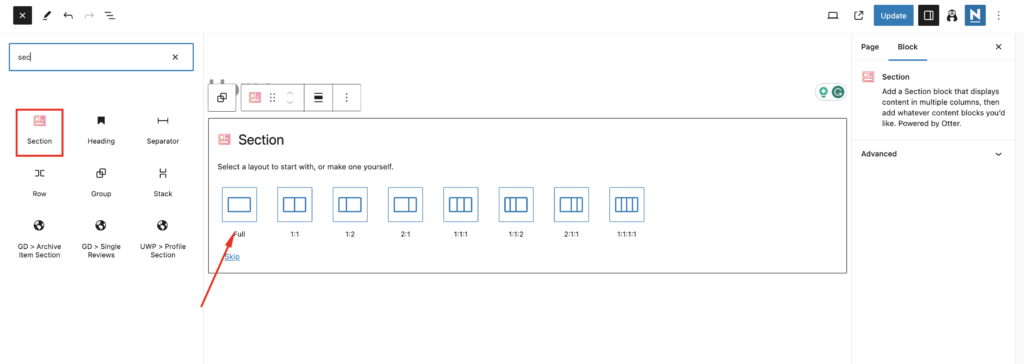
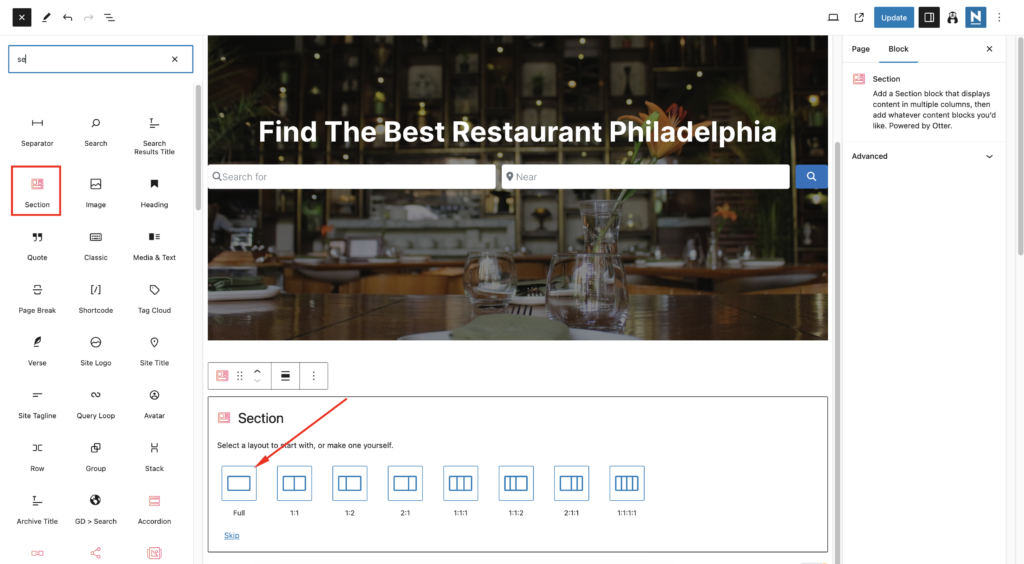
We will add a Section block with a full-size Layout.
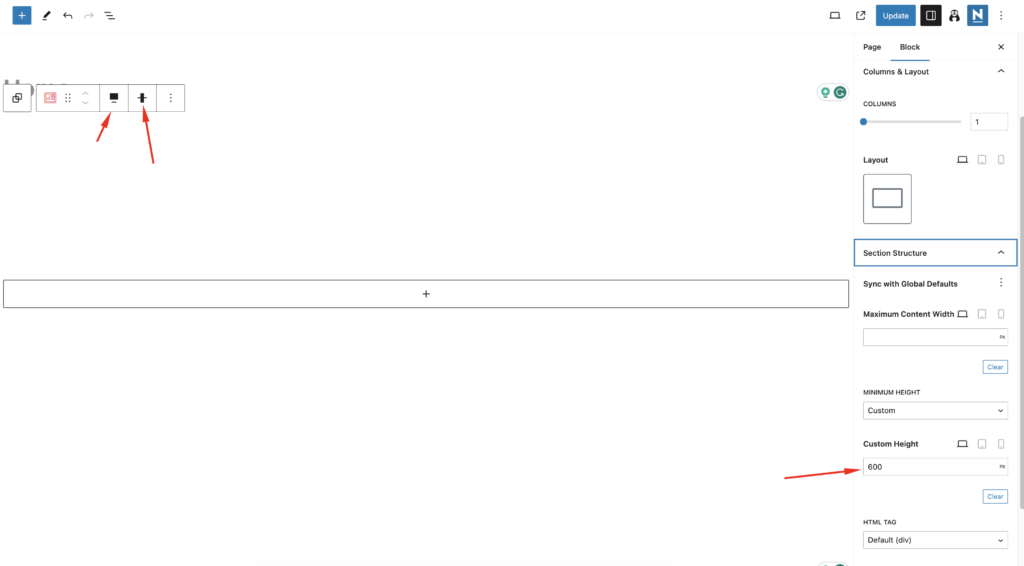
Verticle alignment: Align the middle (shown in the screenshot) in the Section block settings and set the Section Structure settings to.
Minimum Height: Custom
Custom Height: 600
Next, check the block setting and set the Background image.
For the Hero Section, we will need an image, and we will download a free image from Pexels.com (Thanks, @rachel-claire).
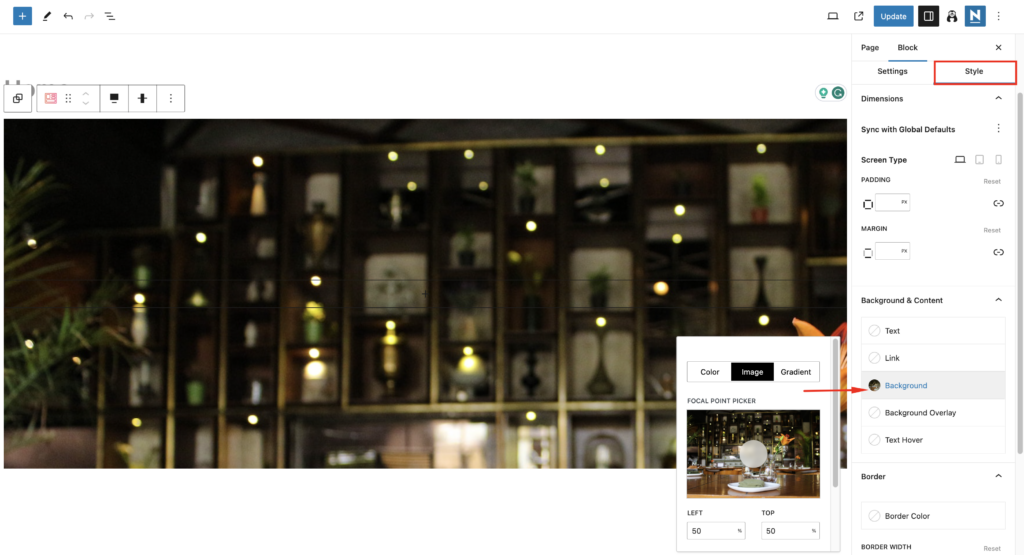
Select Background overlay settings, set
Overlay Opacity: 50
Background Overlay Color: #000000 (Black)
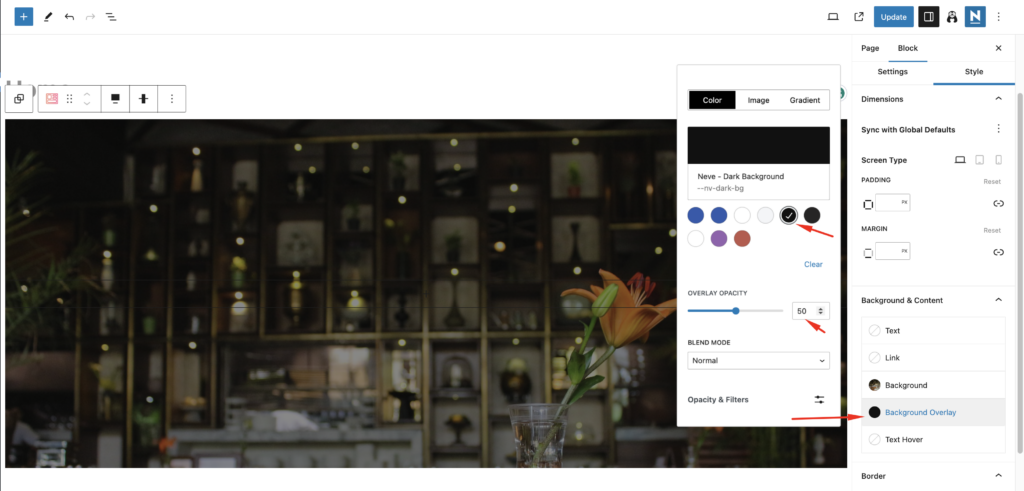
Hero image overlay color settings
Now that we have made the hero image darker, we can add text.
Click the center of the image (a plus button is barely visible). This will allow you to select a new block. Add a Section block.
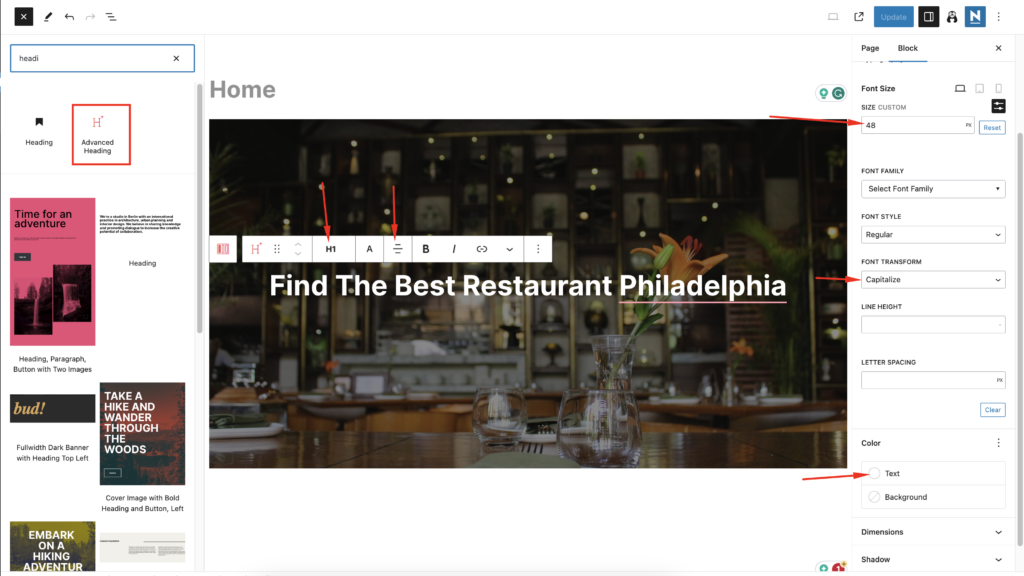
Click the center of the image again and add an “Advanced Heading” block.
In the Text block, add text like: “Find The Best Restaurant Philadelphia”.
Block select H1 as HTML Tag. Text Alignment Center. (shown in the screenshot.)
In the Advanced Heading block style settings
Font Size: 48
Font Transform: Capitalize
Text Color: #FFFFFF
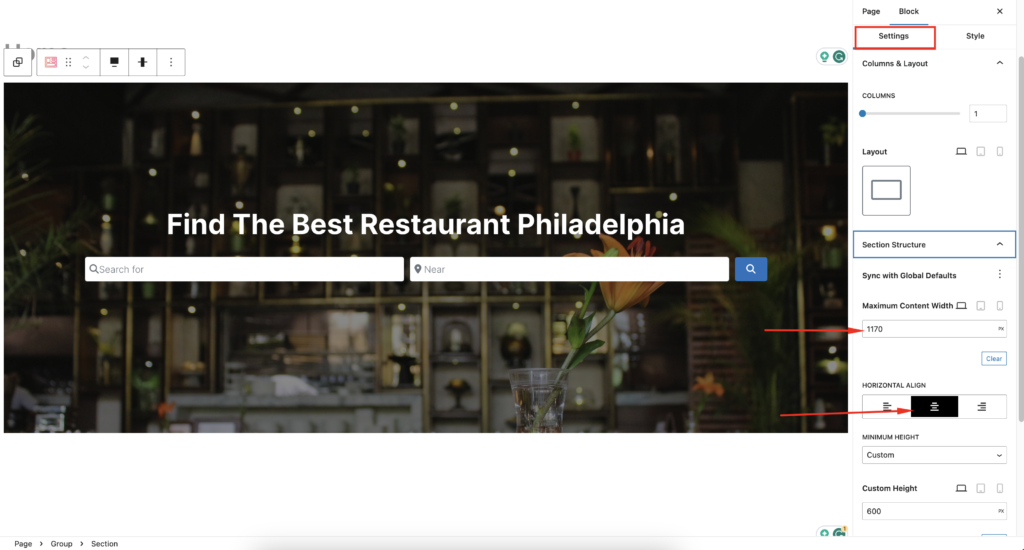
At this point, we can add the search form to the hero section of our Neve directory website.
Click on the + button at the lower-right corner of the Title Section to add a new section.
In order to add GD search on the homepage header, Drag the GD > Search block inside the hero container.

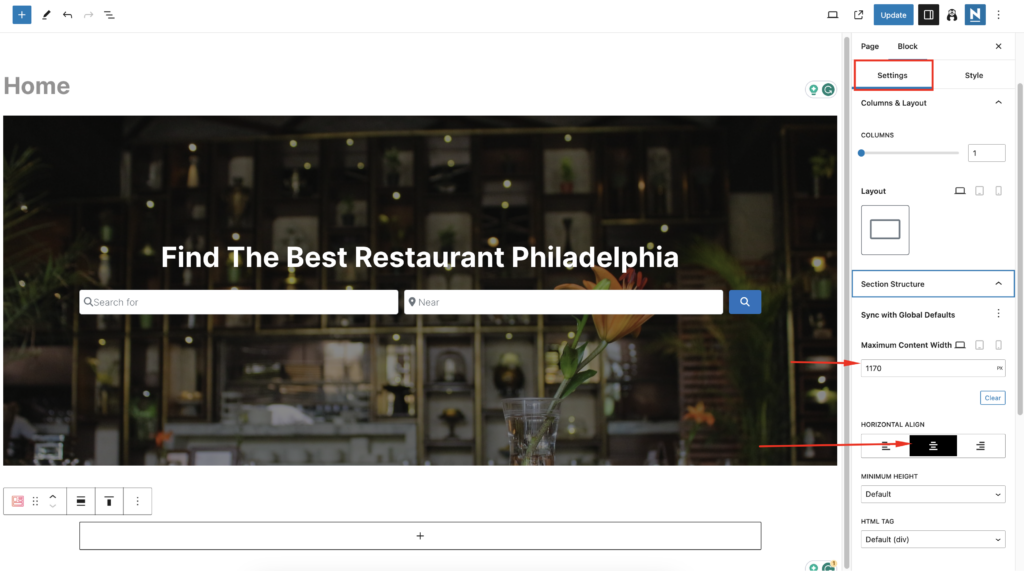
Now let’s add the following settings to the parent Section block.
In the Structure settings set
Maximum Content Width: 1170
Horizontal Align: Center
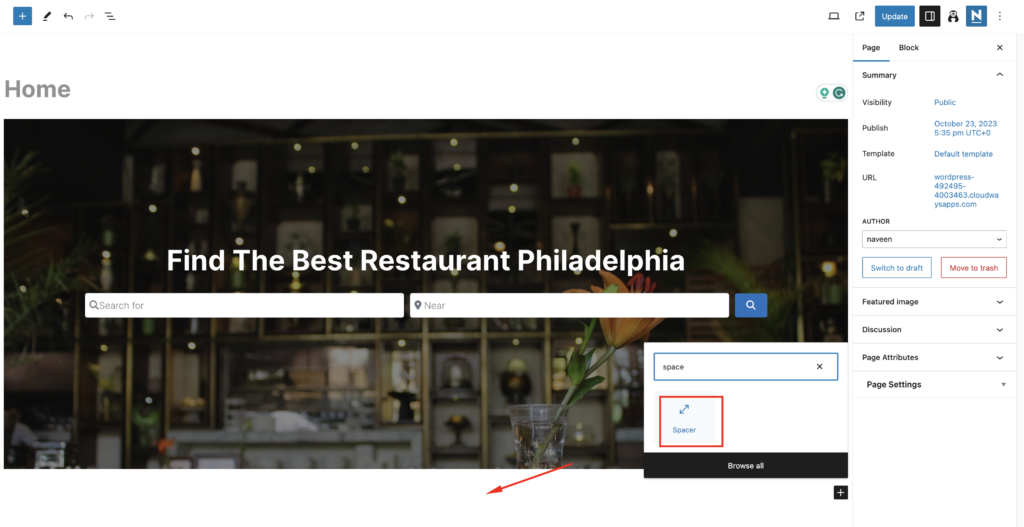
Now we will add some space below the hero section. Let’s use a spacer block and set height = 40.
It’s time to add a few more required sections to the homepage, click on the plus icon and add a Section block with full-size Layout.
Change the Section block settings and update the Section Structure settings to
Maximum Content Width: 1170 and Horizontal Align: Center.
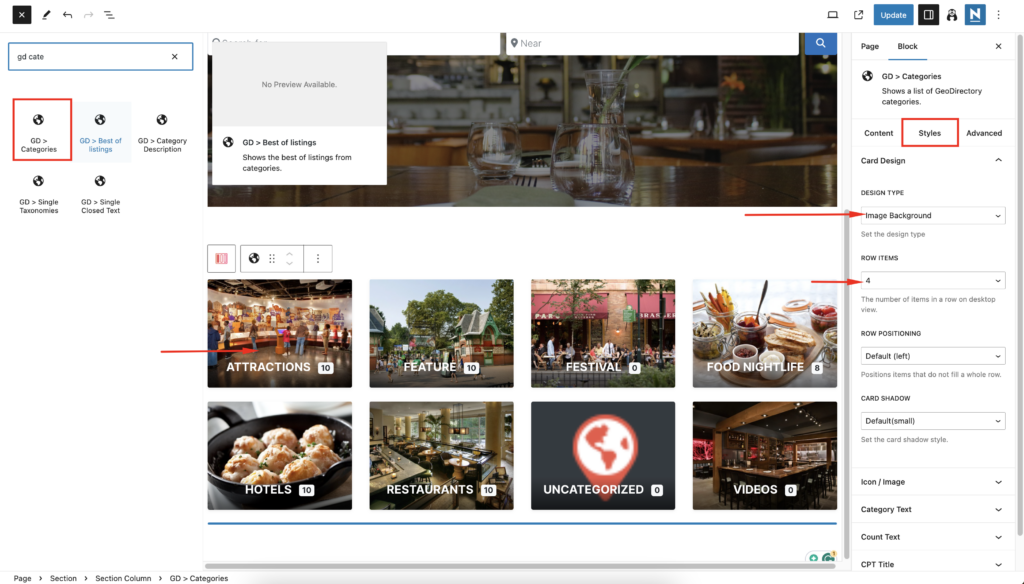
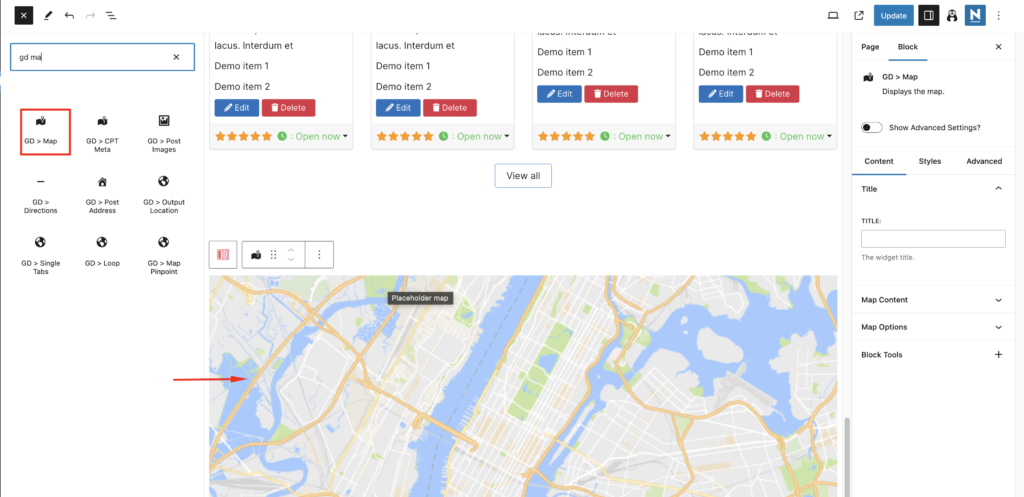
Now we will add an empty section below the hero header and add the GD > Categories block in that grid.
Set block options to the following
Design type: Image Background
Row Items: 4
Enable Use Category Image
You can set the image to a category by editing the category from wp-admin -> places -> Place Categories.
Each category has an option to set a default image
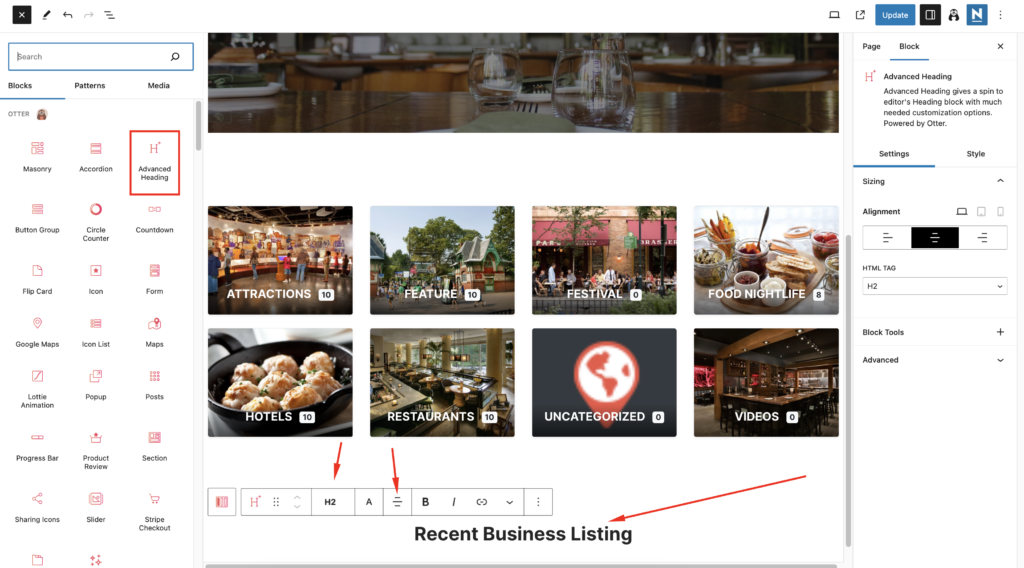
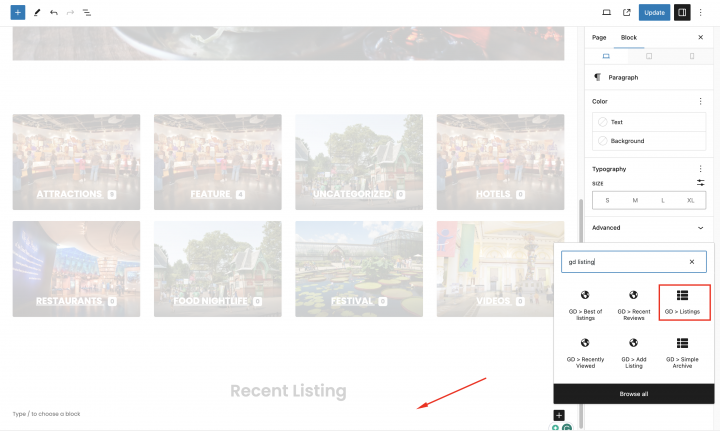
Now, let’s proceed to add the third section to our website. we will call it “Recent Business Listing“.
Click on the plus icon and search for ‘Advanced Heading‘ and once added, configure the text settings as follows: Set the HTML tag to H3 and align it to the center.
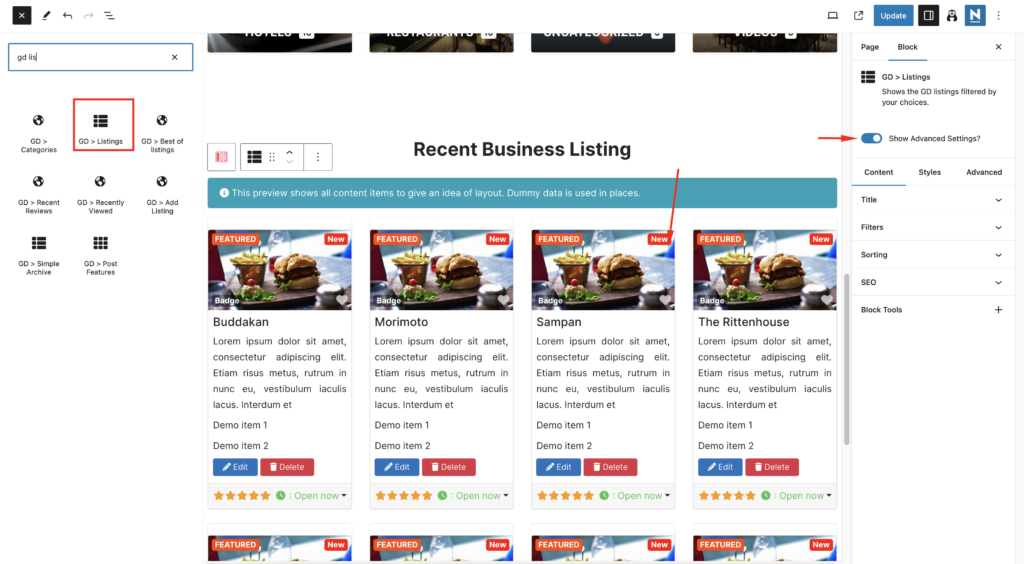
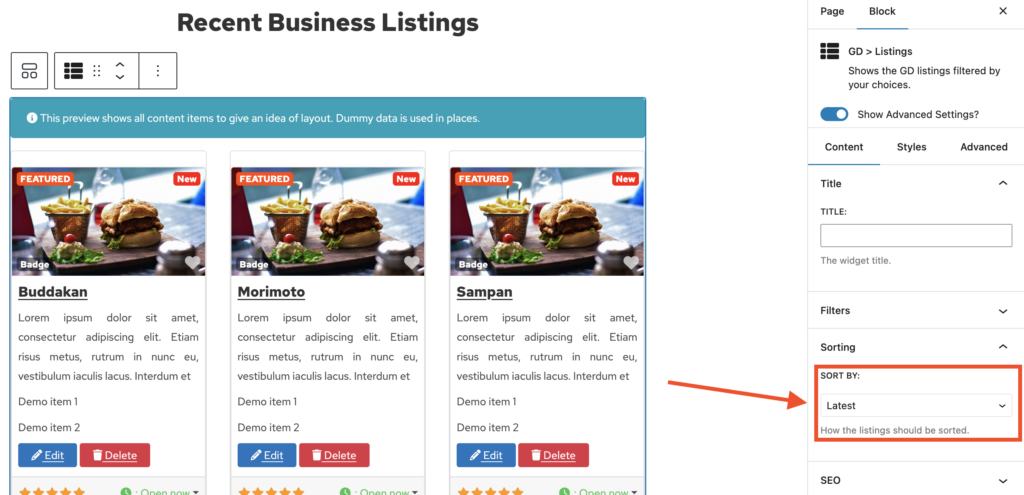
Add a GD > Listing block by clicking on the plus icon and then accessing the block settings. Make sure to enable the Show Advanced Settings option.
In the block Style tab, please update the Layout: Grid View (Four Columns).
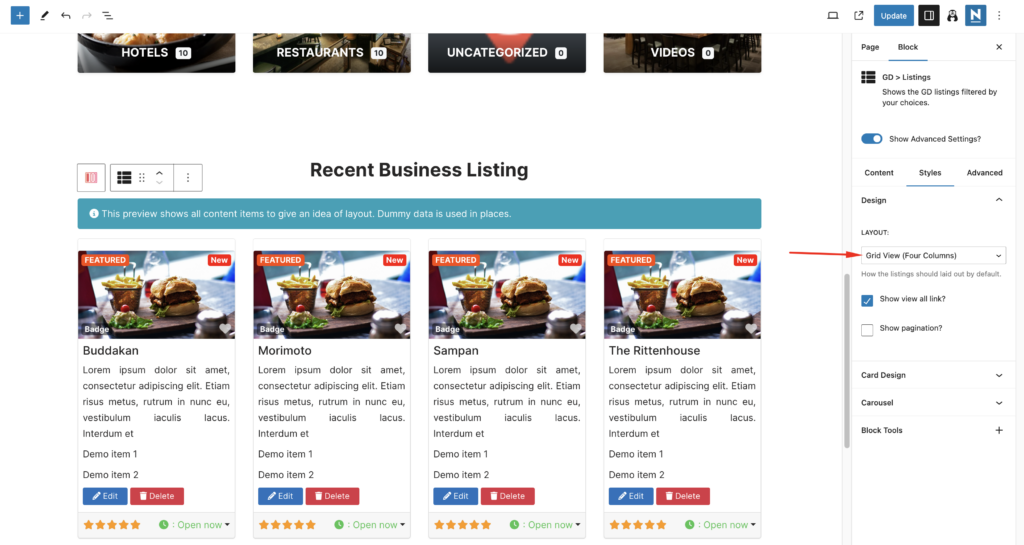
Change the number of posts to show: 8 and ensure that you check the ‘Enable location filter‘ option and set the Sort By: Latest.

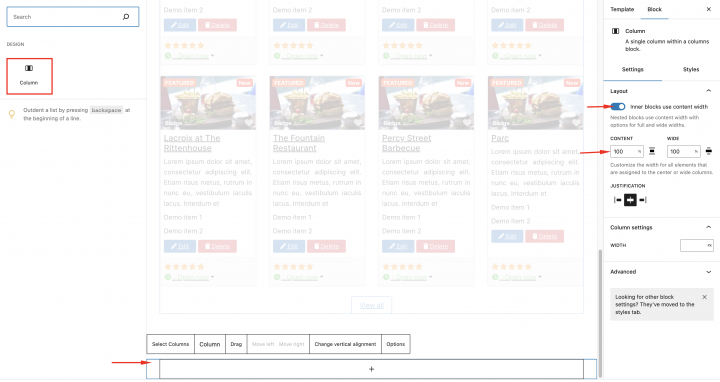
Now let’s add an empty Column with Content and Wide to 100.
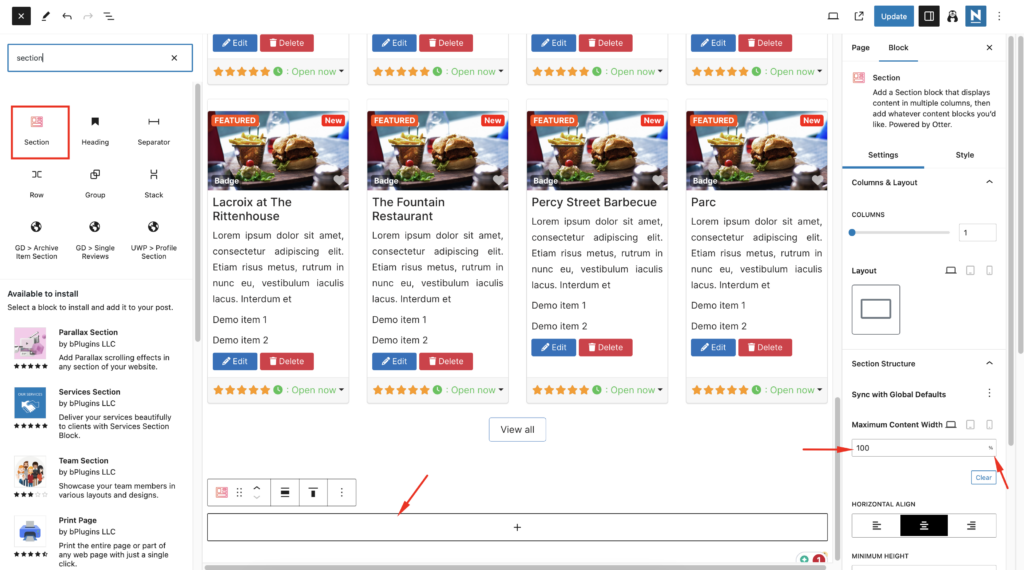
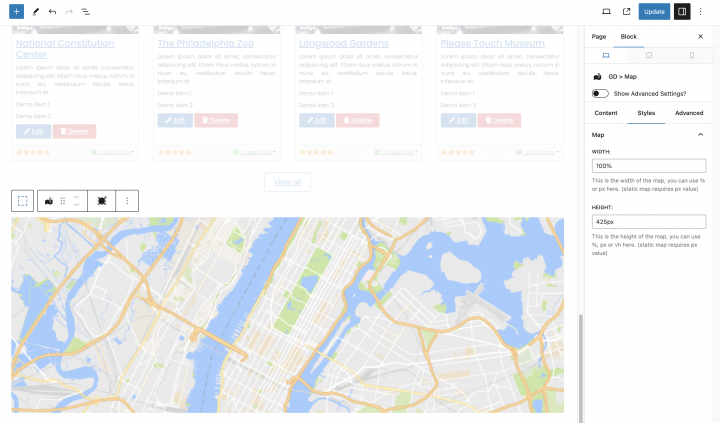
Add the GD > Map block to it and keep the settings to default.
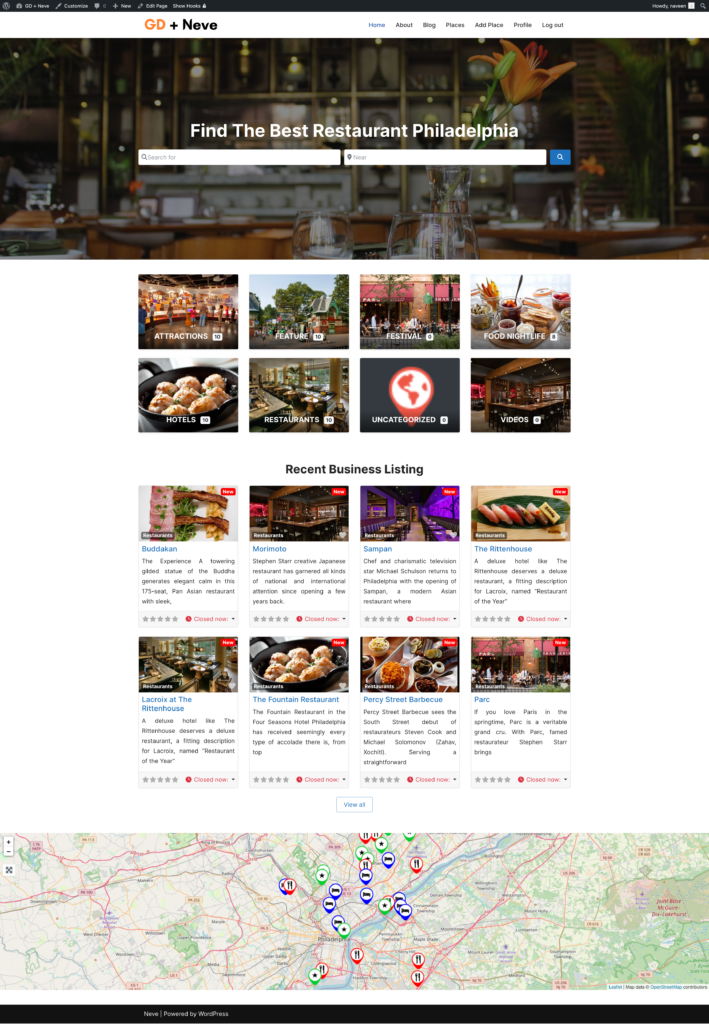
Congratulations! Your homepage is Completed.
2. Neve Directory Website Listings and Search page design
Listings page
Now you need to design two pages that are essential for any directory.
The listings page (general archive, categories, tags), and the search results page.
GeoDirectory creates them by default with a general layout. In this tutorial, we will customize the layout of these pages a bit.
The listing and search pages are mostly identical so we create it once and just copy the layout on the other page.
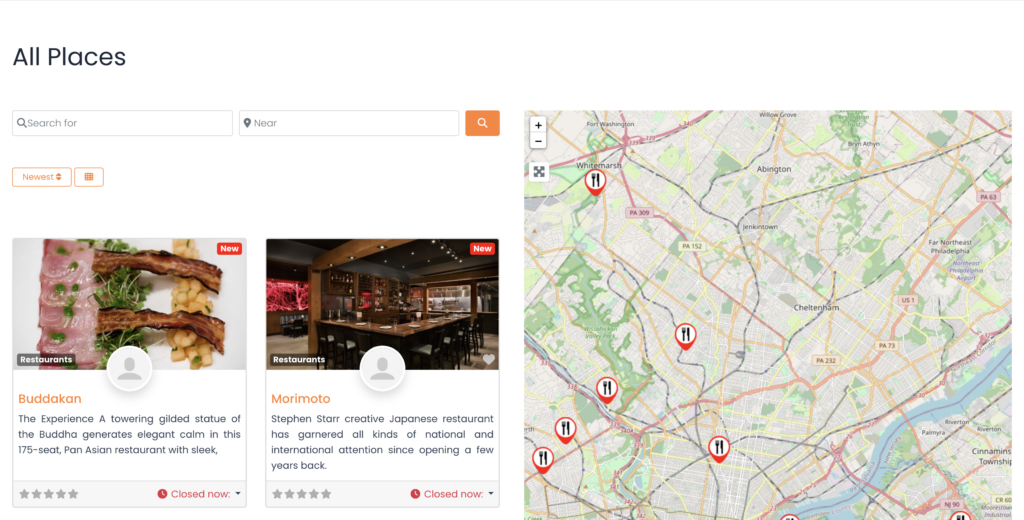
We decided the Listing page layout would be the listings on the left, and on the right, a sticky map showing the listings’ precise location.
This is very easy.
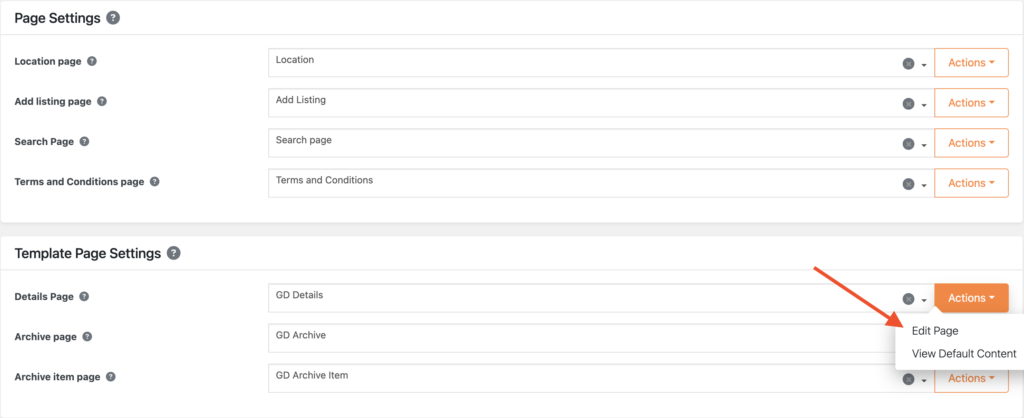
Go to Geodirectory > Settings > General > Pages > Click on edit GD Archive page template

Remove all the content from this GD Archive page template.
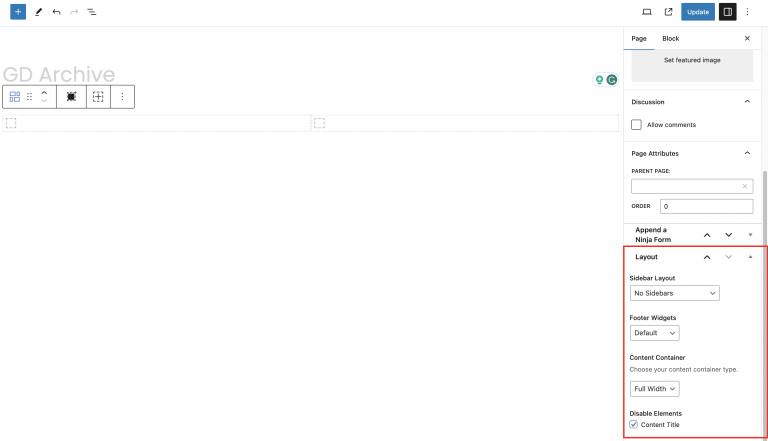
we will set the page settings to the following
Sidebar Layout: No Sidebar
Footer Widget: Default
Content Container: Full Width
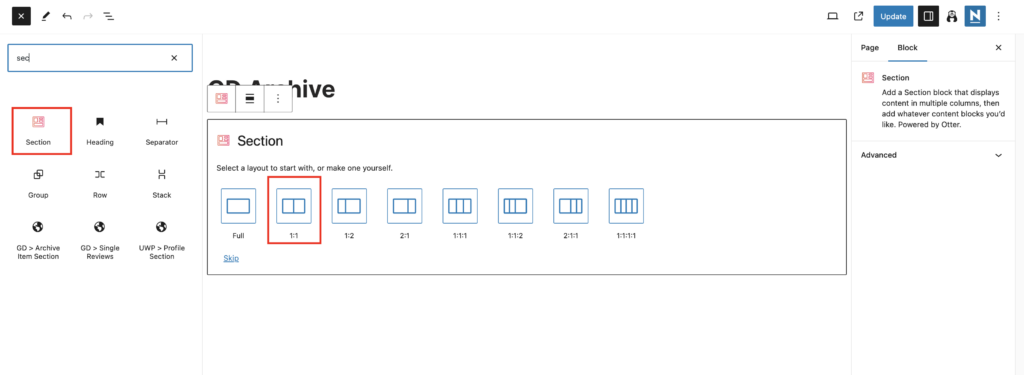
Now, add a Section block with a 1:1 layout.
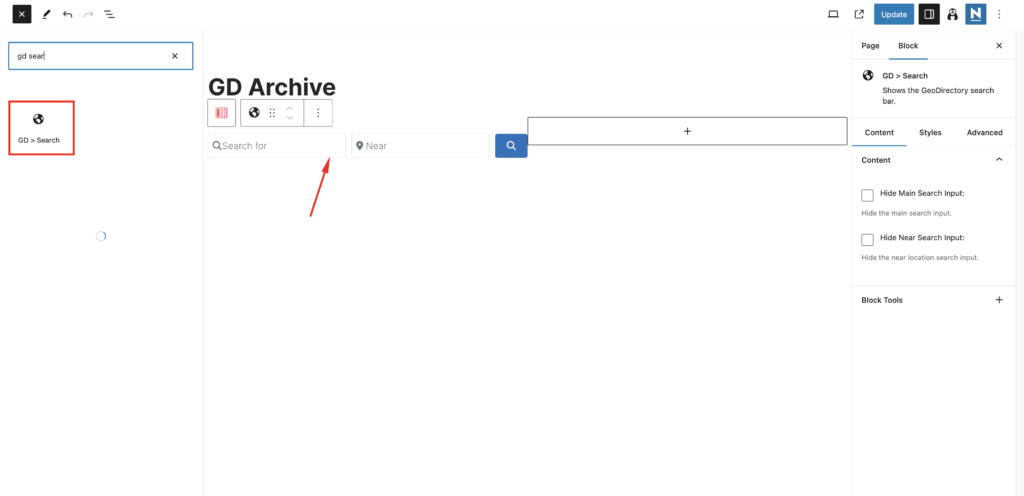
Now on the left container, we will drag GD Archive page-related widgets like GD > Loop Action, GD > Loop, GD > Loop Pagination, and GD > Search on top so the user can search from the Archive page.
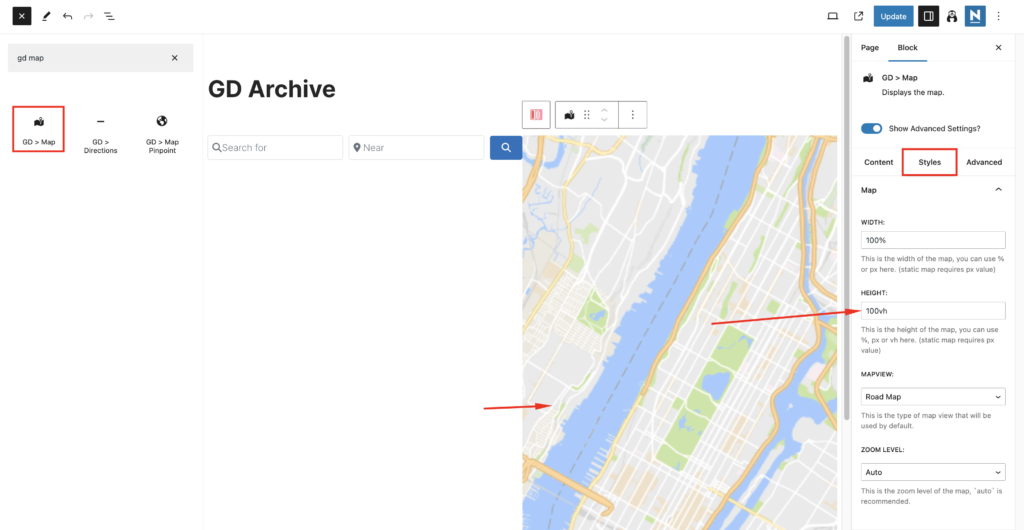
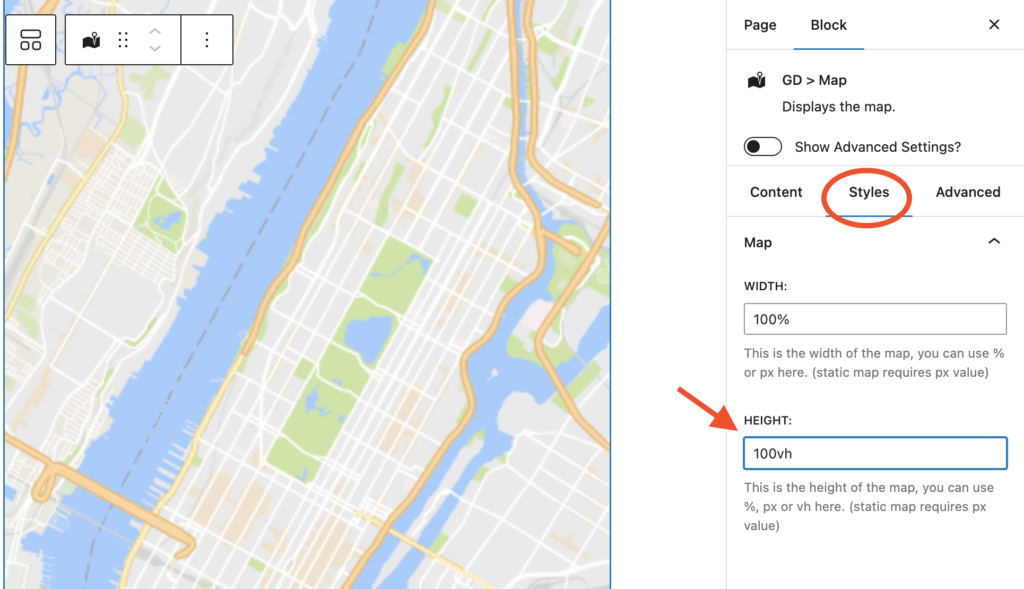
In the right column, drag the GD > Map block, and we’ll leave all the settings at their default settings. However, we’ll set the height of the GD > Map block to 100vh.
To give it a final touch we will add the following CSS in the theme customizer from Appearance => Customize => Add CSS
.geodir-archive .container.grid-container{
      max-width:100%;
}
.geodir-archive .wp-block-geodirectory-geodir-widget-loop .geodir-loop-container .geodir-listing-posts{
    overflow-y: scroll;
    max-height: 100vh;
}
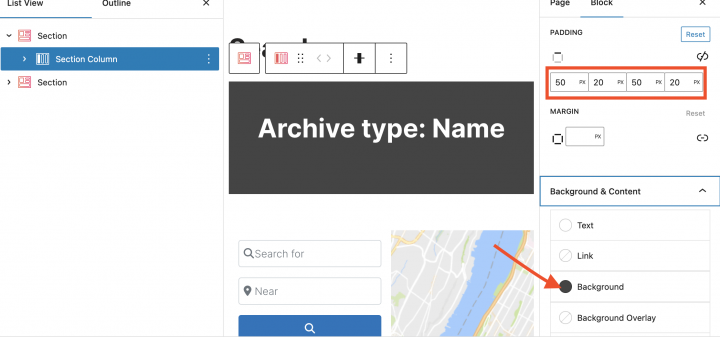
Since the Neve theme has a minor compatibility issue with the GD > Archive page title. we will create a title container at the top of this page.
we will drag an empty section and set the block setting to
Background: #444444
Padding: 50 px, 20 px, 50 px, 20 px
we will drag the Archive title block inside it.
After this, the Listing Archive page is now ready.

Another option is to use the GD > Simple Archive block as explained in this tutorial on how to Build a Directory Website with Elementor.
For the search page, we repeat the same process.
Search page
Go to Geodirectory > Settings > General > Pages > Click on edit GD Search page template
Remove all the content from this GD Search page template.
Copy all the content of the GD Archive page and paste it into the GD Search page.
So now our GD Search and Archive page is ready.
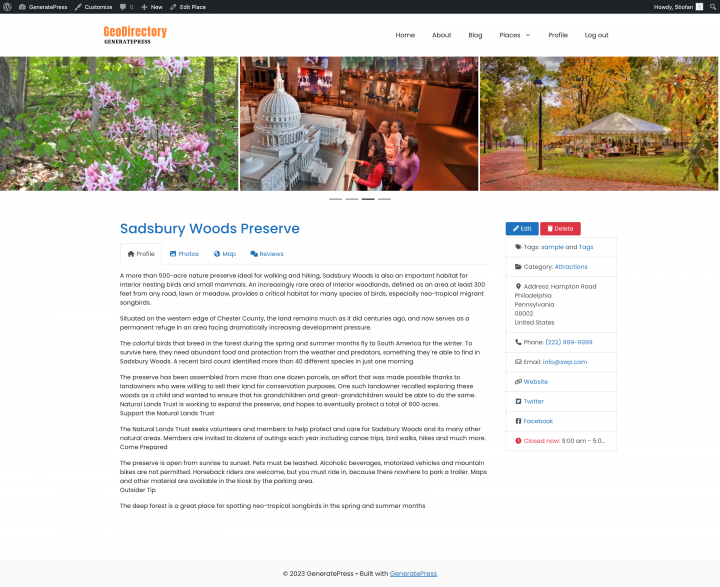
3. Neve Directory Website single Listing page design
Now to edit and customize the GD Detail page, You can go to Geodirectory > Settings > General > Pages > Click on edit GD Detail page template.
In this template, you will already find default content generated by Geodirectory.
we will remove all these default content and add a new Section block.
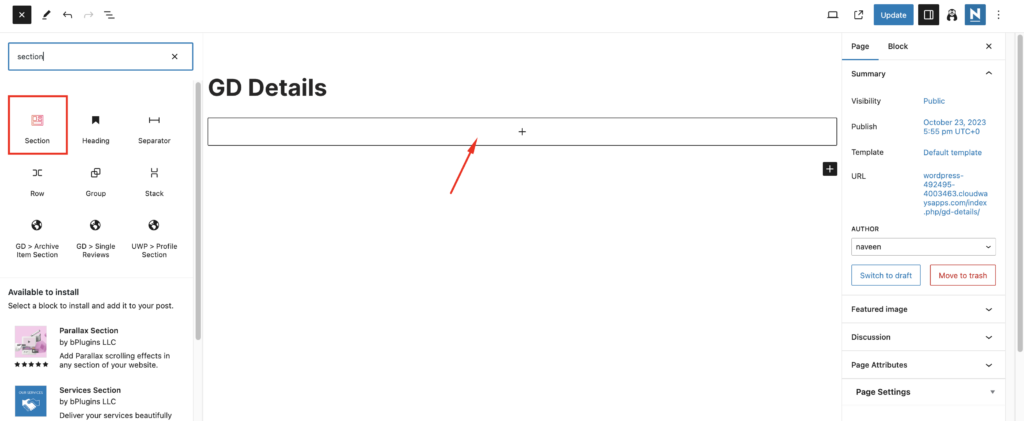
First, let’s add an image slider at the top of the Listing Details page.
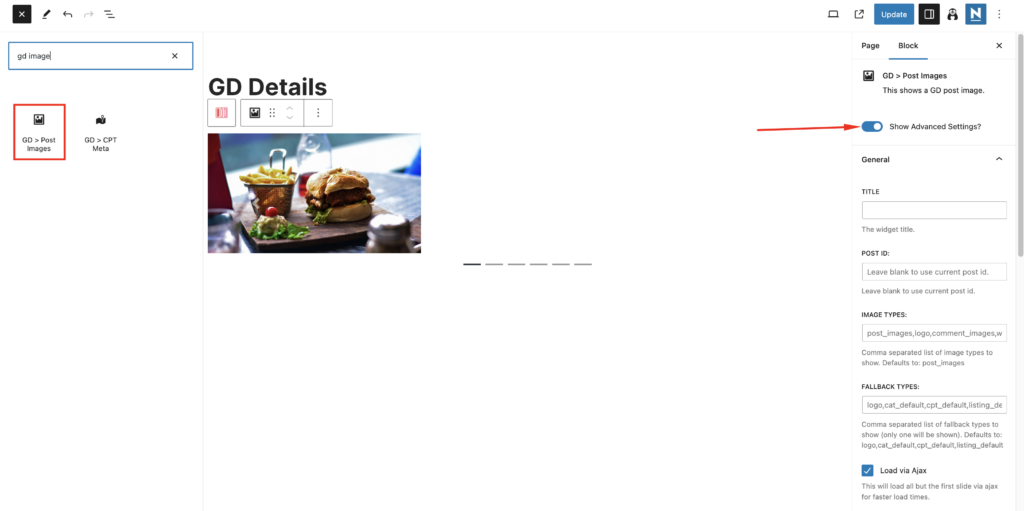
we will drag the GD > Post Image block in this container with the following settings
Image Limit: 10
Show limit: 3
Output Type: Slider
Auto Start: Enable

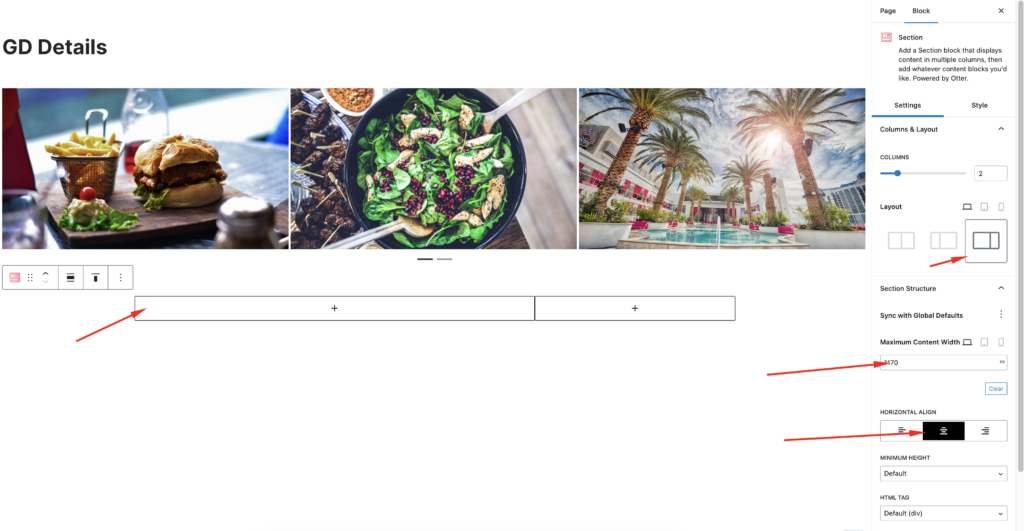
Now we will add one more Section block below it with a 2:1 layout.
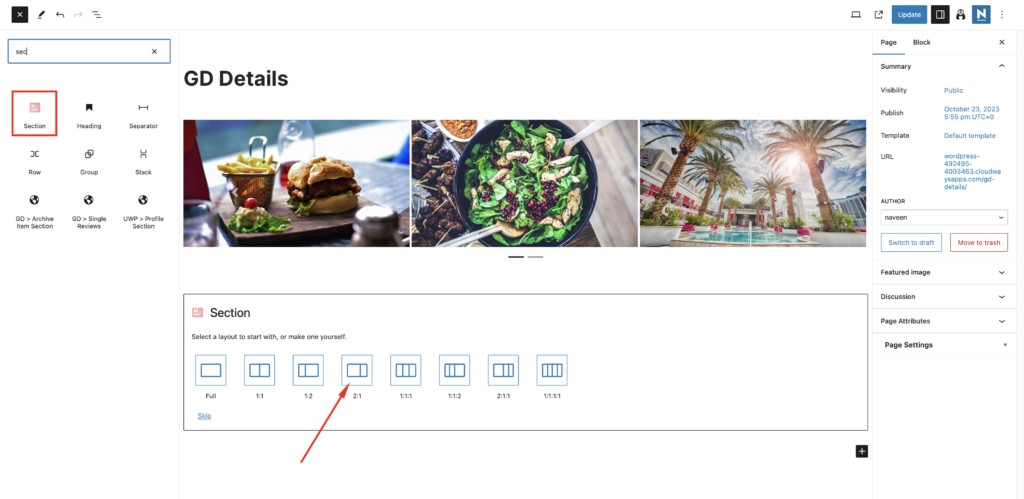
We will change the Section block settings and update the Section Structure settings to Maximum Content Width: 1170 and Horizontal Align: Center
Now let’s add all the required GD Detail page shortcodes on the left column one by one.
Which includes GD > Post Title, GD > Single Taxonomies, and GD > Single Tabs.
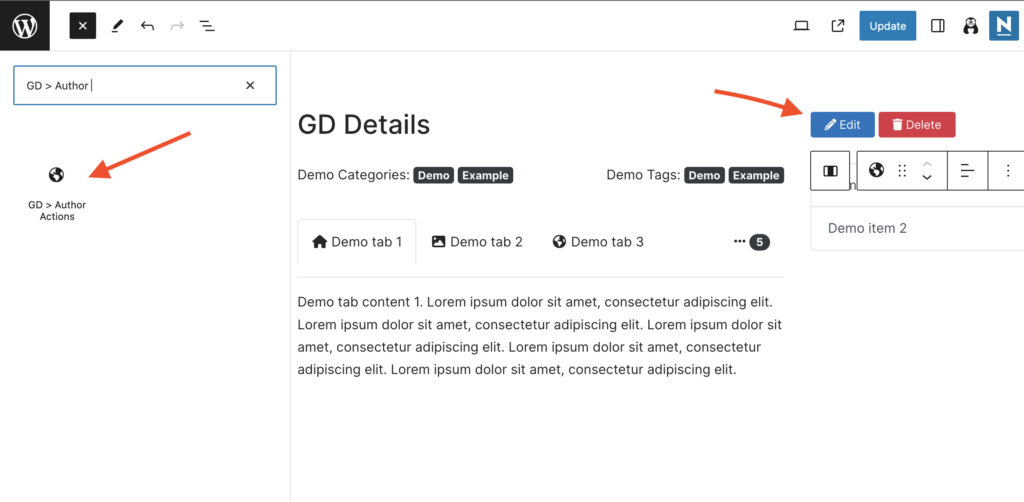
On the right column, we will add GD > Author Action and GD > Output Location block.
Now let’s add a class( single-gd-section ) to this entire parent section to give it a final touch.
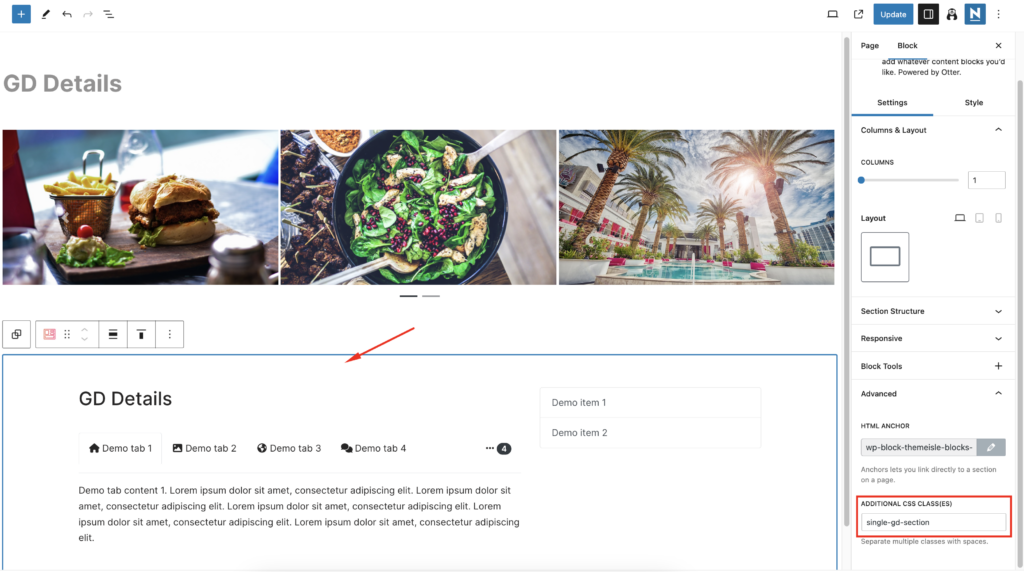
Finally, add the following CSS in the theme customizer from Appearance => Customize => Add CSS
.single-gd-section{
	max-width:1170px;
	margin:auto;
}
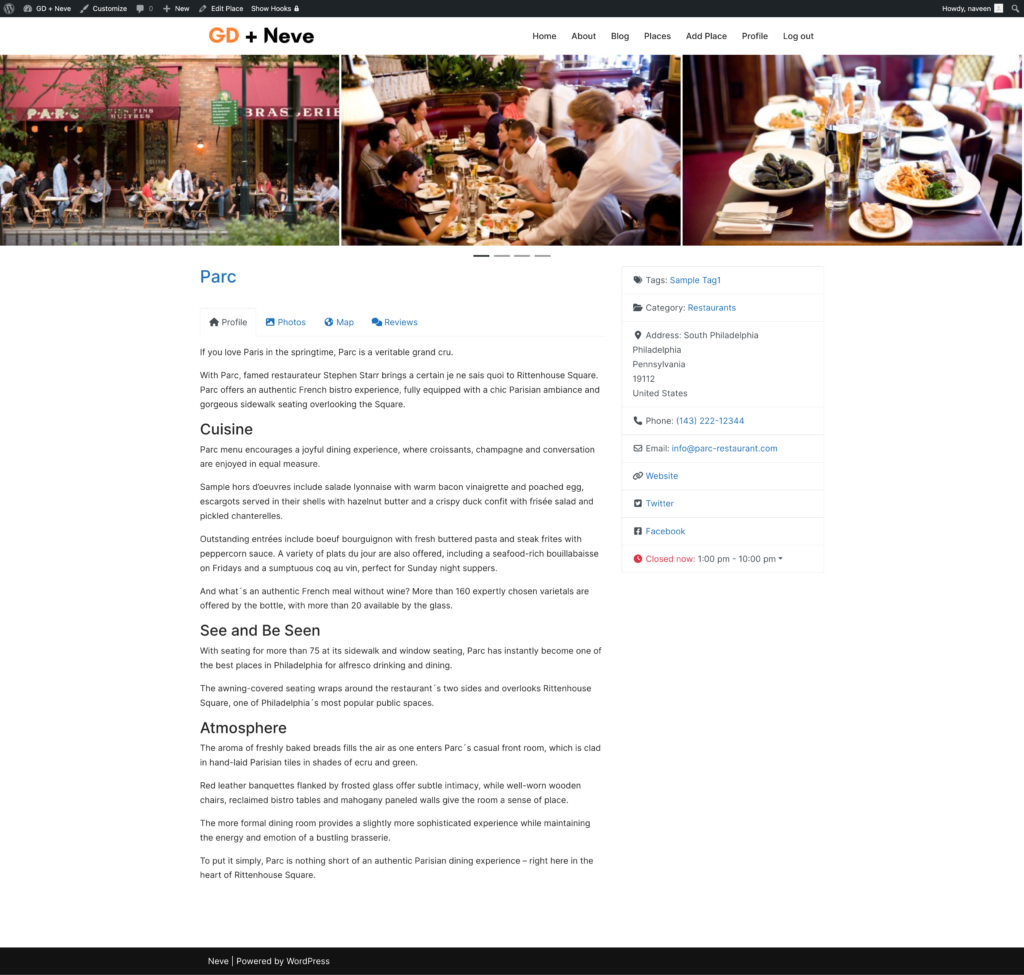
After doing so, our Listing Details page has been completed.
Adding Premium Features to your Neve Directory Website
If you wish, now you can add premium features to your directory, such as:
- Paid Listings: with the GeoDirectory Listing Price Manager add-on, you can set prices for listing submission. For each price tier, you can enable/disable features such as: Restricting the number of pictures for free listings while allowing more pictures for paid listings. Allowing more or fewer tags and categories. Enabling or disabling specific custom fields. Submitting longer or shorter descriptions.
- Claim Listings: This is a fundamental feature for a directory where the admin creates the database and invites business owners to take control of their free listings. The claim listing process may include forcing an upgrade to a paid listing to take over the listing’s ownership.
- Advertising: selling ads is another form of monetizing an online directory. If you have a lot of traffic, you can use Ads networks. Otherwise, you may sell ads directly, allowing businesses to add banners in specific areas of your website or allowing for listings to appear as ads, for example, on top of organic search results.
These are just three examples. However, a directory website offers many ways to make money online.
You can create a global marketplace of handcrafted items, sell event tickets, or sell discount coupons.
Begin building your site today with this detailed guide: Your guide to building a directory website. This is a generic tutorial that can be adapted to any theme or page builder.
The possibilities are endless.

Here’s a step-by-step guide to building a Directory Website using the Ollie theme for WordPress:
- Install the Ollie theme
- Install and setup GeoDirectory
- Design the Directory Website using the OllieWP theme and the Gutenberg Editor
GeoDirectory is fully compatible with FSE Block Themes like Ollie, so we won’t need a page builder or an extra blocks plugin, in this case.
GeoDirectory offers a robust and flexible solution for crafting a dynamic online directory using any theme or page builder.
In this tutorial, we will show how to build a directory website with the OllieWP Theme in combination with the GeoDirectory Plugin.
This duo allows users to seamlessly integrate location-based features, customize layout designs, and incorporate interactive content blocks, ensuring an intuitive and engaging user experience.
With this integrated approach, web developers and designers can easily achieve a professional-grade directory site tailored to specific niche markets or broader community needs.
Let’s see how we can do that in detail.
In this tutorial, we will:
Installing Theme and Plugins.
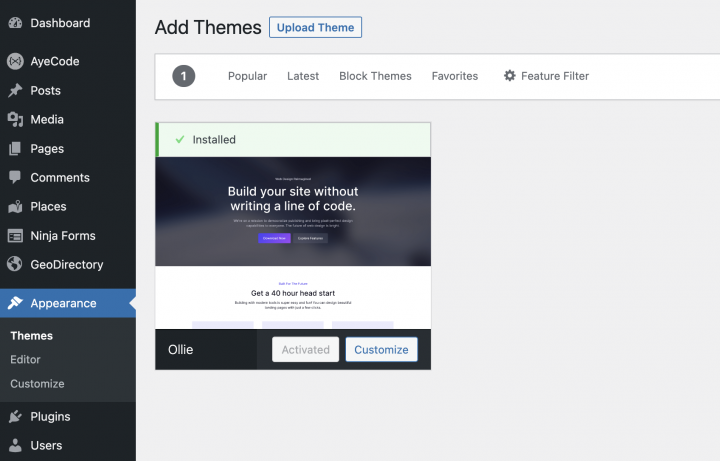
1. Install the OllieWP Theme
We need to install a Theme, and for this tutorial, you will install the OllieWP Theme.
Go to Appearance >> Themes
Select Add New, Install, and Activate the OllieWP Theme.
2. Install GeoDirectory
Finally, you need to install GeoDirectory.
Go to Plugins >> Add new, search GeoDirectory. Please install and activate it, and we finished installing the plugins.
3. GeoDirectory Install Wizard
For GeoDirectory, you will need to complete the Setup Wizard to configure the Google Maps API key and import a few dummy listings.
Choosing the Map System (Google Maps or OpenStreetMap)
You can choose between two mapping systems on the wizard’s first step. Google Maps and Open Street Maps (which doesn’t require an API key).
In this tutorial, we select OpenStreetMaps.
In case you wish to select Google Maps, do the following extra steps.
Click on the Generate Key button and follow the steps of this doc to generate a valid API key.
The essential steps are:
- Enable the Keys.
- Create or select an existing project.
- Get the Key.
- Activate a billing account.
- Restrict the API key (so it can only be used from the URL of your website)
About point four: it is a requirement. However, you only get charged if you pass the threshold, which is $200/month.
This free credit is more than enough for 99% of directories.
Setting the default city
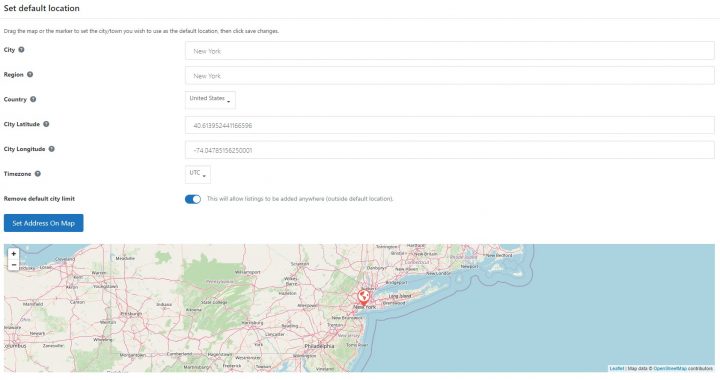
After that, you will set the default location. This is the city for which the directory is created.
We will set Philadelphia as the default city.
You can use whatever location you need.
If you need to add listings to more than one city, you will need the Location Manager add-on.
Adding extra features
In this step, we will install our UsersWP, a user login plugin that lets users register and log into your website.
This is needed to allow users to add and edit their listings. It will also create user profiles where they can find their listings, reviews, and so on.
We will also install Ninja Forms so that all listings have a contact form that sends emails directly to the listing owners.
AyeCode Connect is not mandatory for this tutorial. It is mainly needed if you want to add GeoDirectory premium add-ons and install them directly from the WordPress Dashboard.
Adding Dummy Data
The last step to complete the installation wizard is adding some dummy listings. This will also add listing categories that you can edit later according to your needs.
You will not add sidebar widgets and menu items right now, as we will do that later.
Design the OllieWP Directory Website
Now that we installed the theme and the plugins and done the preliminary setup of GeoDirectory, we can start designing our Directory Website with the OllieWP Suite of tools.
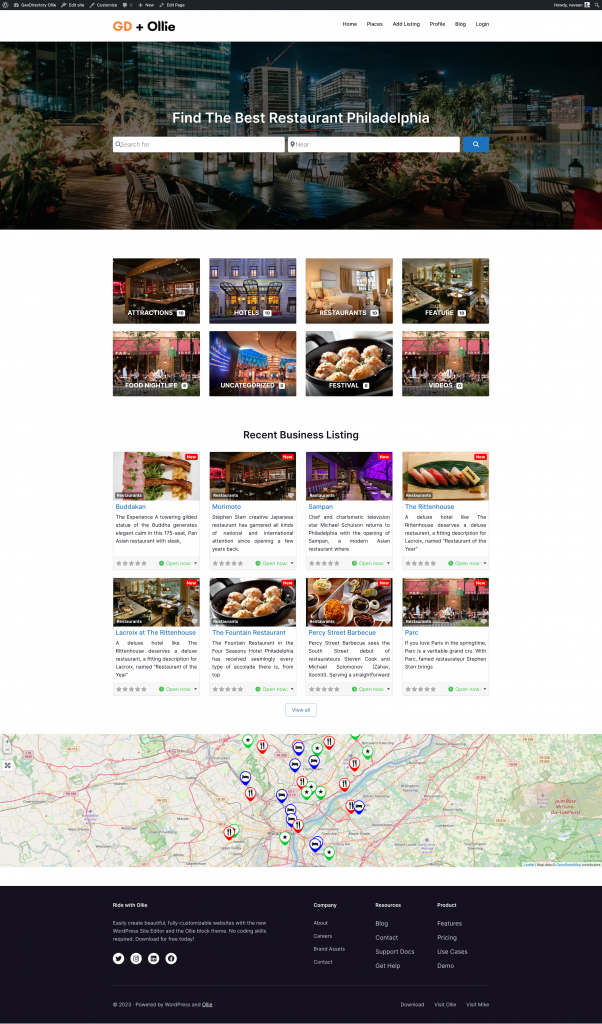
1. OllieWP Directory Home page design
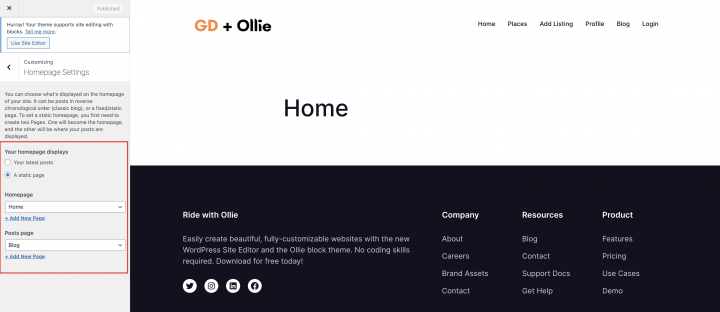
You can create a new page or use one WordPress creates by default, like the Sample Page.
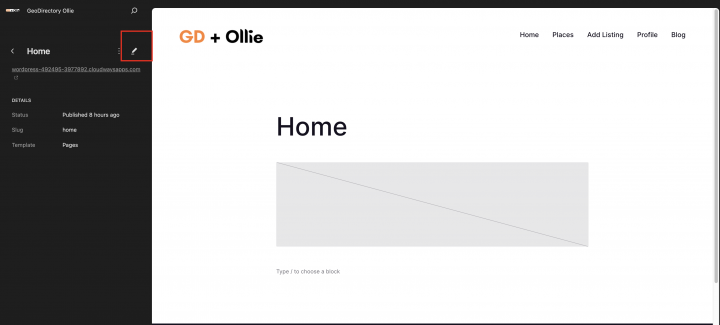
Go to Pages, edit the Sample page, and rename it Home or create a new page for this.
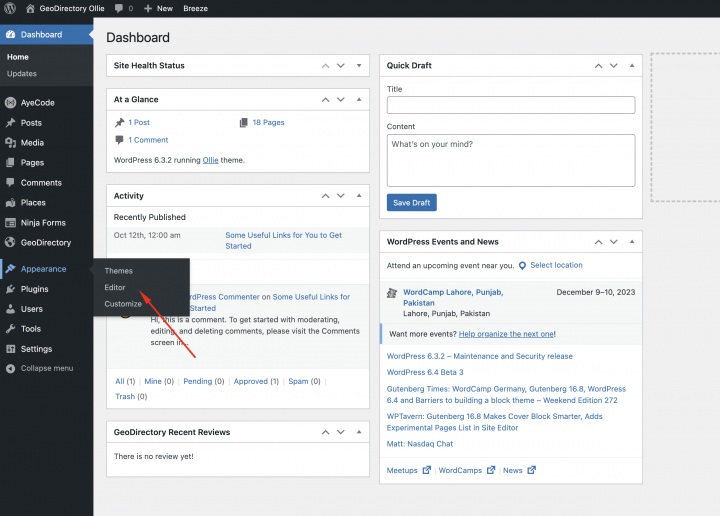
Next, go to Appearance > Editor > Pages > Home and click on the edit button.
The Logo
First thing first, we will need a logo for our website.
You don’t need to invest in a designer to sketch the 1st version of your logo.
One of the biggest mistakes you can make when starting a new directory is investing too much time and money before testing the product market fit.
You can design a logo in five minutes with an app like Canva, which is cheap and surprisingly good.
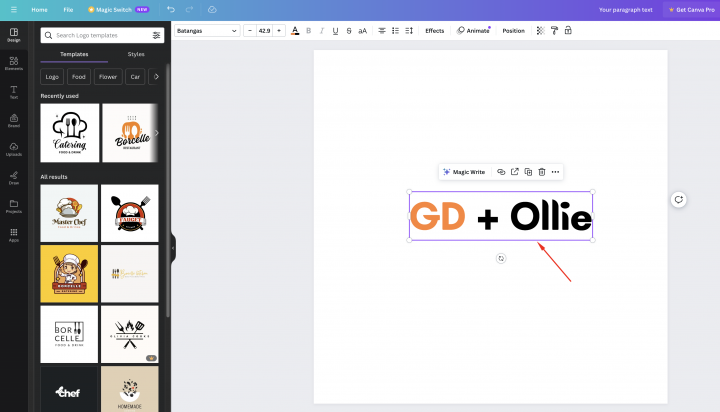
For an MVP (minimum viable product), a logo designed with Canva will be more than enough.
There are several logo templates to choose from, and it doesn’t matter if your initial logo is not as perfect and original as you believe it should be.
If your project gets traction, you can always invest in improving it or radically changing it later.
An average logo is never the leading cause of a failed project.
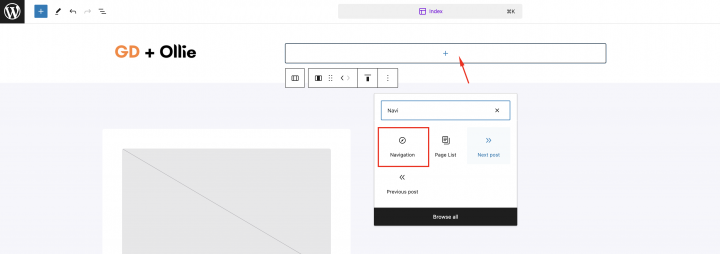
The Navigation Menu
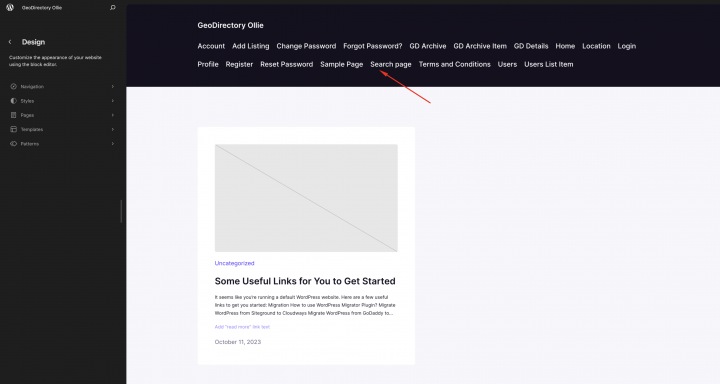
After creating and adding the logo, go to Appearance > Editor, and create your menu.
Click on the menus on top and remove all existing ones.
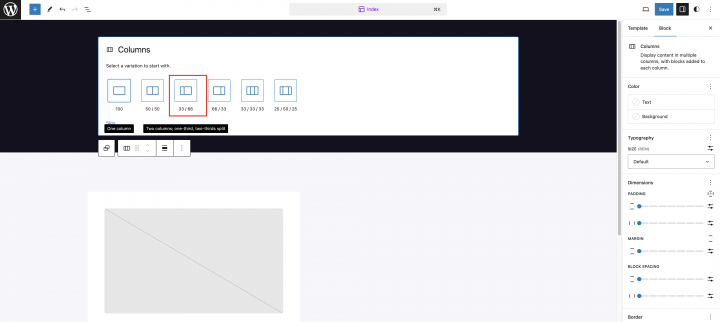
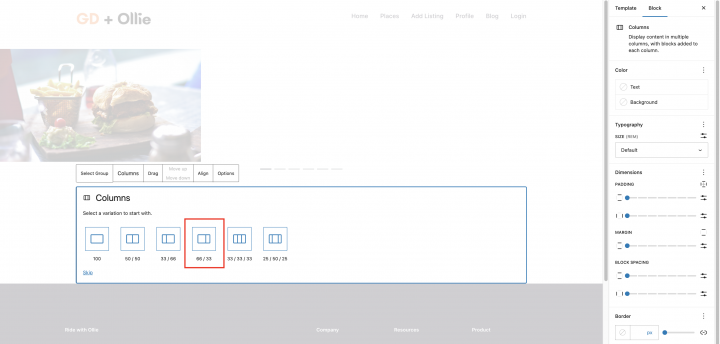
Now let’s add a column block with a two-column layout.
In the left column add the site logo block.
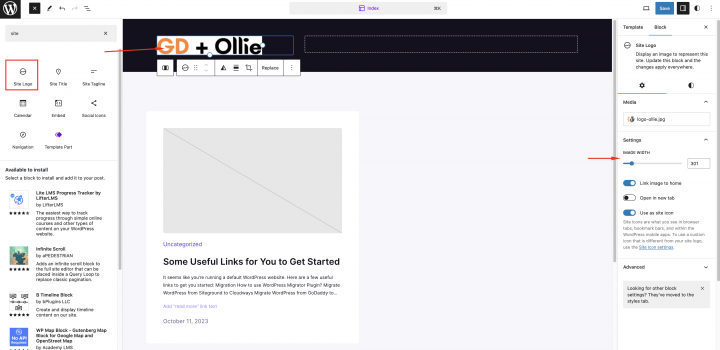
Click on the main header container and from the block settings set the Background: #FFFFF

In the right column add the Navigation menu.
We added the following main navigation links and a few sub-navigation links:
- Home
- About
- Blog
- Places and add places
- Profile
- Login/out
The Login/out block will only Login and Logout links based on the user login status.
The Content
I will start building this page from scratch using the OllieWP and Gutenberg blocks.
Go to Appearance > Editor > Design > Pages and click on the edit home page button.
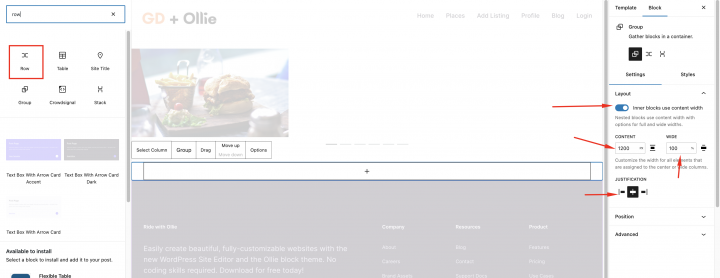
we need a hero header on the homepage for that let’s remove all the content of this page and add a Cover block.
Next, check the block setting and set the Background image URL.
For the Hero Section, we need an image and we will download a free image from Pexels.com (Thanks, @rachel-claire).
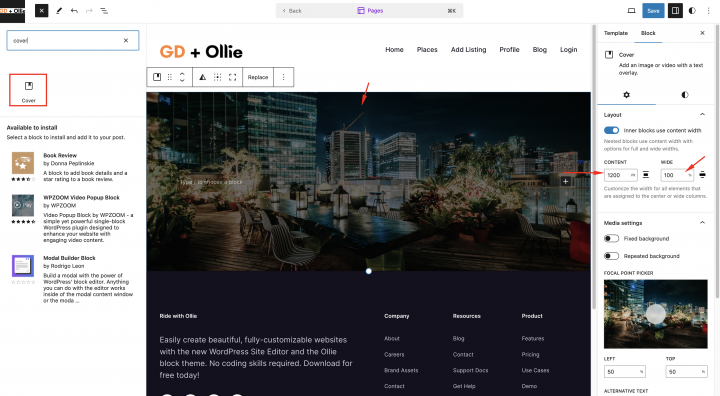
we will add add following settings in this cover block
Content: 1200
Wide: 100
Opacity: 50
Padding & Margin: 0
Minimum Height of cover: 600
Now let’s add a header tag inside this cover block with the
Text: Find The Best Restaurant in Philadelphia
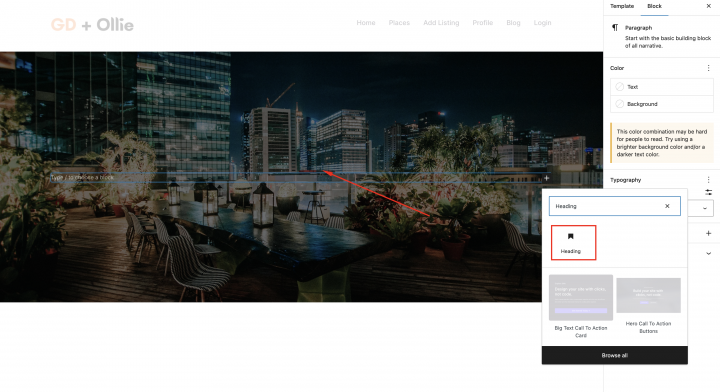
we will also give the header tag one additional class( heading-text-center ) to add some style to it.
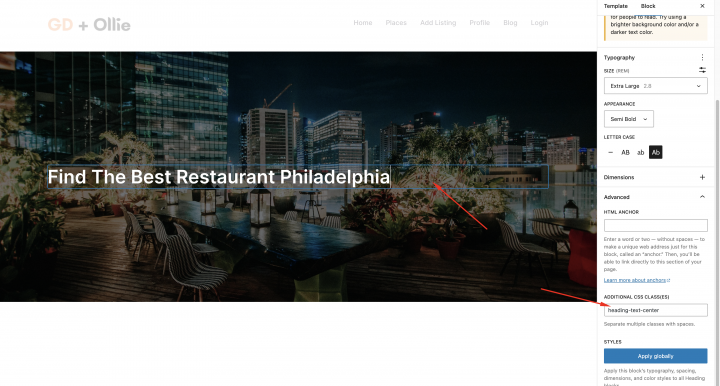
Now let’s add the following style in the theme customiser.
.heading-text-center{
    text-align:center;
}
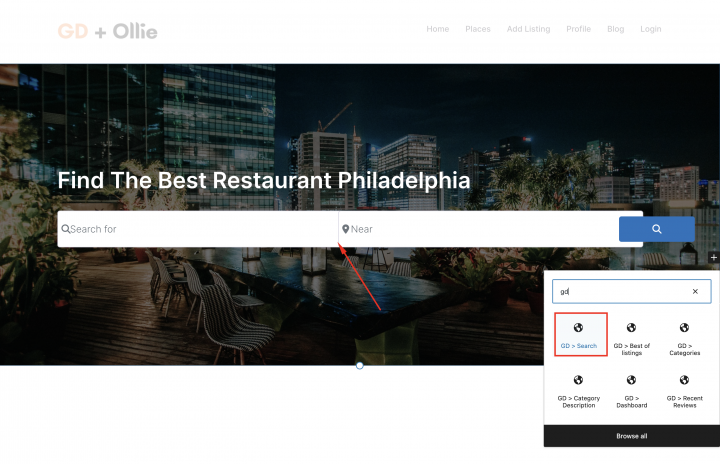
Now let’s add the GD > search block below this heading.
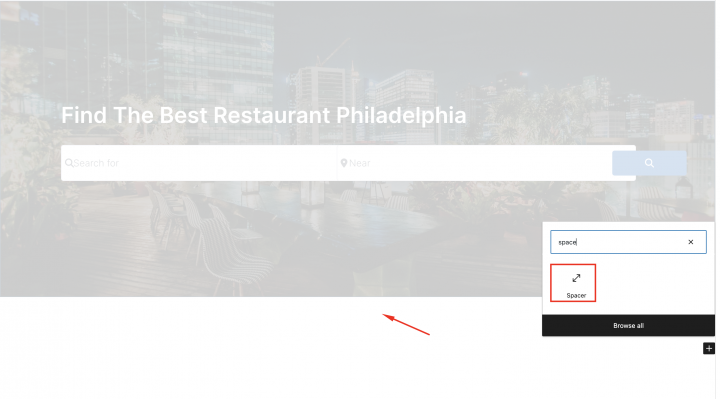
below it, let’s add some space using a spacer block with a Height of: 60
Now let’s add an empty column and put the GD > Categories block in it.
Set block options to the following
Design type: Image Background
Row Items: 3
Enable Use Category Image
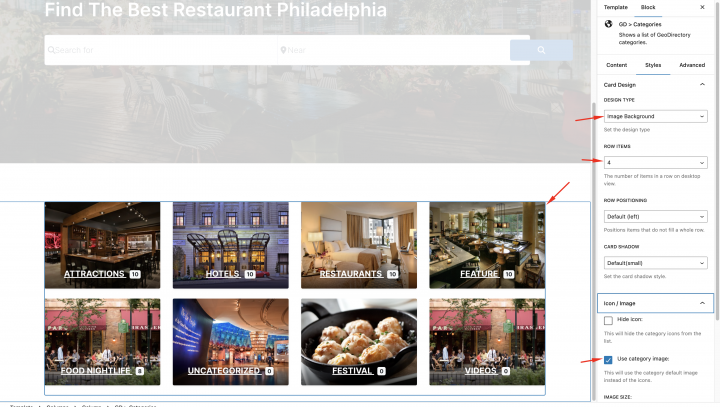
You can set the image to a category by editing the category from wp-admin -> places -> Place Categories.
Each category has an option to set a default image
Below the hero section, add one more Column by clicking on the plus icon and add the GD > Listings blocks there.
Now we will do some needed settings in this GD > Listings block. we will set sorting: recent
Now let’s add an empty Column with Content and Wide to 100.
Add the GD > Map block in it and keep the settings to default.
Click on the Footer and OllieWP already provides a few prebuild Footer templates. I am selecting one of them.

Congratulations! Your homepage is Completed.
2. OllieWP Directory Website Listings and Search page design
Now you need to design two pages that are essential for any directory.
Now you need to design two pages that are essential for any directory.
The listings page (general archive, categories, tags), and the search results page.
GeoDirectory creates them by default with a general layout. In this tutorial, we will customize the layout of these pages a bit.
The listing and search pages are mostly identical so we create it once and just copy the layout on the other page.
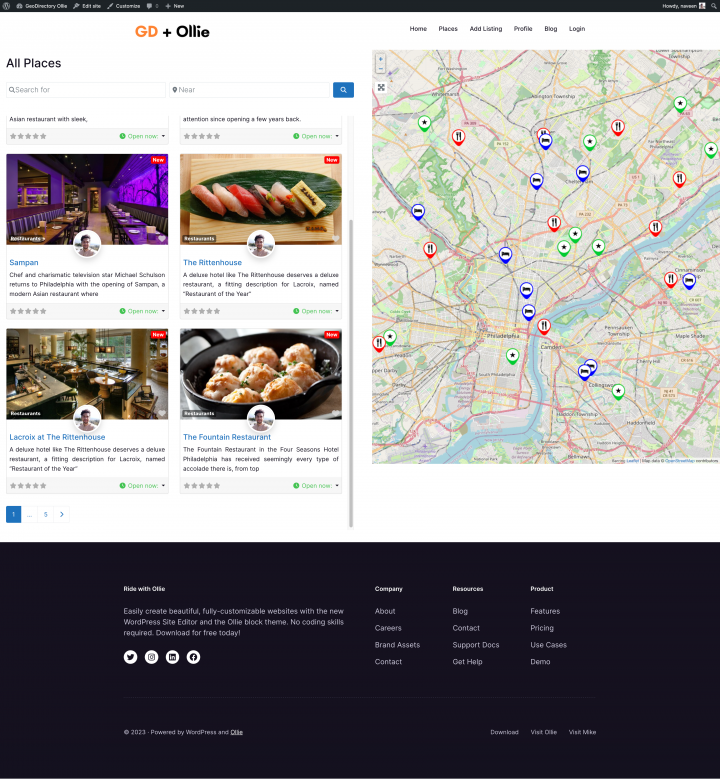
We decided the Listing page layout would be the listings on the left, and on the right, a sticky map showing the listings’ precise location.
This is very easy.
Listings page
Go to Appearance > Editor > Design > Templates and Click on Edit GD Archive page template
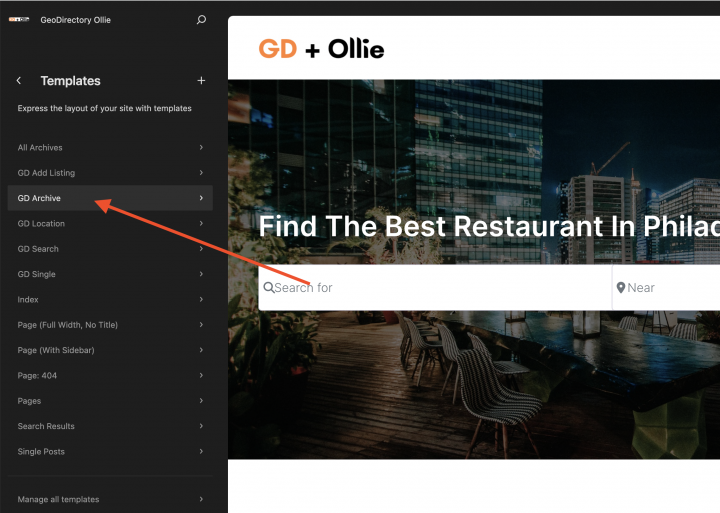
Remove all the content from this GD Archive page template.
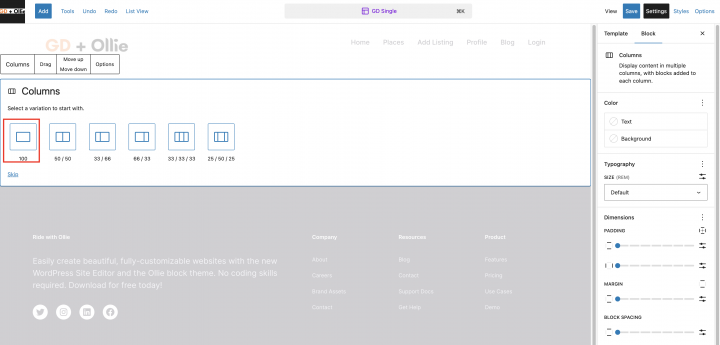
Now let’s add an empty row.
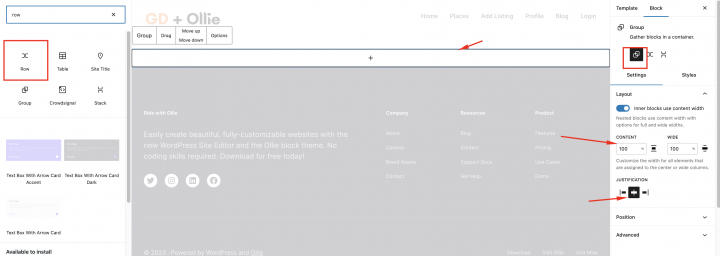
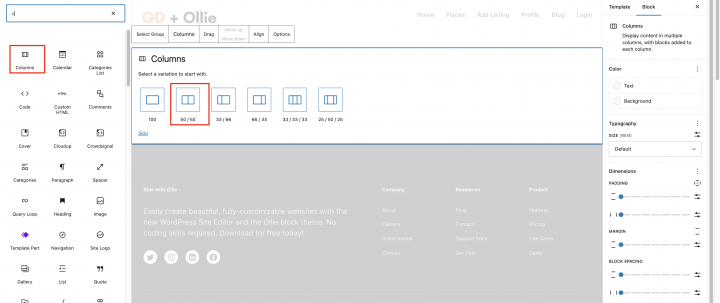
Inside this add a two-column layout
Now on the left container, we will drag GD Archive page-related widgets like GD > Loop Action, GD > Loop, GD > Loop Pagination, and GD > Search on top so the user can search from the Archive page.
On the right column, we will drag the GD > Map block.
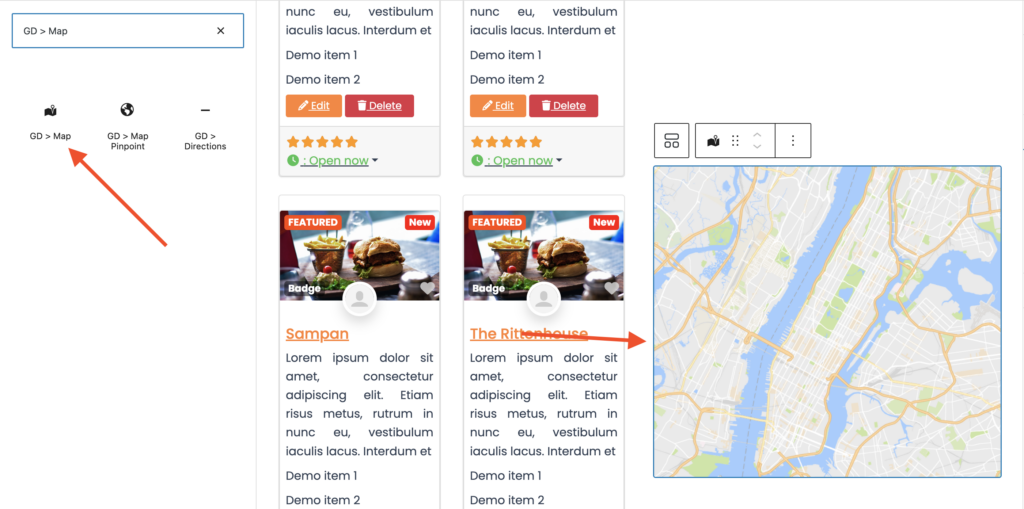
we will keep all the settings default for the GD > Map. let’s give it some height and I have decided to give it the height of 100vh.
Add the following style in the theme customizer from Appearance => Customize => Add CSS
.geodir-archive .geodir-listings .geodir_location_listing{
    overflow-y: scroll;
    max-height: 100vh;
    padding-right: 15px;
}
Now after this, the Listing Archive page is ready.
Another option is to use the GD > Simple Archive block as explained in this tutorial on how to Build a Directory Website with Elementor.
For the search page, we repeat the same process.
Search page
Go to Geodirectory > Settings > General > Pages > Click on edit GD Search page template
Remove all the content from this GD Search page template.
Copy all the content of the GD Archive page and paste it into the GD Search page.
So now our GD Search and Archive page is ready.
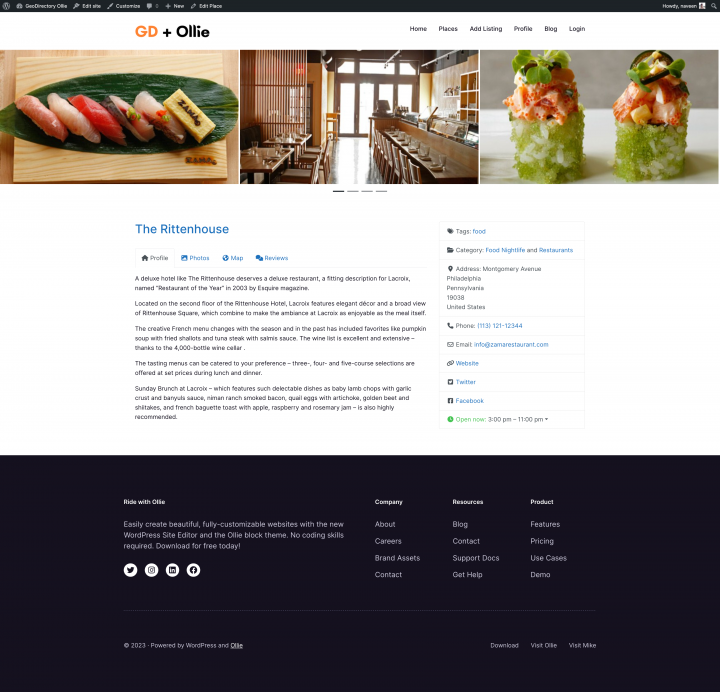
3. OllieWP Directory Website single Listing page design
Now to edit and customize the GD Detail page, You can go to Appearance > Editor > Design > Templates and Click on Edit GD Single page template.

Add an empty column
Let’s first add an image slider at the top of the Listing Detail page. we will drag the GD > Post Image block in this container with the following settings
Image Limit: 10
Show limit: 3
Output Type: Slider
Auto Start: Enable

Now let’s add an empty row with
Content: 1200
Wide: 100
add two columns inside of it.
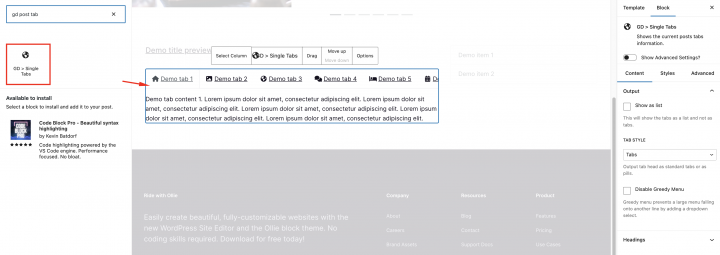
Now let’s add all required GD Detail page shortcodes on the left column one by one.
Which includes GD > Single Taxonomies, GD > Single Tabs, and GD > Single Next Prev.
On the right column, we will add GD > Author Action and GD > Output Location block.
After doing it our Listing Detail page has been completed.
Adding Premium Features to your OllieWP Directory Website
If you wish, now you can add premium features to your directory, such as:
- Paid Listings: with the GeoDirectory Listing Price Manager add-on, you can set prices for listing submission. For each price tier, you can enable/disable features such as: Restricting the number of pictures for free listings while allowing more pictures for paid listings. Allowing more or fewer tags and categories. Enabling or disabling specific custom fields. Submitting longer or shorter descriptions.
- Claim Listings: This is a fundamental feature for a directory where the admin creates the database and invites business owners to take control of their free listings. The claim listing process may include forcing an upgrade to a paid listing to take over the listing’s ownership.
- Advertising: selling ads is another form of monetizing an online directory. If you have a lot of traffic, you can use Ads networks. Otherwise, you may sell ads directly, allowing businesses to add banners in specific areas of your website or allowing for listings to appear as ads, for example, on top of organic search results.
These are just three examples. However, a directory website offers many ways to make money online.
You can create a global marketplace of handcrafted items, sell event tickets, or sell discount coupons.
Kickstart your directory website project with this advice: Start a directory website today.
The possibilities are limitless.

Here’s a step-by-step guide to building a Directory Website using the Generatepress theme and Generatepress blocks plugin:
- Install the Generatepress theme
- Install and setup GeoDirectory
- Install the GenerateBlocks plugin
- Design the Directory Website using the Generatepress theme and the Gutenberg Editor
Generatepress Theme in combination with the GeoDirectory Plugin and a GenerateBlocks Plugin, offers a robust and flexible solution for crafting a dynamic online directory.
This trio allows users to seamlessly integrate location-based features, customize layout designs, and incorporate interactive content blocks, ensuring an intuitive and engaging user experience.
With this integrated approach, web developers and designers can easily achieve a professional-grade directory site tailored to specific niche markets or broader community needs.
Let’s see how we can do that in detail.
In this tutorial, we will:
Installing Theme and Plugins.
1. Install the Generatepress Theme
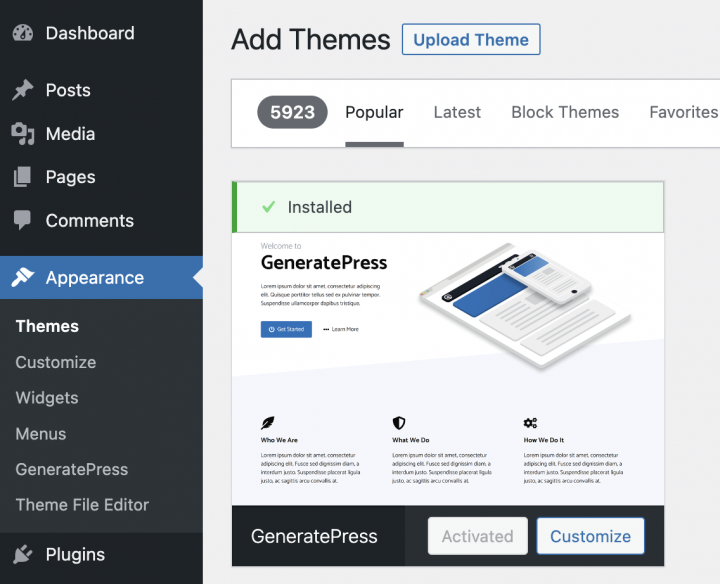
We need to install a Theme, and for this tutorial, you will install the Generatepress Theme.
Go to Appearance >> Themes
Select Add New, Install, and Activate the Generatepress Theme.
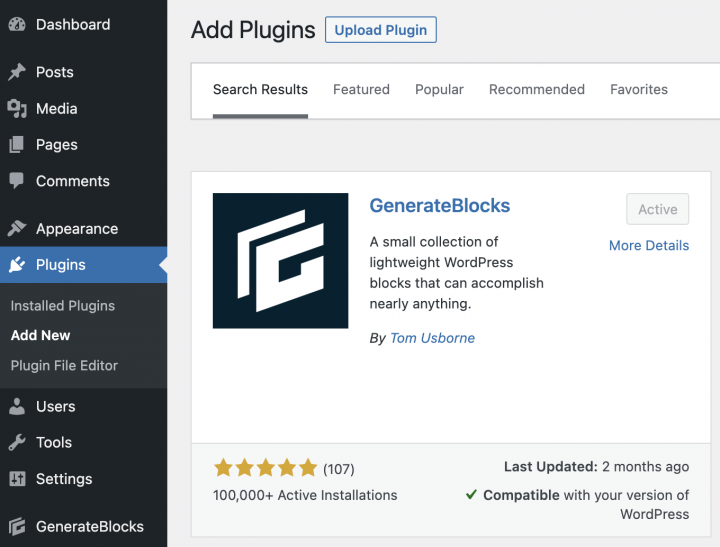
2. Install GenerateBlocks plugin
The default Gutenberg plugin is not enough to style a template so we will install the GenerateBlocks plugin.
This plugin provides customized GenerateBlocks which are better than the default blocks and will help you design the page templates.
Go to Plugins >> Add new.
Search for GenerateBlocks. Install it and Activate it.
You can Skip all steps of the Setup Wizard.
3. Install GeoDirectory
Finally, you need to install GeoDirectory.
Go to Plugins >> Add new, search GeoDirectory. Please install and activate it, and we finished installing the plugins.
4. GeoDirectory Install Wizard
For GeoDirectory, you will need to complete the Setup Wizard to configure the Google Maps API key and import a few dummy listings.
Choosing the Map System (Google Maps or OpenStreetMap)
You can choose between two mapping systems on the wizard’s first step. Google Maps and Open Street Maps (which doesn’t require an API key).
In this tutorial, we select OpenStreetMaps.
In case you wish to select Google Maps, do the following extra steps.
Click on the Generate Key button and follow the steps of this doc to generate a valid API key.
The essential steps are:
- Enable the Keys.
- Create or select an existing project.
- Get the Key.
- Activate a billing account.
- Restrict the API key (so it can only be used from the URL of your website)
About point four: it is a requirement. However, you only get charged if you pass the threshold, which is $200/month.
This free credit is more than enough for 99% of directories.
Setting the default city
After that, you will set the default location. This is the city for which the directory is created.
We will set New York as the default city.
You can use whatever location you need.
If you need to add listings to more than one city, you will need the Location Manager add-on.
Adding extra features
In this step, we will install our UsersWP, a user login plugin that lets users register and log into your website.
This is needed to allow users to add and edit their listings. It will also create user profiles where they can find their listings, reviews, and so on.
We will also install Ninja Forms so that all listings have a contact form that sends emails directly to the listing owners.
AyeCode Connect is not mandatory for this tutorial. It is mainly needed if you want to add GeoDirectory premium add-ons and install them directly from the WordPress Dashboard.
Adding Dummy Data
The last step to complete the installation wizard is adding some dummy listings. This will also add listing categories that you can edit later according to your needs.
You will not add sidebar widgets and menu items right now, as we will do that later.
Design the Generatepress Directory Website
Now that we installed the theme and the plugins and done the preliminary setup of GeoDirectory, we can start designing our Directory Website with the Generatepress Suite of tools.
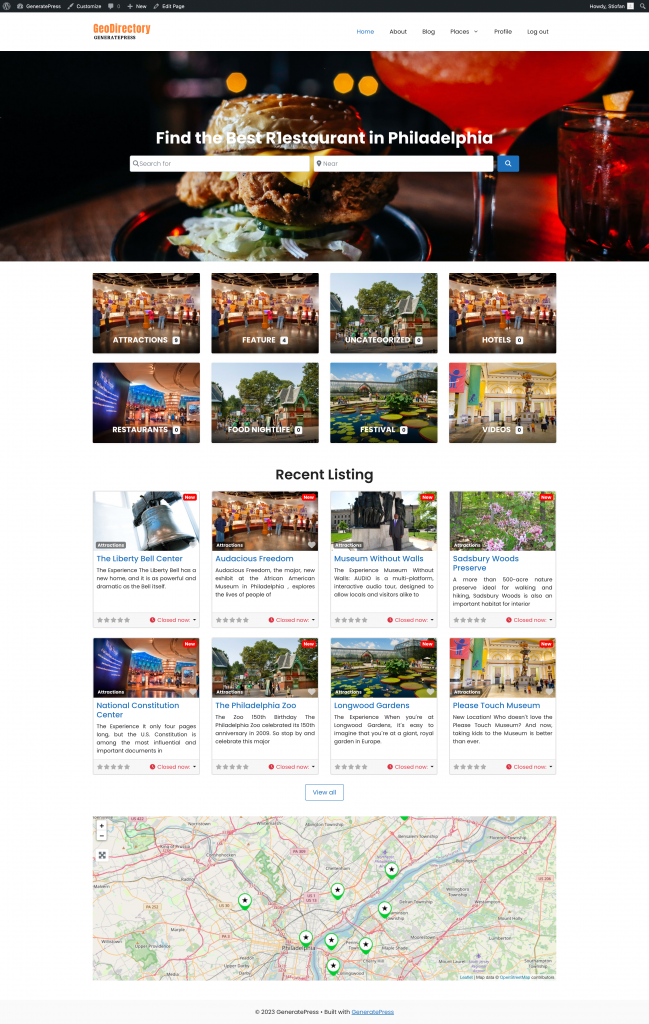
1. Generatepress Directory Home page design
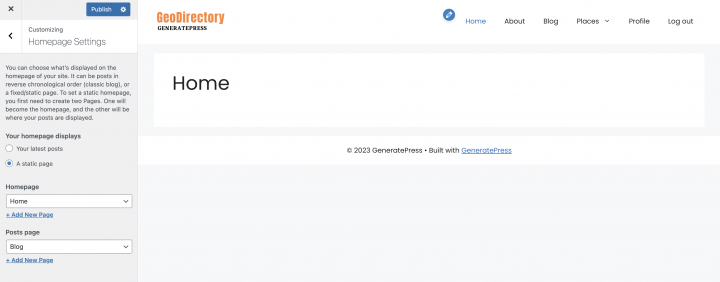
You can create a new page or use one WordPress creates by default, like the Sample Page.
Go to Pages, edit the Sample page, and rename it Home or create a new page for this.
Next, go to Appearance > Customize > Homepage Settings and select your Home.
The Logo
First thing first, we will need a logo for our website.
You don’t need to invest in a designer to sketch the 1st version of your logo.
One of the biggest mistakes you can make when starting a new directory is investing too much time and money before testing the product market fit.
You can design a logo in five minutes with an app like Canva, which is cheap and surprisingly good.
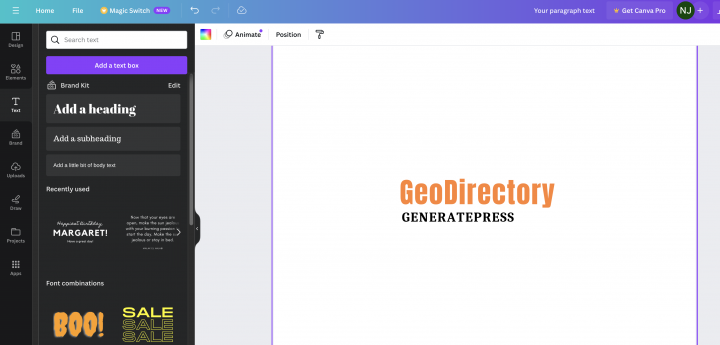
For an MVP (minimum viable product), a logo designed with Canva will be more than enough.
There are several logo templates to choose from, and it doesn’t matter if your initial logo is not as perfect and original as you believe it should be.
If your project gets traction, you can always invest in improving it or radically changing it later.
An average logo is never the leading cause of a failed project.
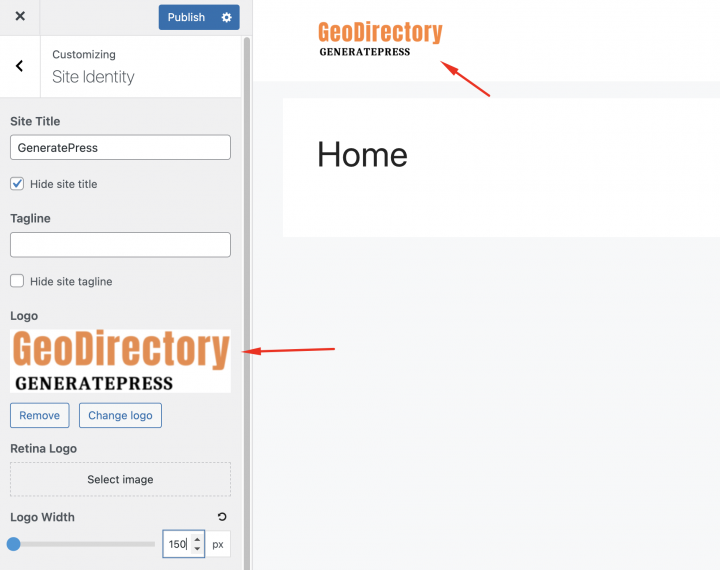
After designing your logo, go to Appearance > Customize > Header, click Logo > Select Logo, and upload your PNG file. Skip cropping (or crop the image as needed), in Logo Layout select the option Logo and click publish.
The Navigation Menu
After creating and adding the logo, go to Appearance > Menus, and create your menu.
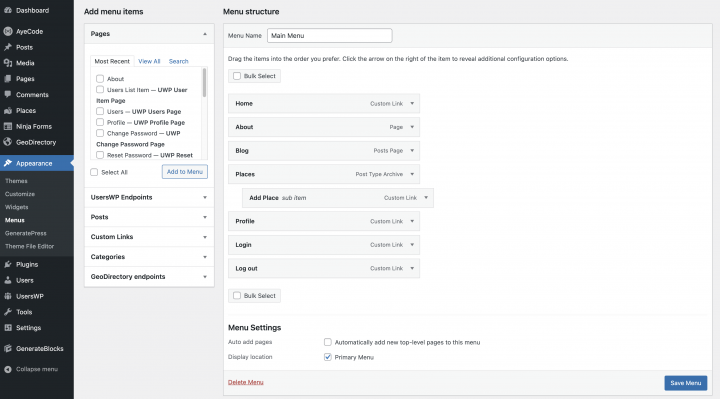
Add the links needed (from the left column to the right column) and save. In the Menu Settings > Display location section, you can check the “Main” option.
If you want, you can make the same menu appear on the footer or create another menu to appear there.
In this example, we’ll only have the header navigation menu.
We added seven main navigation links and a few sub-navigation links:
- Home
- About
- Blog
- Places and add places
- Profile
- Login
- Logout
The Login link (from UsersWP Endpoints) will only appear for Logged-out users, while the log-out, account, and profile links will only appear for logged-in users.
The Typography
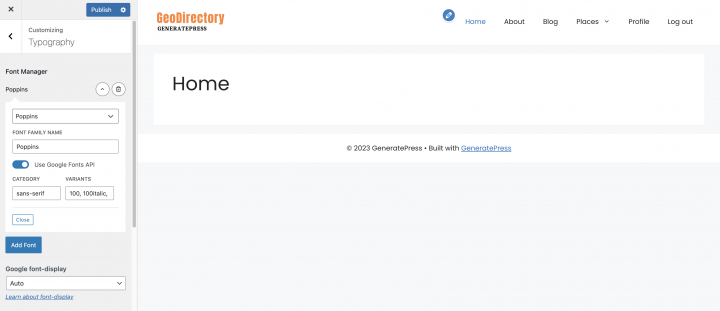
Now let’s define the Typography for the website text font and size. I am setting a global Font Family, Font Weight, and Font Size that will be applied to all site text.
we will go to the Appearance > Customiser > Typography > Body. we will set the Font Family: Poppines Category: sans-serif and Varient: 100, 100italic, 200, 200italic, 300, 300italic, regular, italic, 500, 500italic, 600, 600italic, 700, 700italic, 800, 800italic, 900, 900italic
The Content
I will start building this page from scratch using the GenerateBlocks plugin.
we need a hero header on the homepage for that let’s add a Grid block provided by the GenerateBlocks plugin.
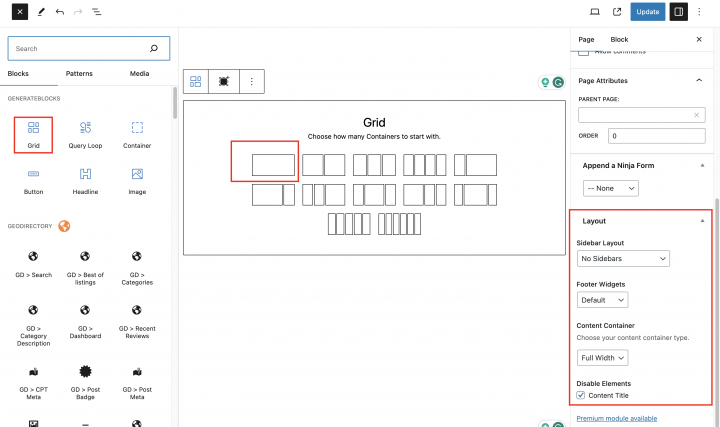
we will set block alignment to wide.
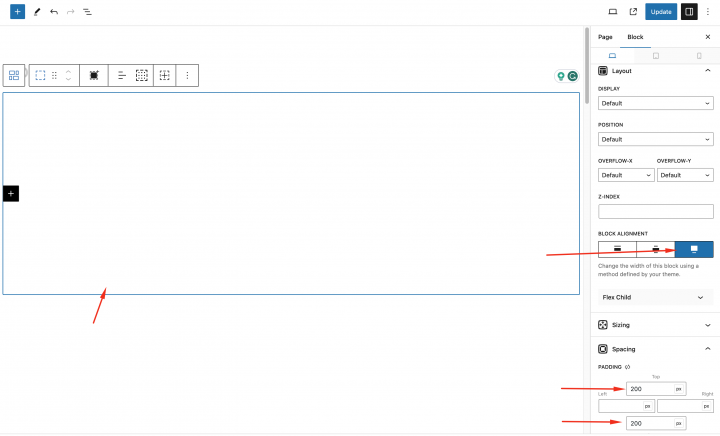
In the Grid setting set the Layout setting to
Sidebar Layout: No sidebars
Footer Widget: Default
Content Container: Full Width
Disable Element: Content Title
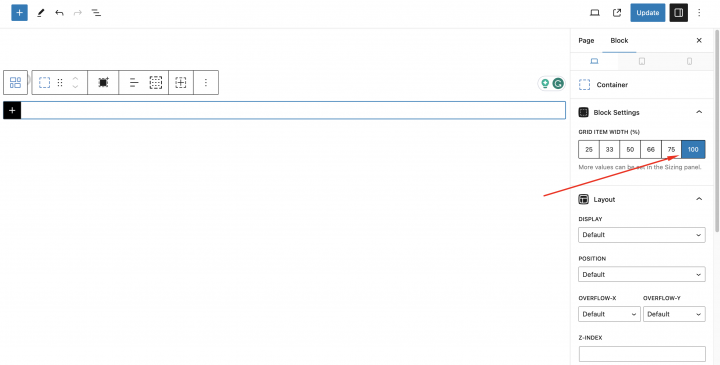
Grid Item Width: 100
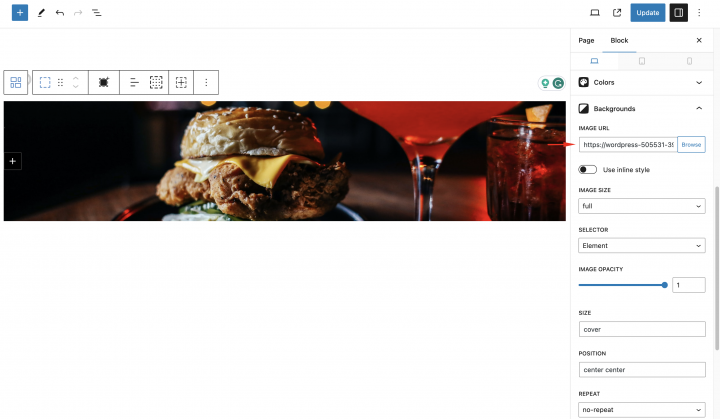
Next, check the block setting and set the Background image URL.
For the Hero Section, we need an image and we will download a free image from Pexels.com (Thanks, @rachel-claire).
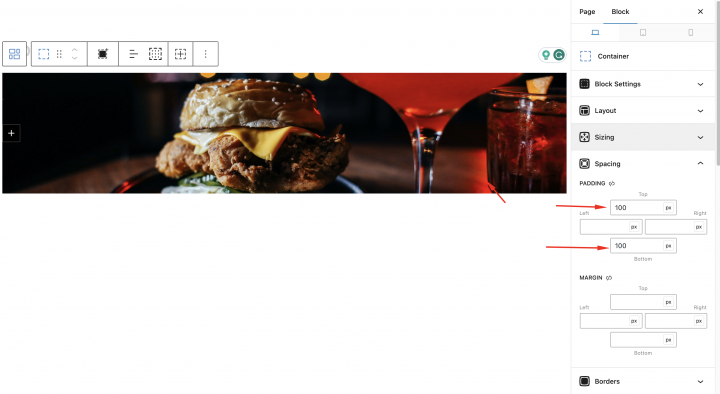
On the spacing setting padding 100px on the Top and Bottom margins.
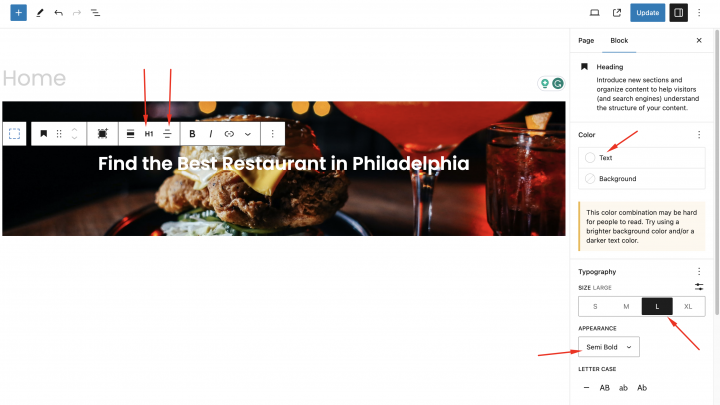
Now let’s add a header tag to add some text.
Text:: Find the best restaurants in Philadelphia
Size: Small
Appearance: Small Bold
Text Color: #FFFFFF
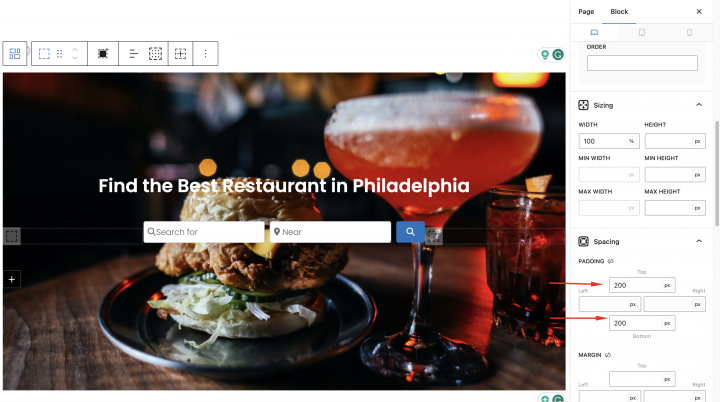
Inside the same Grid, we will add the GD > Search block with padding on top and bottom as 200px.
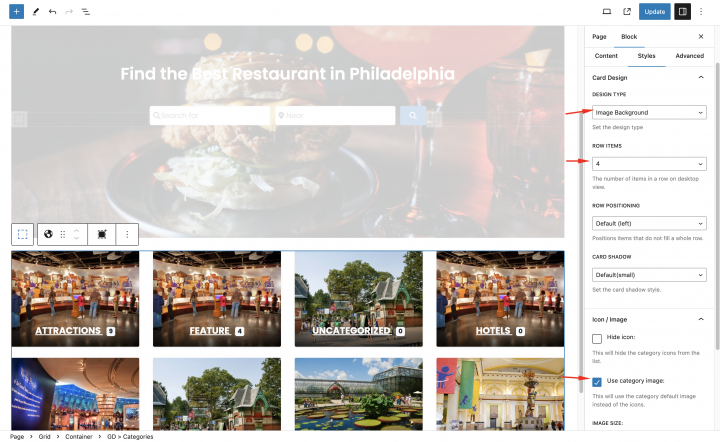
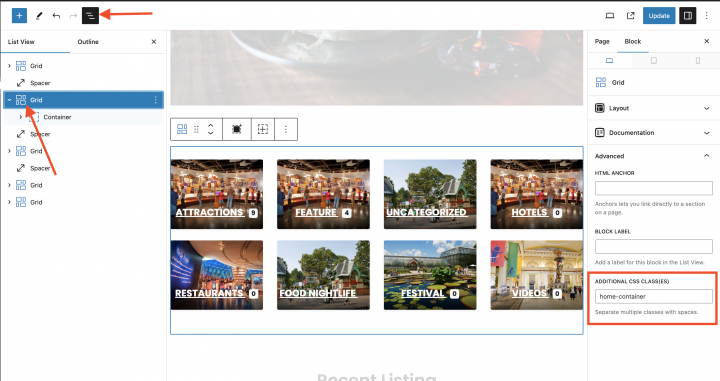
Now we will add an empty grid below the hero header and add the GD > Categories block in that grid.
Set block options to the following
Design type: Image Background
Row Items: 3
Enable Use Category Image
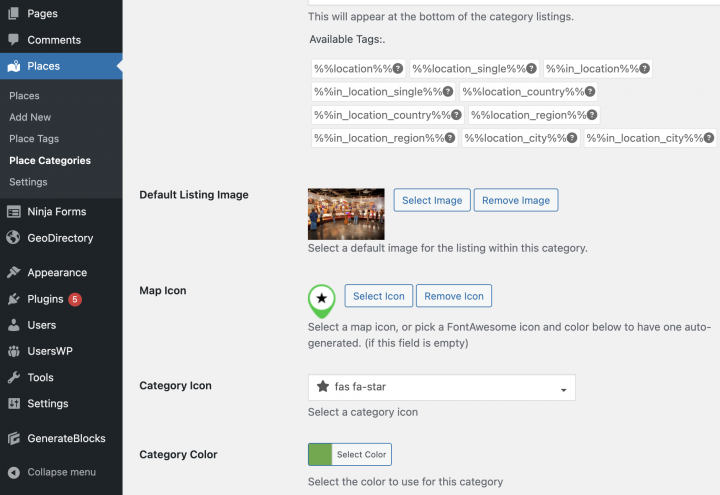
You can set the image to a category by editing the category from wp-admin -> places -> Place Categories.
Each category has an option to set a default image
There is no working setting I found in Generateblocks to make the grid into the content layout. we will add the home-container class to the Category parent grid.
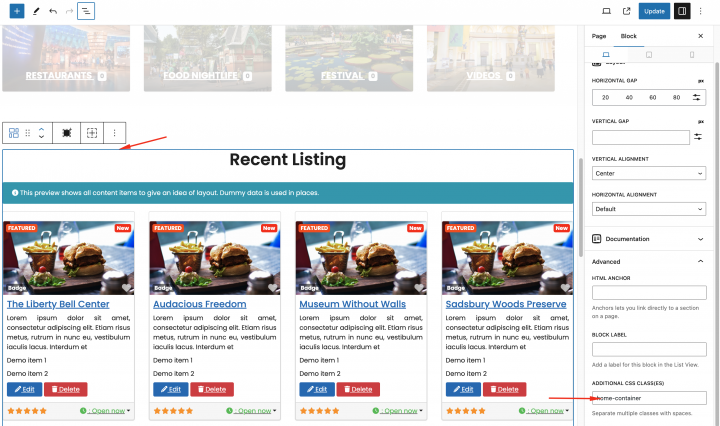
Below the hero section, add one more Grid by clicking on the plus icon and add the GD > Listings blocks there.
Now we will do some needed settings in this GD > Listings block. we will set sorting: recent
Similarly, like the category block, we will add the home-container class to the Recent Listings parent grid.
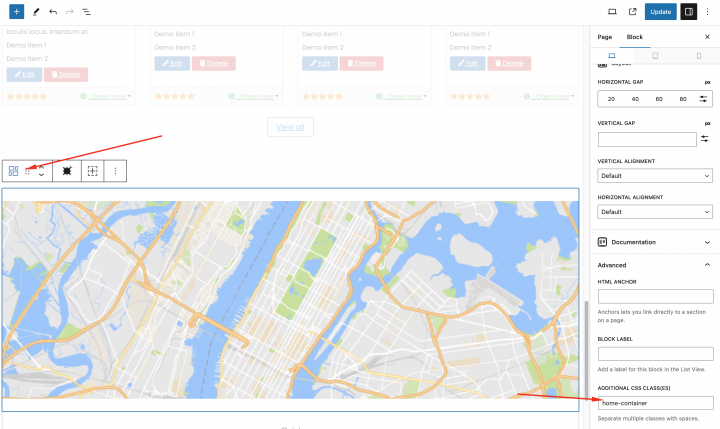
Now let’s add an empty Grid and add GD > Map block in it and keep the settings to default.
Similarly, like others, we will add the home-container class to the GD > map parent grid.
Finally, add the following CSS in the theme customizer from Appearance => Customize => Add CSS
.home-container{
	max-width:1200px;
	margin:auto;
}
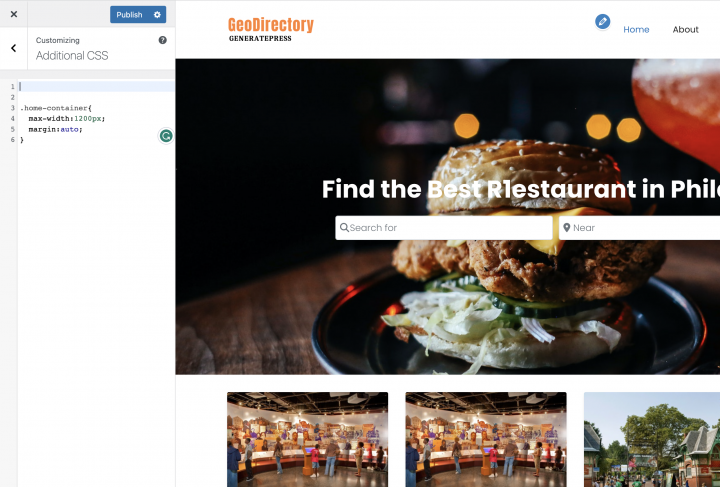
Congratulations! Your homepage is Completed.
2. Generatepress Directory Website Listings and Search page design
Now you need to design two pages that are essential for any directory.
The listings page (general archive, categories, tags), and the search results page.
GeoDirectory creates them by default with a general layout. In this tutorial, we will customize the layout of these pages a bit.
The listing and search pages are mostly identical so we create it once and just copy the layout on the other page.
We decided the Listing page layout would be the listings on the left, and on the right, a sticky map showing the listings’ precise location.
This is very easy.
Listings page
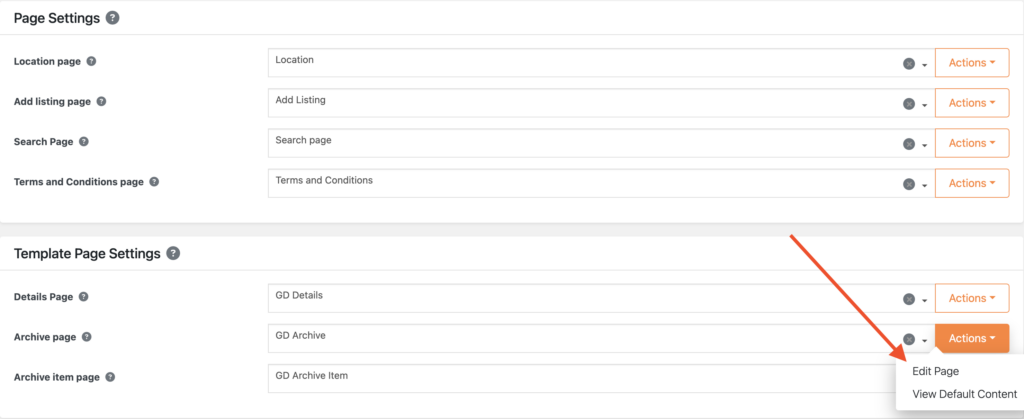
Go to Geodirectory > Settings > General > Pages > Click on edit GD Archive page template
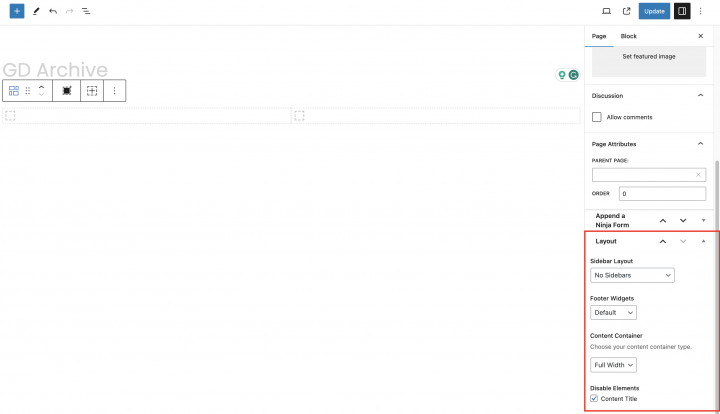
Remove all the content from this GD Archive page template.
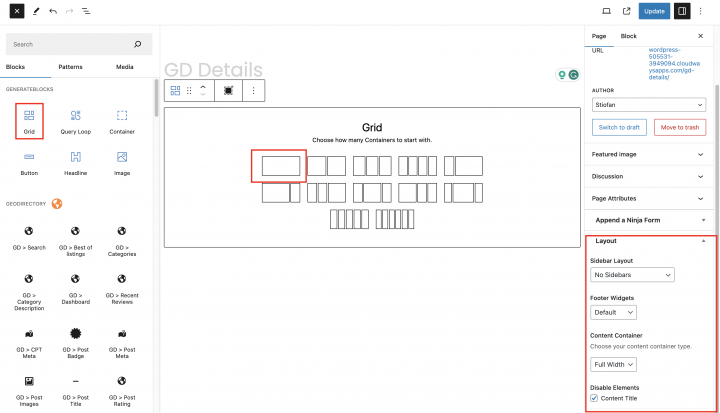
we will set the page setting to the following
Sidebar Layout: No Sidebar
Footer Widget: Default
Content Container: Full Width
Now add an empty Grid with two columns.
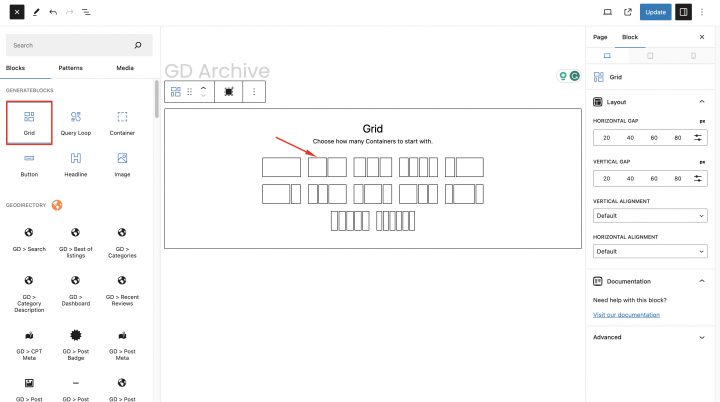
Now on the left container, we will drag GD Archive page-related widgets like GD > Loop Action, GD > Loop, GD > Loop Pagination, and GD > Search on top so the user can search from the Archive page.
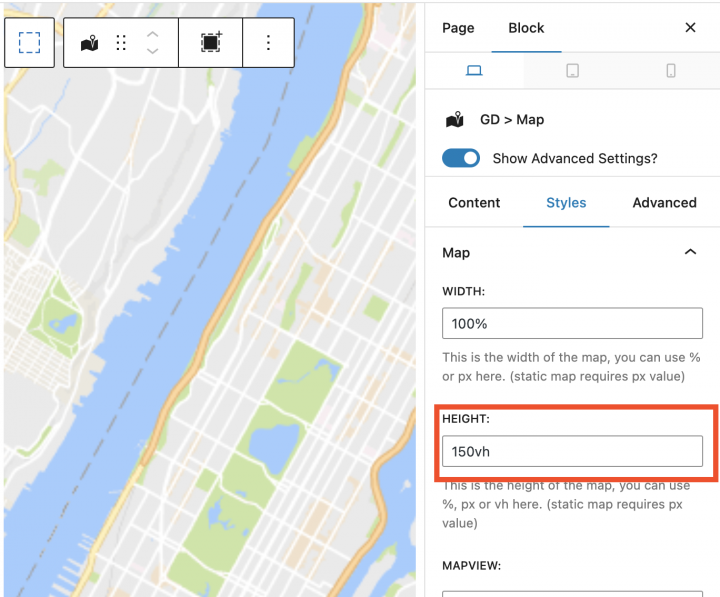
On the right column, we will drag the GD > Map block.
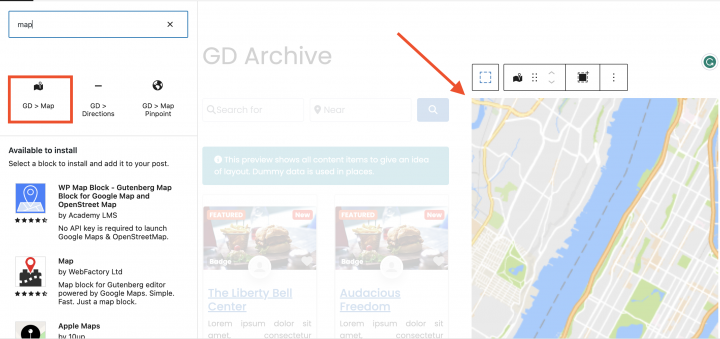
we will keep all the settings default for the GD > Map. let’s give it some height and I have decided to give it the height of 150vh.
In order to make the archive page layout full-width. we will add the following CSS in the theme customizer from Appearance => Customize => Add CSS
.geodir-archive .container.grid-container{
      max-width:100%;
}
.geodir-archive .wp-block-geodirectory-geodir-widget-loop .geodir-loop-container .geodir-listing-posts{
    overflow-y: scroll;
    max-height: 100vh;
}
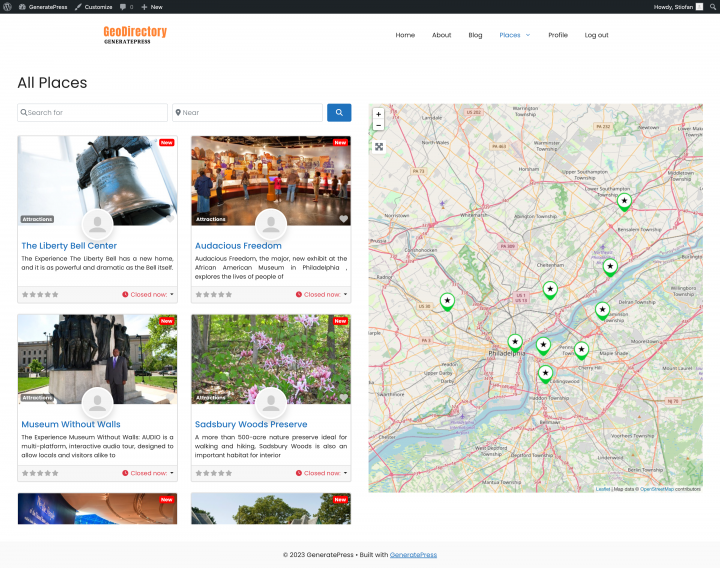
Now after this, the Listing Archive page is ready.
Another option is to use the GD > Simple Archive block as explained in this tutorial on how to Build a Directory Website with Elementor.
For the search page, we repeat the same process.
Search page
Go to Geodirectory > Settings > General > Pages > Click on edit GD Search page template
Remove all the content from this GD Search page template.
Copy all the content of the GD Archive page and paste it into the GD Search page.
So now our GD Search and Archive page is ready.
3. Generatepress Directory Website single Listing page design
Now to edit and customize the GD Detail page, You can go to Geodirectory > Settings > General > Pages > Click on edit GD Detail page template.
In this template, you will already find default content generated by Geodirectory.
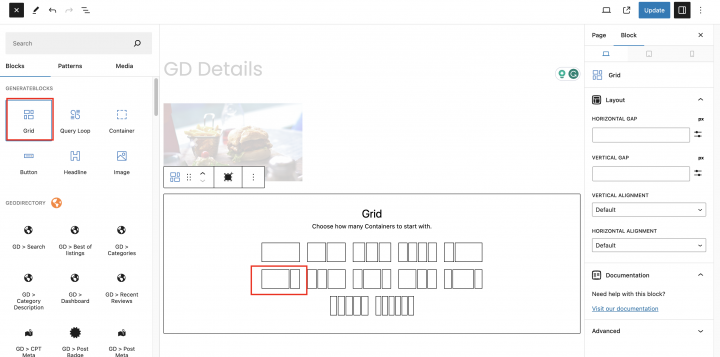
we will remove all these default content and add a new Grid.
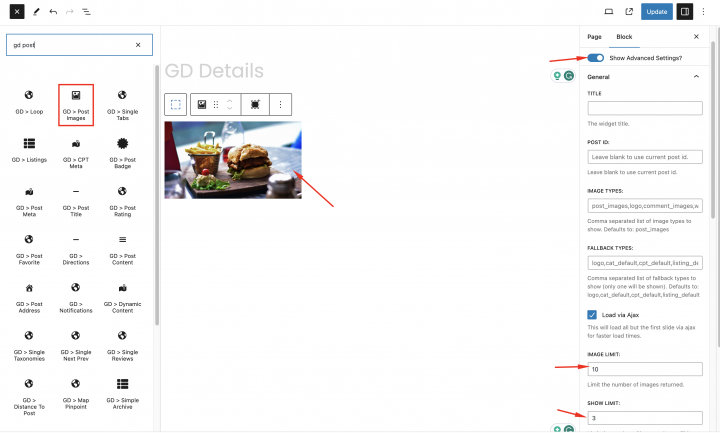
Let’s first add an image slider at the top of the Listing Detail page. we will drag the GD > Post Image block in this container with the following settings
Image Limit: 10
Show limit: 3
Output Type: Slider
Auto Start: Enable
Now we will add one more empty Grid block below it with a two-column layout.
we will add a class (single-details-container ) to this Grid from the block settings.
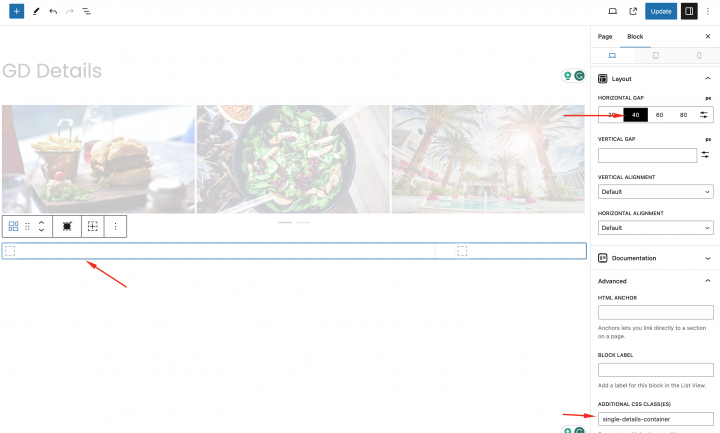
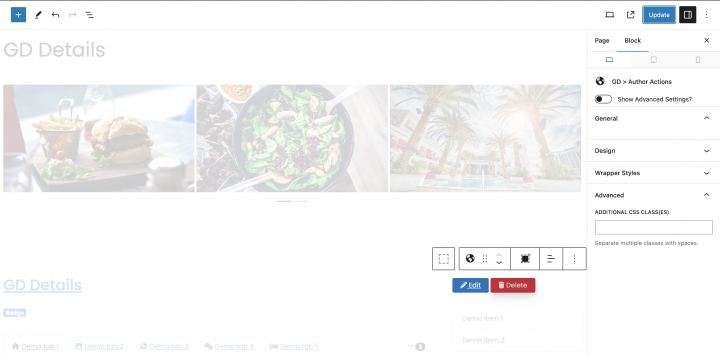
Now let’s add all required GD Detail page shortcodes on the left column one by one.
Which includes GD > Single Taxonomies, GD > Single Tabs, and GD > Single Next Prev.
On the right column, we will add GD > Author Action and GD > Output Location block.
Finally, add the following CSS in the theme customizer from Appearance => Customize => Add CSS
.single-details-container {
    max-width: 1200px;
    margin: auto !important;
}
.single-gd_place .entry-content{
    margin:0px;
}
After doing it our Listing Detail page has been completed.
Adding Premium Features to your Generatepress Directory Website
If you wish, now you can add premium features to your directory, such as:
- Paid Listings: with the GeoDirectory Listing Price Manager add-on, you can set prices for listing submission. For each price tier, you can enable/disable features such as: Restricting the number of pictures for free listings while allowing more pictures for paid listings. Allowing more or fewer tags and categories. Enabling or disabling specific custom fields. Submitting longer or shorter descriptions.
- Claim Listings: This is a fundamental feature for a directory where the admin creates the database and invites business owners to take control of their free listings. The claim listing process may include forcing an upgrade to a paid listing to take over the listing’s ownership.
- Advertising: selling ads is another form of monetizing an online directory. If you have a lot of traffic, you can use Ads networks. Otherwise, you may sell ads directly, allowing businesses to add banners in specific areas of your website or allowing for listings to appear as ads, for example, on top of organic search results.
These are just three examples. However, a directory website offers many ways to make money online.
You can create a global marketplace of handcrafted items, sell event tickets, or sell discount coupons.
Elevate your website with these key strategies: Key strategies for creating a directory website.
The possibilities are limitless.
How to Create a Directory Website with Divi theme?
The easiest way to build a Directory Website using the Divi WordPress theme is to implement the following 3 steps:
- Install the Divi theme
- Install and setup GeoDirectory
- Design the Directory Website using the Divi theme
Before I describe the details of how to create a business directory step by step, I would like to quote a post published on September 11, 2023, on the official Elegantthemes blog, the developers of the Divi theme.
Is GeoDirectory the best WordPress plugin for creating a business directory website with the Divi theme?
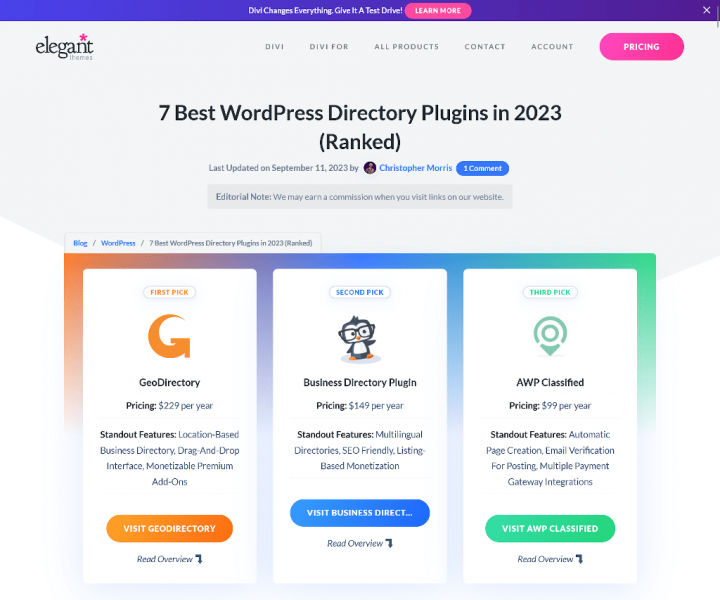
On the Elegant Themes blog, an article titled “7 Best WordPress Directory Plugins in 2023 (Ranked)” was published.
GeoDirectory plugin took the top spot in the ranking. In the article’s content, the author justifies why GeoDirectory is the best WordPress plugin for creating a directory website.
I encourage you to read this article. Below is a quote from the FAQ section of the mentioned article.
What is the best directory plugin for WordPress?
Quote from the FAQ section of the article: 7 Best WordPress Directory Plugins in 2023 (Ranked).
GeoDirectory is the best WordPress directory plugin. It offers customizable listings, advanced search, user reviews, Google Maps integration, monetization options, and great theme/plugin compatibility. You can create feature-rich directory websites easily with GeoDirectory.
My first WordPress site, created in 2013, was a business directory without any dedicated plugins.
I recall when the creators of WP GeoDirectory, Paolo Tajani, and Stiofan O’Connor, forked the “GeoPlaces” theme from Templatic and fixed all its issues.
They enhanced its performance and subsequently introduced GeoTheme over 10 years ago.
Later, adapting to the evolving WordPress ecosystem and drawing from their experiences, they shifted from theme development.
Building on its foundation, they crafted the GeoDirectory plugin, which facilitates the creation of directory sites of nearly any kind.
I’ve tested most of the plugins and themes for WordPress that allow for the creation of a directory website.
Both the aforementioned entry and my 11 years of experience confirm that WP GeoDirectory is the best plugin for this purpose.
Step-by-step guide on how to create a directory website using the Divi theme and the GeoDirectory plugin
Let’s see how we can build a Directory Website with GeoDirectory and the Divi theme in detail.
In this tutorial, we will:
Table of Contents
- How to Create a Directory Website with Divi theme?
- Installing Theme and Plugins.
- Design the Divi Directory Website
- Maximize Your Divi Directory Potential with DiviGeo
- Adding premium features to your Divi Directory Website
Installing Theme and Plugins.
1. Install the Divi theme
First, you will need to install a Divi Theme
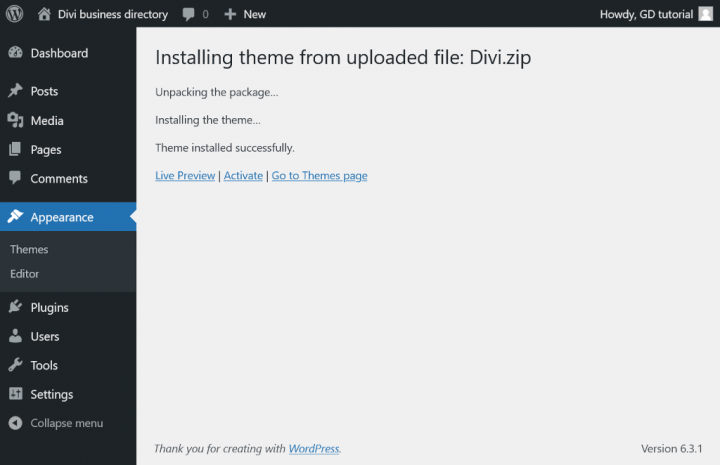
Go to Appearance >> Themes >>
Select Add New, Upload Theme, Install, and Activate the Divi Theme.
2. Install GeoDirectory
Now you need to install the GeoDirectory plugin.
Go to Plugins >> Add new, search GeoDirectory. Please install and activate it.
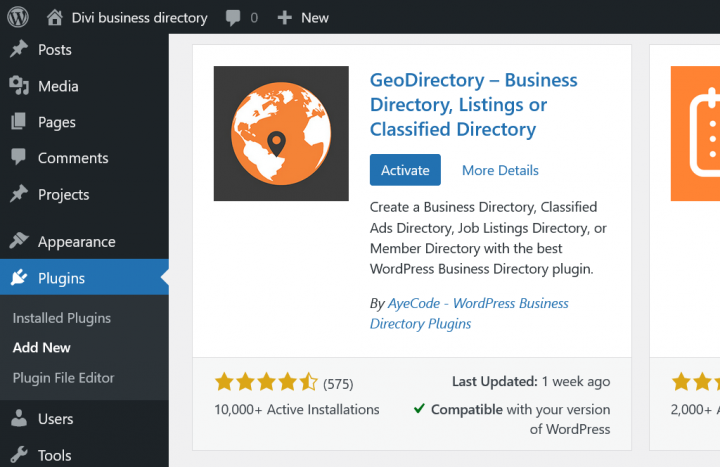
Done, once the Divi theme and GeoDirectory plugin are active, we can move on to the next step.
3. GeoDirectory Install Wizard
If you appreciate Divi Builder for its simplicity, you’ll surely appreciate the Setup Wizard built into the Geo Directory plugin.
Choosing the Map System (Google Maps or OpenStreetMap)
Now you have to complete the Setup Wizard to configure. You can choose between two mapping systems on the wizard’s first step. Google Maps and Open Street Maps (which doesn’t require an API key).
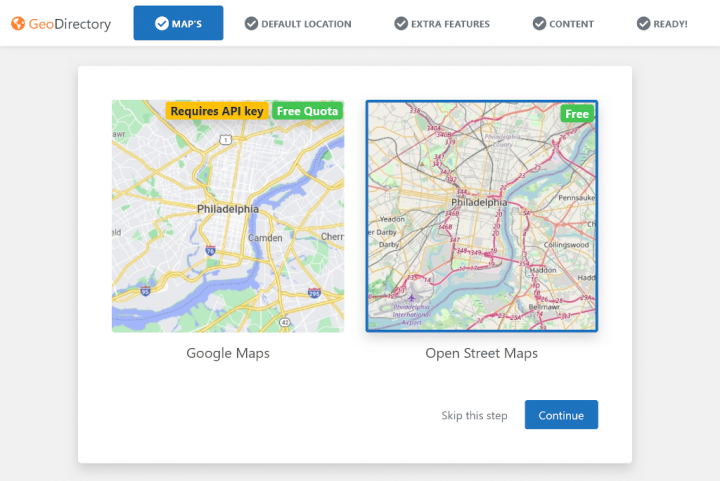
In this tutorial, we select OpenStreetMaps.
Select OpenStreetMap and click continue.
In case you wish to select Google Maps, do the following extra steps.
Click on the Generate Key button and follow the steps in this doc to generate a valid API key.
The essential steps are:
- Enable the Keys.
- Create or select an existing project.
- Get the Key.
- Activate a billing account.
- Restrict the API key (so it can only be used from the URL of your website)
About point four: it is a requirement. However, you only get charged if you pass the threshold, which is $200/month.
This free credit is more than enough for 99% of directories.
Setting the default city
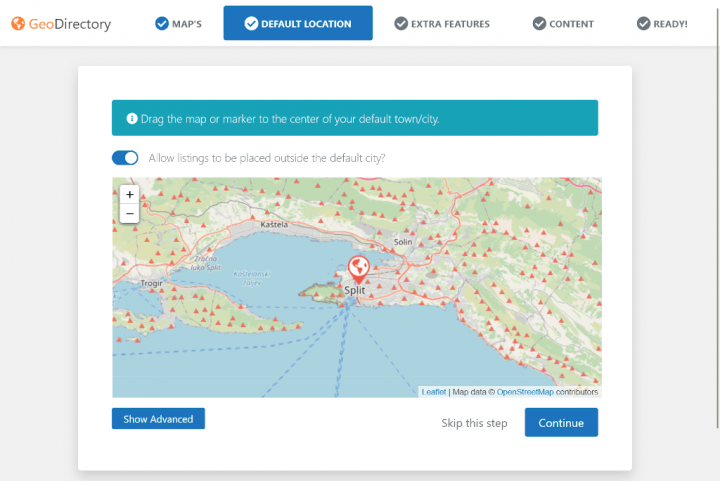
After that, you will set the default location. This is the city for which the directory is created. GeoDirectory uses Philadelphia as the default City.
Considering the niche I chose for this tutorial, we will set the default city to Split in Croatia.
You can drag the map marker to use whatever location you need, or use advanced settings by clicking “Show Advanced”.
If you need to add listings to more than one city, you will need the Location Manager add-on.
Adding extra features
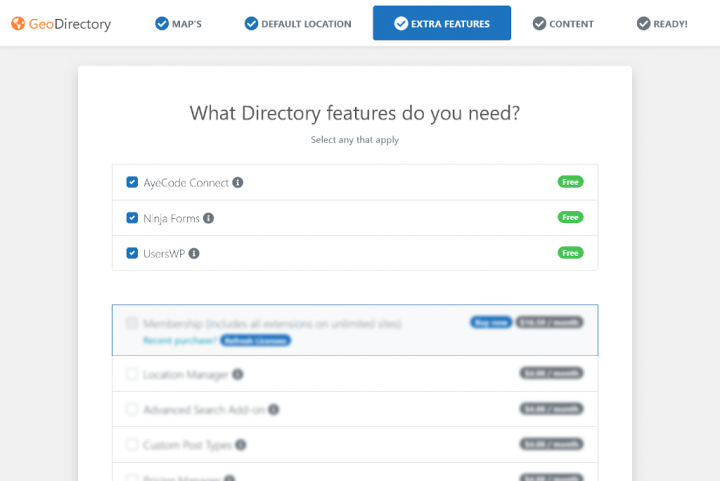
In this step, we will install our UsersWP, a user login plugin that lets users register and log into your website.
This is needed to allow users to add and edit their listings. It will also create user profiles where they can find their listings, reviews, and so on.
We will also install Ninja Forms so that all listings have a contact form that sends emails directly to the listing owners.
AyeCode Connect is not mandatory for this tutorial. It is mainly needed if you want to add GeoDirectory premium add-ons and install them directly from the WordPress Dashboard.
Adding Dummy Data
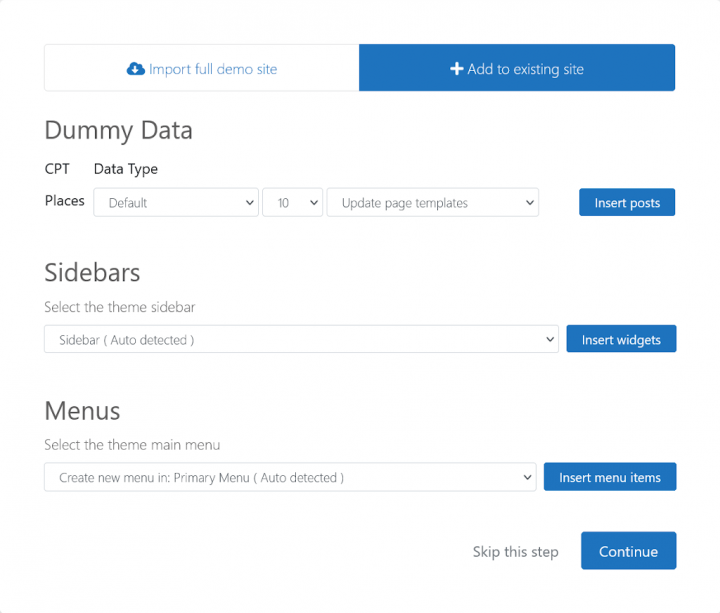
The last step to complete the installation wizard is adding some dummy listings. This will also add listing categories that you can edit later according to your needs.
You will not add sidebar widgets and menu items right now, as we will do that later.
Design the Divi Directory Website
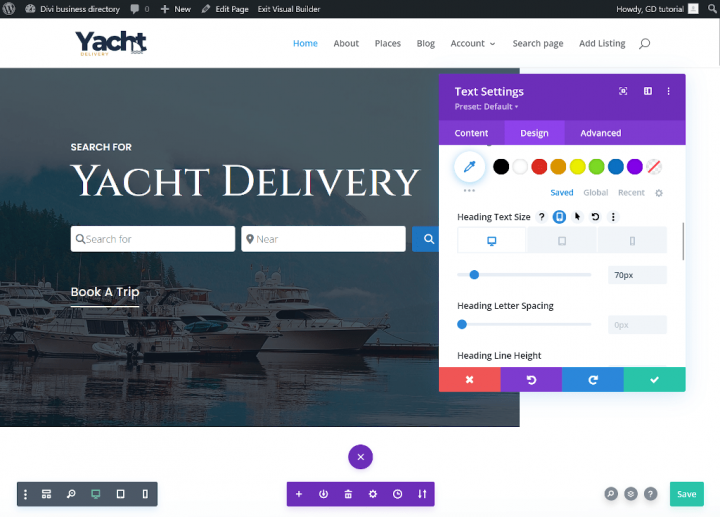
Now that we installed the theme and the plugins and done the preliminary setup of GeoDirectory, we can start designing our Directory Website with the Divi Theme.
1. Divi Directory Website Home Page design
You can create a new page or use one WordPress creates by default, like the Sample Page.
Go to Pages, edit the Sample page, and rename it Home or create a new page for this.
Next, go to Settings > Reading > Homepage Settings and select your Home.
We will select the Posts page later.
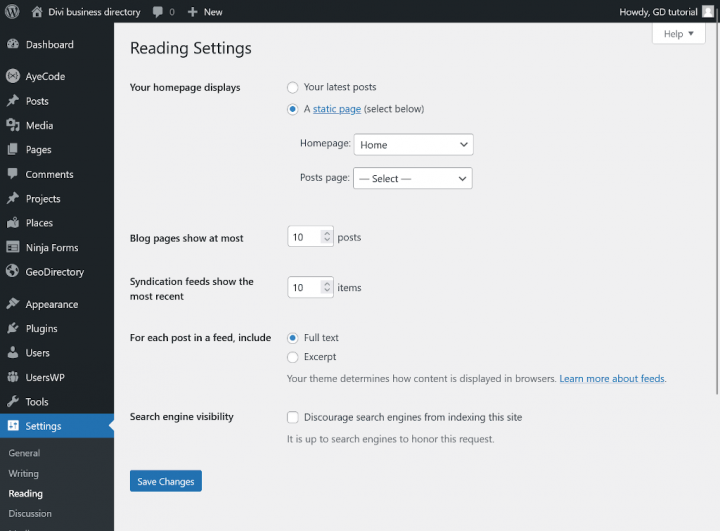
The Logo
Avoid spending on a designer for your initial logo.
Many make the mistake of investing heavily before assessing the market fit.
Use apps like Canva for quick, affordable, and quality designs.
For an MVP, a Canva-designed logo suffices.
While initial perfection isn’t crucial, you can enhance the logo if your project succeeds.
Remember, an average logo isn’t the reason for project failures.
After designing your logo, go to Divi > Theme Options, click upload and select the logo you created with Canva.com.
Skip cropping (or crop the image as needed) and click Save changes in the upper-left corner of the screen.
The Navigation Menu
After creating and adding the logo, go to Appearance > Menus, and create your menu.
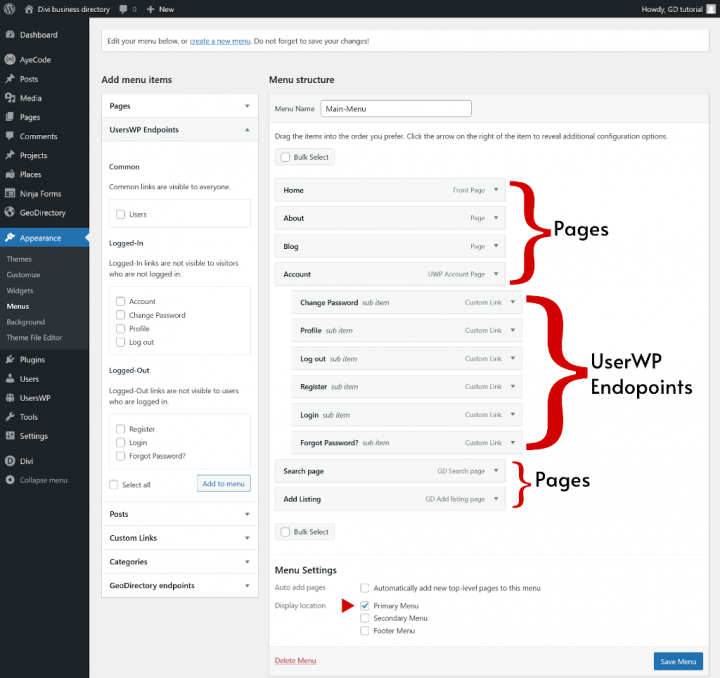
Add the links needed (from the left column to the right column) and save. In the Menu Settings > Display location section, you can check the “Primary Menu” option.
In this example, we’ll only have the header navigation menu.
We added twelve links:
- Home
- About
- Blog
- Account
- Profile (Visible for logged-in users)
- Change Password (Visible for logged-in users)
- Log out (Visible for logged-in users.)
- Register (Visible for not logged in)
- Login (Visible for not logged in)
- Forgot Password? (Visible for not logged in)
- Search Page
- Add Listing
Links from UserWP Endpoints are dynamics, see parentheses above.
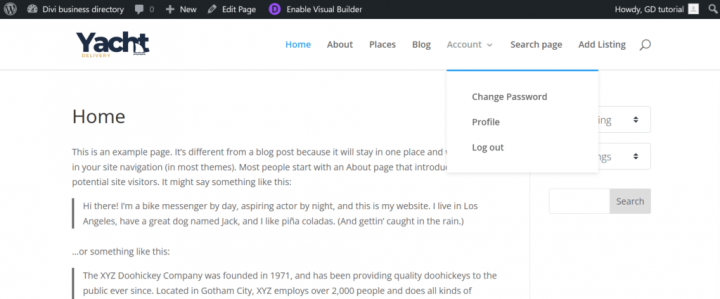
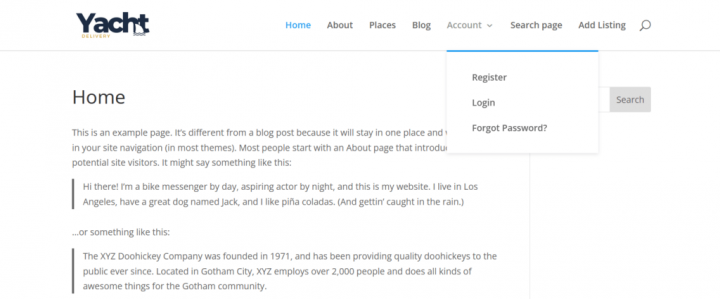
The Content
The Divi theme offers over 330 pre-made Layout packs.
For the purposes of this tutorial, I will choose a ready-to-use layout that allows for the creation of an attractive business directory without the tedious task of styling Divi modules.
For this tutorial, I chose premade Charter Divi Layout Pack.
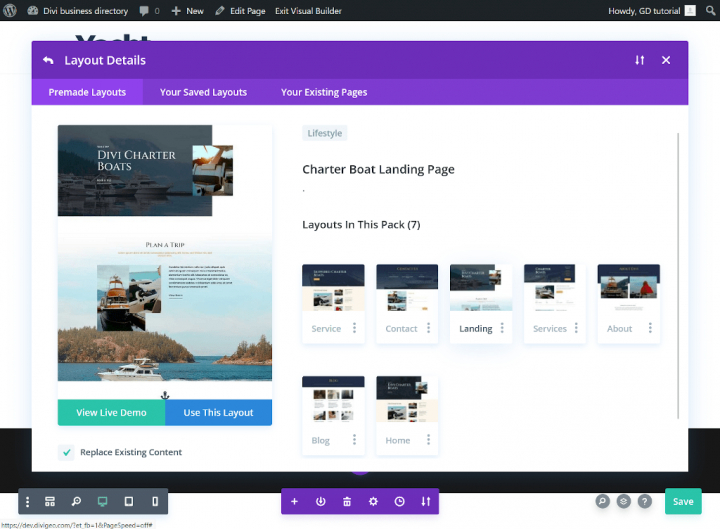
Go to your homepage, click ‘Enable Visual Builder’, and then click ‘Browse Layouts’.
In the premade Layout library, select the ‘Charter Boat Landing Page’ and click ‘Use This Layout.
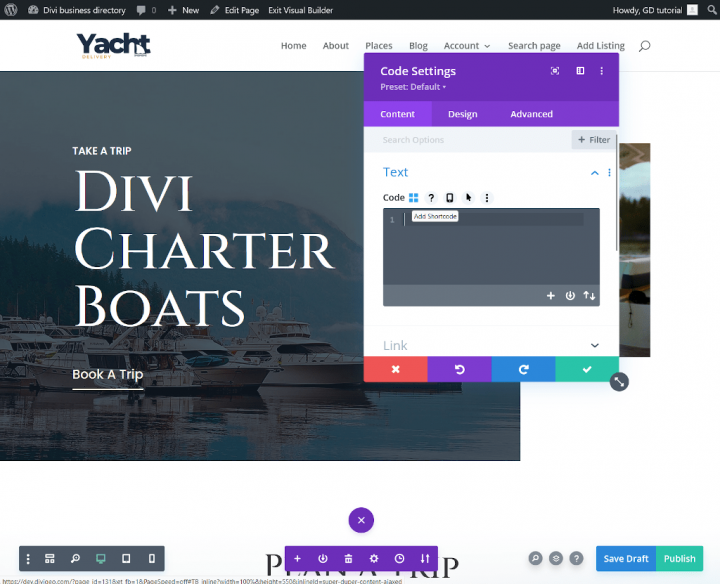
After the second text module, add the code module and click Add Shortcode.
Divi does not allow the use of Gutenberg blocks, but the creators of the GeoDirectory plug-in have implemented shortcode generator.
Thanks to which, you can easily add dynamic widgets using the Divi Code module.
So, the shortcode generator feature is your friend when creating a directory website in Divi.
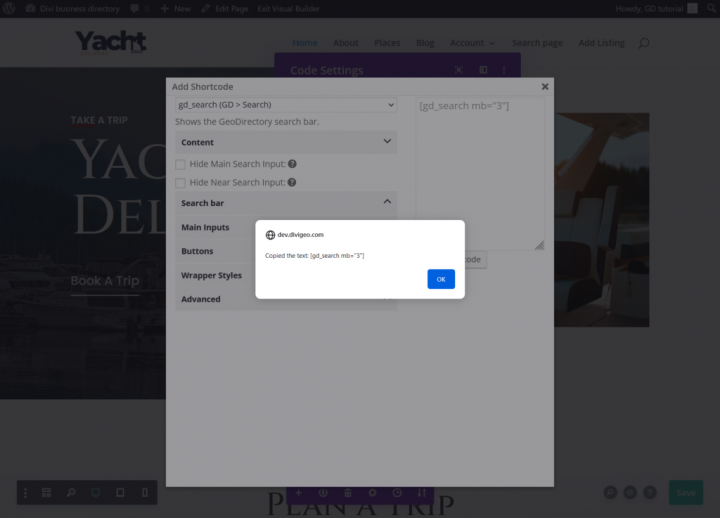
Select “gd_search “(GD > Search)” from the drop-down list and click Copy shortcode.
The copied shortcode is in the clipboard. Paste the copied code into the code module. And click on the check mark icon.
Change the first text module content to “Search for”.
Change the header content in the content tab to Yacht Delivery. In the Design tab, change the h1 header font size to 70px and click the check mark.
Remove the “Book a Trip” button module.
So now our Hero section is completed.
In the next section, from the predefined Divi landing page template, change the content of the H2 header to “Listings Categories”.
Remove the text module under the heading (gold font) or change the content to your own, I will leave the Lorem Ipsum fragments to make the website design more interesting.
Delete the two-column row with photos and text, then add a new row with a code module. When adding, click ‘Add Shortcode’ in the same manner as you did for the search form.
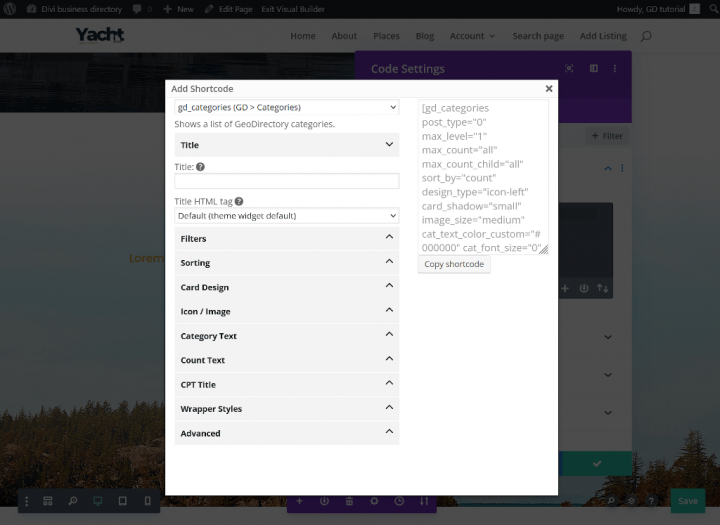
Select “gd_categories “(GD > Categories)” from the drop-down list.
The options I changed in the shortcode generator to achieve the appearance of the category columns as shown below:
Filters tab:
Max cats to show per CPT: 3
Mark: Hide Empty
Card Design Tab:
Design Type: Image Background
Row positioning: Center
Card shadow: Large
Icon / Image Tab:
Mark: Use category image
Image size: Large
You can also copy the shortcode below and paste it into the code module.
Generated shortcode:
[gd_categories post_type="0" hide_empty="1" max_level="1" max_count="3" max_count_child="all" sort_by="count" design_type="image" row_positioning="center" card_shadow="large" use_image="1" image_size="large" cat_text_color_custom="#000000" cat_font_size="0" badge_text_color_custom="#000000" badge_color="light" badge_font_size="0" title_tag="h4" mb="3"]

You can set the image to a category by editing the category from wp-admin -> places -> Place Categories.
Each category has an option to set a default image.
I also changed the category names to match the niche I chose for this tutorial.
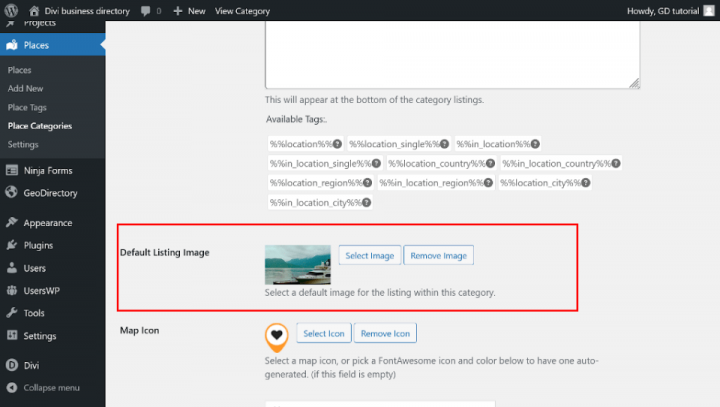
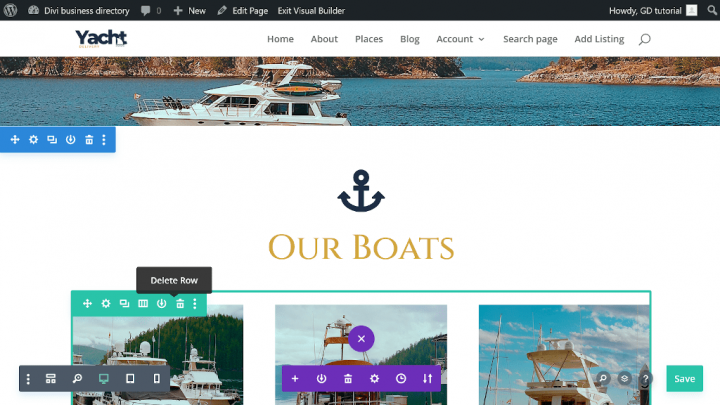
We will use the next section to show the latest entries.
Change Our boats heading to the Latest Yacht providers. Delete the row after the heading and add a new section with Divi code module.
Similarly to the search form and categories, we need to generate a shortcode that will show the latest listings.
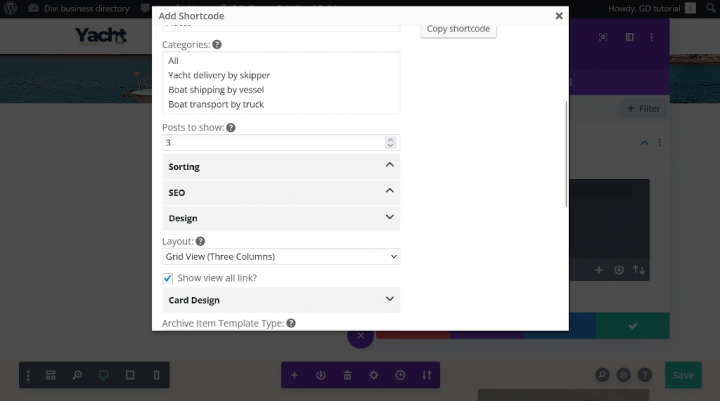
Select “gd_listings “(GD > Listings)” from the drop-down list.
The options I changed in the shortcode generator to achieve the appearance as shown below:
Filters tab:
Posts to show: 3
Design Tab:
Layout: Grid View (three Columns)
You can also copy the shortcode below and paste it into the code module.
Generated shortcode:[gd_listings post_type=”gd_place” post_limit=”3″ add_location_filter=”1″ sort_by=”az” title_tag=”h3″ layout=”3″ view_all_link=”1″ bottom_pagination=”1″ slide_interval=”5″ mb=”3″]
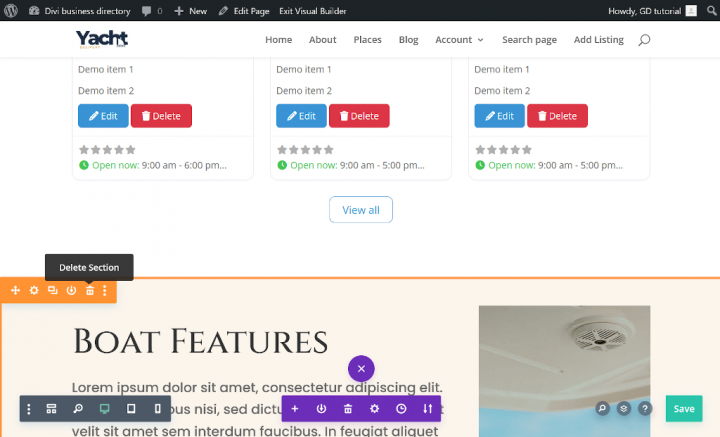
This section will not be needed, so delete it.
The next section will serve as our CTA section. Change the text to “Do you provide Yacht Delivery services?” In the design tab of the text module, change the size of the h2 header to 60px.
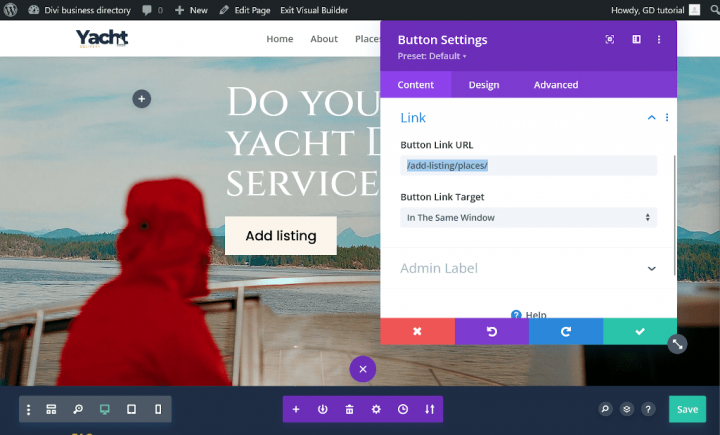
Edit button module text to add listing and set link to “/add-listing/places/”.
You can remove the next “FAQ” section, but I won’t, to make the project look more interesting.
I recommend populating the FAQ section with content related to the niche for which you are creating a business directory.
The more thematic content, the better for optimizing your website in search engines.
Similarly, with the next section, I will remove it in this guide, but you can use it to optimize your website for search engines.
I won’t remove the reviews section for a better homepage design. You can do as you wish.
Create Global footer
The homepage of the Divi Directory website is complete. Now, let’s create a global footer for our site.
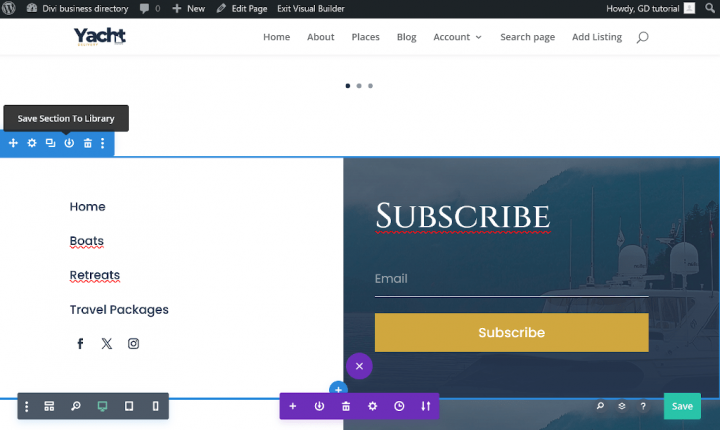
Click save Section to library icon, in the section name field, write “global-footer” and click save to library. After all, Save Your Homepage layout with the Save button In the lower-right corner of the screen.
Delete the section we saved in the Divi library and save the project again.
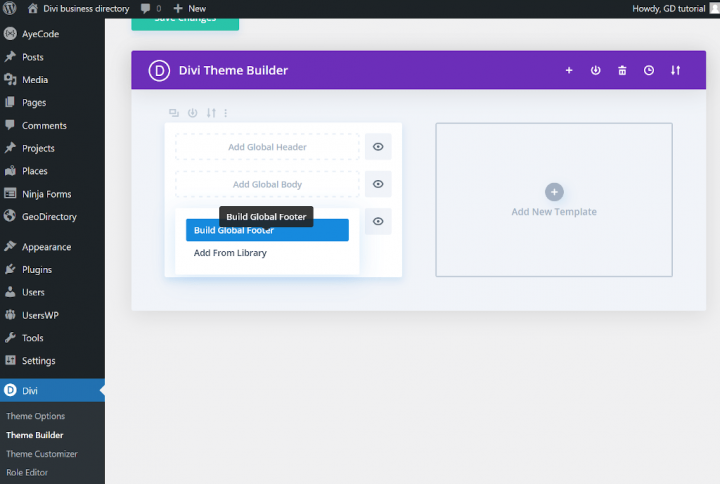
Go to the WordPress dashboard, then click on Divi > Theme Builder, click Add Global Footer and select Build Global Footer.
Insert a new section, click Add From Library, choose the section we created before and click Use This Section.
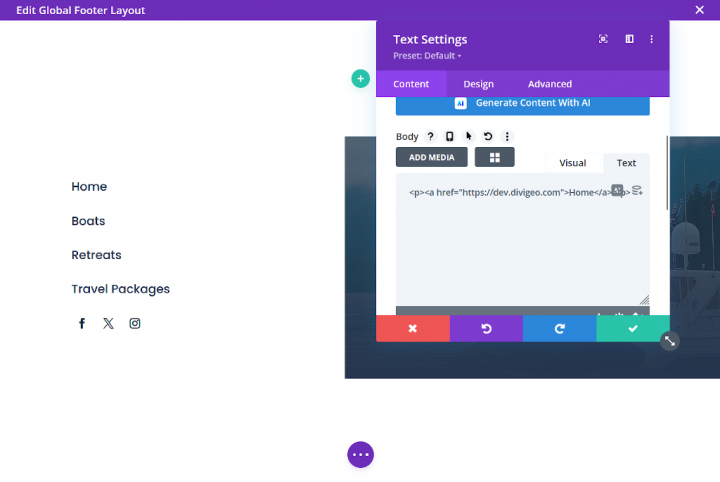
The global footer section is built with photo, four text modules and social icons modules.
Change the content and links of text modules. I will use text modules to re-present the categories of my business directory on the website for easier navigation.
Enter the appropriate links in the Social Media Follow module.
Delete the empty section and save the global footer, then click close in the upper-right corner of the screen.
Very important: when you return to the Divi theme Builder, click the Save Changes button.
The home page and global footer of the directory website are done.
Divi Directory Website Listings and Search page design
Now you need to design two pages that are essential for any directory.
The listings page (general archive, categories, tags), and the search results page.
GeoDirectory creates them by default, but in this tutorial, we will make minor changes to the default pages.
We have to add a map, as well as a Text Module with a dynamic title.
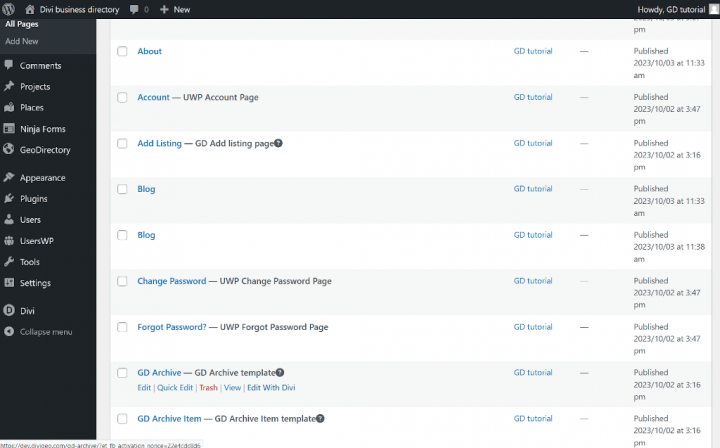
Go to the ‘All Pages’ tab in the WordPress dashboard, find the ‘GD Archive’ page, click ‘Edit With Divi’, and then edit the existing content.
Delete the text module, add the two code modules.
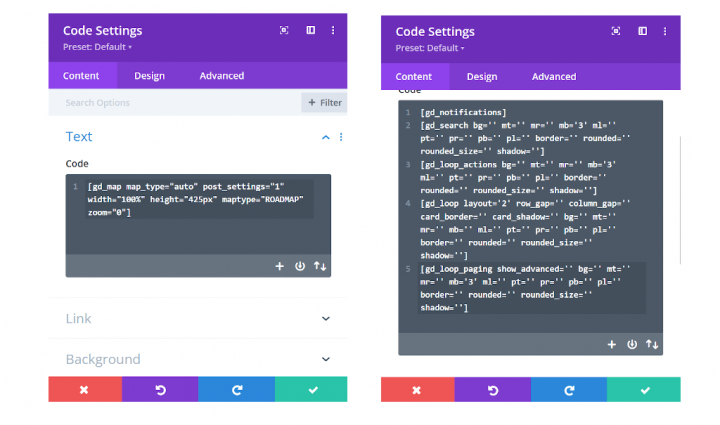
Now, use the shortcode generator in the same way you did for generating shortcodes for categories or recent listings.
From the dropdown list, select, copy and paste the following shortcodes in order:
GD > Map
GD > Notifications
GD > Search
GD > Loop Action
GD > Loop
GD > Loop paging
You can also paste the following shortcodes to code module.
In the first code module, we need to add the shortcode responsible for the map:
[gd_map map_type="auto" post_settings="1" width="100%" height="425px" maptype="ROADMAP" zoom="0"]
Second code module:
[gd_map map_type="auto" post_settings="1" width="100%" height="425px" maptype="ROADMAP" zoom="0"] <br>
[gd_notifications]
[gd_search bg=” mt=” mr=” mb=’3′ ml=” pt=” pr=” pb=” pl=” border=” rounded=” rounded_size=” shadow=”]
[gd_loop_actions bg=” mt=” mr=” mb=’3′ ml=” pt=” pr=” pb=” pl=” border=” rounded=” rounded_size=” shadow=”]
[gd_loop layout=’2′ row_gap=” column_gap=” card_border=” card_shadow=” bg=” mt=” mr=” mb=” ml=” pt=” pr=” pb=” pl=” border=” rounded=” rounded_size=” shadow=”]
[gd_loop_paging show_advanced=” bg=” mt=” mr=” mb=’3′ ml=” pt=” pr=” pb=” pl=” border=” rounded=” rounded_size=” shadow=”]
Now, above the Divi code modules section, we need to add a new section with a Divi Heading Module.
To display the title of the archive pages, we will use Divi’s built-in option for displaying dynamic content.
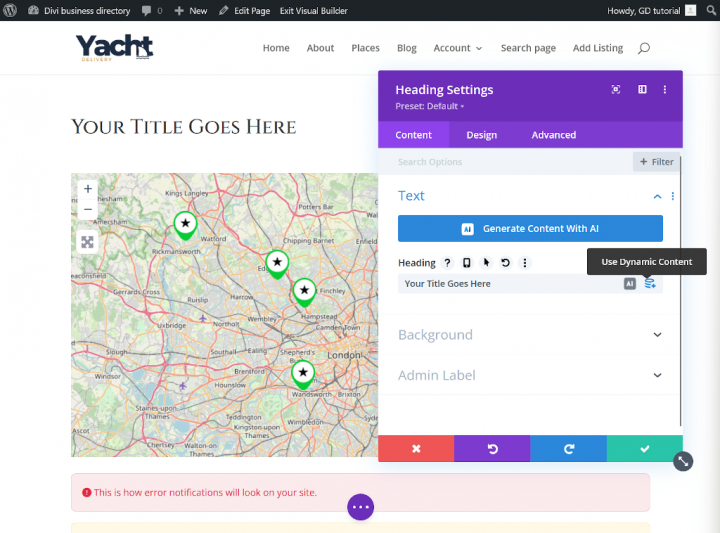
In the content tab, hover over the heading field and click Use Dynamic content on the right. Select Page/Archive Title from the drop-down list.
Click check mark and save Your GD Archive Divi layout.
Search page
For the search page, we repeat a similar process, but as with creating the footer, we will use the Divi Theme Builder.
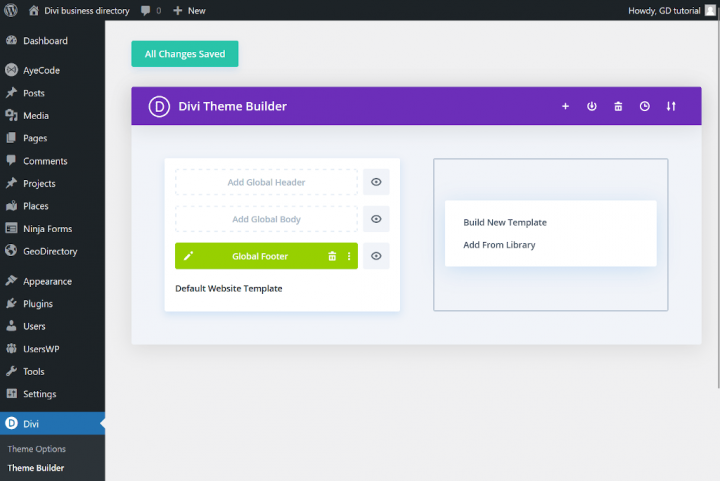
From the WordPress dashboard, navigate to Divi > Theme Builder. Click Add new template and then Build New Template.
You’ll see the Template settings. Under the Use on tab, find the Other section and select GD Search Results Page and click Create Template.
You’ll see a new Template responsible for the GD Search page.
Add Custom Body click Add from library in Your Existing page tab Click on GD Archive Layout and then use this Layout.
Click on the pencil icon and edit the Custom body. You do not have to do anything, just save Layout and save changes in Divi Builder Theme.
Just one more step and your directory website built with Divi will be fully functional.
Single listing page
A single listing page is responsible for displaying a single entry in your directory website.
Similar to the GD archive and Gd Search page, the page template was created by the GD install wizard.
Go to pages in Your WordPress dashboard and edit with Divi GD Details page.
Delete content and add two columns row as shown in the image below.
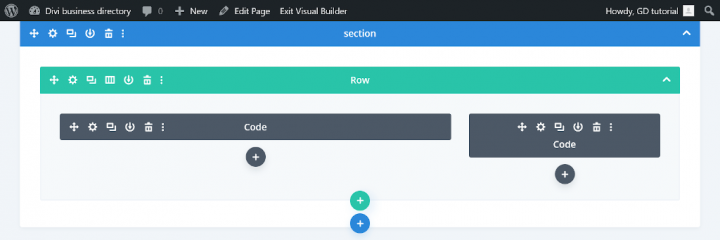
In the left code module, we will add shortcodes responsible for the post content and gallery.
In the right code module, we will add shortcodes that will be responsible for displaying post details such as phone number, address, social media links, and others.
You know how to use the shortcode generator, so generate, copy, and paste the following shortcodes. I have also prepared ready-to-copy shortcodes below.
Code module on the left
[gd_post_images title='' types='' fallback_types='' ajax_load='true' limit='' limit_show='' css_class='' type='slider' slideshow='true' controlnav='1' animation='slide' show_title='true' show_caption='true' image_size='' aspect='' cover='' link_to='' link_screenshot_to='' bg='' mt='' mr='' mb='' ml='' pt='' pr='' pb='' pl='' border='' rounded='' rounded_size='' shadow='' ]
[gd_single_taxonomies taxonomy=” prefix=” link_style=” link_color=” link_color_custom=” link_icon=’false’ mt=” mr=” mb=’2′ ml=” pt=” pr=” pb=” pl=” ]
[gd_single_tabs show_as_list=’false’ output=” tab_style=” disable_greedy=’false’ ]
[gd_single_next_prev bg=” mt=’4′ mr=” mb=’3′ ml=” pt=” pr=” pb=” pl=” border=” rounded=” rounded_size=” shadow=” ]
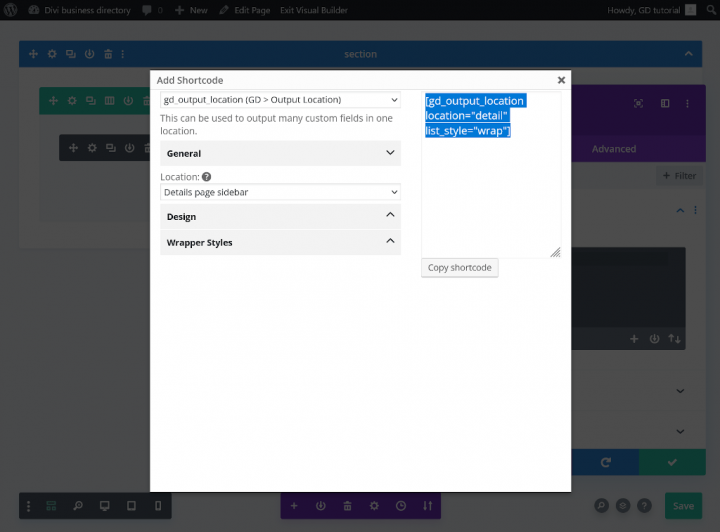
Code module on the right
[gd_output_location location="detail" list_style="wrap"]
Almost done!
Now, similar to when creating the GD archive page template, we need to add a Heading module that will be responsible for displaying the dynamic listing tittle.
Add a new Divi Heading module in the first column above the code module and set the Dynamic title as Page/Archive Title.
Click the check mark and save your layout. The single post page will look as follows.
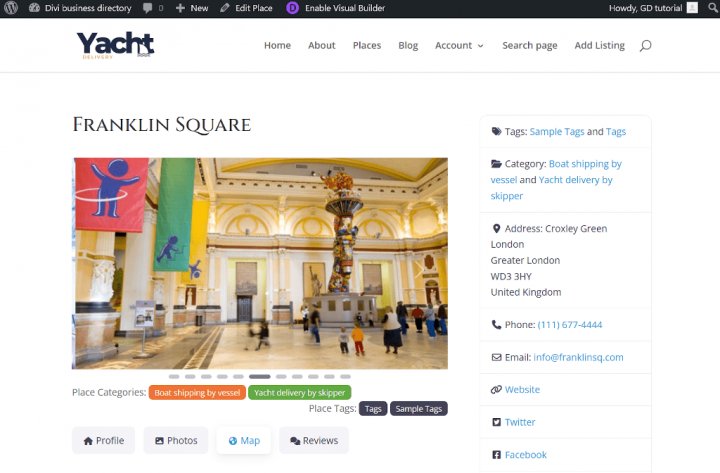
Fine-tuning your Divi directory site
Your Divi directory website is almost ready, now we have set some options, tune up Your website.
Colors and Typography
The main color I chose for this website is a shade of navy blue. Hex code: #1e2d44.
Go to Theme Customizer > General Settings > Layout settings and change Divi theme accent color to: #1e2d44.
Now we have to change GeoDirectory plugin primary color.
In the theme customizer, click on AyeCode UI and set the primary color to: #1e2d44.
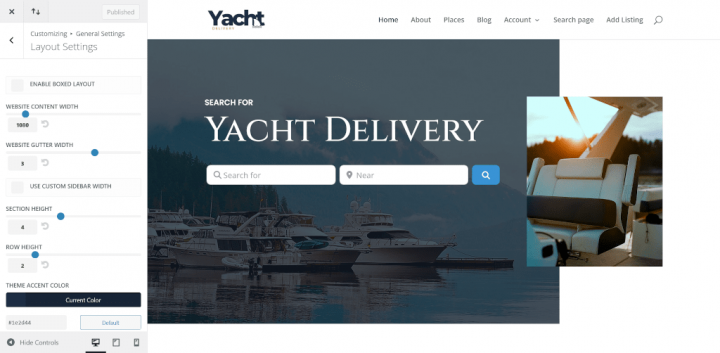
Now we need to set the global font. Go to Theme Customizer > General Settings > Typography and change the Header font to Cinzel.
As you can see, the font of the headers generated by WpGeodirectory did not change to the Cenzel font.
Go to the Additional CSS tab in the Theme customizer and paste the following CSS code.
h1, .h1, h2, .h2, h3, .h3, h4, .h4, h5, .h5, h6, .h6 {
  font-family: 'Cinzel', Georgia, "Times New Roman", serif!important;
}
Change BootStrap Version
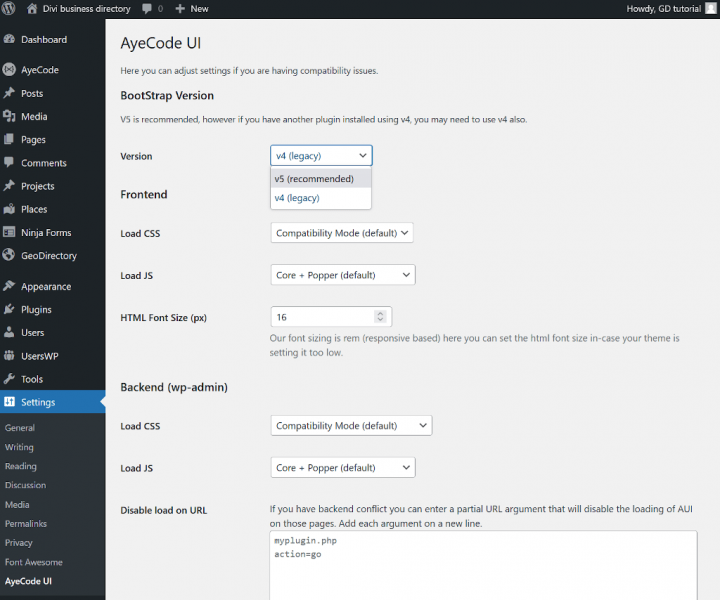
In the WordPress dashboard, click on Settings and AyeCode UI and change Version to BootStrap V5 and save.
Your Divi Directory website is done.
Maximize Your Divi Directory Potential with DiviGeo
This is a simple method to build a directory with GeoDirectory and Divi.
If you prefer not to tackle this project alone, or require something more sophisticated, don’t hesitate to reach out to me.
Visit my website, consider purchasing one of my pre-designed Divi Business GeoDirectory child theme DiviGeo, or hire me to create a unique website tailor-made for your needs.
Adding premium features to your Divi Directory Website
If you wish, now you can add premium features to your directory, such as:
- Paid Listings: with the GeoDirectory Listing Price Manager add-on, you can set prices for listing submission. For each price tier, you can enable/disable features such as: Restricting the number of pictures for free listings while allowing more pictures for paid listings. Allowing more or fewer tags and categories. Enabling or disabling specific custom fields. Submitting longer or shorter descriptions.
- Claim Listings: This is a fundamental feature for a directory, where the admin creates the database and invites business owners to take control of their free listings. The claim listing process may include forcing an upgrade to a paid listing to take over the listing’s ownership.
- Advertising: selling ads is another form of monetizing an online directory. If you have a lot of traffic, you can use Ads networks. Otherwise, you may sell ads directly, allowing businesses to add banners in specific areas of your website or allowing for listings to appear as ads, for example, on top of organic search results.
These are just three examples. However, a directory website offers many ways to make money online.
You can create a global marketplace of handcrafted items, or sell event tickets, or sell discount coupons.
Gain insights into the building process with these tips: Building a directory website: Tips and tricks.
The possibilities are Extensive.
How to Create a Directory Website with OceanWP?
Here’s a step-by-step guide to building a Directory Website using the OceanWP theme:
- Install the OceanWP theme
- Install and setup GeoDirectory
- Install the Spectra Gutenberg Blocks Plugin
- Design the Directory Website using the OceanWP theme and the Gutenberg Editor
OceanWP Theme in combination with the GeoDirectory Plugin and a Gutenberg Blocks Plugin, offers a robust and flexible solution for crafting a dynamic online directory.
This trio allows users to seamlessly integrate location-based features, customize layout designs, and incorporate interactive content blocks, ensuring an intuitive and engaging user experience.
With this integrated approach, web developers and designers can easily achieve a professional-grade directory site tailored to specific niche markets or broader community needs.
Let’s see how we can do that in detail.
In this tutorial, we will:
Installing Theme and Plugins.
1. Install the OceanWP Theme
We need to install a Theme, and for this tutorial, you will install the OceanWP Theme.
Go to Appearance >> Themes
Select Add New, Install, and Activate the OceanWP Theme.
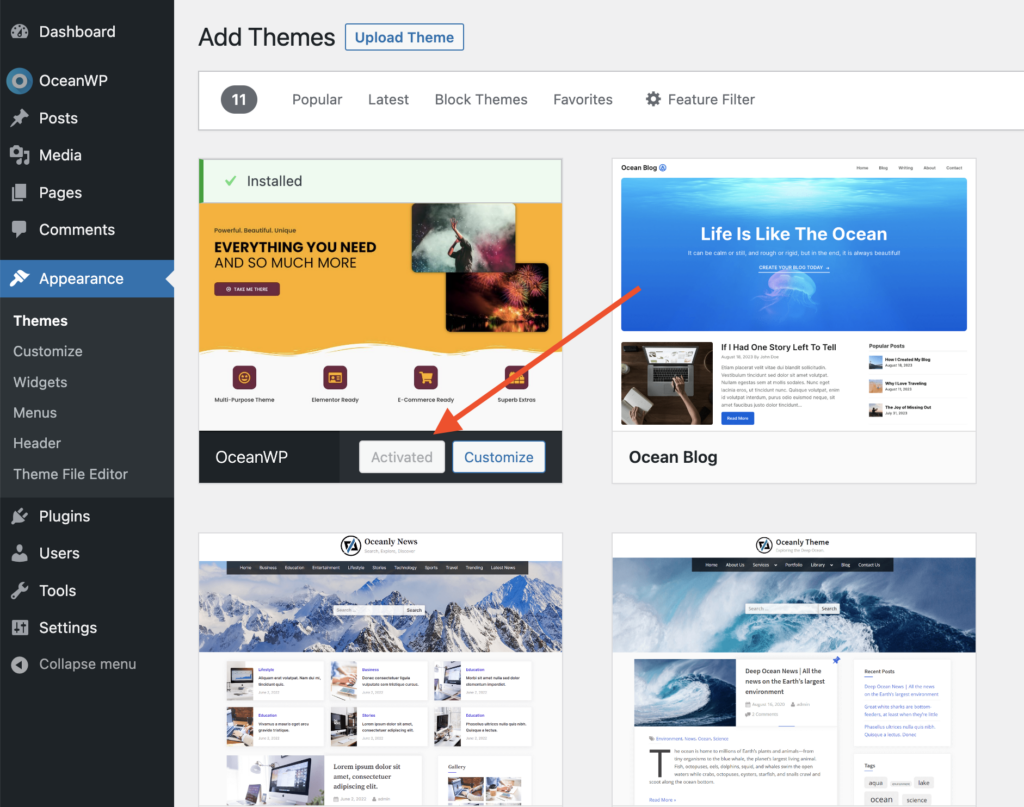
2. Install Spectra Blocks plugin
The default Gutenberg plugin is not enough to style a template so we will install the Spectra Blocks plugin. (check out this tutorial if you want to create a directory website with the Astra Theme and the Spectra Plugin instead)
This plugin provides customized Gutenberg blocks which are better than the default blocks and will help you design the page templates.
Go to Plugins >> Add new.
Search for Spectra Blocks. Install it and Activate it.
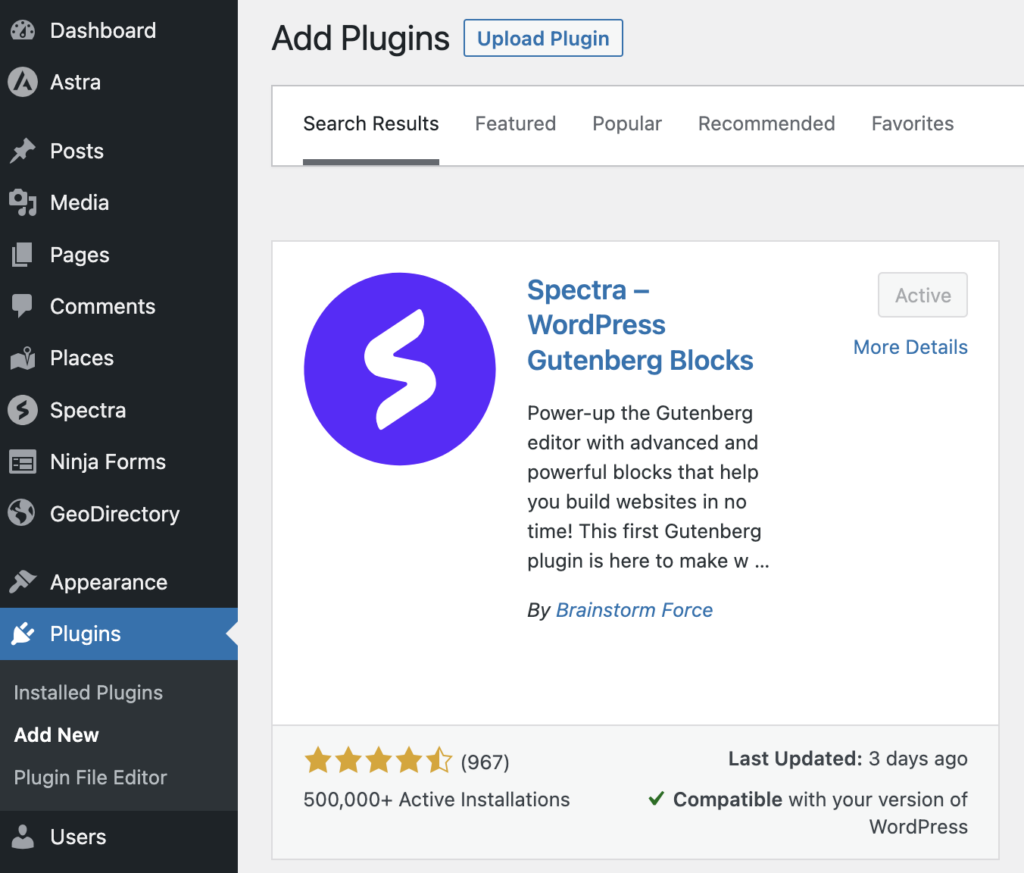
You can Skip all steps of the Setup Wizard.
3. Install GeoDirectory
Finally, you need to install GeoDirectory.
Go to Plugins >> Add new, search GeoDirectory. Please install and activate it, and we finished installing the plugins.
4. GeoDirectory Install Wizard
For GeoDirectory, you will need to complete the Setup Wizard to configure the Google Maps API key and import a few dummy listings.
Choosing the Map System (Google Maps or OpenStreetMap)
You can choose between two mapping systems on the wizard’s first step. Google Maps and Open Street Maps (which doesn’t require an API key).
In this tutorial, we select OpenStreetMaps.
In case you wish to select Google Maps, do the following extra steps.
Click on the Generate Key button and follow the steps of this doc to generate a valid API key.
The essential steps are:
- Enable the Keys.
- Create or select an existing project.
- Get the Key.
- Activate a billing account.
- Restrict the API key (so it can only be used from the URL of your website)
About point four: it is a requirement. However, you only get charged if you pass the threshold, which is $200/month.
This free credit is more than enough for 99% of directories.
Setting the default city
After that, you will set the default location. This is the city for which the directory is created.
We will set New York as the default city.
You can use whatever location you need.
If you need to add listings to more than one city, you will need the Location Manager add-on.
Adding extra features
In this step, we will install our UsersWP, a user login plugin that lets users register and log into your website.
This is needed to allow users to add and edit their listings. It will also create user profiles where they can find their listings, reviews, and so on.
We will also install Ninja Forms so that all listings have a contact form that sends emails directly to the listing owners.
AyeCode Connect is not mandatory for this tutorial. It is mainly needed if you want to add GeoDirectory premium add-ons and install them directly from the WordPress Dashboard.
Adding Dummy Data
The last step to complete the installation wizard is adding some dummy listings. This will also add listing categories that you can edit later according to your needs.
You will not add sidebar widgets and menu items right now, as we will do that later.
Design the OceanWP Directory Website
Now that we installed the theme and the plugins and done the preliminary setup of GeoDirectory, we can start designing our Directory Website with the OceanWP Theme.
1. OceanWP Directory Website Home Page design
You can create a new page or use one WordPress creates by default, like the Sample Page.
Go to Pages, edit the Sample page, and rename it Home or create a new page for this.
Next, go to Appearance > Customize > Homepage Settings and select your Home.
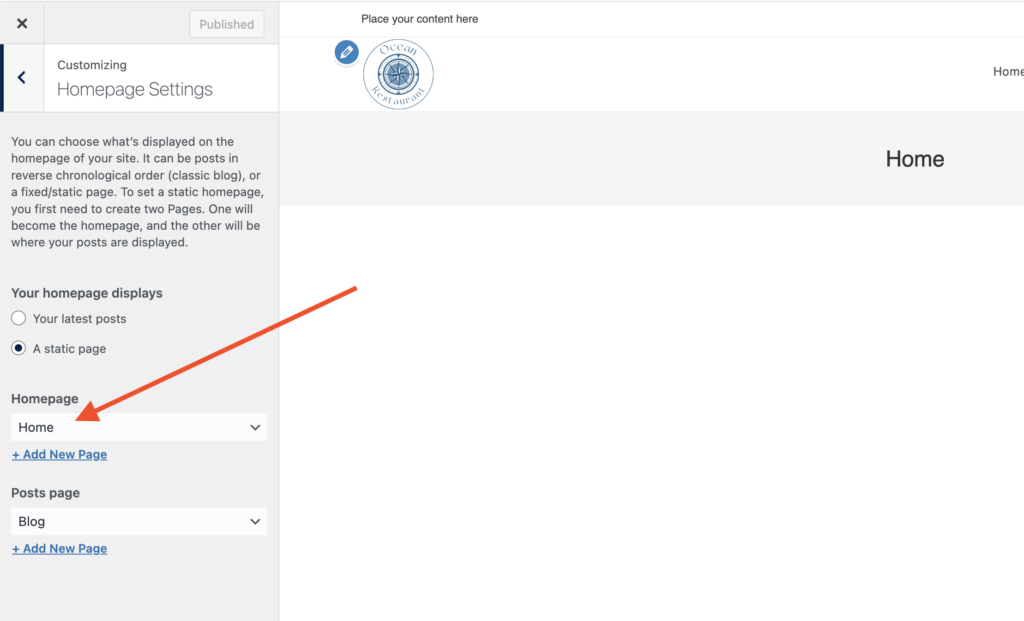
The Logo
First thing first, we will need a logo for our website.
You don’t need to invest in a designer to sketch the 1st version of your logo.
One of the biggest mistakes you can make when starting a new directory is investing too much time and money before testing the product market fit.
You can design a logo in five minutes with an app like Canva, which is cheap and surprisingly good.
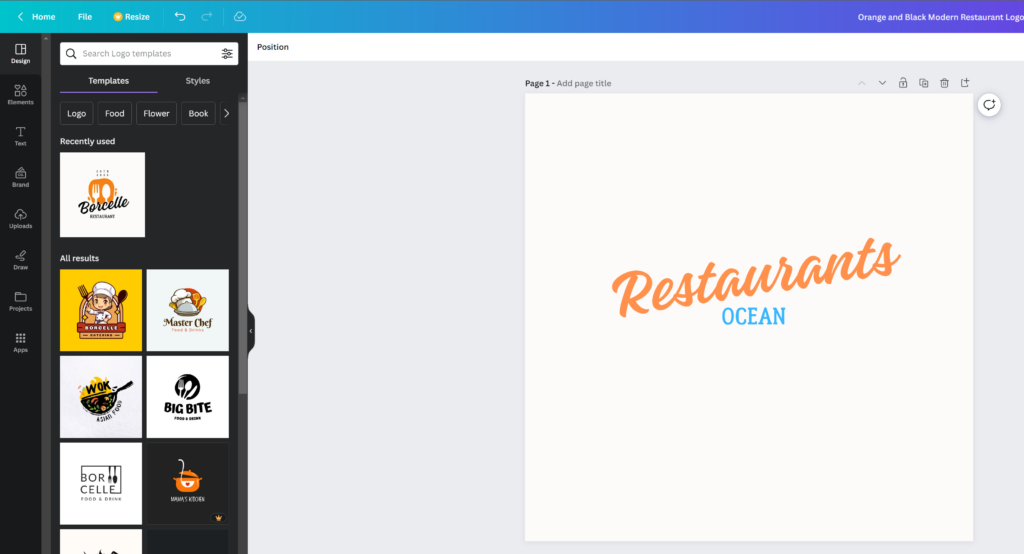
For an initial MVP (minimum viable product), a logo crafted using Canva is adequate.
Canva offers a plethora of logo templates, and it’s okay if your first logo doesn’t epitomize perfection or originality.
As your project gains momentum, you always have the option to refine or completely revamp your logo.
Remember, a project’s success isn’t determined by the perfection of its logo.
Now go to Appearance > Customize > Header > Logo, click Select Logo, and upload your PNG file. Skip cropping (or crop the image as needed) and click publish, You can also set the logo max height and width if your logo is bigger in size.
The Navigation Menu
After creating and adding the logo, go to Appearance > Menus, and create your menu.
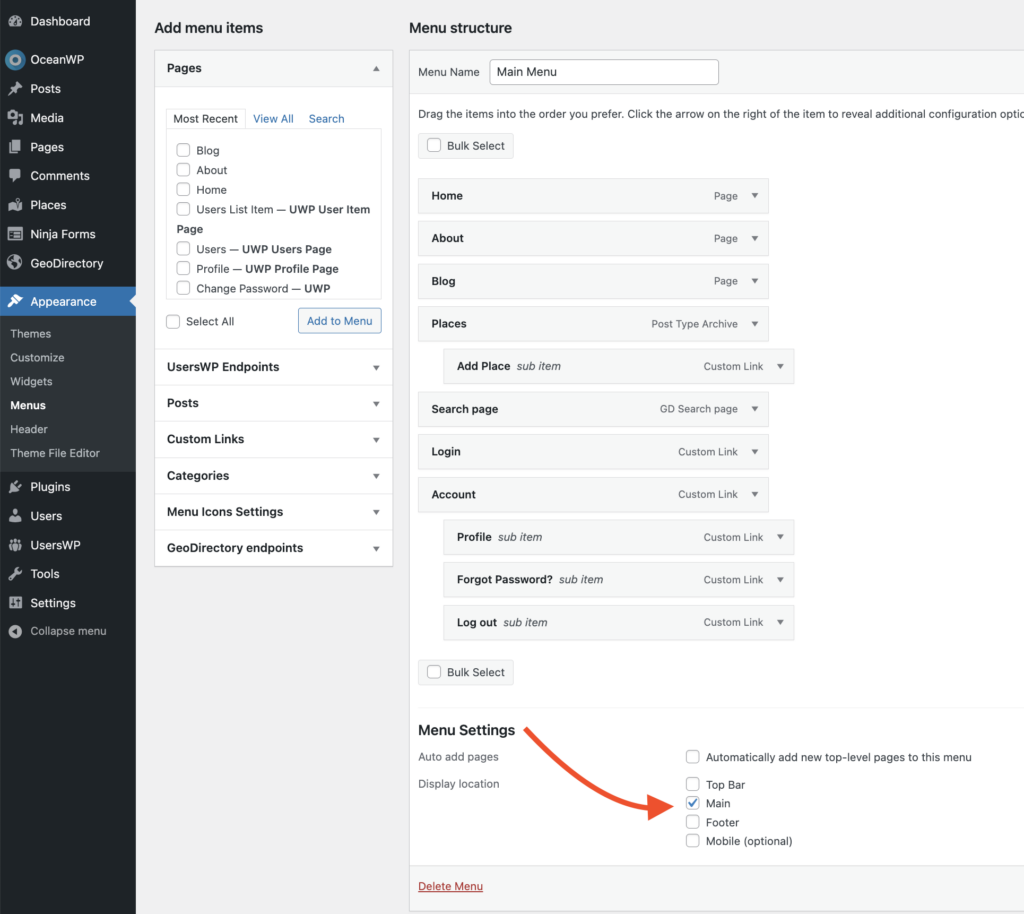
Add the links needed (from the left column to the right column) and save. In the Menu Settings > Display location section, you can check the “Main” option.
If you want, you can make the same menu appear on the footer or create another menu to appear there.
In this example, we’ll only have the header navigation menu.
We added seven main navigation links and a few sub-navigation links:
- Home
- About
- Blog
- Places and add places
- Search Page
- Login
- Account > Profile > Forgot Password > Logout
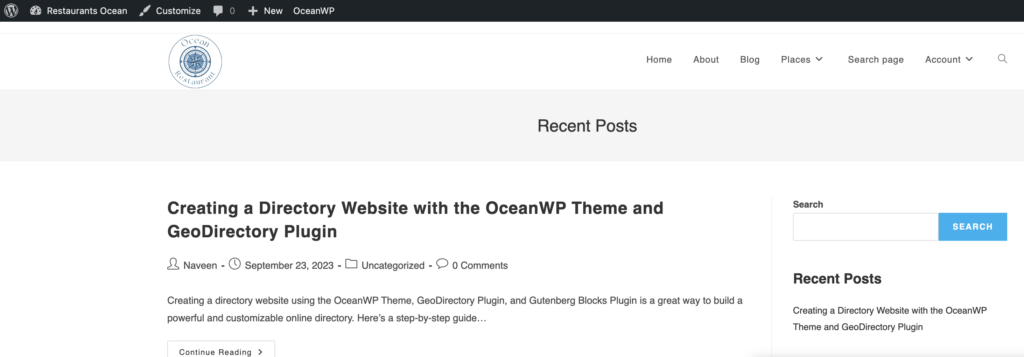
The Login link (from UsersWP Endpoints) will only appear for Logged-out users, while the log-out, account and profile links will only appear for logged-in users.
The Typography
Now let’s define the Typography for the website text font and size. I am setting a global Font Family, Font Weight, and Font Size that will be applied to all site text.
we will go to the Appearance > Customiser > Typography > Body. we will set the Font Family: Red Hat Text and Font Weight: Normal: 400
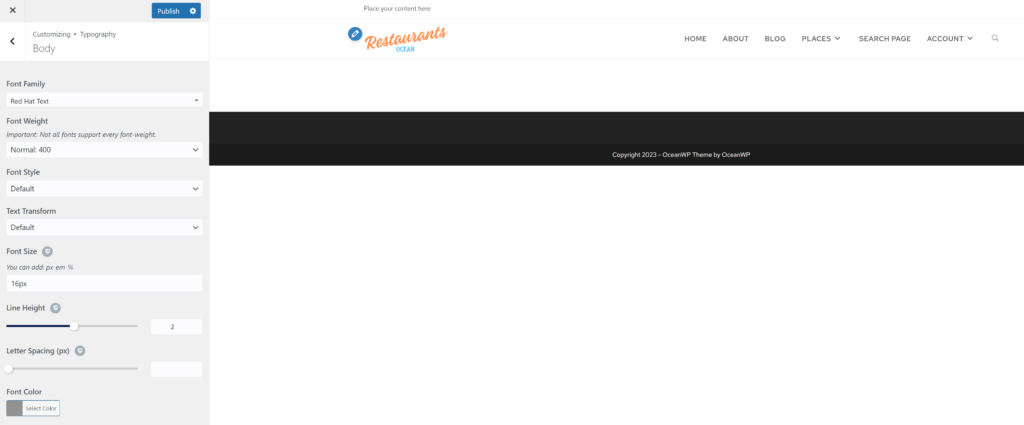
and in the Appearance > Customiser > Typography > main menu settings. we will set Font Weight: Medium 500, Font Size: 13px
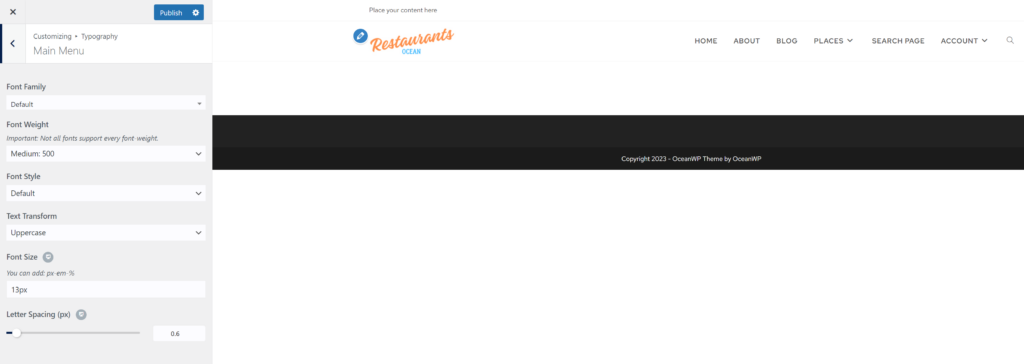
Now we will go to the Appearance > Customiser > General Options > General Styling Primary Color: #ff914d and Hover Primary Color: #ff731c
The Content
I will start building this page from scratch using the Spactra Blocks plugin.
we need a hero header on the homepage for that let’s add a container block provided by the spectra blocks plugin.
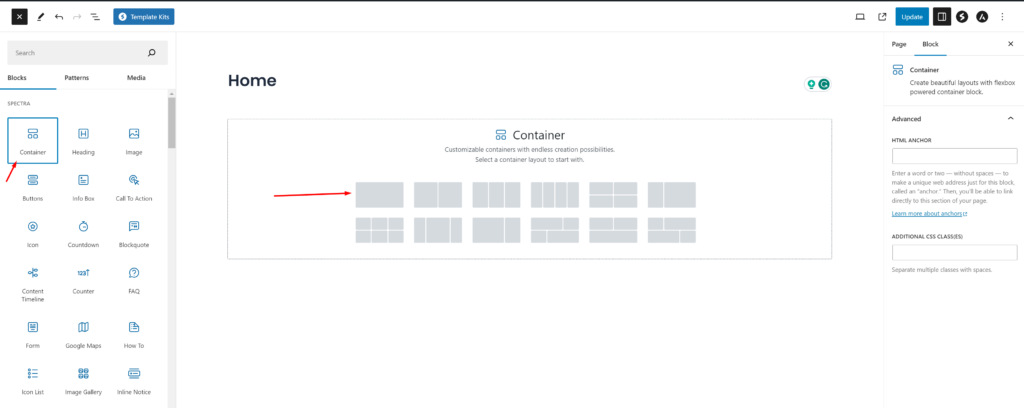
Next, click Style from the top tabs. Select > Type Images as the Background Type.
For the Hero Section, we need an image and we will download a free image from Pexels.com (Thanks, @Kelly).
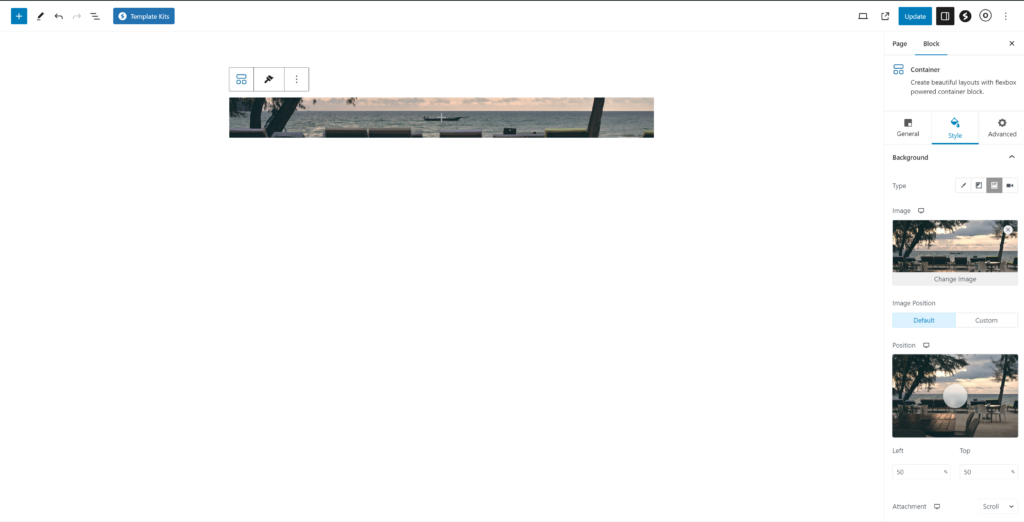
Click on the added section and select Full Width in the Content Width option as mentioned in the below screenshot.
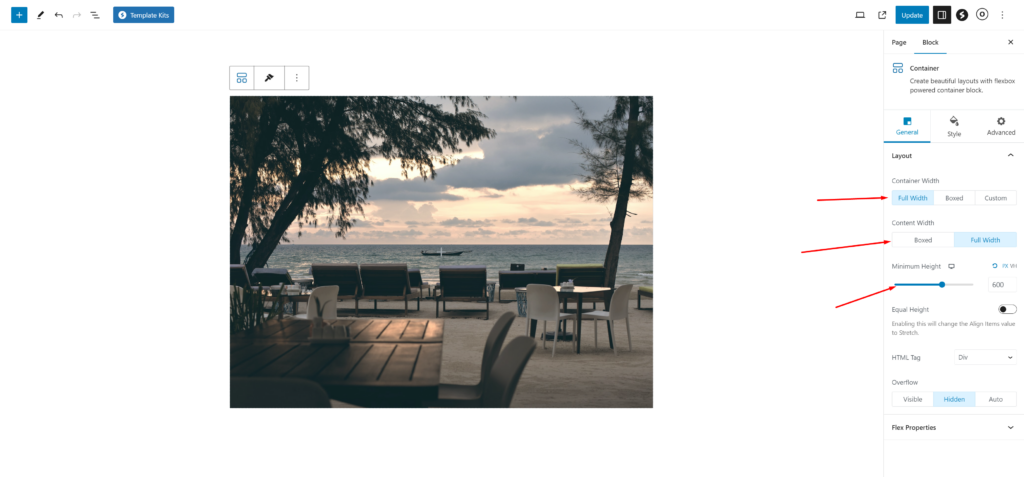
From the style tab of the container block setting select Repeat to No Repeat and Size to Cover.

Drag and Drop a Heading Element inside the Hero Image.
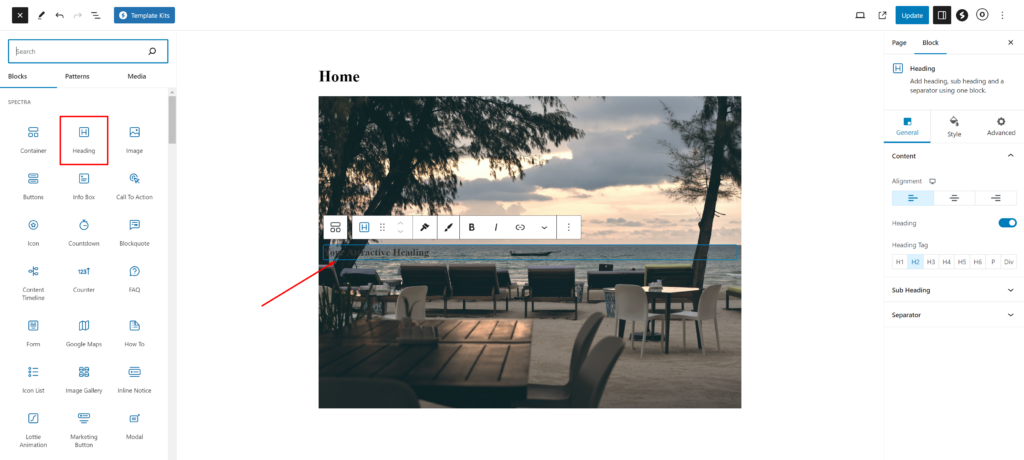
It’s time to give a title to our Homepage Hero Image.
From the Style tab, change the text color to white (#FFFFFF) to improve the contrast and readability.
In this tutorial, I will use something simple like “Find the Best Restaurants in New York” You can add whatever slogan you want here.

Don’t forget to center the text using the alignment option.
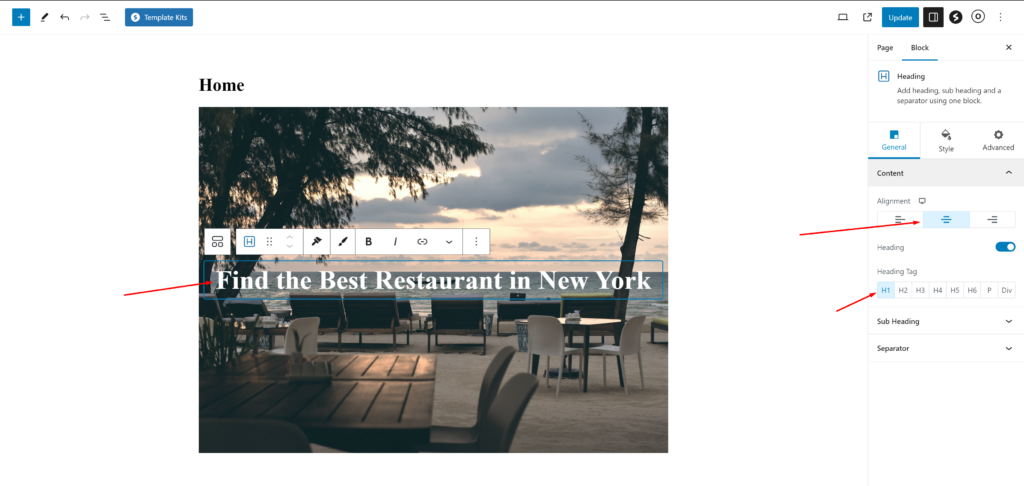
In order to add GD search on the homepage header, Drag the GD > Search block inside the hero container.
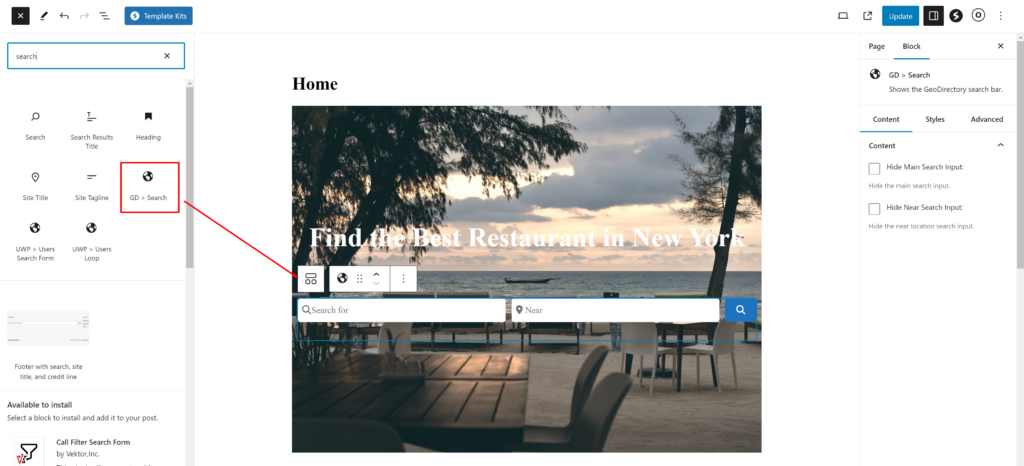
Next, add some minimum height to this hero container. I will set it to 650 x 600 px in width and height and also make the container width: Boxed and content width: Boxed.
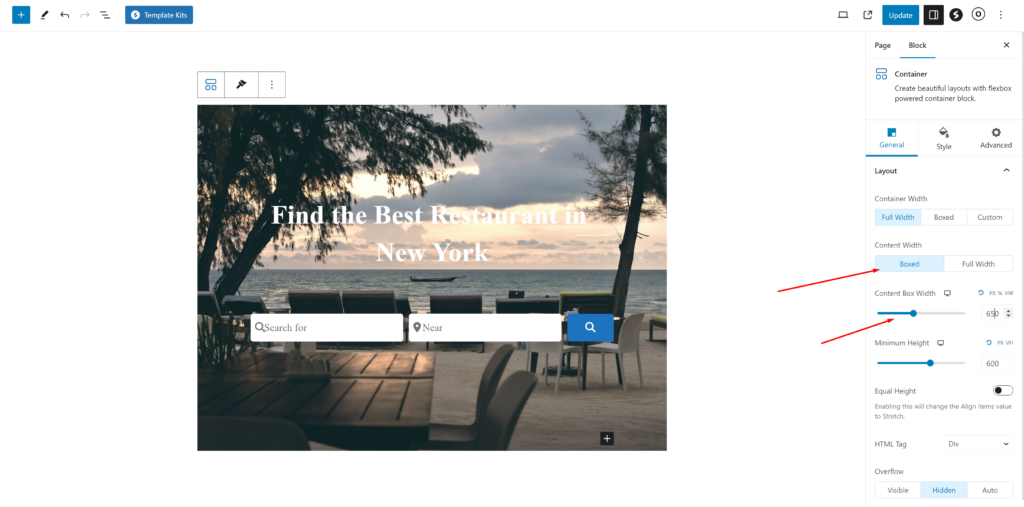
it’s time to remove this page title and extra space in the header section.
Click on the O icon on the right top of the page, just click on it. Inside that check General section set padding: disabled and inside Title selection Title: disabled
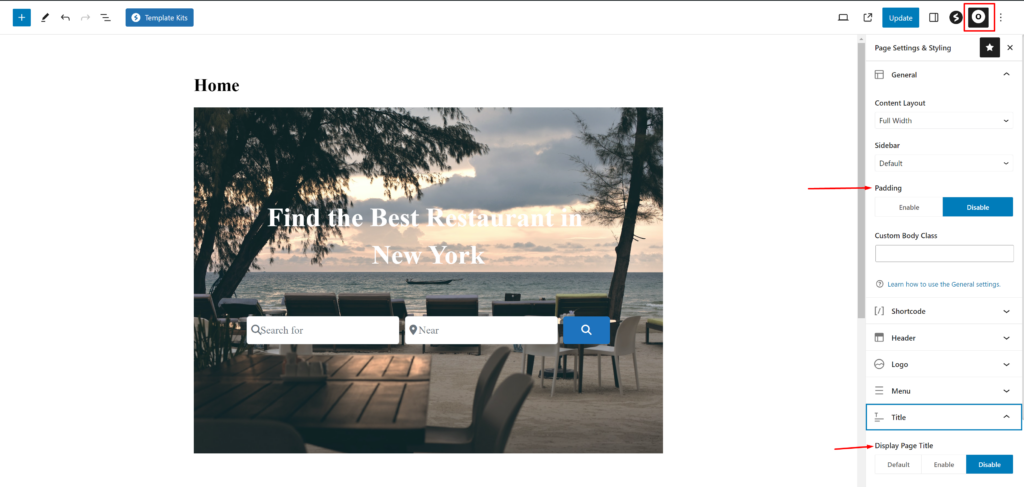
It’s time to add a few more required sections on the homepage, I will add a recent listings section now.
Below the hero section, add one more container by clicking on the plus icon and add the GD > Listings blocks there.
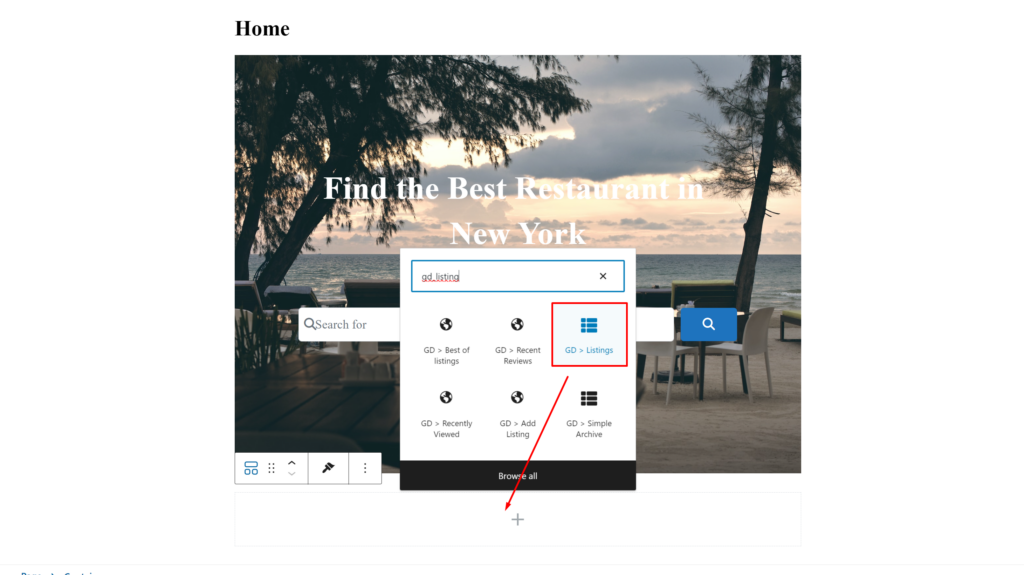
Now we will do some needed settings in this GD > Listings block. we will set sorting: recent
Now we will add a CTA to attract business owners to add their businesses. we will add an empty container and in the style setting.
let’s set a background.
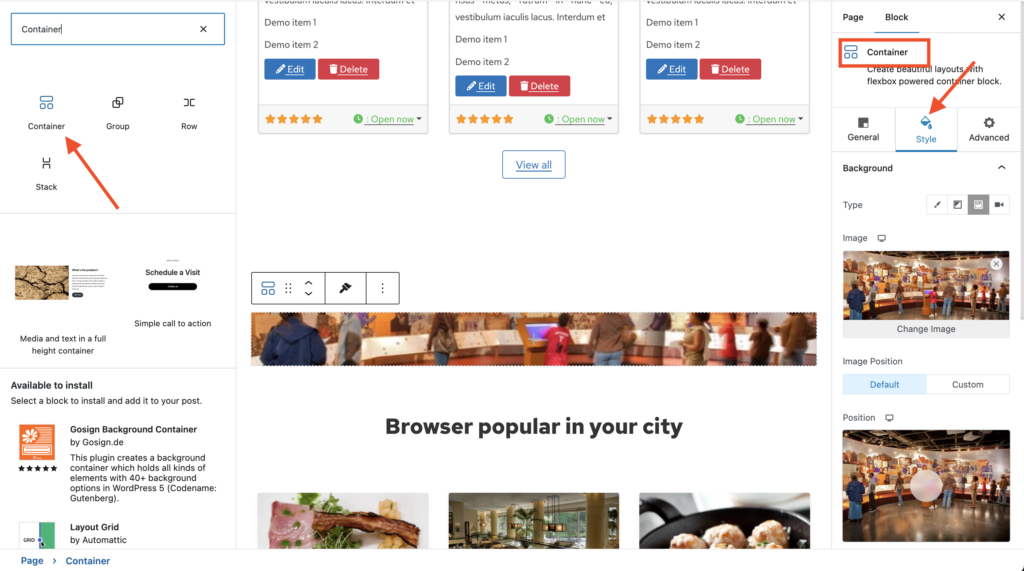
Now Let’s add the container styles:
Overlay Type: Color
Image Overlay Color: #FF6900
Overlay Opacity: 0.3
Container Width: Full Width
Content Width: Boxed
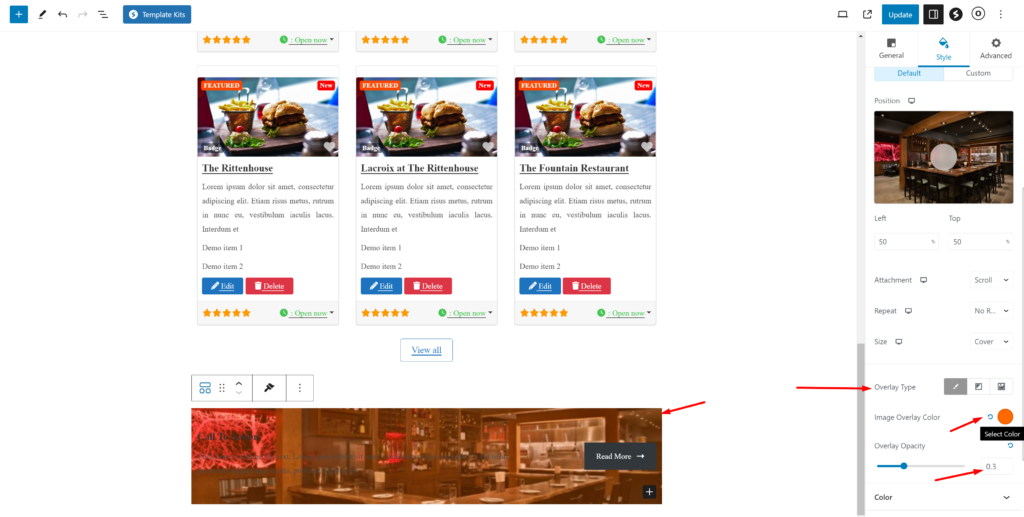
Now we will also add a Call To Action block provided by spectra inside this container.
Typography for the CTA section.
Color: #fffff
Font Size: 32px
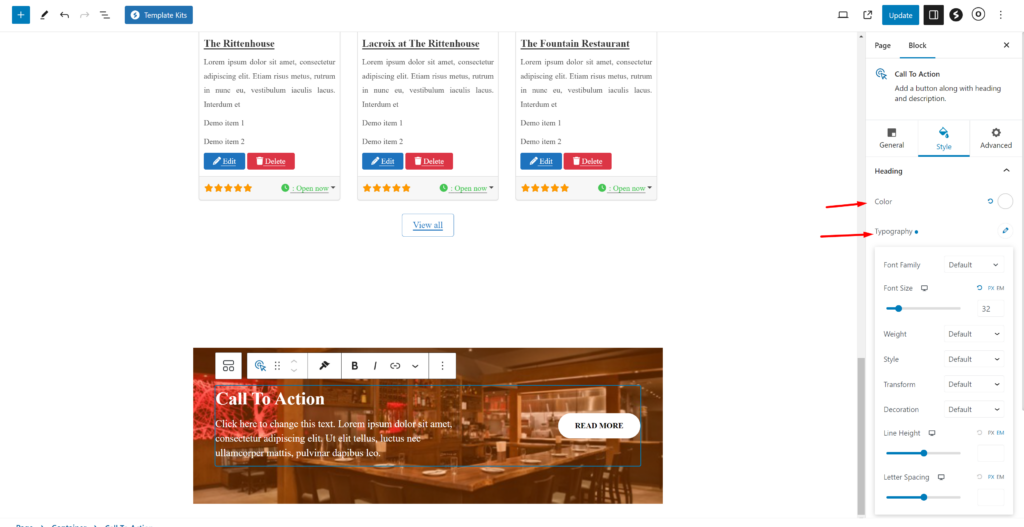
let’s add some style to the button.
Text Color: #000000
Background Color: #FFFFFF
Radius: 30px all sides
Padding: 10px, 30px, 10px, 30px
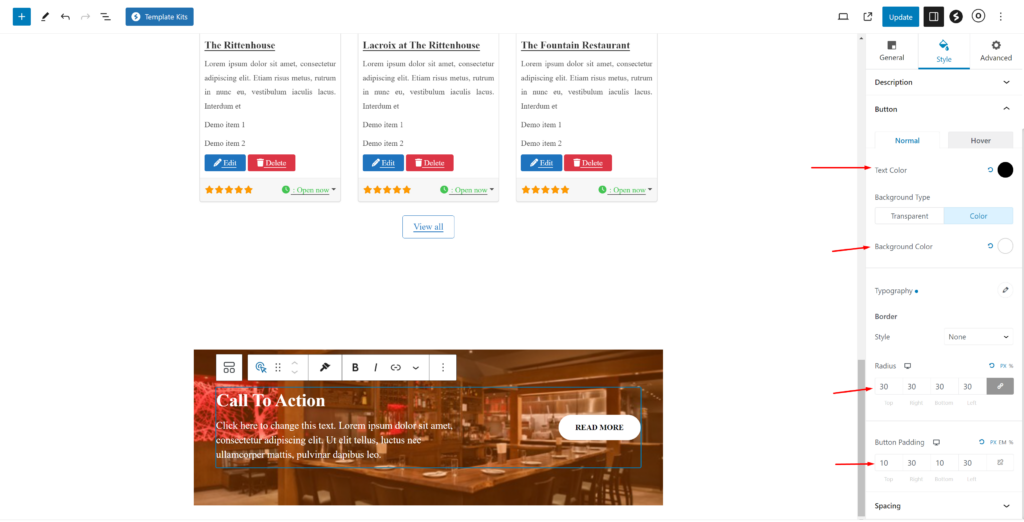
Let’s change the button text to Add Listing and the link to the Add Listing page link.
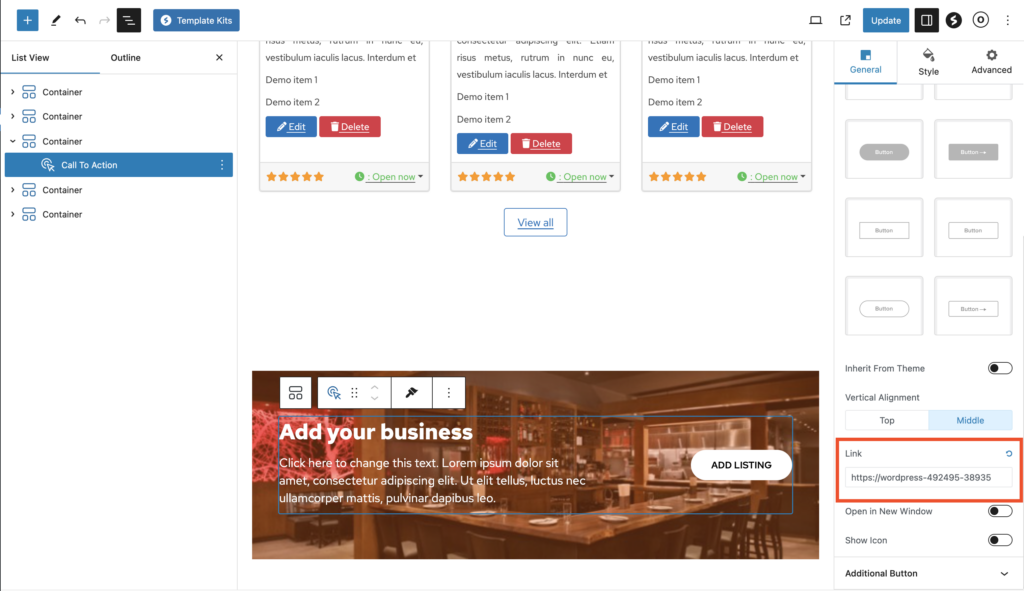
So now our CTA section is completed. we will add one more section the GD > Categories section below it.
Settings will be the following
Design type: Image Background
Row Items: 3
Enable Use Category Image
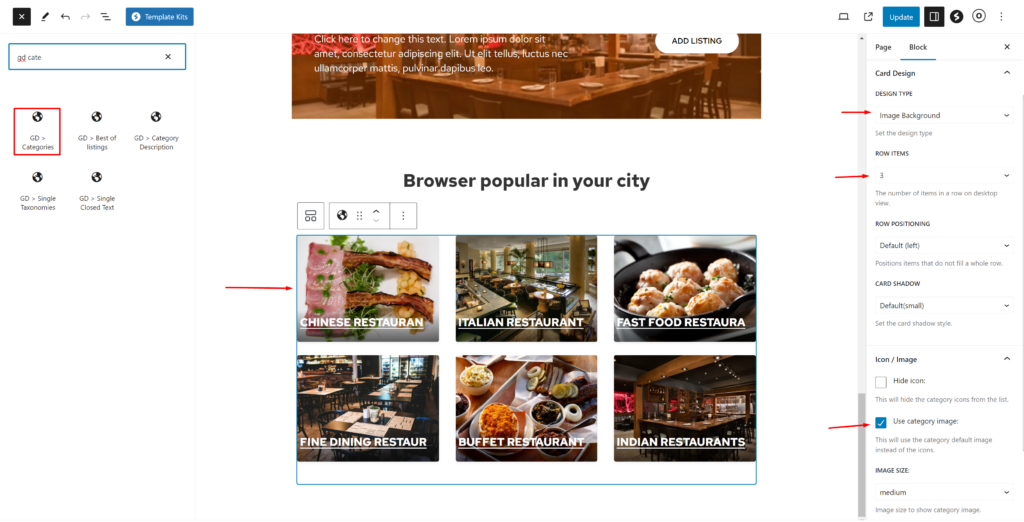
You can set the image to a category by editing the category from wp-admin -> places -> Place Categories.
Each category has an option to set a default image
There you go now let’s add the last section for social media link display. we will call it STAY IN TOUCH.
Add a new empty container with background #000000.
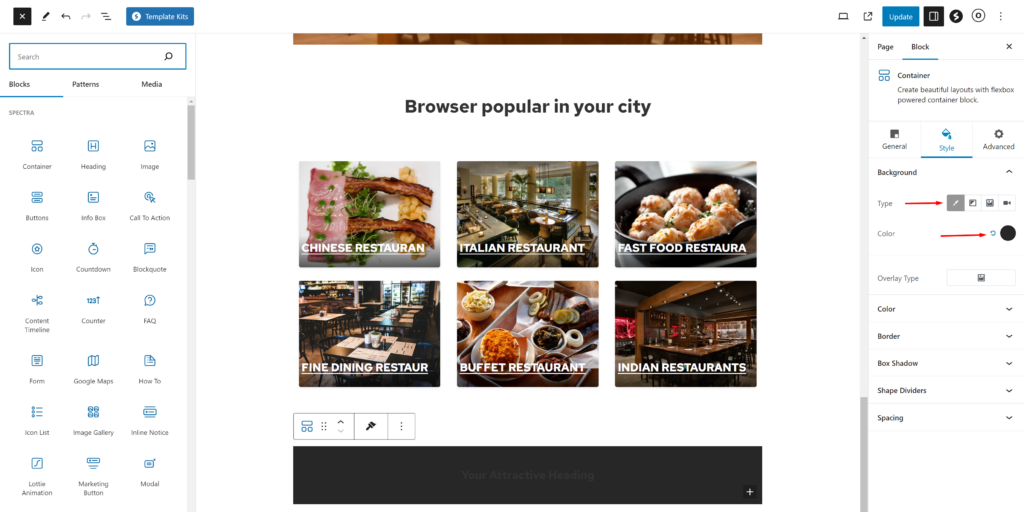
Now we will add a heading in this container with Alignment: Center and Heading: H3
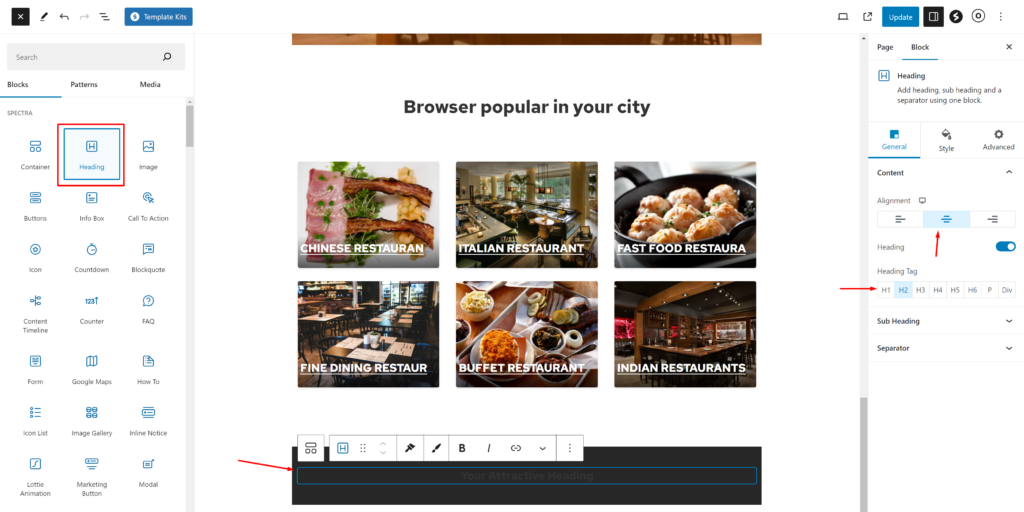
I will add the text “Stay in Touch”
Color: #ffffff
Font Size: 24px
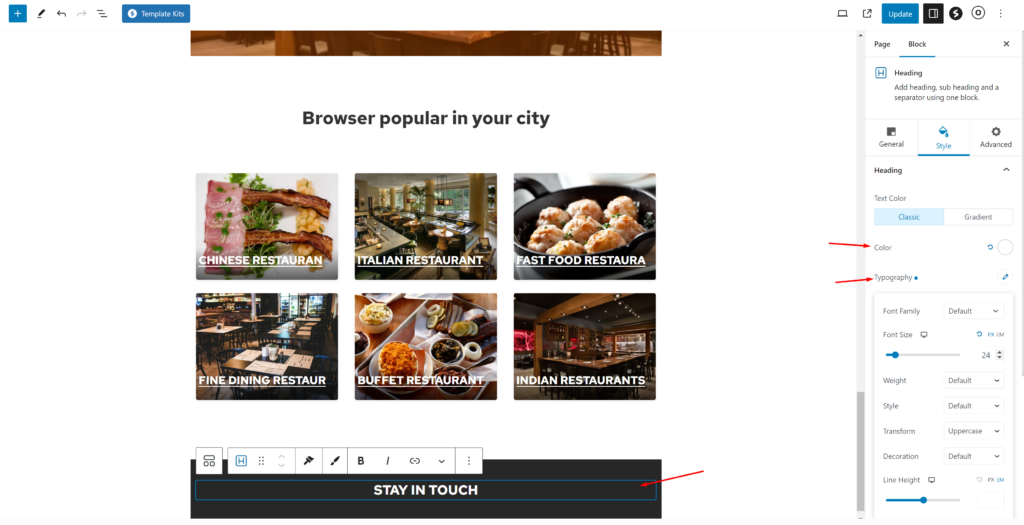
Let’s now add a paragraph below it to add some text.
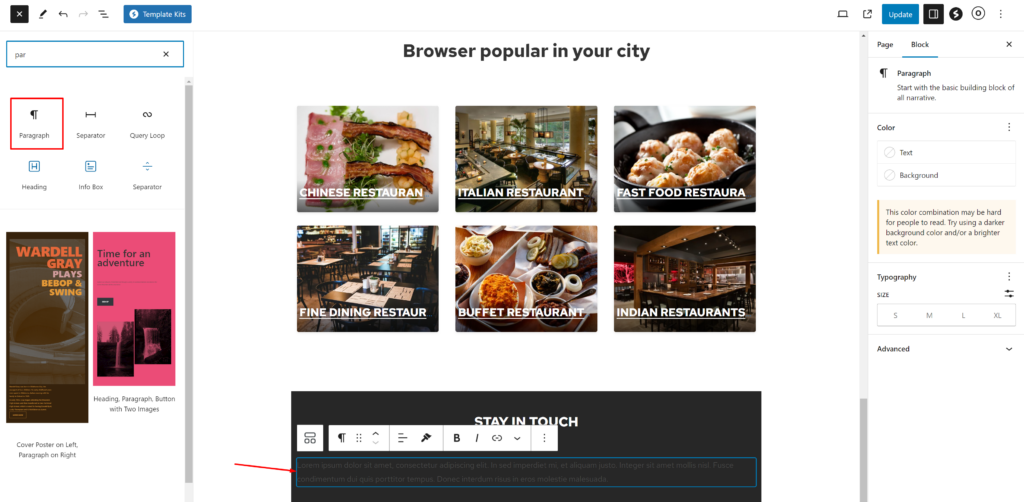
Add some style
Text Color: #ffffff
Size: Small
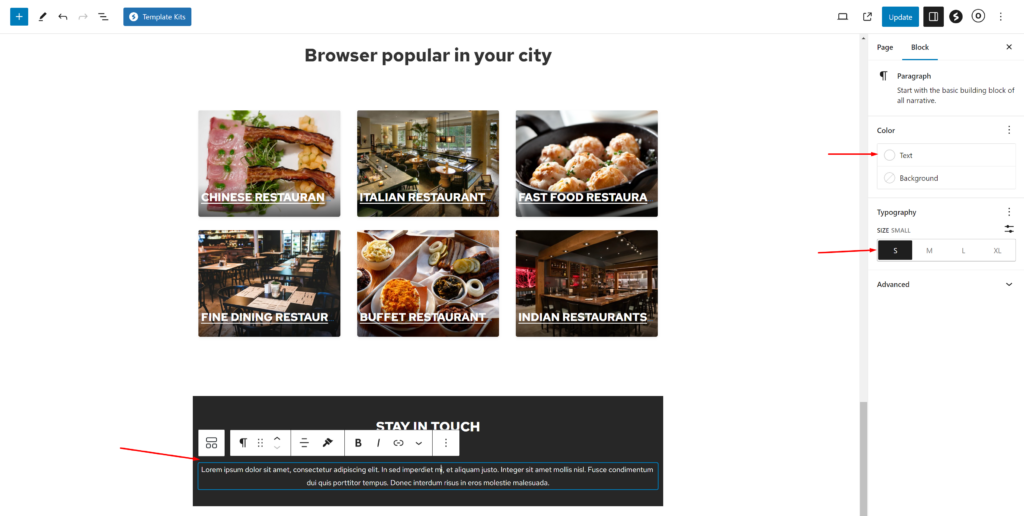
Now we will add the social icon block below it.
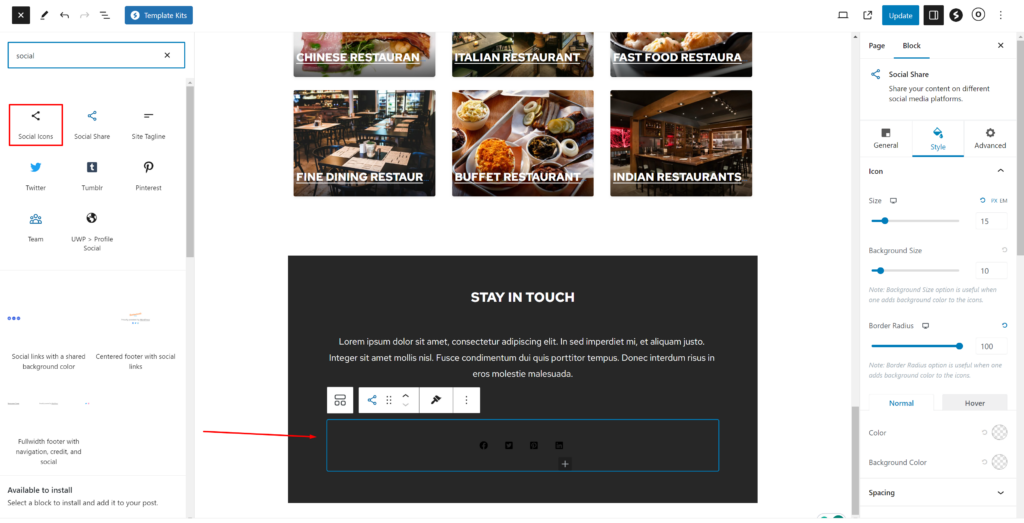
In this social icon block add the following style
Size: 15px
Background size: 10px
Border Radius: 100
Color: #ffffff

Congratulations! Your homepage is Completed.
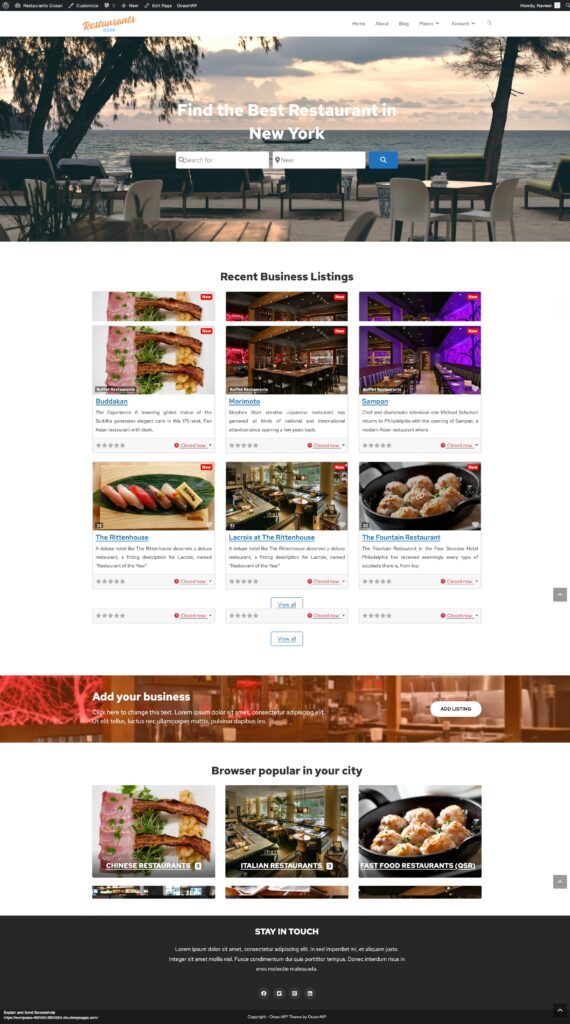
2. OceanWP Directory Website Listings and Search page design
Now you need to design two pages that are essential for any directory.
The listings page (general archive, categories, tags), and the search results page.
GeoDirectory creates them by default with a general layout. In this tutorial, we will customize the layout of these pages a bit.
The listing and search pages are mostly identical so we create it once and just copy the layout on the other page.
We decided the Listing page layout would be the listings on the left, and on the right, a sticky map showing the listings’ precise location.
This is very easy.
Listings page
Go to Geodirectory > Settings > General > Pages > Click on edit GD Archive page template
Remove all the content from this GD Archive page template.
Now add a container with two columns.
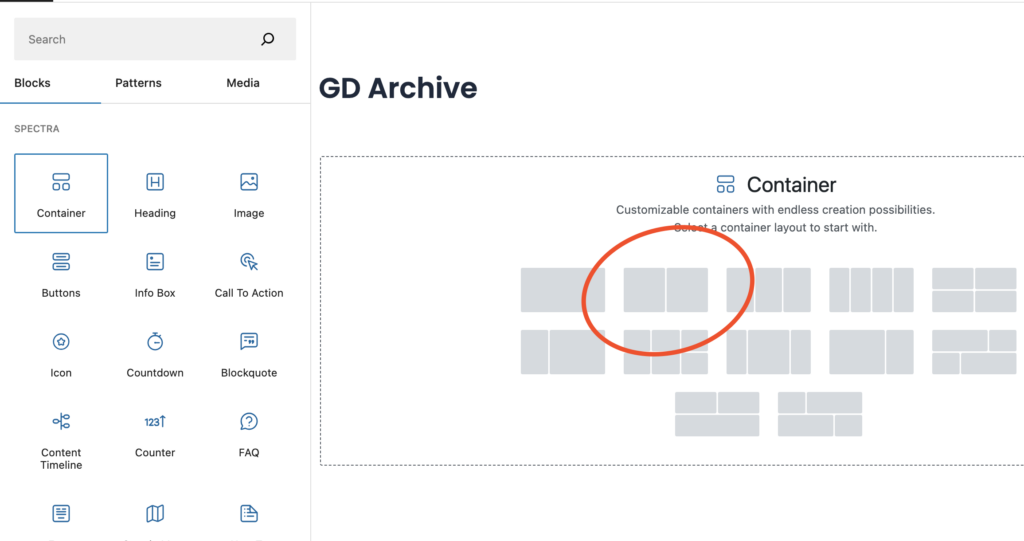
Now on the left container, we will drag GD Archive page-related widgets like GD > Loop Action, GD > Loop, GD > Loop Pagination, and GD > Search on top so the user can search from the Archive page.
On the right column, we will drag the GD > Map block.
we will keep all the settings default for the GD > Map. let’s give it some height and I have decided to give it the height of 100vh.
Now just set the main container to full width by following below instructions given in the image below.
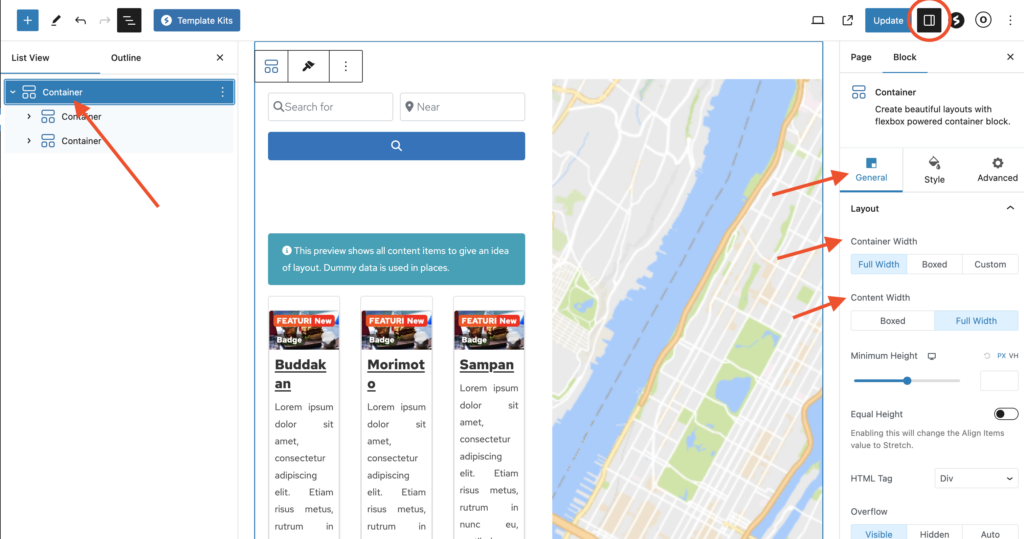
Now we will set the Archive page template to Full width
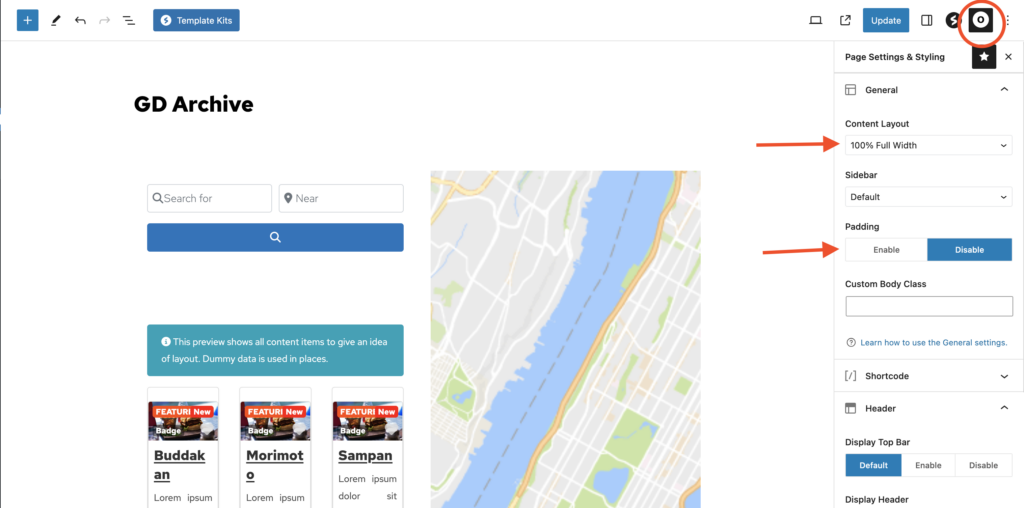
we will also adjust the header style section for all pages from the Theme Customizer > General Options > General Settings.
with Style
Heading Style: Centered
Padding: 20px
Background Color: #1e73be
Text Color: #ffffff
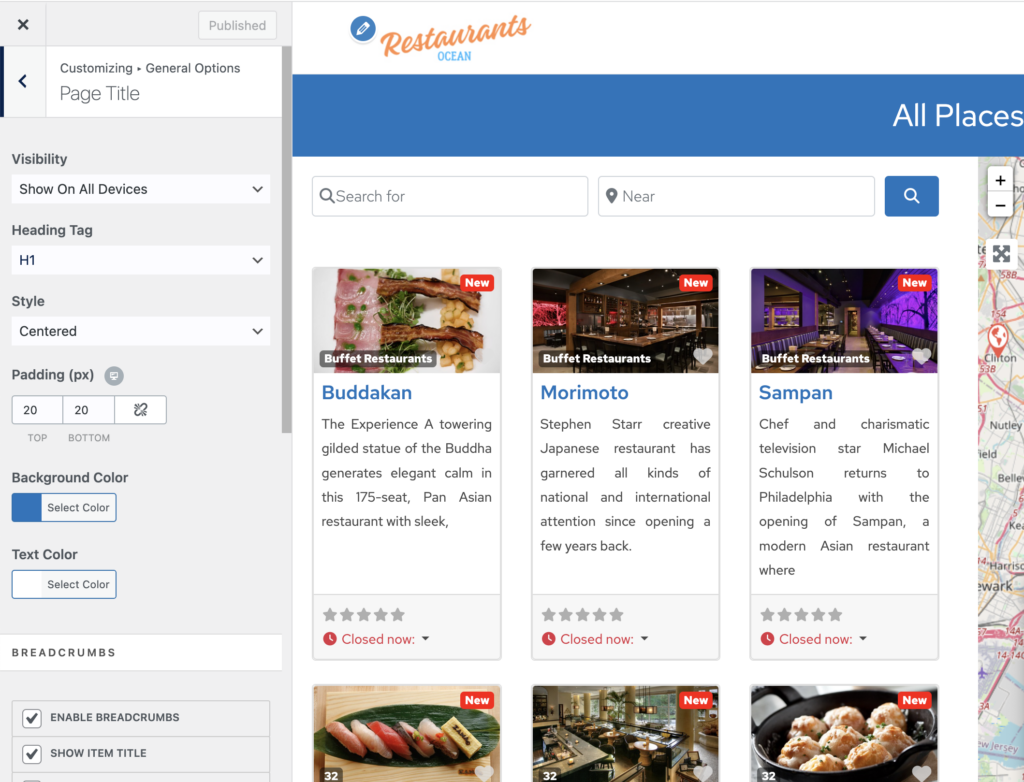
Now after this, the Listing Archive page is ready.
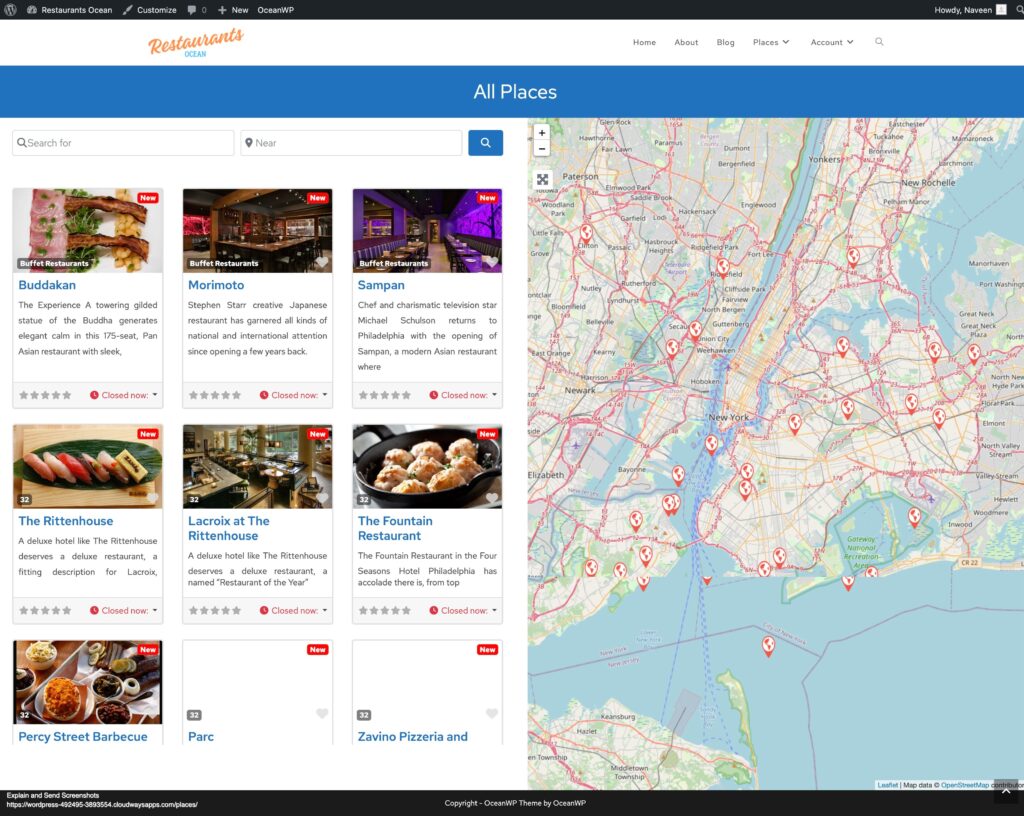
Another option is to use the GD > Simple Archive block as explained in this tutorial on how to Build a Directory Website with Elementor.
For the search page, we repeat the same process.
Search page
Go to Geodirectory > Settings > General > Pages > Click on edit GD Search page template
Remove all the content from this GD Search page template.
Copy all the content of the GD Archive page and paste it into the GD Search page.
So now our GD Search and Archive page is ready.
3. OceanWP Directory Website single Listing page design
Now to edit and customize the GD Detail page, You can go to Geodirectory > Settings > General > Pages > Click on edit GD Detail page template.
In this template, you will already find default content generated by Geodirectory.
we will remove all these default content and add a new container.
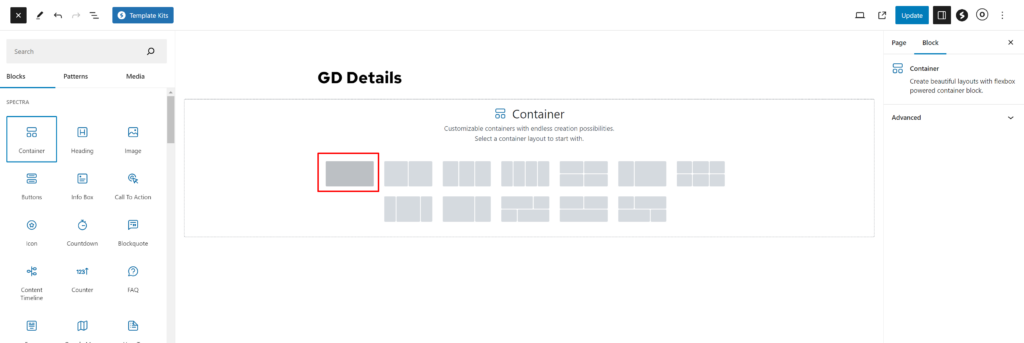
Let’s first add an image slider at the top of the Listing Detail page. we will drag the GD > Post Image block in this container.
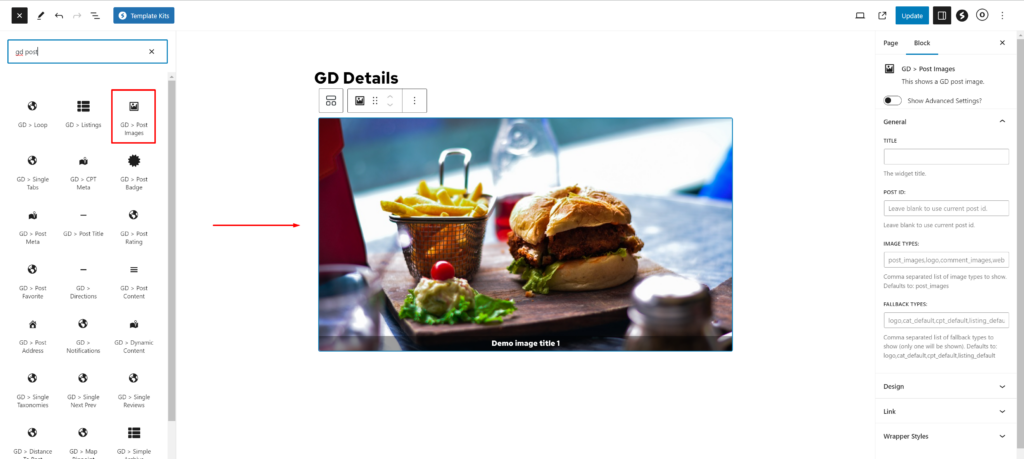
In this GD > Image block adjust the following settings.
Image Limit: 50
Show Limit: 2

Now let’s add one more container below this container. where we will add other required blocks of the Geodirectory Detail page.
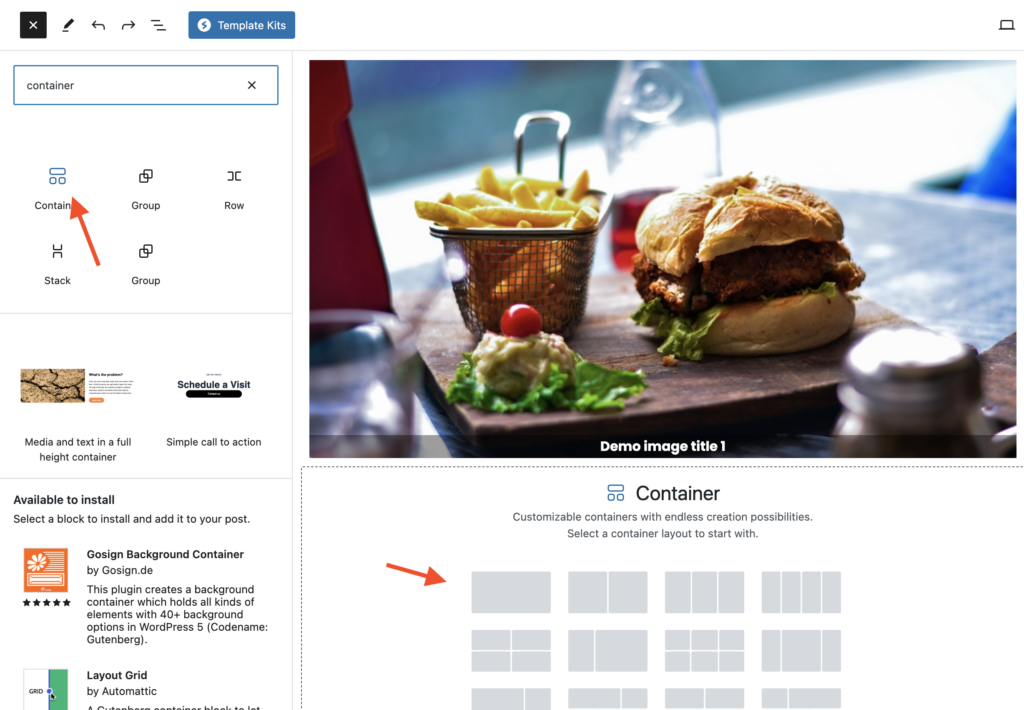
Now let’s add all required GD Detail page shortcodes here one by one. Which includes GD > Single Taxonomies, GD > Single Tabs, GD > Single Next Prev.
Now it’s time to add some sidebar widgets. so we will go to wp-admin > Appearance > Widgets.
Add GD > Author Action widget in the main sidebar. This widget will provide an Edit, Delete Listing option to the Listing Author.
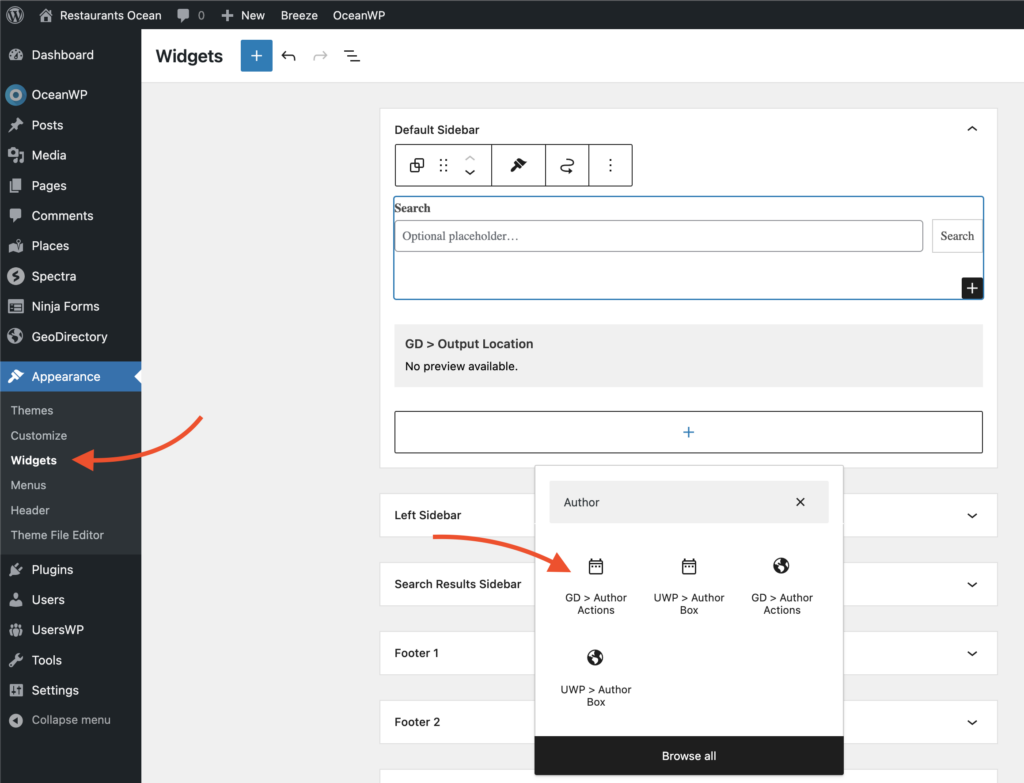
Add one more widget GD > Output Location. This widget will show all major listing details that have been marked to be visible on the Detail page.
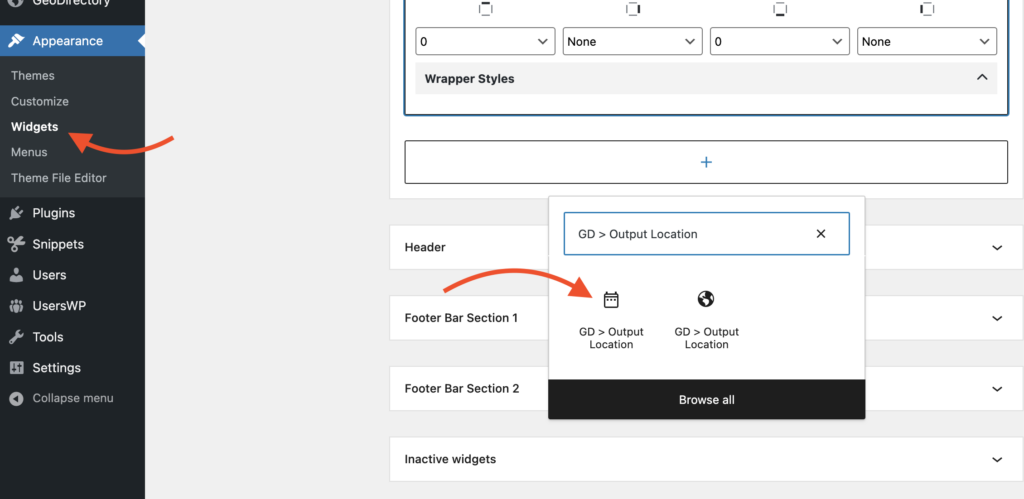
After doing this our Listing Detail page has been completed.
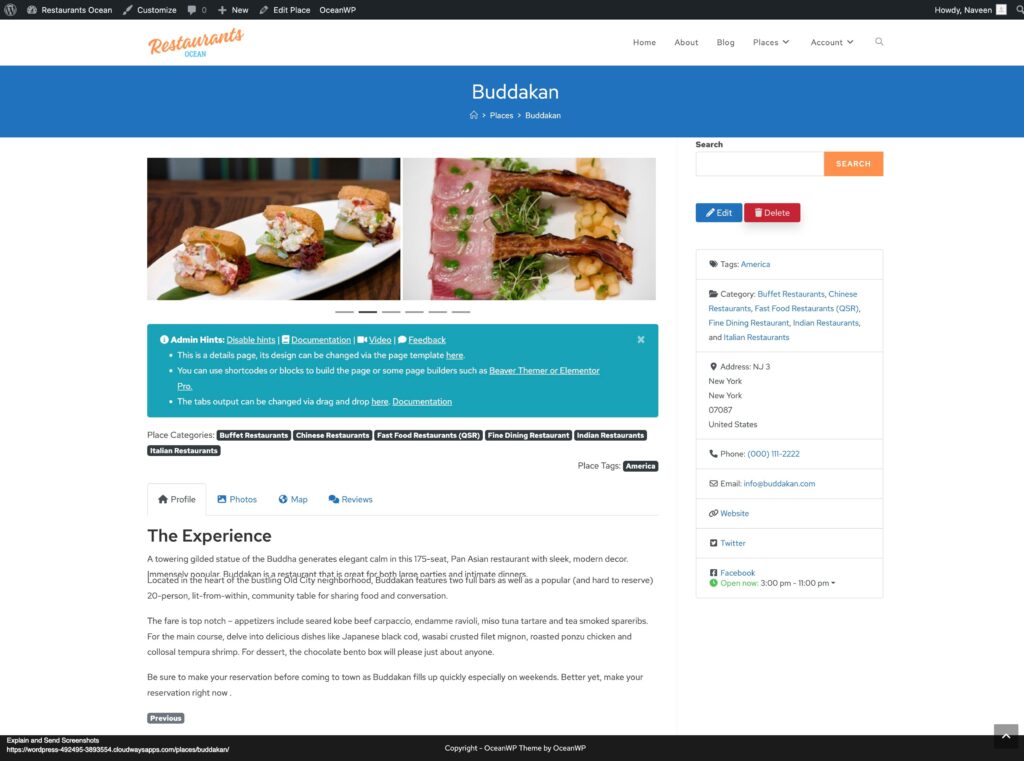
Adding premium features to your OceanWP Directory Website
If you wish, now you can add premium features to your directory, such as:
- Paid Listings: with the GeoDirectory Listing Price Manager add-on, you can set prices for listing submission. For each price tier, you can enable/disable features such as: Restricting the number of pictures for free listings while allowing more pictures for paid listings. Allowing more or fewer tags and categories. Enabling or disabling specific custom fields. Submitting longer or shorter descriptions.
- Claim Listings: This is a fundamental feature for a directory where the admin creates the database and invites business owners to take control of their free listings. The claim listing process may include forcing an upgrade to a paid listing to take over the listing’s ownership.
- Advertising: selling ads is another form of monetizing an online directory. If you have a lot of traffic, you can use Ads networks. Otherwise, you may sell ads directly, allowing businesses to add banners in specific areas of your website or allowing for listings to appear as ads, for example, on top of organic search results.
These are just three examples. However, a directory website offers many ways to make money online.
You can create a global marketplace of handcrafted items, sell event tickets, or sell discount coupons.
Make your directory website stand out by following this guide: Create a professional directory website.
The possibilities are limitless.
What is the best way to build a Kadence Directory Website?
Building a Kadence Directory Website involves the use of the Kadence Theme, Kadence Blocks, and the Best Kadence Directory plugin.
The Kadence Theme is a versatile and highly customizable WordPress theme that provides a solid foundation for your directory website.
Kadence Blocks, on the other hand, is a Gutenberg block library that allows you to create custom layouts and add various functionalities to your website.
Lastly, the GeoDirectory plugin is by far the best directory plugin for the Kadence theme, a powerful tool that enables you to add directory features to your website, such as business listings, user reviews, and advanced search capabilities.
Together, these tools provide a comprehensive solution for creating a robust and feature-rich directory website.
Kadence Directory Website using only a Free Theme and Free Plugins
In this tutorial, we will guide you through the process of building a comprehensive directory website using free WordPress resources, such as the Free Kadence Theme, the Kadence Blocks plugin, and the Free GeoDirectory plugin.
The directory website will feature:
- Unlimited listings with unlimited custom fields.
- Proximity search functionality.
- User Reviews.
- A front-end submission form, allowing users to submit, edit, and/or delete their listings.
We assume you already have a WordPress installation with a hosting provider. For this tutorial, we will create a Business Directory for the City of Philadelphia.
Here’s what we’ll cover in this tutorial:
- Install and configure the Theme and Plugins
- GeoDirectory Install Wizard
- Design the Kadence Directory Website
- The Listings and Search Page Design
- The Single Listing Page Design
- Adding premium features to your Kadence Directory Website
- Kadence Blocks Directory Website Templates
By the end of this tutorial, you will have a fully functional directory website that’s ready to go live. Let’s get started!
Install and configure the Kadence theme and plugins
1. Install the Kadence Theme
To kick things off, we’ll begin by installing a theme. For the purposes of this tutorial, we’ll be using the Kadence Theme.
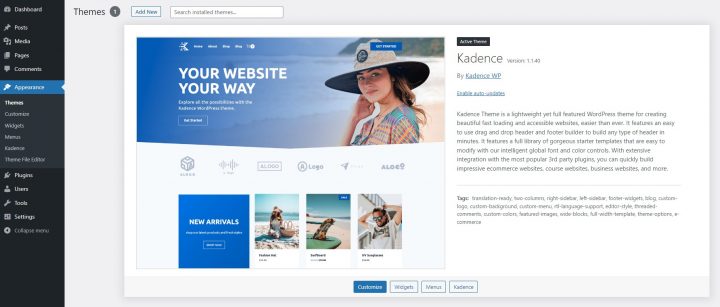
Go to Appearance >> Themes
Select Add New, Install, and Activate the Hello Theme.
2. Install the Kadence Blocks plugin
Now you will need to install the Kadence Block Pluginì.
Go to Plugins >> Add new.
Search for Kadence. Install it and Activate it.
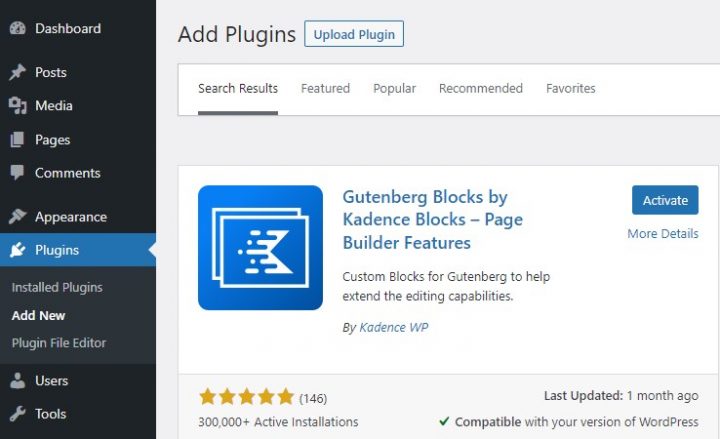
3. Install GeoDirectory
Last but not least, you need to install GeoDirectory.
Go to Plugins >> Add new, search GeoDirectory. Please install and activate it, and we are done installing plugins for now.
- Create or select an existing project.
- Enable the Keys.
- Get the Key.
- Activate a billing account.
- Restrict the API key (so it can only be used from the URL of your website)

4. GeoDirectory Install Wizard
For GeoDirectory, you will need to complete the Setup Wizard to configure the Google Maps API key and import a few dummy listings.
Choosing the Map System (Google Maps or OpenStreetMap)

You can choose between two mapping systems on the wizard’s first step. Google Maps and Open Street Maps (which doesn’t require an API key).
In this tutorial, we select Google Maps.
Click on the Generate Key button and follow the steps of this doc to generate a valid API key.
The essential steps are:
About point four: it is a requirement. However, you only get charged if you pass the threshold, which is $200/month.
This free credit is more than enough for 99% of directories.
Setting the default city
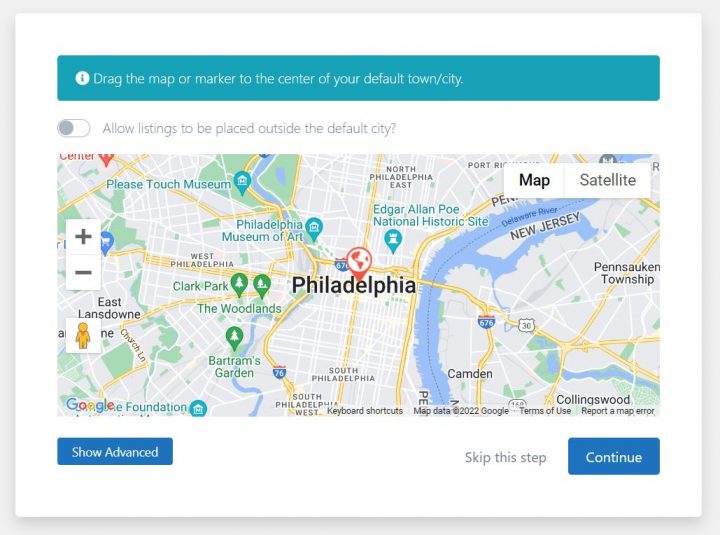
After that, you will set the default location. This is the city for which the directory is created. We will leave the default city unchanged.
GeoDirectory uses Philadelphia as the default City.
You can use whatever location you need.
If you need to add listings to more than one city, you will need the Location Manager add-on.
Adding extra features
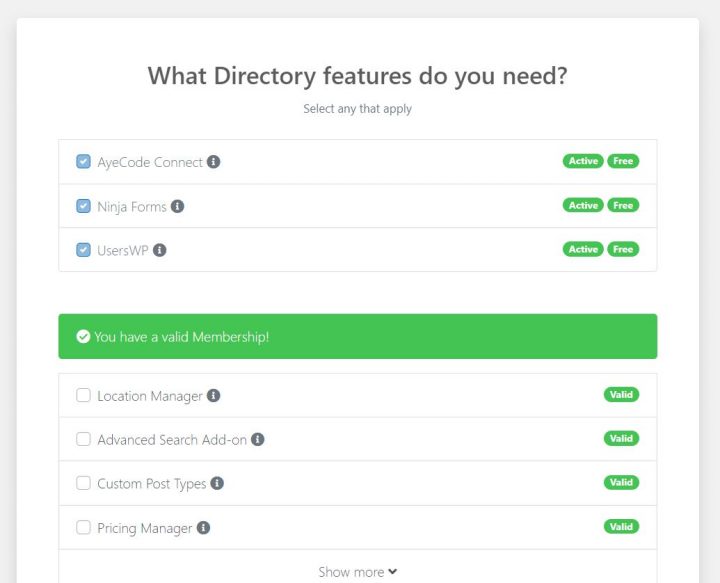
In this step, we will install our UsersWP plugin, a user registration plugin that lets users register and sign in to your website.
This is needed to allow users to add and edit their listings. It will also create user profiles where they can find their listings, reviews, and so on.
We will also install Ninja Forms so that all listings have a contact form that sends emails directly to the listing owners.
AyeCode Connect is not mandatory for this tutorial. It is mainly needed if you want to add GeoDirectory premium add-ons and install them directly from the WordPress Dashboard.
Adding Dummy Data
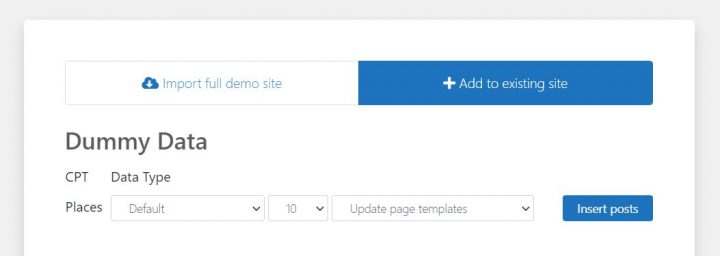
The last step to complete the installation wizard is adding some dummy listings. This will also add listing categories that you can edit later according to your needs.
You will not add sidebar widgets and menu items right now, as we will do that later.
Design the Kadence Directory Website
Now that we installed the theme and the plugins and done the preliminary setup of GeoDirectory, we can start designing our Directory Website with the Kadence Suite of tools.
1. Kadence Directory Home page design
You can create a new page or use one WordPress creates by default, like the Sample Page.
Go to Pages, edit the Sample page, and rename it Home or create a new page for this.
Now click the page setting icon on the top right section of the screen.
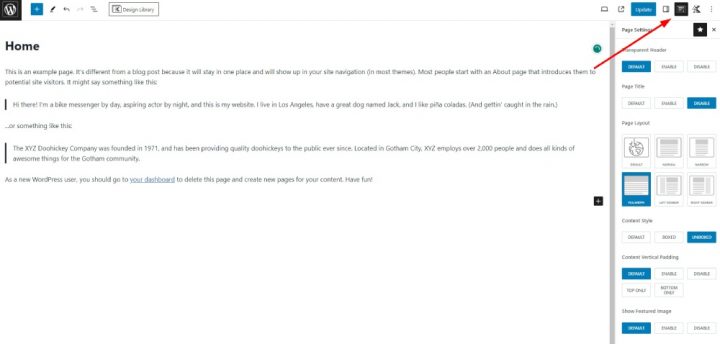
Apply the following changes:
- Page Title: Disable
- Page Layout: Full Width
- Content Style: Unboxed
Leave the rest unchanged. Next, go to Appearance > Customize > Homepage Settings and select the above page for your Home.
We will select the Posts page later.
Before creating the Home Page content we need to work on the header.
We’ll come back to design the Home Page content after that.
The Logo
First thing first, we will need a logo for our website.
You don’t need to invest in a designer to sketch the 1st version of your logo.
One of the biggest mistakes you can make when starting a new directory is investing too much time and money before testing the product market fit.
You can design a logo in five minutes with an app like Canva, which is cheap and surprisingly good.
For an MVP (minimum viable product), a logo designed with Canva will be more than enough.
There are several logo templates to choose from, and it doesn’t matter if your initial logo is not as perfect and original as you believe it should be.
If your project gets traction, you can always invest in improving it or radically changing it later.
An average logo is never the leading cause of a failed project.
After designing your logo, go to Appearance > Customize > Header, click Logo > Select Logo, and upload your PNG file. Skip cropping (or crop the image as needed), in Logo Layout select the option Logo and click publish.
The Navigation Menu
After creating and adding the logo, go to Appearance > Menus, and create your menu.
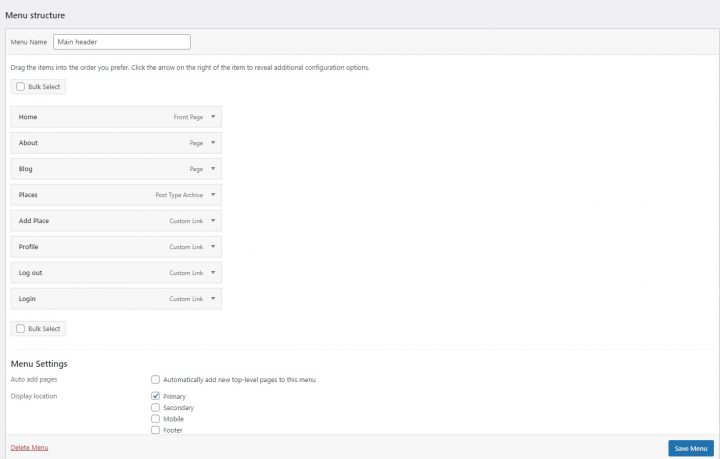
Add the links needed (from the left column to the right column) and save. In the Menu Settings > Display location section, you can check the “Primary” option.
If you want, you can make the same menu appear on the footer or create another menu to appear there.
In this example, we’ll only have the header navigation menu.
We added eight links:
- Home
- About
- Blog
- Places
- Add Places
- Profile
- Login
- Logout
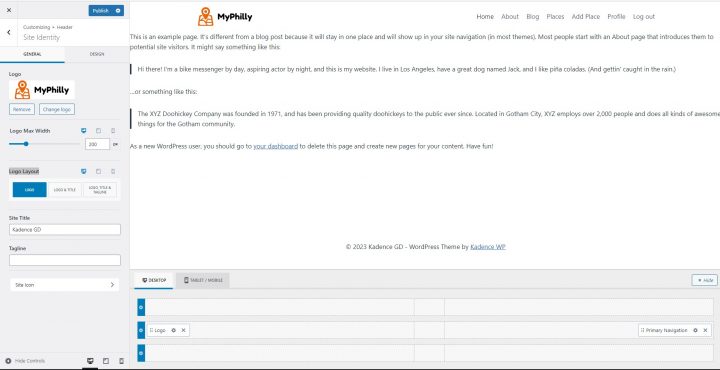
The Login link (from UsersWP Endpoints) will only appear for Logged-out users, while the logout and profile links will only appear for logged-in users.
The Content
Now you can start designing the home page. First, you will need to add a hero image below the header.
To do this, go to Pages > Home and click Edit.
If you used the Sample page, delete the Text. If you created a new page, add a new Row Layout block.
Type /Row where it says Type / to choose a block and select a Kadence Row Layout Block. Next, select the single Row (1st option)
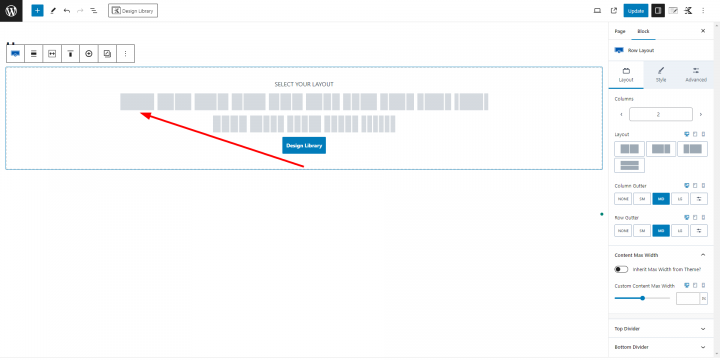
In the Content Max Width option add 800.
Next, click Style from the block top tabs. Click Select Image in the Background image option
For the Hero Section, we will use this free image of Philadelphia from Pexels.com (Thanks, @Kelly).
Upload your image and select the Fixed option for the Background Image Attachment and update.
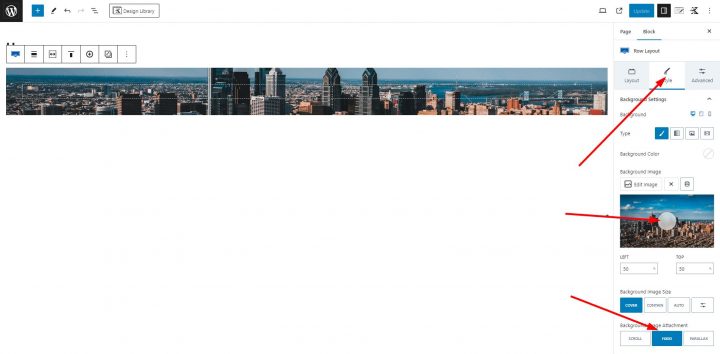
You can now see only a ribbon of our image, but the next steps will make it appear as needed.
The image needs an overlay, or any text on top won’t have sufficient contrast and will be difficult to read.
Select Background overlay settings, set Overlay Opacity to 45, and Overlay Color to 000000 (Black).
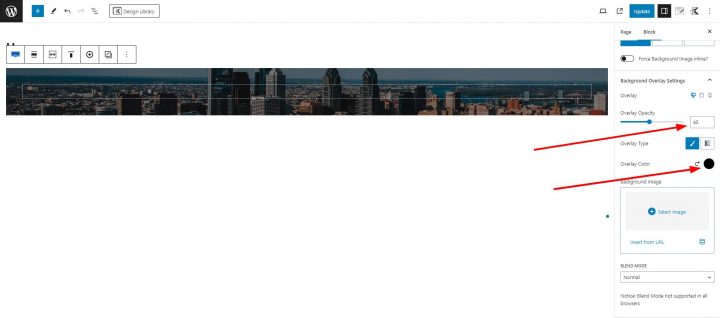
Now click on the Advanced Tab and let’s add some padding. 4 em Top and Bottom padding to be precise. To do so click on the Set Custom Size Icon, add 4 in both the top and bottom input fields, and select EM as size.
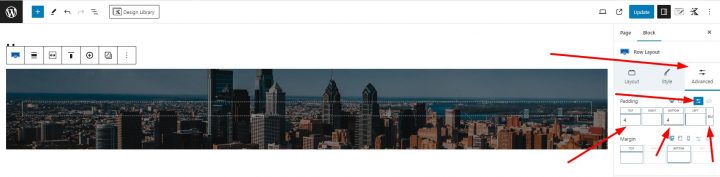
Now that we have made the hero image darker, we can add text.
Click the center of the image (a plus button is barely visible). This will allow you to select a new block. Add a Section block.
Click the center of the image again and add a Text (Adv) block.
in the Text block add something like: “My Philadelphia Directory”.
In the General Section of the Block select H1 as HTML Tag. Text Alignment Center.
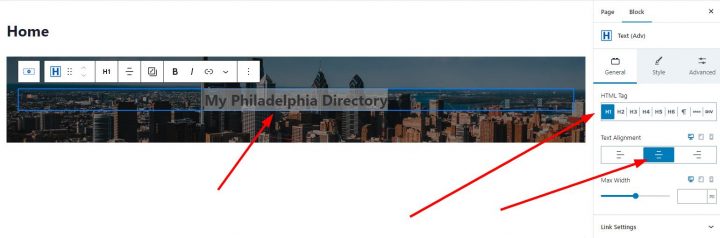
Click on the Style tab, and select Color FFFFFF (white).
Next in the FONT SIZE section, click the set custom size icon and set 40 as the font size.
Finally, in Advanced Typography Settings > FONT WEIGHT select Bold 700.
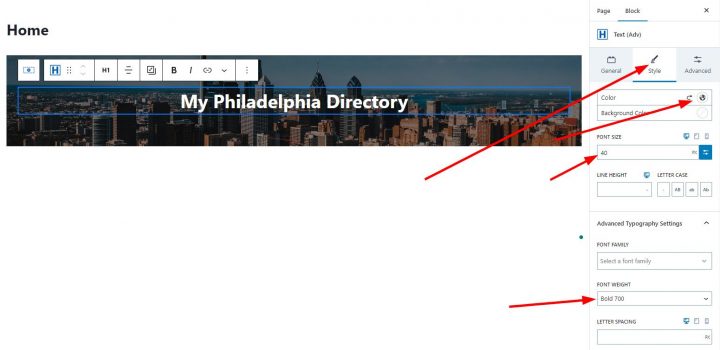
At this point, we can add the search form to the hero section of our Kadence directory website.
Click on the + button at the lower-right corner of the Title Section to add a new section.
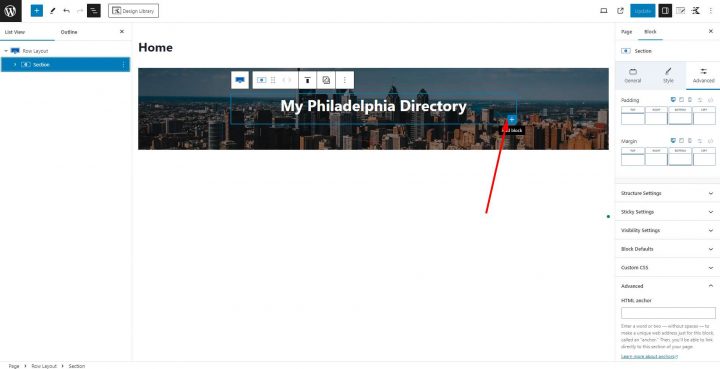
Search and select another Section Block, click on the plus button in the middle of the new section, and add a GD > Search block.
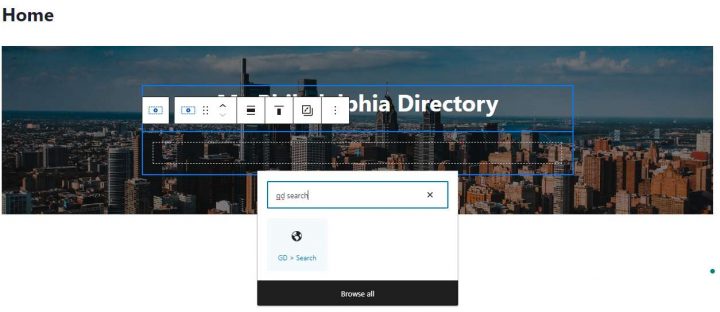
At this point, we completed the Hero Section of the home page and this is what it looks like.
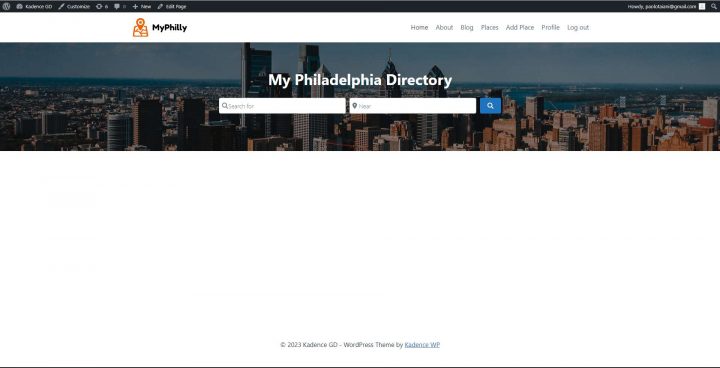
It’s time to add a few more required sections on the homepage, I will add a recent listings section now.
Below the hero section, add one Row Layout block by clicking on the plus icon and add a Section block inside it.
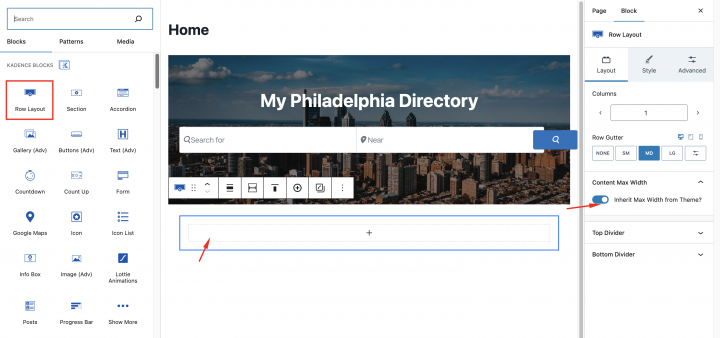
Now we will add a heading block and set Typography to
Size: Large
Letter case: Ab
Text: Recent Business Listings
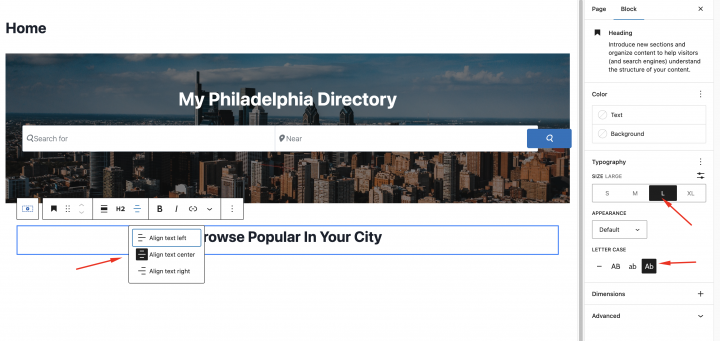
To show the latest listings Let’s add the GD > Listings block below it with the following setting.
Sort by: Latest
Layout: Grid View( 4 Columns )
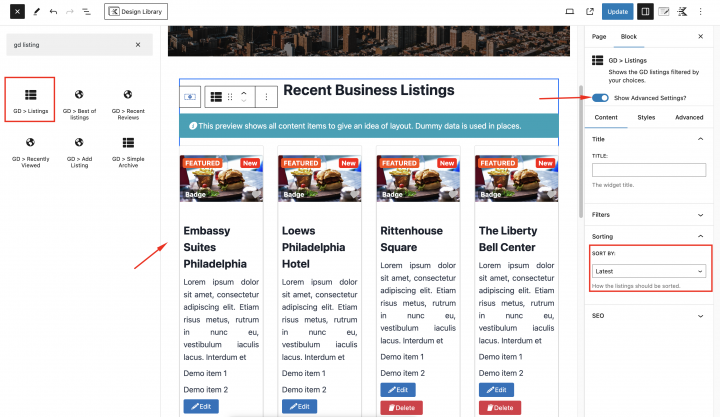
Now let’s add one Row Layout block by clicking on the plus icon and adding a Section block inside it.
In the Typography setting of the heading block
Size: Large
Letter case: Ab
Text: Browse Popular In Your City

Now add the GD>Category block inside it to display all the categories.
In the style add the following settings
Row Items: 4
Design Type: Image Background
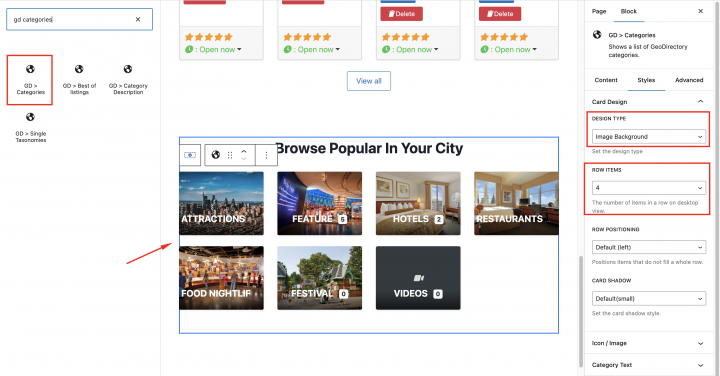
Now we will add one more section for How It Works. let’s add one Row Layout block by clicking on the plus icon and selecting the 4-column layout.
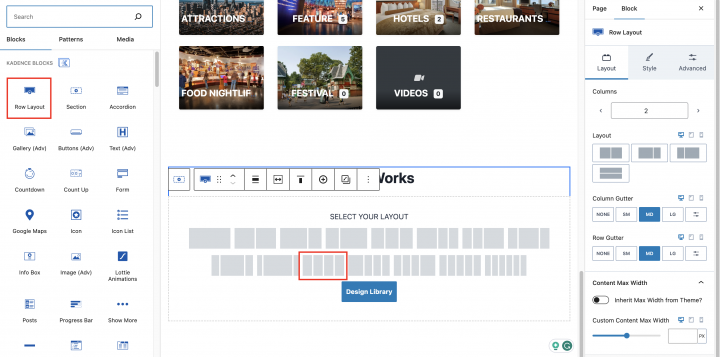
Now add the Info box block in all the containers.
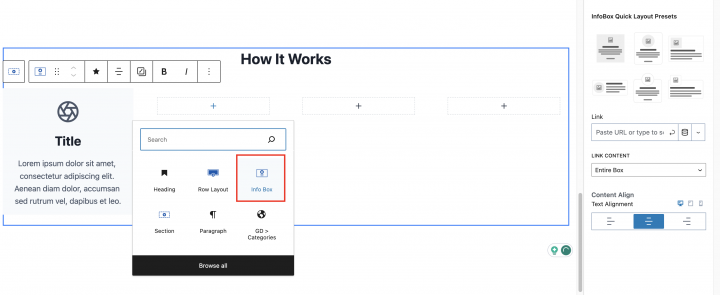
In the content max-width: Inherit Max width from the theme.
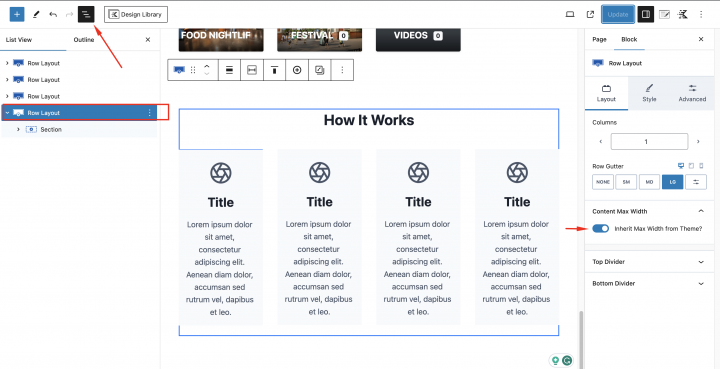
Now we will set the icon for each container. Click on any Info Box and in the block setting Style > Media Settings
Media Type: Icon

Now let’s set the color of the icons
Icon Color: #FFFFFF
Icon Background: #FF6616
Media Padding: 20px
Icon Border Radius: 15px
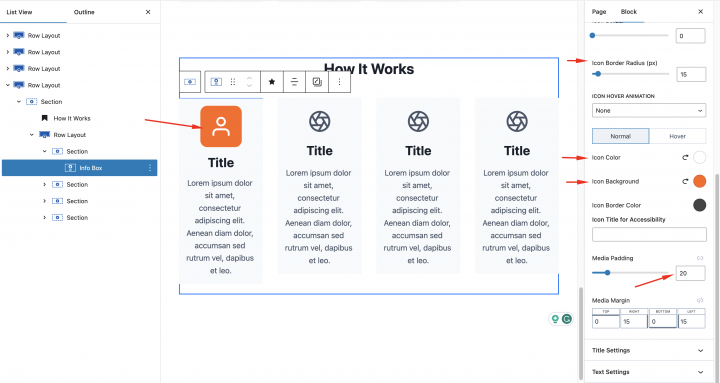
Now let’s add one more empty Row Layout
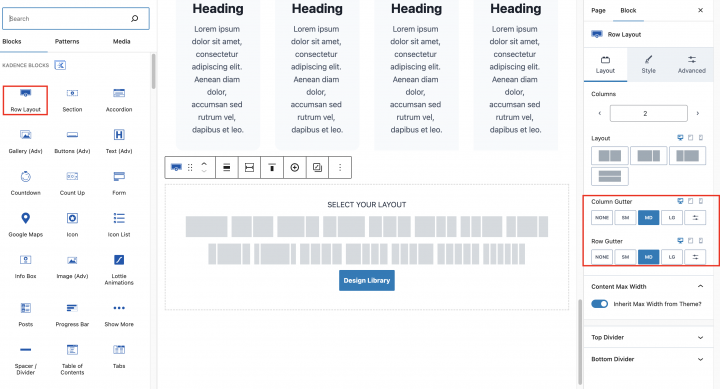
we will add a CTA inside it.
Add a Heading and in the Typography setting of the heading block
Size: Large
Letter case: Ab
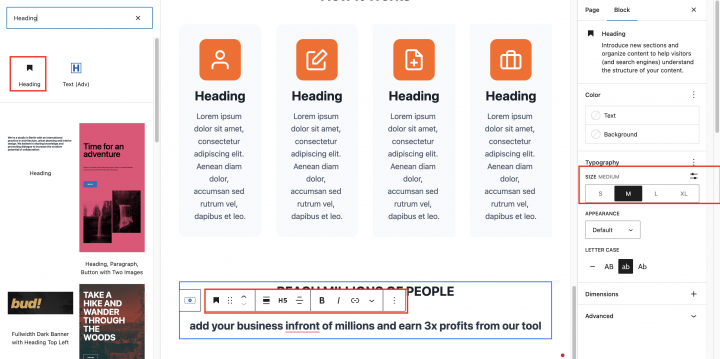
we will add the single button block and Inside the style setting of this block set
Color: #FFFFF
Background Color: #FF6A00
Border Radius: 10px
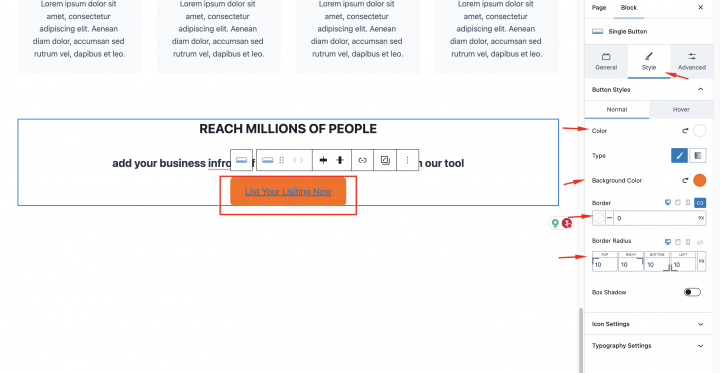
We will set up the Footer now.
Let’s go to Appearance > Customize > Footer
We will add a few footer menu widgets here and Kadence provide a Social block. You can add it at the top of the Footer section.
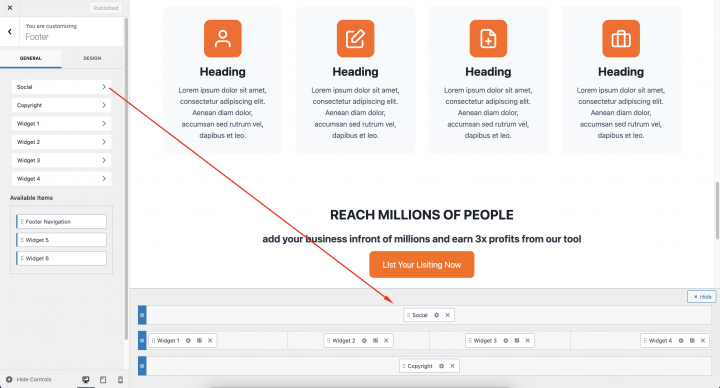
When you click on the setting icons of the social widget. it will open up a setting where you can set Social options.
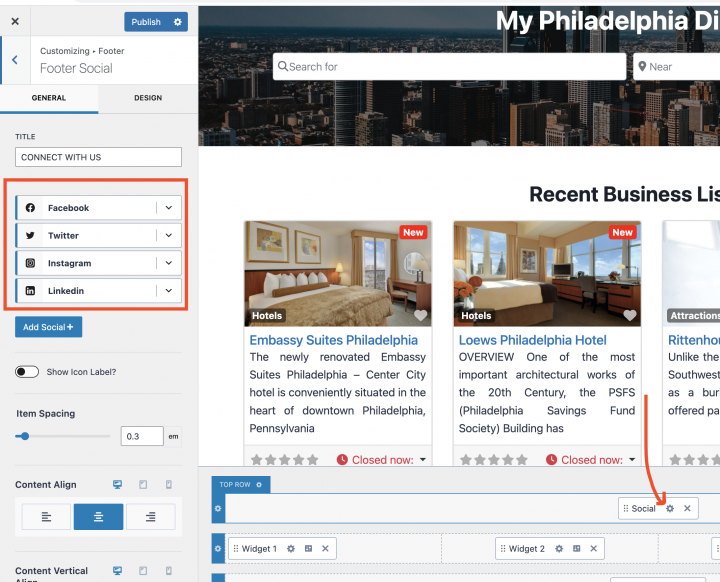
Congratulations your Hompage is ready now.
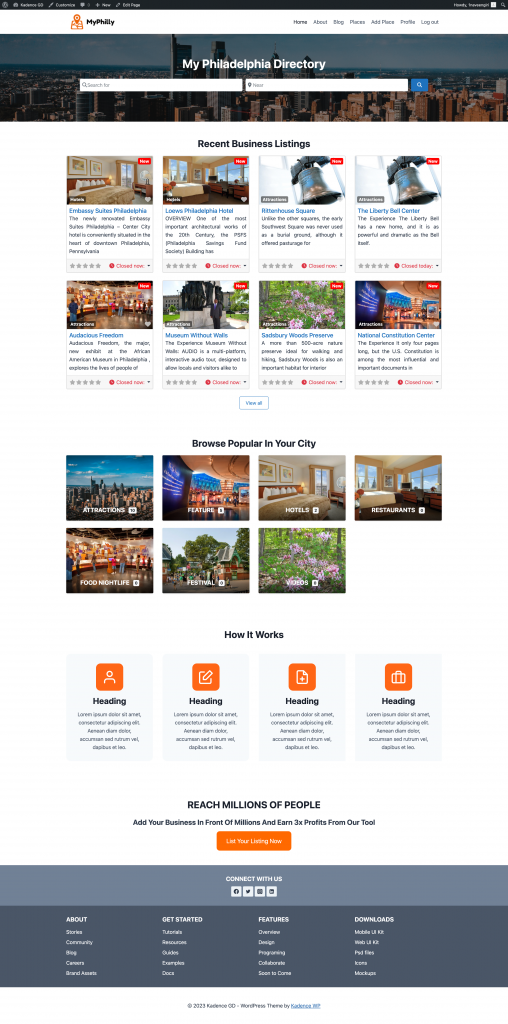
Kadence Directory Website Listings and Search Page Design
Now we need to design two pages that are essential for any directory.
The listings page (general archive, categories, tags), and the search results page.
GeoDirectory creates them by default with a general layout. In this tutorial, we will customize the layout of these pages a bit.
The listing and search pages are mostly identical so we create it once and just copy the layout on the other page.
I have decided the Listing page layout would be the listings on the left, and on the right, a sticky map showing the listings’ precise location.
This is very easy.
Listings page
Go to Geodirectory > Settings > General > Pages > Click on edit GD Archive page template
Remove all the content from this GD Archive page template.
Add a Row layout with
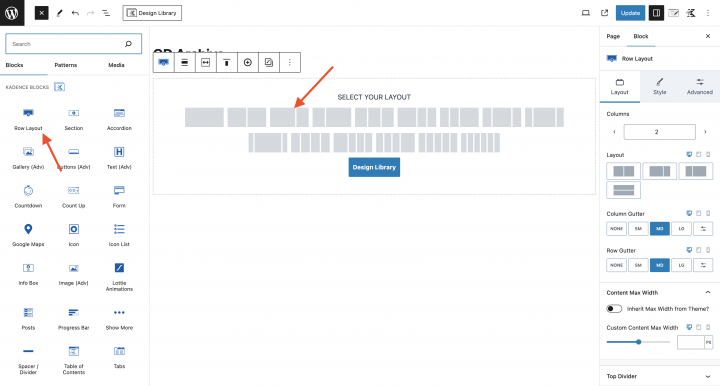
Make it a 60 – 40 ratio by dragging the marked dot in the below image.
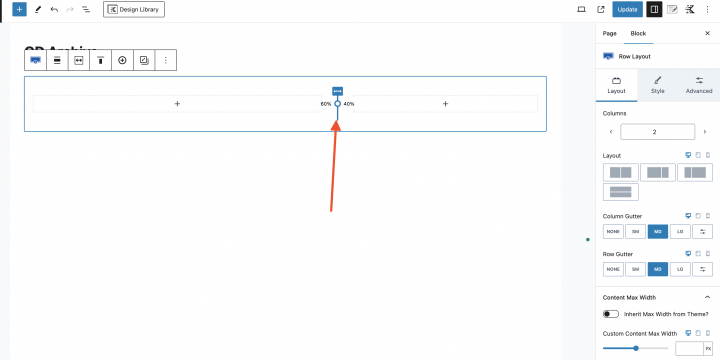
Now in the left section, we will add all required blocks for the GD Archive page. Example like GD > Loop Action, GD > Loop, GD > Loop Pagination, and GD > Search
On the right column, we will drag the GD > Map block.
we will keep all the settings default for the GD > Map. let’s give it some height and I have decided to give it the height of 100vh.
In the map block parent row container, we will add a CSS class kt-inside-inner-col
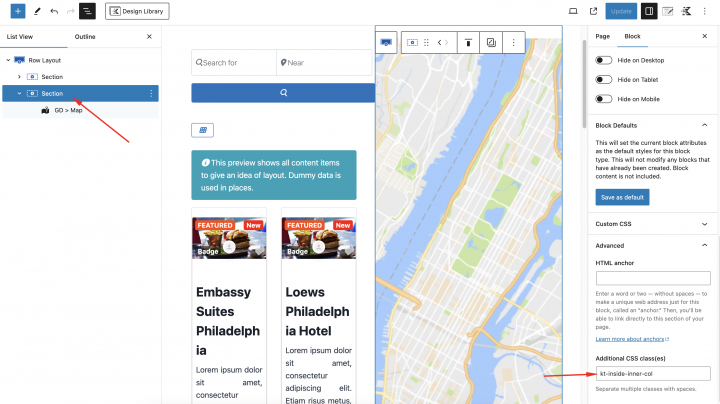
and we will add the following CSS in the theme customizer Appearance > Customize > Additional CSS
body.archive .kt-inside-inner-col {
    position: sticky;
    top: 0;
}
Now at last we will make the page Full Width by clicking on the Kadence icon on the top right and set Page Layout to Full Width.
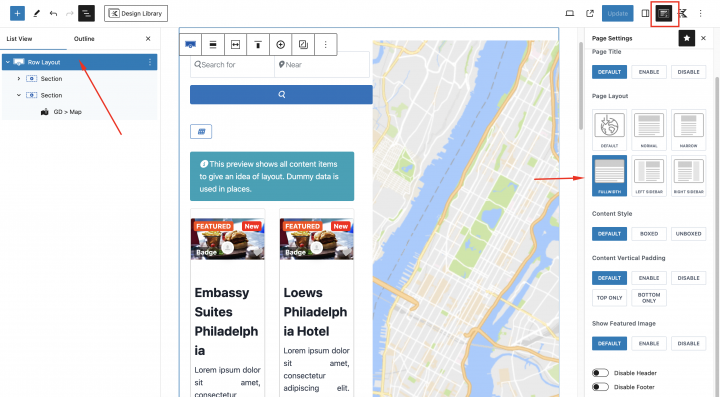
and we will also set the following style for the main Row Layout.
Max Width: 100%
Column Gutter: SW
Row Gutter: None
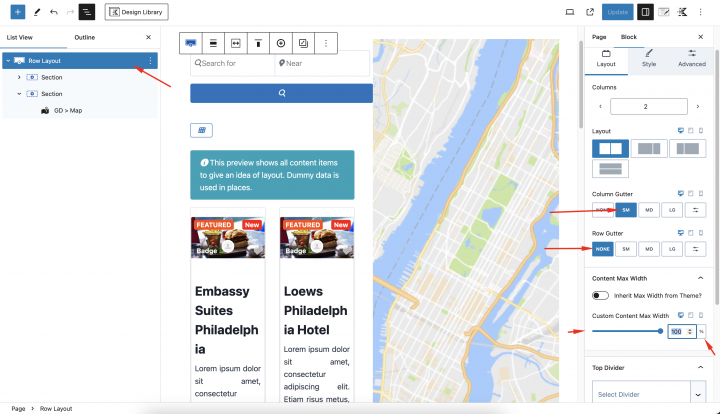
Go to Geodirectory > Settings > General > Pages > Click on edit GD Search page template
Remove all the content from this GD Search page template.
Copy all the content of the GD Archive page and paste it into the GD Search page.
So now our GD Search and Archive page is ready.
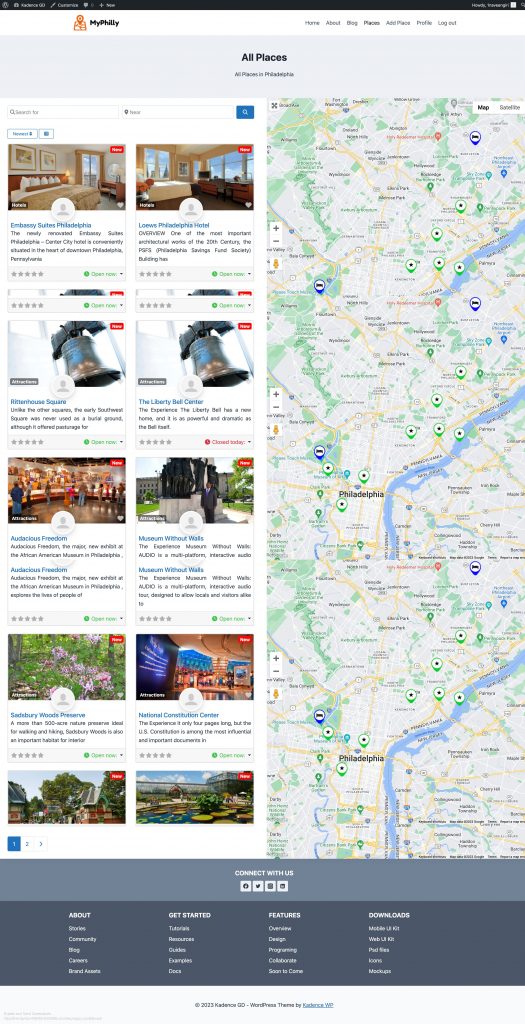
Another option to easily create this template is to use a full-width page template and the GD > Simple Archive block.
Kadence Directory Website single Listing page design
Now to edit and customize the GD Detail page, You can go to Geodirectory > Settings > General > Pages > Click on edit GD Detail page template.
In this template, you will already find default content generated by Geodirectory.
we will remove all these default content and add a new Row Layout with: Content Width: 100%
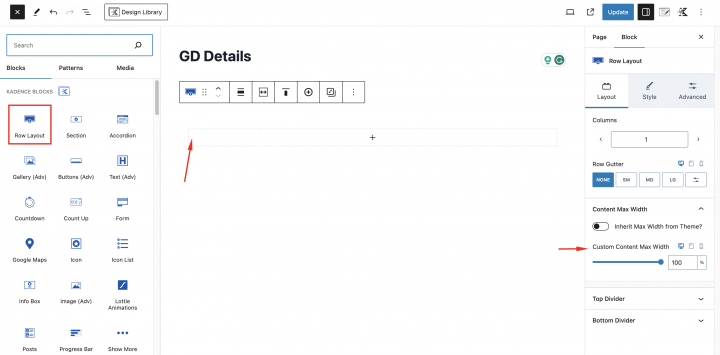
Add a class (single-header-image) to this row layout from Advanced > Additional CSS class
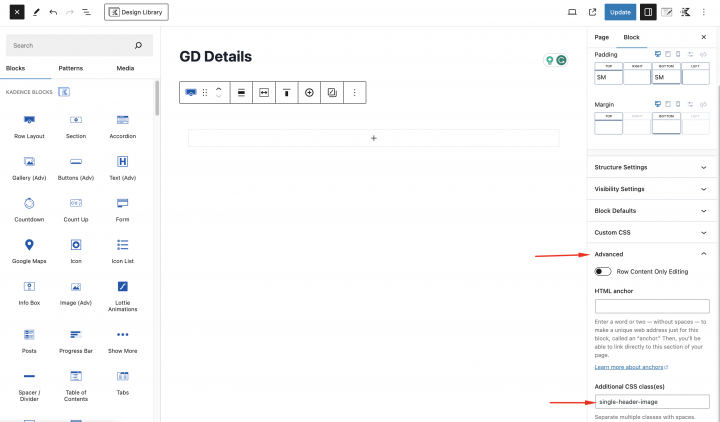
Now we will add a two-column Row Layout container.
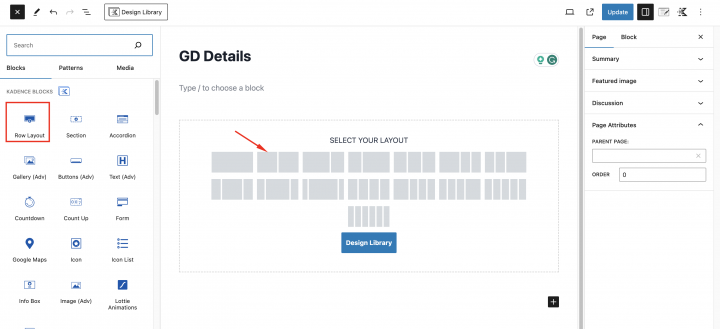
On the Left container, we will add the GD > Post Badge block to define some badges and on the right container, we will add the GD > Post Favorite block.
Inside the parent Row Layout of this container, we will add a custom class(header-position-feature).
Below this, we will add an image slider and for that, we will drag the GD > Post Image block.

we will select the following settings
Output Type: Slider
Auto Start: Enable
Animation: Slide
Now we will add a two-column Row Layout Container.
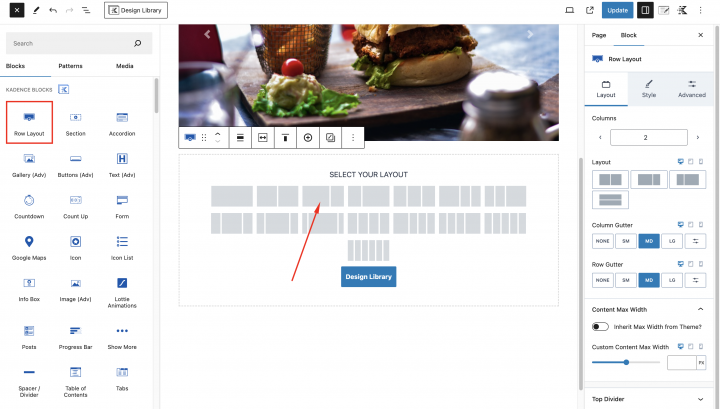
Inside the left container, we will add the required blocks for the GD Detail page. which includes GD > Single Taxonomies, GD > Single Tabs, GD > Single Next Prev.
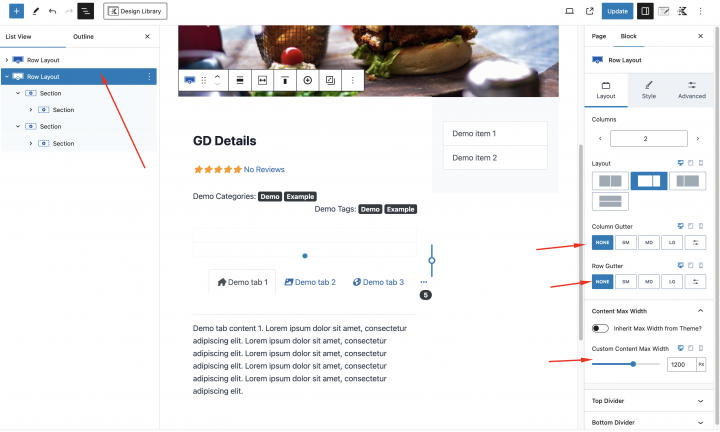
With following settings
Max Width: 1200px
Column Gutter: SW
Row Gutter: None
On the right container, we will use the GD > Output Location and GD > Author Actions block.
we will add some extra design to the GD Detail page layout with the below css.
Add the following CSS in the Apperanace > Customize > Additional CSS
.single-header-image {
    max-height: 400px !important;
    overflow: hidden;
}

.geodir-page-single .entry-header {
	display: none;
}
.geodir-page-single .content-area {
	margin: 0px;
}
.geodir-page-single .content-container {
	padding: 0px;
	max-width: 100%;
}
@media (min-width: 576px) {
.bsui .row.row-cols-md-0 .card .embed-responsive {
    max-width: 100% !important;
    display: inline-block;
}
}
.geodir-page-single .entry-content-wrap {
	padding: 0px !important;
}
.geodir-page-single .entry-content {
	margin-top: 0px;
}
.single-header-image {
	max-height: 400px !important;
	overflow: hidden;
}
.single-feature {
	padding: 10px !important;
}

.header-position-feature {
	position: absolute !important;
	width: 100%;
}

.kb-row-layout-id15_c06314-2b > .kt-row-column-wrap {
    z-index: 1;
    position: relative;
		padding:0px !important;
}
Now our GD Detaiil page is ready.

Adding premium features to your Kadence Directory Website
If you wish, now you can add premium features to your directory, such as:
- Paid Listings: with the GeoDirectory Listing Price Manager add-on, you can set prices for listing submission. For each price tier, you can enable/disable features such as: Restricting the number of pictures for free listings while allowing more pictures for paid listings. Allowing more or fewer tags and categories. Enabling or disabling specific custom fields. Submitting longer or shorter descriptions.
- Claim Listings: This is a fundamental feature for a directory where the admin creates the database and invites business owners to take control of their free listings. The claim listing process may include forcing an upgrade to a paid listing to take over the listing’s ownership.
- Advertising: selling ads is another form of monetizing an online directory. If you have a lot of traffic, you can use Ads networks. Otherwise, you may sell ads directly, allowing businesses to add banners in specific areas of your website or allowing for listings to appear as ads, for example, on top of organic search results.
These are just three examples. However, a directory website offers many ways to make money online.
You can create a global marketplace of handcrafted items, sell event tickets, or sell discount coupons.
Navigate the creation process with ease using this guide: A step-by-step guide to creating a directory website.
The possibilities are Unlimited.
Build a Directory Website with Kadence Blocks
The Kadence theme provides many extended blocks. You can find these blocks inside the Kadence Blocks list and you can also find them in Gutenberg block lists for using it.
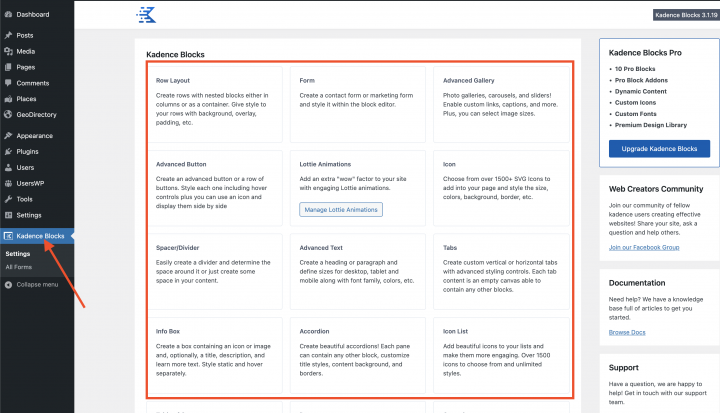
Inside each page, you have a Design Library button at the top. You can click it and use all the predefined block layouts from there.
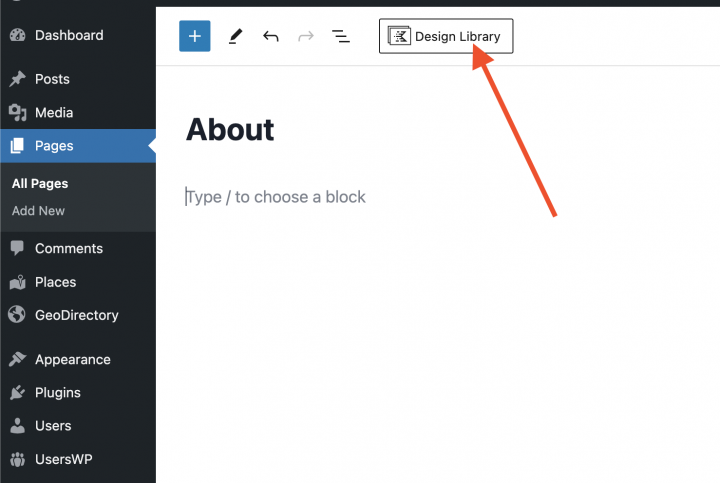
Kadence Blocks Directory Website Templates
Geodirectory has many predefined demos available with the Kadence theme. You can find all these beautiful demos here.
You can import these templates into your website. You need the Ayecode connects plugin, Download and Activate this plugin if not already installed.
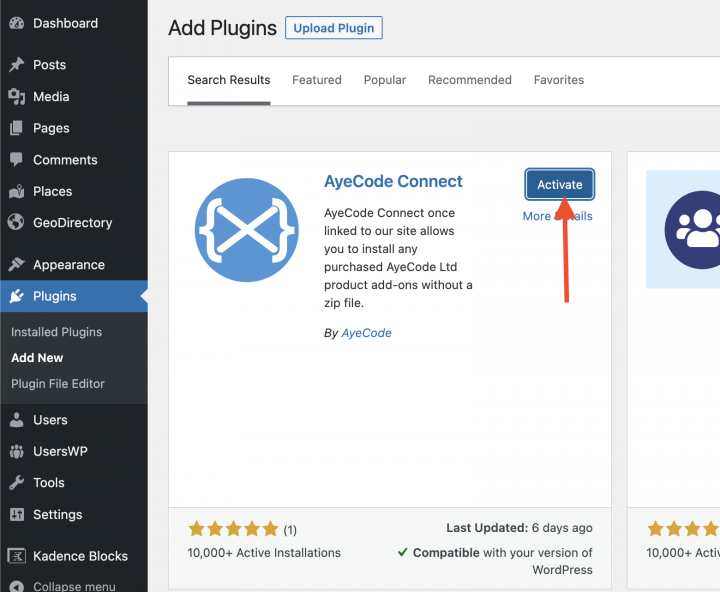
After Activating this plugin, you have to connect your membership.
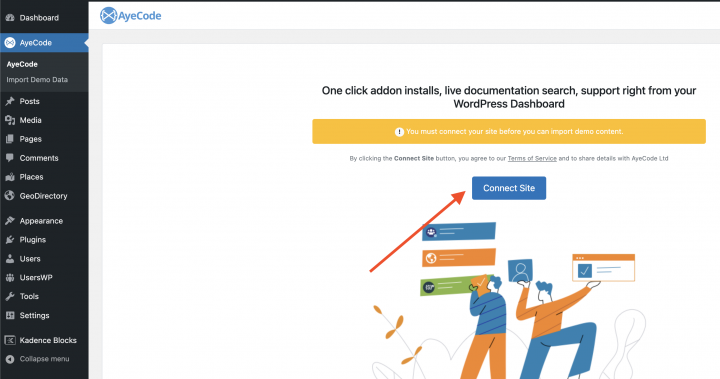
You can import the demo by clicking on the view button beside the Kadence demo.
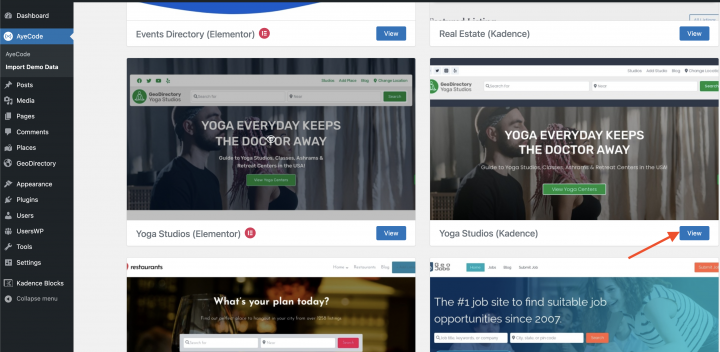
Examples are the Real Estate Directory Theme, The Restaurant Directory Theme, the Job Board Theme and the Yoga Salon Directory Theme designs for the Kadence Theme.
What’s the best way to build a Directory Website using the Astra Theme?
The best way to create a directory website using the Astra Theme is by using the GeoDirectory Plugin and the Spectra Blocks Plugin. A great way to build a powerful and customizable online directory.
Here’s a step-by-step guide to building a Directory Website using the Astra theme and their Spectra Website Builder Plugin
- Install the Astra theme
- Install Spectra Blocks
- Install and set up GeoDirectory
- Design the Directory Website using the Astra theme and Spectra Block
Let’s see how we can build a Directory Website with GeoDirectory and the Astra theme in detail.
In this tutorial, we will:
Installing Theme and Plugins.
1. Install the Astra Theme
First, you will need to install a Theme, and for this tutorial, you will install the Astra theme.
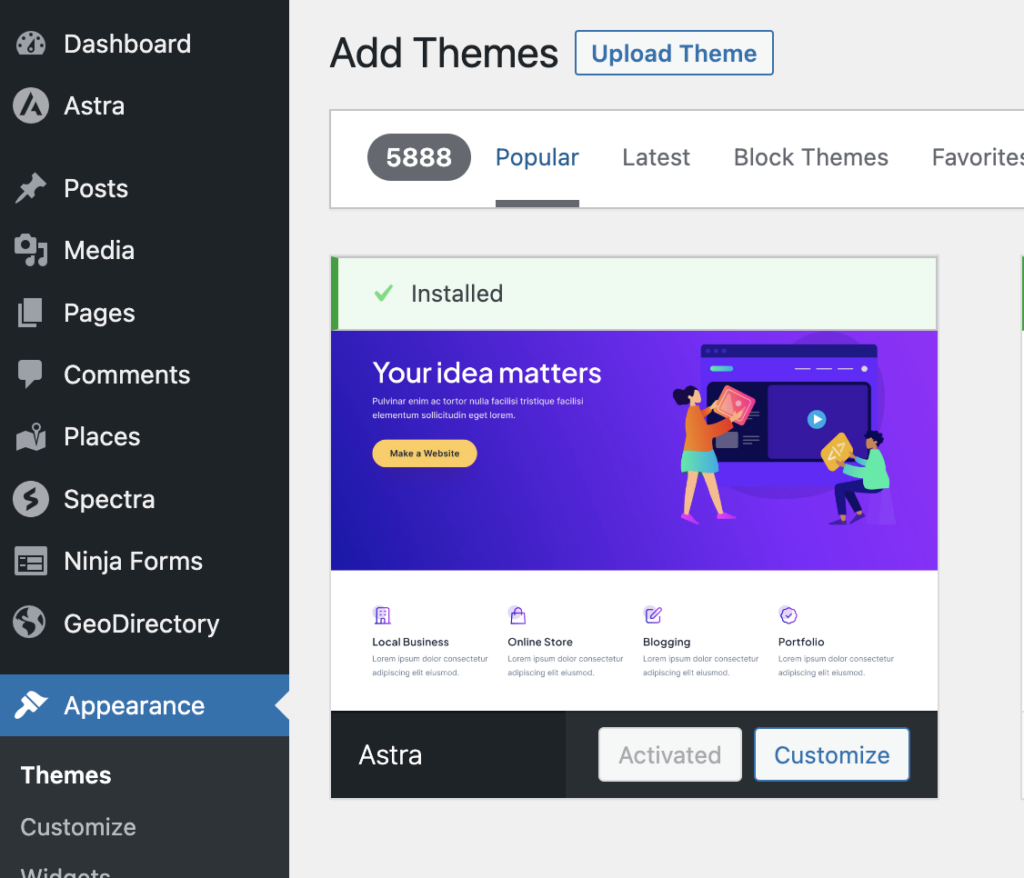
Go to Appearance >> Themes
Select Add New, Install, and Activate the Astra Theme.
2. Install the Spectra Blocks plugin
Now you will need to install the Spectra Blocks plugin. This plugin provides more options to design the page using Gutenberg blocks.
Go to Plugins >> Add new.
Search for Spectra Blocks. Install it and activate it.
You can skip all steps of the Setup Wizard.
3. Install GeoDirectory
Last but not least, you need to install GeoDirectory.
Go to Plugins >> Add new, search GeoDirectory. Please install and activate it, and we are done installing plugins for now.
4. GeoDirectory Install Wizard
For GeoDirectory, you will need to complete the Setup Wizard to configure the Google Maps API key and import a few dummy listings.
Choosing the Map System (Google Maps or OpenStreetMap)
You can choose between two mapping systems on the wizard’s first step. Google Maps and Open Street Maps (which doesn’t require an API key).
In this tutorial, we select Google Maps.
Click on the Generate Key button and follow the steps in this doc to generate a valid API key.
The essential steps are:
- Enable the Keys.
- Create or select an existing project.
- Get the Key.
- Activate a billing account.
- Restrict the API key (so it can only be used from the URL of your website)
About point four: it is a requirement. However, you only get charged if you pass the threshold, which is $200/month.
This free credit is more than enough for 99% of directories.
Setting the default city
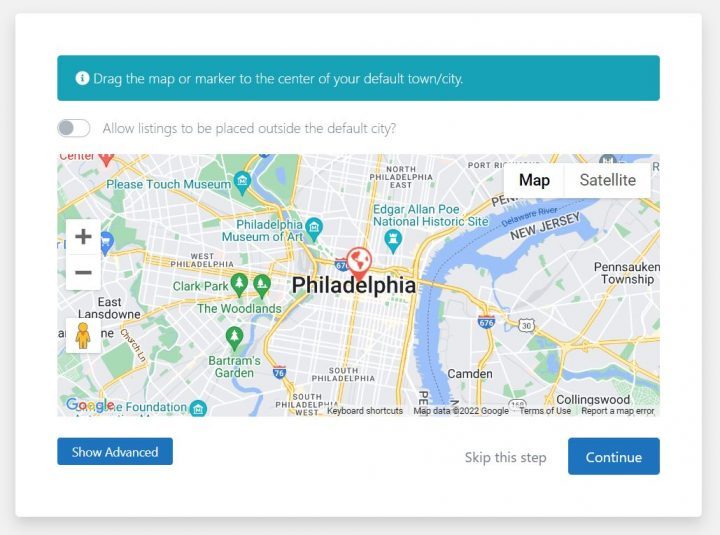
After that, you will set the default location. This is the city for which the directory is created. We will leave the default city unchanged.
GeoDirectory uses Philadelphia as the default City.
You can use whatever location you need.
If you need to add listings to more than one city, you will need the Location Manager add-on.
Adding extra features
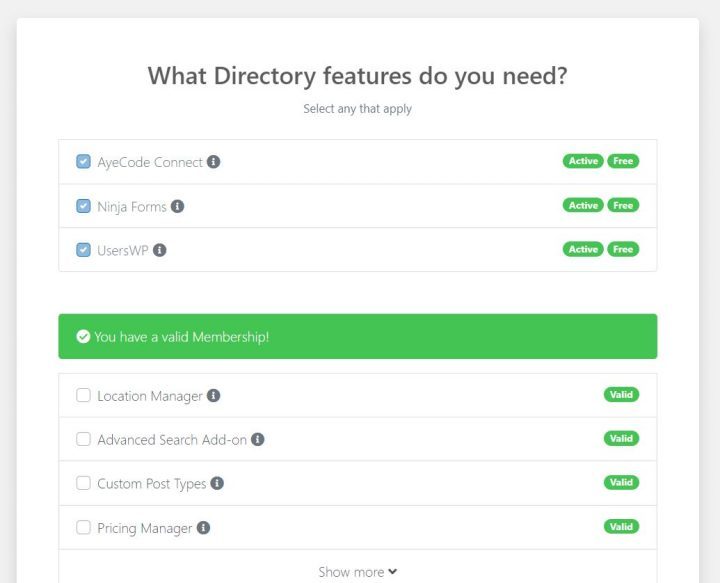
In this step, we will install UsersWP, a user registration plugin that enables users to register and log in to your website.
This is needed to allow users to add and edit their listings. It will also create user profiles where users can find their listings, reviews, and other relevant information.
We will also install Ninja Forms so that all listings have a contact form that sends emails directly to the listing owners.
AyeCode Connect is not mandatory for this tutorial. It is mainly needed if you want to add GeoDirectory premium add-ons and install them directly from the WordPress Dashboard.
Adding Dummy Data

The last step in the installation wizard is to add some dummy listings. This will also add listing categories that you can edit later according to your needs.
You will not add sidebar widgets and menu items right now, as we will do that later.
Design the Astra Directory Website
Now that we have installed the theme, plugins, and completed the preliminary setup of GeoDirectory, we can start designing our Directory Website with Astra.
1. Astra Directory Website Home Page design
You can create a new page or use one WordPress creates by default, like the Sample Page.
Go to Pages, edit the Sample page, and rename it Home, or create a new page for this purpose.
Next, go to Appearance > Customize > Homepage Settings and select your Home.
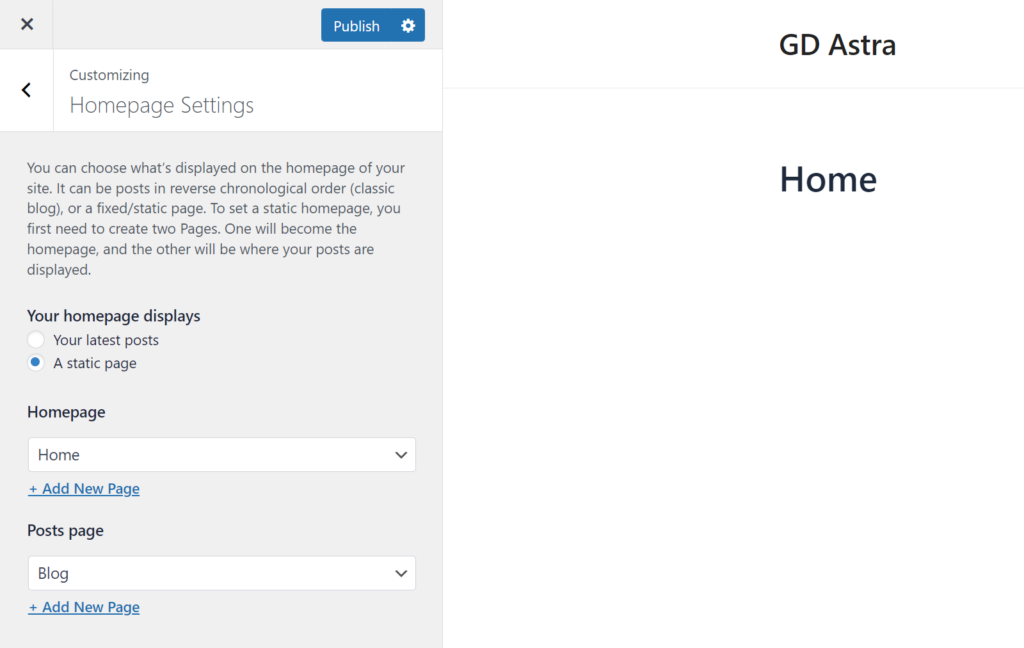
The Logo
First things first, we will need a logo for our website.
You don’t need to invest in a designer to sketch the 1st version of your logo.
One of the biggest mistakes you can make when starting a new web directory business is investing too much time and money before testing the product market fit.
You can design a logo in just five minutes with an app like Canva, which is surprisingly affordable and effective.
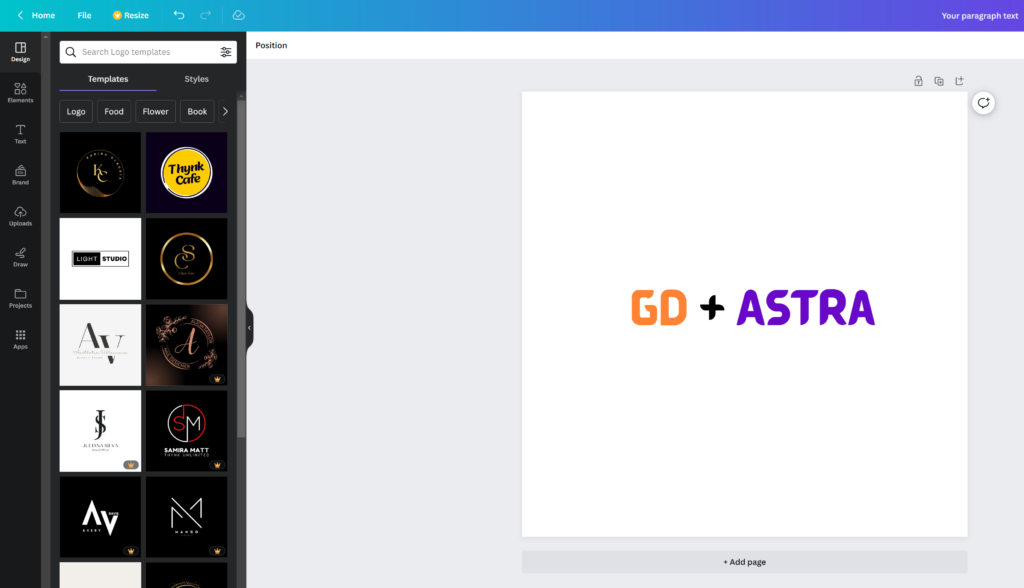
For an MVP (minimum viable product), a logo designed with Canva will be more than enough.
There are several logo templates to choose from, and it doesn’t matter if your initial logo isn’t as perfect or original as you believe it should be.
If your project gains traction, you can always invest in improving it or make radical changes later.
An average logo is never the leading cause of a failed project.
After designing your logo, go to Appearance > Customize > Site Identity, click Select Logo, and upload your PNG file. Skip cropping (or crop the image as needed) and click publish.
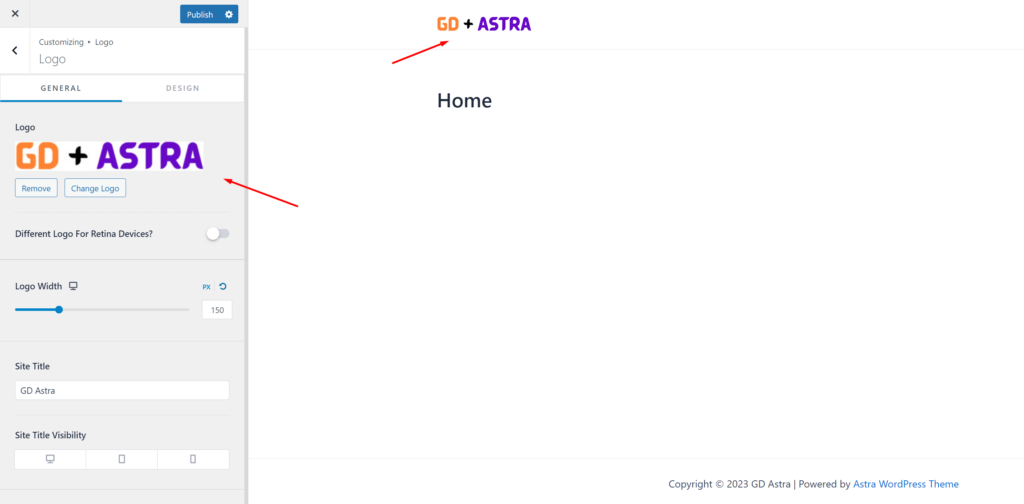
The Navigation Menu
After creating and adding the logo, go to Appearance > Menus, and create your menu.
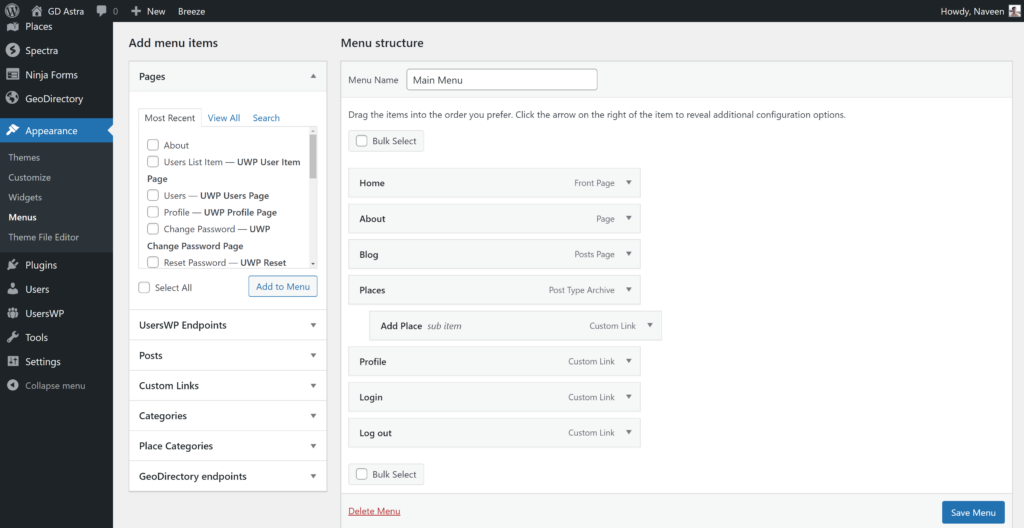
Add the links needed (from the left column to the right column) and save. In the Menu Settings > Display location section, you can check the “Header” option.
If you want, you can make the same menu appear on the footer or create another menu to appear there.
In this example, we’ll only have the header navigation menu.
We added seven links:
- Home
- About
- Blog
- Places
- Profile
- Login
- Logout
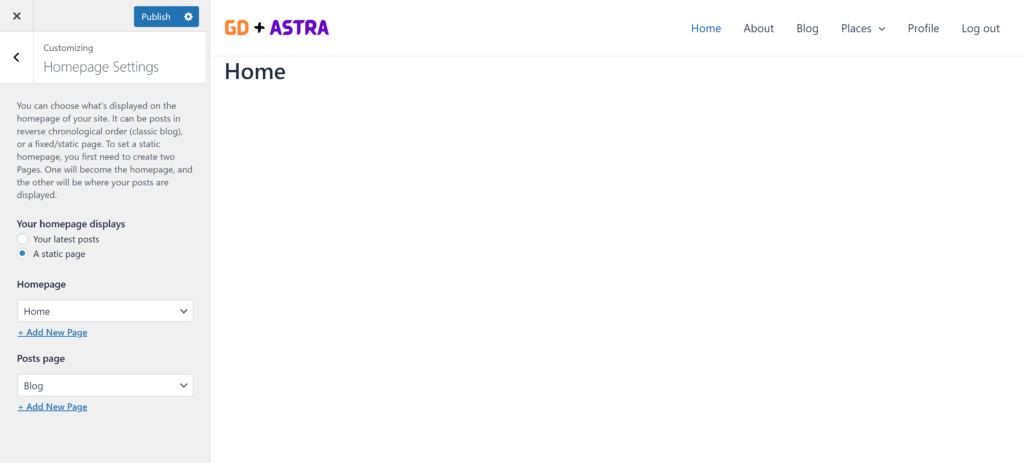
The Login link (from UsersWP Endpoints) will only appear for Logged-out users, while the log-out and profile links will only appear for logged-in users.
The Typography
Now let’s define the Typography for the website text font and size. I am setting a global Font Family, Font Weight, and Font Size that will be applied to all site text.
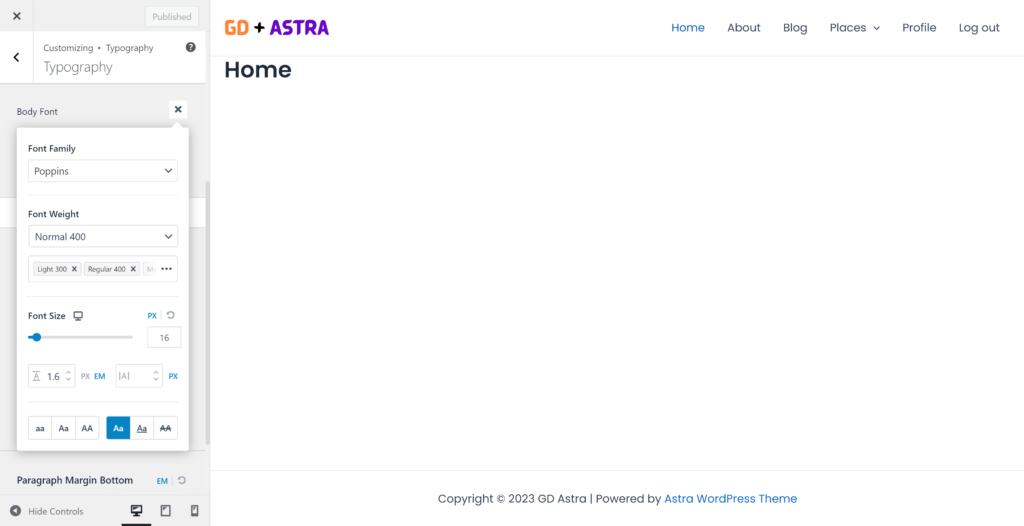
The Content
The Spectra block plugin provides many pre-built page templates. You can access them by clicking the Template Kits button at the top of the edit page screen.
You can use these page templates or a specific pattern for building your site pages.
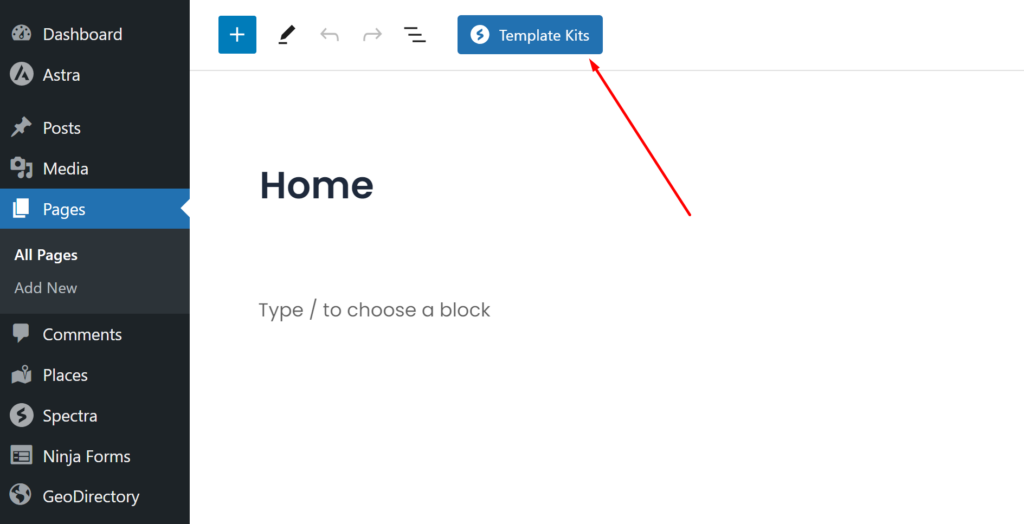
I will start building this page from scratch using the Spactra Blocks plugin.
We need a hero header on the homepage; let’s add a container block provided by the Spectra Blocks plugin.
Click on the added section and select Full Width in the Content Width option as mentioned in the screenshot below.
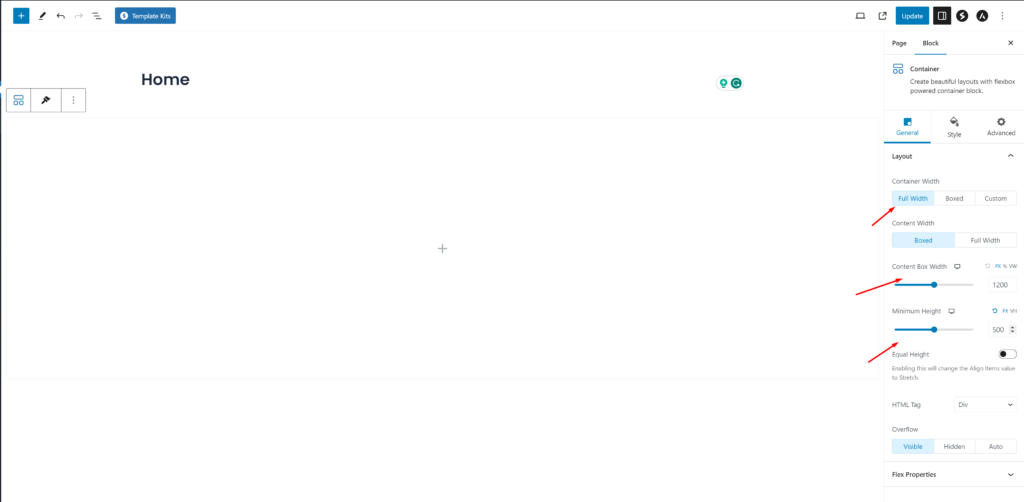
Next, click Style from the top tabs. Select > Type Images as the Background Type.
For the Hero Section, we need an image, which we will download for free from Pexels.com (Thanks, @Kelly).
Upload your image and select Repeat to No Repeat and Size to Cover.
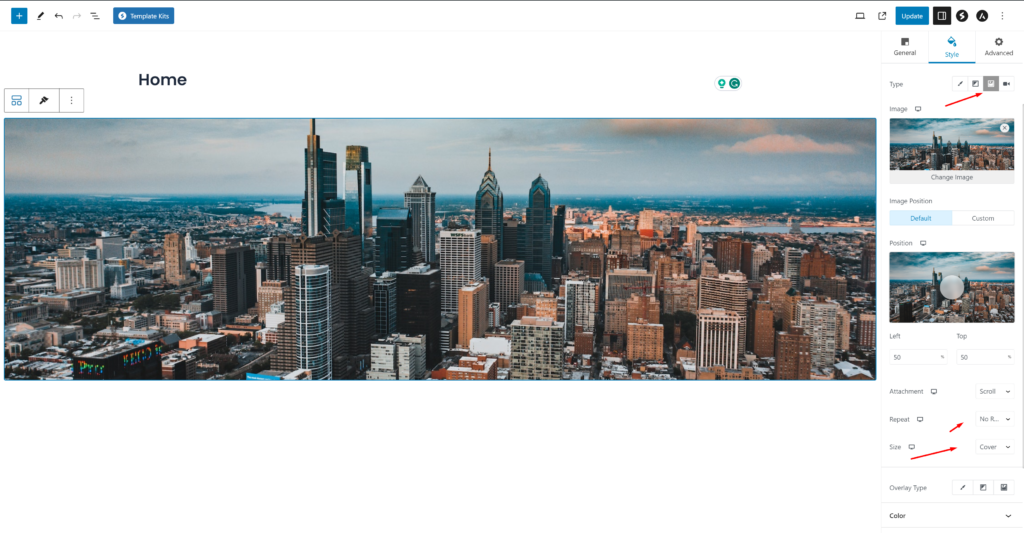
The image needs an overlay, or any text on top won’t have sufficient contrast and will be difficult to read.
Select Overlay Type: Color, Color: #1E293B, and Opacity: 0.3
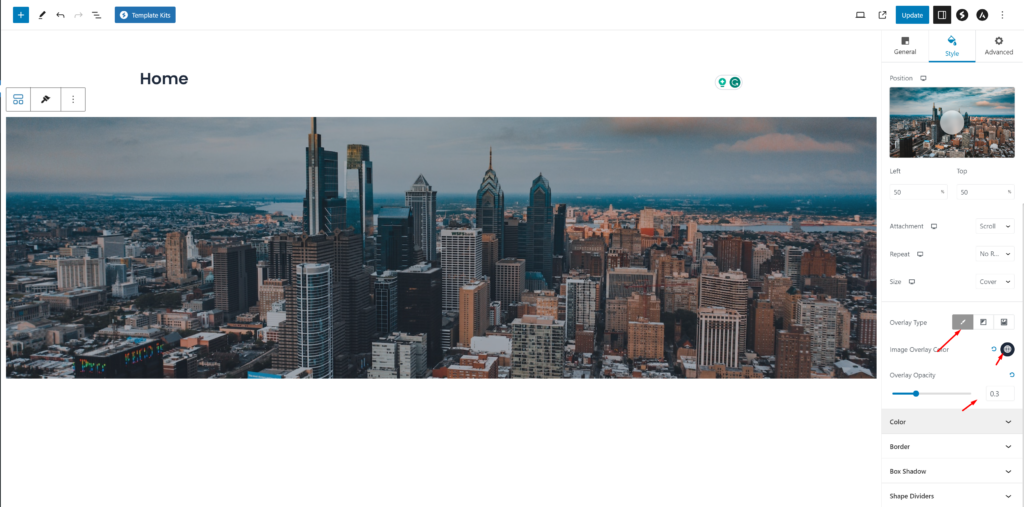
Now that we have made the hero image darker, we can add text.
Drag and Drop a Heading Element inside the Hero Image.
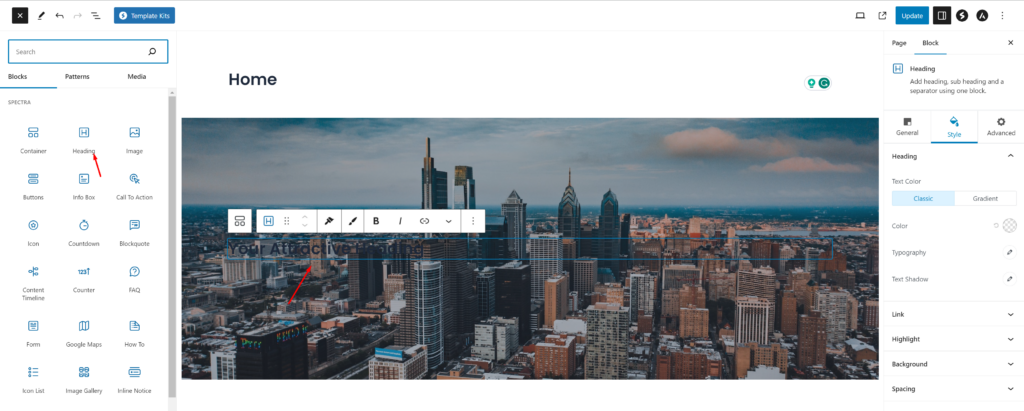
It’s time to give a title to our Homepage Hero Image.
From the Style tab, change the text color to white (#FFFFFF) to improve the contrast and readability.
In this tutorial, I will use a simple example, such as “Find the Best Restaurant in Philadelphia.” You can add whatever slogan you want here. Don’t forget to center the text using the alignment option.
To add the GD search to the homepage header, drag the GD > Search block into the hero container.
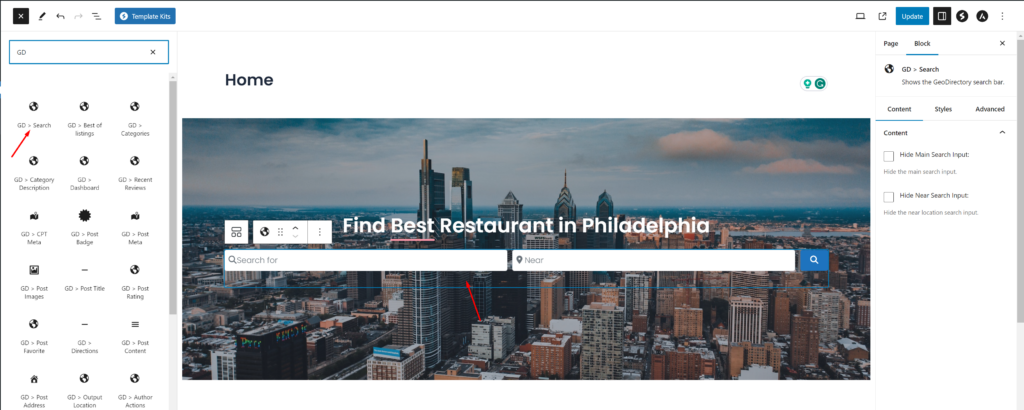
Next, add some minimum height to this hero container. I will set the height and width to 800px, and also make the container’s width full width and its content width to Boxed.
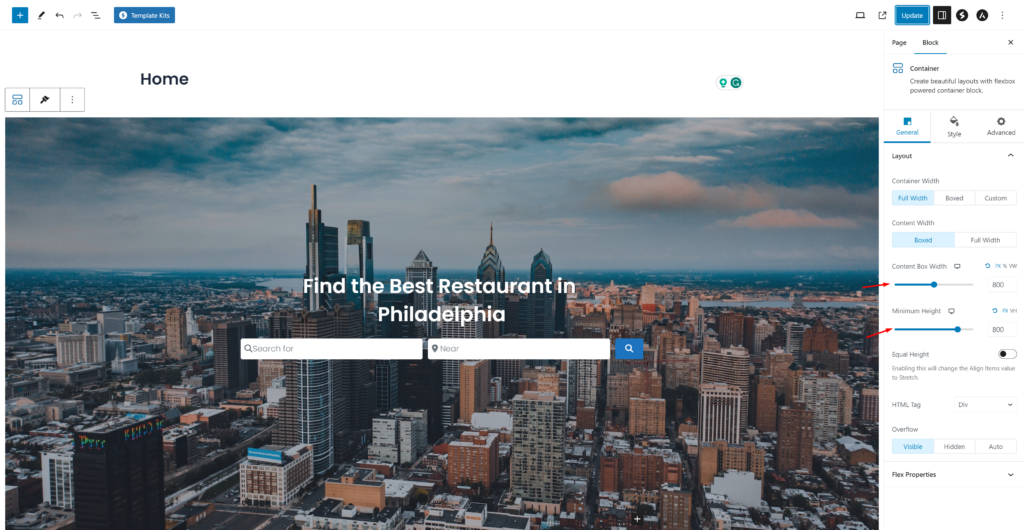
Now the homepage header looks like this with the page title and some extra space.
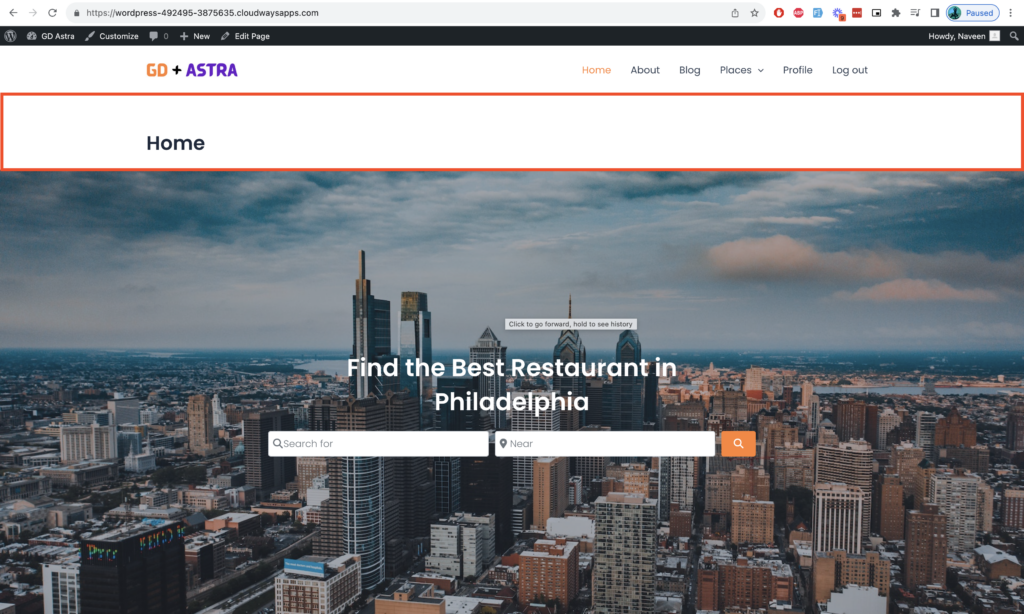
It’s time to remove this page title and extra space in the header section.
Click on the page title, and you will see an Eye icon; click on it to hide the page title and remove the extra space.
It’s time to add a few more required sections on the homepage. I will add a category section now.
Below the hero section, click the plus icon to add another container, then add the GD > Categories blocks there.
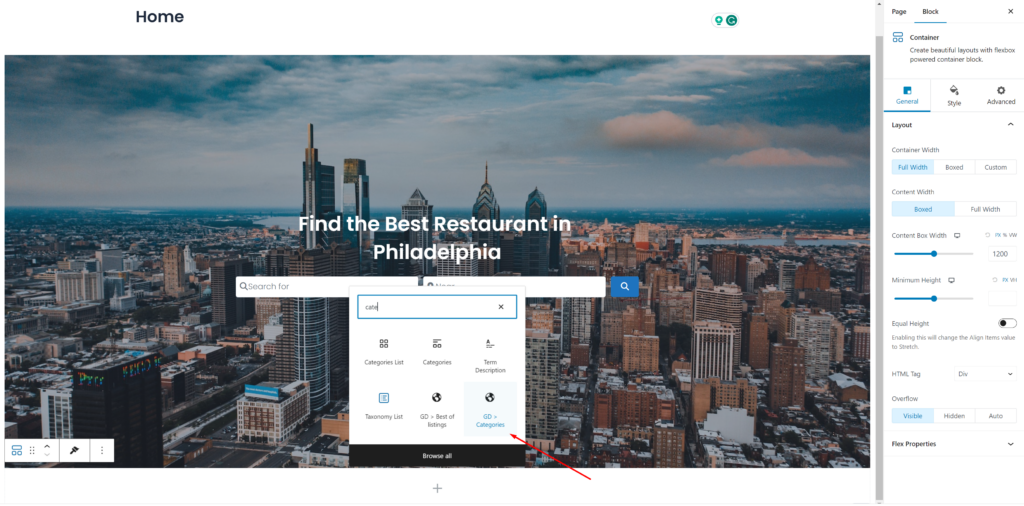
Now we will set up some necessary configurations in this GD > category block. We will set the Design type to Image Background, with 4 Row Items, and enable the use category image setting.
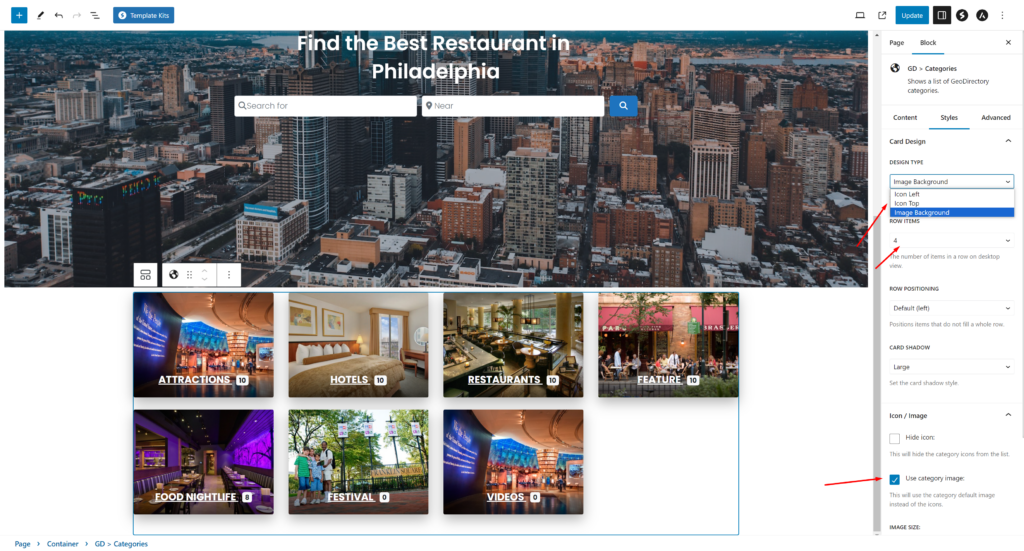
You can set the image to a category by editing the category from the wp-admin -> places -> Place Categories.
Each category has an option to set a default image
Now is the time to add some padding to this new container. So you can click on the outer container and set the required padding from the Style section. I am giving it 70px padding from top and bottom.
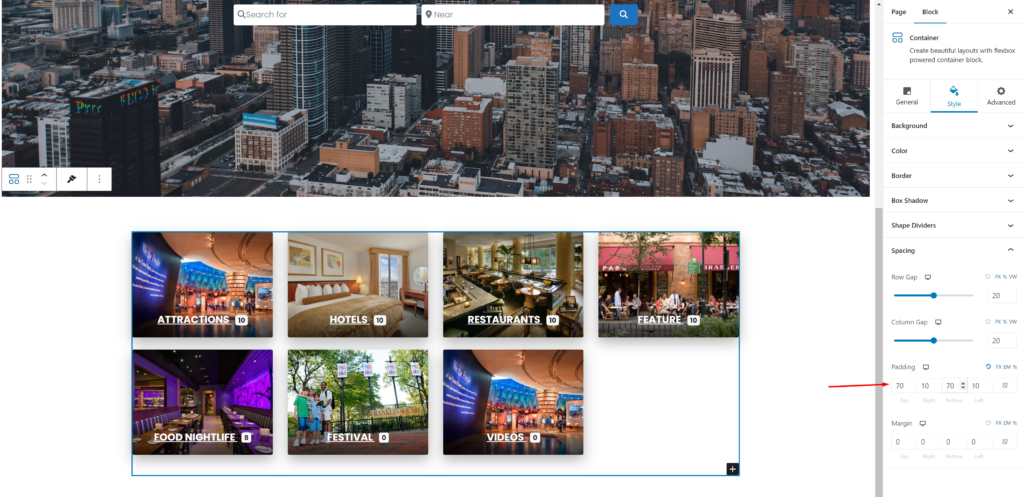
Now, quickly, we will add a few more containers. I will add recent listings below the category section using the GD > Listings widget.
The settings to be changed are:
In Filters > Post to Show = 4
In Sorting > Sort by = latest
In Design > Layout = Grid View (four columns)
Wrappers Styles > Margin Top = 5
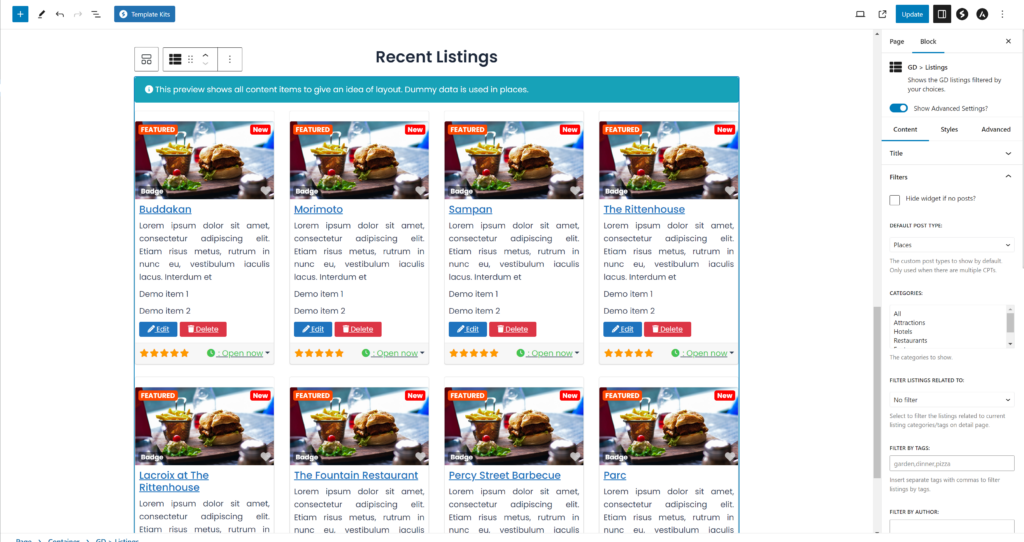
Let’s add some maps there so users can sort out listings with different filters and check them out on the map.
Let’s use GD > Map with the following settings:
Map Type: Directory Map
Map Options: Enable all of them
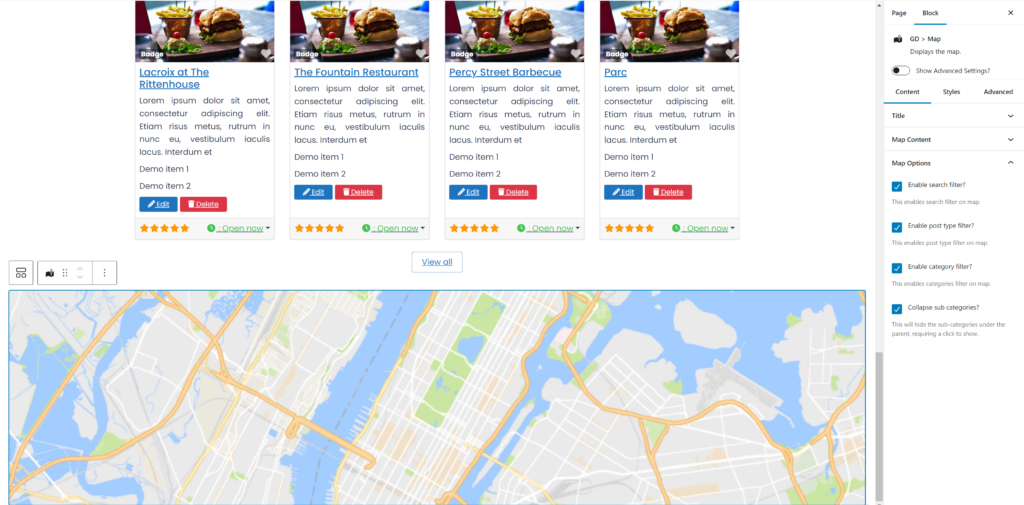
Let’s add some style by clicking on the styles tab and setting the width to 100% and the height to 600px to ensure it’s well displayed.
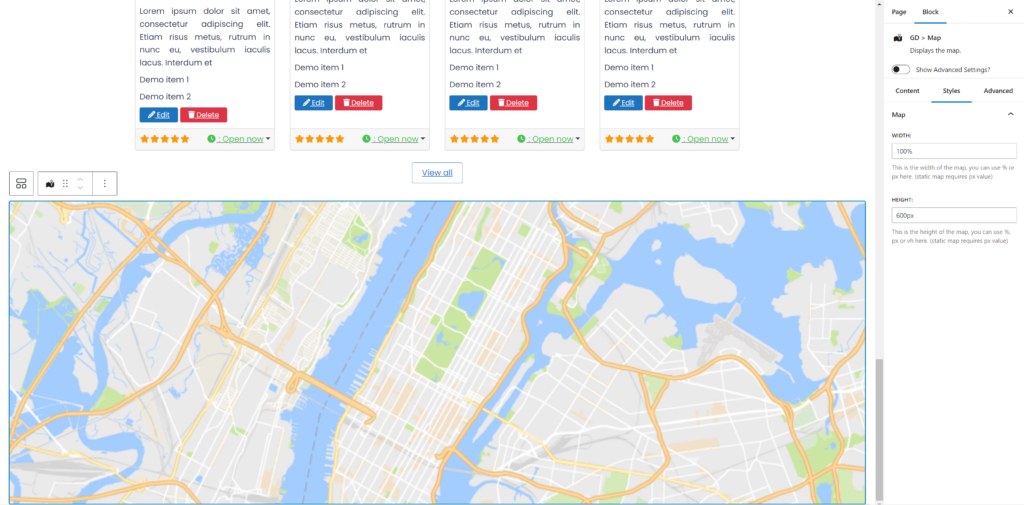
We will also make the map container full-width to make it look wider and look good.
Click on the outer container of the map, and in the general settings, set Container Width: Full Width and Content Width: Full Width.
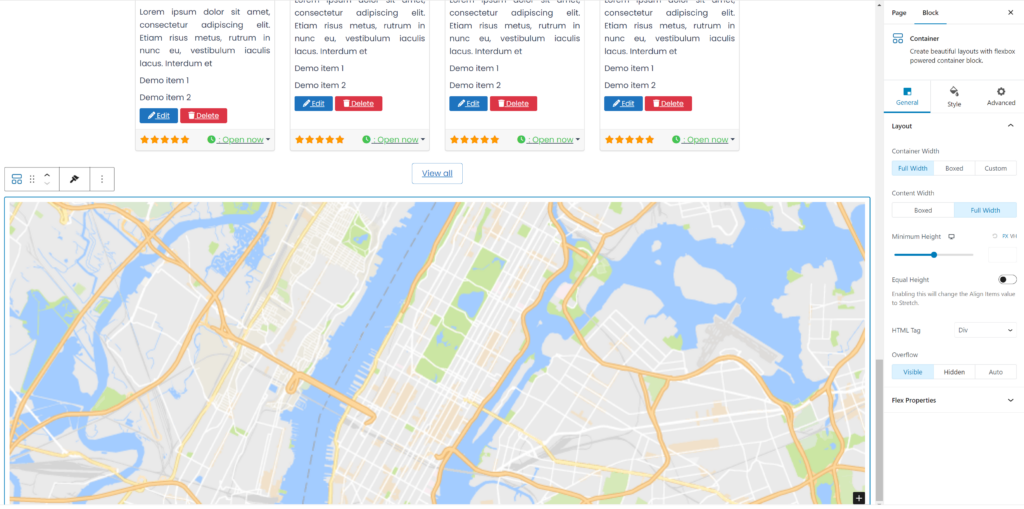
Now let’s add one more container to show recent posts. You can use the Post Grid block container provided by the Spectra Blocks plugin.
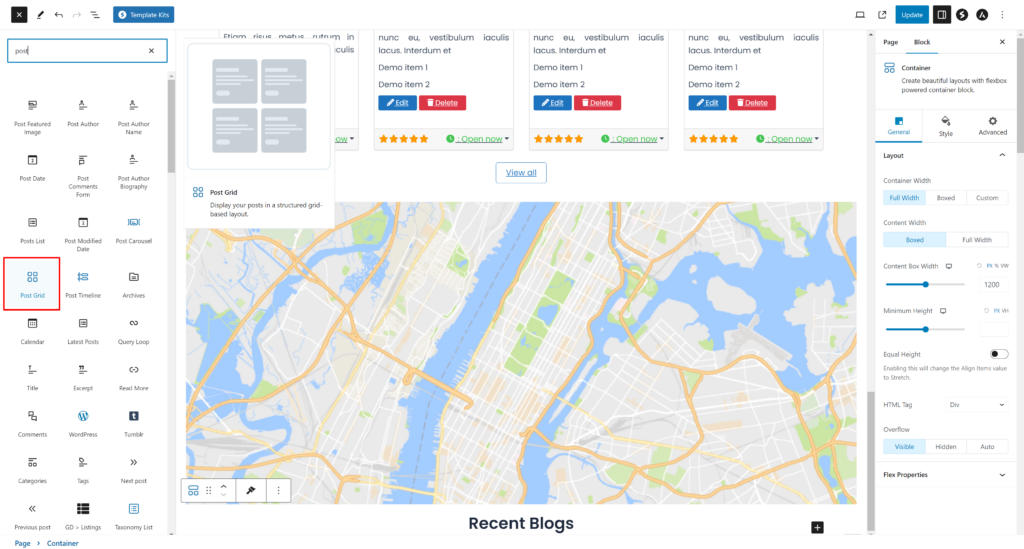
Congratulations! Your homepage is completed.
If you want, you can add multiple other containers or CTA.
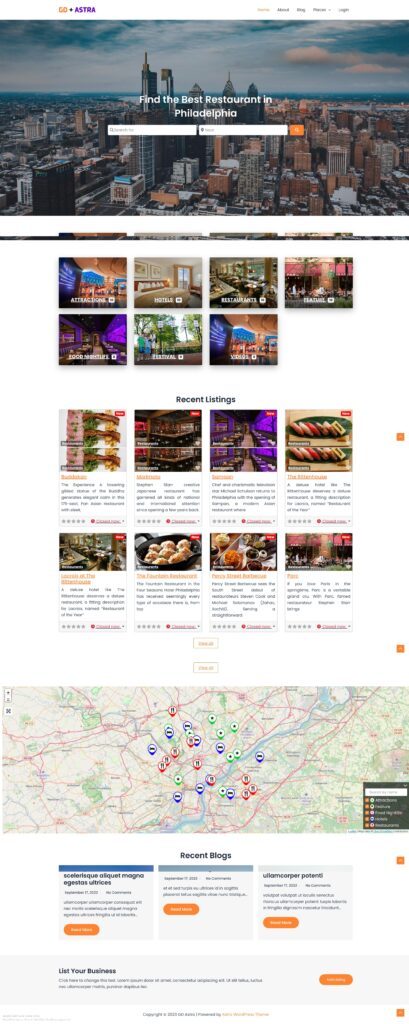
2. Astra Directory Website Listings and Search page design
Now you need to design two pages that are essential for any directory.
The listings page (general archive, categories, tags) and the search results page.
GeoDirectory creates them by default with a general layout. In this tutorial, we will customize the design of these pages a bit.
The listing and search pages are mostly identical, so we create it once and copy the layout on the other page.
We decided the Listing page layout would be the listings on the left, and on the right, a sticky map showing the listings’ precise location.
This is very easy.
Listings page
Go to Geodirectory > Settings > General > Pages > Click on edit GD Archive page template
Remove all the content from this GD Archive page template.
Now add a container with two columns.
Now, in the left container, we will drag GD Archive page-related widgets like GD > Loop Action, GD > Loop, GD > Loop Pagination, and GD > Search to the top so the user can search from the Archive page.
On the right column, we will drag the GD > Map block.
We will keep all the settings default for the GD > Map. Let’s give it some height, and I have decided to provide it with the height of 100vh.
Now just set the main container to full width by following the instructions given in the image.
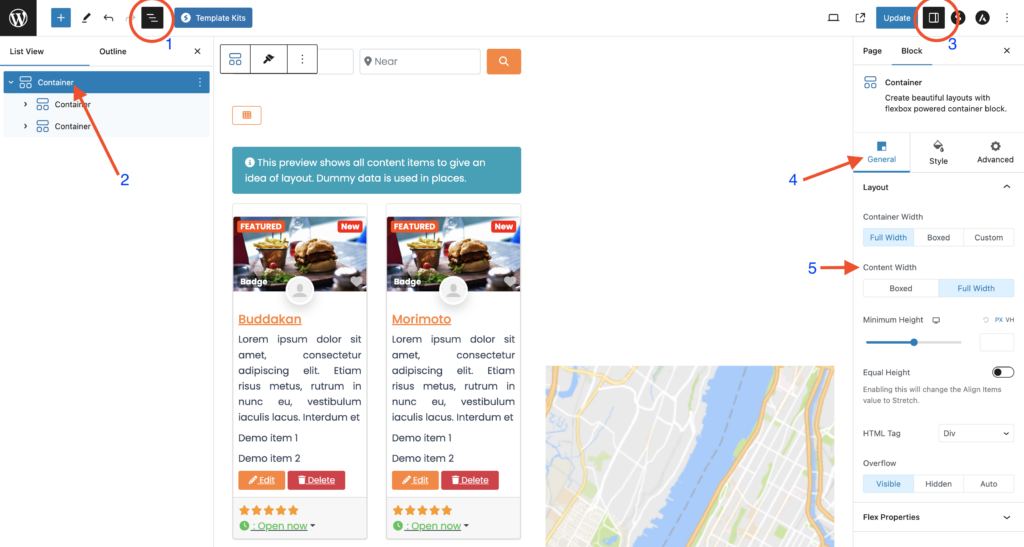
Now, after this, the Listing Archive page is ready.

Astra’s free version has limited settings, so you might need the below CSS snippet to make the left container content equal in size to the correct map container. You can paste it into your theme customizer from wp-admin > Appearance > Customise
.geodir-archive .wp-block-geodirectory-geodir-widget-loop .geodir-loop-container .geodir-listing-posts{
    overflow-y: scroll;
    max-height: 100vh;
}
There is an even easier way. If you set your page to full width, you can add the GD > Simple Archive Block as explained in our tutorial How to build a directory website with Elementor.
For the search page, we repeat the same process.
Search page
Go to Geodirectory > Settings > General > Pages > Click on edit GD Search page template.
Remove all the content from this GD Search page template.
Copy all the content of the GD Archive page and paste it into the GD Search page.
So now our GD Search and Archive page is ready.
3. Astra Directory Website single Listing page design
Now to edit and customize the GD Detail page, you can go to Geodirectory > Settings > General > Pages > Click on edit GD Detail page template.
In this template, you will already find default content generated by Geodirectory.
We will remove all this default content and add a container with the setting Container width: Full Width and Content Width: Full Width.
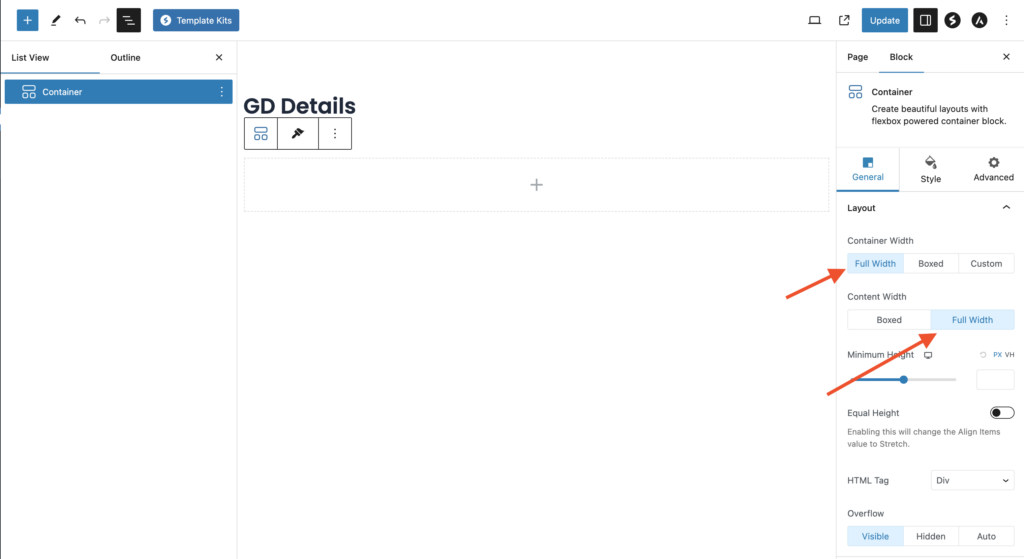
Now let’s add an image slider at the top of the Listing Detail page. We will drag the GD > Post Image block into this container.
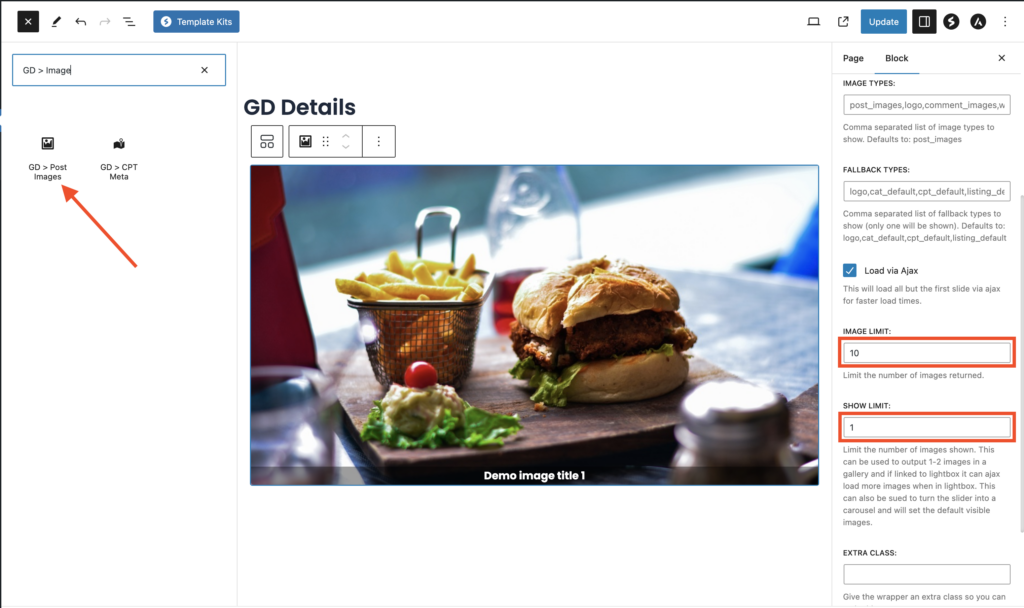
We will set the Image Limit to 10 and Show limit to 1, so only a single image gets displayed on each slide.
Now, let’s add another container below this one, where we’ll place the other required blocks of the Geodirectory Detail page.
Now, let’s add all the required GD Detail page shortcodes here one by one. Which includes GD > Single Taxonomies, GD > Single Tabs
Now it’s time to add some sidebar widgets. So we will go to wp-admin > Appearance > Widgets.
Add the GD > Author Action widget in the primary sidebar. This widget will provide an Edit and Delete Listing option to the Listing Author.
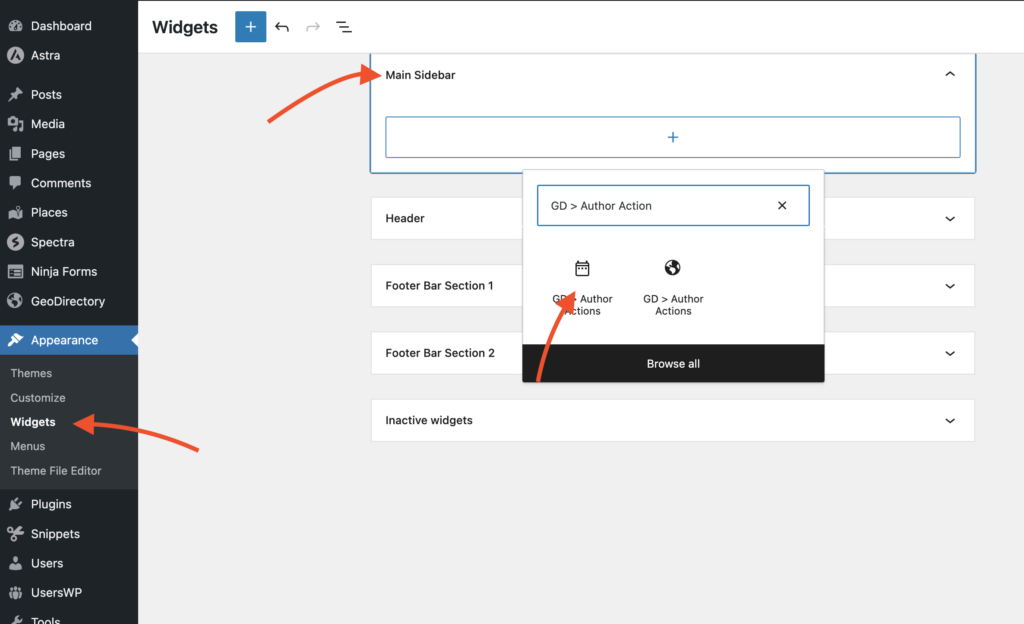
Add one more widget, GD > Output Location. This widget will show all major listing details that have been marked to be visible on the Detail page.
After doing this, our Listing Detail page has been completed.

Adding premium features to your Astra Directory Website
If you wish, now you can add premium features to your directory, such as:
- Paid Listings: With the GeoDirectory Listing Price Manager add-on, you can set prices for listing submission. For each price tier, you can enable/disable features such as: Restricting the number of pictures for free listings while allowing more pictures for paid listings, and allowing more or fewer tags and categories, enabling or disabling specific custom fields. Submitting longer or shorter descriptions.
- Claim Listings: This is a fundamental feature for a directory where the admin creates the database and invites business owners to take control of their free listings. The claim listing process may include forcing an upgrade to a paid listing to take over the listing’s ownership.
- Advertising: selling ads is another form of monetizing an online directory. If you have a lot of traffic, you can use ad networks. Otherwise, you may sell ads directly, allowing businesses to add banners in specific areas of your website or allowing for listings to appear as ads, for example, on top of organic search results.
These are just three examples. However, a directory website offers many ways to make money online.
You can create a global marketplace of handcrafted items, sell event tickets, or sell discount coupons.
Develop your perfect directory site with this comprehensive resource: Crafting your directory website: A comprehensive guide.
The possibilities are endless.
How to build an Elementor Directory Website?
The easiest way to build an Elementor Directory Website using the free Elementor plugin is to implement the following 4 steps:
- Install the Hello Theme
- Install Elementor
- Install and set up GeoDirectory
- Design the Elementor Directory Website
Let’s see how we can do that in detail. But first, let’s see why this solution is the best.
The best way to build a directory website using Elementor.
To build an Elementor Directory Website, Elementor.com suggests using the Custom Post Type UI, the Advanced Custom Fields, and the Elementor Custom Skin plugins.
Is that the best way to go?
Possibly, but only if you are planning to build a simple directory without the following:
- A high number of listings (The wp-posts database table doesn’t scale well)
- Many custom fields for each listing (Advanced Custom Fields does not scale either)
- Option for users to add and edit their listings from the front end
- Advanced search by location, proximity, GeoLocation, or custom fields
- Paid listings with extra features and added visibility
- Options for listing owners to claim their listing
- User reviews and sort listings by rating
- Interactive maps offering directions to reach the business
- Contact forms to send emails to business owners
- Other monetization options
- An Events Directory
Following their tutorial, you can build a catalog of businesses with essential information and very little interactivity for your website visitors.
Here we list all the challenges that you will face following this approach:
Developing a Directory Website with Custom Post Types and Advanced Custom Fields
If you need one or more of the points listed above instead, you would need many extra plugins and, in some cases, quite a lot of custom code.
There must be a better way! Wait, there is!
You can use GeoDirectory:
The Best Elementor Directory Plugin
With its premium add-ons, you can get everything listed above and much more.
In addition, you may even avoid using Elementor PRO because the free version of Elementor will be more than enough for this tutorial.
You only need Elementor PRO if you have a very sophisticated and personalized design.
So, without further ado, let’s see how you can build a Directory Website with GeoDirectory, a free theme, the basic version of the Elementor plugin, with a third-party free add-on.
Elementor Directory Website using only a Free Theme and Free Plugins
We will start this tutorial by showing you how to build a simple directory website using free WordPress resources, such as the Free Elementor Plugin, its free Hello Theme, and the Free GeoDirectory plugin.
It will feature the following:
- Unlimited listings with unlimited custom fields.
- Search by proximity.
- User Reviews
- An add listing form, allowing users to submit their listings, edit, and/or delete them from the website front end.
Of course, WordPress, out of the box, comes with the option to create a blog and unlimited pages.
We assume you already have a Hosting provider and WordPress installed.
I’m creating a Business Directory for the City of Philadelphia in this tutorial.
In this tutorial, we will:
Installing Theme and Plugins.
1. Install the Hello Theme
First, you will need to install a Theme, and for this tutorial, you will install the Hello Theme, which is the Elementor starter theme.
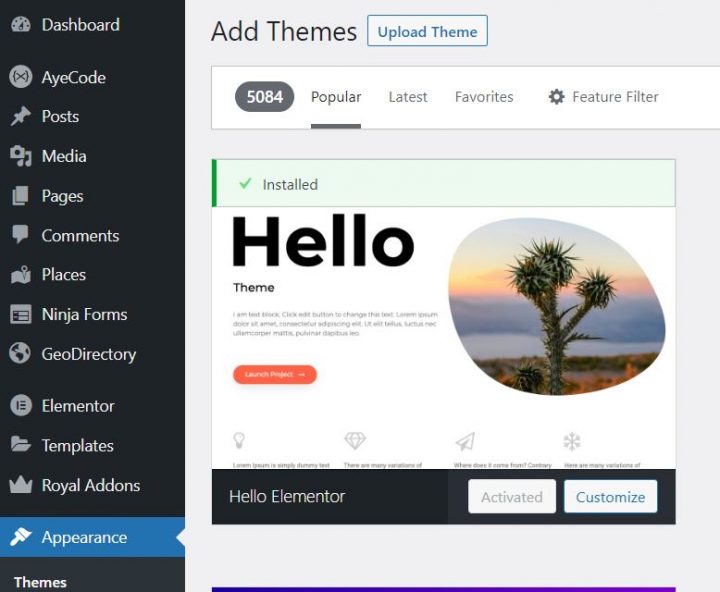
Go to Appearance >> Themes
Select Add New, Install, and Activate the Hello Theme.
2. Install Elementor
Now you will need to install the page builder. In this case, you are installing the free version of the Elementor Plugin.
Go to Plugins >> Add new.
Search for Elementor. Install it and activate it.
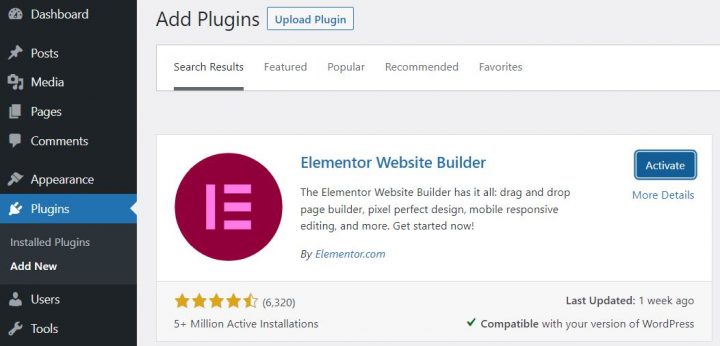
You can skip all steps of the Setup Wizard.
3. Install GeoDirectory
Last but not least, you need to install GeoDirectory.
Go to Plugins >> Add new, search GeoDirectory. Please install and activate it, and we are done installing plugins for now.
4. GeoDirectory Install Wizard
For GeoDirectory, you will need to complete the Setup Wizard to configure the Google Maps API key and import a few dummy listings.
Choosing the Map System (Google Maps or OpenStreetMap)
You can choose between two mapping systems on the wizard’s first step. Google Maps and Open Street Maps (which doesn’t require an API key).
In this tutorial, we select Google Maps.
Click on the Generate Key button and follow the steps in this doc to generate a valid API key.
The essential steps are:
- Create or select an existing project.
- Enable the Keys.
- Get the Key.
- Activate a billing account.
- Restrict the API key (so it can only be used from the URL of your website)
About point four: it is a requirement. However, you only get charged if you pass the threshold, which is $200/month.
This free credit is more than enough for 99% of directories.
Setting the default city
After that, you will set the default location. This is the city for which the directory is created. We will leave the default city unchanged.
GeoDirectory uses Philadelphia as the default City.
You can use whatever location you need.
If you need to add listings to more than one city, you will need the Location Manager add-on.
Adding extra features
In this step, we will install UsersWP, our user registration plugin that enables users to register and log in to your website.
This is needed to allow users to add and edit their listings. It will also create user profiles where users can find their listings, reviews, and other relevant information.
We will also install Ninja Forms so that all listings have a contact form that sends emails directly to the listing owners.
AyeCode Connect is not mandatory for this tutorial. It is mainly needed if you want to add GeoDirectory premium add-ons and install them directly from the WordPress Dashboard.
Adding Dummy Data
The last step in the installation wizard is to add some dummy listings. This will also add listings categories that you can edit later according to your needs.
You will not add sidebar widgets and menu items right now, as we will do that later.
Design the Elementor Directory Website
Now that we have installed the theme, plugins, and completed the preliminary setup of GeoDirectory, we can start designing our Directory Website with Elementor.
1. Elementor Directory Website Home Page design
You can create a new page or use one WordPress creates by default, like the Sample Page.
Go to Pages, edit the Sample page, and rename it Home, or create a new page for this.
Next, go to Appearance > Customize > Homepage Settings and select your Home.
We will select the Posts page later.
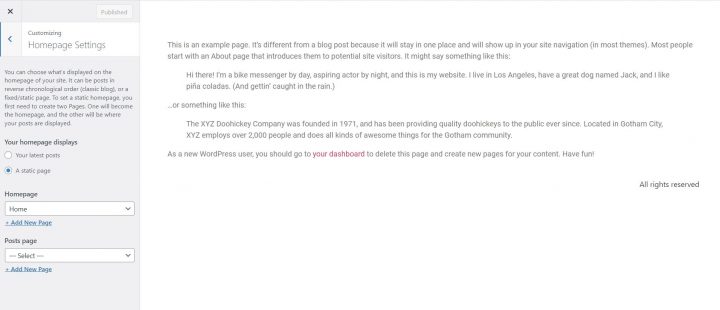
The Logo
First things first, we will need a logo for our website.
You don’t need to invest in a designer to sketch the 1st version of your logo.
One of the biggest mistakes you can make when starting a new business is investing too much time and money before testing the product market fit.
You can design a logo in just five minutes with an app like Canva, which is surprisingly affordable and effective.
For an MVP (minimum viable product), a logo designed with Canva will be more than enough.
There are several logo templates to choose from, and it doesn’t matter if your initial logo isn’t as perfect or original as you’d like.
If your project gains traction, you can always invest in improving it or making radical changes later.
An average logo is never the leading cause of a failed project.
After designing your logo, go to Appearance > Customize > Site Identity, click Select Logo, and upload your PNG file. Skip cropping (or crop the image as needed) and click publish.
The Navigation Menu
After creating and adding the logo, go to Appearance > Menus, and create your menu.
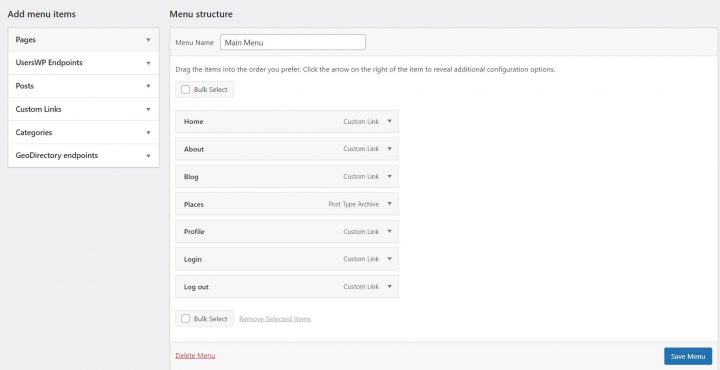
Add the links needed (from the left column to the right column) and save. In the Menu Settings > Display location section, you can check the “Header” option.
If you want, you can make the same menu appear on the footer or create another menu to appear there.
In this example, we’ll only have the header navigation menu.
We added seven links:
- Home
- About
- Blog
- Places
- Profile
- Login
- Logout
The Login link (from UsersWP Endpoints) will only appear for logged-out users, while the log-out and profile links will only appear for logged-in users.
The Content
Now you can start designing the home page. First, you will need to add a hero image below the header.
To do this, go to Pages > Home and click Edit with Elementor.
If you used the Sample page, delete the Text Editor by right-clicking on the text and selecting delete. If you created a new page, add a section. (Click the plus button of the page builder where it says Drag widget here.)
Now you have a blank page with only one section of one column.
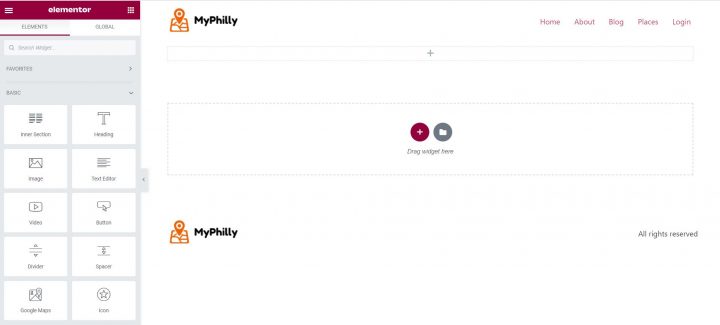
Click the Edit Section Icon (light-blue central icon of sections) and select Full Width in the Content Width option.
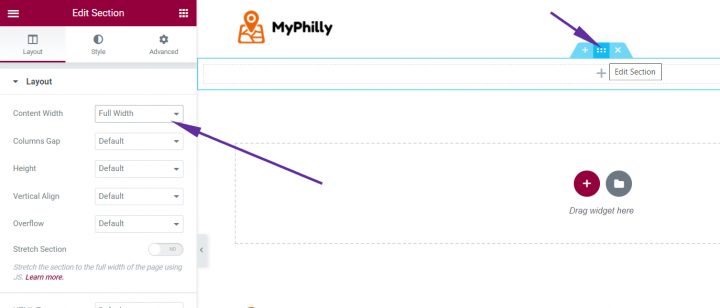
Next, click Style from the top tabs. Select > Classic as the Background Type.
For the Hero Section, we will use this free image of Philadelphia from Pexels.com (Thanks, @Kelly).
Upload your image and use the Position option to adjust the appearance of the background. In this case, select “Center Center.”
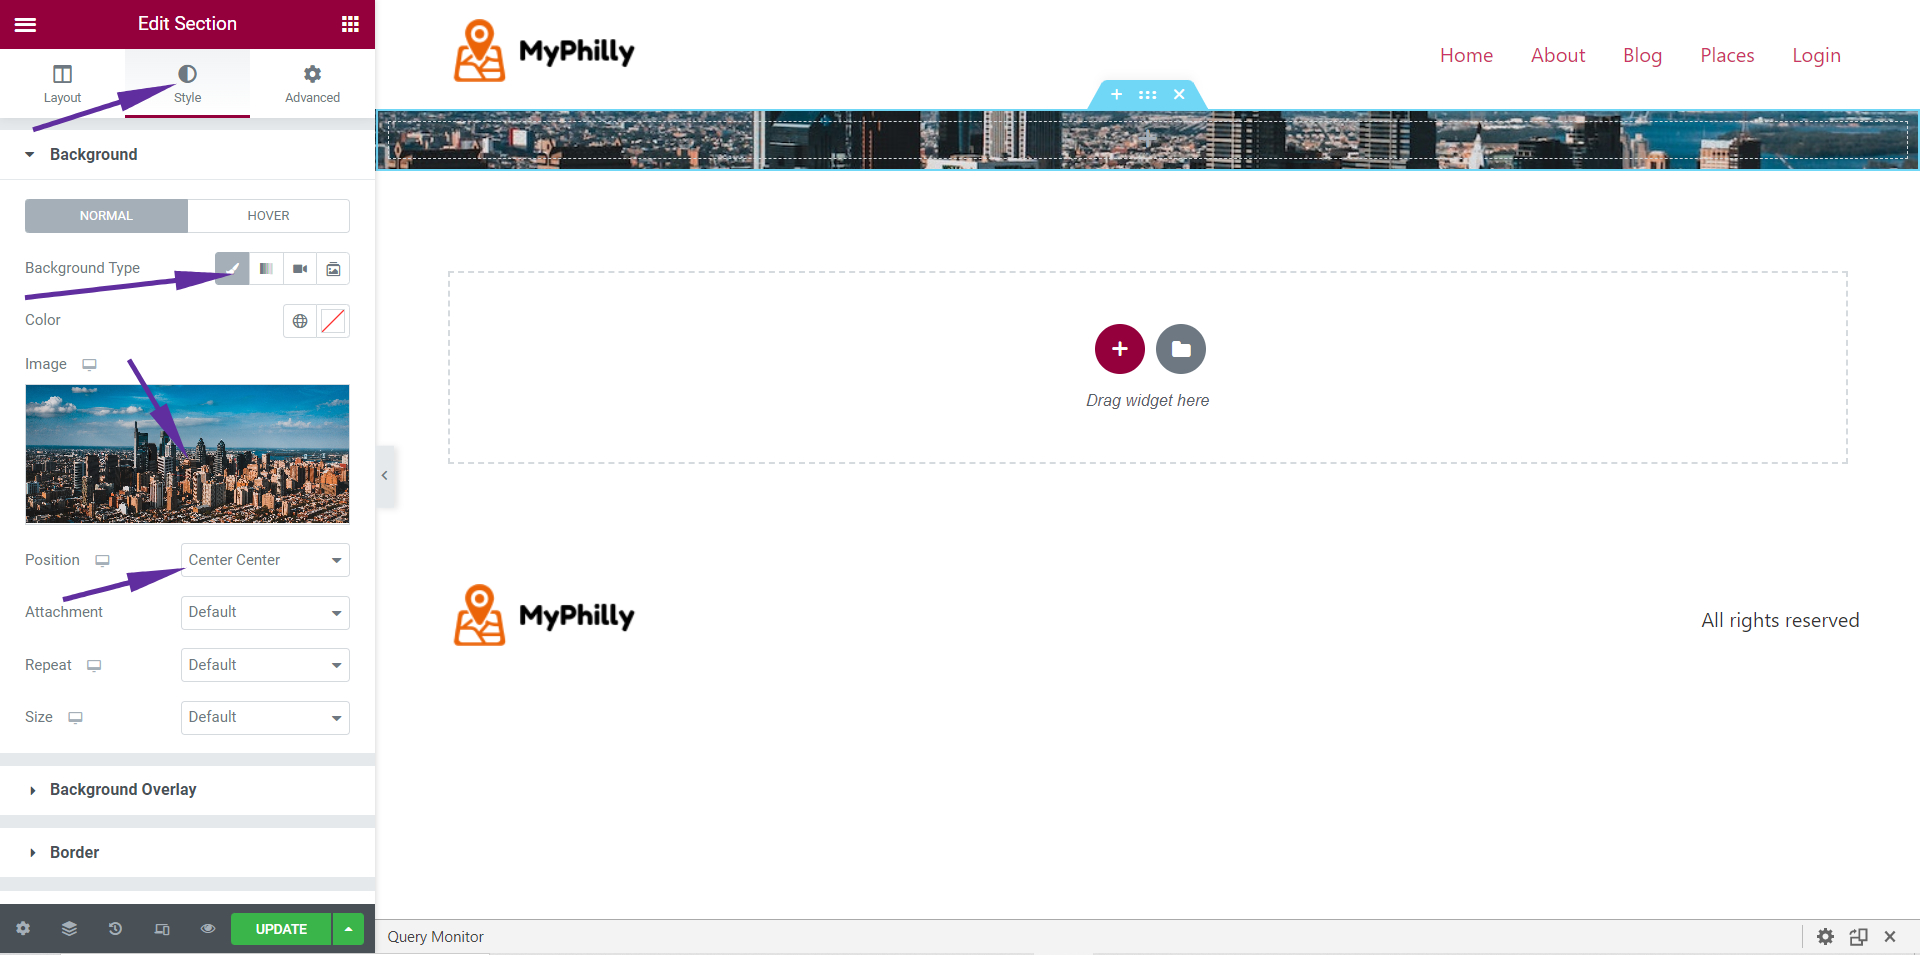
You can now see only a ribbon of our image, but the next step will make it appear as needed.
The image needs an overlay, or any text on top won’t have sufficient contrast and will be difficult to read.
Click Background Overlay, select Background Type: Classic, Color: Black (#000000), and Opacity: 0.5 (it should already be set that way).
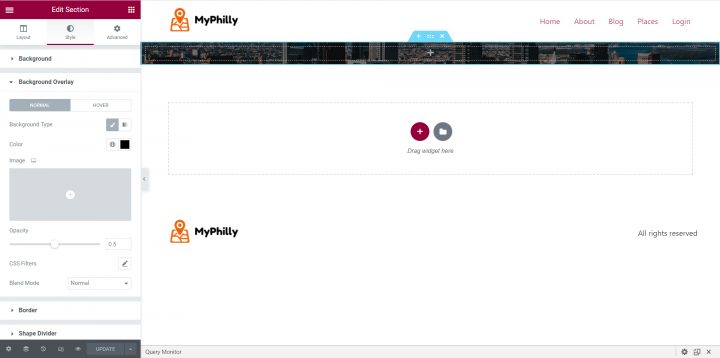
Now that we have made the hero image darker, we can add text.
Click the center of the image (a gray plus button is barely visible). This will bring up the widgets on the left Elementor Panel.
Drag and Drop a Heading Element inside the Hero Image.
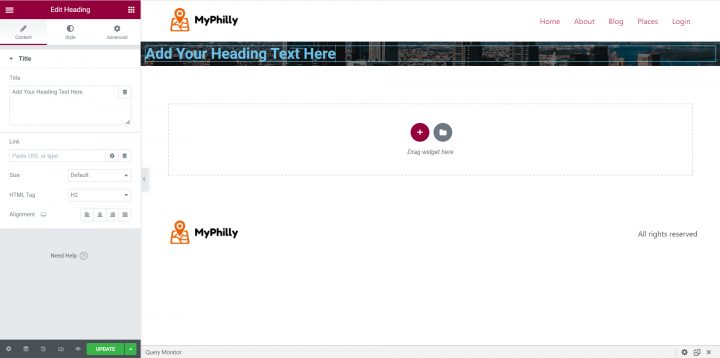
It’s time to give a title to our Homepage Hero Image.
In this tutorial, I will use something simple like “My Philadelphia Directory.” You can add whatever slogan you want here. Don’t forget to center the text utilizing the alignment option.
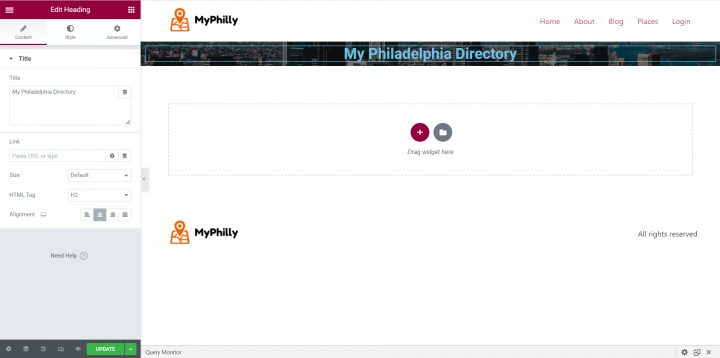
From the Style tab, change the text color to white (#FFFFFF) to improve the contrast and readability.
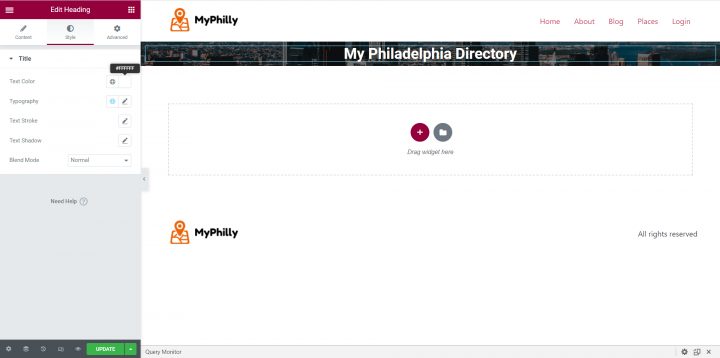
Next, add some padding to reveal the hero image as intended. Select the Advanced tab of the left-side Elementor panel, and unlink padding values (this is done by clicking the link icon at the end of the values).
Add 250 to the top value and 50 to the bottom value. Leave 0 for both the right and left values.
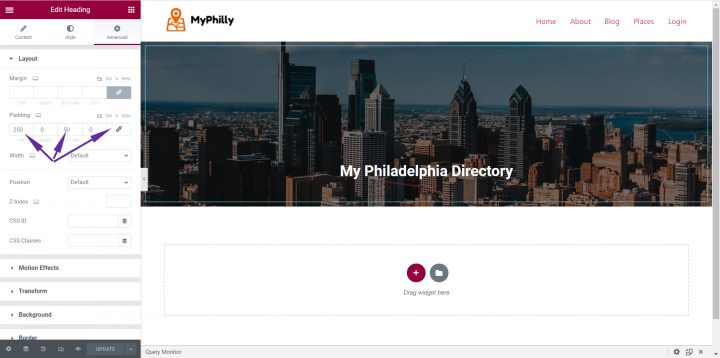
You can add the GeoDirectory Search Widget below the title to complete the Hero Image of the homepage.
But first, you need to add an inner section to control the width of the search form.
On the Elementor Left panel, click the grid icon (right of the Elementor Logo) to return to the Elements List.
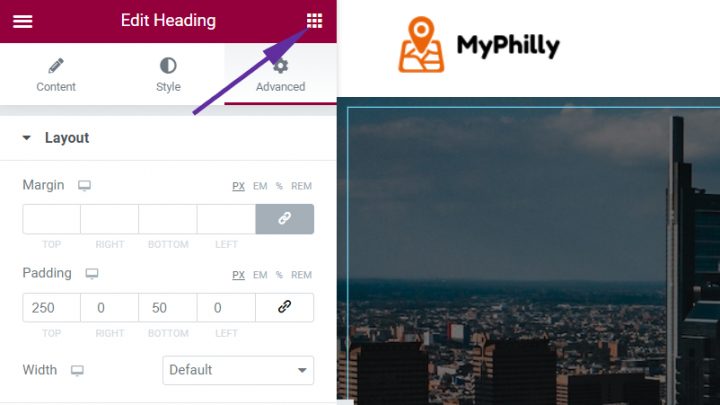
Drag and drop an Inner Section element below the Title.
The inner section will have two columns by default. You have to delete one.
Right-click on one of them and delete it. Now click on the other one and set its width to 700.
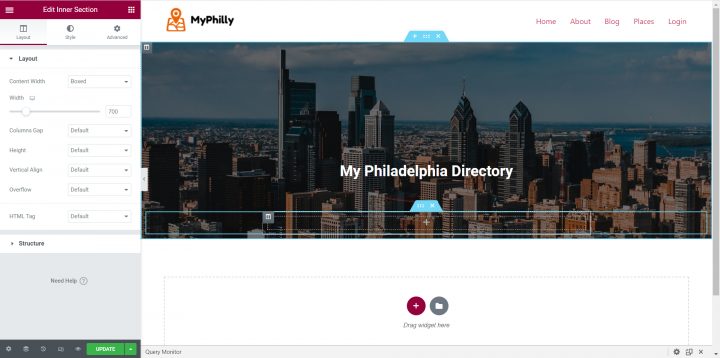
Now you can add the GD > Search element to the Inner Section.
On the Elementor Left panel, click the grid icon again (right of the Elementor Logo) to return to the Elements List.
Search GD > Search and drag and drop it inside the inner section.
Finally, click the Advanced Tab, unlink padding values, and add 200 to the bottom padding option. This will show the bottom part of the hero image.
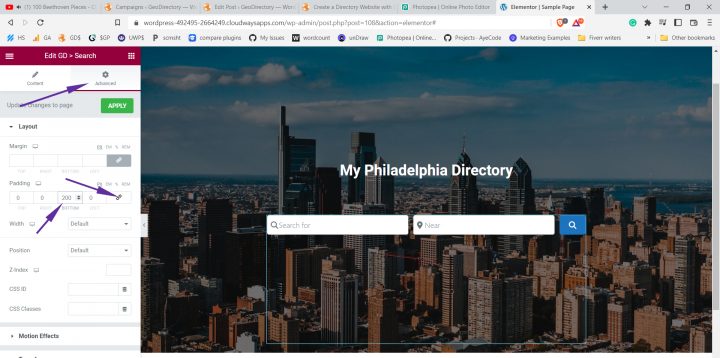
You can now add a few listings widgets below the hero image, along with a widget featuring a few blog posts.
To add, let’s say, a grid with four listings, you will need to add a new section below the hero image, set with a boxed content width and 1140 as width.
Inside this section, first, add a Heading for the recent listing, change the text to Recent Listings (or whatever you see fit), center the text, change the color to dark gray (#333333), and add 50px of Top Margin from the Advanced tab.
Next, add the “GD > Listings” widget. The settings to be changed are:
In Filters > Post to Show = 4
In Sorting > Sort by = latest
In Design > Layout = Grid View (four columns)
Wrappers Styles > Margin Top = 5
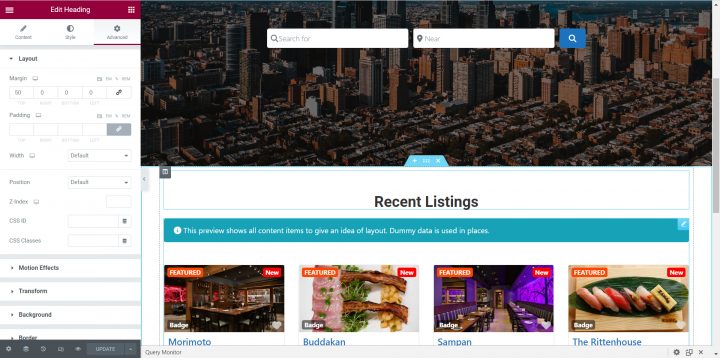
Time to add some blog posts.
I used this plugin to generate dummy posts with Images. I used the Post Grid Elementor Add-on to display them on the homepage.
Below the listings, add a Heading for the recent posts, change the text to Recent Posts (or whatever you see fit), center the text, change the color to dark gray (#333333), and add 50px of Top Margin from the Advanced tab.
Next, add the Post Grid (from WPC Element) and adjust the following settings:
From the Style tab > Title > Typography, change the font size to 1.25rem and the color to match the listings titles’ color (#1E73BE).
Finally, from the Advanced tab, add a 50px top margin.
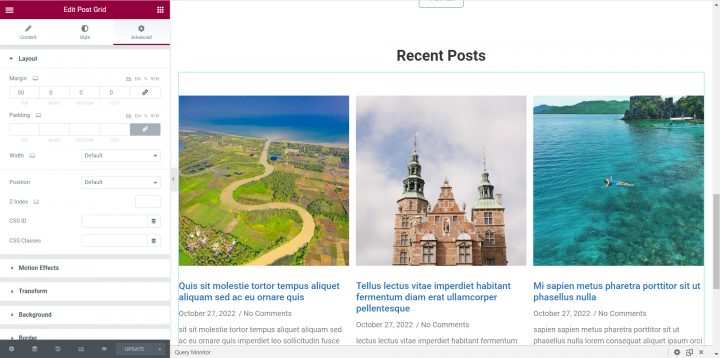
There you go. The homepage is completed. You can add whatever you want next, but this is more than enough for this tutorial.
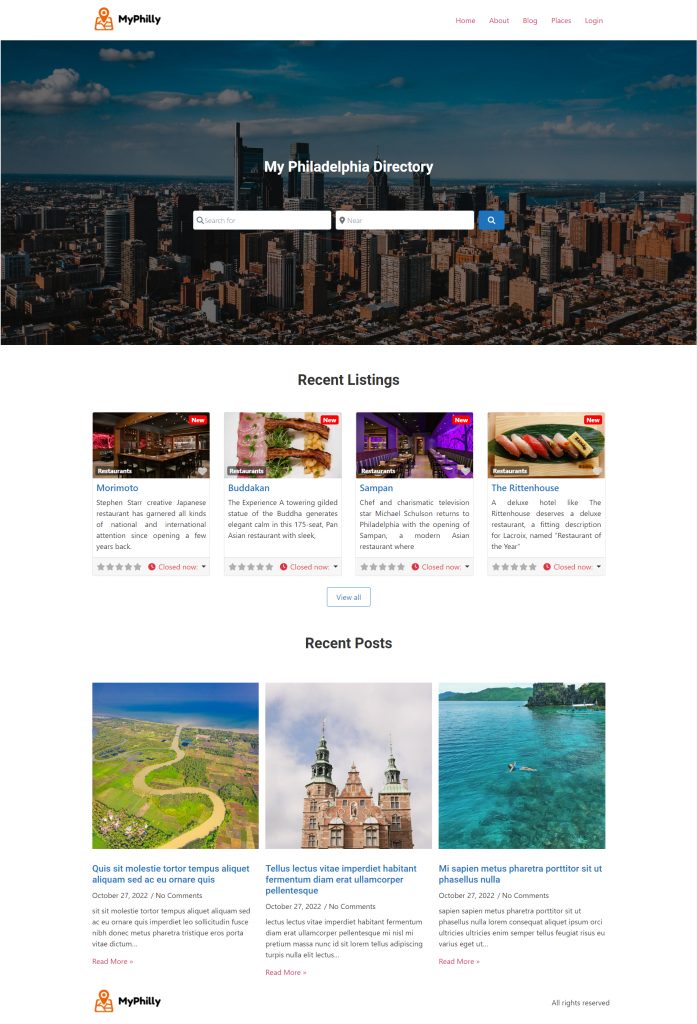
2. Elementor Directory Website Listings and Search page design
Now you need to design two pages that are essential for any directory.
The listings page (general archive, categories, tags), and the search results page.
GeoDirectory creates them by default, but in this tutorial, we will delete the default pages and create our own.
You will create two identical pages. We will use a layout with two wide columns.
There will be the listings on the left, and on the right, a sticky map showing the listings’ precise location.
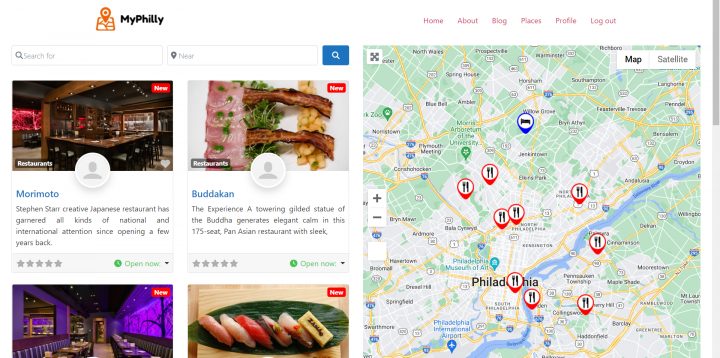
This is very easy.
Listings page
Go to Pages > Add new > Add Title = Listings. Publish the new page.
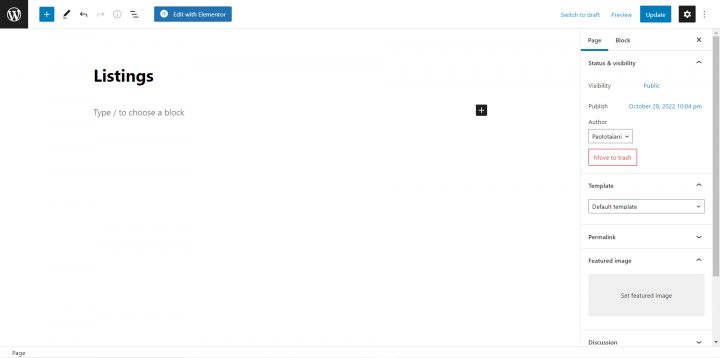
After publishing the page, click the Edit with Elementor button.
Click the Gear Icon at the screen’s bottom-left corner, hide the title, set the page layout to Elementor Full Width, and click update.
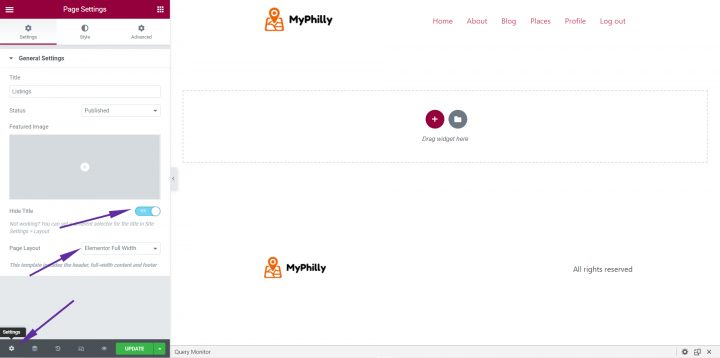
Add a section (Click the plus button of the page builder where it says Drag widget here.)
In Layout > Content Width, set Full Width. Now, click the plus button inside the new section, search for GD > Simple Archive, and drag and drop the widget inside the newly created section.
Adjust the following settings.
Main Output > Check Show Search
Map > Enable Sticky Map
Click Update. That’s it for the Listings page.
For the search page, we repeat the same process.
Search page
Go to Pages > Add new > Add Title = S. Publish the new page.
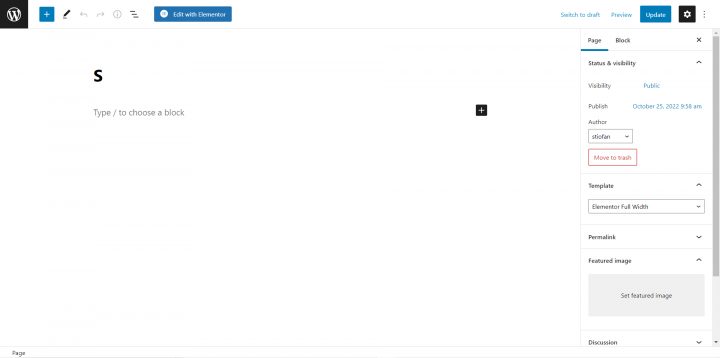
After publishing the page, click the Edit with Elementor button.
Click the Gear Icon at the screen’s bottom-left corner, hide the title, set the page layout to Elementor Full Width, and click update.
Add a section (Click the plus button of the page builder where it says Drag widget here.)
In Layout > Content Width, set Full Width. Now click the plus button inside the new section, search for GD > Simple Archive, and drag and drop the widget inside the newly created section.
Adjust the following settings:
- Main Output > Check Show Search
- Map > Enable Sticky Map
Click Update. That’s it for the Search page.
We need to change GeoDirectory settings to tell the plugin to use these two pages instead of the default ones.
From the WordPress Dashboard, click GeoDirectory > Settings > Pages.
Assign our page titled Listings as the Archive page and the page titled S as the Search Page.
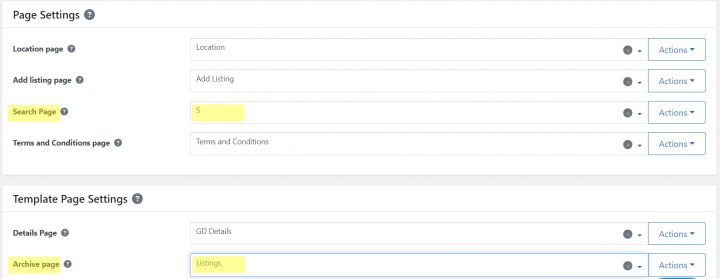
We have completed both the new Listings and Search pages, and GeoDirectory knows how to use these new templates.
3. Elementor Directory Website single Listing page design
To complete the directory, we need to design one more template, the GD Details page. This is the template used to show the single listings.
GeoDirectory generates one automatically, but we will replace it to create a new page.
Use whatever title you prefer. I called it “mpdetails”. Save it as a draft.
We need to change GeoDirectory settings to tell the plugin to use this page instead of the default GD Details page.
From the WordPress Dashboard, click GeoDirectory > Settings > Pages.
Assign our page titled “mpdetail” as the Details Page.
Now let’s go back to the page, open it, and click the edit with Elementor button.
Like we did for previous pages, click the Gear Icon at the screen’s bottom-left corner, hide the title, set the page layout to Elementor Full Width, and click update.
Add a section (Click the plus button of the page builder where it says Drag widget here.)
In Layout > Content Width, set Full Width. Now, click the plus button inside the new section, search for GD > Post Images, and drag and drop the widget inside the newly created section.
Adjust the following settings:
- General > Show Limit: 3
- Design > Output Type: Slider
Next, we need to add the listing title. Search for the element GD > Post Title, then drag it to the “Drag Widget Here” area.
Adjust the following settings:
- General > Output Type: H1
- Design > Font Size: H1
Now we will need to add the Listing Content. Add a new section (Click the plus button of the page builder where it says Drag widget here.)
Select the two-column layout 66/33 (with the left column twice the size of the right column)
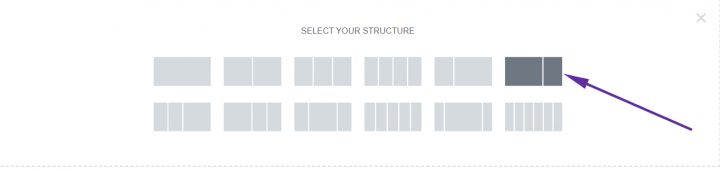
We will drag the element GD > Single Tabs to the left column. The only option to enable is Content > Show as a list.
It will output the Description, Photo Gallery, Map, and Reviews of each listing as a list.
If you do now enable the Show as List option, it will output a group of 4 tabs, each tab showing the content previously mentioned.
We will add the GD > Output location element in the right column.
This element groups several pieces of information about the listing, including tags, categories, addresses, contact information, and Hours of operation.
These details are also available as unique elements that can be used separately for custom designs.
For example, you can use the GD > Post Address element to show the address anywhere on your page.
For all content, there is the GD > Post Meta element. Every custom field can be output through this element by setting the KEY Value accordingly.
Alternatively, you can use the element GD > Badge to show just about any listing information as a button.
To complete our single directory listing page, I will add custom CSS to adapt the design to the theme and achieve the desired look.
I like to keep all my CSS in one spot, and I prefer to add it to Appearance >> Customizer >> Additional CSS with comments.
/* Reduce list heading font size */

h2.gd-tab-list-title.h3 {
font-size: 1.25rem;
}

/* Add white space between headings and content */
div#geodir-tab-content-post_content, div#geodir-tab-content-post_images, div#geodir-tab-content-post_map, div#geodir-tab-content-reviews {
    margin-top: 30px
;
}
This is what the single listing page looks like after this.
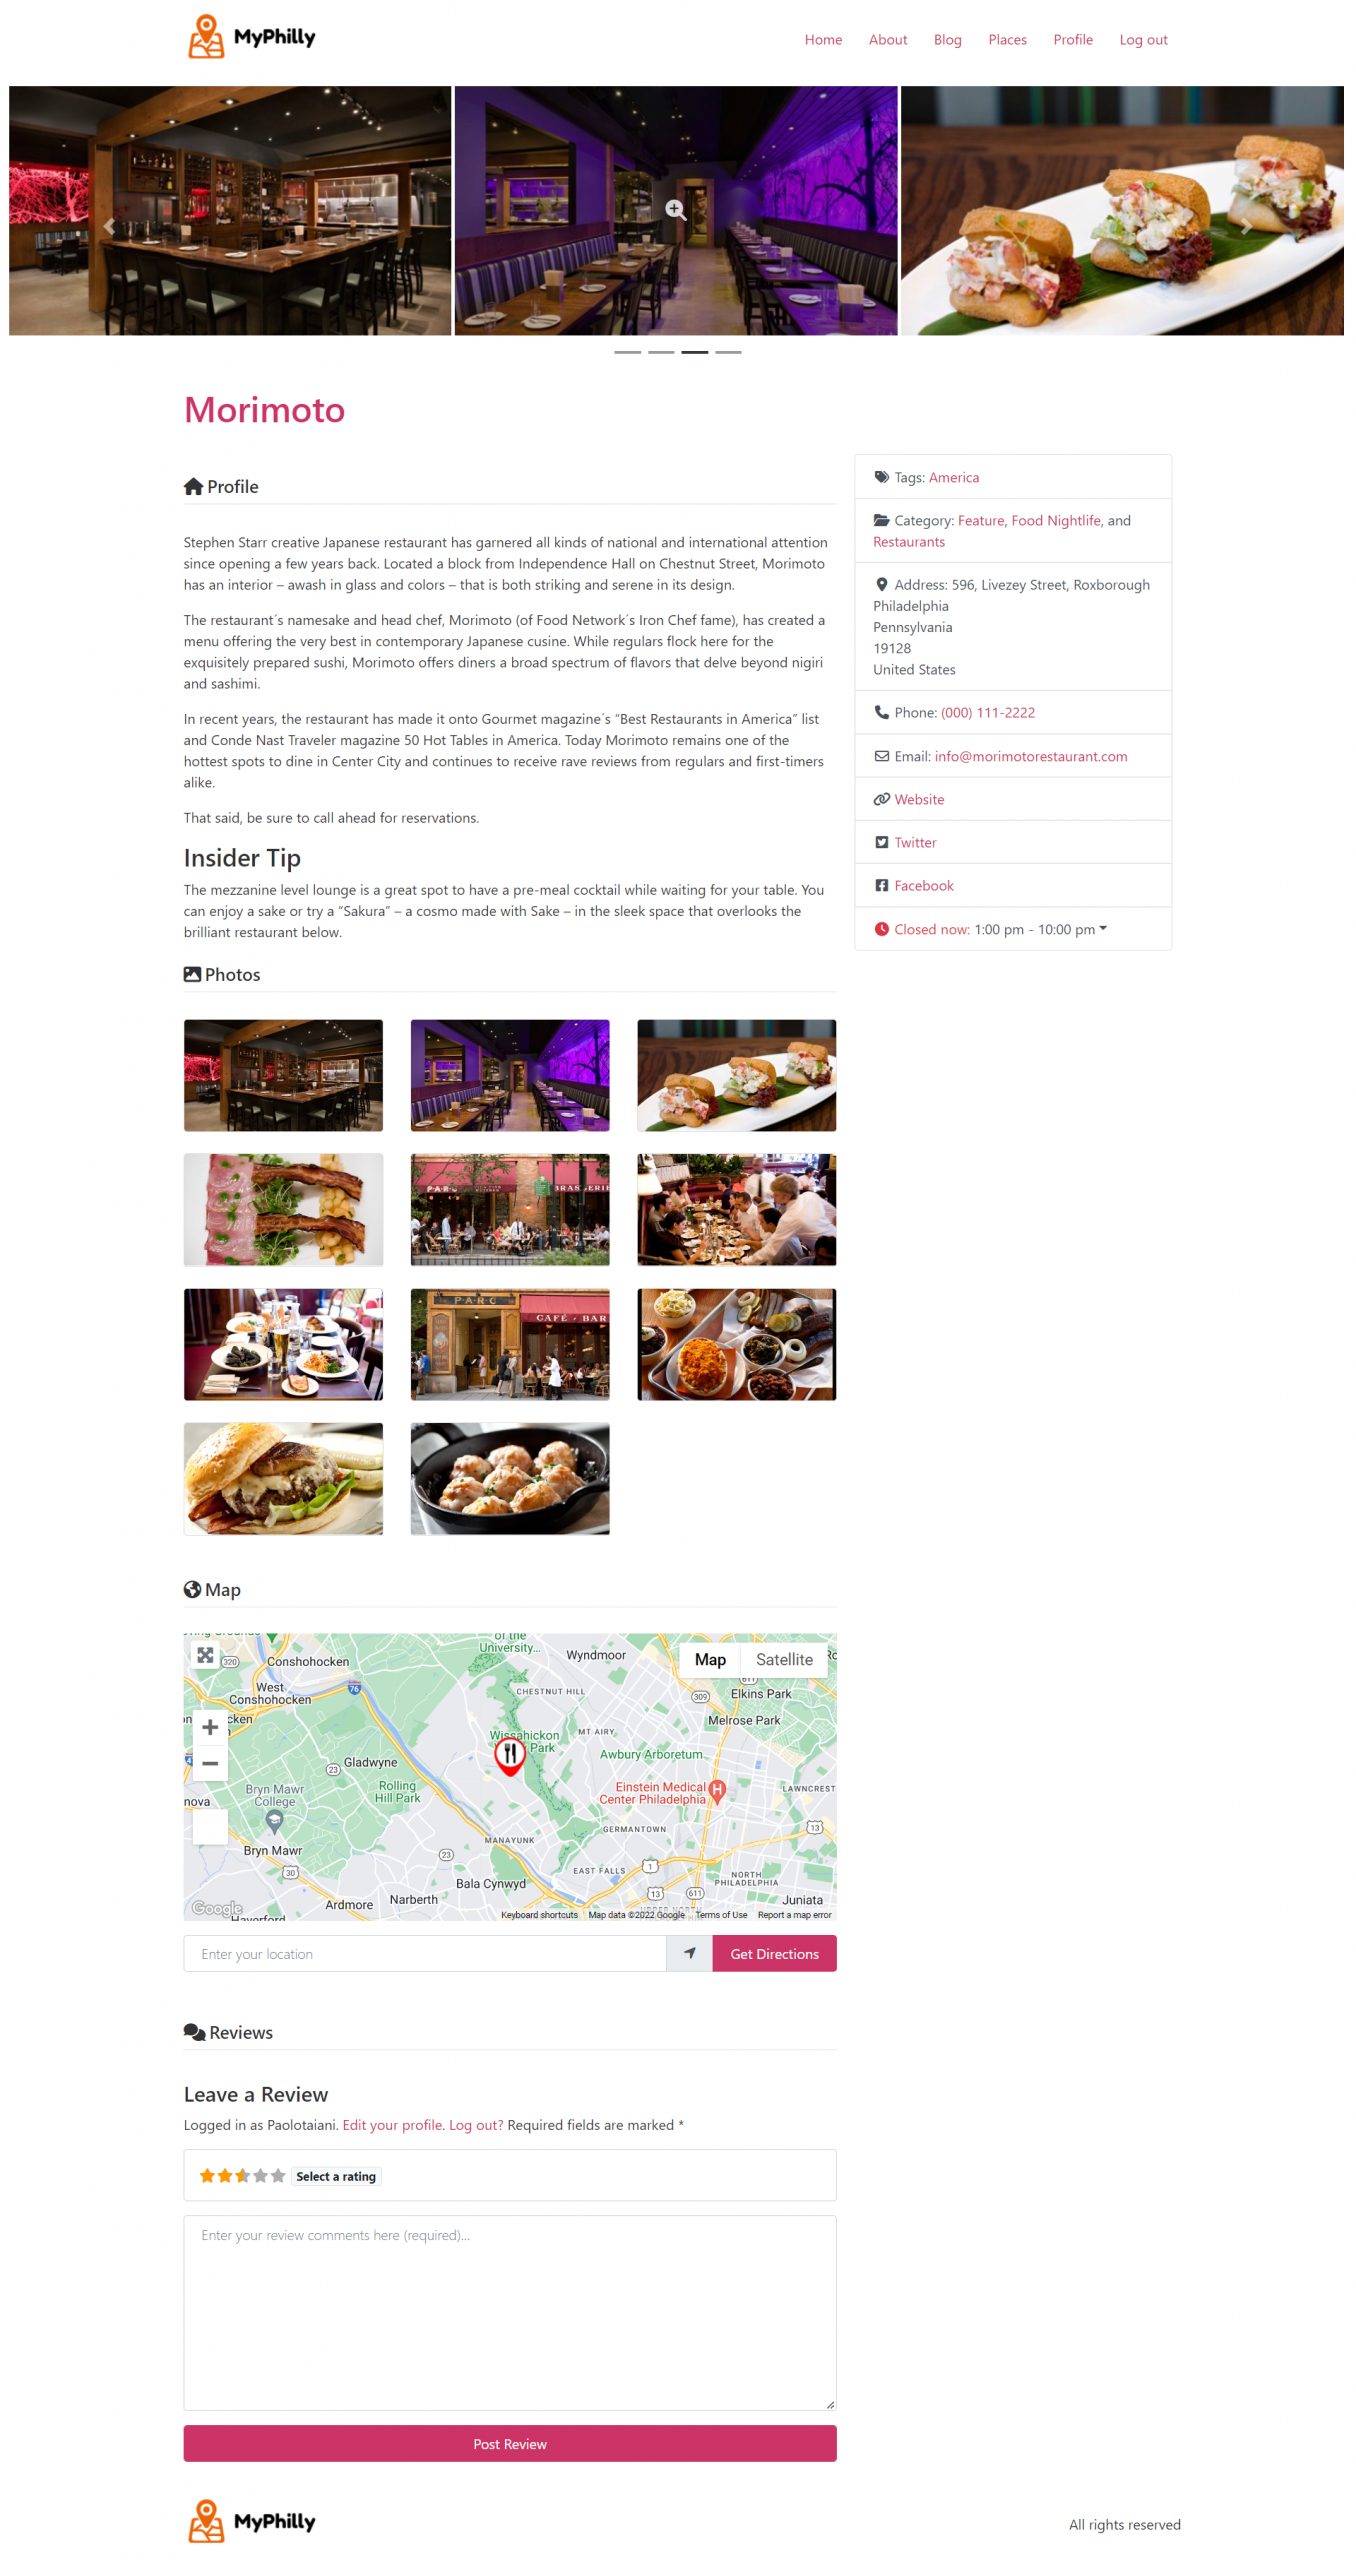
This is it. We built our Elementor Directory Website with the Hello Theme, the free version of Elementor, and GeoDirectory.
Adding premium features to your Elementor Directory Website
If you wish, now you can add premium features to your directory, such as:
- Paid Listings: With the GeoDirectory Listing Price Manager add-on, you can set prices for listing submission. For each price tier, you can enable/disable features such as: Restricting the number of pictures for free listings while allowing more pictures for paid listings, allowing more or fewer tags and categories, enabling or disabling specific custom fields. Submitting longer or shorter descriptions.
- Claim Listings: This is a fundamental feature for a directory where the admin creates the database and invites business owners to take control of their free listings. The claim listing process may include forcing an upgrade to a paid listing to take over the listing’s ownership.
- Advertising: selling ads is another form of monetizing an online directory. If you have a lot of traffic, you can use ad networks. Otherwise, you may sell ads directly, allowing businesses to add banners in specific areas of your website or allowing for listings to appear as ads, for example, on top of organic search results.
These are just three examples. However, a directory website offers many ways to make money online.
You can create a global marketplace for handcrafted items, sell event tickets, or offer discount coupons.
Join our community of members and bring your idea to life: Create a directory website.
The possibilities are endless.
Build a Directory Website with Elementor PRO
As previously mentioned, with Elementor PRO, you can achieve much more sophisticated designs, and I suggest you check this blog post to see the full extent of the GeoDirectory integration with Elementor PRO:
Customize the design of GeoDirectory Templates with Elementor Pro
Elementor Pro Directory Website Templates
For Elementor PRO users, we offer several one-click install templates that provide fully functioning Directory Websites with dummy data.
These templates are free and can be installed in less than a minute.
Next, edit the dummy content with your legitimate content and adjust the template to match your branding by changing the logo, the Directory Website color palette, and typography.
The following are a few examples of what you can get with GeoDirectory and Elementor PRO.
One click install DEMOS via AyeCode connect plugin, see this blog post for a tutorial

Events Directory (Elementor Pro)
An Events directory and tickets marketplace built with elementor pro.


Interested in a tutorial to build a Directory Website with Gutenberg instead of Elementor? Check out this post about how to build a Directory Website with the Astra Theme.
Comparing GeoDirectory’s Elementor PRO integration against other WordPress directory plugins is one of the more useful exercises in plugin selection. We covered the native dynamic data integration question in our Directorist comparison and our HivePress comparison. HivePress, in particular, has had Elementor support as a confirmed feature request since 2022, as documented in the comparison post.