The World’s Most Advanced And Scalable WordPress Directory Plugin
GeoDirectory is an enterprise-grade WordPress plugin for building scalable business directories, city guides, real estate listings, job boards, event sites, classifieds, and local discovery platforms. Unlike generic listing plugins, it uses custom database tables, not WordPress post meta, so sites perform well from small local portals to directories with hundreds of thousands or millions of listings. Core features include optimized search, maps, reviews, frontend submission, and an extensive add-on ecosystem for customization. Rated 4.8/5 across 700+ reviews on WordPress.org and Capterra.
Get GeoDirectoryWhat can i do with GeoDirectory?

As we transition from physical directories to the vast landscape of online directories, the challenges and opportunities have evolved dramatically.
Among the tools that have risen to these challenges are ChatGPT, an advanced language model developed by OpenAI, and GeoDirectory, a robust WordPress directory plugin that effortlessly transforms any WordPress website into a global business directory.
In this post, we are going to discuss how these two powerful tools can synergize, creating a sophisticated, user-friendly, and interactive online business directory.
ChatGPT, with its cutting-edge AI capabilities, can breathe life into a GeoDirectory-based business directory, taking care of your content marketing and listing descriptions.
Ready? Let’s go.
Before starting: Gather your toolkit
The first thing you’ll need to do is assemble your toolkit, which includes a few pieces of software:
- ChatGPT: Available in a freemium model, ChatGPT by OpenAI is a state-of-the-art language model that will handle data management, user interaction, security, and more. Sign up on the OpenAI platform and familiarize yourself with the API documentation.
- WordPress: The world’s most popular open-source content management system, meaning it’s free to use – all you’ll need is a domain and a hosting service.
- GeoDirectory Plugin: This powerful WordPress plugin is specifically designed to create a location-based business directory. The core plugin is free, but additional features can be unlocked through premium add-ons.
- Yoast SEO Plugin: To ensure that your directory is visible and highly ranked on search engines, Yoast SEO is a must. This plugin helps optimize your website for search engines, making sure that your content and meta tags are SEO-friendly.
- Blockstrap: Is AyeCode’s latest theme built around the Bootstrap CSS framework. Paired with the Directory child theme, it is the best theme ever built for GeoDirectory
- Directory Theme: The Directory Child Theme will make your Directory Website as beautiful as those of the top startups out there.
Choosing Your Niche for a Business Directory
- Identify Your Passion and Expertise: What do you love or know well? Say you’re a vegan foodie, you could start a directory for local vegan restaurants.
- Do Your Market Research: Use tools like Google Trends to understand demand. For instance, if pet services are trending in your area, that might be your niche.
- Evaluate Profit Potential: How will your directory make money? Could vegan restaurants pay for premium listings? Or maybe there are affiliate marketing opportunities with vegan food brands.
- Look at SEO Opportunities: Use tools like SEMrush to find high-volume, low-competition keywords in your niche. Keywords like “best vegan restaurants in [your city]” can boost your directory’s visibility.
- Leverage ChatGPT: Unsure about vegan dining interest in your area? Draft a survey with ChatGPT. It can also help you plan your market research and create SEO-friendly content.
Remember, your ideal niche should combine your passion, market demand, monetization opportunities, and SEO potential.
With tools like ChatGPT, you can navigate your way to the perfect niche for your online business directory.
Step 1: Choosing the Right Theme for Your Business Directory
Selecting the ideal theme is crucial when creating a business directory with WordPress. GeoDirectory gives you an attractive and customizable collection of themes, both free and premium ($19 to $39).
That said, currently the best theme for GeoDirectory is definitely The Directory Child Theme of the Blockstrap theme.
This theme is designed for both single or multi-city directories and seamlessly integrates with Google Maps.
It provides predefined listing types for various business features and services, ensuring a smooth experience for listing submissions.
Step 2: Setting Up Your Domain and Hosting
To make your business directory website accessible, you’ll need a domain and hosting service.
Choose a domain name that reflects the directory’s identity and purpose. Aim for simplicity and relevance, perhaps incorporating your industry or region’s name.
Godaddy or Namecheap are great options to acquire your favorite domain name.
For hosting, popular providers like Cloudways, SiteGround, and WP Engine offer dependable services for storing your site’s data and making it accessible online.
Step 3: Install GeoDirectory & Configure Your Settings
After securing your domain and hosting with WordPress one-click install, set up your new WordPress website.
Next, install the GeoDirectory plugin.
This plugin is critical for building a functional business directory, offering a range of tools to manage business profiles, event management, booking capabilities, and business amenities.
Here’s how to install the GeoDirectory plugin:
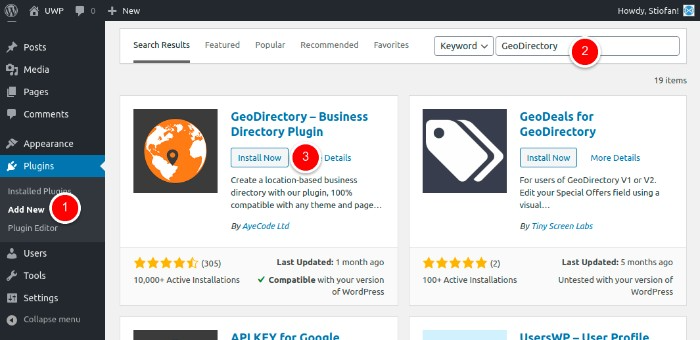
- From your Dashboard, navigate to Plugins > Add New.
- In the search field, type “GeoDirectory” and press Enter.
- Locate the “GeoDirectory – Business Directory Plugin” and click “Install”.
- After the installation is complete, click on the “Activate” button.

GeoDirectory’s features are designed to meet the unique needs of business directories:
- Easy Listing Management: Manage and organize listings for different businesses. Track relevant details such as contact information, descriptions, and photos.
- Events Management: Promote business events, including sales, meetings, or workshops. Create event listings with dates, locations, and descriptions.
- Business Profiles: Showcase businesses by creating profiles that highlight their services, areas of expertise, and contact information.
- User Reviews and Ratings: Allow users to share feedback and rate their experiences with various businesses.
- Business Facilities and Amenities: Highlight different facilities and amenities provided by businesses.
Step 4: Personalize Submission Form Fields
Tailoring the form fields in GeoDirectory for your business directory involves the following steps:
- Access the WordPress dashboard and navigate to ‘CPT > Settings > Custom Fields’.
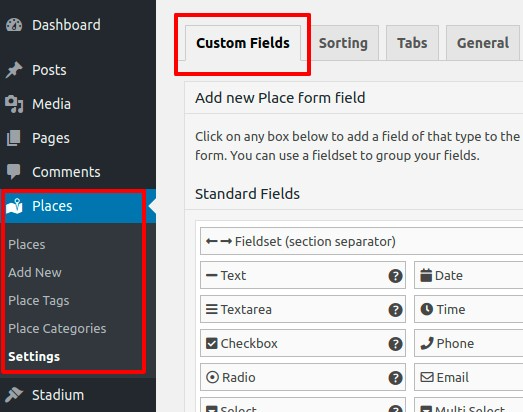
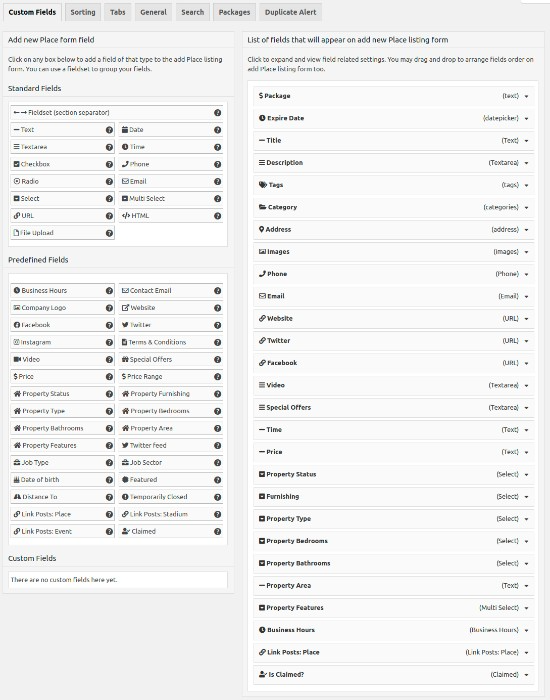
- In the interface, ‘Add New CPT Form Field’ allows you to create new fields. ‘Add New CPT Listing Form’ displays the currently available fields.
- Choose from ‘Standard Fields’, and ‘Predefined Fields’, or use the ‘Custom Fields’ area to incorporate your custom fields (PHP coding required).
Once you’ve customized the field, click ‘Save’. Don’t forget to check the ‘Is Active?’ option to ensure the field is visible on your directory website.
Some customization ideas for your business directory might include:
- Business Category Field: Include a dropdown menu or checkboxes to specify the business categories associated with each listing.
- Services Field: Add a field to specify the services offered by each listed business.
- Operation Hours Field: Provide a field for businesses to specify their operation hours.
- Facilities and Amenities Field: Create a field to highlight the facilities and amenities provided by each business.
Step 5: Creating Your Categories
Creating a well-structured category system is vital for maintaining organization and usability.
GeoDirectory provides the capability to establish hierarchical categories, including parent categories and subcategories, tailored specifically for business directories.
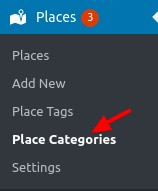
To start, select ‘CPT > CPT Categories’ within your WordPress dashboard and follow these steps:

- Name: Enter the name of the category you want to create, such as ‘Restaurants’, ‘Hotels’, or ‘Shops’. Here’s an example:

- Slug: Define the category slug, which will be part of the URL leading to the category’s page. For example, ‘restaurants’, ‘hotels’, or ‘shops’.
- Parent Category: If applicable, position your new category as a subcategory under a parent category. This helps to organize listings hierarchically. For instance, ‘Food & Beverages’ could be a parent category, with ‘Restaurants’, ‘Cafes’, and ‘Bakeries’ as subcategories.
- Description: Optionally, provide a brief description of the category, offering additional context or details about the listings it encompasses.
- Category Top Description: This text will appear at the top of the category’s listings page, serving as an introduction or providing important information related to that specific category.
- Default Listing Image: Choose a default image that represents listings within this category. It could be an icon, photo, or graphic that visually represents the nature of the category.
- Map Icon: If desired, select a map icon from your media files to visually represent this category on any maps displayed on the directory.
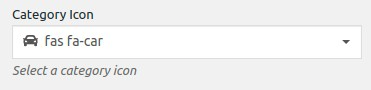
- Category Icon: Set a category icon that visually represents the category. This icon can be utilized within the directory for easy recognition and navigation.

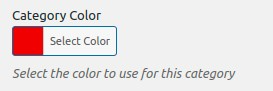
- Category Color: Choose a color that corresponds to the category, providing visual differentiation and aiding in categorization throughout the directory.

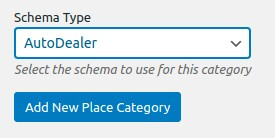
- Schema Type: If there is a suitable schema type available for your category, select it. This helps search engines understand the data within the category and may enhance search result display.
After completing these fields, make sure to save your newly created category.
This category will now be an available selection when introducing new listings to your business directory.
By crafting categories in an effective manner, you bolster the organization and usability of your directory.
This, in turn, simplifies the navigation process and aids users in discovering pertinent information.
Where ChatGPT comes in (+ Example Prompts)
1. Writing Blog Posts
Blog posts are a great way to drive traffic to your directory.
They can provide useful information about the businesses in your directory, advice for business owners, and much more.
ChatGPT can assist in generating high-quality, engaging content for your blog.
Here’s a sample prompt that you can use:
Prompt: “ChatGPT, write a blog post about the importance of local businesses in strengthening the community.”
You would then receive a blog post draft that you could review and edit as needed.
- Content Ideas: Need ideas for your next blog post or feature article on your directory site? ChatGPT can help brainstorm new content ideas. If your directory is only about local vegan restaurants: “ChatGPT, provide five blog post ideas centered around local vegan restaurants.”
- Creating FAQs: Frequently Asked Questions (FAQs) are a great way to address common inquiries your users may have. Go on Google and search for your main keyword (the topic of the article). Then copy-paste the ‘People Also Ask’ questions and ask ChatGPT to answer them while brainstorming more on your behalf as well. Prompt: “ChatGPT, think of all possible FAQs for [Insert Topic] and write short, concise answers for them.” You would then receive a FAQ page draft that you could review and edit as needed.
- Generating Titles: For any article or post, titles are an important part of making them stand out from the crowd: “ChatGPT, write 5 attractive titles for a blog post about the benefits of using a local business directory.”
2. Generating Listing Descriptions
Creating engaging and persuasive descriptions for each listing can be a daunting task, especially if your directory has hundreds or thousands of businesses.
With ChatGPT, you can create a basic description and then use the model to expand and improve it.
For instance, if you have a coffee shop in your directory, you might start with a basic description like this:
“The Coffee Bean is a local coffee shop located in downtown Springfield. They offer a variety of coffee drinks, pastries, and sandwiches.”
You can then ask ChatGPT to expand this description with more detail and persuasive language:
Prompt: “ChatGPT, can you expand on this description for a coffee shop listing? ‘The Coffee Bean is a local coffee shop located in downtown Springfield. They offer a variety of coffee drinks, pastries, and sandwiches.'”
The AI might respond with something like this:
“Tucked away in the heart of downtown Springfield, The Coffee Bean is more than just a coffee shop – it’s a haven for coffee enthusiasts and food lovers alike. Boasting an impressive variety of aromatic coffee drinks sourced from the finest beans, The Coffee Bean ensures each cup is a delightful experience. Their extensive menu also includes a selection of freshly baked pastries and gourmet sandwiches, perfect for a quick breakfast, a leisurely brunch, or a light lunch. Step into The Coffee Bean and find yourself immersed in the rich, enticing aroma of fresh coffee, the warm hospitality of their staff, and a community atmosphere that feels like home.”
With ChatGPT, the potential applications are vast, and these are just a couple of examples of how it can be used to assist in building your business directory.
It can save you significant time and effort, and help you create a more engaging and valuable resource for your users.
3. Email Communication
Whether you need to respond to inquiries, send updates to the businesses in your directory, or create a newsletter, ChatGPT can help craft the perfect email. For example:
- Prompt: “ChatGPT, write an email informing business owners about an upcoming update to our directory that will allow them to add discount coupons to their listings.”
4. Social Media Posts
Promoting your directory on social media is essential to grow your user base. ChatGPT can help generate engaging posts for different platforms. For example:
- Prompt: “ChatGPT, please write a Facebook post promoting the new businesses that have been added to our directory this week.” Then add the list of new businesses.
5. User Testimonials
You can generate example user testimonials to illustrate the value of your business directory.
Of course, you should only use actual testimonials for marketing purposes, but AI-generated examples can give you an idea of what effective testimonials might look like. For example:
Prompt: “ChatGPT, write an example of a positive testimonial from a user who found a great local restaurant through our directory.”
Monetizing Your Business Directory with ChatGPT
Building a comprehensive, user-friendly, and up-to-date business directory opens up several potential monetization strategies.
It’s crucial, however, to balance revenue generation with a positive user experience and value.
The power of AI, and specifically ChatGPT, can help you accomplish this while also creating additional monetization opportunities.
Let’s delve into some strategies where ChatGPT can play a crucial role.
1. Premium Listings
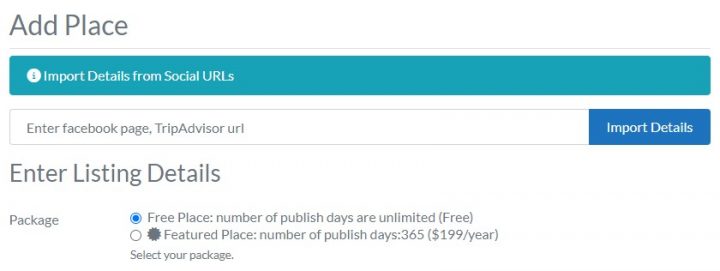
A common monetization method is offering premium listings.
Basic listings in your directory could be free, but businesses could choose to pay for a premium listing that offers more visibility and additional features.
For instance, premium listings could include expanded, AI-generated descriptions written by ChatGPT 4.
The AI can draft unique, compelling content that highlights the business’s offerings, ensuring each premium listing stands out.
2. Advertising
Advertising is another effective way to generate revenue. ChatGPT can contribute in several ways:
- Display Ads: You can create targeted ad copy with the help of ChatGPT, tailoring messages to appeal to different audiences. This personalized approach could make your ad space more valuable to advertisers.
- Sponsored Content: Businesses could pay for AI-generated articles, blog posts, or other content featuring their products or services. ChatGPT can assist in writing this content, ensuring it’s valuable and relevant to your users.
- Affiliate Marketing: If businesses in your directory sell products or services online, you could earn a commission on any sales that originate from your directory. ChatGPT can help draft persuasive product descriptions or reviews that include affiliate links.
3. Partnerships and Sponsorships
When forming partnerships or sponsorships with businesses, ChatGPT can be used to draft partnership proposals, create sponsored content, or develop other communication materials.
This not only makes the process more efficient but also helps you maintain a professional and consistent tone.
4. Subscription or Membership Fees
Depending on the value your directory provides, you may be able to charge users a subscription or membership fee for access to exclusive benefits. ChatGPT can help create exclusive content, such as detailed guides or articles, for subscribers only. Additionally, it can assist in crafting communication about subscription benefits, promotional offers, or renewal reminders.
5. Selling Data Insights
As you gather data about businesses and users, you may find valuable insights that could be beneficial to other businesses, researchers, or government bodies. ChatGPT can assist in generating comprehensive, understandable reports or summaries of this data, making it more valuable and sellable.
6. Legal Copy
ChatGPT can write all your policies, procedures, terms of service, and any legal text that your business might require.
Ready to kickstart your Business Directory?
In the digital age, integrating AI tools like ChatGPT and powerful plugins like GeoDirectory can make your online business directory more dynamic and interactive.
From creating engaging content to assisting in monetization strategies, ChatGPT can significantly enhance your directory.
Remember, building an effective directory is a journey that requires constant evolution and improvement.
So keep exploring and leveraging tools like ChatGPT to stay at the forefront of technology and business.
As you continue this journey, the potential for growth and success is limitless. Good luck with your AI-powered business directory!
In the digital age, information is truly at our fingertips. From finding the nearest bakery to the best bicycle shop in town, a city directory can be a pivotal resource for locals and tourists alike.
In this guide, we will demystify building a city directory using WordPress, one of the world’s most popular content management systems.
Whether you’re a WordPress beginner or a seasoned expert, we’ll walk you through each step, from conceptualizing your directory to launching it online. We will provide you with all the tools and knowledge you need to get started.
By the end of this article, you’ll know how to create a comprehensive, user-friendly city directory that is both functional and visually appealing.
So let’s dive into the exciting world of WordPress and start building your city directory.
What Should I Include in a City Directory?
The first step in building a city directory is deciding what content you want to include.
Your directory could be as basic or comprehensive as you’d like – it all depends on your target audience and the resources you have available.
Generally speaking, a city directory should include:
- Business Listings: This is the backbone of any city directory. List businesses by categories, such as restaurants, retail stores, hotels, and service providers. Include essential details such as business hours, contact information, and a brief description of the services they offer.
- Job Listings: job listings can be easily monetized if the directory receives decent traffic and usually generates a good amount of traffic once the job boards start getting traction.
- Points of Interest: Highlight popular tourist attractions, landmarks, museums, parks, and other points of interest. Include a brief description, location, opening hours, and other relevant information.
- Community Resources: Include information about community centers, libraries, hospitals, police stations, and other critical public resources. This section is especially helpful for newcomers to the city.
- Events Calendar: A regularly updated calendar of events can add value to your city directory and bring back visitors repeatedly. This could include concerts, festivals, public meetings, sports events, etc. Include details such as the event date, time, venue, and a brief description. GeoDirectory features a free events add-on that lets you do this.
- Public Transportation: Details about the city’s public transportation system, such as bus and train schedules, fare information, and route maps, can be incredibly helpful for residents and visitors.
- Housing and Real Estate: Listings of available housing, real estate listings, or noteworthy residential areas can benefit individuals planning to move to the city.
- Local News and Updates: This could involve updates about city development projects, changes in local regulations, or other important news that residents should be aware of.
- Reviews and Ratings: Allowing users to rate and review businesses and points of interest can add an interactive element to your directory and provide valuable feedback for other users.
- Maps and Navigation: Embedding a map for each listed location will help users find their way around. Providing directions or navigational aids can be a helpful feature, especially for larger cities.
Remember, ensuring the information is accurate, up-to-date, and user-friendly is key to a successful city directory.
Tailor your directory to your specific city and audience, and you’ll create a resource that residents and visitors will turn to time and time again.
Step 1: Choosing the right theme
A well-suited theme is crucial when creating a city directory site with WordPress. GeoDirectory conveniently offers a beautiful selection of themes – some of which are free, and others that range from $19 to $39.
In April 2023, we released the new FSE Directory theme, and if you are interested in building a city directory with WordPress, you should consider it as it is the most customizable Directory Theme ever built and it’s ideally suited to build your next City Directory.
All GeoDirectory themes are adaptable to single or multi-city directories and integrate seamlessly with Google Maps.
They include predefined listing types for various city features and events, plus a user-friendly front-end listing submission system with payment processing.
Step 2: Setting Up Domain and Hosting
A WordPress theme is the skeleton of your website, but to bring it to life, you need a domain and hosting.
The domain name is your website’s unique internet address, while the hosting service stores your site’s data and makes it accessible online (e.g., Cloudways, SiteGround, and WP Engine).
Some tips for naming your city directory:
- Local Relevance: Incorporate the city or region name in your domain. This directly signals the website’s purpose and can enhance local search engine optimization.
- Directory Indication: Consider including terms like “directory,” “guide,” or “hub” in your domain name. This helps communicate the nature of your site to users.
- Keep it Simple and Memorable: The domain name should be easy to remember and type. Avoid complex spellings, excessive hyphens, or numbers, as these can confuse users.
- Dot-Com Dominance: If available, opt for a “.com” domain. It’s the most recognized and trusted domain extension.
- Avoid Copyright Issues: Ensure the domain name doesn’t infringe upon trademarks or existing brands. This can lead to legal issues and confusion among users.
- Consider Future Expansion: If you plan to expand your directory to include more cities or regions in the future, choose a domain name that allows for this growth.
Step 3: Install GeoDirectory & Configure Your Settings
Once you have your domain and hosting, it’s time to install GeoDirectory, the leading WordPress Directory Plugin.
This is a crucial step for creating a functional city directory, as it provides all the necessary tools for managing listings, events, payments, reviews, ratings, and more.
- From the Dashboard select Plugins > Add New.
- In the search field enter “GeoDirectory”, then select install on “GeoDirectory – Business Directory Plugin”
- After installation, click Activate.
Once activated you will find a new menu item on the WordPress dashboard.
The GeoDirectory > Dashboard shows you Actions Required and Statistics about your City Directory.
Under Settings, you will find the following:
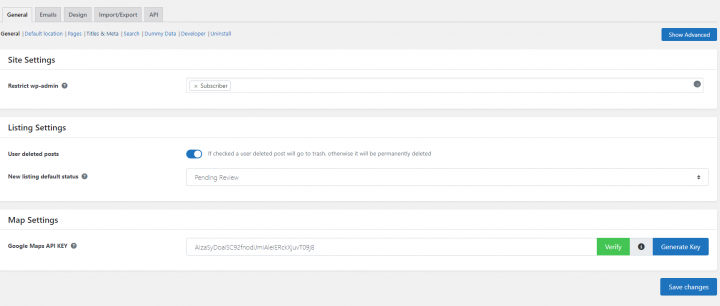
- General: This section is where you handle listings and map settings. Where you select the default location which is the starting point of the add listing form map and Directory pages are set up. It also includes SEO settings, Search settings, Dummy data creation, and more.
- Email: This is where to set up Email and Notification options. This is also where you can modify the email templates.
- Design: Under this tab, you find general design options for the listings archive page, single listing page, reviews, and email templates.
- Import/Export: This is where you can import and export listings, categories, reviews, and settings in bulk via CSV file.
- API: The API tab allows you to enable the REST API for listings and to create an API key for any external application to interact with API.
Remember, configuring these settings best to match your vision and the needs of your audience is crucial for the success of your city directory website.
Step 4: Personalize Submission Form Fields
GeoDirectory comes equipped with standard form fields for listing submissions, appropriate for a basic city directory structure. Of course, you can tailor these fields to your specific needs, enhancing the relevancy and depth of your directory listings.
- Begin by navigating to ‘CPT > Settings > Custom Fields’ on your WordPress dashboard.

2. Here, you’ll find the interface divided into two sections. ‘Add New CPT Form Field’ on the left is for creating new fields, while the right panel displays the fields currently available on the ‘Add New CPT Listing Form’.
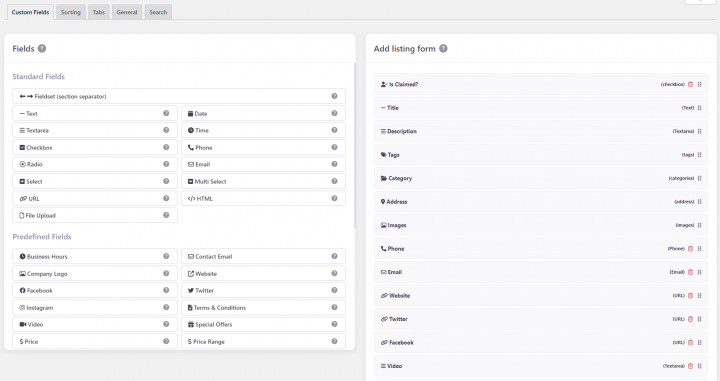
3. Within these sections, you have the choice of ‘Standard Fields’, ‘Predefined Fields’, and a ‘Custom Fields’ area. This last one is particularly useful for developers, enabling them to incorporate their own custom fields through custom code.
4. To add a new custom field, click on your desired field in the left panel, and it will be added to the right panel.
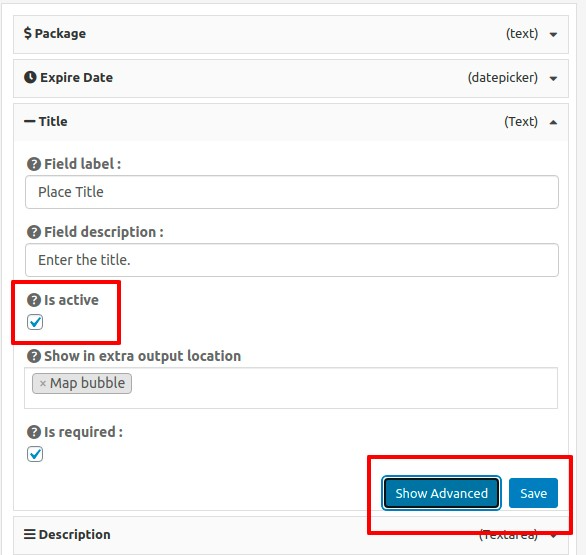
5. Click the newly added custom field and the settings will appear in the right panel.
6. Once you’ve customized your field, click ‘Save’. Be sure to check the ‘Is Active?’ option before saving to ensure your custom field will be visible on your site.
Some ideas for your city directory:
- Add a ‘Neighborhood’ Field: If your city has distinct neighborhoods or boroughs, you might want to add a ‘Neighborhood’ dropdown menu in your submission form. This can help visitors find businesses in specific parts of the city. (Location Manager add-on required)
- Include a ‘Business Hours’ Field: This can be beneficial for users as they can know when the listed businesses or services are open.
- Integrate a ‘Parking Available’ Checkbox: If parking is a concern in your city, a checkbox indicating whether a location has parking available could be a useful addition.
- Add ‘Public Transport Links’ Field: This could provide information about nearby public transport links for each listing. It could be a text field where users can enter information about the nearest subway station, bus routes, etc.
- Create a ‘Special Features’ Field: This could be a text box where listers can add any unique attributes or services their business offers.
Step 5: Creating Your Categories
A city directory website can quickly become overwhelming with hundreds, if not thousands, of listings. The key to maintaining organization and usability lies in well-structured categories.
The GeoDirectory themes allow you to establish categories in a hierarchical form, from a parent category to its subsequent subcategories.
To begin with, go to your WordPress dashboard and select ‘CPT > CPT Categories’. Here, you’ll notice a form on the left side of the page, allowing you to create a new category.
Follow these steps:
- Name: Input the name of the category you want to create. Typically, it’s better to use a plural term such as ‘Cars’ rather than ‘Car’. This is the only required field, though we advise completing the subsequent fields for a more robust directory.

- Slug: Define the category slug. This will form part of the URL that leads to this category’s page.
- Parent Category: If necessary, you can position your new category as a subcategory under a parent category.
- Description: Include a brief description of the category, if desired.
- Category Top Description: This text will appear at the top of your category’s listings page.
- Default Listing Image: Choose a default image for listings within this category.
- Map Icon: Optionally, select a map icon from your Media files to represent this category on any maps.
- Category Icon: Setting a category icon without a specific Map Icon will auto-generate a Map Icon using the Category Icon and Category Color values. Be aware that not all icons are supported.
Category Color: Choose a color for this category. This color is also used to create a custom Map Icon and is utilized in other settings around the site.
Schema Type: If a suitable schema type exists for your category type, it’s beneficial to set one. This informs search engines about the data they can expect, and sometimes, Google might display Schema-specific information in search results.

After completing these fields, submit your new category. It will now be available when adding new listings to your city directory.
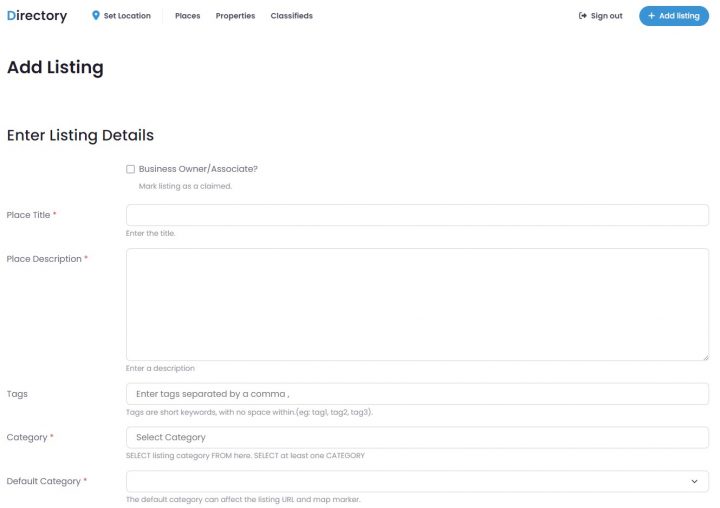
Step 6: Add Your First Listing with the Submission Form
You’ve successfully completed all the fundamental steps to create a city directory site in WordPress. With the full system established, it’s time to add your inaugural listing.
Navigate to the directory page you established in step three.
Here, you’ll find an “Add Listing” button. Click on it to bring up the submission form. Complete the form with relevant information and submit your first listing.
Ensure that everything is functioning smoothly. If you’ve set up any email notifications, make sure to verify these as well. A handy feature of the Business Directory Plugin is its CSV Import & Export capability. This allows you to maintain backups and add multiple items in one go.
Step 7: Attract Visitors to Your City Directory
Congratulations! You’ve successfully built a city directory in WordPress. You can now integrate your directory page into your main menu or any other appropriate location on your website.
Now it’s time to promote your city directory. Some tried-and-true methods include SEO, social media promotion, content marketing, paid advertising, and promotional deals. But you already know those methods.
Related: Boost Your Directory Website’s Traffic with this Comprehensive SEO Guide.
Here are some more creative and actionable strategies to get started on now:
- Host a Launch Event: Consider organizing an event to launch your directory. This could be a meet-and-greet with local businesses, a promotional event with interactive activities, or even a virtual event.
- Run a Contest: Organize a fun and engaging contest. For instance, have users vote for their favorite local business or share their favorite city spots on social media with a designated hashtag. Reward winners with exclusive deals or special recognition.
- Leverage User-Generated Content: Encourage users to share their experiences with businesses listed in the directory. This could be through reviews, social media posts, or blog contributions. Rewarding the best contributions can increase participation.
- Develop a Referral Program: Incentivize users to refer others to your directory. This could be through offering exclusive benefits, discounts, or premium features for successful referrals.
- Establish a Local Ambassador Program: Identify influential locals who love your city and would be happy to promote your directory. Provide them with the tools and incentives to spread the word.
- Offer Exclusive Content: Provide content that users won’t find anywhere else. This could be interviews with local celebrities, deep dives into local history, or insider tips for living in the city.
- Collaborate with a Local Charity: Partner with a local charity and donate a portion of your profits for a certain period. This can generate positive publicity and bring more attention to your directory.
- Utilize QR Codes: Distribute flyers or posters with a QR code that directly links to your directory. This can be a quick and easy way for people to access your directory on the go.
- Create Video Content: A video tour of some top businesses or locations in the city can be engaging content. Share these videos on social media and on your directory site.
- Design an Interactive City Tour: Based on your directory listings, design a virtual or real-life city tour. This can showcase the breadth of your directory and provide a fun experience for users.
Ready to give your city the best directory it’s ever seen?
All in all, creating a city directory in WordPress is a rewarding endeavor that brings your city closer to your online audience. With careful planning, robust organization, and strategic customization, you can create an engaging and informative city directory that benefits local businesses and residents alike.
Remember, a city directory is more than just a collection of listings. It’s a dynamic platform that showcases the spirit of your city. Therefore, continually updating your directory, responding to user feedback, and promoting your platform creatively is essential to maintain its relevance and usefulness.
Use the tips and strategies outlined in this article as your guide. With the right approach and dedication, you can turn your city directory into a valuable resource that enriches your local community and beyond.

What is an Online Directory and why is it important in 2023
A directory website is an online platform that serves as a comprehensive and organized repository of information about businesses, services, or products within a specific industry or niche.
By providing users with a convenient and centralized source of information, directory websites help them make informed decisions when searching for products, services, or businesses that cater to their needs.
In the digital age, where consumers rely heavily on the internet to find solutions and gather information, directory websites play a critical role in connecting businesses with their target audience.
These websites not only make it easier for users to discover and compare offerings from various businesses but also help businesses increase their online visibility, generate leads, and improve their credibility.
With the ever-growing competition in the online space, having a well-designed and user-friendly directory website is essential for standing out and providing value to both users and businesses.
Using WordPress Custom Post Types, and Advanced Custom Fields in creating directory websites
If you ask WordPress-centered Facebook Groups and Subreddits what the best way to build a directory website is, the majority will answer to avoid built-for-purpose plugins and build it with CPT UI (Custom Post Type) and ACF (Advanced Custom Fields).
These are very capable plugins used by millions of users, however, when it comes to developing a directory website using WordPress, Custom Post Types, and the Advanced Custom Fields, the process can be challenging, frustrating, and with a lot of hidden costs.
These tools, while popular and widely used, often require a steep learning curve for developers in order to achieve complexity and can result in suboptimal performance and limited options.
Let me show you why.
15 Challenges in Achieving Desired Features with Custom Post Types and ACF When Building a Directory Website:
- Create a Front-End Submit Listing Form for Adding and Editing Listings with payments and listing expiration.
while with ACF you can easily create a form on the front end of your website to add or edit content, make it accept payments, offer extra features for paid listings vs free listings, allow for subscriptions (recurring payments), and so on will be a lot harder to accomplish.
If you are a hardcore developer who prefers to create DIY solutions, the only way would be to custom-code all extra features.
This would result in weeks of work (months if it is the first time taking on a similar task).
Otherwise, this can be accomplished by adding extra paid plugins.
For example, the pro version of the Frontend Admin plugin would provide front-end user registration, paid listing submission, and editing.
For a single site, this plugin would add $90/year to your budget.
- Distinguishing Premium Listings from Free Listings
If you want to sell premium listings, while having also free listings, you must differentiate the two and add value to the paid option.
The best option you have is to create a “submit listing” form for each listing type and add extra features to the premium listings in the form of extra custom fields.
For example, the free listing could have only the listing Name, Address, Phone number, and 1 picture.
While the premium listings would have more details like a web address, social media accounts, more pictures, a longer text description, a contact form, and so on.
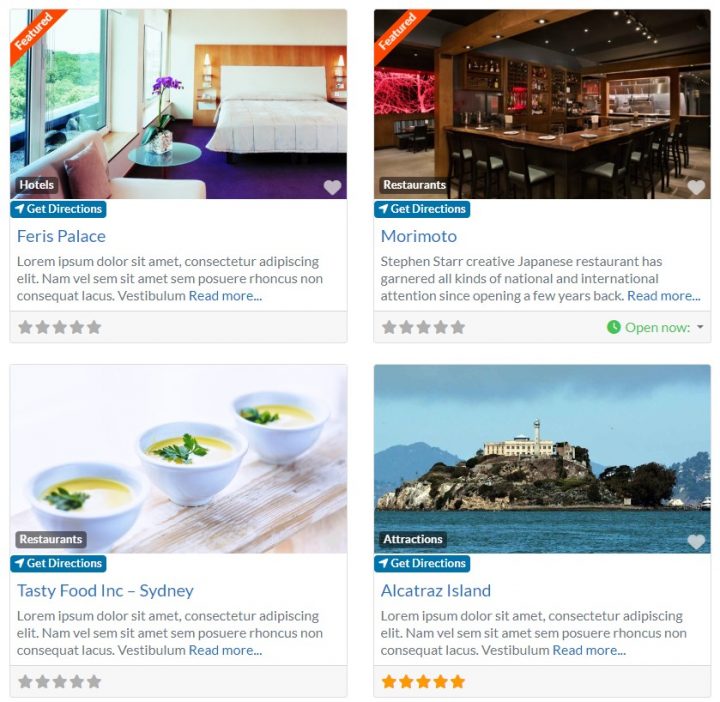
In addition, the premium listings should be visually different, for example showing a “FEATURED” badge, or a different layout.
This is not particularly difficult to accomplish, still, it is relatively time-consuming.
What is not as easy, would be providing extra visibility to the Premium Listings as opposed to the free listings.
For example, making premium listings always rank on top of category archive pages.
For that, you need to master WP queries and or SQL.
- Managing Listing Subscriptions, Failed Recurring Payments, and Listings Expirations
What do you do If a listing owner doesn’t renew a listing by paying again?
Or in the case where you set up a subscription with a recurring payment, and the listing owner cancels the subscription, or his payment method is declined?
You definitely don’t want the listing to remain active or to get the perks of a premium listing without paying, right?
You must set up a system to either downgrade the listing or make it expire and change its status to unpublished.
All this will require custom code and to develop something like that, you need good knowledge of payment gateways APIs, and especially IPNs (instant payment notifications).
You also need to know how to set up a CRON job, how to alter post statuses, and how to turn a premium listing into a free listing, possibly without losing the extra data.
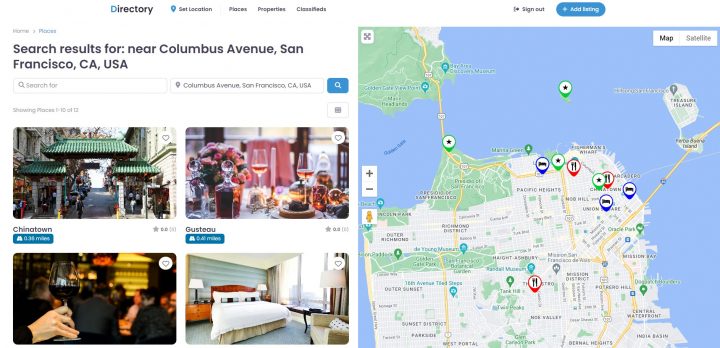
- Developing a Map with Multiple Pins.
Plotting locations on a Google Map using Advanced Custom Fields and a little javascript, is relatively easy.
The first step is to GeoCode the addresses of each listing, and we will talk more about that in point 6 of this list.
What is not easy is plotting a lot of locations. Especially if you are passing more than just a listing title to the map to show on the Map Markers when clicked.
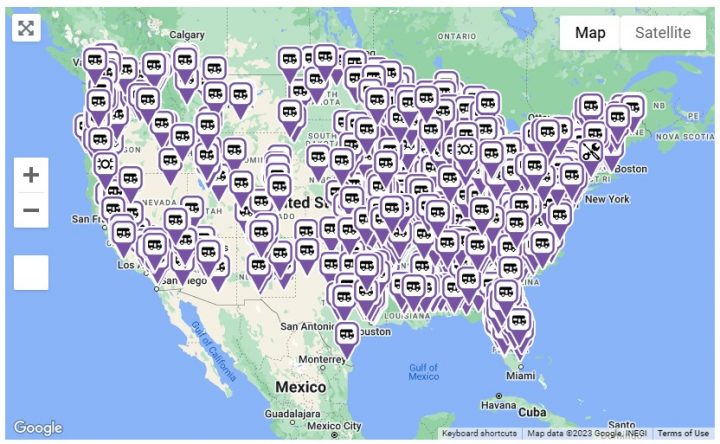
If you start trying to show more than a few hundred listings on a map (less if the server isn’t top-notch), the map will load extremely slowly or even freeze.
The only solution is to asynchronously load the locations and also the information (AJAX).
Doing that is a lot harder than putting up a map with a few markers, and will take a lot more time to accomplish even for a seasoned developer.
The more listings you have the more complex your solution needs to be.
First, you will hit the maximum AJAX response size of the browser, then you need to load details of single listings via AJAX, then you will need clustering and even server-side clustering which can show millions of listings.
Building a system that gathers the Map Markers in clusters for a high amount of listings becomes imperative when dealing with a vast number of listings.
Hitting these limits on a live site, because your site got some publicity is not something you want or can fix overnight
Building this kind of system comes with another huge set of challenges.
Achieving that requires a lot of coding experience.
- Integrating a Dynamic Contact Form to the Listings
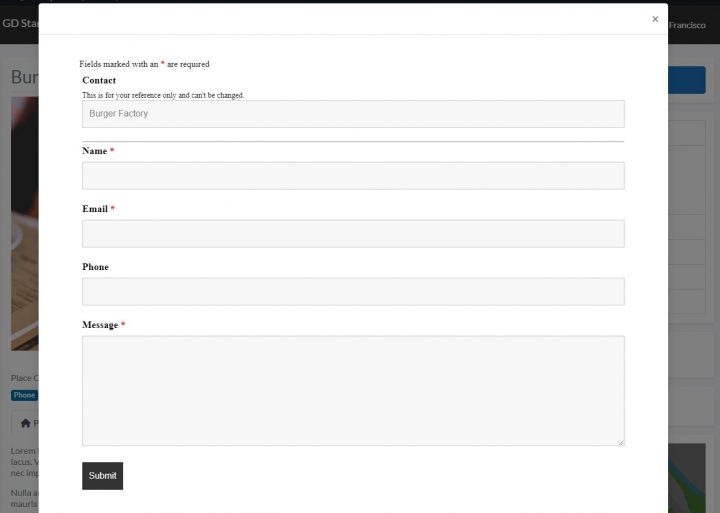
Integrating a unique contact form for each listing, which allows website visitors to contact the business owner directly, can present several challenges.
The complexity of dynamic form generation, data management, customization and consistency, spam prevention, compatibility issues, performance concerns, and ongoing maintenance and updates.
Despite these difficulties, implementing this feature can greatly enhance the website’s functionality and improve communication between visitors and business owners.
There is no plugin available that provides this functionality out of the box.
Significant custom coding is required to implement such a feature in a WordPress directory built using Custom Post Types and Advanced Custom Fields.
- GeoCoding listings and Searching by Proximity
To create a search by proximity feature, you first need to GeoCode the address of each listing.
GeoCoding means getting the longitude and latitude coordinates from the address.
This can be done through the Google Maps GeoCoding API, there are several tutorials online and it’s not a very complex task, however, it takes time.
There is a plugin that can help get started, but it’s not been updated in over 4 years: https://wordpress.org/plugins/address-geocoder/
Once you have all your listings GeoCoded, you have what you need to search by proximity, but achieving that feature requires good WP-Query/SQL knowledge and custom code.
Another option would be to use FacetWP, a premium search plugin that starts at $99/year for 1 to 3 websites.
- GeoLocating Users and Displaying Nearby Listings
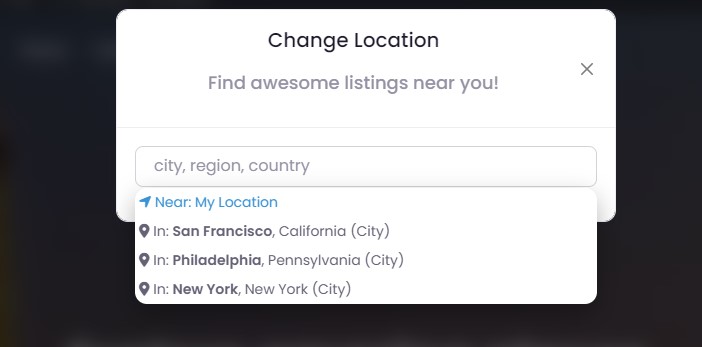
This can be done automatically (you’ll need Trusted IP Geolocation Data).
Or, by using the Google GeoLocation API, by asking users to share their browser location.
The first option is more user-friendly but less precise. The IP address rarely returns a 100% correct address.
The second option will return the user’s location with much higher precision but only works with the user’s authorization.
Both options will require custom coding as there is no plugin that will automate all this.
In addition, having the user’s location is just the starting point.
You still need to query the database and return the listings which are closer to the user location.
- Automating Listing Claims for Business Owners
One of the easier ways to engage with business owners and get them to pay a premium listing is to add their business to your directory as a free listing and let them claim it.
You can then either contact them directly and let them know about the opportunity, possibly with a free trial.
Or, the other option, which normally tends to have the best outcome, is that they discover their listing on your directory, by themselves.
This way you are showing them on the spot that you know how to give visibility to your website and become right away, 10x more attractive to them.
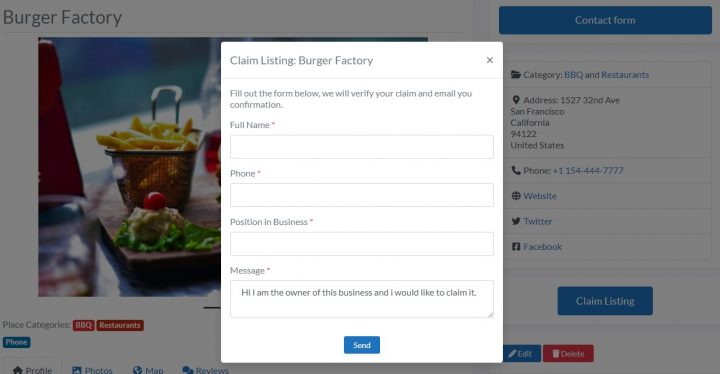
For the second option to be possible, you need to have a Claim Listing system in place.
A claim listing system is a feature implemented in directory websites that allows business owners to take ownership of their business listing on the platform.
This system is designed to ensure that the information displayed on the directory website is accurate, up-to-date, and managed by the authorized business owner or representative.
To claim a listing, business owners must follow a verification process set by the directory website, which may involve providing proof of identity or business ownership, such as a business license, tax identification number, or utility bill.
Once the claim is approved, the business owner gains control over the listing and can update the information, add photos, respond to reviews, or promote their business using premium features offered by the directory website.
For a tiny directory with a few listings, you may set this up with a contact form and a manual process.
If you wish to add some automation, a lot of custom coding need to go into this feature. Especially if you want business owners to pay to upgrade their listing as part of the claim process.
There is no plugin that will do this out of the box for Directories built with CPT and ACF.
- Showing Business Hours and Search Filtering by Availability
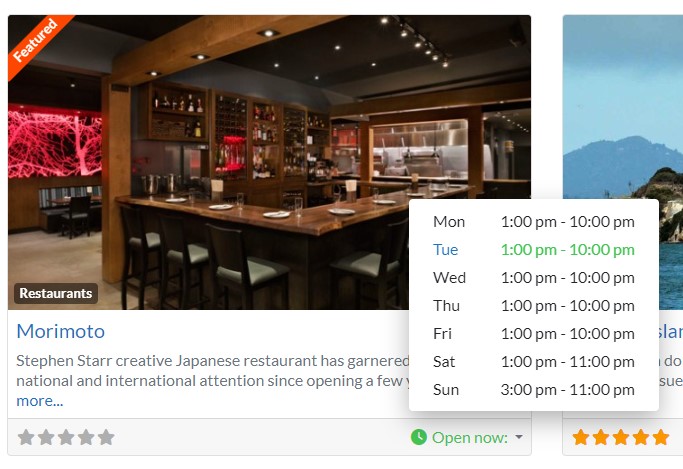
with the Advanced Custom Fields plugin, you can create repeater fields for the opening hours of each listing.
You’ll need to create a dropdown field with the hour values and then use PHP to format it properly for display or calculations.
If you want minute-specific time, you’ll need to use a number field.
Searching by “Open now” or “Closed now”, especially if you have to take into consideration Timezones for the calculation, is only possible with custom queries and code.
Another big challenge is caching this information without disrupting the open/closed status of the listings.
This requires JavaScript skills to have the Open /Closed change live on the page.
It goes without saying that there is no ready-made plugin that will help you accomplish this feature for a CPT and ACF listing.
- Adding Ratings, Reviews, and Sorting Listings by Top Rated
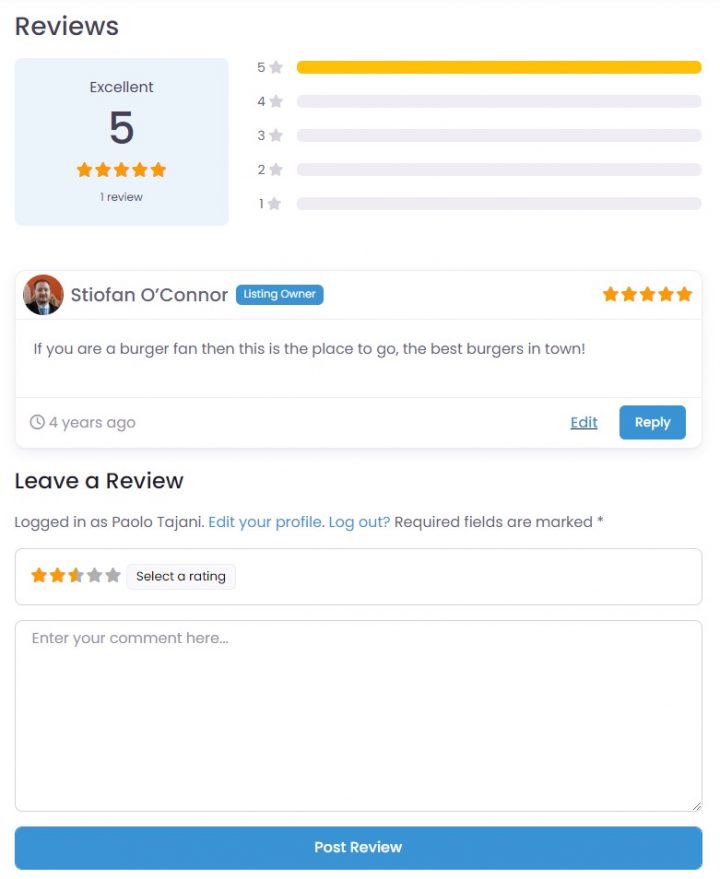
Adding ratings and reviews to a custom post type, using the comments system is relatively easy.
There are free and premium plugins that will help you do that, and you may even find tutorials on how to achieve it without a plugin.
Sorting listings by popularity or top ratings is a bit more complex and will require some custom code and knowledge of the WP_Query class and possibly SQL.
Also, when working on this, you soon realize a simple best rating ordering is a poor ranking factor and it requires more complex ranking queries.
Especially if you decide to build custom database tables because, with all these fields, you will quickly notice that ACF is not scalable at all.
But more on this in the next point.
- Searching Listings by Custom Fields or Location
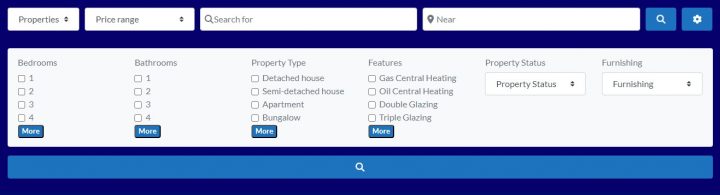
This is where this approach will fail miserably at scale.
The wp_postmeta database table (custom fields) isn’t designed for querying posts by custom fields.
Filtering by anything more than 1 custom field can result in an exponential increase in query times and even a small directory would struggle with filtering more than two custom fields.
For those looking for a technical explanation, you can read this post about ACF scalability limits.
Unless you are dealing with a few hundred listings with a low number of custom fields each, even when using a fantastic search plugin like FacetWP, you will hit a wall quite quickly.
The better your server, the longer it will take you to hit that wall, but eventually, you’ll get there.
There are plugins that save ACF data in custom database tables like: https://hookturn.io/downloads/acf-custom-database-tables/, but it is an extra cost and you will need to write a custom query for your search form to search into the new database tables.
- Implementing Free and Paid Trials for Business Owners
Offering trial options for easier onboarding is an effective way to encourage business owners to explore the features and benefits of a directory website.
By providing free or discounted access to premium features, business owners can experience the value of the platform without making an immediate financial commitment.
This approach helps reduce the barriers to entry and fosters trust between the directory website and potential customers.
As business owners become familiar with the platform and witness its potential to increase their online visibility, generate leads, and improve their reputation, they are more likely to convert from trial users to paying customers.
That said, offering a free or paid trial might not be as simple. If you go the develop-from-scratch route, this will add days if not weeks of custom coding to your project and budget.
- Adding Events and Searching by Date
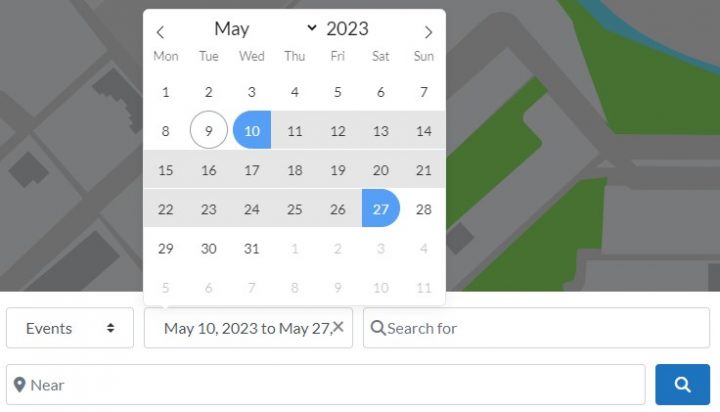
Events are listings with more statuses than the usual listings, which depend on a start date and end date. Events can be Past, upcoming, or ongoing.
You will need yet another custom post type and more complex search queries.
There are several plugins that will add a full Event Calendar to your website, but the style will be completely different from your listings built with CPT/ACF combo.
If you decide to build this too with CPT/ACF, your development time just doubled.
- Creating a Compare Listings Feature
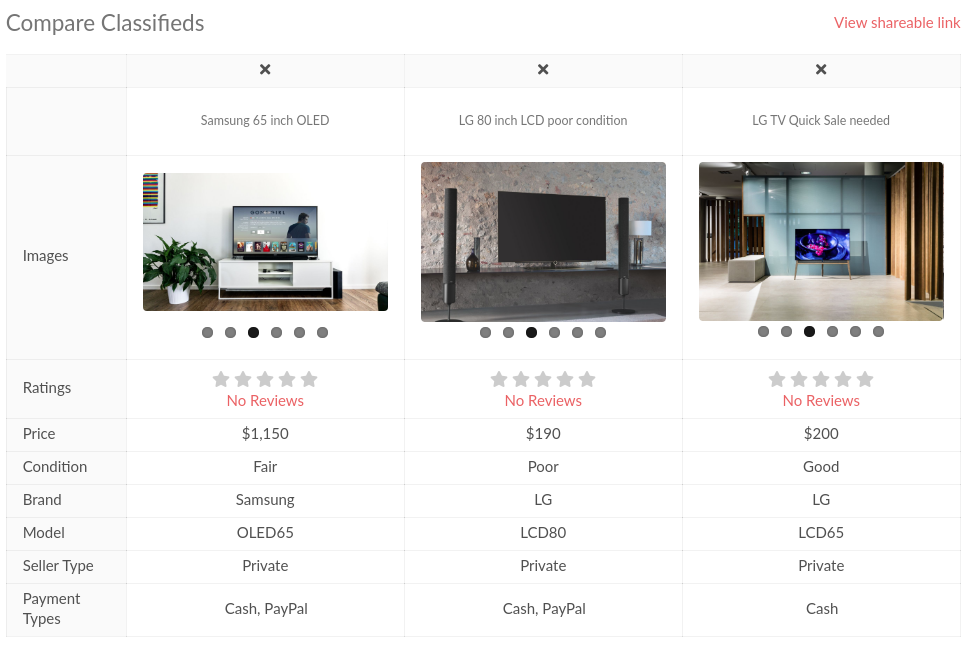
The benefits of allowing users to compare listings on a directory website are numerous.
By enabling users to easily evaluate different businesses or services side by side, a comparison feature can help them make more informed decisions.
This feature allows users to quickly identify key differences, such as pricing, features, ratings, or proximity, and choose the most suitable option based on their needs and preferences.
Implementing a compare listings feature using custom post types and Advanced Custom Fields can be challenging and time-consuming.
The difficulty stems from the need to create a system that dynamically generates a side-by-side comparison of the chosen listings, taking into account various custom fields and attributes.
Additionally, the comparison interface must be designed to be user-friendly, visually appealing, and responsive to different screen sizes and devices.
The amount of time required to implement a compare listings feature depends on several factors, such as the complexity of the listings, the number of custom fields to be compared, and the developer’s expertise with Custom Post Types and Advanced Custom Fields.
However, it is not uncommon for this process to take several weeks of development and testing to ensure a smooth and functional user experience.
- Adding a Booking System for vacation rentals
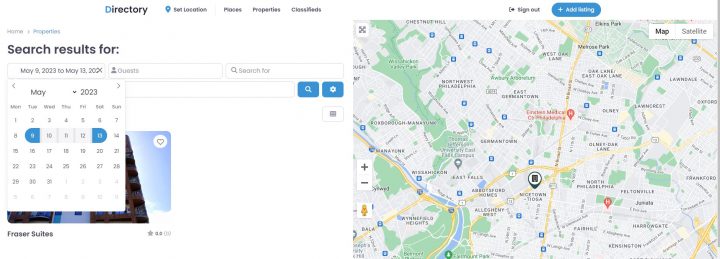
This would be a really complex task with CPT and ACF alone. It would require months of custom coding.
There are a few free plugins that will allow us to take bookings for one property, but in this case, we would need to take bookings for several properties, each owned by different people.
We couldn’t find a premium plugin that would allow multivendor bookings, with a global search by dates, custom fields (Swimming Pool, WiFi, parking), and number of people.
GeoDirectory now is the only solution offering a complete booking plugin for vacation rentals, which allows building a complete Airbnb Clone where the Directory Admin can make money through a commission for each booking secured.
Conclusions
While it is indeed possible to build a fully-fledged business directory using Custom Post Types and Advanced Custom Fields, this approach could take months or even years of custom coding to implement all the required features.
An alternative solution is to use ACF-compatible plugins, which can help streamline certain aspects of development.
However, this approach may require installing an array of plugins from different developers, many of which are not free, leading to potential compatibility issues and increased costs.
For example, if you were to use:
- Frontend Admin: $49.99/year
- FactWP: $99/year
- ACF Custom Database Tables: $149/year
You are already at almost $300/year and you only covered a tiny fraction of the features needed.
A more efficient and cost-effective option is to use a dedicated WordPress business directory plugin, such as GeoDirectory.
By choosing this route, you benefit from a suite of features designed specifically for directory websites, all developed by a single developer.
The plugins are typically lightweight, minimizing performance concerns, and offering a more cohesive and superior application tailored to the purpose of building a directory website.
By opting for a solution like GeoDirectory, you save both time and money, enabling you to create a powerful and user-friendly directory website without the challenges and complexities associated with custom coding and managing multiple plugins.

Did you know that 80% of all job searches were done online as of 2022, and approximately 50% came from job boards?
As the job market becomes more competitive, job seekers and recruiters alike need to be able to find and manage job postings quickly and efficiently.
In response to this growing need, many job board plugins have been developed to help streamline the job-hunting process.
That’s why in this article, we’ll explore some of the top job board plugins available for WordPress.
Whether you are a job seeker or a recruiter, these plugins can help simplify the job search process and make it easier for you to find the perfect match.
Ready? Let’s go.
What is a WordPress Job Board Plugin?
A WordPress job board plugin is a plugin that allows you to publish available jobs from your own company or other companies through WordPress.
These plugins are specifically designed for recruitment and job boards.
Companies and organizations often use them to streamline their hiring process and attract qualified candidates.
Why should you use a job board plugin?
Job plugins are essential components of any job management system.
They provide additional functionalities to simplify job creation, execution, and monitoring processes. Here are some reasons why job plugins are essential:
- Simplify the job search process: Job plugins enable job seekers to find relevant job postings quickly and easily. By offering a centralized location with advanced search capabilities, people can search for open positions without navigating through multiple websites or job boards.
- Job plugins provide customizable job management options, such as the ability to add custom fields to job postings, create custom job application forms, and use custom email templates. These customizations can help you collect relevant information from job seekers, make informed hiring decisions, and build strong relationships with potential candidates.
- Saving time and money: Using a job plugin on your WordPress website means you don’t have to spend extra money on another website for job postings. It also saves you time by eliminating the need to find a third-party job board site.
- Drive traffic to your website: Having a job board on your website can increase its traffic. Indeed, for instance, has averaged more than 600 million monthly visits so far this year.
Criteria to consider when choosing a job board plugin
When selecting job plugins, there are various criteria to consider. Here are some of the most important ones:
- User interface: Look for a job board plugin that is easy to navigate and use, with an intuitive user interface that is easy to understand.
- Customization options: Consider a job board plugin that offers customization options to meet your specific needs, such as the ability to add custom fields or create custom job application forms.
- Compatibility: Ensure that the job board plugin is compatible with your version of WordPress, as well as with any other plugins, themes, or tools you may be using, like an applicant tracking system or email marketing software.
- Features and functionality: Evaluate the features and functionality of the job board plugin, such as the ability to manage job listings, applicant profiles, and notifications. Consider whether the job board plugin provides the necessary features for your organization’s hiring needs.
- Reliability: The plugin should be reliable and stable. An unstable plugin or bug can cause issues with your job management system, such as job failures or data corruption. Check the plugin’s documentation, user reviews, and support resources to ensure reliability.
- Price: Evaluate the cost of the job board plugin, considering both upfront and ongoing costs, and whether it provides value for your organization’s budget.
1. GeoDirectory
With over 10,000 installations and a 4.7 average rating, the GeoDirectory job board plugin from AyeCode Ltd is one of the most advanced and scalable tools on the market.
This plugin has undergone a complete rewrite in April 2019, resulting in an even more feature-rich solution that’s easier to customize with an improved code base.
Designed to seamlessly integrate with any free or paid job board theme, this plugin makes it easy to create a professional-looking website that will help you attract more job seekers and employers.
If you’re looking for a powerful and versatile job board plugin, here are some of the features that make it stand out as one of the top choices in the industry:
Key Features
- Job listing management: Easily manage all of your job listings in one place, including adding new listings, editing existing ones, and deleting expired listings.
- Paid Job Listings: Monetize Job Listing submissions by offering more features such as extra custom fields, more visibility and priority in search results.
- Custom fields: Create custom fields to collect additional job-specific information from employers, such as required education, experience, and skills.
- Advanced search: Job seekers can easily find the right job with advanced search options, such as location, job type, salary range, and more.
- SEO optimization: Optimize your job board for search engines with built-in SEO features, including custom URLs, meta tags, and more.
- User management: With seamless integration of UsersWP, easily manage job seekers and employers with user registration, login, and account management features.
- Listing comparison: The plugin includes a Compare Listing add-on, which allows job seekers to compare job listings side by side, making it easier for them to make informed decisions and find the best job opportunities.
Pricing
The GeoDirectory core plugin is free and can be more than enough to develop a basic Job Board.
To add extra features like Advanced Search, Job Types, and compare jobs, there are various pricing plans.
The membership starts at $99 including 4 months of support and updates for unlimited websites.
The yearly membership instead costs $199 and includes support for unlimited sites and all features for 12 months.
Pros
- Powerful search and filtering options make it easy for users to find the needed listings.
- User reviews and ratings provide valuable feedback and enhance the user experience.
- Google Maps integration provides accurate location information and maps for job listings.
- The active development community provides frequent updates and support.
Cons
- The learning curve can be steep for WordPress beginners.
- Some features may require additional plugins, which can increase costs.
2. WP Job Manager
WP Job Manager is a WordPress job board plugin developed by Automattic.
With just a few steps – creating new pages and adding shortcodes – you can establish a fully functional job portal within minutes.
This plugin enables recruiters to sign up on your website and post job openings, while job seekers can effortlessly manage their listings via an intuitive dashboard.
Moreover, WP Job Manager offers the opportunity to generate revenue through paid job postings using premium add-ons.
Additional add-ons allow for email notifications, seamless integration with WooCommerce for monetization, the inclusion of a resume manager, and more.
WP Job Manager is best for providing alerts and filterable job listings.
Key features
- Advanced search and filtering options: The plugin offers a range of search and filtering options that allow users to find jobs based on various criteria, such as location, category, and keywords.
- Resume manager: It offers a resume manager that allows job seekers to upload their resumes and apply for jobs directly through the website.
- Job alerts: WP Job Manager offers job alerts functionality that enables users to receive notifications when new jobs are posted that match their criteria.
- Integrates with a variety of other plugins and tools.
- Easy-to-use dashboard for job listings.
Pricing
WP Job Manager offers a free version with basic features and a range of paid add-ons that provide additional functionality. The pricing for a single personal site is $159 per year, inclusive of all core add-ons.
Pros
- Lightweight and easy to use, making it a popular choice for small businesses and startups.
- Customizable job submission forms enable administrators to collect the information they need from job seekers.
- Advanced search and filtering options make it easy for users to find the jobs they need.
- Resume manager and job alerts functionality enhance the user experience.
Cons
- Some features are only available through paid add-ons, which can increase costs.
- Limited functionality compared to more robust job board plugins.
- Some users have reported issues with support and documentation.
3. Simple Job Board
Simple Job Board is a shortcode-based job board plugin that enables you to establish a highly adaptable online job board system.
Simply insert the [jobpost] shortcode on your desired location within your website to begin utilizing the plugin.
You can craft distinct application forms for each job vacancy, incorporating multiple-choice options, specifying required fields, and more.
Supporting 14 languages, Simple Job Board is the perfect choice for multilingual websites.
Simple Job Board is best for a multilingual site.
Key Features
- Uses shortcode to add job listings.
- Ability to add notes to applications from the dashboard.
- Ability to add multiple job features to job listings.
- Customizable application forms.
Pricing
The plugin is currently free, but there are several paid add-ons, which are needed to extend the plugin’s features and capabilities.
Pros
- Available in 14 languages.
- Enables you to short out unsuitable applicants quickly.
Cons
- PHP 7.0 and above is required.
- Limited features make the plugin lack advanced features vital for a job board.
4. ApplyOnline
Apply Online is a versatile classified ads management plugin that enables users to respond promptly to listings.
With this plugin, effortlessly incorporating a job board into your website and accepting applications becomes a breeze.
Equipped with robust features such as ad categories, filters, customizable application form fields, and email notifications, Apply Online delivers a comprehensive solution.
However, one limitation is its inability to create paid job listing websites.
To overcome this, you can integrate a membership plugin to establish subscription plans or utilize a payment form plugin to accept orders.
Key Features
- Resume parsing: ApplyOnline automatically parses resumes and extracts relevant information, making it easy for employers to review applications.
- Drag and drop form builder.
- Notification system: The plugin notifies employers when new applications are received, making it easy to manage the hiring process.
- Integration with job board plugins: It integrates seamlessly with popular job board plugins such as JobRoller and WP Job Manager.
- Multiple file attachment fields.
Pricing
ApplyOnline offers a range of pricing plans based on the number of sites and features required.
The Premium Pack plan starts at $199 for a license including 6 months of updates and support.
Pros
- Customizable application forms enable employers to collect the information they need from job applicants.
- Resume parsing makes it easy for employers to review applications.
- A notification system makes it easy to manage the hiring process.
- Integration with popular job board plugins provides additional functionality.
Cons
- Limited customization options for templates and design.
- Some users have reported issues with performance and stability.
- Plugin is not compatible with all WordPress themes.
- Limited customer support.
5. WP Job Openings

WP Job Openings is another good option for incorporating a job board into your WordPress website.
WP Job Openings is a powerful and user-friendly plugin for creating job listing pages on WordPress websites.
It is designed based on a thorough analysis of various job listing layouts and methods, offering simplicity and extensibility as a high-performing recruitment tool.
Key Features
- Simple and easy setup and usage
- Two modern layout options: Grid and List
- Unlimited job specifications and filtering options
- AJAX-powered job listing and filtering
- Default application submission form and HR role setup
- Customizable email notifications and templates
- Job expiry options and SEO-friendly structured data
- WPML support and compatibility with top WordPress themes and plugins
Pricing
The free version of WP Job Openings can be upgraded to a PRO version that cost $69/year for 1 website, $139/year for up to 5 websites, and $399 for unlimited websites.
Pros
- Intuitive design and user-friendly interface
- Extensive customization options
- Regular updates and detailed documentation
- Compatible with many WordPress themes and plugins
Cons
- Premium features require paid add-ons
- Limited to two layout options
The verdict: Which is the best job board plugin?
All in all, if you’re looking for the best job board plugin for your WordPress site, there are plenty of great options available.
The right job board plugin for you will depend on your website’s needs and requirements.
By considering each plugin’s key features, pricing, pros, and cons, website owners can choose the best plugin for their needs.
However, if you need greater flexibility and a plugin that is more than just a Job Board and that can be used for any kind of listing, GeoDirectory stands out as the clear winner.
With its advanced features and user-friendly interface, the plugin makes it easy to manage job listings, attract top talent, and create a professional-looking job board website.
So if you want to take your job board to the next level, we highly recommend giving GeoDirectory a try.

Are you looking for ways to make some extra money on the side and maybe grow a side hustle into your main business? You’re not alone.
Escaping the 9-to-5 rat race and managing your own time should be your top priority.
For Stiofan and me, that’s exactly what GeoDirectory was meant to be. It’s a side hustle to earn some extra cash.
I wanted to build an Italian version of “Yelp” on the side while still working with my SEO customers.
This was over a decade ago, when Yelp was starting to launch in major European cities, such as Paris and London.
I knew they would eventually come to Milan and Rome, and they would likely acquire anything that could give them a competitive edge. That was my plan. Build a database of businesses and reviews to sell to Yelp.
Stiofan wanted to rebuild his directory of hotels and B&Bs on the Scottish Island where he comes from.
Coincidentally, we found ourselves working on the same project at the same time – a fully functional Directory Theme for WordPress.
When we met on a forum and realized we could complete the task faster as a team, we started working together.
Once we finished the theme, we realized that many people would want to use what we created, so we started selling it publicly.
Business picked up quickly. I never even started building my Yelp clone, and Stiofan only puts in a few hours of work each year on his Barra Island Directory.
GeoDirectory has become a solid business that has not only sustained both our families since then but also grown into a team of twelve which is still expanding.
In summary, GeoDirectory started as a side hustle but has grown into a solid business, proving that making a little extra money on the side can lead to big things.
Opportunities like this are still out there, for those willing to take a shot.
WordPress now is a behemoth and with some very basic skills and some hard work, you could start making money working with it today.
Whether you want to supplement your income, make it a full-time thing, or just have a little fun, here are 15 great side hustles you can start today!
We’ll also discuss what skills are needed for each one, how difficult it is to get started, and recommend tools that make getting paid easy. So let’s dive in!
1. Blog Marketing
- Skills needed: Writing proficiency + Basic SEO
- Difficulty: Low/Medium
- Tools needed: WordPress hosting + domain, AdSense account (or any other ads network)
If you’ve got a knack for writing, blogging is one of the best side hustles to get started on WordPress.
You can start your own blog by picking a niche that interests you, writing high-quality content regularly, and using search engine optimization (SEO) practices to get more people to visit your website.
Some great free resources for learning the basics of SEO include Search Engine Journal, Matt Diggity’s videos, and the SEMrush blog.
Once you start generating solid monthly traffic, you can monetize this organic audience with ads, affiliate links, and sponsored posts, which is how most bloggers make the vast majority of their income.
With a plugin like GetPaid, you can sell text and image ads on your WordPress site based on the number of impressions, clicks, or by time on your website.
You can pick zones on your site to display these ads:

Alternatively, you can leverage your writing talents to help other people market their blogs.
45% of marketers say blogging is the #1 most important piece of their content strategy.
So, if you have a good handle on what works in terms of writing and SEO, you can start doing freelance blog marketing for small businesses.
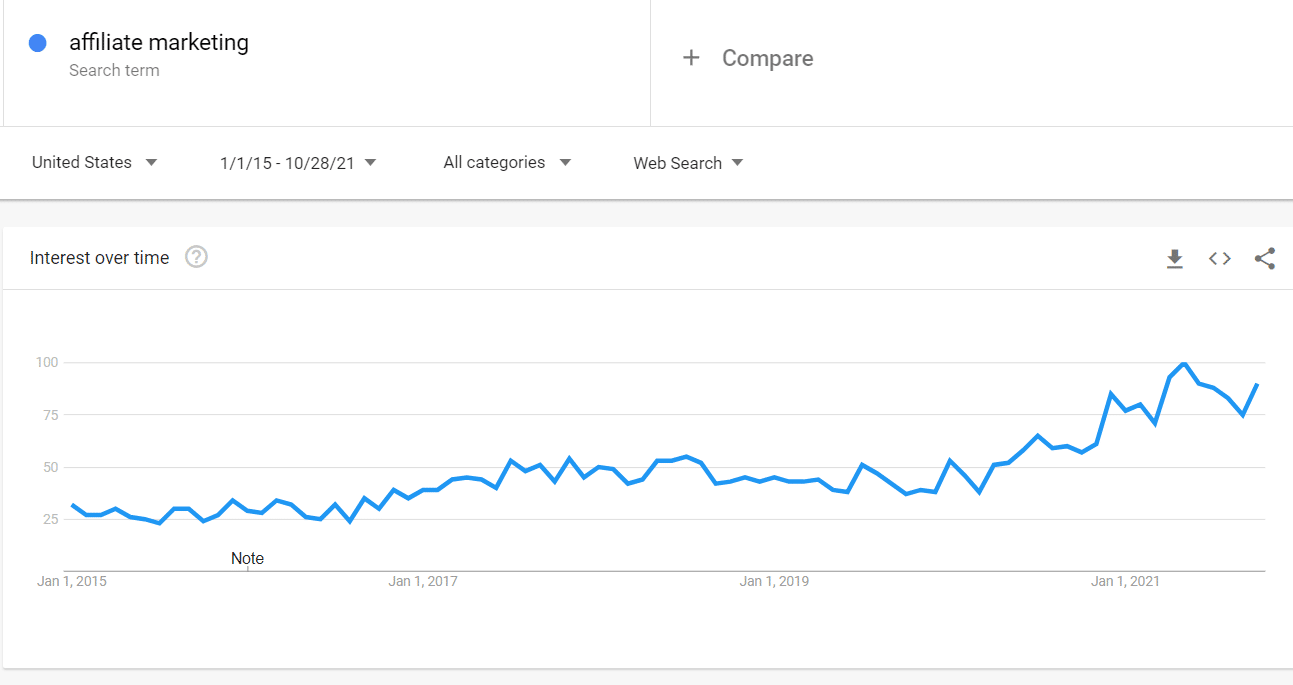
2. Affiliate Marketing
- Skills needed: Writing proficiency, basic SEO, sales and marketing knowledge
- Difficulty: Low/Medium
- Tools needed: WordPress hosting + domain, online merchant accounts.
From 2015 to 2023, google searches for “Affiliate Marketing” more than doubled. Why? Because it’s an effective way to make money.
All you have to do is create content about products and services that you already love and promote them through your blog.
Every time someone clicks on one of your links and makes a purchase, you will earn a commission from the sale.
- Find a niche that you are passionate about, and that has a large audience.
- Research and partner with reputable affiliate programs that align with your niche.
- Create valuable content that promotes the products or services you are affiliated with.
- Utilize multiple marketing channels such as social media, email marketing, and influencer partnerships.
- Track your performance and adjust your strategy accordingly.
- Be transparent and disclose your affiliate relationships to your audience.
- Continuously educate yourself on industry developments and new marketing techniques.
3. Web Directories
- Skill needed: Writing proficiency + Basic SEO
- Difficulty: Low/Medium
- Tools needed: WordPress hosting, GeoDirectory, GetPaid
Sites like Yelp, TripAdvisor, and Angie’s List are great for finding reputable services or businesses.
But did you know you can start your own directory on WordPress?
With a plugin like our GeoDirectory, you can easily create an online directory with custom categories, ratings, and reviews.
Once your directory is set up, the next step is to start getting paid.

Here’s how you can make money with a directory:
- Charge a fee for businesses to claim their listing in your directory.
- Offer memberships that include premium features, such as featured listings, priority support, and discounts on products or services.
- You can also sell text and image ads in different zones of your directory site.

With the GetPaid plugin, you can easily add payment gateways for listings and other premium features.
What would my online directory be about?
Your online directory could be about anything that you are passionate about and knowledgeable about. Here are a few ideas:
- Restaurants, bars, and cafes in your local area
- Local attractions or activities
- Shopping services or stores
- Home service providers like plumbers and electricians
- Real Estate
- Software
- Medical services
For example, Coast Radar is a directory website that acts as a guide to the best beaches and coastlines in the UK.
 Of course, you’ll also need to market your directory. Here are some of the best ways to do that:
- Optimize your website for search engines by incorporating relevant keywords and meta tags.
- Build backlinks to your website from other reputable websites.
- Utilize social media platforms to promote your directory and engage with your audience.
- Create valuable content, such as blog posts or videos, that highlights the businesses listed in your directory.
- Email marketing is a great way to reach out to potential customers and businesses, and a newsletter can help keep your audience engaged and informed about new businesses and updates to the directory. You can use automation tools like Mailchimp to make this process easier.
- Use paid advertising on social media or Google Ads.
- Create a referral program to encourage satisfied customers to share their positive experiences with your directory.
Click here for a full Directory SEO Guide.
4. eCommerce: Physical goods
- Skills needed: Writing proficiency, basic SEO, sales
- Difficulty: Medium/High
- Tools needed: WordPress hosting, GetPaid, Products to sell
Want to start selling physical goods online? With WordPress, you can easily set up an eCommerce store in minutes.
First, you’ll need to decide what type of products you want to sell.
Then, you can use the GetPaid plugin to add payment gateways for customers and manage orders.
For example, you can sell individual items or bundles using the “BUY NOW” button, which displays an overlaying payment form.

You can also set up a blog on your site promoting your products. This is an effective way to increase organic search traffic and drive more sales for your store.
Once your store is set up, it’s time to start marketing.
You can use SEO, paid ads, and social media to get the word out about your products.
Additionally, ensure that you provide quality customer service to keep customers coming back.
5. eCommerce: Digital goods
- Skill needed: Writing proficiency, basic SEO
- Difficulty: Medium/High
- Tools needed: WordPress hosting, GetPaid, one or more digital products to sell
Like physical goods, you can also create an eCommerce store for digital products.
Whether you’re selling digital downloads or subscription-based services, GetPaid makes it easy to set up a digital store and start selling.

Start by adding your digital products to the store, then use SEO and paid advertising to drive traffic.
You can also create promotional campaigns for specific products or bundles.
Additionally, you may want to consider setting up an email list to engage with your customers regularly.
6. Copywriting
- Skill needed: Native-level writing proficiency, sales and marketing knowledge, basic SEO, and a good understanding of different social platforms
- Difficulty: High
- Tools needed: WordPress hosting, GetPaid, and copywriting frameworks
Copywriting is a great way to make money online, and for many, it can be a lucrative side hustle.
Copywriters write the marketing material for advertising campaigns, websites, emails, landing pages, and other marketing materials.
It’s essential to have native-level language proficiency and a solid grasp of search engine optimization (SEO) to create compelling copy that resonates with the target audience online.
To get started, you can learn with resources like the Kopywriting Kourse, Udemy’s Complete Copywriting Course, or The Copywriter’s Handbook.
Once you’ve become comfortable with the basics, you should set up a portfolio website on WordPress with samples of your work to showcase your skills, along with packages to sell your services using GetPaid’s service retainer feature:

7. Server Management Service
- Skill needed: IT
- Difficulty: High
- Tools needed: WordPress hosting, GetPaid
Companies need server management services for maintenance and upgrades, monitoring and troubleshooting, backup and recovery, compliance, cost-effectiveness, and security.
If you have IT experience, you can start a server management service – which requires advanced knowledge of networking, server hardware, and system administration.
This can be a lucrative side hustle for those with the technical know-how to manage servers.
You can use WordPress hosting to create your website and GetPaid to set up packages for your services.
Ensure that your website includes a portfolio showcasing your previous projects or clients that you’ve worked with.
Additionally, it’s essential to have a good understanding of different social platforms so that you can promote your services and interact with potential clients.
Pro tip (applicable to service-based businesses in this article): When selling a service tailored to specific business needs (as opposed to a standardized plan), you can send clients a custom quote through GetPaid, which they can accept. This will then automatically convert into an invoice.

8. Security Researcher
- Skill needed: Writing proficiency + IT security
- Difficulty: Very High
- Tools needed: WordPress hosting, GetPaid, vulnerability scanners, malware analysis tools, debugging tools, network analyzers
If you’re passionate about computer science and networks with a background in IT security, then security research could be a great side hustle.
As a security researcher, you’d be responsible for testing the security of applications and systems, identifying vulnerabilities, and recommending solutions to fix them.
You’ll need an understanding of the different types of attack vectors, how to detect and respond to malicious threats, and how to develop secure applications.
9. SEO/SEM Services
- Skills needed: Writing proficiency + SEO/Marketing
- Difficulty: High
- Tools needed: WordPress hosting, GetPaid, Ahrefs, Surfer SEO
If you have a solid understanding of search engines and digital marketing, offering SEO and SEM services can be a profitable side hustle on WordPress.
You can help businesses improve their search engine rankings, drive more traffic to their website, and increase conversions.
One of the best tools for SEO and SEM services is Ahrefs, which allows you to research keywords and backlinks, track organic traffic and competitors, and monitor your own website’s performance.
A tool like Surfer SEO will help you optimize your content based on the keyword and competitor data.
The SEO industry is constantly evolving, so it’s essential to stay current with the latest trends.
You also want a portfolio with a proven track record since the space is known for many self-proclaimed professionals selling empty promises.
10. Web Design
- Skills needed: UI/UX Design
- Difficulty: Medium/High
- Tools needed: WordPress hosting, BLockstrap, Divi or Elementor
Web design is another in-demand side hustle on WordPress.
With a good eye for design and a solid understanding of UI/UX, you can create beautiful and functional websites for businesses, nonprofits, and individuals.
Our newest Blockstrap theme (+ plugin) is free, and you can build any website with it using the Bootstrap framework without writing one line of code.
Alternatively, two popular WordPress page builders are Divi and Elementor, which allow you to create custom designs without writing any code as well.
They also have a library of pre-designed templates that you can customize to fit your client’s needs.
11. Custom Back end Development
- Skills needed: Programming
- Difficulty: High
- Tools needed: WordPress hosting, PHP, MySQL
Do you have strong programming skills? You can offer custom back-end development services on WordPress.
This includes creating custom plugins, integrating with third-party APIs, and optimizing database performance.
To offer this service, you’ll need a solid understanding of PHP and MySQL.
Additionally, you can use tools like the Query Monitor plugin to debug and optimize your custom plugins and functions.
12. Hosting Provider
- Skills needed: IT + Large Capital
- Difficulty: Very High
- Tools needed: Data center infrastructure, cPanel, WHM
If you have a strong background in IT and a significant amount of capital to invest, you can start your own hosting provider business for WordPress.
Being a hosting provider requires a significant investment in data center infrastructure, servers, and networking equipment.
You can offer a range of hosting services, including shared hosting, VPS hosting, and dedicated hosting.
You will also need to have a good understanding of cPanel and WHM, which are popular control panel software for managing web hosting accounts.
It’s a challenging business, as it requires a substantial investment of time and resources. Still, it can also be a highly profitable venture, given the ongoing demand for web hosting services.
As a hosting provider, you will also need to demonstrate excellent customer service and technical support, as well as a solid understanding of security, to keep your customers’ websites safe and secure.
Additionally, you will have to continuously monitor and upgrade your infrastructure to ensure that your hosting services are always running at optimal performance.
13. Plugins Development and Distribution
- Skills needed: Programming + Basic SEO
- Difficulty: High
- Tools needed: WordPress hosting, GitHub, CodeCanyon
Developing and distributing your own plugins for the biggest open-source content management system in the free world can be pretty lucrative.
Creating a WordPress plugin requires mastering the art of PHP, JS, and MySQL programming.
PHP is the backbone of WordPress plugin development as it allows interaction with WordPress functions and APIs.
JavaScript and ReactJS, in particular, are becoming increasingly prominent as the new editor is built with them.
MySQL, on the other hand, is used to store and retrieve data for the plugin, such as user information and settings.
You’ll also need a deep understanding of WordPress plugin development guidelines, actions, and filters, as well as best practices, to create a plugin that seamlessly integrates with the platform and provides an excellent user experience.
And if you’re looking to add more advanced features to your plugin, knowing HTML, CSS, and JavaScript will definitely come in handy.
You can distribute your plugins using the Freemium business model using the WordPress.org plugins repository and selling premium add-ons (like we do) using a plugin like GetPaid and its license manager plugin.
Alternatively, you could use a platform like CodeCanyon, a marketplace for commercial WordPress plugins, which allows you to focus on developing and providing support. At the same time, they handle every other aspect of the business for you.
14. Themes Development and Distribution
- Skills needed: Programming + UI/UX Design + Basic SEO
- Difficulty: High
- Tools needed: WordPress hosting, GitHub, ThemeForest
Just as you can develop and distribute your own WordPress plugins, more design-focused and artistic individuals can do the same for WordPress themes to earn a good income.
To design and develop WordPress themes, you will need a solid understanding of HTML, CSS, JavaScript, PHP, and MySQL, as well as knowledge of WordPress’s template hierarchy, template tags, and action/filter hooks.
With a keen eye for design and a strong understanding of web design frameworks like Bootstrap or Foundation, you can create beautiful and functional themes that help businesses and individuals enhance their website’s performance and functionality.
You can distribute your themes on WordPress.org or on ThemeForest, which is a marketplace for commercial WordPress themes.
15. Website Maintenance Service
- Skills needed: Basic IT, Programming, and UI/UX Design
- Difficulty: Medium/High
- Tools needed: WordPress hosting, UpdraftPlus, WP-Optimize
Website maintenance is an ongoing task that must be performed to keep a website running smoothly and ensure it remains up-to-date.
If you have skills in IT, programming, and UI/UX design, you can offer website maintenance services on WordPress.
You can use backup tools to make sure that your client’s website is backed up regularly, a security plugin to keep it secure, and caching plugins to keep it fast and efficient.
You can also offer services such as plugin and theme updates, security scans and monitoring, and other performance optimization.
Parting words
Starting a side hustle on WordPress can be a great way to make money while also honing your skills and gaining experience with the platform.
Whether you choose to develop plugins and themes or offer website maintenance services, there is a range of businesses that you can pursue on WordPress.
What are you waiting for? Get started on your WordPress side hustle today!
Good luck, and enjoy the ride!

Most “best WordPress real estate plugin” guides assume you need MLS integration on day one.
The assumption is wrong for the vast majority of operators.
MLS data feeds require an IDX Broker, IDX/Showcase IDX, or Realtyna subscription that costs anywhere from $80 to $300+ per month, on top of MLS board membership fees that vary by region.
The full stack runs $1,500 to $5,000 per year before you list a single property.
For brokers running large teams in competitive US markets, that math works.
For solo agents, international operators, niche real estate businesses (vacation rentals, commercial, land, luxury, off-market deals), and anyone testing whether a website is worth the investment, it does not.
You can launch a real estate website with manually-entered listings, capture leads, build SEO authority, and validate the business model for under $250/year.
When the revenue justifies it, add MLS later.
This post is the honest comparison of seven WordPress real estate listing plugins, the framework for separating MLS-dependent options from standalone setups, and the case for starting lightweight.
The MLS Trap
MLS integration is sold as the killer feature of real estate websites.
The pitch makes intuitive sense: pull in every listing in your market automatically, never type a property detail again, and visitors get a full local inventory to browse.
The hidden costs:
- IDX feed providers (IDX Broker, Showcase IDX, Realtyna, IHOMEFINDER) charge $80-$300/month for the data feed connection
- MLS board membership fees ($300-$1,500 annually per board, depending on region)
- Some MLS boards require co-brokerage agreements before granting feed access
- Display restrictions vary by MLS — some require listings to disappear when the listing agent removes them, others require specific branding
- The full inventory you import competes with your own listings for SEO authority, which can dilute rather than help organic rankings
- You are dependent on the MLS feed staying live (outages happen) and the data structure not changing (it does, periodically)
The agents who actually benefit from MLS integration are the ones with enough volume to absorb the recurring costs and enough team capacity to convert the higher lead flow.
Solo agents, new agents, niche operators, and anyone selling internationally where MLS does not exist (most of Europe, Asia, Latin America) are better served by a plugin that handles manually-entered listings well, with the option to add MLS later when the business case is clear.
What to Look For in a Real Estate Listing Plugin
Beyond MLS integration, the features that separate serious real estate plugins from glorified post-type plugins:
- Front-end listing submission so team agents can add properties without WordPress admin access
- Custom fields per property type (single family, condo, commercial, land, rental)
- Google Maps integration with location-aware search and filtering
- Multi-location support for agents serving multiple markets
- Lead capture forms on every listing tied to your own CRM
- Mortgage calculator, walk score, virtual tour support per listing
- Energy rating compliance (required by law in most of Europe)
- SEO-friendly URLs, schema markup, and indexable category and area pages
- Page builder compatibility (Elementor, Bricks, Beaver Builder, Divi)
- Multilingual support for international markets
- Front-end claim listings workflow if your model includes verified agent profiles
- Performance at scale (a directory of 10,000 listings should not slow your site to a crawl)
A plugin missing more than two or three of these is built for a narrower use case than a serious real estate operator needs.
For the full walkthrough on actually building the site, see our guide to how to build a real estate website.
The Comparison Table
Seven WordPress real estate listing plugins in 2026, sorted by MLS dependency and total annual cost.
| Plugin | Starting Price (Year 1) | MLS Required? | Best For |
|---|---|---|---|
| Essential Real Estate | Free | No | Budget builds, beginners |
| GeoDirectory | Free, or $139/year single site / $229/year unlimited | No | Serious real estate businesses, multi-location, paid listings |
| Easy Property Listings | Free, or $87 PRO one-time | No (paid MLS via add-ons) | Simple manually-entered listings |
| Estatik | Free, or $89 PRO / $649 Premium | No (Premium tier adds MLS) | Solo agents who may add MLS later |
| WPCasa | Free (GitHub), or €149/year Standard | No | Developer-friendly custom builds |
| Realtyna WPL | Free, paid plans for MLS | Optional (paid) | Agents committed to Realtyna’s ecosystem |
| IMPress for IDX Broker | Free + IDX Broker subscription ($80+/month) | Yes (the whole point) | US agents with MLS access and budget |
Five of these plugins run without MLS dependency.
One has MLS as a paid option in its top tier (Estatik Premium).
One is built specifically for the MLS-via-IDX-Broker use case and assumes you already pay for the underlying feed.
The Plugins, Reviewed
GeoDirectory
GeoDirectory is the free WordPress directory plugin built by our team at AyeCode Ltd, with the dedicated Real Estate Directory add-on that adds real estate-specific features on top of the core.
Active on 10,000+ websites, in continuous development since 2014.
The architectural difference from competitors comes from two specific technical choices.
First, GeoDirectory stores listing data in its own custom database tables (wp_geodir_gd_place_detail and wp_geodir_gd_{cpt-name}_detail for additional listing types) rather than overloading WordPress’s wp_postmeta.
The result is a directory that stays fast at 50,000 listings instead of slowing to a crawl at 5,000 (which is where every wp_postmeta-based competitor hits a performance wall).
Second, GeoDirectory has native compatibility with every major page builder, including deep dynamic data integration with Bricks and Elementor PRO that requires no bridge add-ons.
The free core covers multi-location directories, custom post types for different property categories, Google Maps integration with location-aware search, front-end submission forms, and SEO-friendly indexable archives.
The free Real Estate Directory add-on adds mortgage calculator, energy rating chart (HERS for US, EPC for EU), Walk Score integration, and virtual tour support per listing.
The free Real Estate Listings theme provides a polished default design out of the box.
Optional paid add-ons cover the monetization side: Pricing Manager for paid listing packages, Claim Listings for verified agent workflows, Event Manager for open house calendars, and Reviews Manager for property and agent ratings.
Pricing: $139/year single site or $229/year unlimited sites, with a $115 four-month option and a 30-day refund policy. No lifetime license, by design.
MLS integration is not built into the current core.
An MLS add-on from our team is on the roadmap, priced as a reasonable yearly subscription add-on rather than the recurring monthly subscriptions that define the rest of this category.
For operators who eventually need MLS data feeds, the upgrade path stays affordable instead of adding $80-$300/month to the cost of doing business.
Easy Property Listings
Easy Property Listings is the most beginner-friendly real estate plugin in the WordPress repository.
Free core, with the PRO version at $87 one-time and the full Core Extension Bundle at $297 one-time for the complete add-on set.
The setup wizard walks you through listing types, search forms, and template selection in under 15 minutes.
Built specifically for agents and brokers in markets where MLS data feeds (REAXML, JUPIX) are the standard rather than the US-centric IDX model, with strong adoption in Australia, UK, and parts of Asia.
The trade-off is the underlying architecture: listing data stored in WordPress’s wp_postmeta table, which hits the performance wall mentioned in the GeoDirectory section once your directory exceeds a few thousand listings.
Best for solo agents and small offices with under 1,000 listings who want a one-time-fee solution.
Estatik
Estatik is a mid-market real estate plugin with a clean Elementor-integrated visual builder for property pages.
Free core, $89 PRO, and $649 Premium one-time for the MLS-integrated version with RETS plus RESO Web API support.
The Premium tier is the only legitimate MLS integration option in this list that uses a one-time fee instead of recurring subscriptions, which makes Estatik attractive for agents who need MLS data but want to avoid IDX Broker’s monthly costs.
The catch: MLS board compatibility varies. Confirm Estatik supports your specific MLS before paying for the Premium tier.
HubSpot CRM integration is built in, which is useful for agents already running marketing through HubSpot.
Around 8,000 active installations, 4.3/5 rating.
Essential Real Estate
Essential Real Estate is the most comprehensive completely-free real estate plugin in the WordPress repository.
Includes property listings, custom data fields, Google Maps integration, agent profiles, front-end and back-end customizer, Visual Composer compatibility, and WPML translation support.
Supports global payment integration (PayPal, Stripe, Wire Transfer) and 360-degree virtual tours.
The trade-offs: documentation is translated from a non-English original and shows it, support quality varies, and the learning curve is steep because the feature surface is large.
Best for budget-conscious operators willing to invest setup time in exchange for $0 ongoing cost.
WPCasa
WPCasa is a developer-friendly real estate plugin that was removed from the official WordPress.org repository for guideline violations and now distributes through GitHub.
The plugin itself is still actively maintained.
Free core via GitHub, with Standard at €149 and Developer at €199 for premium themes, add-ons, and support.
WPCasa functions as both a real estate plugin and a theme framework, which gives developers more control but adds complexity for non-developers.
The wp.org removal means you cannot install or update WPCasa through the standard WordPress plugin browser, which adds operational friction over time.
Best for developers and agencies building custom real estate sites for clients.
Realtyna WPL
Realtyna WPL Real Estate is a comprehensive real estate platform built by Realtyna, an MLS integration specialist that also offers full MLS data feed services as part of its ecosystem.
Free core handles unlimited listings, multiple listing types (sale, rent, vacation rental), and basic agent management.
Paid plans add MLS integration through Realtyna’s RETS Listings service, which is sold separately at subscription tiers based on data volume and refresh frequency.
The free version is more functional than most free real estate plugins, but the upgrade path locks you into Realtyna’s broader ecosystem (which is a strength if you want one vendor for everything, a constraint if you prefer modular tools).
Best for US agents who plan to use Realtyna’s MLS data services and want the plugin from the same vendor.
IMPress for IDX Broker
IMPress for IDX Broker is the official WordPress plugin from IDX Broker, the largest IDX data feed provider in the US real estate market.
The plugin itself is free.
It requires an active IDX Broker subscription to function, which runs $80+/month for the basic tier and climbs with feature add-ons (lead management, custom widgets, advanced search).
The IMPress family (formerly separate plugins: IMPress Listings, IMPress Agents) has been consolidated into the single IMPress for IDX Broker plugin.
If your business is built around US MLS data feeds and you already pay for IDX Broker, this is the cleanest integration option.
If you are starting fresh and have not yet committed to the IDX Broker subscription, the MLS-dependent approach is the most expensive path to a working real estate website.
When MLS Integration Actually Matters
The case for MLS integration is real for specific scenarios.
Large brokerage firms in competitive US markets where every comparable agent has MLS-powered search on their site.
Teams with the volume to convert higher lead flow into closed deals (the per-lead value has to exceed the subscription cost, which typically requires 5+ closings per year attributable to MLS-driven traffic).
Operators in jurisdictions where buyers expect to see full market inventory rather than just an agent’s own listings.
For everyone else, MLS is a cost without a corresponding revenue case.
Start without it.
Add it when the business demands it.
The Practical Path
The best real estate listing plugin for most operators is the one that handles real estate as a first-class capability without forcing MLS dependency at launch.
For most operators, that is the free GeoDirectory plugin paired with the free Real Estate Directory add-on and the free Real Estate Listings theme.
Listings, search, maps, mortgage calculator, energy rating, walk score, virtual tour support: all included, all free, all ready on activation.
The paid Membership bundle at $139/year single site or $229/year unlimited sites adds the monetization layer (paid listing packages, claim listings, events, reviews) for less than one month of most IDX Broker subscriptions.
For the step-by-step build walkthrough, see our guide to how to build a real estate website.
For an Elementor-specific build path, see our tutorial on how to create a WordPress real estate listings directory.
For the broader case against SaaS directory platforms across all directory categories, see our best business directory software guide.
Final Thoughts
The real estate plugin market splits cleanly into two camps.
Plugins that assume MLS integration is essential, charge accordingly, and lock you into an ecosystem of recurring subscriptions before you have validated whether the website even produces leads.
Plugins that handle real estate listings well on their own, give you the option to add MLS later when the business case justifies it, and let you keep the difference in your pocket while you grow.
The free GeoDirectory plugin sits squarely in the second camp by design, has been in continuous development since 2014, and stays out of your way as the directory grows from a side project into a real business.
Start without MLS.
Build the asset.
Add MLS only when the revenue makes the recurring cost obvious.
Want to create a directory website?
The easiest way to create a directory website is to implement the following steps:
- Choose a platform (we recommend WordPress)
- Pick your niche
- Design and customize your directory website
- Gather and organize your data
- Optimize for SEO
- Promote your directory website
- Monitor and improve
Before diving into the details, let’s first understand the key benefits of creating a directory website for you and your visitors.
Some people need a map, compass, and a pack of hunting dogs to find the business they’re after.
Luckily, others will have your business directory website to guide them to what they need.
Your directory will be the ultimate resource for finding information about businesses, products, and services in any specific area or industry.
With the right tools, setting up your own business directory website is surprisingly easy.
This guide will show you how to create a powerful online directory using WordPress.
Why start a directory website?
- Passive income: Monetize your directory with ads, listing fees, affiliate marketing, premium listings, or sponsored content, and earn money effortlessly.
- Flexibility: Work from anywhere with an internet connection, enjoying the freedom of a digital nomad without the hassle of finding accommodation.
- Build a strong network: Connect with various businesses and people, potentially forging valuable relationships that could benefit your future ventures.
Step 1: Choose a platform
The first step in creating your business directory website is choosing the right platform.
With many options available, it’s best to go with user-friendly platforms like WordPress, Wix, or Squarespace:
- WordPress: The Swiss Army Knife of website builders—versatile, powerful, and highly customizable, allowing you to create anything without limitations.
- Wix: Flashy and easy to use, packed with excellent features, but it has limited customization options and fewer plugins.
- Squarespace is sleek, minimalist, and visually appealing, but it has limited functionality and can be pricey.
Our recommendations for beginners
If you’re new to website building, WordPress is your best bet.
With countless tutorials and resources available, plus a vast plugin marketplace, you’ll have all the tools you need to build the perfect site.
For instance, the GeoDirectory plugin lets you set up a powerful directory website in minutes. It features advanced search, social media integration, ratings, reviews, and more. It’s easy to customize and manage.
In this guide, we’ll show you how to use it.
Step 2: Picking your niche
The next step is to pick your niche. What kind of businesses or products do you want to feature on your website?
Choose a niche for your directory. What types of businesses or products do you want to feature?
- Identify Your Target Audience: Determine who you want to attract—small businesses, large corporations, or a specific industry.
- Research Your Competition: Explore existing directories and look for market gaps. Identify what makes your directory unique and how you can stand out.
- Consider Geographical Location: Decide if your directory will focus on a specific city, state, or region. Tailor your directory to the needs of businesses and users in that area.
- Narrow Down Categories: Focus on key categories relevant to your target audience. Keep them well-defined and easy to navigate.
- Test Your Ideas: Get feedback from potential users and businesses to validate your concept before launching.
Examples of Niche Business Directories:
- A vegan restaurant directory for a specific city
- Pet grooming services in a particular region
- Women-owned businesses in a specific industry
- Eco-friendly products in a specific country
Get creative and find a niche that resonates with you and your audience.
Check this link for a tutorial on creating a restaurant directory with WordPress or How to Create a Classified Ad Website.
Once you’ve chosen your niche, you’re ready for the next step.
Step 3: Design and customize your directory website
Now that you’ve chosen a platform and identified your niche, it’s time to design and customize your directory website.
Start by installing and setting up the GeoDirectory plugin:
- Install the plugin
- Complete the setup wizard
- Create listings and categories
- Set up widgets
- Add links to the menu bar
For guidance, watch this walk-through by Nicole Sauk, which covers these steps:
Once the basics are set up, you can begin customizing the design—this is where the fun begins!
You can choose your preferred WordPress Directory Theme for GeoDirectory to create a beautiful website that reflects your business.
WordPress Directory Themes and Page Builder Tutorials
If you need help choosing a 3rd party theme to use with GeoDirectory, we have a fantastic series of tutorials: How To Create A Directory Website.
Beyond the pre-built designs, you’ll want to personalize your site to make it stand out. Here are some tips:
- Choose a unique color scheme that reflects your brand, city, or target audience.
- Customize your logo with colors and images that align with your niche.
- Use high-quality images specific to your brand and niche.
- Customize your fonts for a consistent, professional look.
- Add personal touches, like a welcome message or personal story, to connect with your audience.
- Use widgets and plugins to add features like social media feeds or contact forms.
GeoDirectory offers powerful add-ons to enhance your site. Check them out here. Below are some must-haves:
- Location Manager: Ideal for scaling globally, allowing you to manage different directory locations individually.
- Advanced Search: Helps users filter searches by criteria you set, making it easier to find listings.
- Pricing Manager: Lets you monetize listings with premium options, manage payments, and set up pricing models.

- Multi-Ratings and Reviews: Builds credibility by allowing users to leave reviews with customizable icons and rating categories.
These add-ons will help you maximize your directory’s potential and user experience.
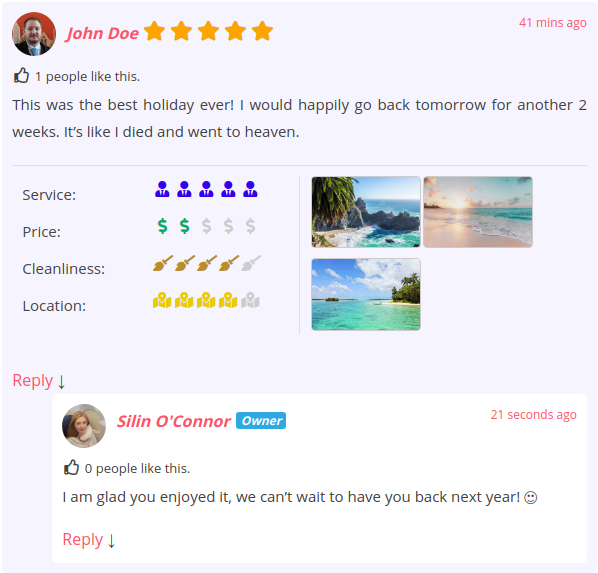
It’s time to populate your directory with listings—one of the most time-consuming but rewarding steps in creating your site!
- Start with Dummy Data: Use dummy data to test features, customizations, and how GeoDirectory handles different content types.
- Import Your Data: If you have your database, use the CSV import tool to add and categorize listings in bulk. Check out this guide on how to import/export data.
- Organize Your Listings: Set up categories, tags, and sub-categories to help users quickly navigate your directory and find what they need.
- Add Filters: Use filters to refine search results, making it easier for users to find specific listings without wading through long lists.
Properly organizing your data ensures a better user experience and makes your directory valuable!
Step 5: Optimize for SEO
SEO is crucial for your directory’s long-term success, so start building your SEO foundation now. In the next section, we’ll cover short-term marketing strategies.
To optimize your business listings for SEO, follow these steps:
A. Keyword Research and Targeting
- Brainstorm potential keywords your audience might use to find related services.
- Use tools like Google Keyword Planner to find relevant, high-volume keywords.
- Include target keywords in titles, descriptions, and relevant listings fields.
- Create SEO content based on low to medium-competition keywords.
B. Optimizing Meta Tags and Content
- Optimize title tags and meta descriptions with concise, accurate information and keywords.
- Use target keywords within your listings to provide relevant information about each business.
C. Building Backlinks
- Reach out to industry websites and businesses for backlinks to your listings.
- Create valuable content that other sites will want to link to, like blog posts or infographics.
- Focus on getting backlinks from reputable websites in your industry.
GeoDirectory’s built-in SEO optimization makes it easier to set your directory up for success.
Pro tip: Consider hiring an SEO agency for expert guidance, as SEO can be complex and time-consuming.
For more tips, check out this SEO guide for online directories.
Step 6: Promote your directory website
Now that your directory website is set up, it’s time to promote it. Here are some effective ways to get the word out:
Social Media Marketing
- Choose the Right Platforms: Focus on where your target audience spends time online. For example, LinkedIn is great for local businesses, while Instagram suits food directories.
- Create a Content Calendar: Post regularly about updates, featured businesses, events, tips, and insights related to your niche.
- Engage with Your Audience: Respond to comments and messages to show you value their input.
- Use Social Media Ads: Platforms like Facebook and LinkedIn allow targeted advertising to reach your ideal audience.
- Partner with Influencers and Businesses: Collaborate with industry influencers or other businesses for cross-promotion to boost credibility and reach.
Email Marketing
- Collect Email Addresses: On your website and social media, use sign-up forms with compelling offers to gather email addresses.
- Use Email Marketing Software: Tools like MailChimp can help automate newsletters, promotions, and updates.
- Highlight New and Featured Listings: Announce new businesses and spotlight different ones monthly to keep your directory engaging.
- Share Industry News and Events: Keep your subscribers informed about relevant trends and upcoming events.
- Personalize Your Emails: Use recipients’ names and make your content relevant. Craft catchy subject lines and clear calls to action to boost engagement.
Networking and Partnerships
- Attend Local Events: Networking events and business meetups are great for building relationships with other business owners.
- Host Events or Webinars: Showcase your expertise and attract potential customers by hosting informative events.
- Offer Referral Programs: Provide discounts or incentives to encourage customers to refer new businesses, helping you expand your directory and build loyalty.
Promoting your directory through these strategies will help you attract more users, grow your listings, and establish a strong presence in your niche.
Step 7: Monitor and improve
Congratulations!
You’ve launched your business directory website, but the journey doesn’t end here.
To ensure success, you must continuously monitor, update, and improve your site.
Here are some tips:
Analyzing Website Performance
- Tools like Google Analytics can be used to track traffic and user behavior. This will help you identify what’s working well and what needs improvement.
- Key metrics to watch include bounce rate, time on site, and page views.
- GeoDirectory offers a Google Analytics add-on that integrates tracking and shares basic stats on your site.
Gathering Customer Feedback
- Ask customers for feedback through surveys, reviews, or social media.
- Use their insights to identify areas for improvement and inspire new features or services.
Making Updates and Improvements
- Use feedback and performance data to update content, improve navigation, or add new features to enhance the user experience.
- Regularly refining your website keeps you ahead of the competition and ensures an excellent user experience.
A successful directory website is an ongoing project that requires constant attention and refinement—keep evolving to stay ahead!
Start a profitable directory business today with GeoDirectory
Building a business directory website can be both rewarding and profitable. By following the steps in this guide, you can create a professional directory that delivers value to your customers and generates passive income.
- Choose a niche, personalize your website, promote it through various channels, and keep improving it to ensure your directory stands out from the competition and is a valuable resource for businesses and consumers.
- You can turn your passion into a thriving online business with the right tools, resources, and mindset.
So why not give it a try? Your business directory could be the next big thing!

If you’re starting (or already running) a business directory, one of the ways to monetize your directory website should be premium listings.
These paid listings add value to your directory and make it more attractive to businesses looking for visibility in the marketplace.
But how exactly does a premium listing gives businesses an edge over their competitors? How do you sell them on it?
In this blog post, we’re going to share four things that will convince businesses to pay for a premium listing on your directory website.
And then, we’ll show you how to start offering one with the GeoDirectory plugin.
Ready? Let’s go.
What is a premium business listing? And how is it different from a free listing?
A premium business listing is essentially a paid version of a basic or free business listing.
It typically includes more information about a business and typically comes with additional features or benefits.
Here are a few key differences between premium and basic/free business listings:
- Businesses can add more information: A premium business listing typically includes more details about a business, such as its address, phone number, hours of operation, hi-res photos & videos, and description of the products or services it offers. A basic or free listing may only include limited information like the business name, address, and logo or a basic picture.
- Gain more visibility: Premium business listings are often given more visibility on websites or directories, meaning they may appear higher in search results or be more prominently displayed. This can be especially useful if you want to attract more customers to your business.
- Get special privileges: Premium business listings may come with additional features or benefits, such as the ability to add more photos or videos, the option to highlight your listing, the ability to add links to their social media, or the ability to respond to customer reviews (new feature coming soon into the pricing manager add-on). Basic or free listings may not have these options.
- There’s a cost: Of course, the main difference between premium and basic/free business listings is the cost. Premium listings typically come with a fee, while basic or free listings are, well, free.
Overall, a premium business listing is a great way to get more exposure for a business and provide potential customers with more information about what they do.
It can be a valuable investment, especially if you’re looking to attract new customers or stand out in a crowded market.
Show them all the enhanced features and functionality
When customers are searching for local businesses, they want to find the most relevant and up-to-date information.
They want to learn as much as possible about a business before they visit.
So, the more information you let businesses provide to customers, the better!
A premium business listing gives companies access to a range of enhanced features and functionality, such as:
- Contact information and hours of operation
- The option to upload unlimited photos – putting a face and place to a business helps to build trust with potential customers.
- Add videos and other multimedia – video can be a great way to show off businesses in action or company culture.
- Include links to your website and social media profiles – this helps customers learn more about any business and stay connected.
- Highlight listings – draw attention to important offers or promotions with the ability to highlight your listing.
When you build your directory website on GeoDirectory, you can tailor the information you collect/display, including adding your own custom fields.
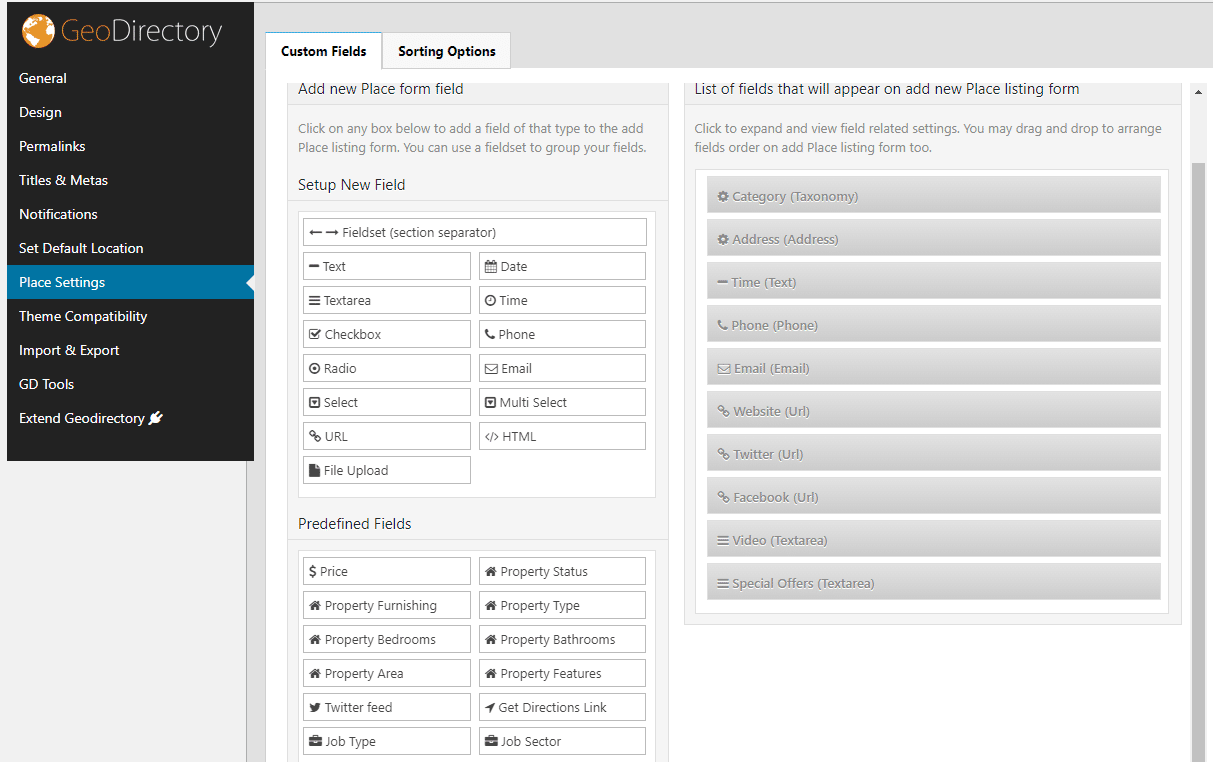
The custom fields are flexible and go deep, so you can set up exactly what you want premium users to mention as extra information regarding their business.
There’s even a feature that allows you to either keep things private for admins, or visible to the public.
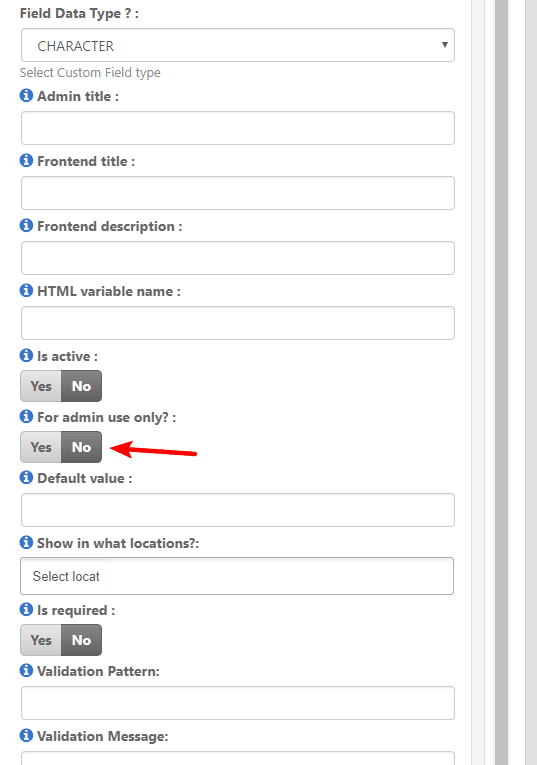
The credibility & trustworthiness factor
As we mentioned earlier, a premium listing lets businesses add more information.
Stating your address, phone number, and hours of operation and adding photos and videos of an establishment and its people give potential customers a better understanding of what you do and what they can expect when they visit your business.
And when you display businesses more prominently on the directory website with a “Featured” or “Recommended” badge, customers can feel more comfortable about choosing that business for their needs, knowing they’re an established organization with a solid reputation.
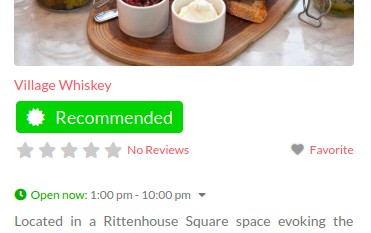
Speaking of reputation, a premium listing also helps customers see a company listing’s reviews and ratings at the forefront, which is important for persuading customers to choose one business over others, as many people rely on reviews and ratings to make their buying decisions.
In fact, 58% of consumers would pay more or travel further to support a company with good reviews.
Mention how they will get more exposure
A premium business listing can increase the visibility of local businesses on a directory website in several ways:
- Higher search ranking: Premium listings may be given higher priority in search results, meaning they appear higher up in the list of search results when someone is looking for businesses like yours, making it more likely that potential customers will see your business and click on your listing. (Advertisement add-on required for this)
- Prominent display: Paid listings are typically displayed more prominently on the directory home page and directory pages, such as being highlighted (e.g., shown as “Featured”) or given higher rankings on category pages or sidebars. This makes businesses stand out and draw more attention from potential customers.

- Additional features: Again, premium listings also come with additional features that can help to increase visibility, such as the ability to add photos or videos, or highlight your listing. These features can help to make business listings more attractive and share-worthy to potential customers and increase the chances that they will choose a business over others.
Make it easy to see the potential for more business growth
A premium listing can attract more qualified traffic to a business to generate more leads and customers.
This means that your users may see an increase in revenue from the paid listings alone.
In addition, premium listings are often cheaper than other forms of online advertising, such as pay-per-click or Google Ads – making them a cost-effective solution for businesses looking to promote their products or services.
Additionally, when it comes to business growth, it can be smart to leverage data transparency and social proof to incentivize businesses to pay for a premium listing:
- Let businesses track analytics: You can set up front-end analytics for premium users to monitor incoming traffic from your online directory. The measurable results will make your directory business one that can be trusted and used long-term.
- Enable embeddable reviews & ratings: 95% of people say that reviews, positive or negative, influence their purchasing decisions. Needless to say, they’re very important. As mentioned earlier, by allowing reviews on your directory website, premium listings can show off their positive social proof both at the top of search results and on their own website with the embed add-on to boost revenue. Businesses can also show that they care by responding to customer reviews publicly – which can be set as a special privilege for premium listings only. (Both these options are coming soon to the pricing manager add-on.)
How to start offering premium listings to local businesses
Want to make some money from your online directory? The first step is to actually build one. Don’t worry, it’s easier than you think.
1. Build out your online directory
First things first, you’ll need to have a hosting plan set up and have WordPress installed on it. From there, you can easily install and activate the GeoDirectory plugin.
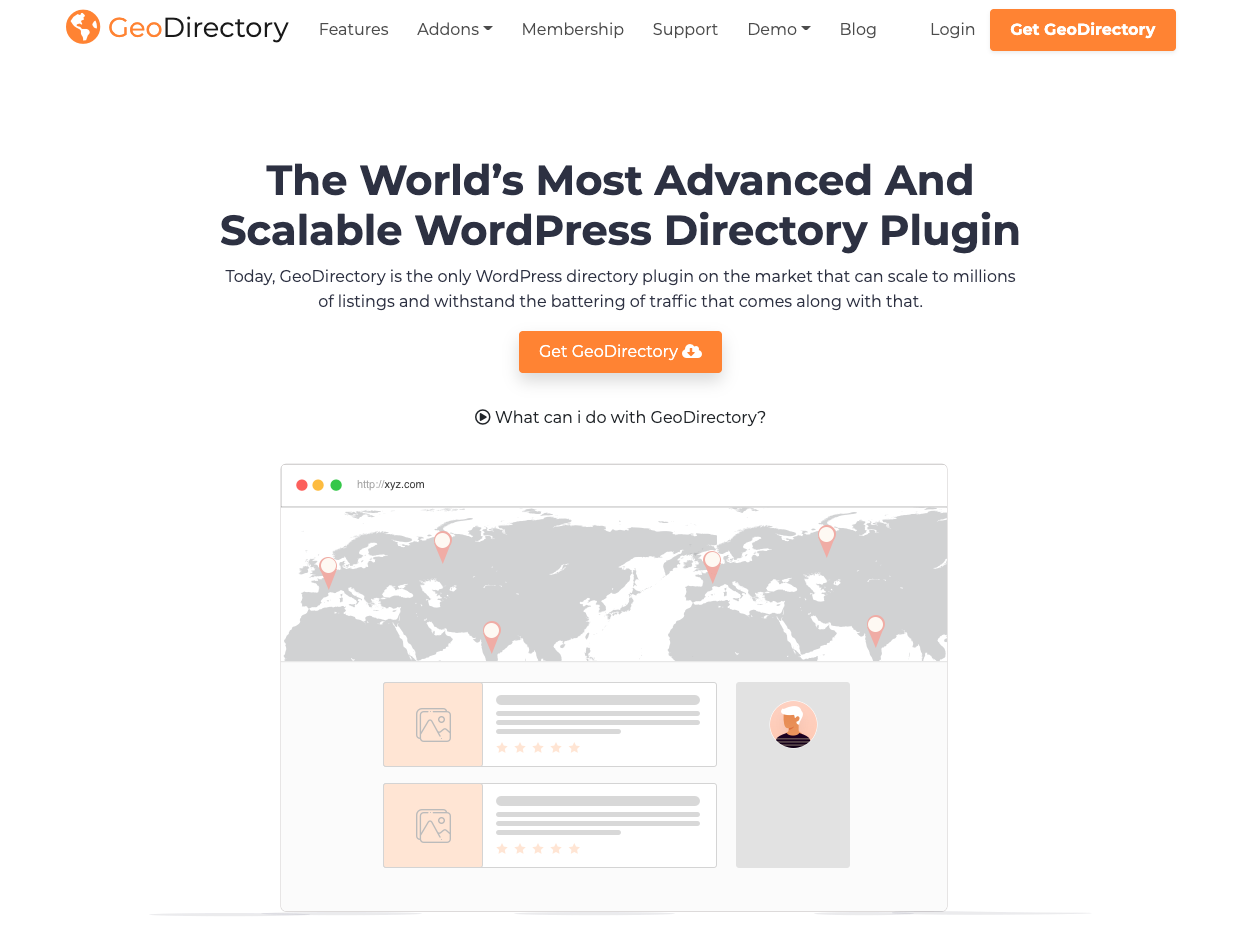
GeoDirectory allows businesses to showcase their products and services on an attractive listing page that features all of the important details about the company, like contact information, hours of operation, and photos and videos.
The plugin is easy to set up and manage, so you can quickly get your clients’ premium listings up and running in no time.
And best of all, businesses can track their success over time, making it easy to optimize their listing for maximum impact.
If you’re not sure where to start, check out our video guide: How to Create a Directory Website with WordPress.
2. Set up premium listings with the Pricing Manager
The Pricing Manager add-on for GeoDirectory allows you to sell premium listings that include more fields for users to fill out when creating listings, such as extra pictures, categories, tags, a longer description, and custom fields.
These premium listings can also be “featured” and displayed in prominent places on your site and can be contingent on subscriptions, where users can pay for recurring featured listings.
Your premium listing setup would look something like this:
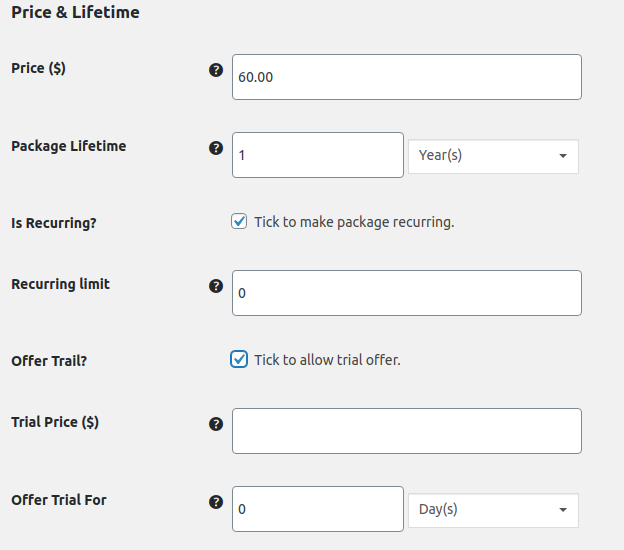
The plugin offers many possibilities and can be customized to create a unique directory that stands out and generates reliable sales.
3. Calibrate your paid listing offerings
As a directory website, you can arm business owners with a range of tools to manage premium listing much easier:
- Recurring payments allow for a steady income stream without the need to chase up businesses for renewals on their paid listings
- Alternatively, you can shoot payment reminders for single payments to ensure businesses renew their expired premium listings
- Offer free trials as a no-risk option for businesses to test out your premium listing service
- Create unlimited pricing packages to cater to different paid business listing needs. For example:
- Standard: includes basic listing information such as business name, contact information, and a small number of pictures.
- Premium: includes all the features of the standard package plus additional pictures, a longer business description, and the ability to include videos in their listing.
- Platinum: includes all the features of the premium package plus the ability to include a “featured” tag on their listing, and priority placement in search results.
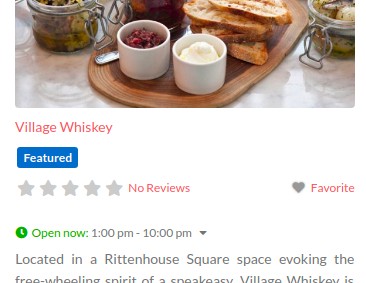
- VIP: includes all the features of the platinum package plus the ability to include special promotions, a dedicated customer support representative, and a customized webpage for the business.
- “Pay to Claim” feature, when paired with the Claim Listings Manager, allows you to require an upgrade in order to claim a listing. This means that you can offer a free basic listing, but for businesses to fully claim and manage their listing, they would need to upgrade to a paid version.
Example of a directory website using premium listings
Many businesses already use premium listings to gain an edge over their competition. For example, winetasting.com is an online directory for American Wineries, where businesses can pay for premium listings to stand out from the crowd.
When someone searches for wineries in their area, those with a premium listing appear more prominently on the home page and the search results page:

Notice how the premium listing has featured badges that indicate a ‘Featured’ status for more trust and credibility. These perks make featured listings stand out and catch a customer’s attention from the rest.
Parting Words
A premium listing on your directory website can be an effective way for businesses to promote themselves and generate more leads.
It provides customers with the assurance that they’re an established, reputable business while also allowing them to see customer reviews and ratings at the forefront.
Plus, it’s a cost-effective addition to other forms of online advertising.
To measure success and optimize for maximum benefit, track key metrics such as website traffic, sales, conversion rate, visitor engagement rates, and search result visibility and makes these data available in the advertising landing page.
So the next time you’re scratching your head on how to sell businesses on your paid listings, refer back to this article. 😉
You can get GeoDirectory here today:

Are you looking to build a classified ad directory faster than you can say “classified ad”? Then you’ve come to the right place.
The total market of classifieds ads is $21.72 billion in 2023 alone. It can be a profitable endeavor – and creating a revenue-generating classified website doesn’t have to be difficult.
Whether you’re new to web development or an experienced coder, this guide will walk you through every step of creating a powerful classified site using GeoDirectory.
So if you’re ready to get started on building your perfect classified ad website, read on!
What is a classified ad website?
A classified ad website is a site that allows people to buy, sell, and trade items online.
It’s like your very own Craigslist, Kijiji, or Gumtree.
It’s like an online marketplace, and it can be used to find almost any type of item you’re looking for.
With a classified ad website, the sky is the limit!
The aim is to bridge the gap between a seller offering a product/service and a potential buyer seeking it, or in the case of job boards or wanted ads, connecting a provider with a seeker.
How do I make money with my classified ads website?
Classified websites can be a goldmine for owners looking to earn some cash. Here’s the lowdown on how you can make bank:
- Listing sales: The classic way to make money – charge folks to post an ad on your site.
- Ad sales: Offer paid banner ads for placement on the site – it’s a great add-on for those purchasing a listing.
- Pay-per-click advertising: Use ad networks like Google Ads, Ezoic, or Mediavine to earn some dough from third-party banner ads shown to visitors. Tip: if you use a tool like GeoDirectory to create your classified ad site, then you can connect with networks like Google Adsense (using the advertising add-on) to earn ad revenue through text, image, and HTML ads.
- Membership fees: Give your members exclusive perks and make some recurring revenue with membership options. (coming soon to GeoDirectory)
Some examples:
- Priority listing: Allow members to have their listing appear at the top of search results or on a dedicated “featured” section.
- Analytics access: Offer members access to detailed analytics on their listing’s performance, such as the number of views and clicks.
- Unlimited listings: Offer members the ability to post unlimited listings, rather than limiting them to a certain number.
- Custom banners: Allow members to display a custom banner or logo on their listings for added visibility.
- Affiliate links: Include links to partner products and watch the money roll in from sales generated from these links.
In short, there are loads of ways to make money with a classified website. Get creative and start raking in the dough!
Setting up your classified ads site: DIY vs Classified Tools
Once you’ve decided to build a classified website, the first question you should ask yourself is: should you do it yourself or use a specialized tool?
Doing it yourself (DIY) means coding from scratch. This approach might be up your alley if:
- You’re a web developer with the coding skills
- You are willing to pay for a developer to do the job for you.
But it’s worth noting that if you go the DIY route, it can take a very long time to get your classified website up and running.
There’s also a lot of maintenance involved, as your custom code might need constant updating to make sure it’s secure.
Alternatively, you can take the path of least resistance and use a specialized tool like GeoDirectory to quickly create a powerful classified ads website.
With this method, you’re not bogged down with coding and too much of the tech stuff and enjoy a range of special features.
- With user-friendly tools like a drag-and-drop builder, even those without a tech background can easily build and manage their own classified site.
- Increased money-making opportunities through built-in revenue-generating features like pay-per-listing, advertising, and (coming soon) membership add-ons).
- Integrated blog modules for hassle-free content management.
- Professional appearance that helps establish a good reputation.
- Advanced search capabilities (e.g. customizable filters) make it easy for users to find what they’re looking for.
- Mapping system and GeoLocation search features.
- Users Profiles and community features.
If you start with a pre-built design and you don’t pretend to have a complete custom design before even validating your idea, with the help of the classified dummy data, you’ll have your classified ad website up and running in under an hour.
It’s safe to say that for most people, using a classified tool is a no-brainer.
How to Create a Classified Website
With the assumption that you’re probably not here for a coding tutorial, we strongly recommend using WordPress – the most popular website builder on the planet – and the GeoDirectory plugin (the most advanced of the WordPress classified plugins) to create a professional-looking classified website.
Follow along with this guide as we show you exactly how to do it.
Step 1: Pick your niche
When creating your classified website, the first step is to find your niche.
What type of industry or market do you want to target? If you already have a business idea, great!
If you see a gap in your industry or local area, seize the opportunity to create a thriving online classified community that connects people, businesses, and services while earning you classified ads revenues.
And if you’ve got nothing at the moment, don’t worry.
There’s still plenty of room for new and innovative classified sites as they continue to grow in popularity.
A good idea is worth nothing, execution is what makes the difference.
Here are some ideas for classified websites to start you off:
- Real estate listings
- Used car sales
- Services (e.g., lawn mowing, house cleaning)
- Local marketplaces for goods
- Industry-specific job boards
- Membership directories
However, if you are able to find a tiny niche and dominate it, that’s where the chances of success are a lot higher.
Craigslist can be a great source of inspiration and the bigger niches have already been exploited, but you could always come across an emerging gem.
Step 2: Purchase your domain
Next up, pick a memorable and easy-to-spell domain name. Your niche should influence your business name, which should be the foundation of your domain name.
You can then purchase the domain from any number of providers, like Google Domains, GoDaddy, or Namecheap.
Step 3: Get a hosting plan (server)

This will be the most expensive part.
But it doesn’t have to be hundreds of dollars per month.
An entry plan with Cloudways (we suggest the 1GB High-Frequency Vultr instance) costs less than $15 per month and it’s a great starting point for a fast classified website that can sustain heavy traffic (and make healthy profits).
Step 4: Download & install GeoDirectory

Now that you have your domain set up and your server ready, it’s time to download and install GeoDirectory.
No need to shell out big bucks for a web dev to build your WordPress site, or constantly fork over cash for updates.
Once you’ve got your hands on top-notch classified ads software like GeoDirectory, it’s time to get organized and categorize your site.
The great thing about using the plugin is that it works with any theme or page builder.
And if you’re an experienced developer, you’ll be happy to know that GeoDirectory is developer-friendly since all the code is built to be extended with many hooks and filters.
The directory starter theme can help you put a basic classified website online in minutes.
Step 5: Adding Dummy Data
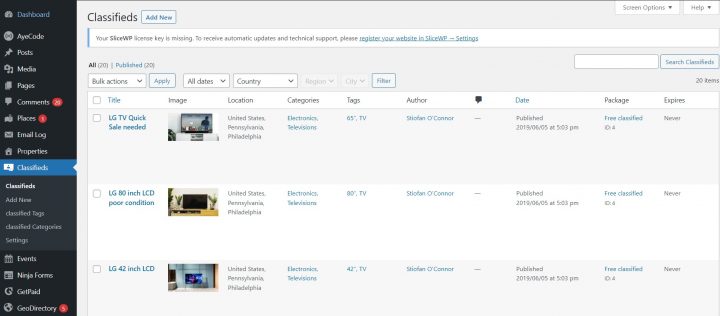
The last step in setting up your classified website is to add dummy data.
This will give you the best chance of making a good first impression with visitors and search engines alike.
Dummy data provides realistic content that shows off what your classified ad site has to offer. You can test the site’s features, see how it looks with actual data, and make any necessary changes before the website goes live.
Here’s how to add dummy data to GeoDirectory (alternatively, you can watch this instructional video):
Head over to Settings –> General (tab) –> Dummy Data (sub-tab).
- Pick your data type: Decide what data you want to import for each custom post type (CPT) and set the number of items. In this case, you would select “Classifieds.”
- Update templates: Opt to update the template pages if you want to show specific custom info, like prices. Just a heads up, if you’ve made custom changes to the archive or details page templates, this option will override them.
- One-click import: All you have to do is click “Insert Posts” and GeoDirectory will handle the rest. Pro-tip: installing the Advanced Search addon before importing will add extra search fields to non-default data types.
- Removing dummy data: When you’re done building your site, removing dummy data is as easy as clicking the “Remove Data” button.
And there you have it! Keep in mind, when using the CPT addon, each CPT will have its own settings for dummy data import.
The same goes for the Events addon and its Events CPT – it’ll have its own special dummy data types.
Step 5: Customize the functionality
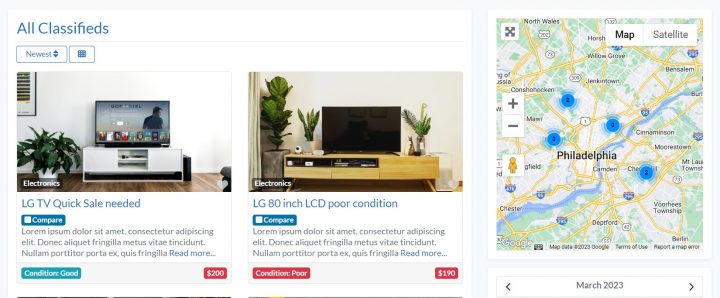
Now that you’ve got your dummy data in place, it’s time to customize the functionality of your classified ad website and make it a breeze to navigate for both visitors and search engines.
How?
- Add new categories and fields: Customize the existing fields or add new ones to get more detailed information from your visitors (here’s a guide on how to do that). Make sure to provide detailed information for each category, and don’t be afraid to add sub-categories for advanced filtering options.
- Bonus tip – offering to feature a listing in multiple categories is a smart way to upsell your premium membership levels.
- Configure search and filter options: Tweak settings and create custom search options to make it easy for people to find exactly what they’re looking for (check out this guide on adding filters to the main search bar).
- Set up user registration and submission forms: Enable users to register on your site and submit ads without any hassle (refer to this guide with instructions).
Step 6: Promoting your website
Your classified ad website is ready, now it’s time to get the word out and start driving traffic.
Here are a few tips:
- Optimize for SEO: Make sure your site is optimized for search engines by adding keyword-rich titles and descriptions, submitting your sitemap to Google Search Console, and creating high-quality content. Blogging is one of the best ways to drive traffic and sales to your website – Being a WordPress plugin, GeoDirectory is easily coupled with WordPress’s Blog Module where you can create, monitor, and optimize your content.
- Leverage platforms like Twitter, Facebook, Instagram Linkedin, and Pinterest, to spread the word about your classified ad website and drive traffic. Use catchy hashtags and visuals to catch people’s attention and link back to your site.
- Advertise online: You can also use online advertising to reach a wider audience. You can use Google Ads, Facebook Ads (including Instagram), or other platforms to target specific audiences. Include special offers like discounts or exclusive deals on premium membership levels to encourage more people to register.
- Reach out to local media outlets: If your classified ads website is focused on a specific region or area, reach out to local media outlets like newspapers, TV stations, and radio stations. They may be able to help you reach potential users in your target area.
- Use email marketing: Build an email list and send out regular newsletters or promotional emails to your subscribers. This can help keep your website top of mind and encourage repeat visits.
Parting words
Creating a classified ad website doesn’t have to be hard. With the help of GeoDirectory and its dummy data, you can get your site up and running in no time.
From setting up categories and fields, configuring search options, customizing user registration forms, optimizing for SEO, leveraging social media platforms, or advertising online – there are plenty of ways to promote your new classified ads website.
But don’t forget about email marketing too – building an email list is one of the best strategies for driving repeat visits.
Pro tip: Add-ons are the key to making your classifieds website truly functional and unstoppable. You can save a lot of money (90%) by grabbing a plan that includes all of them instead of paying for them individually ($30-$40 each).

A business owner is casually strolling through the internet, looking for a website that can help him promote his business.
He searched high and low, but they just couldn’t find one. Then he stumbles upon your directory!
Your directory stands out from the rest because you’ve added the GeoDirectory Claim Listing add-on. It allows business owners to claim their listings and take full control of them.
Not to mention, when combined with the GeoDirectory Price Manager add-on, you can now monetize your directory by requiring business owners to upgrade and pay for their listing in order to claim it.
So let’s learn how to install and set up this amazing feature!
What is the claim listing feature?
Claim Listing is a feature that allows users to verify ownership of a business listing you added to your directory in advance, with a basic description and a set of pictures.
Once they’ve claimed the listing, they have full control over it and can add to or update its information.
This helps keep the directory up to date with accurate customer data.
Why adding the claim feature to your directory site is a must
Adding a claim listings feature to a business directory website is a smart move for several reasons:
- Proving it’s yours: With this feature, business owners can claim their listing and ensure all details, such as contact info, hours, and description, are up to date and accurate.
- Getting noticed: Claimed listings often get more attention and appear higher in search results, which can lead to more customers and a stronger online presence.
- Building trust: Verified and claimed listings help build trust with customers, who can be confident that the information they see is accurate and up to date.
- Analyzing the scene: Business owners can take a closer look at how customers engage with their listings and use that insight to improve their online strategy.
In short, adding a claim-listing feature is a win-win: it improves the customer experience and gives business owners valuable insights.
Step 1: Install the GeoDirectory Claim Listing Add-on
You can purchase the claim listings add-on here.
Pro tip: GeoDirectory users can save 90% by grabbing a GeoDirectory membership that includes all the add-ons to make their directory website unstoppable, instead of purchasing add-ons one by one for a higher rate.
Now, you want to install the Claim Listings extension.
There are two ways to do this: the automatic way and the manual method.
The automatic installation only works on a live website – here’s how to go about it:
- First, head over to the WordPress backend and click on GeoDirectory > Extensions.
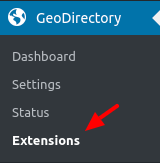
- You’ll then see a notification pop up with a big ol’ button that says “Connect Site.”

- Clicking that will take you to our parent company website, where you can log in using your login from any AyeCode product like GeoDirectory, UsersWP, or GetPaid.
- All you gotta do is click “Connect,” and voila! You’re now connected.
- You should be returned to your site at this point, from where you can install any extensions you have a valid license for with ease – including the “Claim Listing” feature.

A manual installation might be better for those with a local hosting environment. To do this, you’ll want to go this route:
- Download the extension zip file from your account area.
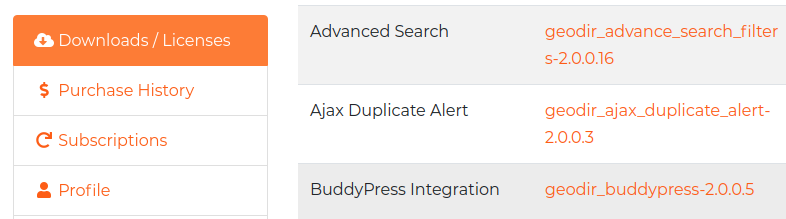
- Head to the WordPress backend and click on Plugins > Add New.
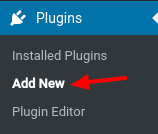
- Up at the top of the screen, hit the Upload Plugin button.
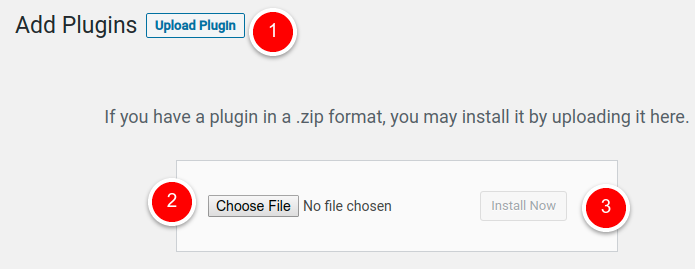
- Select the zip file you just downloaded and click “Install Now.”
- And that’s it! Just hit the Activate Plugin button, and you’re good to go.
Step 2: Setting up your add-on
Once the add-on is active, head to your GeoDirectory > Settings page and scroll down to the Claim Listings section to configure important settings.
How will users claim listings? And how will you approve them?
These are the two main ways to manage claim listings:
- Manual approval: This requires you (the admin) to manually approve each listing before it is activated. To approve claims manually, go to GeoDirectory > Settings > Claim Listings (tab) > Listing Claims (sub-tab), and then you can choose to approve, reject, or delete the submitted claims.
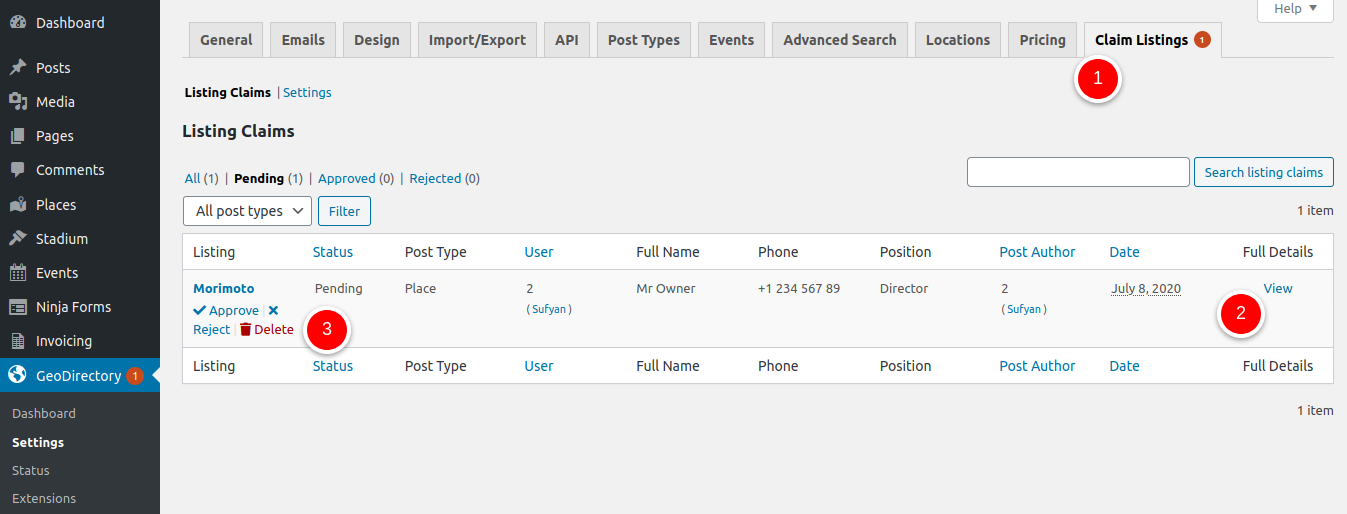
- Automatic approval: This is a more hands-off option where you can set conditions and stipulate that, once a claim is submitted, it will be approved automatically, and the listing will become active. For example:
- If you want people to fill out a form to claim a listing, the free Ninja Forms Integration lets you personalize your claim form and even make several versions to fit the unique needs of your directory. You can also show the claim forms directly on the details page in a tab.
- If you want to set up an email verification system, select the “Auto Approve via Email Verification” option so that business owners receive an email with a link to automatically verify their listing claim.
- If you have a pay-to-claim system and you turn on “Auto Approve on Payment Received,” claims will be automatically approved once payment is received (note: you’ll need the pricing manager add-on installed for this – more on this later).

- And if you want to simply approve submitted listing claims immediately, just head to GeoDirectory > Settings > Claim Listings > Settings and tick the box.
Add the “Is Claimed?” Field
Next up, let’s make sure the “Is Claimed?” custom field is added to your available fields so users can claim listings when adding a new listing.
Here’s how:
Go to CPT > Settings > Form Builder and drag the “Is Claimed?” field over to the available fields section. Without this step, the “Is Claimed?” widget might not show up where you want it.
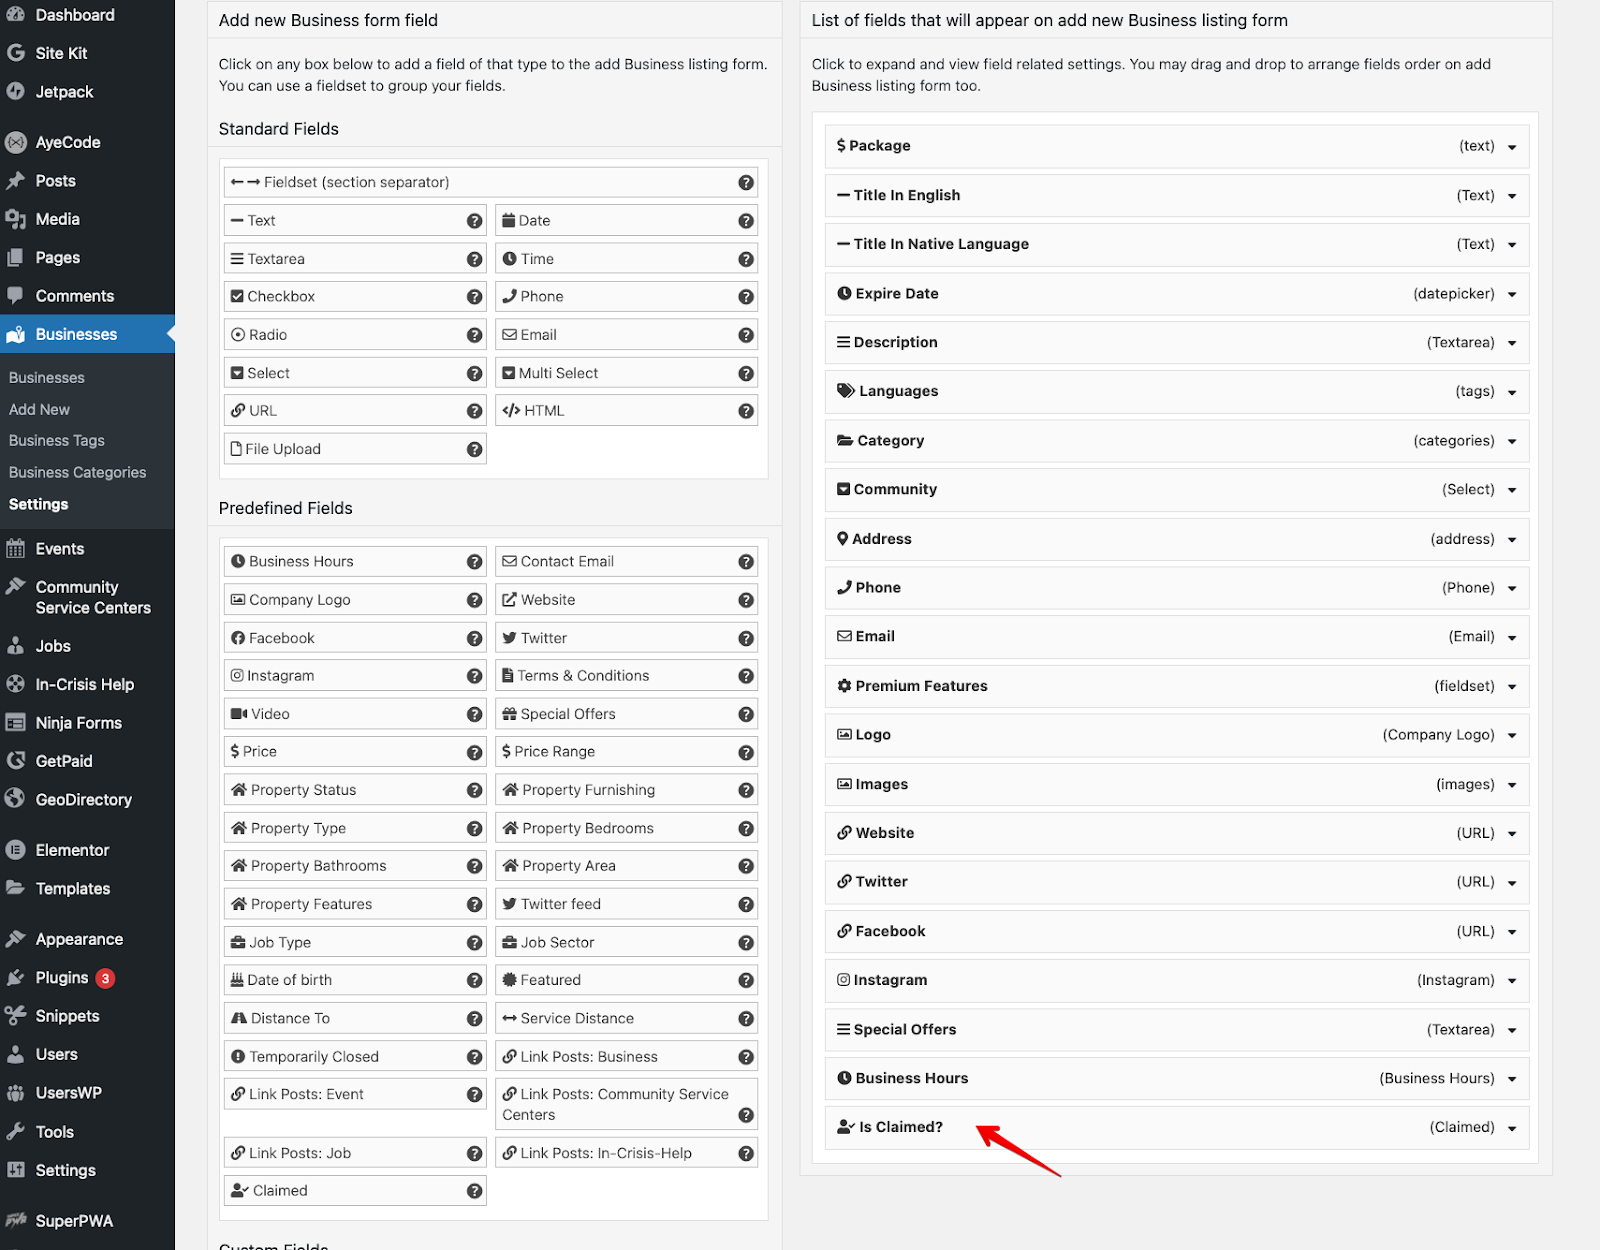
Add the “Claim Listing” button
You can’t have a “Claim Listing” function without the actual button, so make sure to add it in:
To get the claim button on the front end, use our GD > Post Claim widget. You can add it to any widget area or use it as a shortcode or block in your content.
Ideally, it should be added to the GD Detail page, which is the template used for each single listing page.
It can also be used in the GD Archive Item page, which is the template used for the listing cards.
Here are some things you can configure on it:
- Title – The title for the widget.
- Text – The button or link text.
- Output Type (A) – You can choose whether to output a button or a simple link.
- Show/Hide Options – Choose where the widget should be shown.
Based on the Output Type you select, the widget outputs a button (or a simple link). The button will look something like this:

And once someone clicks on it, the form to submit a listing claim will look like this:
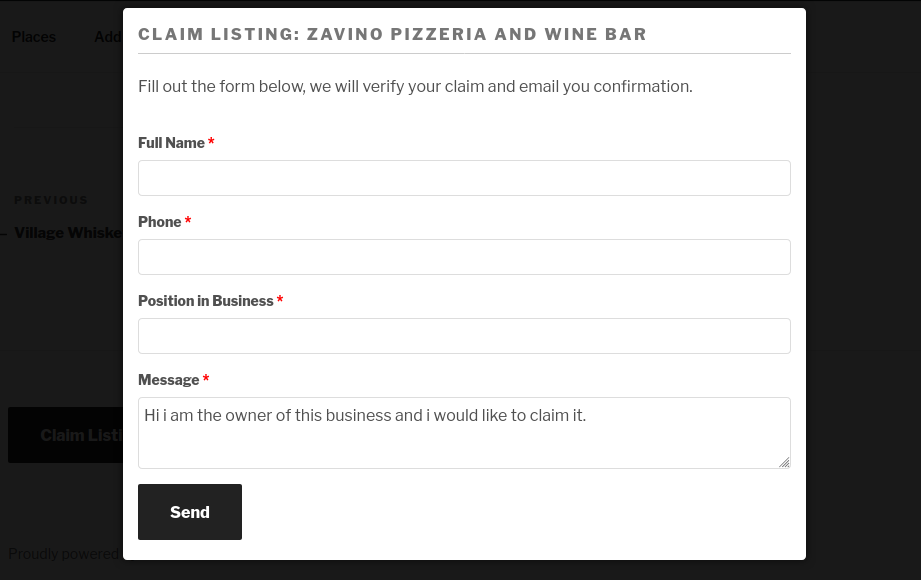
Step 3: Integrate with the Pricing and Payments Add-on to make money off the feature
Setting up pricing options for claimed listings is made easy with the GeoDirectory Price Manager add-on.
This add-on gives you full control over the prices for your membership packages and claimed listings, allowing you to create various plans.
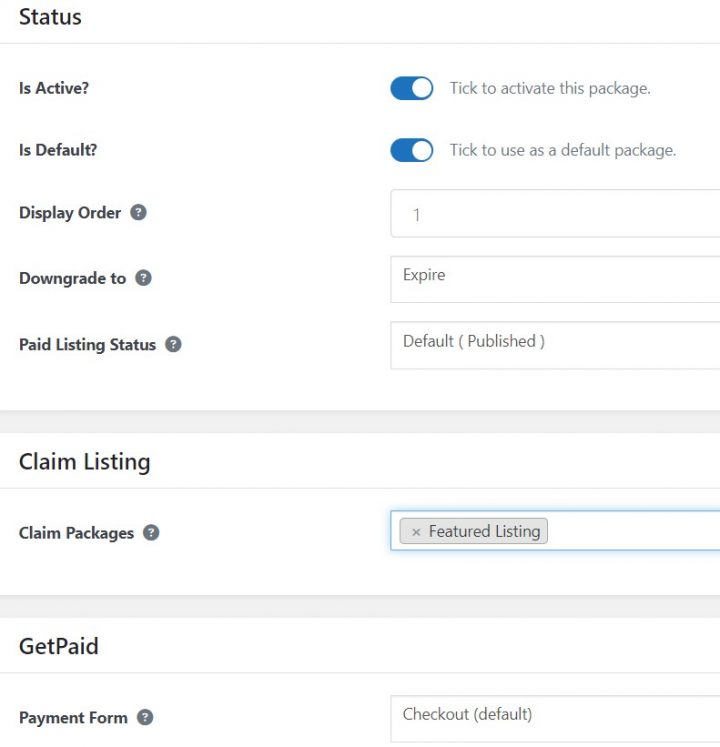
You can also integrate payment gateways such as Stripe or PayPal so users can pay for their listings right away.
This makes it easier and more efficient to manage payments, as you won’t have to handle them manually.
Once payment is received, the claim will be automatically approved, and the listing activated – no manual approval or processing is needed!
Step 4: Promote and encourage claiming listings
Once your GeoDirectory Claim Listing feature is up and running, it’s time to promote it and encourage users to claim their listings. Here are a few tips:
- Add a compelling call-to-action on the front end – Use a CTAs section on your homepage to encourage users to claim their listings. Create a section of the advertising landing page explaining everything a business owner needs to know before claiming their listings.
- Let your business owner know why they should claim their listing – Communicate the benefits of claiming a listing, like increased visibility and credibility in search results (like with a ‘verified listing’ badge), more accurate information display, and improved access for customers.
- Offer incentives for claiming – Alongside the obvious benefits, businesses might need an extra push to actually take action. Offer a discount, a special paid listing trial, or bonus points when they claim their listing, and make it easier for them to find the “Claim Listing” button on your front end.
Step 5: Monitor and Manage Claims
Once your claims feature is up and running, it’s important to keep an eye on it.
You may need to monitor and manage claims in various scenarios, including but not limited to:
- When you want to verify the legitimacy of a claimed listing to prevent fraudulent or incorrect information from being published in your directory.
- When you want to enforce your directory’s guidelines and policies for listing claims, such as reviewing and approving claims based on certain criteria.
- When you have a “Pay to Claim” system, ensure payment has been received before approving a listing claim.
- When you need to track and manage the status of listing claims, such as keeping a record of approved, rejected, or pending claims.
- When you need to respond to inquiries or disputes regarding listing claims, you need to access the relevant information and data to resolve the issue.
GeoDirectory provides a Claims Dashboard where you can monitor and manage everything. And if, for any reason, you want to unapprove a listing claim, you can do so by heading to the Listing Claims under Approved and clicking Undo for that particular claim.
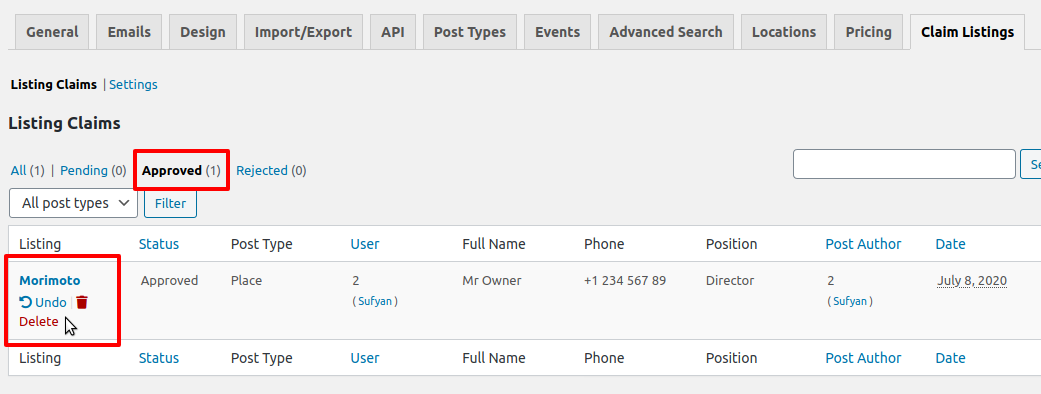
By monitoring and managing claims, you can ensure that all listings on your directory are legitimate, compliant with your guidelines and policies, and up to date.
This will help to keep your directory accurate, trustworthy, and profitable.
Parting words
That’s how easy it is to get started with the GeoDirectory Claim Listings add-on.
Being able to claim listings is an invaluable feature for any business directory.
With it, you can create a more interactive and engaging user experience and generate additional revenue by allowing users to pay to claim their listing.
We hope this guide has given you a better understanding of the GeoDirectory Claim Listing add-on and how to use it effectively.
To further customize and optimize the claiming feature on your directory, be sure to check out the GeoDirectory Price Manager add-on and consider integrating UsersWP with GD for better user account management.
So what are you waiting for? Get started today and make listing claiming easy and profitable!
Good luck with your directory venture, and happy claiming! 🙂