The World’s Most Advanced And Scalable WordPress Directory Plugin
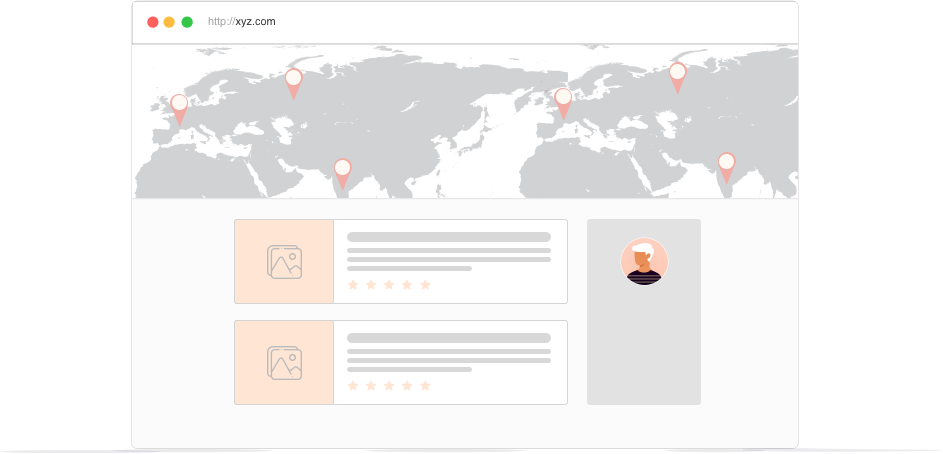
GeoDirectory is an enterprise-grade WordPress plugin for building scalable business directories, city guides, real estate listings, job boards, event sites, classifieds, and local discovery platforms. Unlike generic listing plugins, it uses custom database tables, not WordPress post meta, so sites perform well from small local portals to directories with hundreds of thousands or millions of listings. Core features include optimized search, maps, reviews, frontend submission, and an extensive add-on ecosystem for customization. Rated 4.8/5 across 700+ reviews on WordPress.org and Capterra.
Get GeoDirectoryWhat can i do with GeoDirectory?

Are people still using the Yellow Pages? Yes, but not the big yellow book; they are using its online version.
About 92% of consumers use online directories to find local businesses still today!
The Yellow Pages still stands out as one of the most effective and trusted platforms. Its long-term success is not accidental, and it is a great reference point for anyone looking to build something similar.
If you are wondering how to create your own YP–style website, you are in the right place.
In this guide, you will learn:
- How to build a YP-style website, step by step
- Practical tips for designing a clean, usable directory
- The tools and software you actually need
- Proven ways to monetize your directory and make it sustainable
If you are ready to get started, take a look at GeoDirectory.
It is a WordPress plugin built specifically for sites like that. It gives you all the core features you need, without requiring advanced technical skills.
Just think of it as your secret weapon in this exciting endeavor!

A Brief Overview of YP Websites
The concept of a YP website stems from the traditional Phone Book directories, which were once a must-have in every household and business.
These print directories provided a detailed listing of local businesses, services, and their contact details.
Moving this concept into a digital format, the YP website aims to transform these listings into an extensive online directory.
This, in turn, enables consumers to conveniently find out about local businesses and services.
Why It’s Beneficial to Create a Similar Website?
No doubt, creating a directory website of this kind can be a highly beneficial and lucrative venture for several reasons. Here are a few major ones:
- Digital Accessibility: allows users to easily find local businesses and services from any device at any time.
- Wider Audience Reach: Unlike the localized nature of printed directories, it can reach a global audience.
- Monetization Opportunities: According to Semrush, yellowpages.com received around 11.89M visits in September 2023. Such websites can become lucrative through various revenue models, like ad fees, premium listings, etc.
- Community Support & Development: It can play a crucial role in supporting and promoting local economies by highlighting local businesses.
- Adaptability & Scalability: Digital platforms are easily adaptable and scalable, allowing for growth and changes in line with market and technology trends.
Essential Tools for Website Development in WordPress
Creating a comprehensive online directory for businesses and services requires a blend of the right tools and technologies.
These tools not only facilitate the development process but also ensure that the website is user-friendly, efficient, and scalable.
Here’s what you’ll need at hand for the development of this kind of WordPress website:
- Domain Name: Your domain name is your digital address. Choose a name that’s easy to remember, relevant to your content, and aligns with your branding strategy.
- Reliable Hosting Provider: A good hosting provider ensures your site is always accessible and loads quickly. Look for a host with strong uptime records and scalability options to accommodate your website’s growth. We recommend CloudWays
- WordPress Theme: Choosing a WordPress theme specifically designed for GeoDirectory is crucial. Themes like ‘Hello for Elementor,’ ‘Kadence,’ or ‘Blockstrap’ offer out-of-the-box designs and functionalities tailored for a YP-style website built around GeoDirectory.
- Directory Plugin: The key component is a directory plugin. It allows you to create listings, set up location-based searches, and include features for user reviews. For creating a detailed and user-friendly directory, we recommend using the ‘GeoDirectory’ plugin.
- SEO Tools: For any website, especially a directory site, SEO is critical. Tools like ‘Yoast SEO’ or ‘Rank Math’ help optimize your content, generate sitemaps, and ensure your site is search-engine-friendly.
- Backup Solutions: Regular backups are crucial. Plugins like ‘UpdraftPlus’ or ‘BackupBuddy’ ensure that you have a recent backup of your website, which is essential for recovery in case of any mishaps.
- Security Plugins: Protect your website from malicious attacks and unauthorized access. Look for features like firewalls, malware scanning, and login security options.
- Analytics & Tracking: Integrating analytics tools like ‘Google Analytics’ helps you understand user behavior, track traffic, and measure performance. This data is essential for informed decision-making and site optimization.
- Payment Gateway Integration: If your directory site includes premium listings or other paid features, secure payment gateway integration is a must. Ensure that the gateway is reliable and supports multiple payment methods. GetPaid, the default payment processor of GeoDirectory, supports several payment gateways, including Stripe and PayPal.
- User Registration & Management: A robust system for user registration and management is essential for personalized user experiences. This includes user profiles, personalized dashboards, and management of listings and subscriptions.
Pro Tip: While integrating these tools, maintain a focus on mobile responsiveness and page loading speed.
Optimizing for these factors is key to enhancing user experience and retention.
Choosing the Right Page Builder
According to a survey, 48% of people judge a website’s credibility based on its design. Hence, choosing the right website builder for creating your website is essential to ensure it’s functional yet visually appealing.
Here’s what to consider when choosing the right page builder:
- User-Friendly Interface: Choose a page builder with an intuitive, drag-and-drop interface. This makes designing and managing your site easy, even for those with minimal technical skills.
- Customization Capabilities: Opt for a page builder offering extensive customization. This is essential for tailoring your site’s look and functionality to your specific requirements.
- Responsive Design Compatibility: Ensure the page builder supports responsive design so your site looks great and functions well on all devices, including smartphones and tablets.
- SEO-Friendliness: Select a page builder optimized for SEO, helping your website rank higher in search engine results through fast loading times and clean code.
- Compatibility with Plugins: Choose a page builder that integrates seamlessly with key WordPress plugins, enabling additional features such as maps, reviews, and advanced search options.
A free Website Builders
Still not sure which page builder is best for creating your website? Well, no need to scratch your head;
Blockstrap Page Builder
Using Blockstrap, a WordPress theme based on Bootstrap and developed by the creators of GeoDirectory, for a Yellow Pages website is highly effective.
Blockstrap is optimized for speed, ensuring quick load times, crucial for user engagement and SEO.
Its full integration with GeoDirectory makes it ideal for managing extensive business listings, providing seamless functionality and ease of use.
This integration ensures the site operates efficiently, offering a smooth, user-friendly experience for both visitors and administrators.
Step-by-Step Guide to Create a Directory Website Using GeoDirectory
Creating a YP-style website involves setting up a platform where businesses can list their services and customers can find and review them.
WordPress, with its versatility and user-friendly interface, is an ideal platform for this purpose.
Let’s assume you have secured a domain name and your hosting provider has made your website live.
Following this, you can embark on the journey of setting up your Yellow Pages website on WordPress by following these steps:
Step 1: Install and Activate GeoDirectory Plugin
GeoDirectory is a powerful, scalable, and user-friendly WordPress plugin designed to create sophisticated business directories. Here’s how to install and activate this plugin:
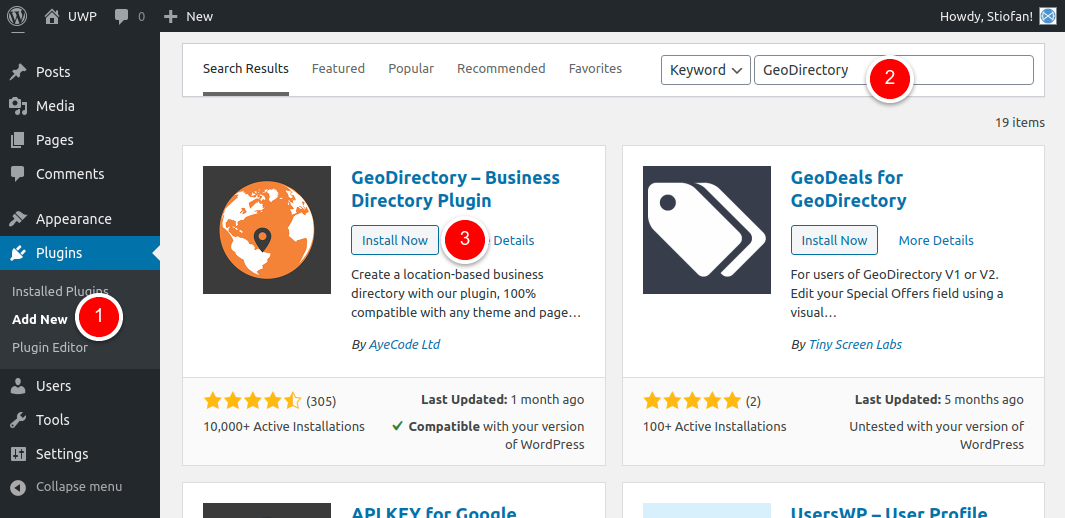
- Access Your Dashboard: Begin by logging into your WordPress admin dashboard.
- Navigate to Plugins: On the left-hand menu, click on ‘Plugins‘ and then select ‘Add New‘ to open the plugin installation interface.
- Search for GeoDirectory: In the search bar, type “GeoDirectory” and press enter. You will be looking for the “GeoDirectory – Business Directory Plugin.”
- Install the Plugin: Among the search results, find “GeoDirectory – Business Directory Plugin” and click on ‘Install Now.’ This will download and install the plugin on your WordPress site.
- Activate the Plugin: After installation, a new option, ‘Activate,,‘ will appear in place of ‘Install Now’. Click on this to activate the GeoDirectory Plugin on your site.
The core plugin is free and offers sufficient features to get started with a single location directory.
However, if you want to enhance the functionality of your site, it’s wise to install additional free and paid extensions.
Pro Tip: Install the ‘AyeCode Connect’ helper plugin. The tool will help you seek support for GeoDirectory and troubleshoot any issues related to the setup of your website.
Step 2: Run the Wizard
Upon activating GeoDirectory, you’ll be prompted to run a setup wizard. This step is crucial as it simplifies the initial configuration process. The wizard guides you through:
- Key Configurations: Location, country, region, etc.
- Geo-Location Settings: Essential for enabling location-based searches.

Step 3: Set Up Your Categories
Establishing a well-organized category framework is crucial for keeping order and enhancing the user experience on a Yellow Pages directory website that features numerous listings.
To begin with, go to your WP dashboard and click CPT > CPT Categories.
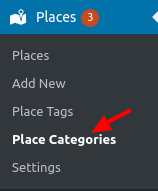
Here, you can tailor your categories as follows:
- Name: Choose a name for your category, like ‘Restaurants,’ ‘Home Services,’ or ‘Healthcare Facilities.‘ This is the primary label that will represent the category across your directory.
- Slug: Formulate a slug for the category. It forms part of the URL and should be simple yet descriptive, such as ‘restaurants,’ ‘home-services,’ or ‘healthcare.’ This slug is vital for web navigation and SEO.
- Parent Category: If your new category is a subset of a broader category, assign it as a subcategory. For instance, under the ‘Healthcare’ parent category, you could have ‘Dentists,’ ‘Hospitals,’ and ‘Pharmacies’ as subcategories.
- Description: Provide a concise, optional description for the category. This brief overview gives users a quick insight into what types of listings the category includes.
- Category Top Description: Draft a short introduction that will be displayed at the top of the category’s listings page. This description sets the context for the entire category.
- Default Listing Image: Select a representative image for listings in this category. It can be a symbol, a photo, or a graphic that visually encapsulates the essence of the category.
- Category Icon: Choose an icon that visually symbolizes the category. This icon aids in easy identification and navigation within the directory.
- Category Color: Pick a distinctive color for the category. This color aids in visual differentiation and helps users associate categories with specific colors for quick recognition.
- Schema Type: Opt for an appropriate schema type for your category, if available. This selection helps search engines better understand and categorize the listings, potentially improving SEO performance.
Step 4: Create Directory Related Pages
A Yellow Pages website is a combination of several directory listings.
Some of the most important pages include listing submission forms, listing single pages, and listing archives.
Thankfully, all these pages are automatically generated by the GeoDirectory plugin.
But still, customization is important to ensure the style of these pages matches your website’s design. This might include:
- Editing the Page Layout
- Adding or Removing Fields
- Modifying the Appearance
Step 5: Get Listings
A directory relies heavily on its listings for relevance.
However, attracting businesses to list can be challenging if the directory isn’t well-known.
An effective strategy to kickstart the initial batch of listings is by contacting local businesses and presenting an introductory discount.
Alternatively, you can provide free listings to your intended customers and then give them the option to claim these listings at a cost.
Following the above simple guide, you can easily create and manage your Yellow Pages website on WordPress.
5 Tips to Design Your Yellow Pages Website
Yellow Pages website on WordPress involves more than just listing businesses and services.
It’s about providing a seamless, intuitive, and engaging user experience that makes finding information easy and efficient.
Here are five pro tips to design your Yellow Pages website effectively:
1. User-Centric Design
Prioritizing user experience is paramount when developing your Yellow Pages website. Here’s how to achieve it:
- Intuitive Navigation: Craft a user-friendly navigation system that guides visitors effortlessly through your site. Ensure that categories are logically organized, and primary features are easy to access.
- Clear Categories: Divide listings into clear and concise categories. Users should be able to quickly identify the section they need, whether it’s restaurants, medical services, or local events.
- Prominent Search Bar: Place a prominent search bar at the top of your website, ensuring it’s easily visible and accessible. Implement auto-suggestions and predictive search features to help users find what they’re looking for more efficiently.
2. Mobile Responsiveness
In today’s digital landscape, a responsive design is non-negotiable. Make your Yellow Pages website accessible on all devices to attract a wider audience. Here’s how:
- Responsive Theme: Choose a WordPress theme that adapts seamlessly to various screen sizes. This ensures that your site looks and functions beautifully on desktops, tablets, and smartphones.
- Touch-Friendly Navigation: Optimize your navigation menus for touch-screen devices, ensuring that buttons and links are easily clickable.
3. Advanced Search Features
Enhance the search capabilities of your Yellow Pages website to deliver precise results.
Consider implementing the following:
- Robust Search Options: Offer advanced search filters, allowing users to refine their queries based on criteria such as location, price range, and ratings.
- Location-Based Searches: Enable location-based searches to provide users with results specific to their geographic area. This feature is especially valuable for users seeking local businesses and services.
You can try out GeoDirectory to enhance the search capabilities of your Yellow Pages site. Its advanced search features allow users to refine their queries based on location, price range, and ratings. With GeoDirectory, you can enrich the user experience and prompt users to visit again.
4. User Engagement
Encouraging user-generated content can significantly enhance your website’s trustworthiness and engagement. Here’s how to achieve this:
- Reviews and Ratings: Enable users to leave reviews and ratings for businesses. Encourage feedback and provide a platform for genuine customer experiences.
- User Profiles: Allow users to create profiles and engage with the community. This fosters a sense of belonging and encourages active participation.
5. Regular Updates & Maintenance
To keep your Yellow Pages Directory Software reliable and up-to-date, consistent upkeep is crucial.
Consider the following maintenance practices:
- Listing Updates: Regularly update business listings, ensuring they reflect the latest information, such as contact details, operating hours, and services offered.
- Broken Link Checks: Conduct routine checks for broken links and fix them promptly to maintain a seamless user experience.
- Routine Maintenance: Perform routine maintenance tasks, such as software updates and security patches, to keep your website running smoothly and securely.
3 Effective Strategies to Drive Traffic to Your Yellow Pages Website
You’ve taken the first step by creating your Yellow Pages website. But the real challenge? Driving traffic to your online business directory.
That said, let’s explore 3 effective strategies to drive traffic to your new website:
Strategy 1: Optimize Your Website for Search Engines
First, performing SEO for your directory website is key. This strategy involves:
- Keyword Research: Identify relevant search terms.
- Content Optimization: Integrate keywords into content, meta tags, and headers.
- Backlinks: Build high-quality links from local directories and industry websites.
Strategy 2: Leverage Social Media Marketing
Engaging with your audience on social media platforms is an effective way to drive traffic to your Yellow Pages website. For this, you’ll need to create a marketing strategy for your online directory. Here’s how to do so:
- Social Media Presence: Build and maintain profiles on essential social media platforms to connect with your audience.
- Engaging Content: Regularly post content that is relevant and engaging to keep your audience connected and interested.
- Community Interaction: Foster audience engagement by encouraging user-generated content through contests and reviews.
- Localized Ad Campaigns: Use targeted social media advertisements to reach specific local audiences effectively.
- Website Accessibility: Ensure your social media profiles and posts prominently feature links to your website for easy access.
Strategy 3: Harness Paid Advertising Campaigns
To accelerate traffic growth, consider running targeted paid advertising campaigns. Here’s how to do so:
- Ad Platforms Selection: Opt for platforms like Google Ads and popular social media channels based on where your target audience is most active.
- Precision Targeting: Use relevant keywords and demographic filters to target local users effectively.
- Compelling Ad Creatives: Create engaging and visually appealing ad content to attract and retain user attention.
- Performance Tracking: Regularly monitor and analyze ad metrics for insights into campaign effectiveness.
- Campaign Optimization: Make data-driven adjustments to improve your strategies and enhance ROI.
Pro Tip: Be sure to combine all these strategies to achieve maximum results. By doing so, you can create a well-rounded approach to drive traffic to your Yellow Pages website.
Monetizing Your Yellow Page Website
Did you know that the global business directory software market is projected to reach approximately $1,323.35 million by 2030?
That said, creating a Yellow Pages website is a lucrative opportunity. Here’s how you can monetize a directory website.
Featured Listings: Charge businesses for placing their listings at the top of search results or in highlighted sections. This premium positioning makes businesses more visible and, thus, can lead to more customer engagement.
Subscription Models: Offer tiered subscription plans to businesses, providing them with different levels of exposure and features. Higher tiers could include additional services like more detailed profiles, customer reviews, or increased visibility.
Banner Advertisements: Sell advertising space on your website to businesses or third-party advertisers. You can offer various sizes and positions for banners, with pricing based on the visibility and traffic of the ad’s location.
Pay-Per-Click Advertising: Implement a pay-per-click model where businesses pay each time a visitor clicks on their listing or ad. This model is attractive to advertisers as they pay only for actual leads or potential customers.
Affiliate Marketing: Partner with businesses and earn a commission for every referral or sale made through your website. This method works well if your Yellow Pages site targets a specific niche or industry where related products or services can be promoted.
GeoDirectorty features addons for monetization like the Pricing Manager, which will allow you to easily handle Featured Listings & Subscription models, while the Advertising manager will allow you to sell Banners and Pay-Per-Click Ads.
GeoDirectory – Your Own Yellow Pages Website Is Not Far Away
Creating a successful Yellow Pages website involves a strategic approach that balances user-friendly design, robust functionality, and effective marketing.
By following the above-mentioned guide, you can build a business directory Yellow Pages website that stands out in the digital landscape.
Key Takeaways:
- Optimize your site for mobile access and user-friendly experience.
- Regularly update and verify listings for accuracy.
- Utilize robust hosting for reliability and speed.
- Integrate advanced search features for ease of use.
- Offer premium listings for additional revenue.
While embarking on this venture, consider the power of GeoDirectory.
Its robust features and user-friendly design make it an excellent choice for anyone looking to create a comprehensive and dynamic directory.
So install and simplify your yellow pages website creation task.
Frequently Asked Questions – (FAQs)
How does the Yellow Pages get information?
Yellow Pages Script typically gathers business information from various sources, including public records, business registration entities, and directly from businesses themselves.
They may also update their listings based on information provided by customers or through their own research efforts.
Does Yellow Pages help SEO?
Yes, listing a business on the Yellow Pages Directory Site can positively impact its SEO.
The Yellow Pages website is a high-authority domain, and having a business listed there creates a backlink to the business’s website.
This can enhance the business’s online visibility and credibility, potentially improving its ranking in search engine results.
Is it free to add your business to Yellow Pages?
Many Yellow Pages software offer a basic listing option for free, which typically includes fundamental business details like name, address, and contact information.
However, additional features like advertisements, enhanced listings, and extra services may incur charges.
Did you know that Elon Musk, one of the wealthiest men on the planet, started his Business empire with an Online Directory Business?
He launched Zip2 with Venture Capital from Angel Investors in 1996, and this is how it looked back then:
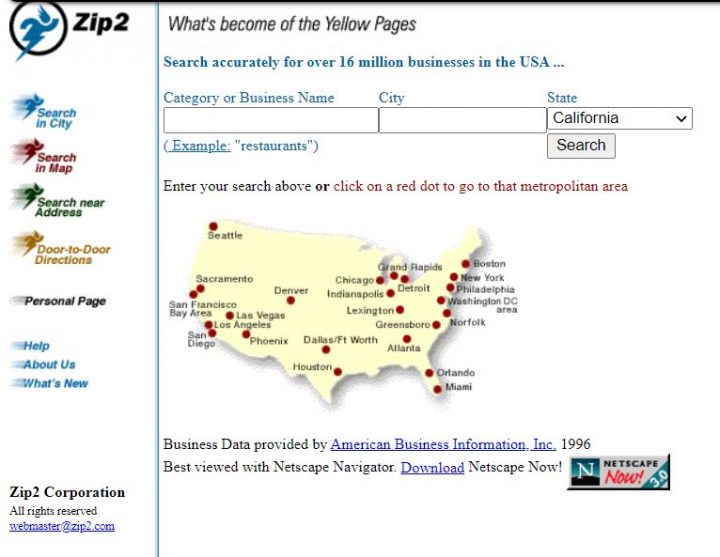
He admitted it was online during the day and he’d work at night to improve its code 7 days a week.
He’d sleep on a couch in the office he and his brother rented in Palo Alto and shower at the YMCA.
The company’s business model was to create a database of physical businesses that could be searched by business name, category, or location.
They’d sell the service to major newspapers and media publishing companies.
After landing contracts with The New York Times, Chicago Tribune, and other major publishers, they sold the company to Compaq in February 1999, just three years after its inception, for $307 million in cash.
It was definitely easier to make money online back then.
For his 7% stake, Elon received $22 million, and that’s the money he used to create PayPal.com.
The rest is history.
Since then, the need for online business directories hasn’t decreased.
In an ever-growing sea of brands, competitors, and products, it can get confusing really quickly when looking for something and getting a gazillion options in return.
We also live in the digital age. And information has never been more accessible.
Online Business Directories still help internet surfers today.
You can swiftly find the companies you’re looking for with a few clicks.
But what if you’re not looking for companies? Looking for shoes? Cars? Places for rent? Talents for Hire?
The most popular old-school directory/classified website, Craigslist, covers a multitude of categories, but newer successful directories focus on verticals.
They are becoming more and more specialized.
The unbundling of Craigslist has carved out niche products and services from a broader horizontal network. That’s the direction to take.
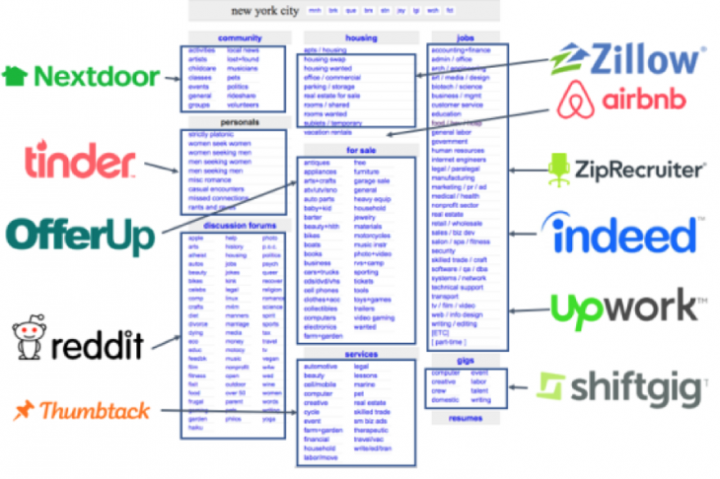
A website that is currently being unbundled is Reddit.
In its subreddits, you can find countless ideas that could lead you to a successful niche for a new online directory.
As you can see, Online directories are ubiquitous and can be very profitable and worthwhile to start up.
In this guide, you’re going to learn everything you need to know about them, and we’ll show you 12 examples of modern business directory verticals.
Let’s get to it.
What is an online business directory, and how does it work?

Businesses listed in an online business directory are organized into categories, subcategories, locations, and other types of taxonomies.
So that information can be found quickly and easily.
As a user, you can effortlessly search for information about a business you’re interested in, based on simple and advanced search criteria.
The goal of a directory website is to create as many business profiles as possible.
A reliable directory will gather information and depend on the companies to improve the data themselves, as it’s in their best interest to be presented accurately and honestly.
The company that runs the directory then drives traffic to its pages, mainly through SEO and social outreach for applicants and surfers.
In a nutshell, think of online business directories like the yellow pages or printed local business directories back in the day.
Your go-to “dictionary” for any company, in any niche, for any reason.
How do business directories earn money?

Like all businesses providing value, everything comes at a price.
Online business directories primarily generate revenue by selling visibility through promoted/featured listings and ad slots on their websites.
Depending on their niche and business models, there can be other forms of monetization:
- Affiliate marketing
- Direct sales of goods and services
- Selling leads
- Earning commissions for sales of goods or services promoted (Freelancers, Event Tickets, Rentals)
Promoted/Featured listings
For promoted/featured listings, companies can essentially pay the directory to show their name at the top of search results for their category.
This is usually a recurring revenue business model since by paying a (typically) monthly membership fee, companies can get featured on a certain number of listings and categories on the first page, depending on the tier of the plan.
So, for instance, an online directory business may choose to tier their membership plans by Bronze, Silver, and Gold.
- Bronze ($30/month)
- Featured listing in 1 category
- 2 uploadable pictures
- Silver ($50/month)
- Featured listings in 3 categories
- 5 uploadable pictures
- Link 1 social media account
- Gold ($100/month)
- Featured listings in 5 categories + 1 rotating Ad slot
- 10 uploadable pictures
- Link 5 social media accounts with active feed updates
And so on.
Fixed ad slots on websites
Secondly, businesses can also pay for ad slots on the directory website if they receive a high volume of organic traffic.
The transaction here is simple.
For a flat rate, a company can reserve a spot on, say, the top right blank space of the website to place an ad for their business, allowing users to see it.
The other method of charging ad slots is by CPM (cost per 1000 impressions) or CPC (cost per click).
That means that you’ll only be charged if your positioned ad on the directory website gets 1000 impressions, or a user clicks on the ad because they’re interested.
Monetizing your online directory is definitely worthwhile.
There are top directories out there raking in millions of dollars per year at a remarkably high profit margin.
That’s because of the popularity and organic traffic they were able to accrue.
How do I set up an online business directory?
It’s not rocket science, we can tell you that much.
In fact, Content Management Systems like WordPress have made it ridiculously easy.
If you want to create an online business directory, you can easily install a special Directory Plugin for WordPress, like GeoDirectory, for as low as $139 USD a Year.
No coding.
No hiring expensive programmers.
It’s there: done and ready, and can be set up in minutes.
If that isn’t an option, like if you’re trying to stand out, but don’t have the technical knowledge to do so.
Then, there are professional freelancers available on platforms like geodirectryexperts.com (alternatively, Upwork or Fiverr) who can handle the programming aspect.
Just note that although setting it up is pretty easy, running an online business directory isn’t a walk in the park.
Here are some key stakeholders to consider when developing the strategy and structure for growing your directory business.
- Administrator: the owner of the website with complete control over the entire website, every single feature.
- Business Owners/Vendors: the customers of online business directories: they post business listings on the directories and often pay for top listing positions and ad placements.
- Business listing: the listing of a company, service, or product posted by a vendor or on behalf of the vendor by the admin team.
- Category/subcategory: an advanced and convenient categorization structure that makes filtering through results easier and more relevant.
- Clients/users: the people who visit an online business directory to find a business of interest and obtain the correct contact information to reach out and learn more.
The most essential part of running an Online Directory is definitely the marketing aspect if you want to succeed. You must master how to boost your directory traffic with SEO or Social media marketing. Those who master both have a 100% success rate guaranteed.
How do I market an online business directory website?
Marketing a business directory website isn’t the most challenging task, but consistency is crucial.
Ideally, you want to have a good amount of site traffic so that your vendors have a legitimate incentive to pay you a subscription fee to use your platform and audience.
To attract that traffic to your website, you need to have a large number of business listings that help users find what they’re looking for.
Alternatively, you need excellent content tailored to the niche of your directory.
That takes work.
It’s easy to want to rush things to get rich as fast as possible.
However, slapping your pretty membership structure on the front page for promoted listings and ad placements on a website with no traffic… It won’t get you any registrations soon.
Keeping website visitors engaged is a challenging task, as it requires striking a balance between the number of business listings and the number of visitors.
As a result, there is a good chance that the online business directories won’t attract both vendors and users if the promotion isn’t done right.
That’s why you’ll need a smart strategy to market a business directory website.
- Fill out business listings yourself to begin—the Internet has a lot of information available. If you’re too busy to input all the data yourself, hire a data entry operator or invest in a data-scraping tool.
- Invite all business owners (whose listings you have created) to claim and verify their listings. Along with verification, ask them if they would like the listing removed or if some changes should be made.
Never forget to let them know that it’s completely free, a promotional plus, and that you appreciate presenting them on your website.
They’re the reason your website exists, so be an honest suck-up if you have to.
Besides, no one minds a free listing.
In fact, some of them will likely contact you to suggest edits to their listing. Establish a relationship with them.
- As soon as you have a reasonable number of businesses listed in the business directory, focus on attracting traffic to the directory by using strategies such as:
- Search engine optimization
- Online marketing using social networks
- Sending email messages
- Paid advertisements
- Business directories can sometimes be a bit boring. Consider adding sections such as:
- Your industry’s latest news.
- Videos
- Tips, tricks, advice.
- A community of consumers of that industry’s products.
Such content, if keyword-optimized, can also help your business directory win points with search engines so you can attract organic traffic and build site authority.
Since users like to search for that kind of stuff, you’d be readily available with the answers (so search engines will push your content to the top, and with that comes great exposure to your site).
As soon as your directory starts generating enough traffic, monetizing it will become a lot easier.
It may take some time for the right balance between website visitors and registered vendors to emerge.
A large number of online business directories fail because they attempt to generate revenue from the outset.
Alas, it doesn’t happen so quickly with new brands.
If you already have an audience, instead, monetizing it with a directory will be a lot easier.
What are the types of online business directories?
1 Business Directory Website
Let’s start with the most traditional type of online business directory.
The go-to industry example is Yellow Pages.
This list comprises a range of niche businesses operating within a specific geographic area. Usually, businesses are grouped by type, location, activity, and size.
A business directory typically includes information such as location, phone number, type of products or services offered, number of employees, serving area, and professional affiliations.
Users can easily find local businesses, products, or services in a targeted manner.
A business listing website is one of the best ways to increase online visibility.
Businesses will also be able to increase their search rankings and authority with search engines with a listing in a top online business directory.
As a result, potential customers have a greater chance of finding them online.
If your site has high traffic, it’s easier to sell premium listings to business owners.
The Yellow Pages model is also subject to unbundling. Today, directories about verticals are more attractive than generic online directories.
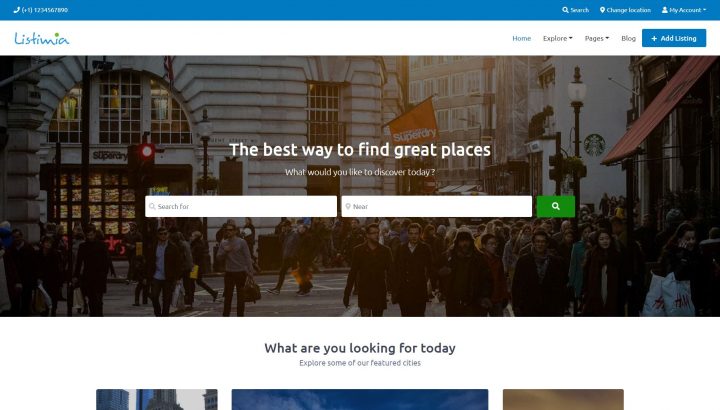
To build a Business Directory website, you can easily start using the Listimia theme for GeoDirectory. Read more about that here.
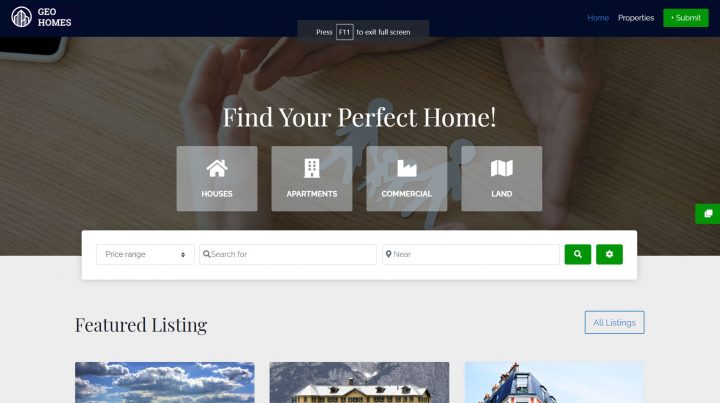
2 Real Estate Listings Portals
Many people visit the internet when they want to find the perfect property today.
Therefore, having a well-designed real estate web directory is crucial for real estate agents and service providers.
Think Zillow.com.
Most real estate directories generate revenue by offering services to both homebuyers and sellers, such as featured listings and real estate agent advertisements.
They also sell leads to real estate professionals and homeowners (especially for rentals).
Offering real estate agents high-quality advertising and marketing services (customized websites).
They may also offer mortgage services as partners or affiliates.
In this market, there are still big opportunities in hyperlocal niches.
If you wish to start a Real Estate Listings Directory, you can use the GeoDirectory Real Estate template that can be installed with one click in less than 2 minutes. Read more about the GeoDirectory Real Estate Theme here.
3 Short-Term Rentals
To go even more niche, renting housing spaces falls under the broader category of real estate.
You can rent a hotel room through Booking.com or Expedia.
Rooms, apartments, and houses for rent with Airbnb and VRBO, and even office space for rent with WeWork.
4 Job boards
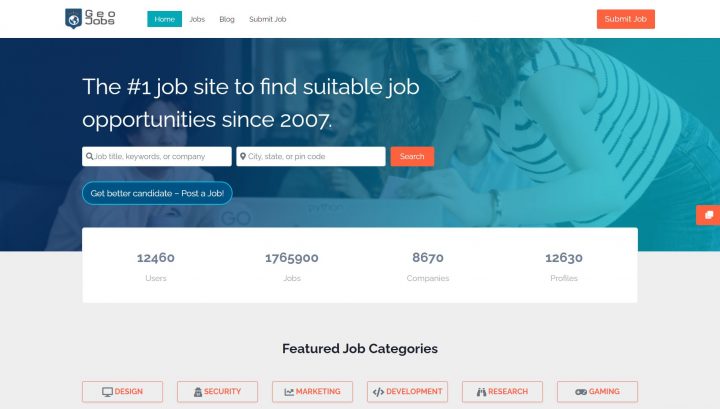
Companies like Indeed, Monster, Glassdoor, and ZipRecruiter have found success by creating job listings tailored to unemployed individuals seeking job opportunities.
Their revenue comes from corporations buying job postings.
Don’t be intimidated by the industry giants.
New job boards are flourishing in the post/covid era. Remoteok.io, which has attracted 10,000 registered remote worker profiles in one year, has provided remote jobs to thousands of people globally.
Starting a Job Board Directory is simple with GeoDirectory and the 1-click demo install of the WP Job Board Theme.
5 Freelancers
As it turns out, there’s a great demand for quick talent that comes with no conditions or logistics.
Hire a professional, get the job done, and keep them in good condition for as long as you need.
Fiverr, Upwork, and Codeable (for WordPress) offer a vast network of outsourceable talent through text search and advanced filters.
Examples include service required, country (enabling collaboration with someone familiar with your culture), niche, seller level (for premium services), and more.
These companies generate revenue by taking a cut of transactions between buyers and sellers, directing them to the right talent, and providing insights to aid decision-making.
6 Home Service Providers
Generally, they make money by charging companies and professionals to list their services on the site.
Additionally, they often sell leads, professional tools, and even furniture.
The primary difference between these directories and freelancing directories is that the businesses featured are more hands-on and local, whereas freelancers tend to work remotely.
So think Angie, Thumbtack, Houzz, and HomeAdvisor.
7 Events Directories
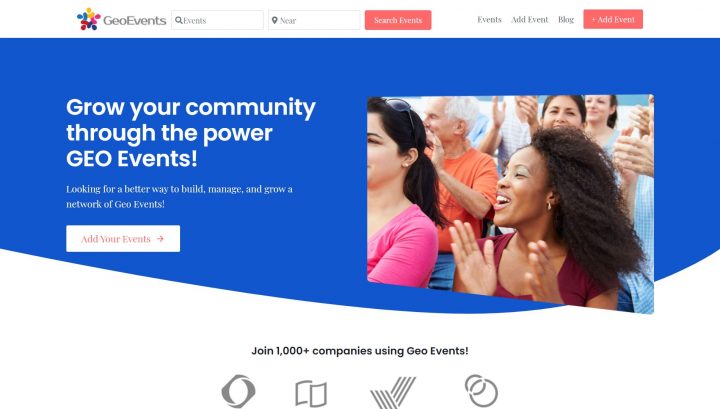
All things events.
If there’s a social event happening locally or at a concert, these companies enable hosts and vendors to sell tickets to interested audiences.
To keep the lights on, they’ll take a cut from ticket buyers for compensation for enabling their concert dreams.
The common names in the industry are Eventbrite and Ticketmaster.
However, businesses like Meetup.com should be considered an Event Directory, where you can connect with people of similar interests.
If you’re curious, group organizers pay Meetup a monthly fee to run their groups and events.
8 Doctor Directories
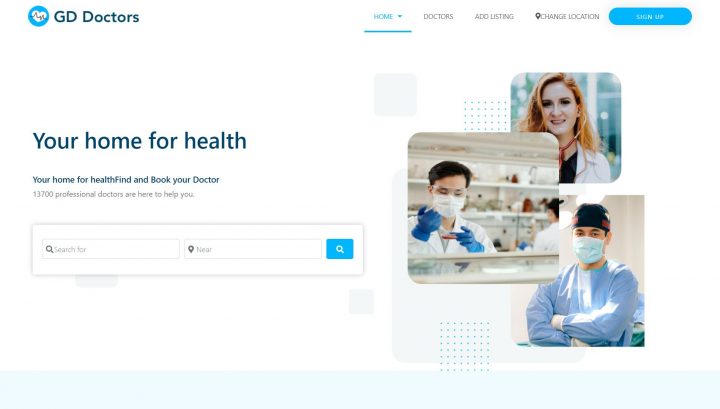
Using these directories, patients can connect with doctors.
Companies in this sector mainly make their profits by charging doctors for listing themselves.
Another option is to offer services to healthcare professionals, enabling them to communicate more easily with their patients, nurses, and other teams.
We’re talking WebMD, HealthGrades, and Doximity.
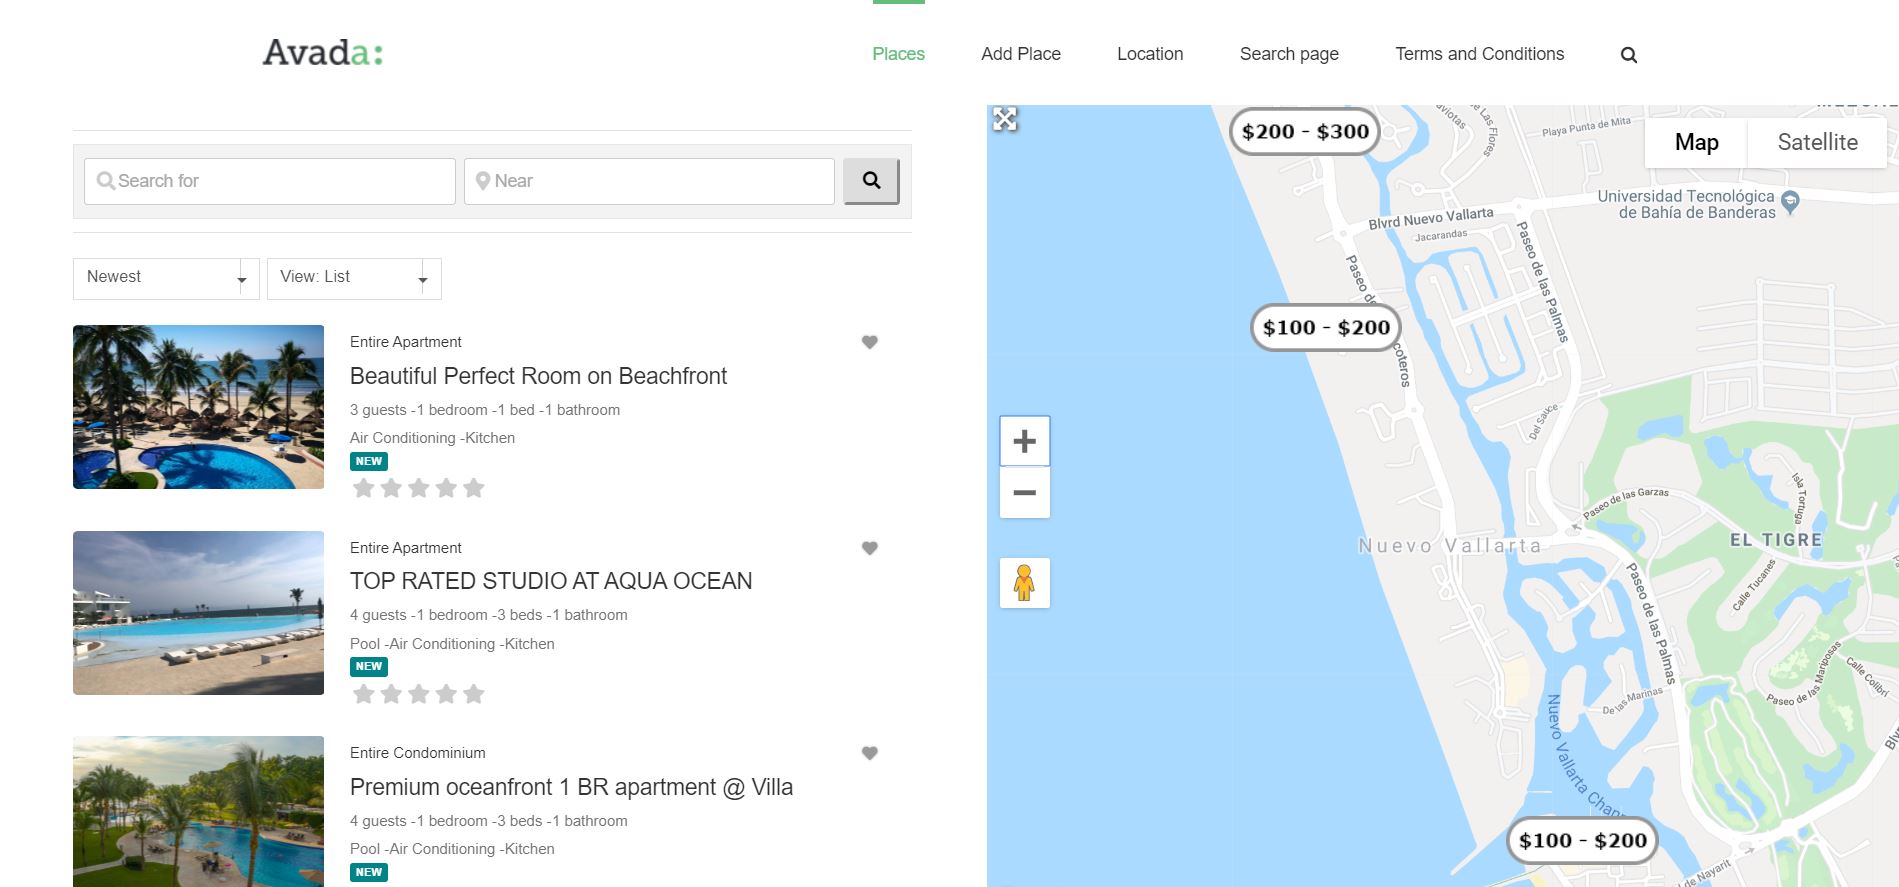
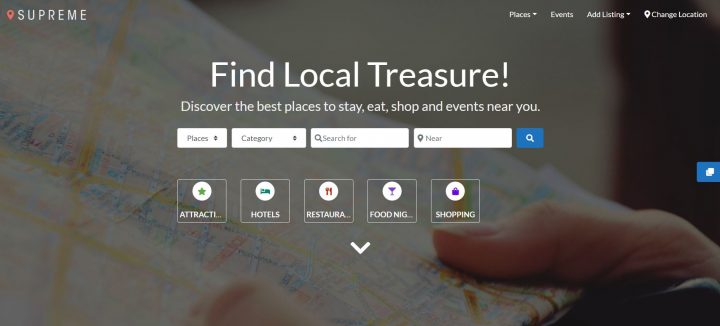
9 Travel and Experiences (Restaurants/Hotels/Trips)

Travel and experience directories help users connect with places before they get there.
They facilitate the decision-making process for the next trip by displaying user reviews, selling ads, and promoting featured listings.
Of course, they take a commission from bookings and reservations.
We’ve all probably heard or even used examples like Yelp.com and Tripadvisor.com.
However, there are also successful new players in this niche, like Nomadlist.com.
You can create a Yelp Clone using our Whoop Theme or a WordPress Restaurant directory using our Geo Restaurants 1-click demo import template.
10 Software/Apps Directory
Some of these directories sell ads, featured listings, and recommendations.
They’re the middlemen between a tech vendor and a client looking for a software service.
With the right filters, suggestions are provided.
Many software companies pay for listings and work to achieve organic positions (by fostering good reviews) on directories like Capterra, to gain maximum exposure and acquire more clients.
G2 is another example, but it has an interesting business model since it sells data back to the SaaS owners that are being reviewed on its site.
11 Generic Classifieds
These are directory websites that enable individuals to sell used items privately.
This business model is more environmentally friendly and cost-savvy for individuals on a low budget.
The best example is eBay, which receives a % of each sale.
Other sites like Craigslist, though, may model their revenue income as pay-per-listing.
For a generic Classifieds portal, the GeoDirectory Supreme Directory theme will be a great fit and provide an excellent WordPress Classifieds Theme. You can install a demo in less than 2 minutes.
12 Cars
Companies like Autotrader or Cars.com are online directories that help users buy and sell cars.
Simple as that.
They typically charge users to submit their listings in exchange for exposure and potential buyers.
There is also usually an option to sell ads to try to scale or fast-track a sale.
To wrap it up
There are many more options; you need to look for them and be disruptive.
The directory’s business model isn’t getting any smaller.
And with rising competition, they’ll only be more useful.
But for every online business, you need an audience.
Either you already have one or you’re growing one with SEO and marketing.
It can’t happen without it.
So, what Online Directory are you thinking of starting?
According to the Business Listings Trust Report, a staggering 94% of consumers have used an online directory to find information about a local business in the last 12 months.
This underscores the crucial role of the right WordPress classifieds plugins in today’s digital marketplace.
In a world where first impressions are digital, these tools are indispensable for crafting compelling and organized online directories.
Get ready to explore:
- The essence of a classified ad plugin.
- The vital role of these tools in the digital ecosystem.
- Key considerations before making your choice.
- A comprehensive list of the top 9 classified ad software plugins.
- Essential takeaways for an informed decision-making process.
P.S., in this realm of elite tools, GeoDirectory stands out. It’s not just about listing businesses; it’s about creating a vibrant, user-friendly search network.
Whether you need to build a City Directory or you want to Create a Classified Ad Website, GeoDirectory transforms any WordPress theme into an interactive community hub. Let’s discover how it claims its spot in this prestigious list.
What is a Classified Ad Software Plugin?
In the digital age, where information is at our fingertips, the way businesses connect with potential customers has evolved dramatically.
Enter classified ad software plugins – the game changers in digital marketing and online directories.
At its core, a classified ad software plugin is a tool that integrates with your website, specifically designed for creating and managing online directories and listings.
Think of it as a digital bulletin board but with far more sophistication and capabilities.
These plugins allow website owners to effortlessly set up and run a space where businesses can advertise their services, and consumers can browse through them with ease.
Why Are These Tools Important?
In an online world brimming with content, standing out is not just important—it’s essential.
Classified ad software plugins play a crucial role in this endeavor, especially for websites focusing on business directories, job boards, and similar listings.
Here’s why these tools are indispensable in today’s digital landscape:
- Enhancing User Experience: The modern consumer values efficiency and accuracy. Classified ad plugins organize information in a way that’s easy to navigate, making it effortless for users to find what they’re looking for. This enhanced user experience keeps visitors on your site longer, reducing bounce rates and increasing engagement.
- Boosting SEO Efforts: Search engines love well-structured and relevant content. By organizing listings in a clear, searchable format, these classified ads plugins help improve your website’s SEO. Better SEO means higher rankings, which leads to more visibility and traffic.
- Facilitating Business Growth: For businesses listed on your directory, these plugins are a gateway to growth. They provide a platform for businesses to reach their target audience, showcase their offerings, and ultimately drive leads and sales.
- Versatility and Customization: Whether you’re running a local business directory or a nationwide job board, these plugins offer the flexibility to cater to various niches. Customizable features ensure that you can tailor the classified listings to suit the specific needs of your audience and the businesses featured.
- Data Insights and Analytics: Understanding your audience is key to any successful online venture. Many classified ad plugins come with built-in analytics, giving you valuable insights into user behavior, popular listings, and the overall performance of your directory.
In the context of GeoDirectory, these benefits are amplified.
It’s not just a plugin; it’s a comprehensive solution that transforms any WordPress site into a powerful, scalable directory.
Its robust set of features, combined with ease of use, makes it a standout choice for anyone looking to build a professional-grade directory.
Key Considerations Before Making Your Choice
When it’s time to choose the right classified ad software plugin, the decision might feel like navigating a maze.
But fear not! We’ve got the breadcrumbs to lead you out. Here are some crucial factors to consider:
- Compatibility and Ease of Use: First things first, ensure the classified ads WordPress plugin plays nice with your website’s theme and other plugins. You want a tool that’s easy to integrate and manage. A smooth user experience for you means a smooth experience for your visitors.
- Customization Capabilities: Your directory, your rules. Look for a plugin that allows you to customize fields and layouts. This flexibility lets you tailor the directory to fit your specific needs and the unique flavor of your brand.
- Scalability: Think big. Even if you’re starting small, choose a plugin that can grow with your business. You don’t want to outgrow your software just as things are getting exciting.
- SEO Friendliness: This is non-negotiable. A good plugin should boost your site’s SEO. It’s all about being found online, right? Look for features like optimized URLs and metadata fields.
- Support and Updates: A plugin without support is like a ship without a captain. Ensure there’s a dedicated team behind the software, ready to help and regularly rolling out updates.
And here’s where GeoDirectory shines.
It checks all these boxes and more. It’s a plugin that doesn’t just fit in; it stands out.
Easy to use, customizable, scalable, SEO-friendly, and backed by stellar support – it’s the kind of tool that doesn’t just meet expectations, it exceeds them.
Navigating the world of classified ad software can feel like a treasure hunt.
You’re looking for that perfect gem that’ll transform your website into a bustling marketplace or a thriving community hub.
Here are the top 9 classified ad software plugins that are worth their weight in digital gold:
Key Takeaways
- For creating a comprehensive business directory with intuitive mapping and monetization options, use GeoDirectory.
- For building a versatile and user-friendly directory with a range of customizable features, use Classified Listing.
- For crafting professional business directories with advanced features and design options, use Directorist.
- For a simple, mobile-friendly solution compatible with any WordPress theme, use WPAdverts.
- For creating a wide variety of classified featured ads with live chat and multiple mapping sources, use AWP Classifieds.
- For designing any type of directory website with a powerful listing plugin and drag-and-drop builder, use uListing.
- For a directory plugin that’s adaptable for any type of website with customizable features and templates, use Business Directory Plugin.
- For an all-in-one solution for various types of directory websites with extensive customization and functionality, use Advanced Classifieds & Directory Pro.
- For an easy-to-implement solution to transform a WordPress site into a diverse directory, with Google Maps and Mapbox integration, use Web 2.0 Directory Plugin.
#1. GeoDirectory
GeoDirectory, a trailblazer in the realm of directory software, has been revolutionizing the way businesses get listed online since 2008.
Crafted to seamlessly integrate with any WordPress theme, this WordPress classified plugin is a testament to versatility and user-friendliness.
It’s designed to work harmoniously with popular page builders like Elementor, Divi, and Beaver Builder, ensuring that customization is a breeze.
Key Takeaway: GeoDirectory stands out for its ability to turn any WordPress site into a highly functional, scalable directory, catering to a wide range of listing types.
Key Features
- Customization Freedom: Easy editing and customization of PHP templates in your child theme.
- Extensive Design Options: Offers over 40 widgets, shortcodes, and blocks for maps, categories, listings, and more.
- Advanced Features: Includes business hours display, proximity search, and customizable ratings & reviews.
- Dynamic Badging System: Unique badges for classified listings based on custom field values.
- Ninja Forms Integration: Unlimited contact forms with easy form building and advanced CRM integrations.
- SEO Optimization: Built-in integrations with major SEO plugins like Yoast and RankMath.
- Professional Features: Scalable design, secure code, CSV import/export/edit, and Google Analytics integration.
- Developer-Friendly: Extensive hooks and filters, clean code, and API calls for extended functionality.
Pricing
GeoDirectory offers versatile pricing options tailored to different needs:
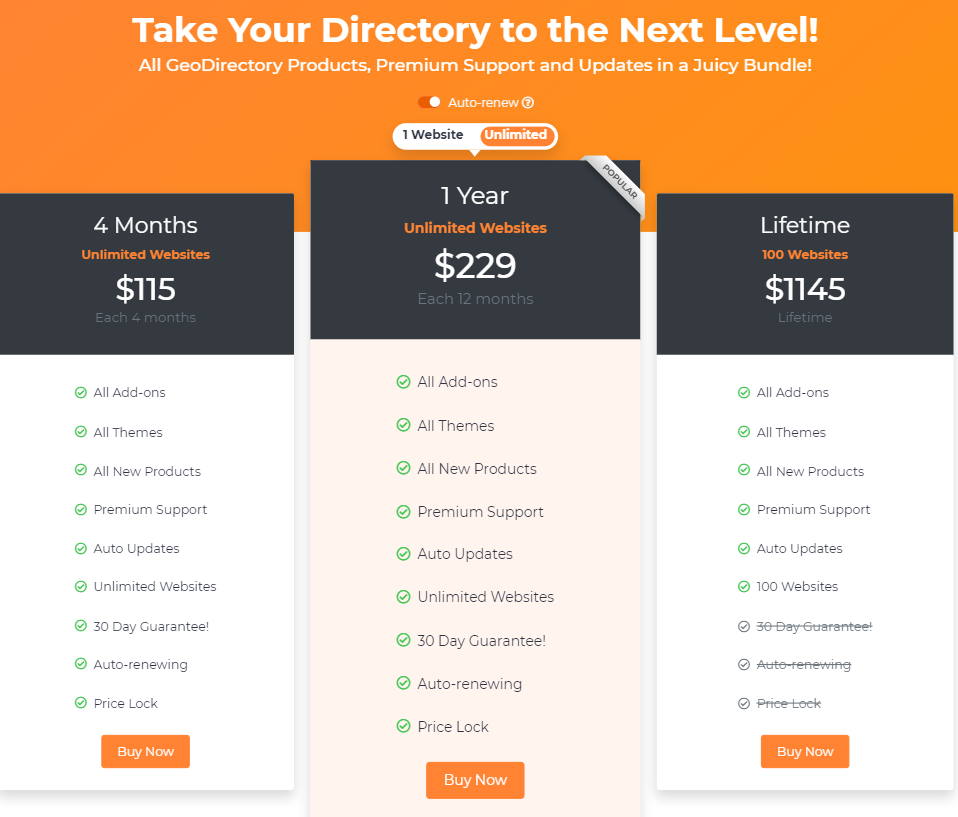
- 4-Month Plan: Priced at $115, this plan includes all add-ons, themes, new products, premium support, auto-updates, and unlimited websites. It’s auto-renewing with a 30-day guarantee and a price lock feature.
- 1-Year Plan: For $229 (unlimited websites) or $139 (1 website), this plan offers yearly access to all features included in the 4-month plan, ensuring a full year of comprehensive directory tools.
- Lifetime Plan: At $1145 for up to 100 websites, this one-time purchase gives you lifetime access to all of GeoDirectory’s features, excluding the 30-day guarantee and auto-renewal options.
Pros
- Highly customizable and compatible with major WordPress page builders.
- Rich in features for both users and administrators.
- SEO-friendly, enhancing the visibility of listings.
- Developer-friendly with extensive support for customization.
Cons
- Might have a learning curve for beginners.
- Requires familiarity with WordPress to maximize its potential.
#2. WPAdverts
WPAdverts stands out as the most accessible and popular 5-star plugin for classifieds on WordPress.
Renowned for its ease of use and compatibility with any WordPress theme, WPAdverts is the go-to choice for creating both paid and free classifieds, and it’s optimized for mobile devices, ensuring a flawless experience across all platforms.
Key Takeaway: WPAdverts is the epitome of simplicity and efficiency in classified ad software, offering an intuitive experience for users of all skill levels.
Relevant Features
- Seamless WordPress Integration: Offers powerful control with built-in search and user management.
- Customization Options: Includes grid or list views, categories, sub-categories, and secure moderation tools.
- Decade of Expertise: Over ten years of experience in supporting thousands of customers.
- Uncompromised Security: A focus on security as a top priority for web development.
- High Compatibility: Works with any WordPress theme and plugin, ensuring maximum flexibility.
- User-Friendly Setup: Simple upload and activation process with familiar WordPress admin controls.
- Multiple Extensions: Premium extensions available for enhanced customization.
- Exceptional Support: Rated “Perfect” by customers, offering responsive and helpful assistance.
- Optimized Performance: Expert coding for a light, fast, and SEO-friendly plugin without bloat.
- Responsive Design: Ensures a great look on all desktop and mobile devices.
- Developer-Friendly: Extensive documentation and customization options for developers.
Pricing
WPAdverts provides various pricing packages:
- Start-Up: $59 per year, ideal for new websites and small-scale projects.
- Professional: $149 per year, the most popular option, offering a balanced range of features.
- Professional Plus: $299 per year, offering additional extensions and support for larger projects.
- Lifetime: A one-time payment option is also available for long-term investment.
Pros
- High compatibility with any WordPress theme and plugin.
- User-friendly and easy to set up.
- Strong focus on security and performance.
- Excellent customer support and extensive documentation.
Cons
- The need for extensions for advanced features may increase the overall cost.
- May not offer as many out-of-the-box features as some competitors.
#3. AWP Classifieds
AWP Classifieds recognized as a top-tier WordPress classifieds plugin, is designed to quickly and easily get classifieds up on your website.
Catering to a variety of classified categories like personal, pet, local, car & motorcycle, and job classifieds, it’s versatile and user-friendly.
AWP Classifieds excels in keeping users engaged, making money on your site, and ensuring quick setup with awesome support.
Key Takeaway: AWP Classifieds is a robust solution for anyone looking to create a diverse range of WordPress classified ads with ease and efficiency.
Relevant Features
- User-Friendly Design: Focuses on ease of use and setup, offering an intuitive experience for both website owners and users.
- Monetization Options: Integrates with major payment gateways and allows for featured listings and banner, featured ads.
- Customization Simplicity: Offers settings and sensible defaults for easy configuration.
- Responsive Support: Boasts over 200 5-star reviews for its customer support.
- Compatibility: Ensures smooth operation with well-written themes and common plugins like Yoast SEO.
- 14-Day Risk-Free Trial: This free classifieds WordPress plugin encourages starting your classifieds website with a trial period to gauge its suitability.
Pricing
AWP Classifieds offers different pricing tiers:
- Basic Plan: $49.50 per year, offering essential features for classified ads on one site.
- Pro Plan: $149.50 per year, the most popular option with additional features and support for up to 5 sites.
- Elite Plan: $249.50 per year, providing all pro features, priority support, and use on unlimited sites.
Pros
- Easy to use and set up, making it suitable for users of all skill levels.
- Offers a variety of monetization options for revenue generation.
- Compatible with major WordPress themes and plugins.
Cons
- Advanced features and broader site support require higher-tier plans.
- May require additional customization for specific classified Google AdSense ad needs.
#4. uListing
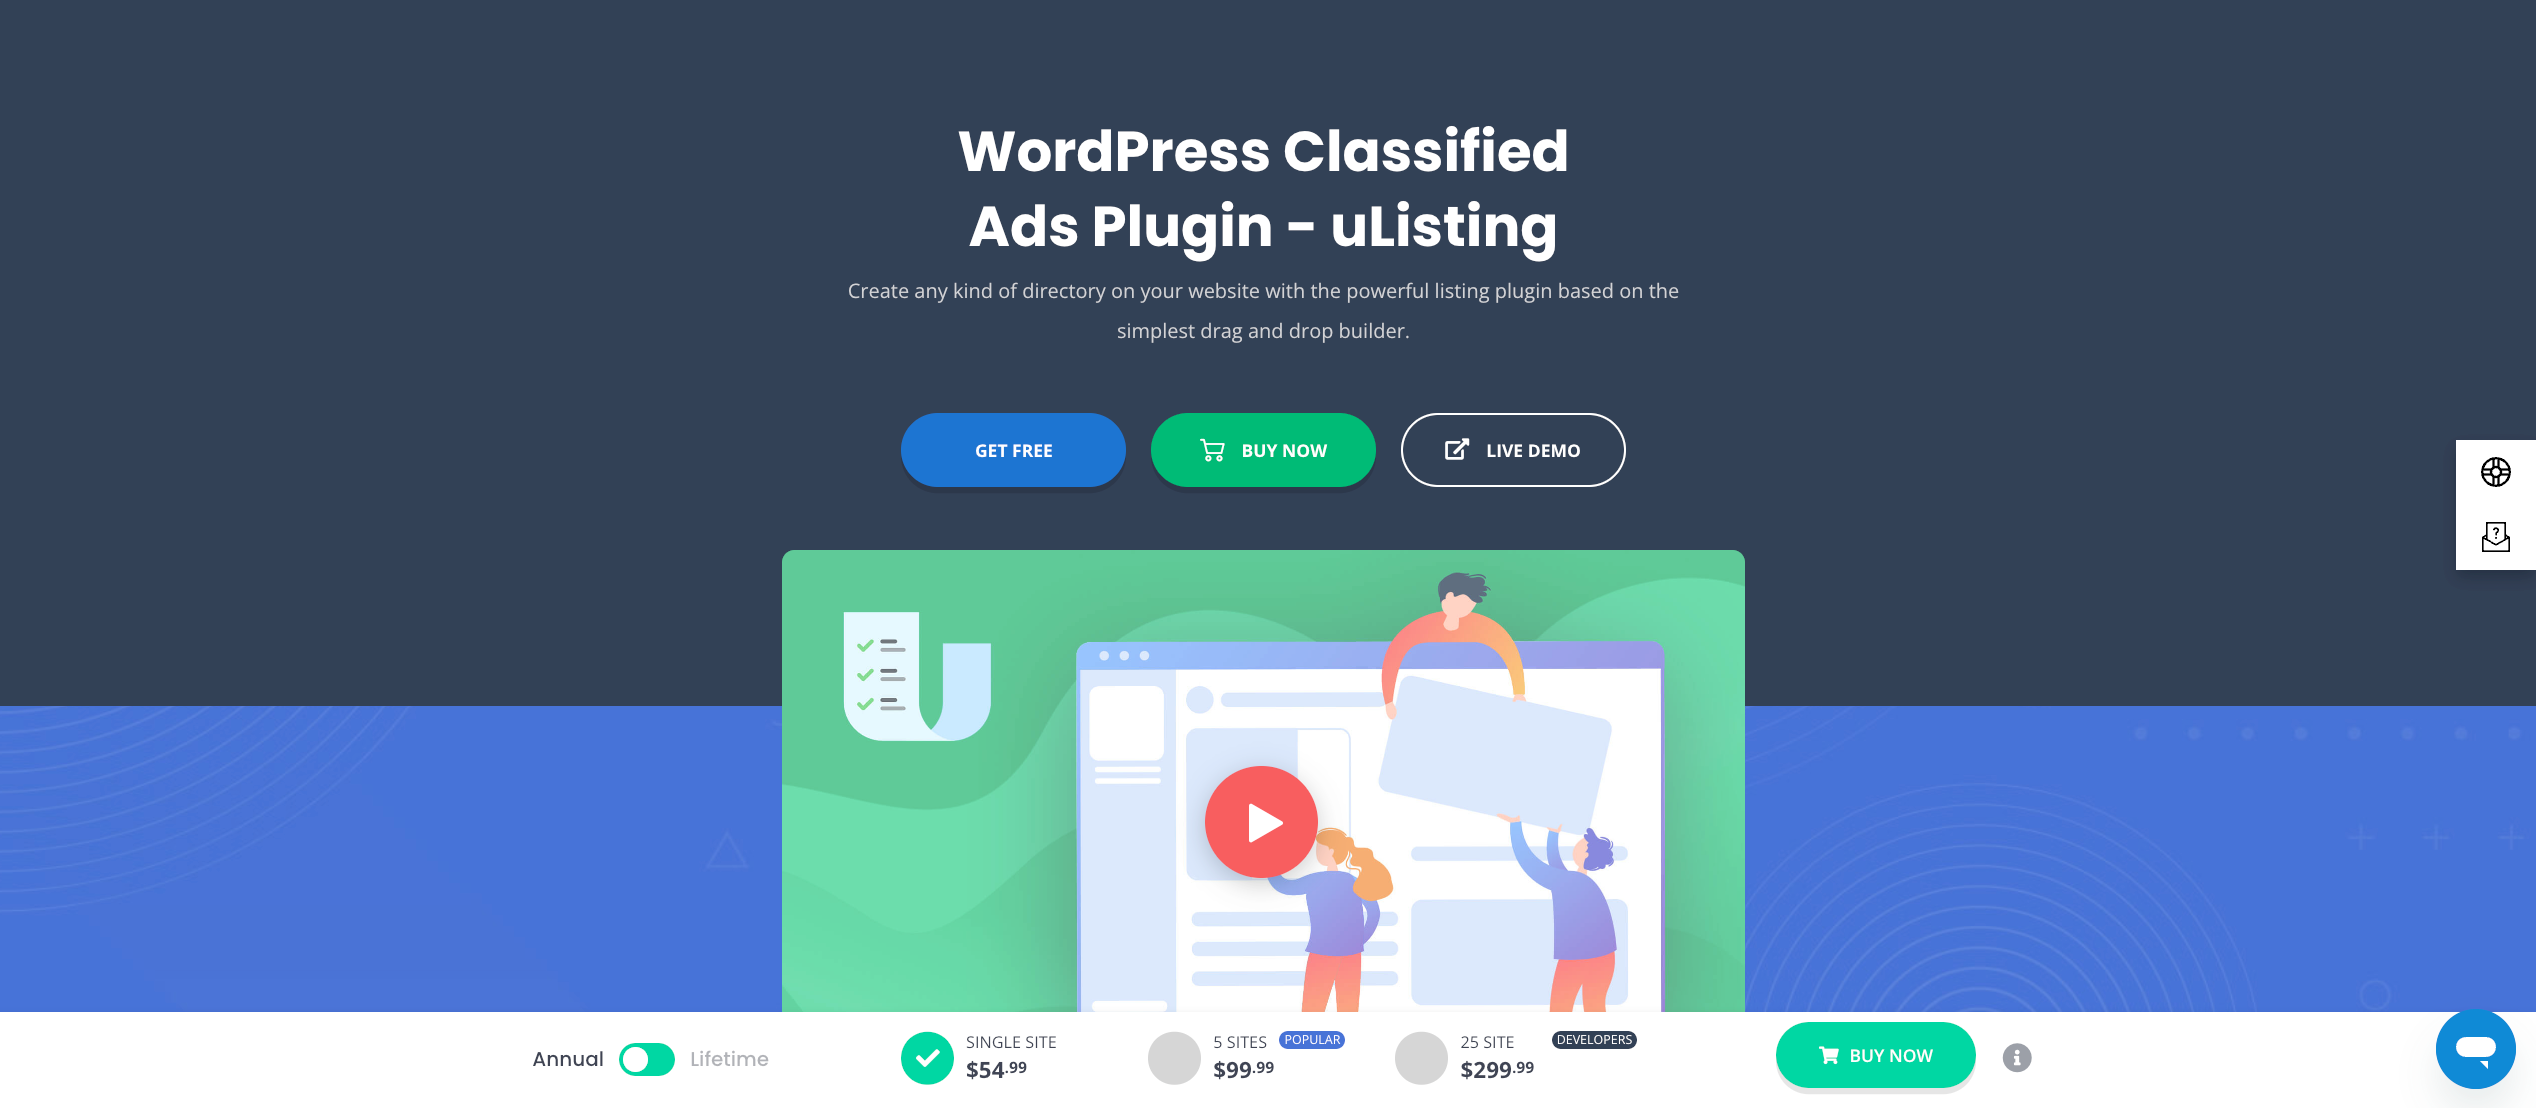
uListing, a groundbreaking WordPress plugin by StylemixThemes, revolutionizes the way directories are created on classified ads websites.
Built on Vue.js, it’s compatible with WordPress 4.6 and higher, making it a robust tool for building a variety of directory listings such as real estate, jobs, events, vehicles, and more.
uListing stands out for its versatility, allowing users to create directory websites similar to popular platforms like Yelp, Zomato, TripAdvisor, and Airbnb.
Key Takeaway: uListing is the go-to classified ads plugin for anyone aiming to create diverse directory listings with minimal hassle, offering extensive customization and user-friendly features.
Relevant Features
- Diverse Directory Options: Allows the creation of various types of directories, including business, coupon, job boards, and real estate or vehicle dealerships.
- Simplification of Tasks: Manages categories, sorting, search and filtering options, payment features, and featured listing management.
- Unlimited Listing Types: Add different types of listings for products or services on your site, enhancing flexibility.
- Customizable Inventory Page: Utilize a drag and drop builder to create inventory pages with various layout options.
- Rich Single Page Design: Create detailed single pages for properties with integration for amenities, galleries, and contact forms.
- Listing Cards and Preview Options: Set up customizable listing cards with grid or list view options.
- Advanced Search Features: Includes unlimited search fields, autocomplete suggestions, radius search, and geolocation.
- User-Driven Listing Order: Allows sorting by price, property square, or upload date.
- Frontend Submission Form: Users can submit their listings, reducing the workload and bypassing the need for admin access.
Pricing
uListing offers various pricing plans:
- Annual Plans:
- Single Site: $54.99
- 5 Sites: $99.99
- 25 Sites: $299.99
- Lifetime Plans:
- Single Site: $149.99
- 5 Sites: $299.99
- 25 Sites: $999.99
All plans come with 1-year updates and support for annual plans and lifetime updates and support for lifetime plans, along with a 14-day money-back guarantee.
Pros
- Suitable for creating a wide range of directory types.
- User-friendly with drag-and-drop builder for customization.
- Offers advanced search and sorting capabilities.
Cons
- May require a higher budget for the more advanced features in the premium plans.
- The wide array of features might be overwhelming for beginners.
#5. Classified Listing
Classified Listing, offered by RadiusTheme, is a versatile WordPress plugin designed to create a range of directories on your website.
This tool is tailored for building classified ads, business directories, and specialized listings like restaurants, local businesses, real estate, and hotels.
It’s a comprehensive solution for anyone looking to establish a classified ads website, job directory, local business directory, or service directory, boasting full responsiveness and compatibility with any standard coding WordPress theme.
Key Takeaway: Classified Listing is a dynamic and fully responsive plugin, ideal for creating a classified listing website or a detailed business directory, offering extensive customization and interactive features.
Relevant Features
- Diverse Directory Creation: Enables the building of various directory types, including classified ads and specific business directories.
- Multiple Promotion & Membership Features: Includes options for ad promotions like Top, Featured, and Bump Up, allowing revenue generation from user posts.
- Live Chat Between Buyers & Sellers: Facilitates direct communication within the platform, enhancing user interaction.
- Advanced Search Features: Offers radius search, Ajax auto-suggestion, and filtering by custom fields for efficient navigation.
- Unlimited Custom Fields: Allows the creation of unlimited custom fields, set category-wise, for detailed listing information.
- Multiple Payment Gateway Support: Integrates with various payment gateways including PayPal, Stripe, and WooCommerce for flexible transaction options.
- Front-End Listing Submission & Management: Empowers users with front-end control over their listings, including addition, editing, and account management.
- Developer Friendly: Offers template file override options and enhances core features with filter hooks.
- Elementor Widgets & Gutenberg Blocks: Provides compatibility with popular page builders for customizable and intuitive design options.
Pricing
Classified Listing offers several pricing plans:
- Yearly Plans:
- Personal: $39/year for 1 site or domain.
- Professional: $149/year for 5 sites or domains.
- Agency: $419/year for 100 sites or domains.
- Lifetime Plans:
- Personal: $199 for 1 site or domain.
- Professional: $349 for 5 sites or domains.
- Agency: $489 for 100 sites or domains.
Pros
- Offers a wide range of directory types and customization options.
- Includes live chat for direct communication between buyers and sellers.
- Supports multiple payment gateways and has robust search features.
Cons
- The variety of features and settings might be overwhelming for beginners or those new to WordPress plugins.
- Integration with specific themes or external systems may require additional customization or technical support.
#6. Directorist
Directorist is a standout player in the world of WordPress directory plugins, revered for its user-centric design.
Catering to over 10,000 businesses globally, Directorist streamlines the process of building online business directories efficiently.
Key Takeaway: Directorist is designed for those seeking a directory solution that balances advanced features with user accessibility.
Relevant Features
- User-Friendly Design: Ideal for beginners, requiring zero coding skills for operation.
- Extensibility: Compatible with popular page builders like Elementor for enhanced functionality.
- Monetization Capabilities: Offers features to generate revenue and expand your business.
- Theme Compatibility: Seamlessly integrates with various WordPress themes, including Elementor and Divi.
- Advanced Functionalities: Built to support scalable directory listing businesses.
- Translation Ready: Offers easy translation to cater to a global audience.
- Custom Fields and Advanced Search Filters: Tailor your directory to meet specific needs.
Pricing
Directorist offers flexible pricing plans:
- 3-Month Plan: $67 for three months, offering all extensions, themes, and upcoming products with unlimited sites license and priority support.
- 6-Month Plan: $103 for six months, including all features in the 3-month plan with a renewal discount option.
- 1-Year Plan: $149 annually, providing comprehensive access to Directorist’s features and a renewal discount.
- Lifetime Plan: Ranges from $339 to $824 as a one-time payment, depending on the number of sites. Includes all extensions, themes, and no renewal requirement.
Pros
- Highly extensible and beginner-friendly.
- Comprehensive monetization features.
- Compatible with a wide range of themes and page builders.
Cons
- The variety of features might be overwhelming for new users.
- Pricing may be higher compared to some other plugins, especially for the lifetime plan.
- There were some concerns due to security issues and vulnerabilities.
#7. Business Directory Plugin
Business Directory Plugin, a versatile WordPress tool, is your go-to for creating a myriad of directory types on your website.
Whether you’re aiming to set up local business directories akin to Yelp or Yellow Pages, staff directories for team listings, or specialized directories for restaurants, hotels, and travel reviews, this classified listing plugin has got you covered.
Its ease of use and comprehensive features make it an ideal solution for anyone looking to establish an online directory, be it for businesses, services, or community members.
Key Takeaway: Business Directory Plugin is an adaptable and user-friendly plugin, perfect for crafting any type of directory website. It offers a wide array of customizable features and templates to suit your specific needs.
Relevant Features
- Versatile Directory Options: From local business directories to staff and member directories, create various types tailored to your requirements.
- Free & Paid Submissions: Boost traffic with free listings or generate revenue through recurring subscriptions and multiple payment gateways.
- Responsive Designs: Ensure a seamless experience on all devices with mobile-friendly listings.
- Google Maps Integration: Enhance your directory with map listings, offering advanced search capabilities by location.
- Rating & Reviews System: Build a review site with ratings that show up in Google search results.
- Full Field Control: Customize with specific form fields like phone numbers and social media links.
- Easy Setup & No Coding Required: Set up your directory effortlessly with a platform that requires zero coding skills.
- Revenue Generation: Create multiple income streams through advertisements, listing sales, or service promotions on your directory website.
Pricing
Business Directory Plugin offers three pricing plans:
- Basic Plan: $99/year for 1 site. Includes unlimited listings, PayPal integration, ratings and reviews, and more.
- Pro Plan: $149/year for 3 sites. Adds features like Stripe and Google Maps integration, city/zip code filters, and priority support.
- Elite Plan: $249/year for 25 sites. Offers all Pro features plus WordPress Multisite, Payfast, and all directory themes.
Every plan comes with a 14-day, no-risk money-back guarantee, ensuring that you can try the wordpress business directory plugin with confidence.
Pros
- Wide variety of directory types and customizable options.
- Integrates Google Maps and offers advanced location-based search features.
- Flexible payment options with free and paid listing capabilities.
Cons
- The Elite plan might be costly for small businesses or individuals.
- Some features might require technical understanding for maximum utilization.
- The plugin design is extremely outdated.
#8. Advanced Classifieds & Directory Pro
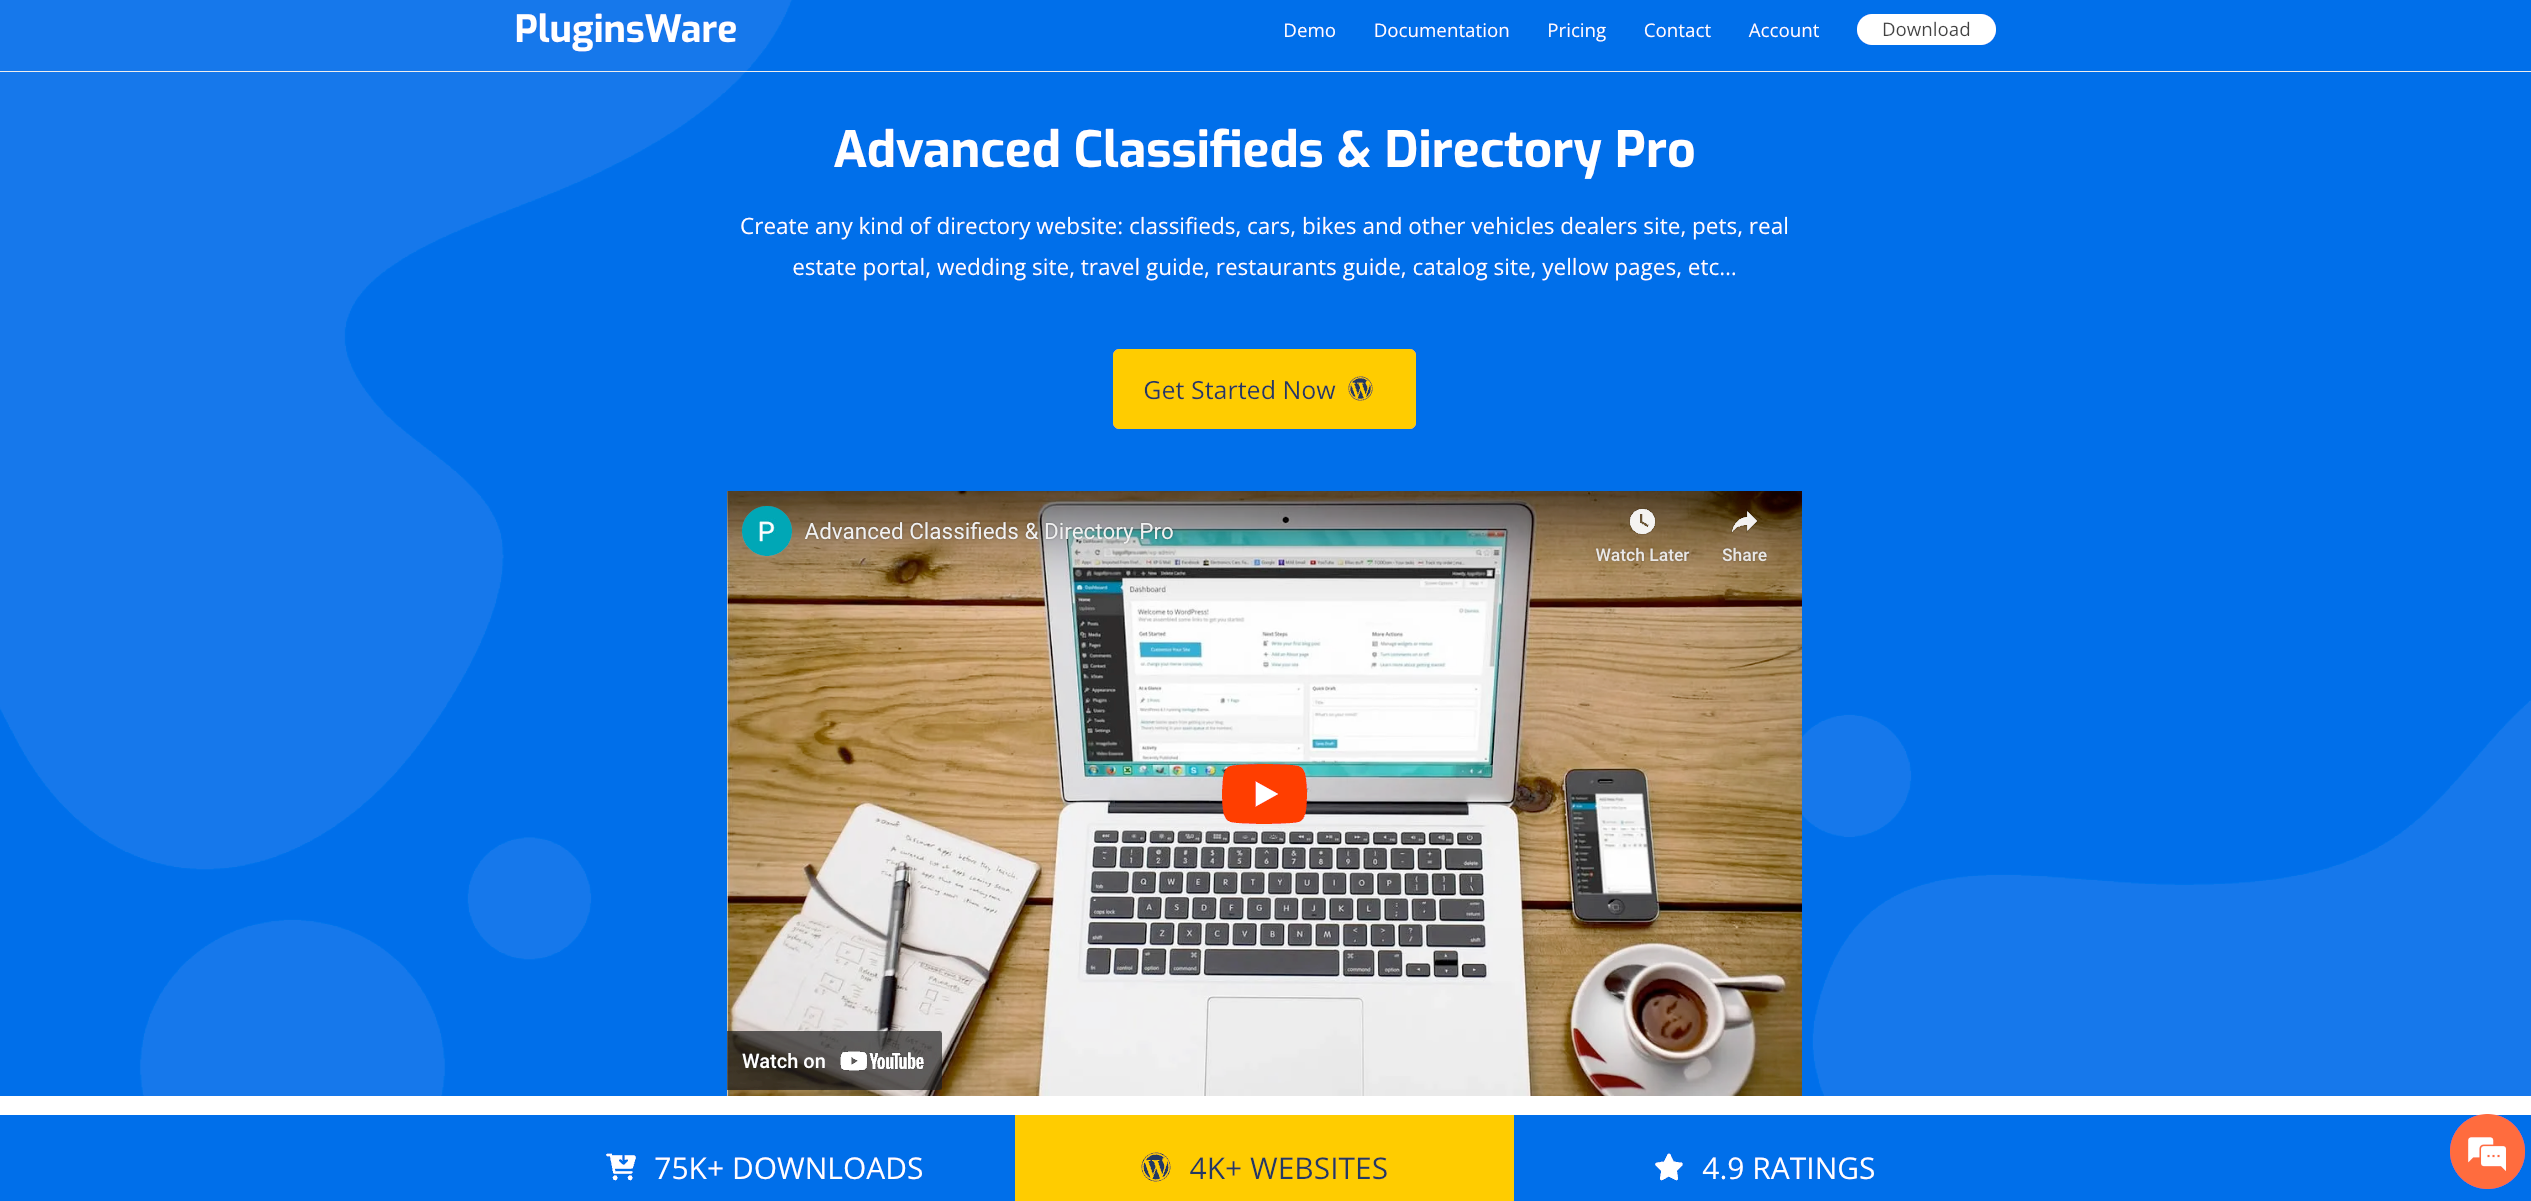
Advanced Classifieds & Directory Pro (ACADP) is a comprehensive WordPress plugin designed by PluginsWare.
It’s an all-in-one solution for creating various types of directory websites like classifieds, vehicle dealerships, pet listings, real estate portals, wedding sites, restaurant guides, and more.
With its impressive track record of over 75,000 downloads and powering over 3,000 websites, ACADP stands out with its high user rating of 4.9.
It’s a powerful tool for anyone looking to build a versatile and feature-rich directory WordPress website.
Key Takeaway: ACADP is a robust and flexible plugin, ideal for crafting an extensive range of directory websites. It’s packed with features that allow for extensive customization and functionality, making it a go-to choice for WordPress users.
Relevant Features
- Unlimited Everything: Enjoy the freedom to create unlimited listings, categories, locations, and custom fields.
- Front-End Listing Submission: Allows users to submit listings directly from the front-end of your website.
- Versatile Display Options: Choose between grid, list, or map views for your listings.
- Advanced Search & Filtering: Offers detailed search capabilities including keyword, location, category, price, and custom field filters.
- Monetization Options: Generate revenue with paid listing plans, featured listings, and flexible pricing for different advert durations.
- Multimedia Integration: Add images and videos from platforms like YouTube and Vimeo, enhancing the visual appeal of your listings.
- Customizable Layouts & Settings: Tailor the appearance and functionality of your directory to suit your specific needs.
- Multifunctional Widgets: Includes a variety of widgets for search, categories, locations, and more, simplifying content management on your site.
- Advertiser & User Panel Functions: Users and advertisers have personal panels for managing profiles, listings, and purchasing promotions.
Pricing
Advanced Classifieds & Directory Pro (ACADP) by PluginsWare offers two main pricing plans:
1. Starter Plan:
- Cost: Free
- Features: Unlimited listings, categories, locations, custom fields; grid, list, map display options; advanced search form; front-end listing submission; featured listings; Gutenberg blocks; shortcode builder; sidebar widgets; email templates; spam blocking with reCaptcha.
2. Professional Plan:
- Cost: $95.88 per year
- Features: Includes all Starter features, plus paid listing plans, PayPal and Stripe payment gateways, WooCommerce integration, listings slider/carousel, CSV import/export, multi-categories, and honeypot spam blocking.
Pros
- Provides limitless options for listings, categories, and customizations.
- Supports advanced search functionalities and multimedia integration for a rich user experience.
- Offers multiple monetization avenues and personal panels for users and advertisers.
Cons
- The sheer number of features may be overwhelming for beginners or those seeking a simpler solution.
- Customizing and managing advanced settings might require a moderate level of WordPress proficiency.
#9. Web 2.0 Directory Plugin
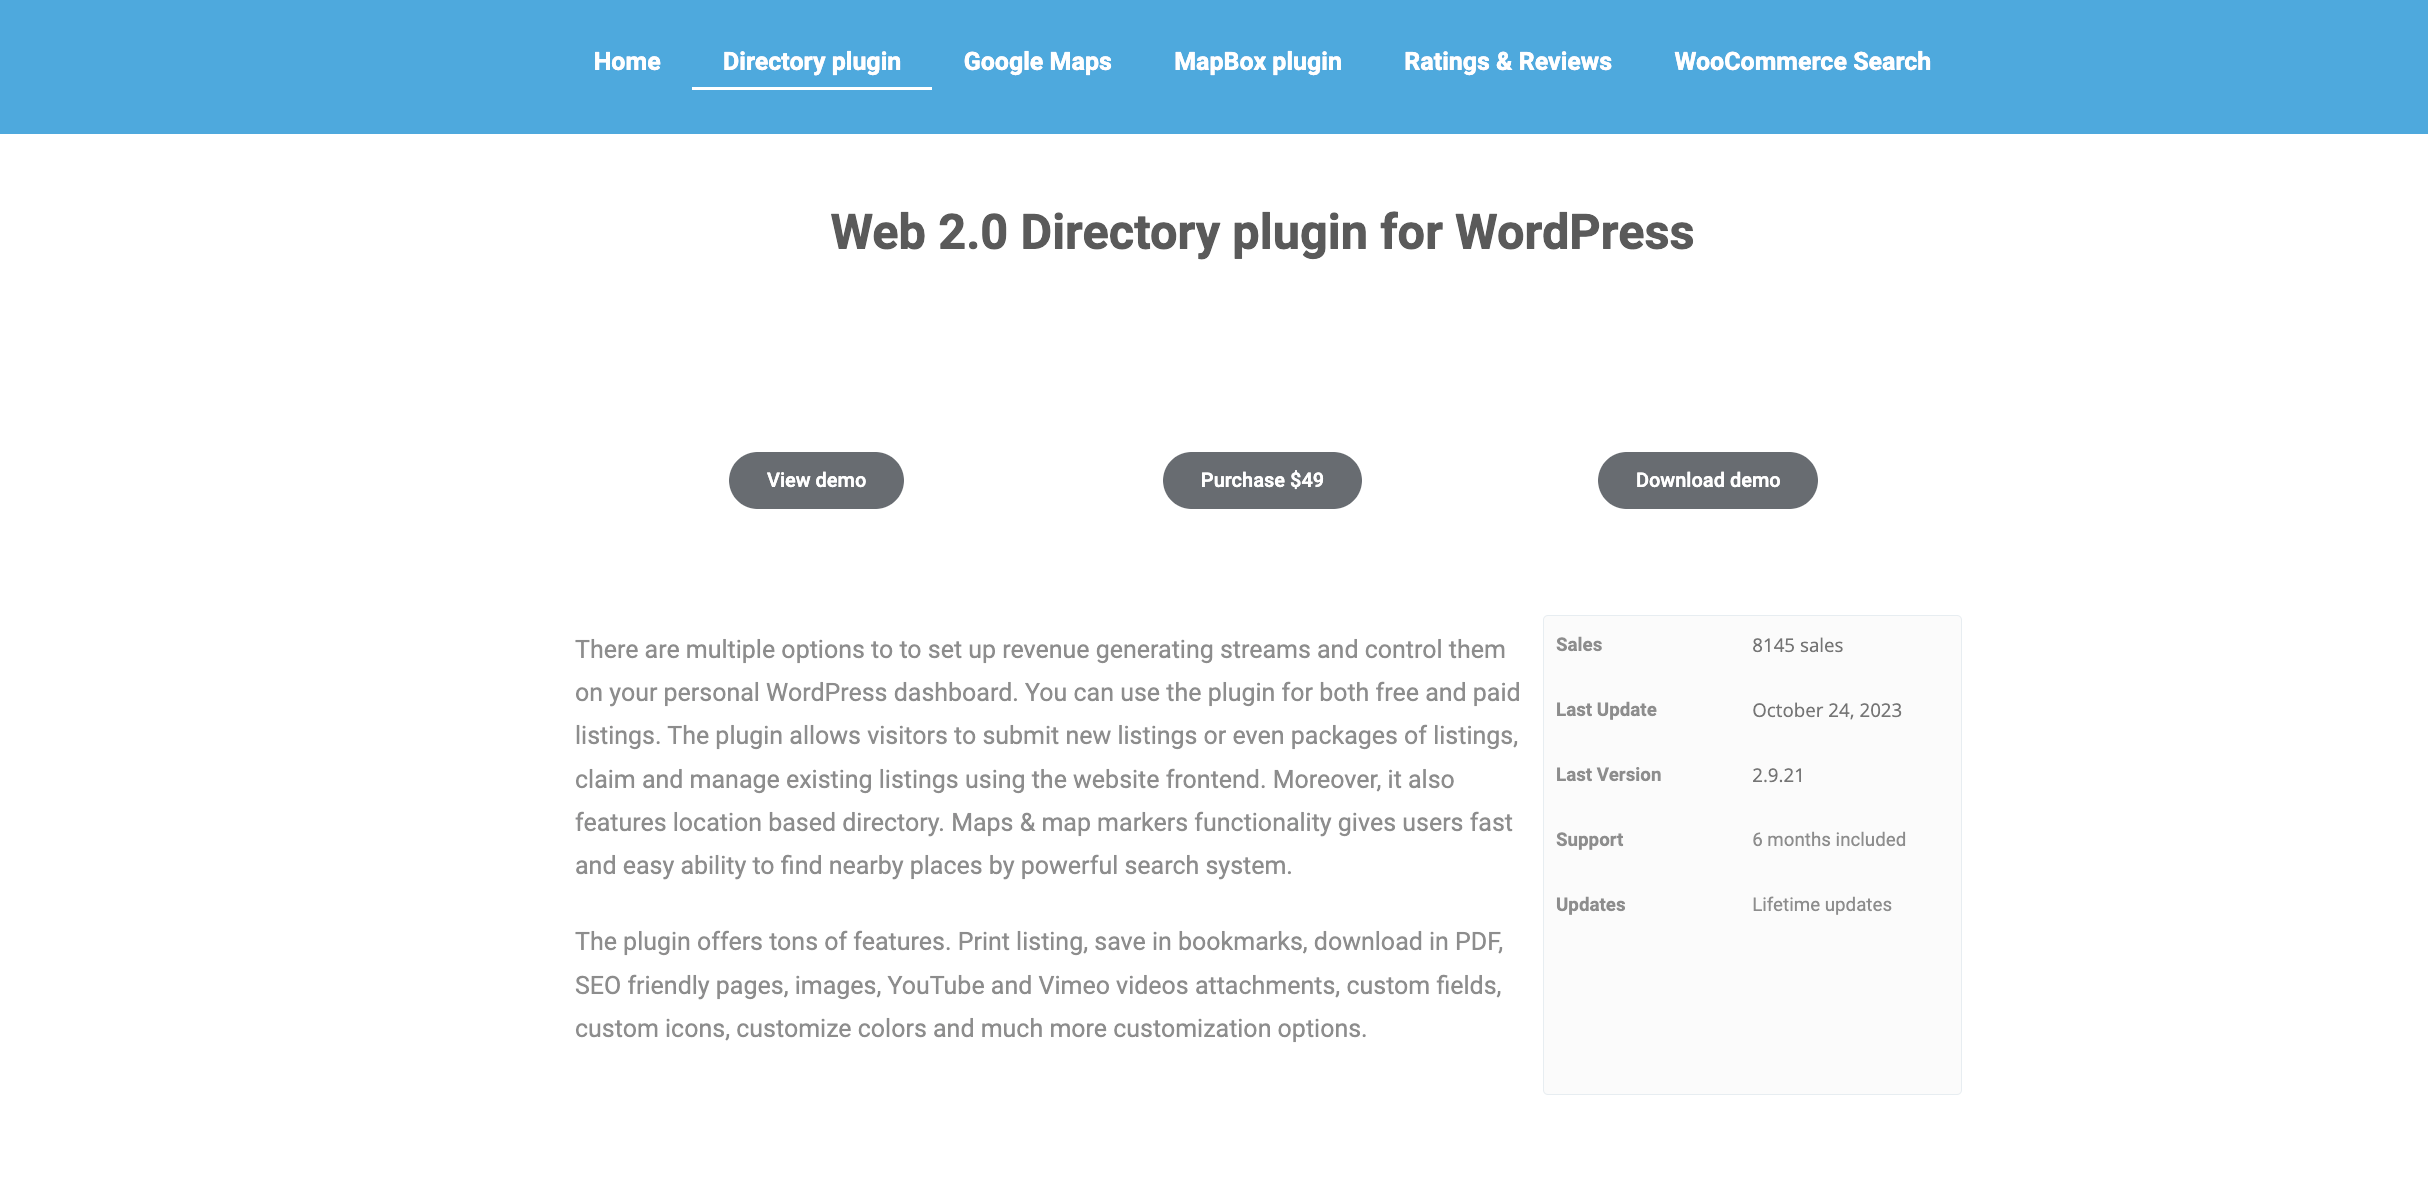
Web 2.0 Directory Plugin, available for $49, is an exceptional tool for building an online WordPress directory website.
It’s especially user-friendly, making it easy to convert any existing site into a fully-featured directory business website.
This plugin is versatile, and suitable for various purposes such as classifieds, events directories, car dealerships, restaurant guides, real estate portals, and more.
It’s a perfect solution for creating local directories, building Yellow Pages websites, or business listings with ease.
Key Takeaway: Web 2.0 Directory Plugin is a cost-effective, feature-rich plugin that enables the creation of diverse directory websites with minimal effort. It’s ideal for users seeking an easy-to-implement solution for transforming their WordPress site into a directory.
Pricing: $49
Relevant Features
- Versatile Directory Creation: Suitable for various types of directories, including classifieds, events, vehicles, restaurants, and more.
- Google Maps and Mapbox Integration: Enhances directory listings with map functionality, aiding in location-based searches.
- Front-end Submission and Dashboard: Allows users to submit and manage listings directly from the classified website front-end.
- Multiple Revenue Options: Supports both free and paid listings, with features like listing packages, claim management, and location-based directories.
- Advanced Customization: Offers SEO-friendly pages, multimedia attachments, custom fields, and icons, along with color customization.
- Payment Addons: Includes PayPal and Stripe for secure transactions.
- Ratings Addon: Incorporates a 5-star ratings system for listings.
- Search Forms Builder: Enables creation of detailed search forms, enhancing user navigation.
- CSV Import/Export Tool: Facilitates easy data management.
- 6 Months Support & Lifetime Updates: Ensures ongoing assistance and access to the latest features.
Pros
- Offers a wide range of directory types and extensive customization options.
- Integrates with Google Maps and Mapbox for enhanced location functionality.
- Provides front-end listing submission and user dashboard for easy management.
Cons
- The initial setup might require some time to familiarize with all the features.
- Advanced customization options could be overwhelming for beginners.
Elevate Your Directory Game with GeoDirectory
Wrapping up, you now have a treasure trove of insights on the top classified ad software plugins.
Each plugin brings something unique to the table, whether customization, user-friendliness, or diverse functionalities.
Remember, the right tool can transform your website into a dynamic, user-centric directory.
- Versatility in Directory Types: From local businesses to job boards.
- Monetization Opportunities: Leverage listings for revenue.
- User Engagement: Enhanced with responsive designs and interactive features.
- Ease of Setup: Simplifying directory creation for all skill levels.
- Integration and Customization: Tailoring to specific needs and preferences.
GeoDirectory, standing tall amongst its peers, is your ace in the hole.
It’s not just about adding listings; it’s about creating an engaging, searchable network that connects businesses with their audience.
If you’re looking to build a directory that’s not only functional but also scalable and SEO-optimized, GeoDirectory is the way to go. It’s the perfect fusion of simplicity, power, and flexibility to elevate your directory game.
Most “best business directory software” guides recommend SaaS platforms that charge $99 to $200 per month and host your business on their servers.
For some operators, that trade-off makes sense.
For most, it does not.
A directory website is a long-term asset.
The listings you collect, the SEO authority you build, the customers who pay for premium placements, all of it is your business equity.
Building that equity inside someone else’s SaaS platform means the equity belongs to them.
When the platform raises prices, changes terms, gets acquired, or shuts down, you have limited options.
This post is the honest comparison of the directory software market in 2026, the framework for separating long-term equity plays from short-term rental arrangements, and the case for why self-hosted (WordPress with a directory plugin) wins for the vast majority of operators serious about building a directory business.
The Real Question Is Self-Hosted vs SaaS
Before comparing specific products, the right question is architectural.
Do you want to own your directory, or rent it?
Self-Hosted (WordPress + a directory plugin)
You install WordPress on hosting you control, add a directory plugin, and your data, design, and customer relationships live on your server.
Pros: complete ownership of the site, the data, and the SEO authority you build. Predictable annual cost (typically $0 to $250 per year for the plugin, plus hosting). Full design and integration flexibility. No revenue cuts. No platform terms-of-service to comply with.
Cons: you handle hosting, security updates, and the small amount of technical maintenance WordPress requires (or you pay a developer or managed host to do it).
SaaS (eDirectory, Brilliant Directories, Wild Apricot, and similar)
You pay a monthly fee to a directory software vendor and your site runs on their infrastructure with their templates and their feature set.
Pros: faster initial setup. The vendor handles hosting, security, and updates. Built-in support team for non-technical questions.
Cons: monthly fees compound (a $149/month SaaS plan costs $1,788 per year, every year, forever). Your data lives on the vendor’s servers. Design and feature flexibility are capped at what the platform allows. Platform shutdowns or price increases force you to migrate the entire business.
The math gets dramatic over time.
Five years on eDirectory Basic at $99/month is $5,940.
Five years on GeoDirectory‘s unlimited-sites plan at $229/year is $1,145.
That is a $4,795 difference, before you account for the SaaS platform retaining your data and your customer relationships at the end of those five years.
What to Look For in Directory Software
The features that separate serious directory software from glorified contact lists:
- Front-end listing submission so business owners can add and manage their own listings without admin intervention
- Custom fields and custom post types for different listing categories (restaurants need different fields than law firms)
- Google Maps integration with location-aware search and filtering
- Multi-location support for businesses with multiple branches
- Paid listing monetization (one-time fees, recurring subscriptions, featured placements)
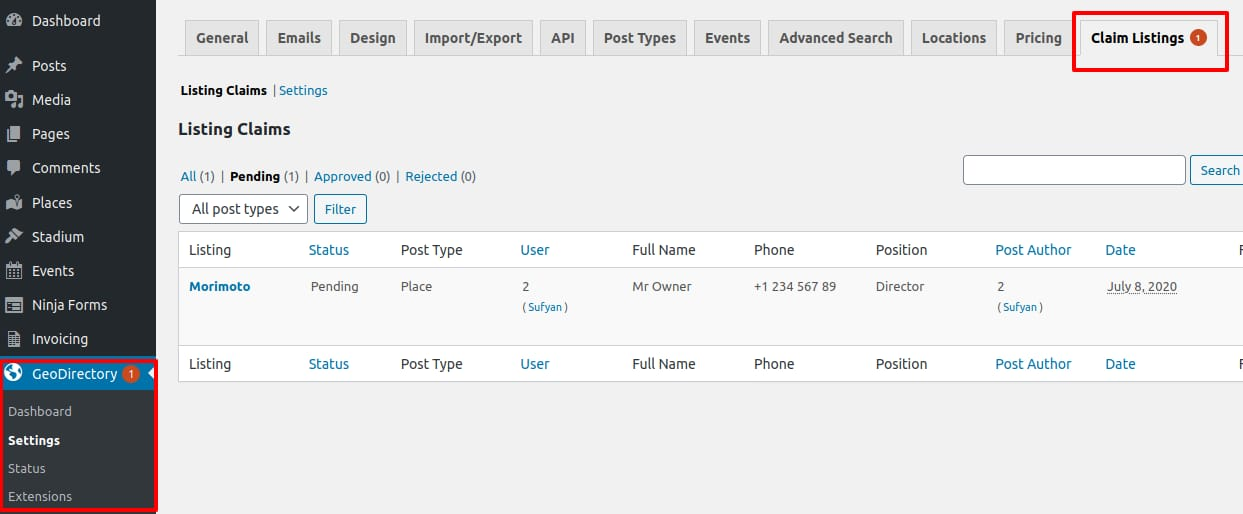
- Claim Listings workflow so business owners can take over and verify listings you pre-populate
- Review and rating system tied to listings
- SEO-friendly URLs, schema markup, and indexable category and location pages
- Page builder compatibility (Elementor, Bricks, Beaver Builder, Divi) for design flexibility
- Multilingual support for directories serving multiple language markets
- Event Manager capability for directories that combine listings with events
A platform missing more than two or three of these is built for a narrower use case than a serious directory operator needs.
The Comparison Table
Eight directory software options in 2026, mixed self-hosted and SaaS, sorted by total annual cost.
| Software | Type | Starting Price (Year 1) | Best For |
|---|---|---|---|
| Connections Business Directory | WordPress (self-hosted) | Free, or $59/year Pro | Simple contact directories |
| GeoDirectory | WordPress (self-hosted) | Free, or $139/year single site / $229/year unlimited | Serious directory businesses, multi-location, paid listings |
| Directorist | WordPress (self-hosted) | Free, or from $99/year Pro | Add-on-driven WordPress directory builds |
| HivePress | WordPress (self-hosted) | Free, or $169/year Premium bundle | Theme-led WordPress directory builds |
| MyListing | WordPress theme | $69 one-time + extensions | Designers who want a polished theme out of the box |
| Wild Apricot | SaaS | From $63/month ($756/year) | Membership organizations with directory needs |
| eDirectory | SaaS | From $99/month ($1,188/year) or $1,499 source license | SaaS-committed buyers |
| Brilliant Directories | SaaS | From $95/month ($1,140/year) | Professional associations |
The five self-hosted options together cost less per year than one month on most SaaS platforms.
That ratio holds every year, for the life of the directory.
The WordPress Self-Hosted Options
GeoDirectory
GeoDirectory is the free WordPress directory plugin built by our team at AyeCode Ltd, in continuous development since 2014.
It is the most architecturally serious WordPress directory plugin in the market, and that statement is grounded in two specific technical choices most competitors did not make.
First, GeoDirectory stores listing data in its own custom database tables (wp_geodir_gd_place_detail and wp_geodir_gd_{cpt-name}_detail for additional listing types) rather than overloading WordPress’s wp_postmeta table.
This sounds like a small detail.
It is the difference between a directory that stays fast at 50,000 listings and a directory that crawls to a halt at 5,000.
WordPress’s wp_postmeta table is not indexed for fast lookups across millions of custom fields.
Every directory plugin that stores listing data in wp_postmeta hits a performance wall as the directory grows.
Second, GeoDirectory has native compatibility with every major page builder.
Deep dynamic data integration with Bricks and Elementor PRO works without any bridge add-ons, which is rare in the WordPress directory plugin market.
The free core covers single and multi-location directories, custom post types for different listing categories, Google Maps integration with location-aware search, front-end submission forms, and SEO-friendly indexable archives.
The optional add-ons cover the monetization side: Pricing Manager for paid listing packages with subscriptions and free trials, Claim Listings for the verified-business workflow, Event Manager for events-plus-directory sites, and Reviews Manager for the rating system.
WPML is officially supported for multilingual directories (Polylang is not).
All current themes are free, including the official AyeTheme child themes built specifically for directory layouts.
Pricing for the paid add-on bundle: $139 per year for a single site or $229 per year for unlimited sites, with a $115 four-month option for short-term builds and a 30-day refund policy.
There is no lifetime license, by design.
For the team behind the plugin: 10 people at AyeCode Ltd, the same team that builds GetPaid (the payment engine GeoDirectory uses for paid listings) and UsersWP (the membership plugin many GeoDirectory operators pair it with for member-only directories).
Directorist
Directorist is the most shortlisted GeoDirectory alternative in the WordPress space.
Free core, with paid add-ons covering most of the same monetization features GeoDirectory bundles.
The architectural difference is that Directorist relies on WordPress’s standard wp_postmeta table for listing data, which limits long-term scalability on large directories.
Pricing starts around $99/year for the lowest paid tier and climbs based on add-on bundling.
For a head-to-head breakdown of where each plugin wins and loses, see our GeoDirectory vs Directorist comparison.
HivePress
HivePress is the theme-led WordPress directory option, with the theme tightly coupled to the plugin.
This gives polished defaults out of the box.
It also locks you into the theme-plugin combination, which limits flexibility if you want to switch designs or use a different theme down the road.
Premium bundle at $169/year covers the core monetization features.
For the full breakdown, see our GeoDirectory vs HivePress comparison.
MyListing
MyListing is a WordPress directory theme sold on ThemeForest for a one-time $69 fee, with optional extensions.
Visually polished and beginner-friendly to set up.
The trade-off is that ThemeForest themes have a different support model than dedicated directory plugin teams, and the one-time fee includes only six months of support and updates beyond which renewal is required.
Best for designers who want a pre-styled directory and are comfortable with the ThemeForest support model.
Connections Business Directory
Connections Business Directory is the lightest-weight WordPress directory plugin in this list.
Free core covers a basic searchable contact directory.
Pro tier from $59/year adds advanced search, categories, and integration extensions.
Best for sites that need a simple staff directory, member directory, or contact list rather than a monetized business directory.
The SaaS Directory Platforms
eDirectory
eDirectory has been around since 2003 and is the longest-running dedicated directory SaaS platform in the market.
Pricing tiers in 2026 are Basic at $99/month, Professional at $149/month, and Enterprise at $199/month, with a one-time Source License available at $1,499 for self-hosting the eDirectory codebase.
The feature set is comprehensive: integrated maps, multiple revenue streams (paid listings, banner ads, classifieds, deals), mobile app builder, and an open API.
The trade-offs are the recurring cost (the Basic plan is $1,188/year and never goes down), the dependency on eDirectory staying in business and not changing terms, and consistent user reports of slow support response times and performance issues at scale.
The Source License option mitigates the SaaS-dependency risk but introduces ongoing maintenance responsibility on legacy PHP infrastructure.
Brilliant Directories
Brilliant Directories is a SaaS directory platform positioned primarily for professional associations and membership organizations.
Pricing starts around $95/month and climbs based on features and add-ons.
The platform bundles hosting, security, support, and the directory software in one package, which removes the technical setup work but introduces the standard SaaS limitations: your members, listings, and revenue data live on Brilliant Directories servers, and you cannot easily migrate elsewhere.
User reviews note that essential add-ons can become costly and unpredictable on top of the base subscription.
Wild Apricot
Wild Apricot is membership management software with a member directory feature included.
Pricing scales with contact count, starting around $63/month for small organizations and climbing past $400/month for larger member bases.
Best for membership organizations whose primary need is member management and whose directory is a secondary feature, not for operators building a directory business as the primary asset.
The Hidden Cost of SaaS Directories
The recurring subscription fee is the visible cost.
The hidden costs show up at the moments you would least want them to.
The platform raises prices and you have no negotiating leverage because your data lives on their servers.
The platform changes its terms of service and your existing listings get reclassified into a tier that costs more.
The platform gets acquired and the new owner shifts strategic focus away from directory software toward whatever the parent company prioritizes.
The platform has an outage and your directory is down until they restore service.
The platform shuts down (it happens, even to large players) and you discover the data export tool gives you a CSV file that loses 80% of the structure your directory depended on.
You are building on rented land.
The convenience is real.
The dependency is also real, and it shows up as a hidden tax on your business equity for as long as the directory exists.
Where GeoDirectory Wins
GeoDirectory is built specifically for operators who treat their directory as a long-term business asset rather than a short-term experiment.
Three architectural decisions matter most:
Custom database tables that keep the directory fast as it scales past 10,000, 50,000, or 100,000 listings.
Native compatibility with every major page builder, so you can use Elementor, Bricks, Beaver Builder, or Divi without bridge add-ons (and switch later without rebuilding the directory).
Annual flat pricing instead of monthly recurring fees, with the unlimited-sites plan capped at $229/year regardless of how many directories you build.
The plugin pairs natively with the rest of the AyeCode stack when the directory needs to monetize.
GetPaid handles paid listings, recurring subscriptions, taxes, and invoicing through the Pricing Manager add-on.
UsersWP handles member registration, profiles, and content restriction for directories that combine listings with paid memberships (a common pattern for B2B directories where contact information sits behind a paywall).
The three plugins are built by the same team and tested as one integrated stack, which avoids the integration friction that comes with stitching together third-party plugins from different vendors.
The Practical Path
The best business directory software for most operators is the one that turns the directory into a long-term owned asset rather than a recurring rental.
For most operators, that is WordPress plus a serious directory plugin, hosted on your own infrastructure, with predictable annual costs and full ownership of the data and customer relationships.
The free GeoDirectory plugin handles single and multi-location directories, custom post types, Google Maps integration, front-end submissions, and SEO-friendly indexable archives out of the box.
The $139/year single-site bundle or $229/year unlimited-sites bundle adds the monetization layer: paid listings, claim listings, events, reviews.
Total cost over five years on the unlimited plan: $1,145.
Total cost over five years on the cheapest serious SaaS competitor (eDirectory Basic): $5,940.
For step-by-step guidance on building the directory itself, see our guide to how to create a directory website.
For head-to-head comparisons with the strongest WordPress alternatives, see GeoDirectory vs Directorist and GeoDirectory vs HivePress.
Final Thoughts
A directory website built well becomes a long-term asset.
A directory website built on a SaaS platform becomes a long-term liability, paid monthly, with the equity living on someone else’s servers.
Pick the architecture that lets you keep what you build.
The free GeoDirectory plugin was built for exactly this use case, has been in continuous development since 2014, and stays out of your way as the directory grows from a side project into a real business.
Start with the free version.
Add the monetization layer when the directory is earning enough to pay for itself.
Keep the rest of your business equity on infrastructure you actually own.

How to Monetize a Directory Website?
To monetize a directory website, follow these steps:
- Find an unexploited market niche.
- Create high-quality content for your database.
- Encourage and gather user-generated content through reviews.
- Master marketing and SEO to generate high traffic.
- Monetize your directory by:
- selling listings
- selling ads
- allowing business owners to claim and upgrade their listings
- using affiliate marketing
- Offering extra services to business owners (a highly underused technique)
- Work on improving your conversion rates.
Let’s dive into each step in detail. But first, why build a directory website in the first place?
Why Build an Online Directory?
Directory websites first appeared as a way to organize the internet itself, long before search engines were around.
They evolved from simple collections of links, like DMOZ, to today’s business listing directories with user reviews and specialized forums, such as TripAdvisor and Yelp.
One of the biggest initial challenges for directory publishers is finding effective ways to monetize their websites.
Now let’s explore the steps in detail on how to:
1) Find the right niche
2) Build the database
3) Encourage reviews
4) Boost visibility
5) Monetize your directory
6) Improve conversion rates
Lastly, we’ll share an Extra Tip on how to make money with business directory websites.
1 Find the right niche

The best way to make money online by building a directory website is to identify and capitalize on a profitable niche.
Key Qualities of a Profitable Niche
- Strong traffic potential
- Low to moderate competition
- High suggested ad bid rates
To find viable keywords that meet these criteria, use the free Google Adwords Keyword Planner.
This tool lets you search for keywords based on phrases, websites, or categories, giving you valuable insights into monthly search volume, competition level, and suggested ad bids.
When you find a niche with the key qualities mentioned earlier, you’re on the right path to earning online.
First and foremost, focus on creating value within that niche. Start small, aim high, and move quickly.
Tips for Building a Successful Directory
- If your directory is broad or covers high-competition categories, consider focusing on a specific geographic area you know well, potentially offering concierge services.
- A global directory can succeed if it’s highly specialized in an emerging market with minimal keywords.
To stand out, consider creative alternatives to overly competitive niches like hotels, restaurants, or real estate. Here are some ideas:
- Luxury Hotels with breathtaking views
- Directory of Restaurants specializing in raw food
- Doctors who prescribe a specific treatment
- Medical marijuana-friendly rentals (a potential niche in some U.S. states)
- Lawyers Directory specializing in niche areas, like LGBTQ+ divorce law
Choosing a unique, less-explored niche is often the key to a profitable directory.
Gay Divorce and Lesbian Lawyers, for example, are niches with the mentioned characteristics.
If, instead, you try to build a global directory with thousands of locations, categories, and custom fields, you’ll end up working on something too large to manage without a big team and will most likely struggle to succeed.
2 Build the database

Should I Build My Database or Wait for Users?
Is scraping an option?
These are common questions from our customers.
Don’t rely on visitors to build your database with user-generated content.
Your directory won’t grow quickly enough that way.
Start by adding listings yourself, and ask friends and colleagues to help with this task.
Avoid scraping.
The only information you can legally scrape includes basic details like business names, addresses, geo-coordinates, phone numbers, website links, and email addresses.
Everything else is likely used on other websites, making it ineffective for your goals.
Sure, with the rise of AI, you can generate “original” content. However, if you’re publishing content on topics you have no real experience with, it’s unlikely to provide genuine value.
Want Google to rank your listings? Ensure they contain richer content than other pages already ranking for similar topics.
This means better images, detailed business descriptions, services offered, current promotions, and numerous reviews.
Every piece of content should be original for the best results.
3 Encourage reviews
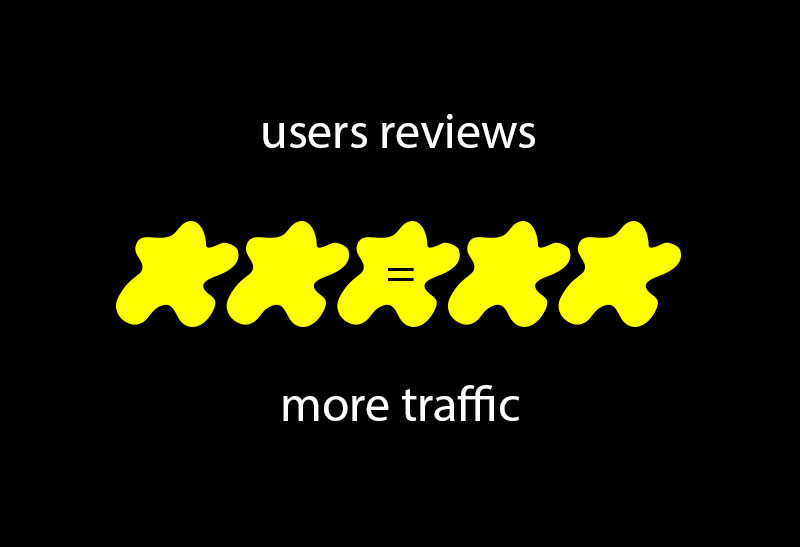
A large number of reviews provides a wealth of original content that both your visitors and Google will appreciate.
Getting those first user-generated reviews is often the toughest hurdle.
Start by personally reviewing every listing you’re familiar with in your directory.
Inviting people in your network to contribute their own reviews can help you cover more listings quickly.
Users are more likely to submit reviews in directories where they feel part of a community.
Adding a forum can be highly effective, but it requires active participation from you or someone you trust to build and nurture the community.
Here are some practical ways to encourage users to leave reviews on your directory:
How to Incentivize User Reviews for Your Directory
- Seed Initial Reviews Yourself
Start by personally reviewing familiar listings, and encourage friends or colleagues to contribute their own reviews. This will create a foundation and make the directory appear active. - Offer Small Rewards for Reviews
Provide incentives like a chance to win a monthly prize or other small rewards to motivate users. Even simple recognition, such as “Top Contributor” badges, can encourage users to participate. - Simplify the Review Process
Make it as easy as possible for users to leave reviews. A streamlined, intuitive process increases users’ likelihood of sharing their feedback. - Send Friendly Reminders
Send follow-up emails or notifications to users after interacting with listings, reminding them to leave a review. This gentle prompt can help increase participation. - Foster a Sense of Community
Users are more inclined to leave reviews in a directory where they feel part of a community. Consider adding a forum or discussion section where users can interact or feature top reviewers on your site. This not only builds community but also encourages others to contribute. - Encourage Honest, Quality Feedback
Let users know you value genuine reviews. Encouraging honest feedback helps build trust in your directory, making it more appealing to visitors and boosting credibility.
These strategies help directory publishers gather valuable, high-quality reviews, enhancing the site’s credibility and appeal to users and search engines.
4 Boost visibility
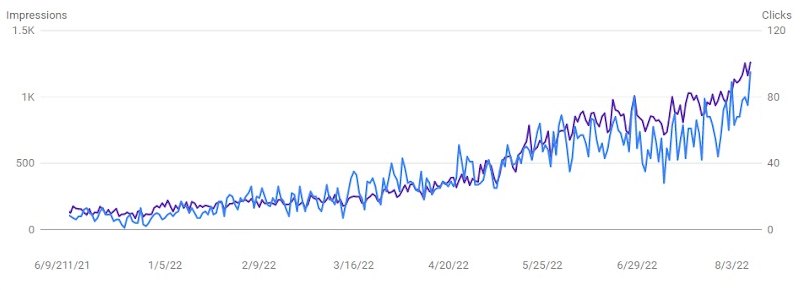
This is perhaps the most critical point.
The formula for making money online consistently relies on strong SEO and social media marketing.
If your directory website isn’t ranking well on Google for your niche, or you don’t have a substantial social media following, potential customers won’t see the value in paying to submit listings.
Without the ability to bring them traffic, and ideally, sales, you won’t appear valuable to them.
To succeed, you need to become proficient in SEO and establish authority in your niche.
The more traffic you bring to your site, the easier it will be to monetize your business directory or any online venture.
Focus on learning the essentials of SEO, especially content creation and white-hat link-building techniques.
Quality backlinks and excellent content are still the top factors in dominating Google search results.
Simply installing an SEO plugin isn’t enough; it’s just the first step.
Some niches allow you to publish shareable content, like stunning pictures and videos.
Leverage this to grow a community on social networks as well.
Finally, explore reputable SEO blogs that offer concepts and real-life examples to deepen your understanding and apply effective techniques to your directory website.
We have a guide on how to do effective SEO for Directory Website, start from there.
There are countless SEO blogs out there: The Search Engine Journal, Yoast.com, detailed.com, and Backlinko are just few examples.
5 Monetize your directory

There are several ways to generate revenue from a directory website.
The most common methods include:
- Selling Featured Listings
Offer premium listing options with extra features compared to free listings. Premium listings could allow for more photos, website links, phone numbers, social media links, inclusion in multiple categories, extended descriptions, and additional custom fields. - Selling Ad Space
Monetize your site by selling ad placements through networks like Google AdSense (PPC) or BuySellAds (impression-based). You can also sell ad space directly through your website. - Claim Listings and Featured Rankings for Business Owners
Allow business owners to claim their listings for a fee, giving them access to premium features and higher visibility, such as top positions in category archives, search pages, and sidebar features. Premium listings can also be ad-free for added value. - Affiliate Marketing
Use affiliate links within the directory to earn commissions on products or services that complement the businesses listed. - Sell memberships
Some directories have such valuable listing data that the data itself becomes the product. They may show basic profiles for free, but charge visitors to access premium details like contact information, pricing, supplier lists, revenue estimates, owner details, investment data, or advanced filters. A real estate directory could lock rental yield data or off-market opportunities behind a membership. A B2B directory could charge for verified leads, phone numbers, and decision-maker contacts. At that point, the directory becomes a full membership website, where users pay to access premium listing data. - Offering Extra Services
Use the directory as a lead generator for additional services, such as marketing, web design, and social media management. Many businesses in your directory may need help with tasks like maintaining social media accounts, graphic design, photography, or even building a complete website.
Types of Listings
Your directory can include various types of listings, such as business listings, event listings, job listings, classified, or real estate listings.
The main difference lies in the custom fields and search options available.
You can charge a one-time fee for limited-time listings or set up recurring subscriptions that renew automatically until canceled by the publisher.
This approach essentially creates a subscription-based business model for your directory.
Additional Revenue Streams
- Blog Content
Maintaining a blog alongside your directory can help attract more traffic and provides additional space for ads and affiliate links, boosting revenue.
By offering these options, you diversify your income streams, making it easier to build a profitable directory website.
Different WordPress directory plugins handle these monetization paths in very different ways. We documented the gaps in two recent comparisons: GeoDirectory vs Directorist and the HivePress teardown. Both walk through pricing tiers, claim listings, featured placement, pay per lead, and the booking models each plugin supports.
6 Improve your conversion rates

Converting Free Listings into Paid Listings
Converting free listings to paid ones can be challenging, especially in the beginning.
Here’s how to approach it effectively:
- Start with Reasonable Prices
Don’t aim for high prices initially; focus on building a base of featured listings. Setting competitive prices helps you attract your first paying customers. - Use Telemarketing
According to our statistics, telemarketing still has the highest conversion rate. Prepare a script, and aim to speak directly with the business owner or a top manager. - Present the Value
Introduce your directory and let them know their business is already listed for free. If the listing has any reviews, mention this to add value. Explain how a premium listing can boost their business with greater visibility, backlinks, more traffic, and potential new clients. Close the pitch by asking if they’d like to upgrade to a premium listing. - Expect Persistence
Getting one “yes” out of ten calls is a good start. Stay persistent, and don’t get discouraged if conversion takes time. - Offer Free Featured Listings to Market Leaders
Providing free premium listings to top businesses can encourage competitors to see the value of being listed on your site and motivate them to pay for the same benefits. - Address Common Questions
Be prepared to answer two key questions from potential customers:
- “Who are you?”
Establishing a connection can make a significant difference. If you know someone in common or can relate in any way, mention it (but be genuine). Even a small connection can increase trust. - “Who else has signed up?”
Offering free listings to well-known businesses allows you to confidently say, “All the major [hotels, restaurants, etc.] are already listed,” which builds credibility.
These steps can help convert free listings to paid ones, build trust with potential customers, and set your directory up for long-term success.
Extra Tip on how to make money with a business directory website
NAP Citations for Local SEO
If you don’t have a network to help influence business owners to buy premium listings or can’t find a niche where you can add value, consider selling NAP citation submissions for local SEO.
NAP stands for Name, Address, and Phone, critical components for local SEO, much like links are for organic SEO.
NAP citations are precisely what business directory websites provide.
Each listing on sites like Yelp, TripAdvisor, or even a Facebook page counts as a single NAP citation.
The key is to ensure that the business’s address and phone number are formatted identically to their Google My Business (GMB) listing.
When competing with others of similar review count and GMB quality (description, images, videos, offers, etc.), having a higher number and quality of NAP citations can make the difference in ranking within Google’s Map Pack.
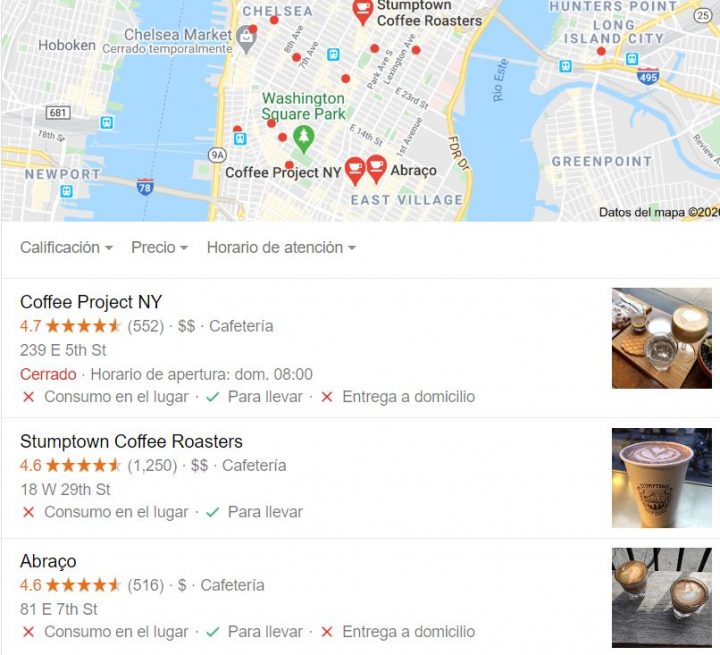
Appearing in the Google Map Pack can be crucial for local businesses, making NAP citations incredibly valuable.
How to Sell NAP Citations
- Build a Network of Local Directories
Start by creating around 20 high-quality local directories. Ensure they’re not all hosted on the same server, and aim for a Domain Authority (DA) of 20 or higher with good loading speeds. You can check DA on MOZ.com, and for an alternative metric, you can check Domain Rating on Ahrefs.com. - Optimize Your Directories
Ensure each directory has enough backlinks and quality content to maintain a respectable DA. The more valuable and well-structured your directories, the better they’ll serve as trusted NAP citation sources. - Target Key Directories
Identify the top 10-15 directories for the area you want to target, including well-known sites like Yelp, TripAdvisor, Yellow Pages, and HotFrog. This mix of large and mid-sized directories strengthens your NAP citation offerings. - Offer NAP Citation Packages
Create a page on your site where you offer to submit business listings to your directory network and other valuable directories, providing up to 40 NAP citations. This can be easily managed with the GetPaid plugin. - Set a Competitive Price
Charge between $50 and $99 per campaign for this service. You could earn between $18k and $35k annually with minimal daily effort with just one sale per day.
By offering NAP citation services, you provide a valuable SEO tool for local businesses while building a steady income stream from your directory network.
If you need an example, https://fatjoe.com/local-business-citations/
To Wrap it Up
Building a successful online directory website takes research, dedication, and patience. It may be challenging initially, especially if you’re starting from scratch, but the rewards can be well worth the effort.
We hope you found this article helpful. If so, please share it with others!
If you have questions about this topic or suggestions for improving this post, please leave a comment below!

In this post , we will discuss:
- The Importance of Event Listing Websites for an Effective Promotion
- Promotion Strategies
- What are popular Events Promotion Strategies?
- Top Event Listing Websites to Reach a Broader Audience
- Alternative Websites for Listing Events to Boost Promotion
- Limitations of Traditional Event Listing Websites
- Creating Your Event Listing Website
- Introducing the GeoDirectory Events Add-On
- GeoDirectory Events Premium Features
The Importance of Event Listing Websites for an Effective Promotion
Promoting an event through Event Listing Websites is more important than ever in today’s busy world.
With so many options, such as concerts, workshops, webinars, and conferences, it’s tough to stand out.
The market is crowded, and people have endless choices, so it’s easy for your event to get overlooked.
Limited visibility, competition, and information overload can hurt attendance.
Recognizing and addressing these challenges is key to hosting a successful event.
Promotion Strategies
One of the best ways to stand out is through multi-platform promotion.
Relying on just one channel limits your reach and may not connect with your entire target audience.
People find events in different ways.
Some through social media, others through event listing sites or local boards.
Promoting across multiple platforms widens your reach and increases your chances of attracting more attendees.
This approach boosts visibility and keeps your event in your audience’s mind.
In today’s media landscape, using multiple platforms isn’t just helpful, it’s essential for maximizing your event’s impact.
What are popular Events Promotion Strategies?
Leveraging as many popular Event Listing portals as possible is a strategy I highly recommend.
Event Listing platforms like Eventbrite, Facebook Events, and Meetup, to name a few, have large user bases that provide immediate exposure.
Listing your event on these sites taps into their audiences and uses their built-in marketing tools.
This increases your chances of reaching attendees who might not have found your event otherwise, saving time and resources.
These Event Listing sites offer features like targeted ads, ticketing, and community engagement tools, boosting your promotion without needing a big investment.
While popular event listing sites are valuable, creating your own event listing website offers more control and, possibly, monetization options.
It allows you to customize branding, user experience, and content for your audience.
You can generate extra revenue by allowing others to promote their event on your site, charging for premium listings, selling ads, or offering subscriptions.
Plus, it helps build a community, encouraging repeat attendance.
Combining the reach of event listing websites with the control of your own event listing website creates a powerful strategy for both exposure and profitability.
Top Event Listing Websites to Reach a Broader Audience
1. Eventbrite
Eventbrite is a top event management and ticketing platform widely used by organizers and attendees worldwide.
It supports events of all sizes, from local gatherings to major conferences.
Its popularity and user-friendly design make it a go-to choice for reaching a broad audience and boosting event visibility.
Eventbrite’s strength is in its powerful ticketing and event management tools.
Organizers can easily create event pages with customizable templates, detailed descriptions, and multimedia.
The platform supports various ticket types, like free or paid tickets, reserved seating, early-bird specials, and discount codes, offering flexible pricing.
Eventbrite’s analytics track sales, attendee demographics, and marketing performance, helping organizers make data-driven decisions.
Integrating social media and email marketing tools makes promotion easier and more effective.
Eventbrite Pricing
Eventbrite is free to use to host free events, making it a great option if you’re not charging for tickets.
However, Eventbrite charges a fee for paid events based on the ticket price and payment processing.
The fees can be passed on to the attendees or absorbed by the organizer, giving you flexibility in managing costs.
This pricing structure makes it accessible for both small community events and larger, ticketed gatherings, with the added benefit of Eventbrite’s built-in promotional tools and ticketing services.
2. Facebook Events

Facebook Events is a powerful tool for promoting your event, offering access to a massive, diverse audience.
Creating an event taps into your network, encouraging attendees to share it and expanding your reach.
Social media’s interactive features allow for real-time engagement through updates, questions, and event discussions, building excitement and community.
A key advantage is Facebook’s targeted advertising, letting you reach specific audiences based on demographics, interests, and location.
You can optimize your marketing with customized ads and use analytics to track performance and adjust strategies.
Combining organic reach with targeted ads, Facebook Events helps boost visibility and attract the right attendees.
Facebook Events Pricing
Facebook Events offers a free way to create and promote your events.
If you want to boost your event’s visibility even more, you can set up a paid ad campaign to reach a broader audience.
3. Meetup
Meetup is designed to build communities around shared interests, connecting people in real life for activities or learning.
Organizers create groups where members regularly interact, fostering a sense of belonging and lasting relationships.
It’s ideal for recurring events, like workshops or hobby groups, and attracts people eager to join based on their interests.
Meetup’s algorithms recommend your group to users with similar passions, helping it grow over time.
This makes it an excellent tool for reaching a targeted audience and building a loyal following.
Meetup Pricing
Meetup offers a free version for creating and listing events, making it easy to start and grow a community.
However, for organizers looking for more advanced tools, Meetup Pro is available as a paid option.
Meetup Pro provides additional features like enhanced analytics, custom branding, and the ability to manage multiple groups under one account.
This allows for more control and scalability, making it a good choice for larger organizations or businesses looking to foster communities across different locations.
The free version is perfect for smaller, local groups, while Meetup Pro caters to those needing more robust event management features.
4. AllEvents.in

AllEvents.in is a global platform for discovering and promoting events across various categories and locations.
It lists millions of events, from concerts and festivals to webinars and conferences, allowing users to find events that match their interests.
Its easy-to-navigate interface lets users filter by category, date, and location, making event discovery simple.
AllEvents.in’s global reach gives organizers access to a wide audience.
The platform provides tools for creating detailed event pages with descriptions, images, and ticketing options.
Users can engage by showing interest, sharing events, or adding them to calendars, with personalized recommendations increasing engagement and attendance.
AllEvents.in Pricing
AllEvents.in provides free event listings, making it accessible for organizers with any budget.
Premium options are available for those wanting to boost their event’s visibility, offering additional promotional features to reach a wider audience.
5. Local Online Calendars and Forums

Tapping into local networks is a great way to promote your event, especially when targeting a specific area.
Local online calendars and forums help you reach people interested in nearby events, boosting attendance and fostering community support.
Community boards and local media outlets like newspapers, radio, and TV often have free event listings.
Platforms like Nextdoor, local Facebook groups, and community-specific Reddit threads allow for personal engagement with potential attendees.
Local blogs and influencers can also help spread the word.
These resources ensure you connect with a local audience that values community events.
Alternative Websites for Listing Events to Boost Promotion
While the following are not traditional event listing websites, they can be just as effective, if not more so, in 2024 for promoting your event to an audience that wasn’t necessarily looking for one.
This approach is a form of outbound marketing, as it involves proactively putting your event in front of potential attendees rather than waiting for them to find it on their own.
1. Instagram
Instagram is a powerful platform for event promotion, especially among Millennials who use it to discover events.
Its visual design makes it perfect for showcasing your event with photos, videos, and behind-the-scenes content, creating excitement and drawing attention.
Instagram offers targeted advertising tools to reach specific demographics like age, interests, and location, helping you connect with your ideal audience.
Features like Stories, Reels, and IGTV keep your audience engaged, while hashtags, geotagging, and influencer partnerships can expand your reach.
Interactive elements like polls and countdowns further boost engagement and build excitement leading up to your event.
Instagram Pricing
Instagram is free to use for event promotion, allowing you to share posts, stories, reels, and more to engage your audience.
However, for greater reach and targeting, Instagram offers paid advertising options.
With Instagram Ads, you can promote your event to specific demographics based on factors like age, location, interests, and behaviors.
2. Tik Tok
TikTok is a powerful platform for reaching Gen Z, emphasizing short, engaging videos.
It allows event organizers to capture attention creatively, and its algorithm can make content go viral, even without a large following..
To promote your event, utilize popular trends, challenges, and hashtags.
Share behind-the-scenes content or interactive challenges to build excitement and encourage user participation.
Like on Instagram, collaborating with influencers can boost your event’s visibility, as their followers trust their recommendations.
TikTok’s targeted ads also help you reach specific demographics based on age, interests, and location.
Leveraging these features can create buzz and drive attendance.
Tik Tok Pricing
TikTok is free for sharing event-related content. It lets you use trends, challenges, and hashtags to promote your event organically.
For expanded reach, TikTok offers paid advertising options like In-Feed ads and Branded Hashtag Challenges, which allow you to target specific audiences based on demographics, interests, and behaviors.
Depending on your promotional goals, these paid options can increase visibility and engagement for your event.
3. YouTube
YouTube is an excellent platform for event promotion, offering access to over two billion monthly users.
Its video content lets you showcase your event through highlight reels, speaker intros, behind-the-scenes clips, or trailers, giving potential attendees a real feel for what to expect.
A major benefit is YouTube’s search and recommendation algorithms, which boost your content’s visibility over time.
Optimizing videos with keywords, thumbnails, and descriptions helps you reach a broader audience. YouTube Live also enables real-time engagement through live streams or Q&A sessions.
Like with Instagram and TikTok, collaborating with YouTube creators can further expand your event’s reach.
Using YouTube’s features can generate excitement and draw in attendees.
YouTube Pricing
YouTube allows you to promote events for free by uploading content like trailers, highlight reels, or behind-the-scenes footage.
For those looking to expand their reach, YouTube offers paid advertising options such as TrueView ads, which allow you to target specific audiences based on demographics, interests, and search habits.
Limitations of Traditional Event Listing Websites
High Competition
Traditional event listing websites are convenient and provide a built-in audience, but they come with challenges.
One of the biggest issues is the competition.
These websites are packed with event listings, all fighting for the same audience’s attention.
With so many event listings, it’s tough for your event to stand out unless you invest extra in promotions or featured spots.
This overcrowding can limit your event’s visibility, making it harder to draw in attendees.
Limited Customization and Branding
Another drawback is the limited customization and branding options.
Most traditional event listing websites offer a standard event listing template, which doesn’t allow much room for personalization.
This makes it harder to showcase your brand’s identity or create a unique experience that connects with your target audience.
As a result, your event might come across as generic, affecting how potential attendees perceive it.
Fees and Revenue Sharing
Fees and revenue sharing are another issue.
Many platforms charge fees for listing events or take a cut from ticket sales.
For smaller events or organizations with limited budgets, these costs can quickly add up, cutting into profits and limiting what can be reinvested in further promotion.
Dependency on Platform Policies
Finally, there’s the issue of relying on platform policies.
You’re subject to their rules, algorithms, and terms of service, which can change without warning.
These changes can directly affect your event’s visibility and reach.
For example, if a platform shifts its algorithm to favor certain events, your listing could drop in search results.
This lack of control over your event’s promotion can create unexpected challenges for your marketing strategy.
Creating Your Event Listing Website
Building your event listing website brings a lot of advantages to your event promotion.
Full control over content, design and the ability to build a dedicated audience
The biggest perk is having complete control over both content and design.
Unlike traditional platforms that limit customization, your site lets you shape everything to match your brand’s identity and vision.
This allows you to create a user experience that truly connects with your audience, making your events more engaging and memorable.
You’re not just “renting” an audience from third-party platforms.
You’re building your own community.
This allows you to foster stronger relationships, encourage repeat visits, and build a loyal following over time that nobody can take away from you.
Encouraging Community Engagement
Another big advantage is boosting community engagement by letting others publish events on your website.
By allowing user-generated content, you enrich the variety of events listed and increase site traffic as more people visit to post and discover events.
This collaborative approach turns your site into a central hub for events in your niche or local area, creating a sense of community among users.
Increased engagement can lead to more interaction, networking opportunities, and a livelier, more vibrant platform.
Opportunities for extra Monetization
Finally, building your event listing site opens up several monetization opportunities.
You can charge for event listings or offer premium features to organizers looking for more visibility or special tools.
Selling advertising space is another way to generate income, allowing businesses to reach your audience while boosting your revenue.
These strategies provide extra income and give you the resources to improve and grow your platform.
Plus, controlling how you monetize ensures that it aligns with your brand values and enhances the user experience rather than taking away from it.
If your event listing website takes off, it could become your primary business, with organizing events becoming more of a secondary pursuit or a personal passion.
Introducing the GeoDirectory Events Add-On
If you want to enhance your event promotion and create your personal Event Listing Website for free, the GeoDirectory Events plugin for WordPress offers a powerful solution.
GeoDirectory turns your WordPress site into a complete directory website, allowing you to create a global or regional business directory.
With the Events Add-On, you can easily integrate event listings into your directory, giving you complete control over how events are displayed and managed on your website.
The Events Add-On features user-friendly event submission forms, making adding events simple for you and your users.
For basic search functionality, users can search by event name and dates.
GeoDirectory Events Premium Features
Advanced Search
However, the Advanced Search Add-On is required for advanced search filters like categories or custom event attributes.
This ensures a smooth user experience, allowing visitors to find the events that matter to them easily.
Venue Management (custom post types)
In addition to managing events, GeoDirectory supports venue management.
The custom post-type add-on lets you associate events with specific venues, complete with detailed information and maps.
Event Listing Themes
If you start from scratch, GeoDirectory provides a new elegant event directory theme.
However, it can be integrated seamlessly with your existing website’s theme, ensuring that event listings align with your brand’s look and feel.
Monetization Features
For monetization, the Premium Pricing Manager add-on allows you to sell premium or featured event listings or charge venue owners for business listings.
The Events Ticket Marketplace lets you sell tickets without commission fees (except credit card fees) while allowing you to charge third-party organizers for promoting their events.
The Advertising Add-On allows you to display ads across your site beyond the event directory pages, providing additional revenue streams.
Compared to traditional event listing platforms, GeoDirectory offers significant advantages, such as complete control over your site’s design and branding.
No commission fees on ticket sales or listings.
This allows you to keep 100% of your revenue while opening up new monetization options and encouraging community engagement.
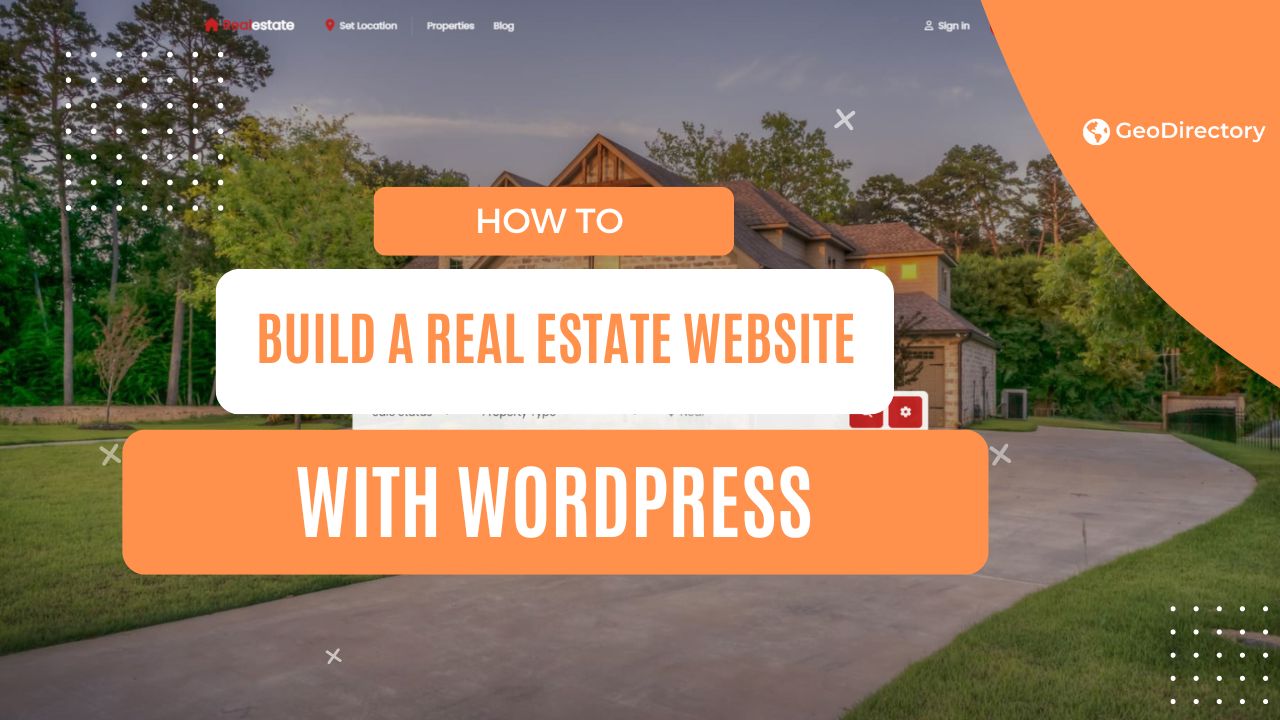
Most “how to build a real estate website” guides eventually push you toward Zillow Premier Agent or Realtor.com Connections.
The pitch is convenient: pay a monthly fee, get placed at the top of buyer searches in your ZIP code, watch the leads roll in.
The math gets ugly fast.
Zillow Premier Agent runs anywhere from $200/month in soft markets to $1,500+/month for competitive ZIP codes, with no guarantee of lead quality.
Realtor.com charges similar subscription fees plus per-lead pricing.
HomeLight takes 25-30% of your commission on every closed deal that comes through their referral network.
Five years of paying $500/month to Zillow is $30,000 in lead-generation fees, with zero equity to show for it.
You can build your own real estate website for a fraction of that, own the leads it generates, and keep the SEO authority you build over time.
This post walks through the practical build, step by step, using the free GeoDirectory plugin and the free Real Estate Listings theme.
The Real Cost of Renting Leads
The SaaS lead-generation platforms are profitable for one reason: the agents who use them are paying rent on visibility they could build themselves.
Every search a buyer runs on Zillow benefits Zillow’s domain authority, not yours.
Every contact form a buyer fills out on Realtor.com feeds Realtor.com’s database, not your CRM.
Every closed deal through HomeLight pays HomeLight a slice of your commission, forever.
The trade-off works for some agents: faster initial leads, no technical setup, no SEO learning curve.
The trade-off stops working once your annual lead-platform spend reaches the cost of building and maintaining your own website (typically year one or two for any agent doing meaningful volume).
This is the same architectural argument we apply to business directory software more broadly: own the asset, not the rental.
What You Get From Owning Your Real Estate Website
A real estate website built on WordPress with a serious directory plugin gives you:
- Your own searchable property database, with filtering by location, price, bedrooms, property type, and any custom fields you want
- Google Maps integration so buyers can browse listings on an interactive map
- Lead capture forms tied to your own CRM (not a third-party platform’s)
- SEO authority that accumulates over years, ranking your listings in organic search
- Open house dates, virtual tours, mortgage calculators, walk scores, and energy ratings on every listing page
- Multilingual support if you serve international buyers
- Full ownership of customer relationships, listing data, and marketing channels
The platform-rented version of this same setup costs $300 to $1,500 per month on Zillow Premier Agent.
The self-hosted version costs $0 to $229 per year for the plugin (depending on whether you need the paid add-ons), plus hosting and a domain.
What You Actually Need
Three pieces of software, plus a domain and hosting.
- WordPress, the free content management system that powers 43% of the web
- The free Real Estate Listings theme, built on the BlockStrap framework and pre-configured for real estate sites
- The free GeoDirectory plugin and its free Real Estate Directory add-on, which together handle the listings, search, maps, and real estate-specific features
Total cost for the free stack: $0 in software, plus $5-15/month for WordPress hosting and $10-15/year for a domain.
The paid GeoDirectory Membership ($139/year single site, $229/year unlimited sites) adds the optional add-ons most production real estate sites end up wanting: Pricing Manager for paid listing packages, Claim Listings for verified agent profiles, Reviews Manager for property and agent ratings, Event Manager for open house calendars.
For the full breakdown of why GeoDirectory beats SaaS platforms architecturally, see our best business directory software guide.
For a comparison against other WordPress real estate plugins specifically, see our best real estate listing plugins for WordPress.
Step 1: Install AyeCode Connect
AyeCode Connect is the free helper plugin that imports pre-built demos directly into your WordPress site.
Navigate to Plugins → Add New in your WordPress admin and search for AyeCode Connect.

Click Install, then Activate.
An AyeCode menu item appears in the WordPress sidebar.
Click it, then click the Connect Site button to link your WordPress site to the AyeCode demo library.
Step 2: Import the Real Estate Demo
From the AyeCode Connect interface, you can import a pre-built demo to skip the layout work entirely.
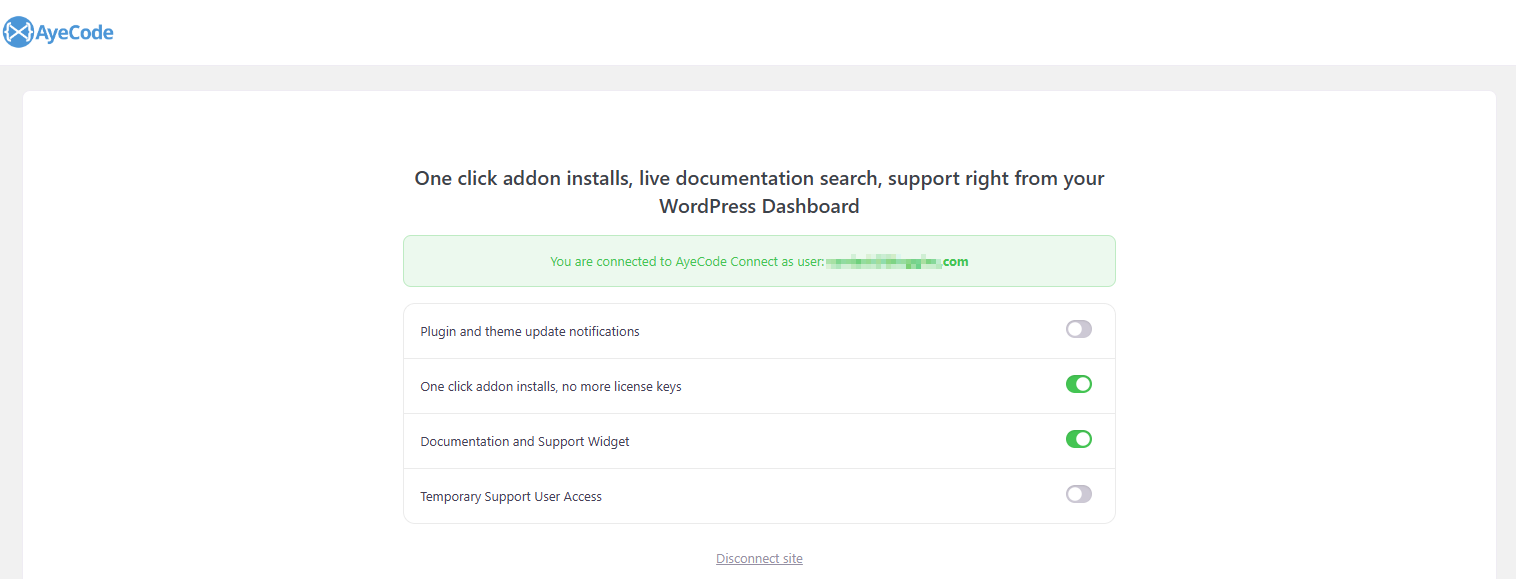
Select the Real Estate Directory (BlockStrap) demo.
Click Import.
The import installs the free Real Estate Listings theme, the GeoDirectory core plugin, the Real Estate Directory add-on, and a set of demo property listings to use as a starting point.
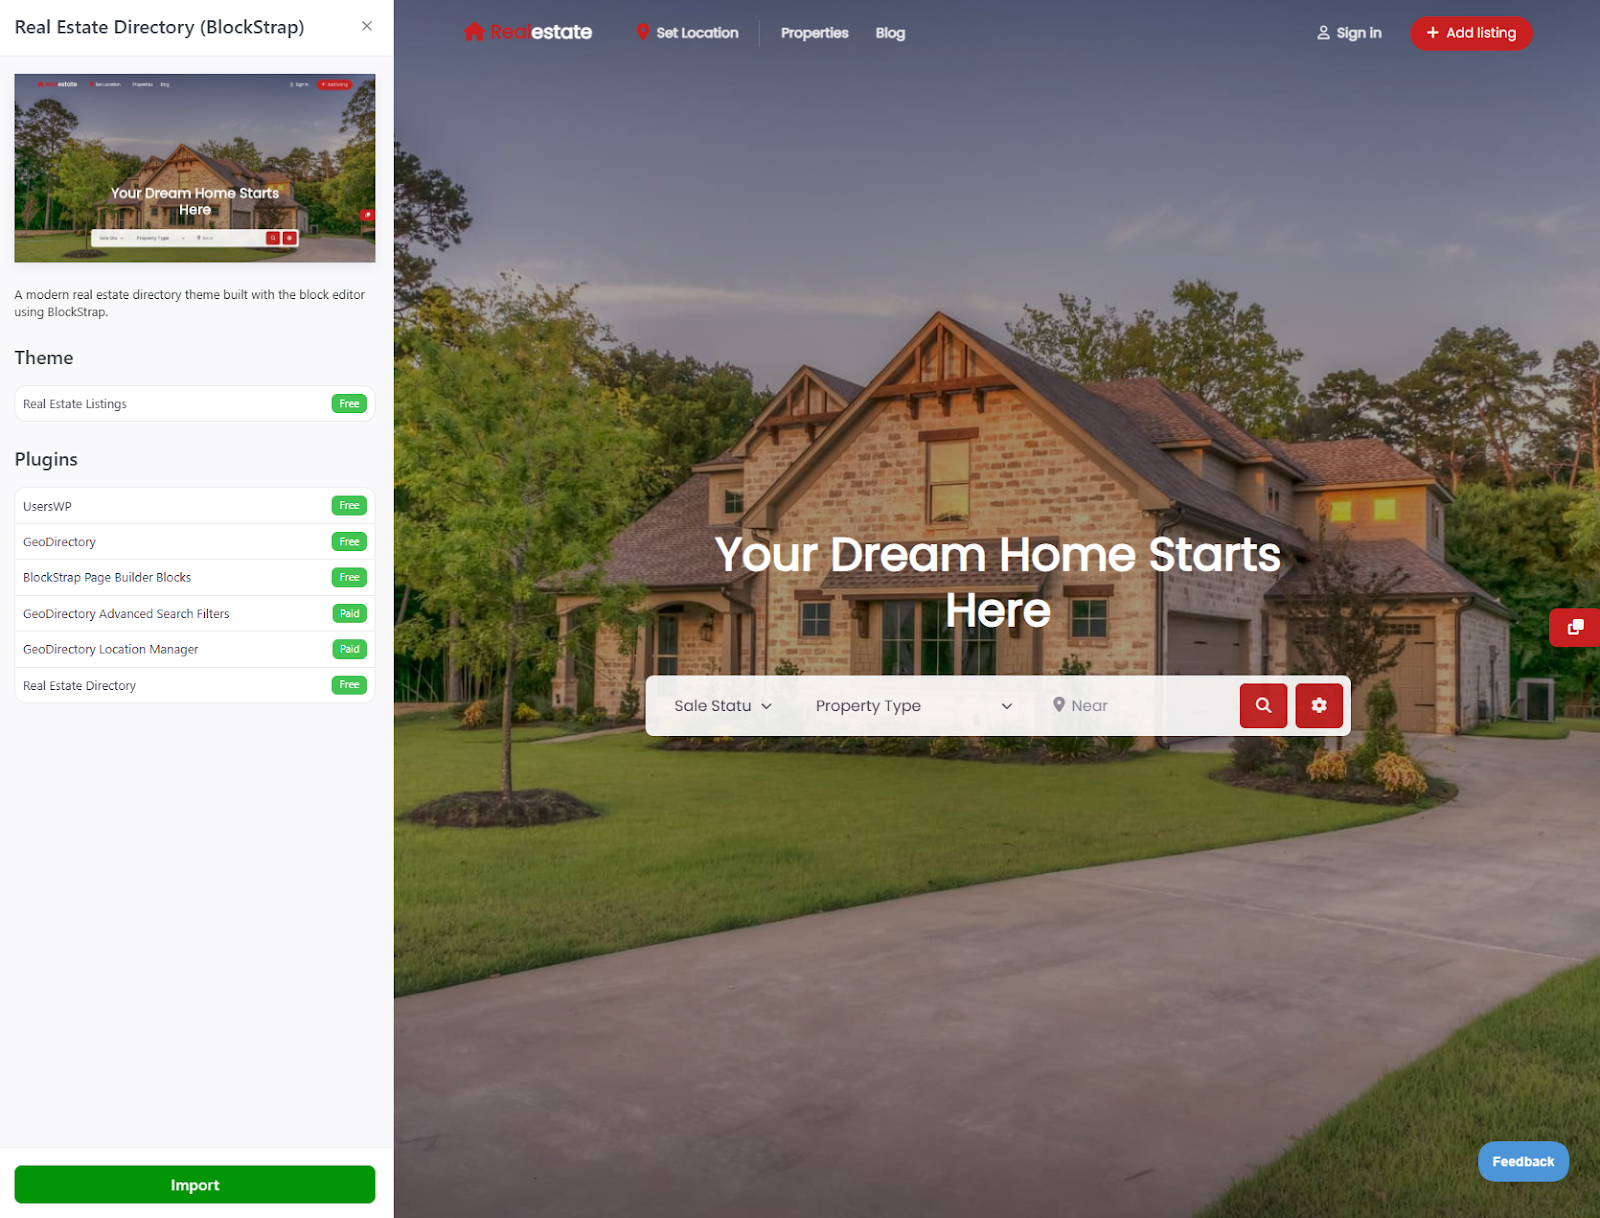
When the import finishes, click View Site.
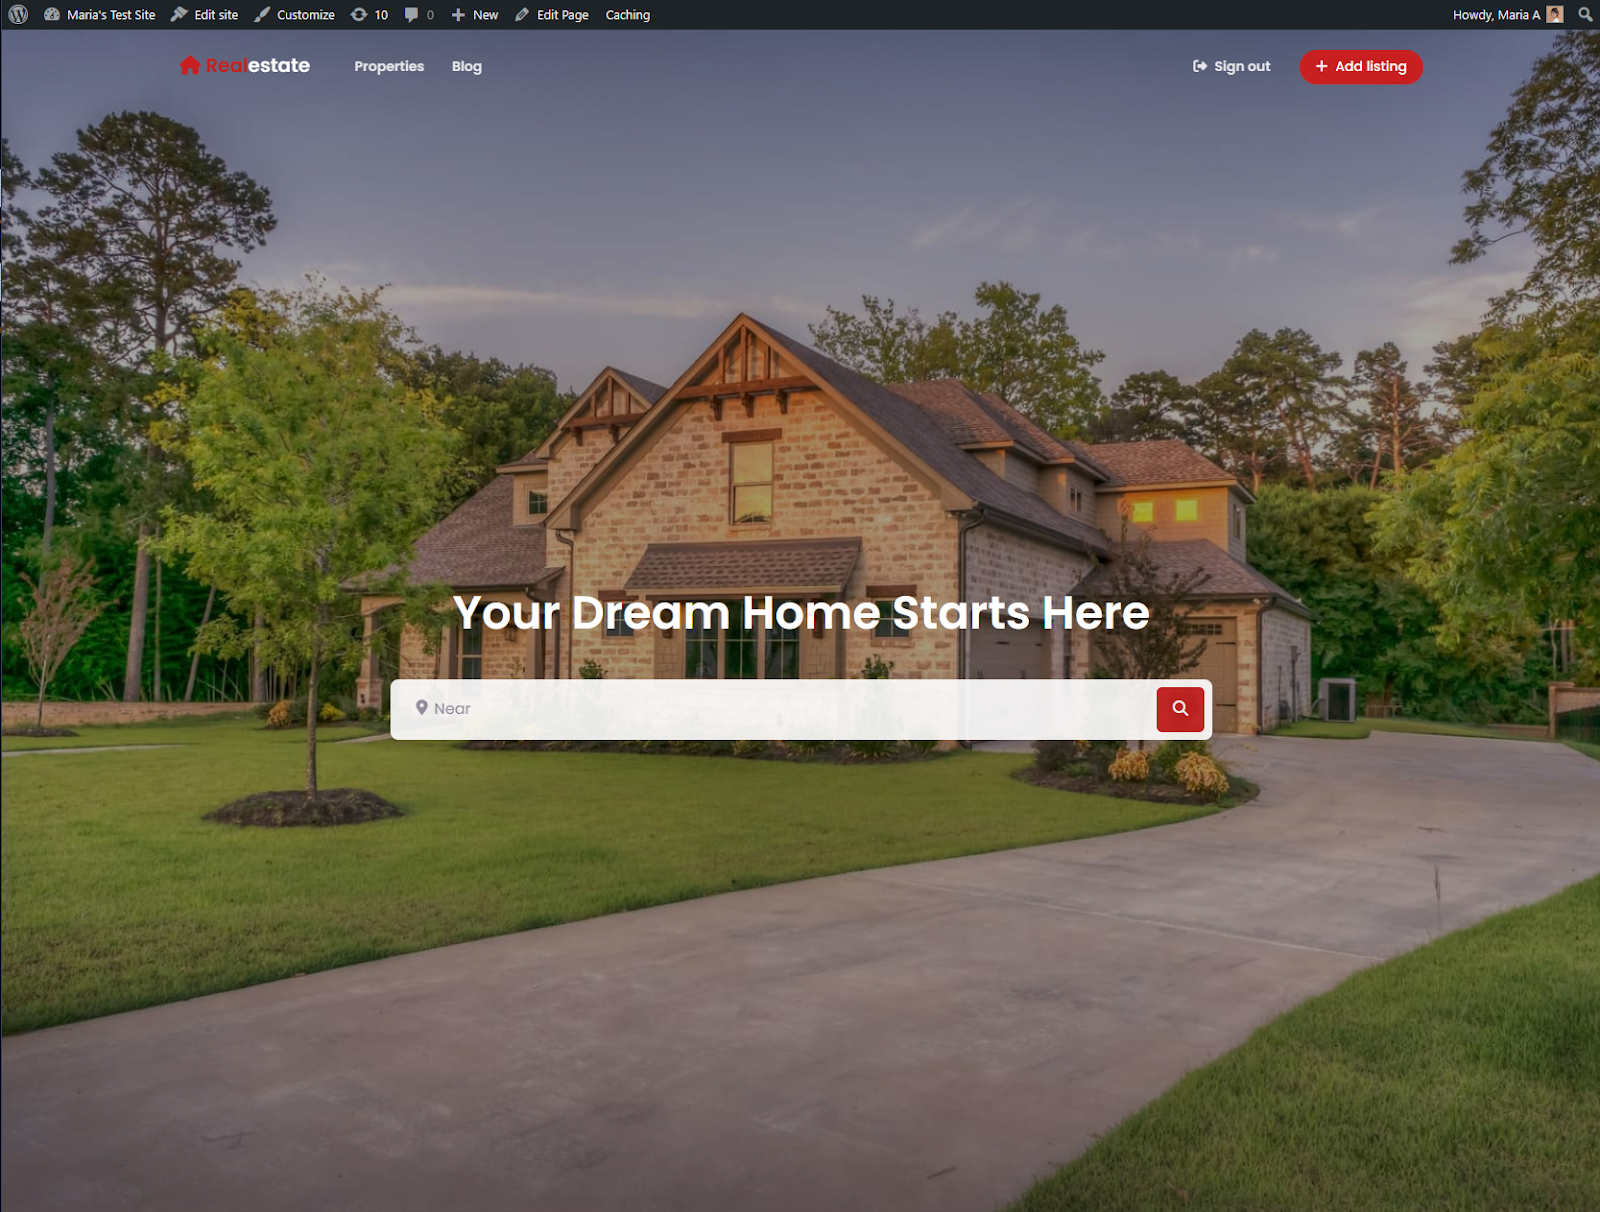
You have a working real estate site, identical to the demo, populated with sample listings.
The rest of the work is replacing the demo content with your own.
Step 3: Customize Branding
Navigate to Appearance → Editor.
The block editor opens with a customization menu on the left for templates, styles, pages, and navigation.
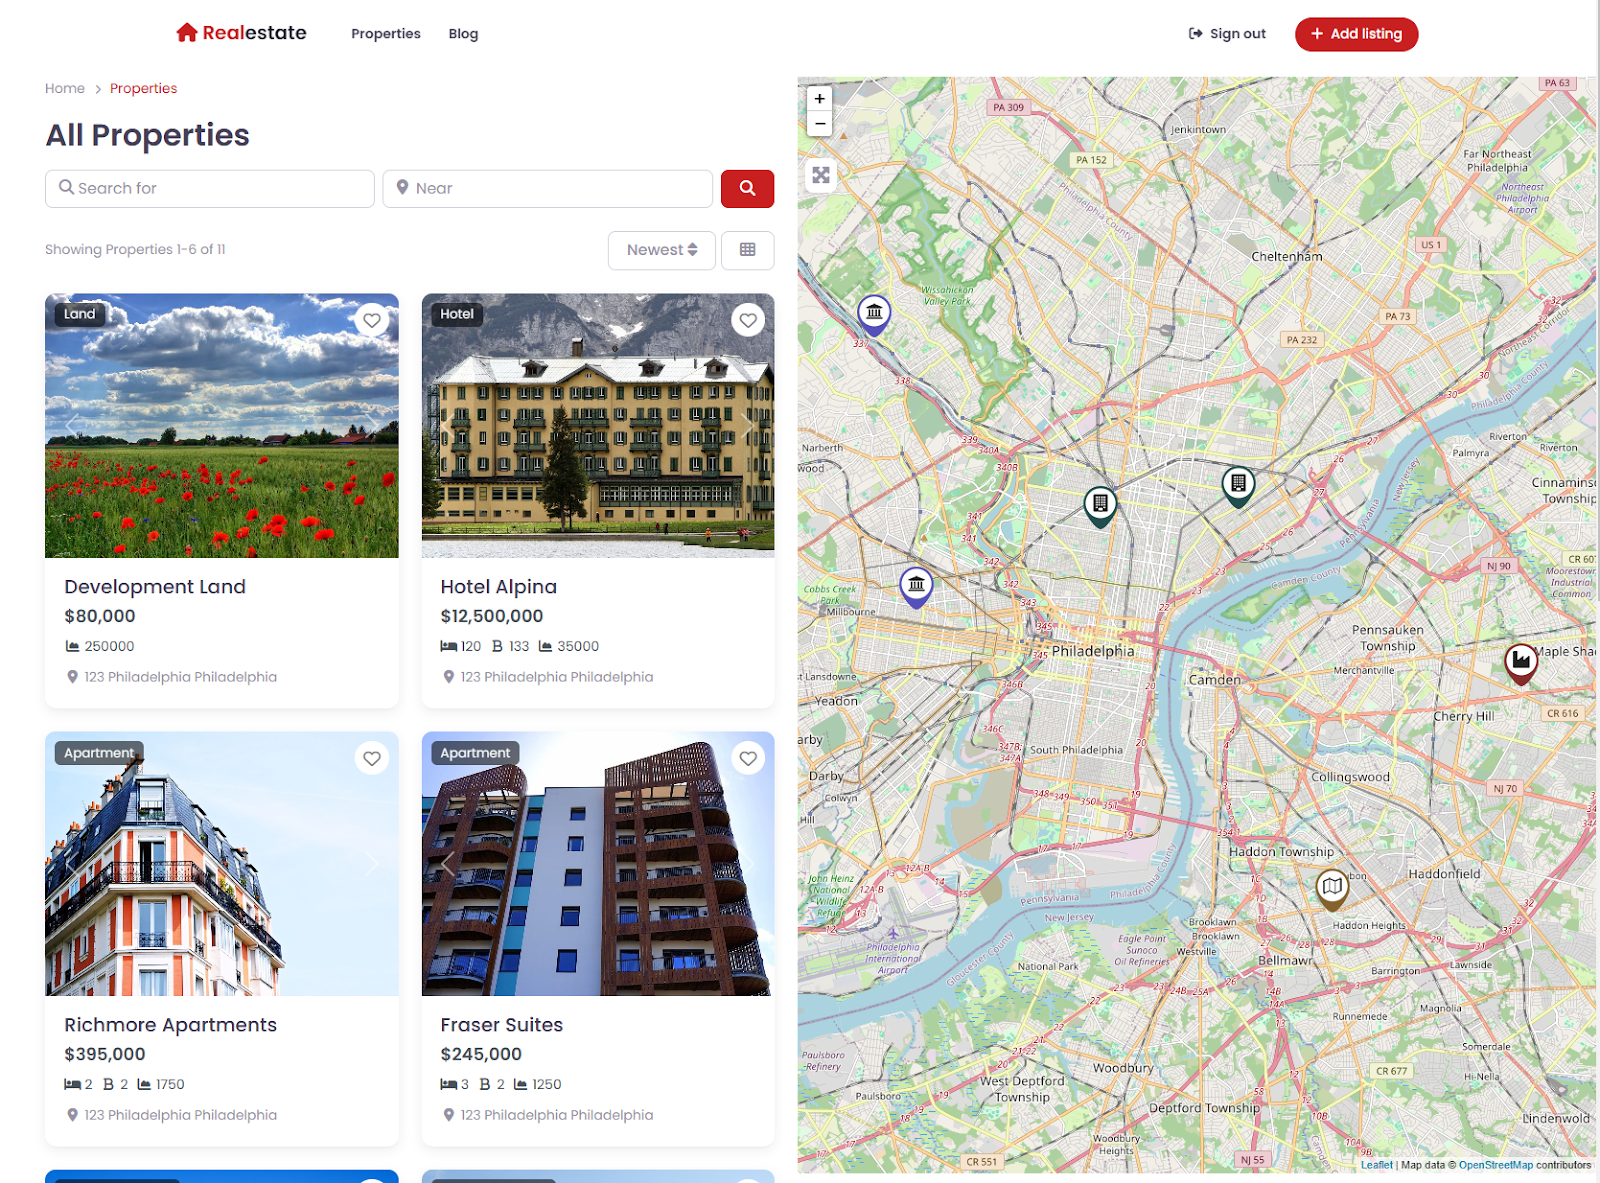
Logo and Navigation
Click the Real Estate Logo placeholder, then the Document Overview icon to reveal the header structure.
Replace the placeholder logo with your own brand mark.
Edit the menu items in the BS Nav block to match your site’s navigation: Home, Listings, Agents, Areas, Contact, and any other top-level pages relevant to your business.
Colors and Typography
The Real Estate Listings theme ships with several style presets in the Styles menu.
Try each preset to see which fits your brand, or click the pencil icon to open the full style editor and create a custom palette.
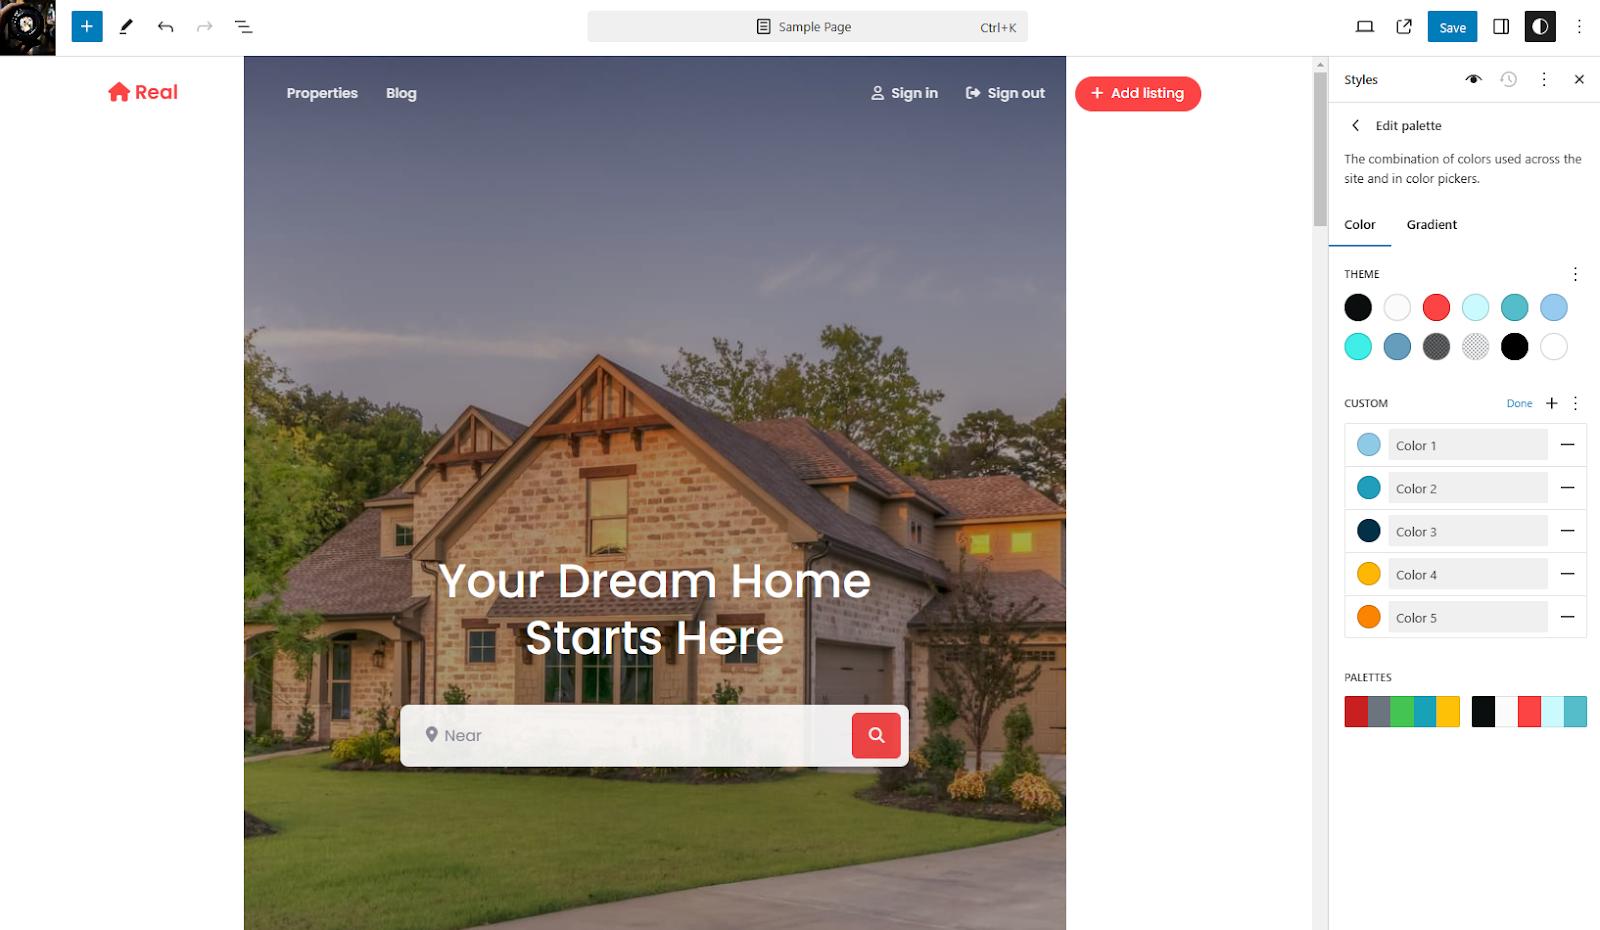
Under Colors → Palette → Custom, set your brand colors.
Under Colors → Elements, control the colors for text, links, backgrounds, buttons, and headings independently.
Under Typography, set the fonts for body, headings, and links.
Step 4: Replace Demo Listings With Real Properties
Demo listings live under Places in your WordPress admin (GeoDirectory’s default custom post type for listings).
For each property, the listing form captures:
- Property title (typically the street address or a descriptive headline)
- Description (the long-form copy for the listing page)
- High-resolution photos (drag and drop to reorder)
- Price, square footage, bedrooms, bathrooms, lot size
- Property type (single family, condo, townhouse, multi-family, etc.)
- Listing type (for sale, for rent, sold, pending)
- Address (auto-geocoded for the map)
- Agent assigned to the listing
- Mortgage calculator inputs (down payment %, interest rate, property tax, HOA)
- Energy rating (HERS for US, EPC for EU)
- Walk Score (auto-populated from a Walk Score ID)
- Virtual tour URL (Matterport, embedded 3D walkthrough, or 360-degree photos)
You can also add custom fields specific to your market (school district, HOA name, age of construction, recent renovation history, etc.) through the GeoDirectory Form Builder.
The listing front-end submission form allows agents on your team (or buyers’ agents in your network) to submit listings without needing WordPress admin access, with optional moderation through the Claim Listings add-on for verified agent submissions.
Real Estate-Specific Features
The free Real Estate Directory add-on ships four features tailored specifically for real estate sites.
Mortgage Calculator
Lets buyers estimate monthly mortgage payments based on price, down payment, interest rate, loan term, property tax, and HOA fees.
Shipped as a block on every listing page by default.
Customize the default values in Appearance → Editor → Templates → GD Single.
Energy Rating Chart
Displays a property’s energy efficiency as a letter grade and numerical score.

Supports both the US HERS rating and the EU EPC rating, configurable per property based on which standard applies in your market.
Energy ratings have become a meaningful selling point for younger buyers and a legal disclosure requirement in much of Europe.
Walk Score
Rates the walkability of a property’s location based on proximity to restaurants, shops, parks, schools, and other amenities.
Pull a Walk Score ID for each property from walkscore.com, paste it into the listing form, and the data populates automatically on the front end.
Virtual Tour
Embeds a 360-degree interactive walkthrough of the property using Matterport, iGUIDE, or any other 3D virtual tour provider.
Virtual tours dramatically increase qualified buyer inquiries by letting prospects pre-screen properties before requesting an in-person showing.
What This Costs to Build and Run
Honest cost breakdown for the full setup:
- Domain: $10-15/year
- WordPress hosting: $5-15/month depending on traffic ($60-180/year)
- Real Estate Listings theme: Free
- GeoDirectory core plugin: Free
- Real Estate Directory add-on: Free
- GeoDirectory Membership (optional, for paid add-ons): $139/year single site or $229/year unlimited sites
- Walk Score API access: Free for basic, paid tiers for high-volume sites
- Matterport (optional, for virtual tours): $69/month for unlimited active spaces (or pass to your photographer)
Year-one total for a real estate site that does everything Zillow Premier Agent does (and more): $250 to $500 depending on hosting tier and which optional add-ons you install.
Year-one cost of Zillow Premier Agent in a competitive ZIP code: $6,000 to $18,000.
Year five of the same comparison: roughly $1,500 self-hosted vs $30,000 to $90,000 on Zillow Premier Agent.
The self-hosted version also produces a brand and SEO authority that compounds over those five years, instead of disappearing the moment you stop paying.
What to Build Around the Listings
The listing system is the core, but a real estate website that ranks needs more than listings alone.
The pieces that matter for organic traffic:
- Neighborhood guides for each area you serve (school quality, walkability, market trends, restaurants, commute times)
- Buyer guides (first-time buyer process, financing, home inspection, closing)
- Seller guides (pricing strategy, staging, photography, negotiation)
- Market reports updated monthly or quarterly (median prices, days on market, inventory levels)
- Agent profiles with bios, listings history, testimonials, and contact forms
- A blog covering local market news, new developments, and real estate education
This content compounds.
A neighborhood guide written today still attracts buyers searching for that neighborhood three years from now, with no additional spend.
The same buyer reached through Zillow Premier Agent costs you a fresh lead fee every single time, for as long as you keep paying.
The Practical Path
The fastest way to launch a real estate website that you own is:
- Buy a domain and basic WordPress hosting
- Install AyeCode Connect
- Import the Real Estate Directory demo
- Customize the branding (logo, colors, typography)
- Replace demo listings with your real properties
- Add 5-10 neighborhood guides for the areas you serve most
- Set up a contact form and lead capture flow
- Submit your sitemap to Google Search Console
A weekend of focused work gets you a working site.
The first three months of consistent content (one neighborhood guide per week, fresh listings added as you take them on) build the SEO foundation.
By month six, organic search starts producing leads that cost you nothing per acquisition.
By year two, your real estate website is producing more qualified leads than Zillow Premier Agent ever did, for a fraction of the cost.
Final Thoughts
The real estate industry runs on rented attention.
Zillow, Realtor.com, Redfin, and HomeLight have built billion-dollar businesses by sitting between buyers and the agents who serve them, charging both sides for the introduction.
The agents who own their own real estate websites stop paying that toll.
They build their own audience, their own brand, their own SEO authority, and their own customer relationships.
The technical setup takes a weekend.
The free GeoDirectory plugin and the free Real Estate Listings theme handle the listings, the maps, the search, the mortgage calculators, and the virtual tours.
For the deeper comparison of WordPress real estate plugins, see our best real estate listing plugins for WordPress.
For the broader case against SaaS directory platforms, see our best business directory software guide.
Stop renting leads.
Build the asset.
Connecting online browsing and in-store shopping is integral to retail success for many businesses.
Adding a store locator to your website can help you guide potential customers to the closest store.
There are several WordPress Store Locator Plugins. However, a good store locator is more than just a map with pins.
It makes it easy for customers to access important details about the store, such as the address, opening and closing times, and directions.
From a technical standpoint, this improves local SEO and helps you drive more organic traffic to your website and, ultimately, to your retail store.
In this article, I’ll show you how you can add a store locator to your WordPress site using the GeoDirectory plugin.
Why you need a store locator on your WordPress site
A store locator is a tool that’s integrated into a website and lets customers find the physical locations of a store based on an address or the customer’s current location.
It uses mapping technology and the company’s store database to help users find the closest store to their location.
Stores with multiple physical locations often use store locators to help users discover their retail stores.
Customers can quickly get directions and information about the stores closest to them.
Some businesses that might benefit from adding a store locator on their website include:
- Chains of restaurants
- Banks, for all their branches
- A chain of hotels
- A chain of convenience stores
- Brands with multiple store locations
These are just a few examples, but store locators are helpful for any business with more than one physical location.
Store locators improve the overall user experience and customer satisfaction.
Reducing prospective customers’ friction when transitioning from online browsing to in-store shopping can help you drive business results.
Let’s go over some of the main benefits of adding a store locator to your website:
- Enhance user experience. Offering users an easy way to locate stores using geographical maps improves the overall user experience of your corporate website.
- Improve local SEO. Search engine robots like store locators. It’s a great way to improve local SEO and make it more likely for your site to appear higher in search engine results. Enhancing visibility in local search results can help boost organic traffic to your business site.
- Boost brand visibility. Creating SEO-optimized listing pages with store locators can help you increase brand visibility and drive traffic to your site and, ultimately, to your retail store.
How to add a store locator to your WordPress site using GeoDirectory
We’ll show you how to add a store locator to your WordPress site using the GeoDirectory plugin.
Arguably the Best Store Locator Plugin for WordPress

GeoDirectory offers a simple yet effective solution for adding a store locator to your company’s website.
You can display store locators with custom map designs, create different types of listings, and display upcoming events or newly launched products on directory pages.
It’s perfect for businesses enhancing their omnichannel strategy by bridging the gap between online and offline channels.
The best part about GeoDirectory is that it’s easy to use.
You can add a store locator to your WordPress site in 3 simple steps:
Step #1: Install and activate GeoDirectory
Install and activate the GeoDirectory plugin on your WordPress site to get started. Navigate to Plugins → Add New Plugin and search for GeoDirectory.
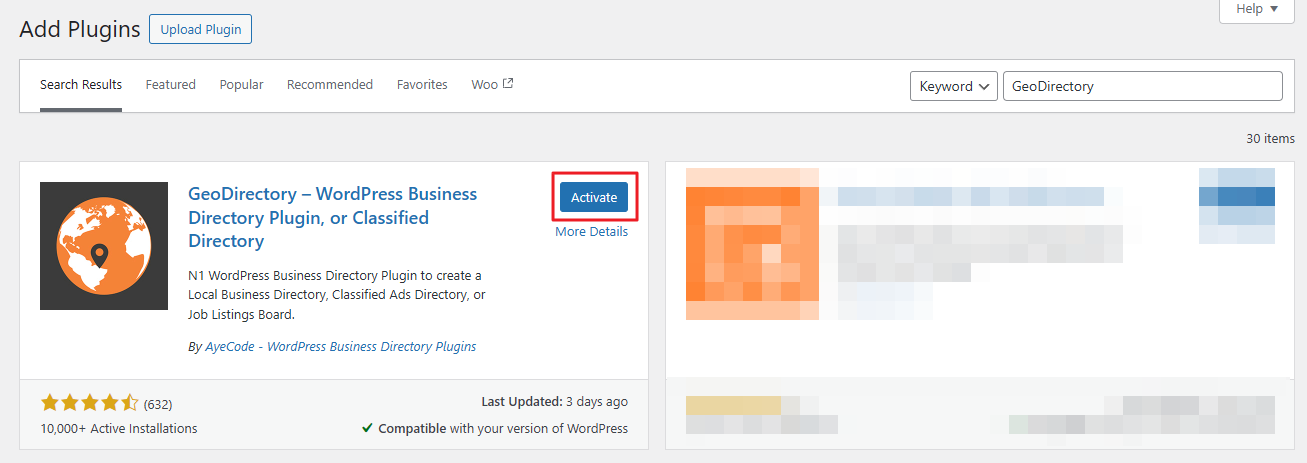
Click the Install button and then the Activate button to use it on your site.
After that you will need to:
- Select a default location (if the site is for multiple cities, you will need the Location Manager add-on)
- Set Categories (at least one is required)
Step #2: Set up a store locator
Let’s say you want to set up a store locator for your candy store business.
To do this, navigate to Places → Settings → General and edit the default Places post type to reflect your needs.
You will need the Custom Post Types add-on if you wish to have both the Places post type and a Candy Store post type.
In this example, we created the new post type, which will add a new menu item on your WordPress admin panel.
For this, you can navigate to GeoDirectory → Settings and then click on the Post Types tab from the top.
Click the Add New button to create your site’s “Candy Store” post type.
Once you’re ready, make sure to click on the Save Changes button at the bottom. This will add a new Candy Stores menu item to your WordPress admin panel.
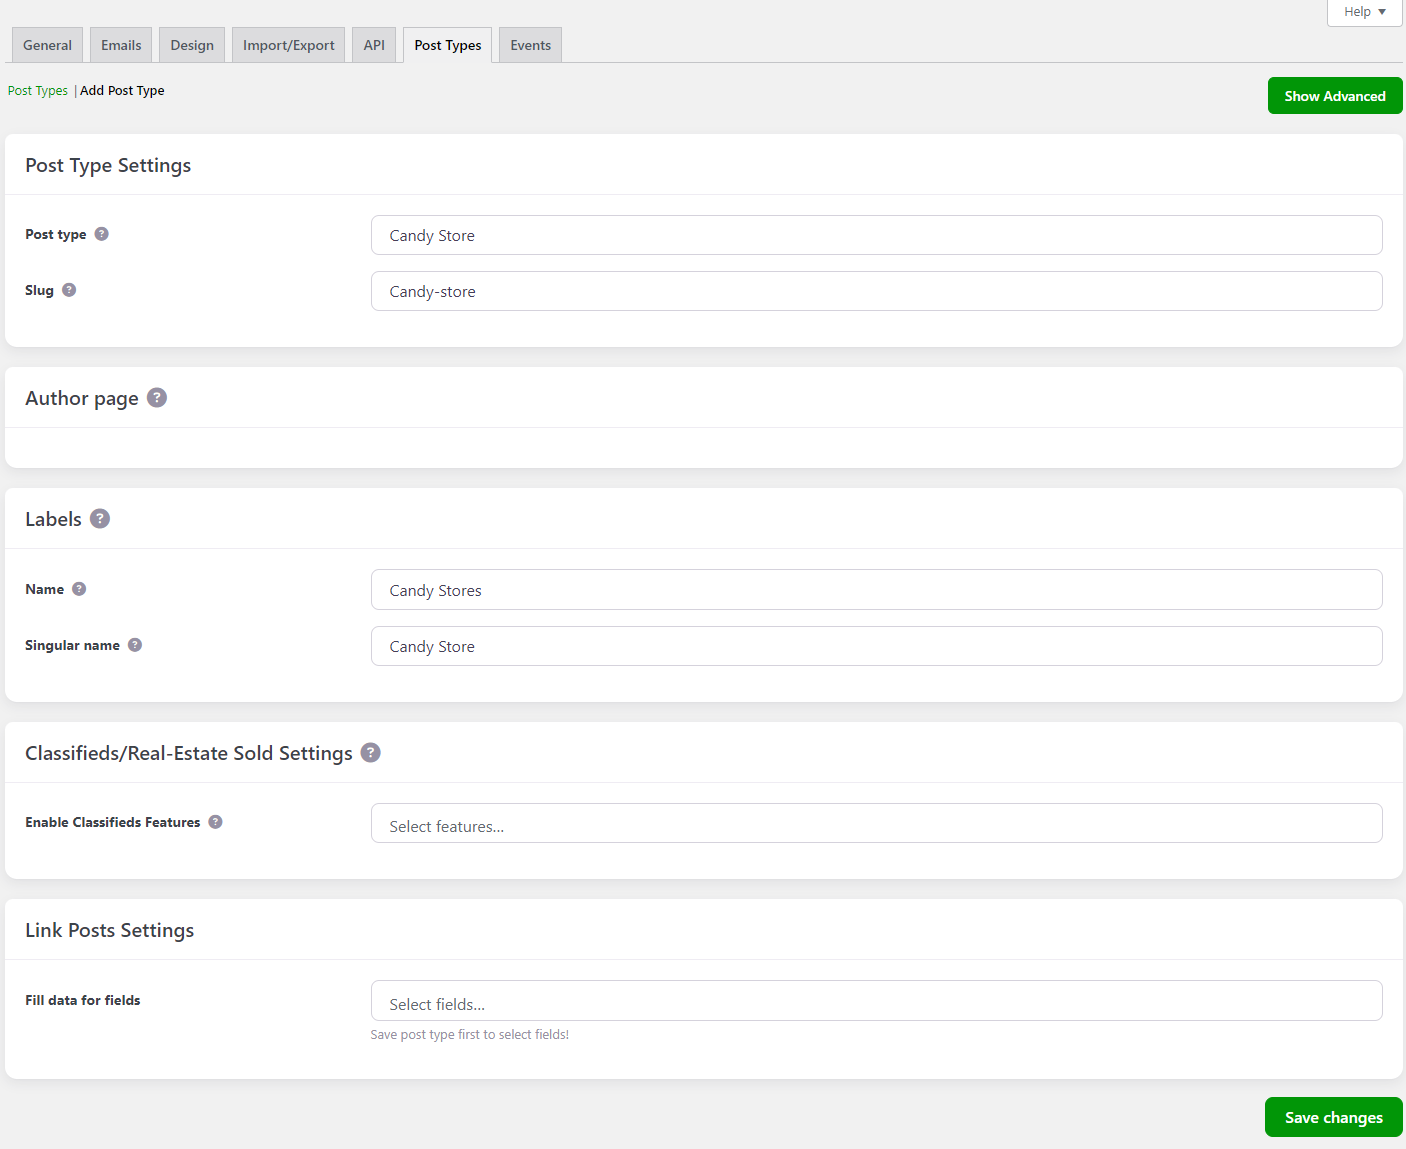
Now, you can start adding the different branches of your candy store and add a store locator to make it easier for customers to find the candy store nearest to their location.

To do this, navigate to Candy Stores → Add New to create a new listing.
You can add a store name, a brief description, and a listing image.
You can add a store locator from the Candy Store Information tab by manually adding the address or selecting the store location using the map.
In addition, you can use the Select Map View drop-down menu to select how the map will appear to customers on the front end.
The different options include satellite maps, terrain maps, and hybrid maps.
Once you’re ready, click on the Publish button to continue.
Step #3: Preview
The Candy Store listing on the front end (yoursite.com/candy-stores) will display a store locator that customers can use to view your store’s branches and find the closest one to their location.

For instance, if customers search for the term “Broad,” they will see the two Candyland Delights stores that match the search query: Candyland Delights on Broad Street and Candyland Delights on South Broad Street.
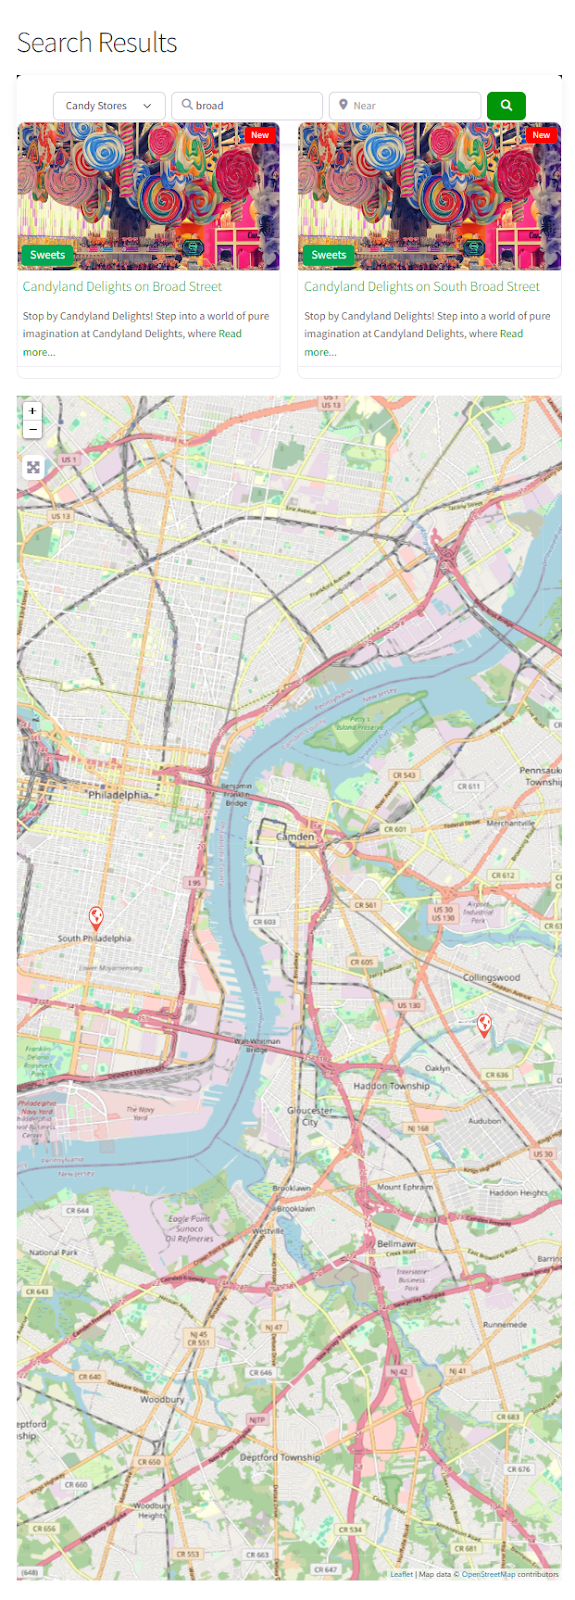
Customers can click on a store location to view details about that specific store and get directions.
All they have to do is enter their location or select it using the dynamic map, and the map will automatically show them directions to the store without leaving the listing.
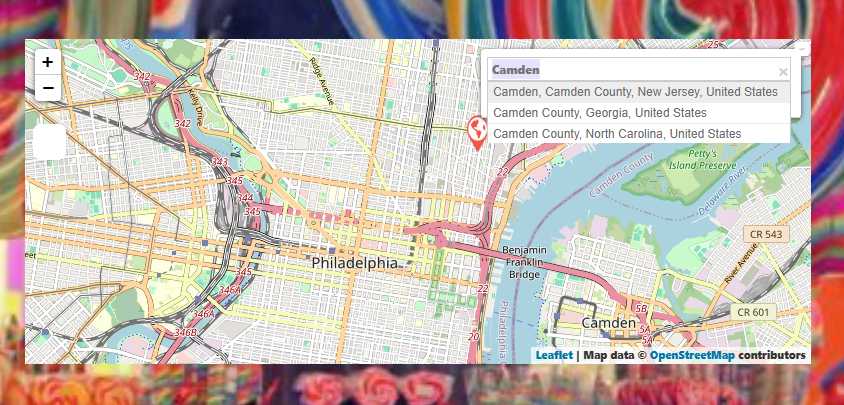
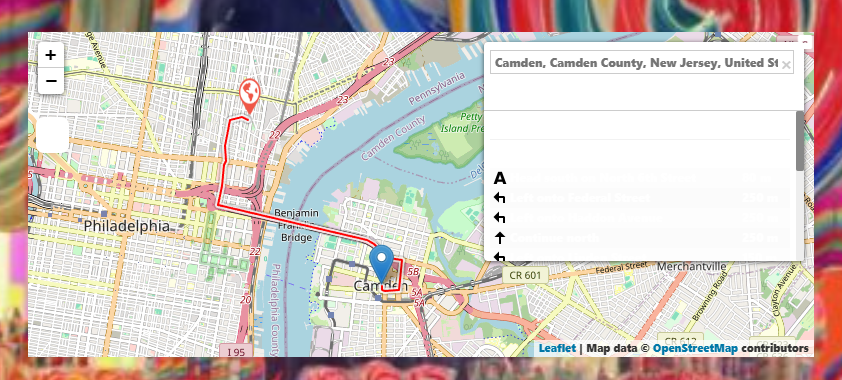
Adding advanced searching capabilities to your WordPress site
While most store locator plugins will only let you add a map with simple markers to your WordPress site, GeoDirectory has much more to offer.
With GeoDirectory’s wide range of add-ons, you can add advanced searching capabilities to your business site with AJAX filters.
This means your users will have more options to narrow their search than using a regular store locator map.
Adding extra search filters to your store locator
GeoDirectory offers a basic search widget that lets users search by location or zip code. For example, a user might want to find hotels near Chicago only or look for the top-rated clothing stores in Paris.
Users can directly input the area code into the “Near” search field to make it easier to locate stores near them or search for nearby stores within a specific area.
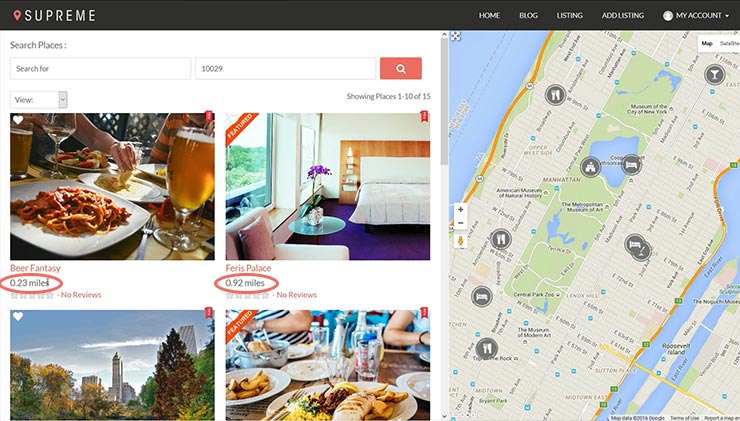
To add a layer of sophistication, you can use the Advanced Search add-on to let users make proximity and radius searches by location, leverage address and location autocomplete, search by custom fields, and more.
It also adds extra fields to the main search bar, like Search by category or a select field.
Searching within a certain radius from a specific point, using custom fields as search filters (like price or open/close depending on business hours), and using the address autocomplete helps users search faster and more precisely.
Creating multi-location store locators
As mentioned before, the Location Manager add-on lets you add unlimited locations, which is perfect for companies with many physical store locations.

You can also limit multiple locations, which means you can set it up so only stores in France and the UK will be published on your business site.
Grouping a massive number of locations
If your store locator has many markers displaying various stores, it can quickly cause clutter on your site and lead to a confusing user experience for prospective customers.
To avoid this, you can use the Marker Cluster add-on to group multiple markers and simplify the display of store locations on the map for users.
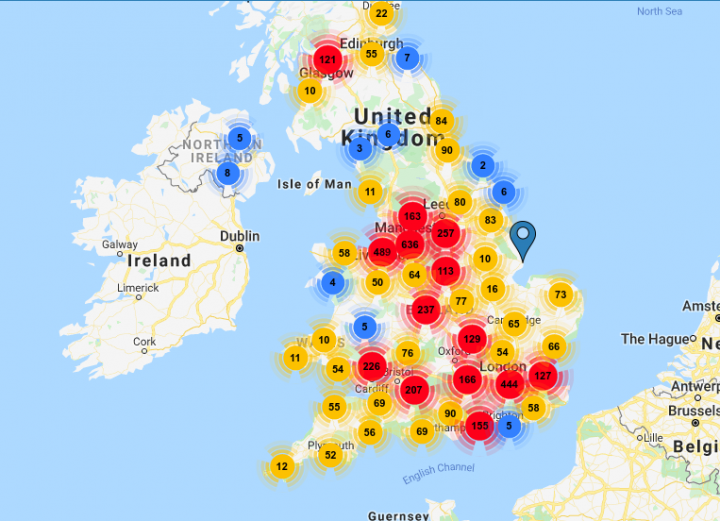
It offers an effective way to prevent clutter on business websites that have many store locations in the same area or region.
Creating events for each store in the store locator
GeoDirectory also offers an easy way to create events for each store location on your business website.
Using the Event add-on, you can create multiple events and link them to specific stores.
For example, you can display multiple events that will be held in a specific store location.

You can also create recurring events for stores and let users search for events on the front end using dates or timelines that suit them.
For more information, you can go over our guide on how to link custom post types using GeoDirectory.
Comparing stores using specific factors
The Compare Listing add-on lets you display an easy-to-follow comparison chart on your directory website.

It can make it easier for users to compare different features, such as prices or rations, to decide on the right one, especially on business websites with many store locations.
By default, the add-on lets your customers compare up to 5 listings at once using an optimized lightbox display.
Users can choose the best listing without navigating multiple pages before traveling to the store’s location.
Integrating WooCommerce stores with store locators
In addition to all these add-ons, GeoDirectory also lets you integrate WooCommerce stores with store locators using the GeoMarketplace add-on.
This way, you can create directories for online stores and offer direct purchase links to their products directly on the store page.
For example, you might use this feature to list popular clothing items from each top-rated apparel store in an area.
Similarly, you can list menu items for delivery or pickup on your restaurant website.
Conclusion
Store locators are dynamic, interactive maps that can help prospective customers get accurate geographical map data for your brand’s physical stores.
This way, users can find your stores quickly on the map, get directions, and have the pin location to share with friends and family.
However, since WordPress doesn’t automatically allow you to add an interactive store locator to your site, you must use a plugin like GeoDirectory.
This will allow you to display professional store locators on your business website and use various advanced options using add-ons.
Ready to add a store locator to your WordPress site? Get GeoDirectory today!
Are you looking to showcase all the information about an event on a single WordPress page? You’ll need a Directory Plugin for WordPress.
One of the best ways to encourage more site visitors to take action is by minimizing friction in the conversion funnel.
You can do this on your listing site by displaying all relevant information about an event, venue, or business on a single page.
This not only helps reduce friction on your WordPress site but also encourages more visitors to act on your conversion goal.
In this article, we’ll show you step-by-step how to link different listing types in WordPress so you can display more information on a single page.
Let’s put everything into context before we begin.
Why you might want to link different listing types
Linking different listing types can be immensely useful for running a directory website.
For those unfamiliar, it’s essentially a way to join two listing types where one or more of one type belongs or is connected to the other.
Let’s look at some examples:
You might want to display multiple doctors on a hospital listing page to let visitors quickly see the available doctors.
Or maybe you want to display multiple products or services a business offers on a business listing page.
Linking different listing types together is a great way to add to the overall user experience on your directory website.
This way, site visitors can view all relevant details about an event or a property from a single page.
Let’s take a closer look at some of the benefits of linking different listing types on your WordPress site:
- Enhance browsing experience. By displaying all information about a listing on a single page, you create an easy-to-navigate browsing experience for your site visitors. Visitors can see the linked listing type at a glance on the main directory page and click on it to view detailed information. This reduces friction for your site visitors and is a great way to create professional-looking listings on your WordPress directory site.
- Encourage site visitors to take action. By displaying extra information or other listings on a single directory page, you encourage more site visitors to take the following action instead of just looking around.
- Maximize visibility. Linking different listing types increases overall visibility and helps site visitors discover people or offerings more easily.
How to link different listing types in WordPress using GeoDirectory
Here, we’ll show you how to link different listing types in WordPress using the GeoDirectory plugin.
GeoDirectory offers an all-in-one solution for setting up a global business directory portal on your WordPress site.
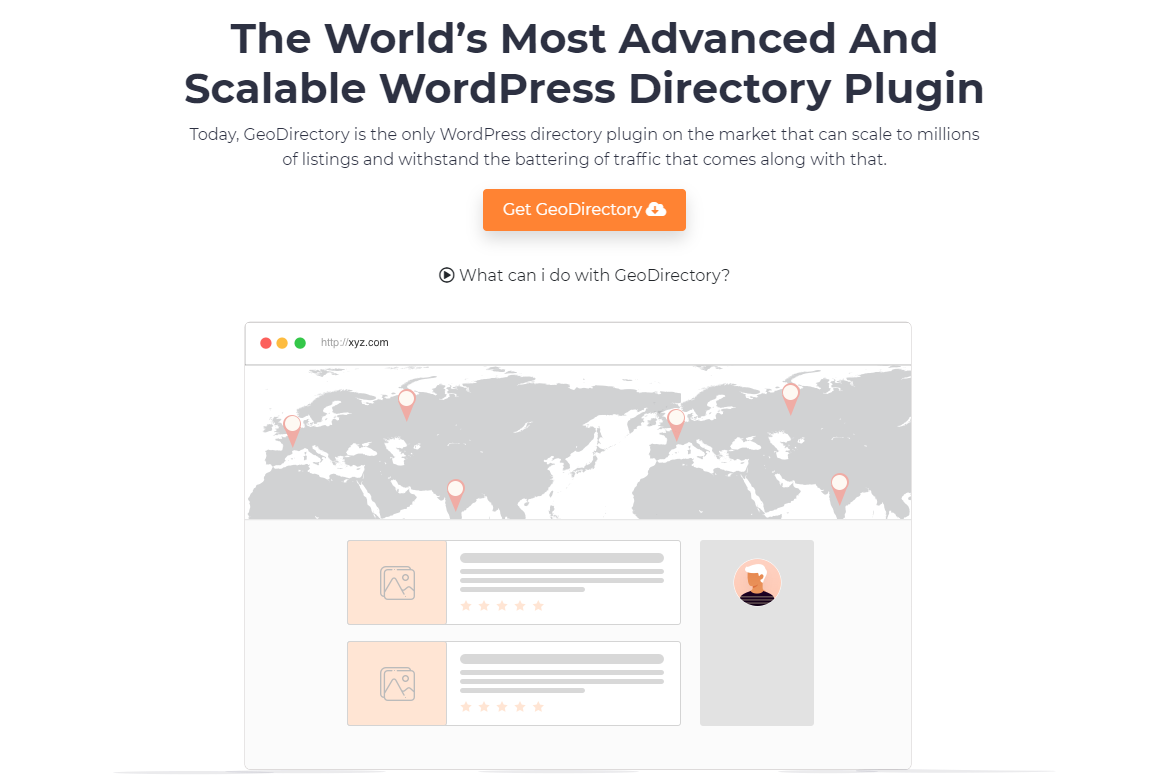
You can add listings to your WordPress site within a few seconds after installing the GeoDirectory plugin.
It’s incredibly easy to use and offers extensive functionality for creating attractive front-end submission forms.
You can create a fully professional business directory, event listing website, property directory, or venue directory by displaying details, maps, images, and a way for customers to get in touch with the business quickly.
The great thing about GeoDirectory is that it’s very simple and straightforward to set up on any WordPress site, even if you’re not very tech-savvy.
Let’s go over how you can do this to link multiple listing types on a single page.
All services or products for a business
Once you have the GeoDirectory plugin installed on your WordPress site, navigate to GeoDirectory → Extensions to install and activate the Custom Post Types extension.
This will let you create custom listings on your WordPress site so we can link them together or display them in the same place.
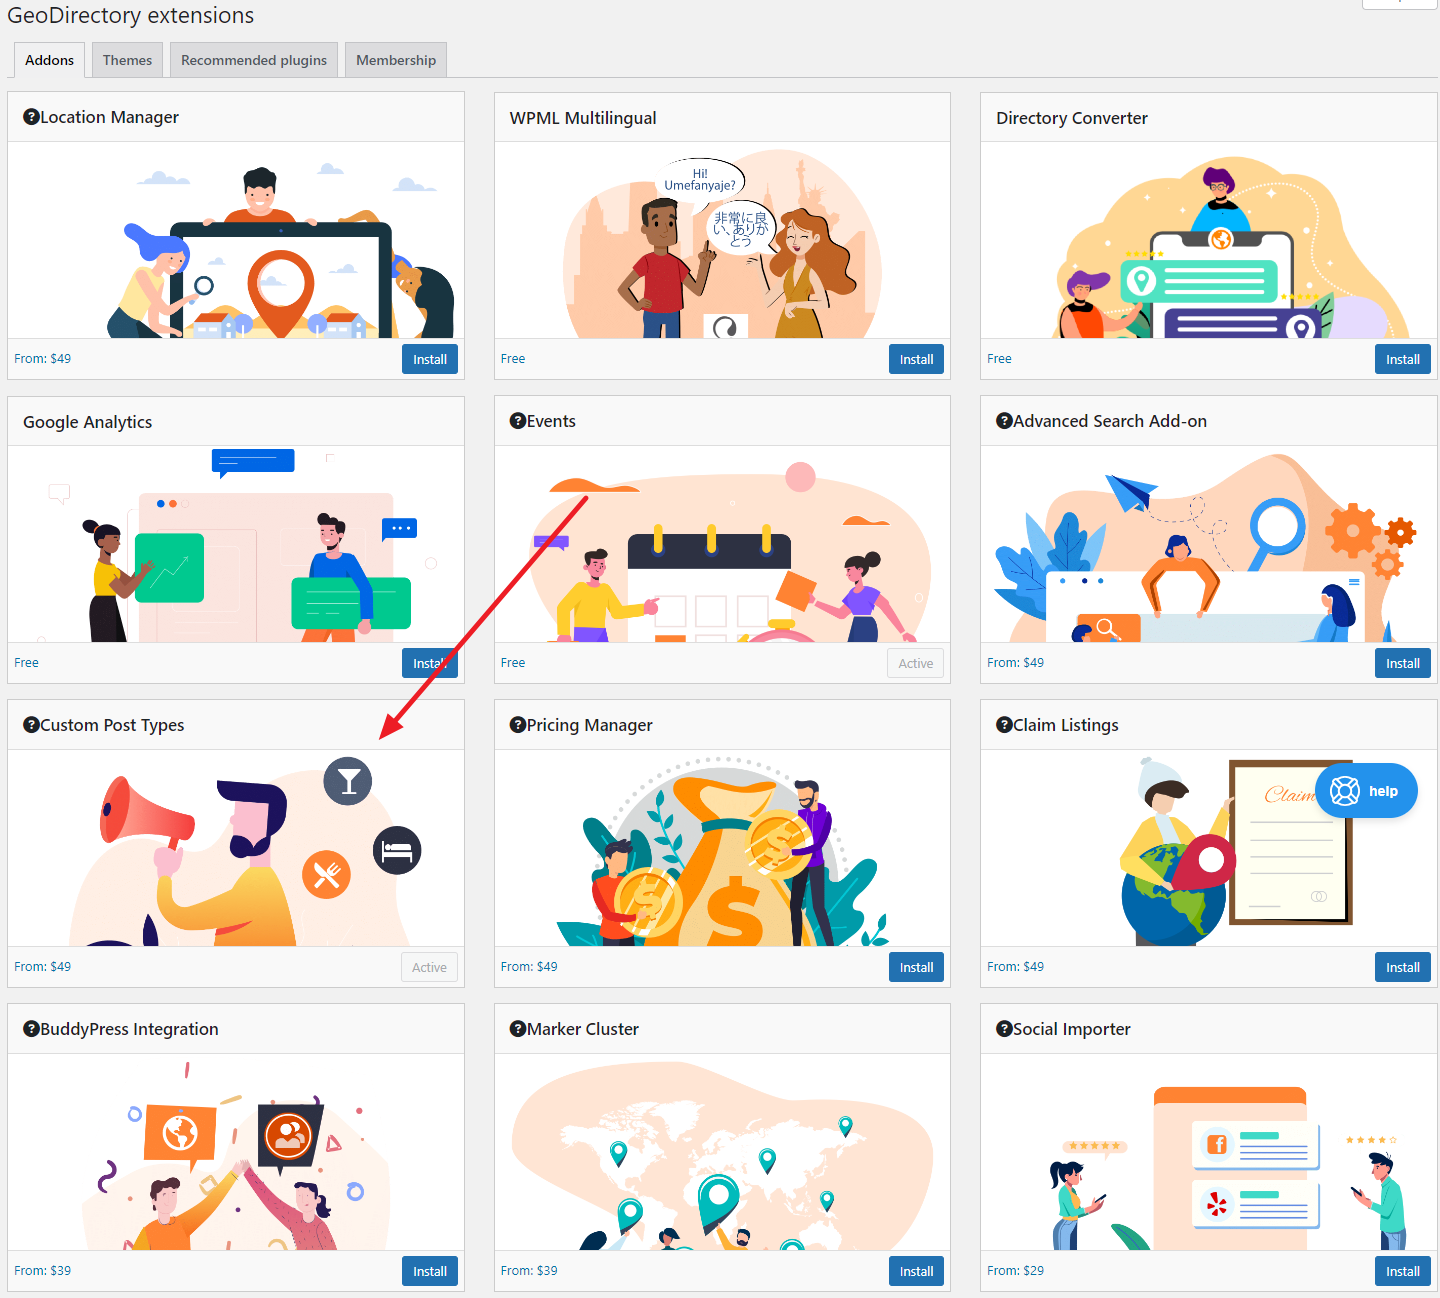
Now with the Custom Post Types extension activated, navigate to GeoDirectory → Settings and then click on the Post Types tab from the top and then the Add New button to get started.
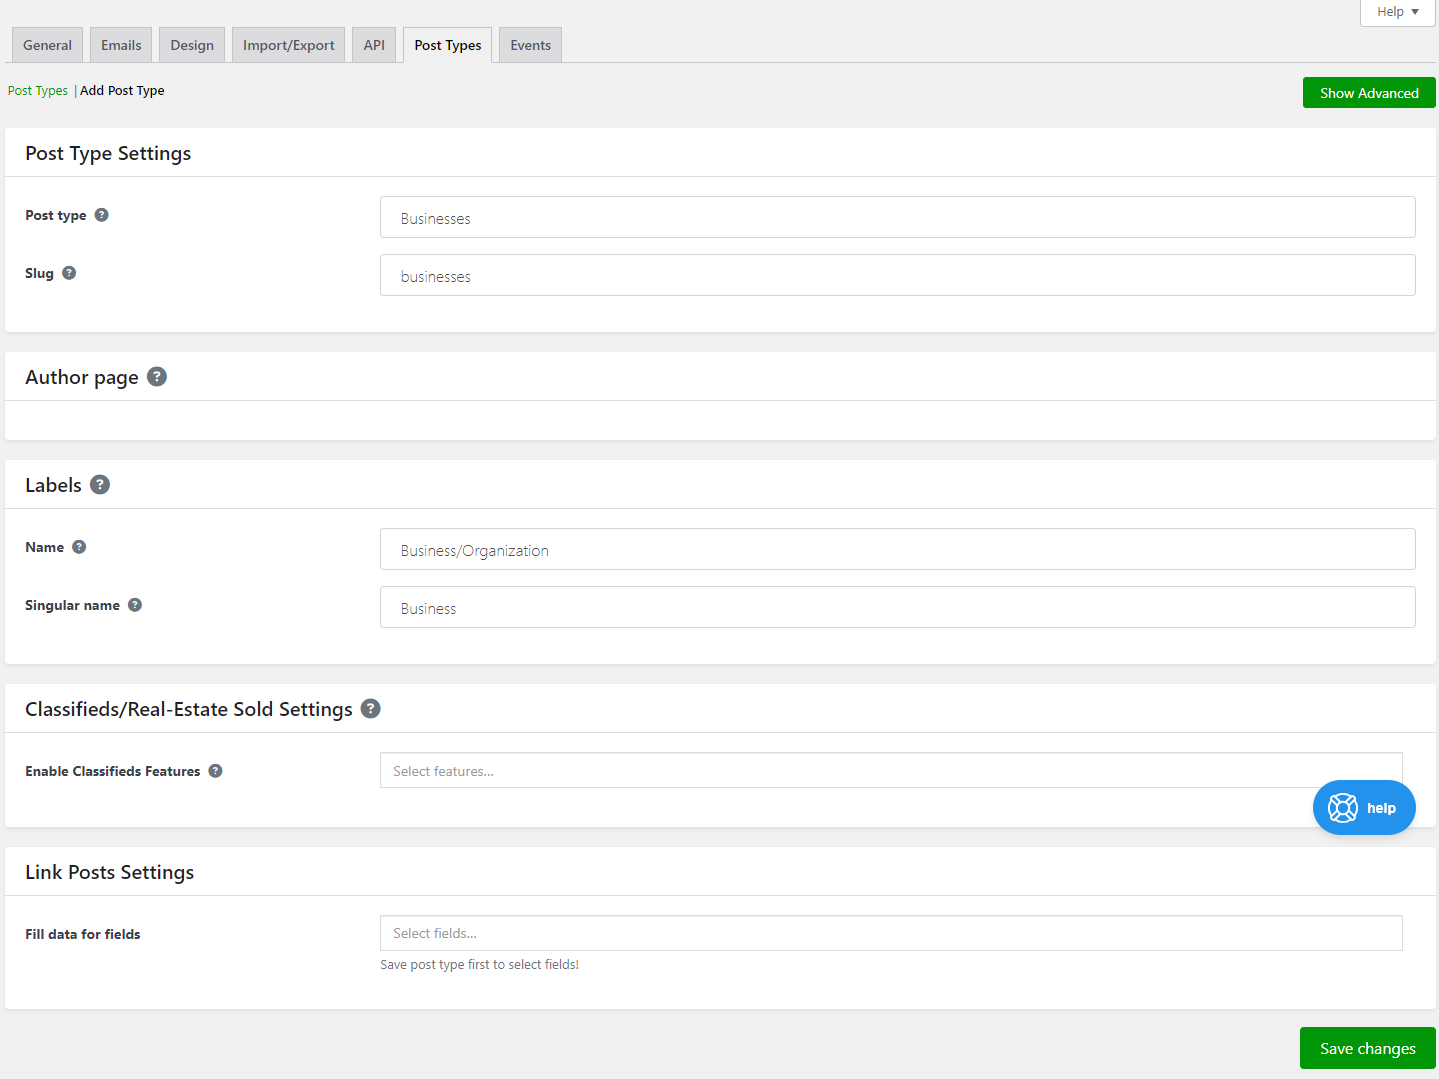
Set up a custom post type according to the type of listing you want to add to your WordPress site.
For instance, if you’re looking to display all services or products for a business, you will need to create two custom post types: one to showcase business information and the other to add product information.
When you’re ready, click on the Save Changes button to continue.
This way, you can set up multiple types of custom post types and start adding listings to your WordPress site.
Once you have two or more custom post types created, we can start linking them together to be displayed on the GeoDirectory details page on the front-end.
In our example, we’re going to list popular products of a business directly on the business directory page.
To do this, we’ll first navigate to Products → Settings and add the Link Posts: Business field to the add listing form.
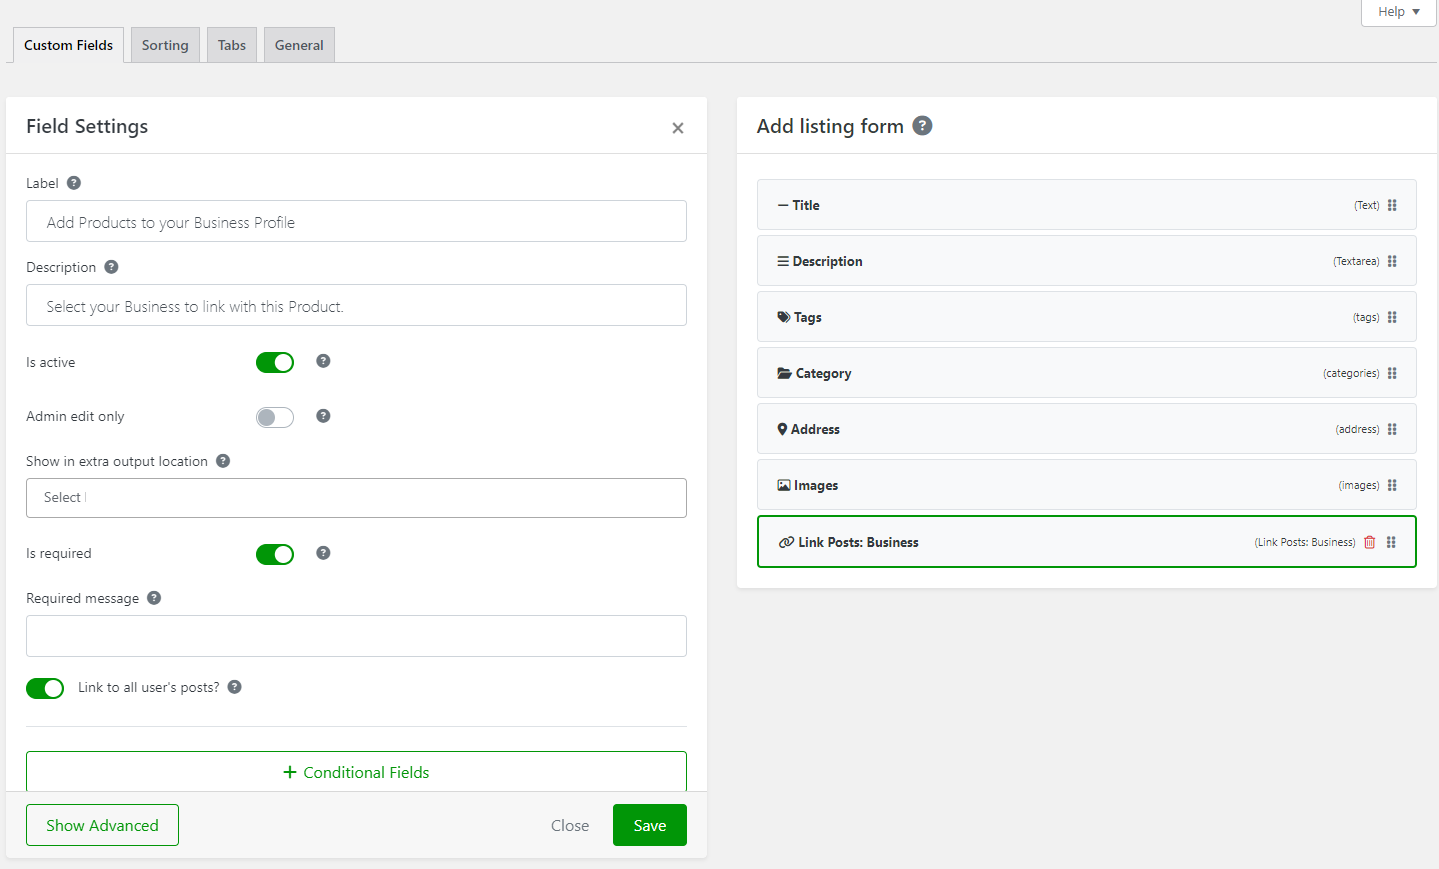
Make sure to select the Link to all user’s posts checkbox to ensure all future products created by the same user will be listed on their business directory page automatically.
Once you’re ready click on the Save button to continue.
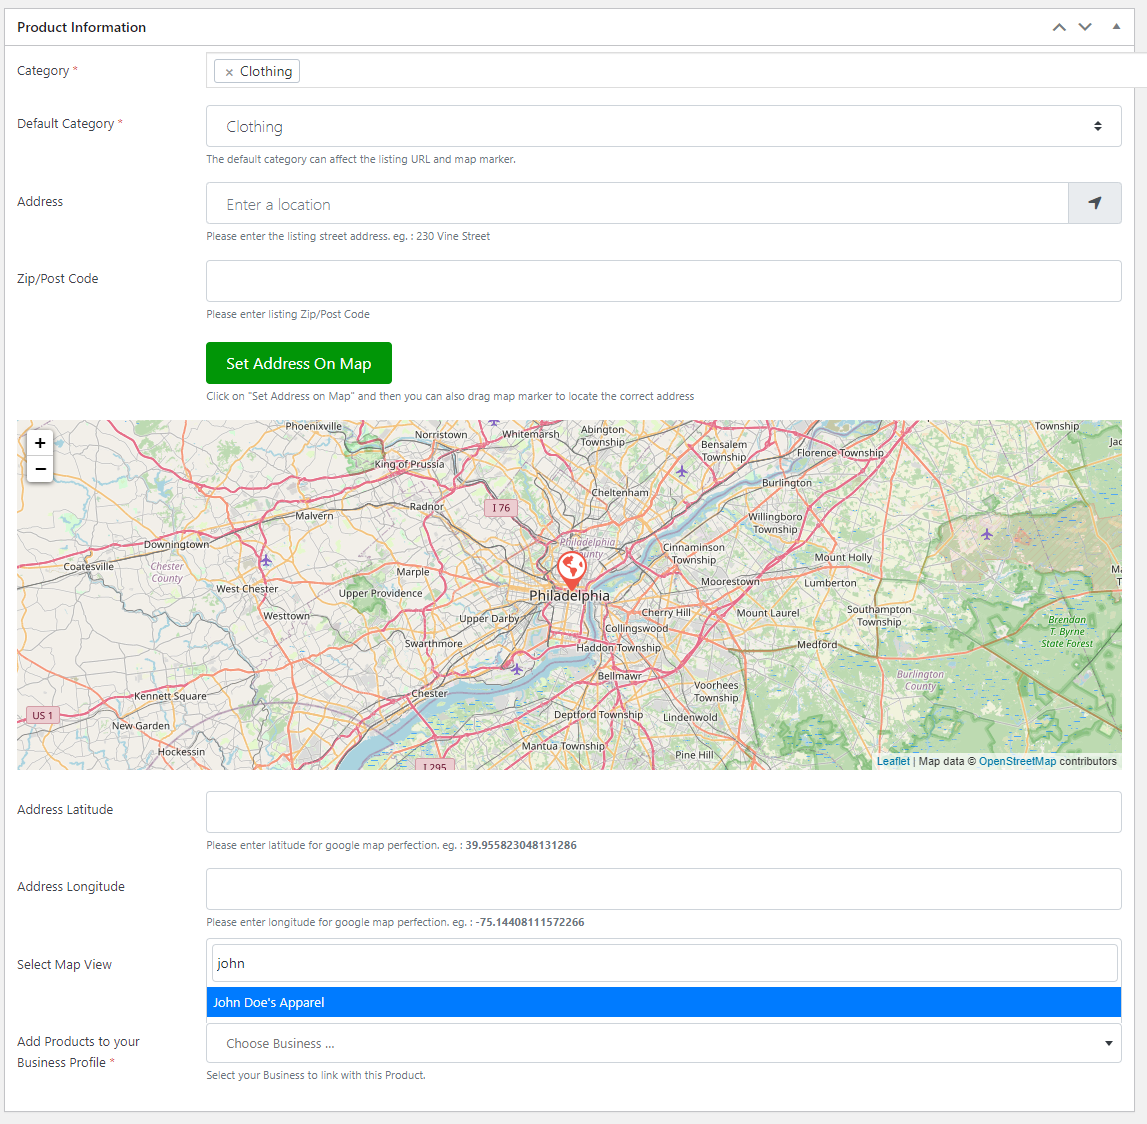
This will allow users to link their business profiles when adding product listings to your WordPress site.
To display this on the front end, navigate to the other custom post type settings, Business Name → Settings, and click on the Tabs section from the top.
Now, add the Linked From: GD_Products custom field to the tab display of your business name directory.
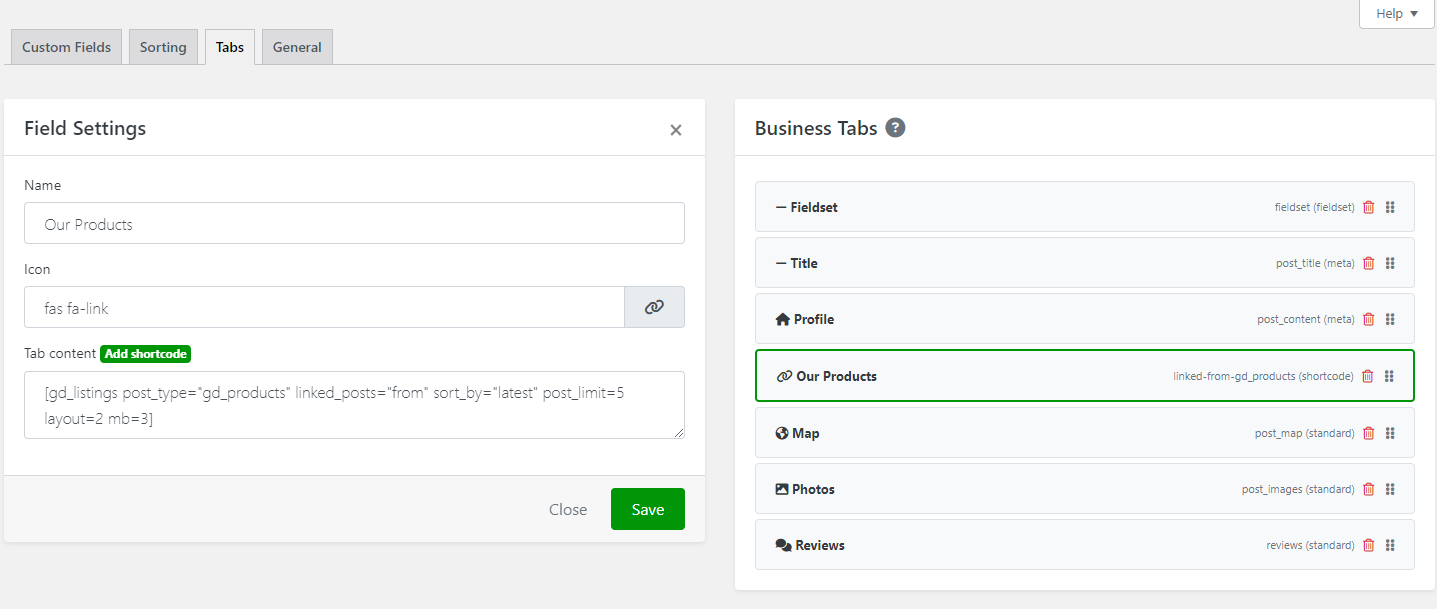
Click on the Save button to continue.
The business’s products will now be displayed on its main directory page.
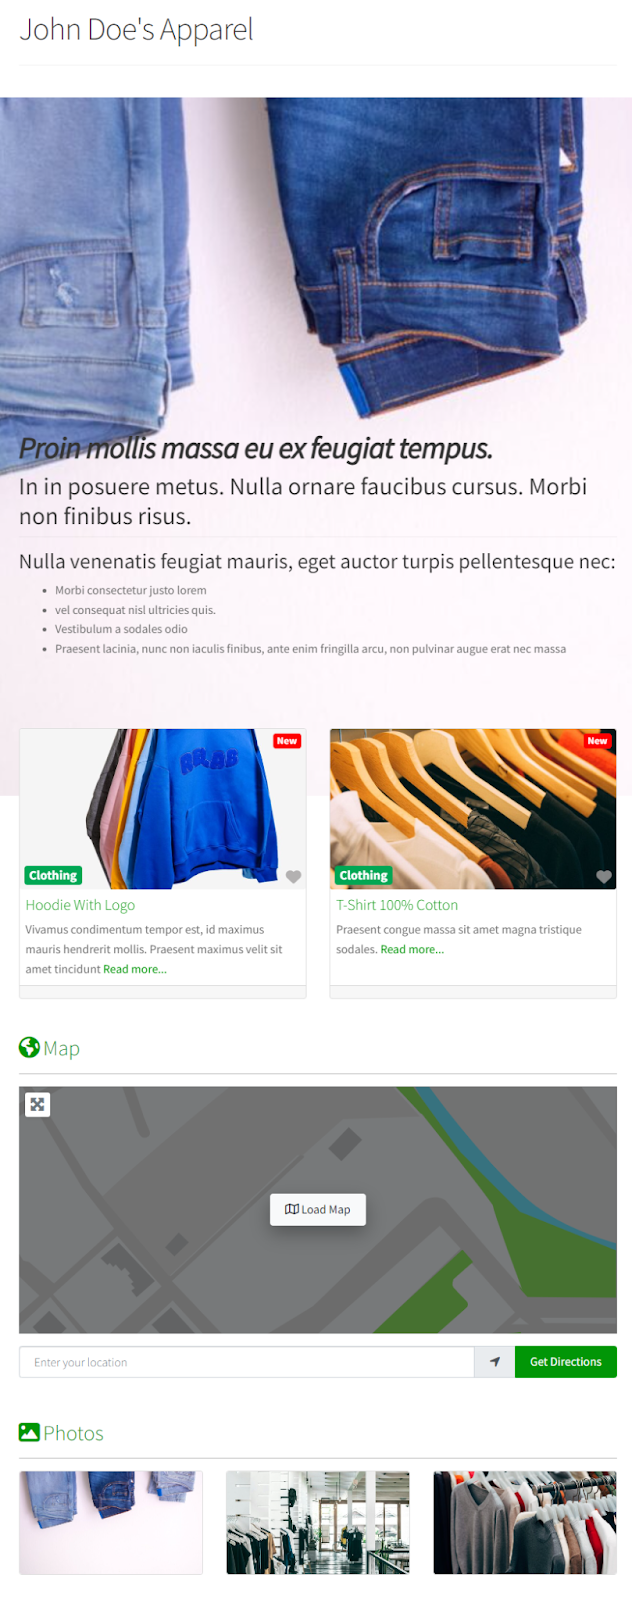
All events being held in a venue
With GeoDirectory, you can also display all events being held in a venue on the same listing display page.
While you can do this using the Custom Post Types extension, GeoDirectory also offers a dedicated Events extension that’s designed to set up events on your WordPress site.
For the purpose of demonstration, we’ll be using both of the extensions together to showcase multiple events being held in a venue.
To get started, we’ll first add the linked post extra field to the event new listing form so users can link events to the venue where they are being held.
To do this, navigate to Events → Settings and add the Link Posts: Venue field to the add listing form.
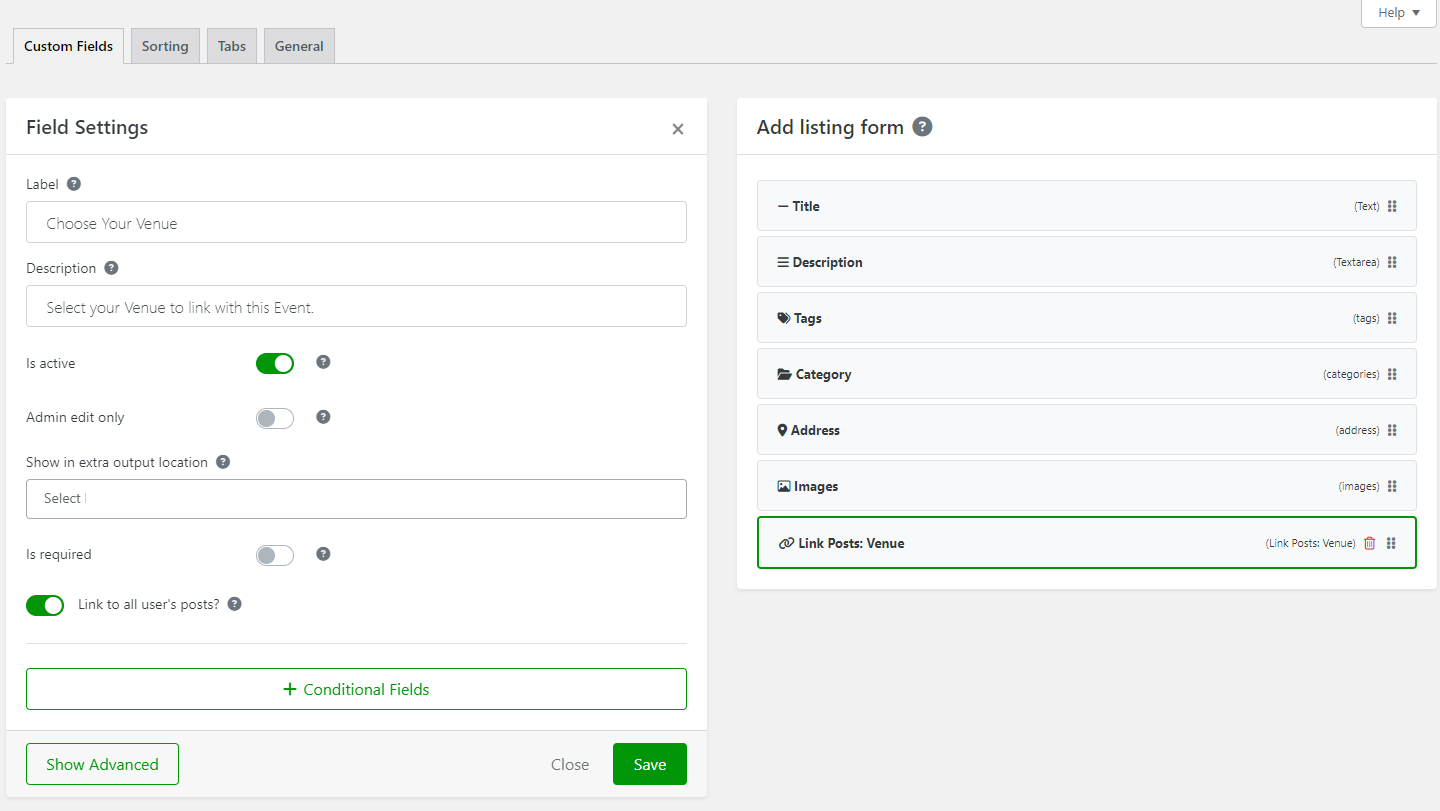
Make sure to select the Link to all user’s posts checkbox before clicking on the Save button to continue.
Now when users add new events to your directory site, they will be given the option to link the venue to the event or multiple events to the same venue.
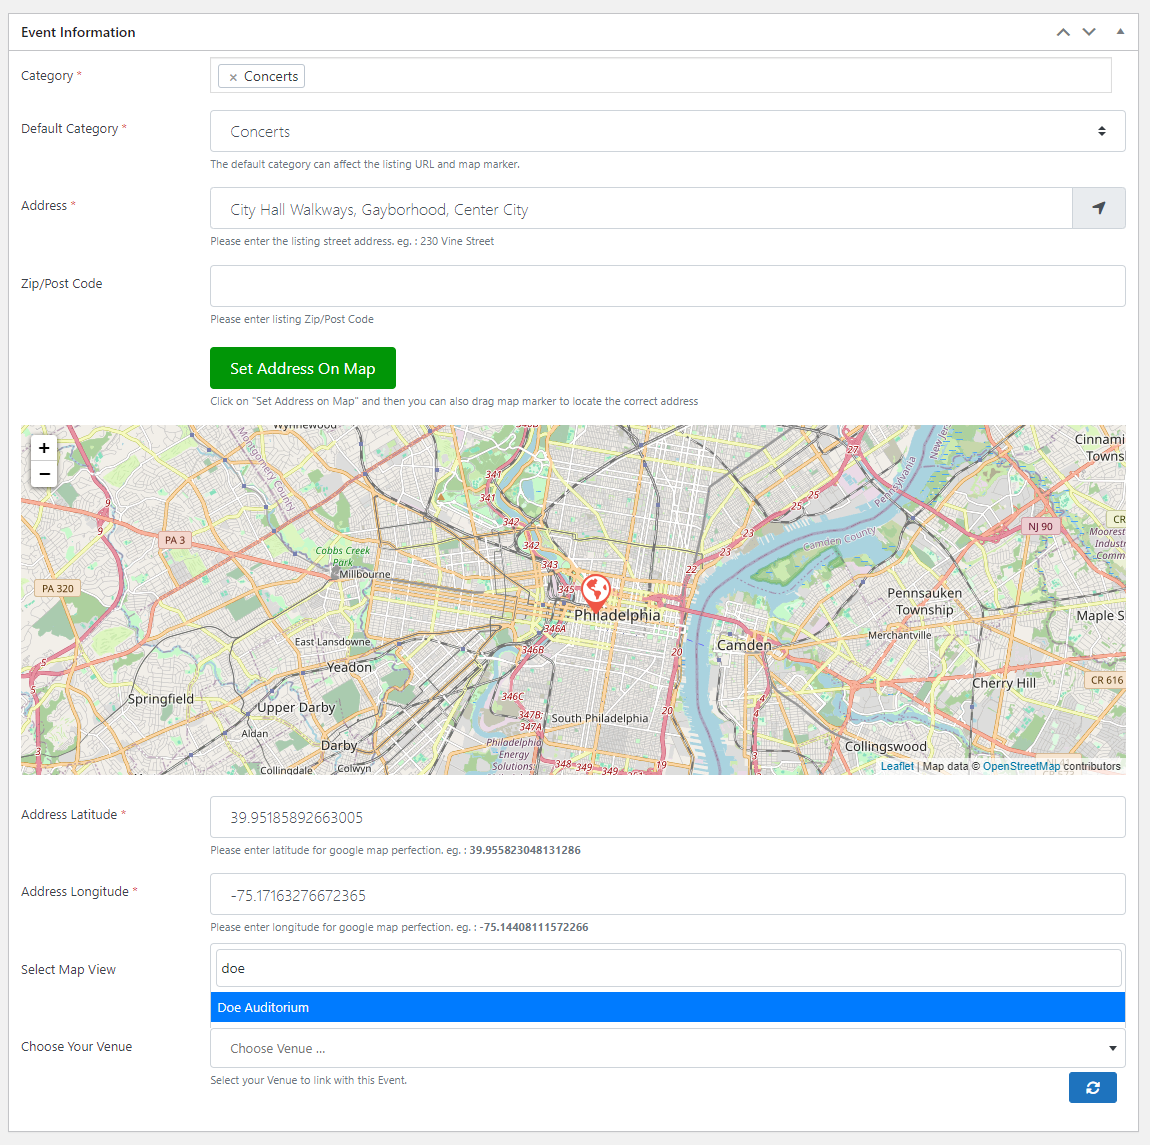
To display all events under the same venue details page, navigate to Venue → Settings and click on the Tabs section from the top.
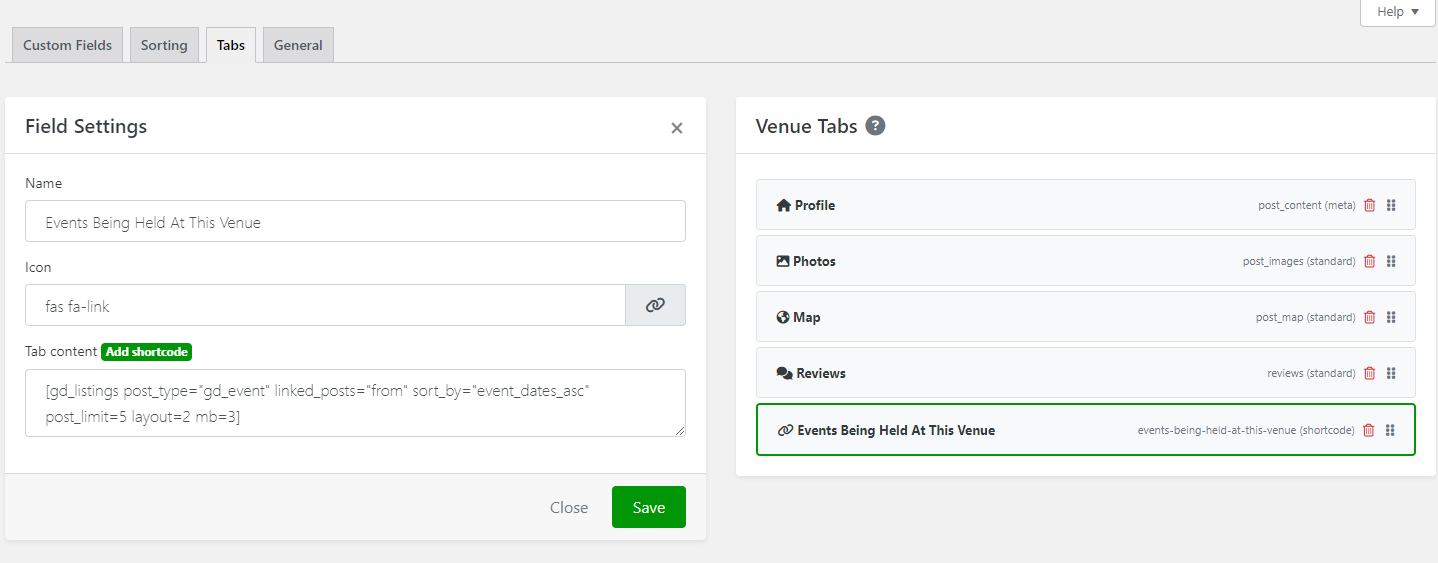
Add the Linked From: gd_event field to showcase all linked events to the venue on a single page.
Once you’re ready click on the Save button to continue. It will look something like this on the front-end:
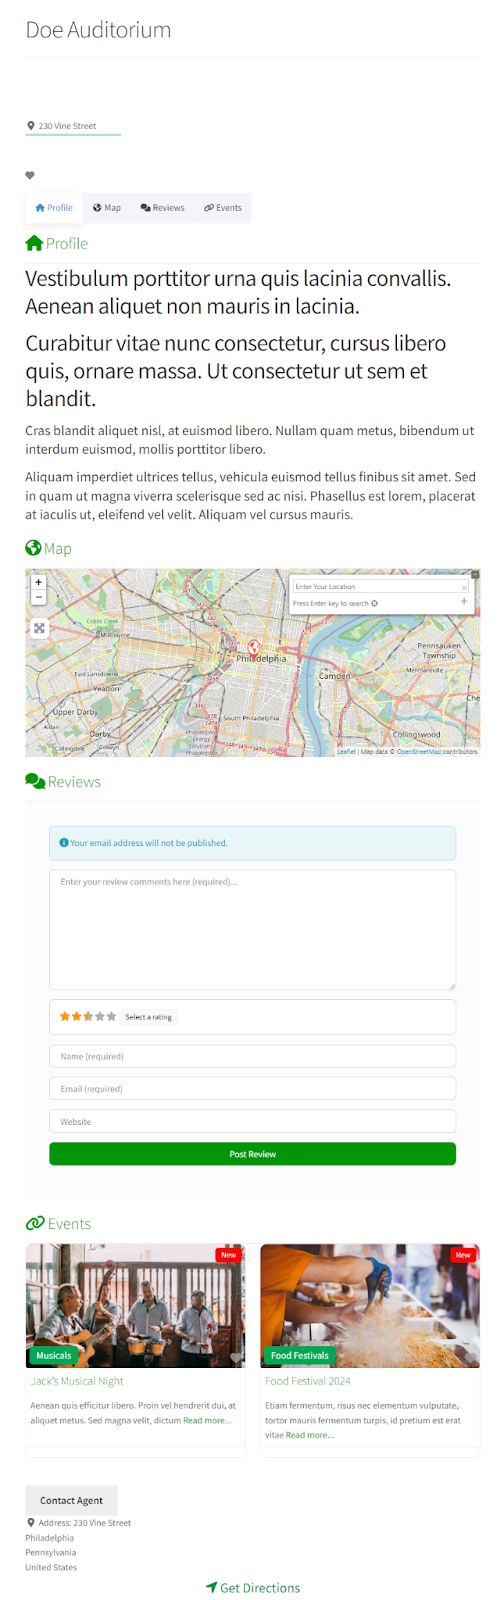
All doctors available in a hospital
You can also use the GeoDirectory plugin to list all doctors currently available in a hospital.
For this, we’ll need to create a custom post type like “Doctors” and link it with the right property or hospital.
Navigate to GeoDirectory → Settings → Post Types and click on the Add New button.
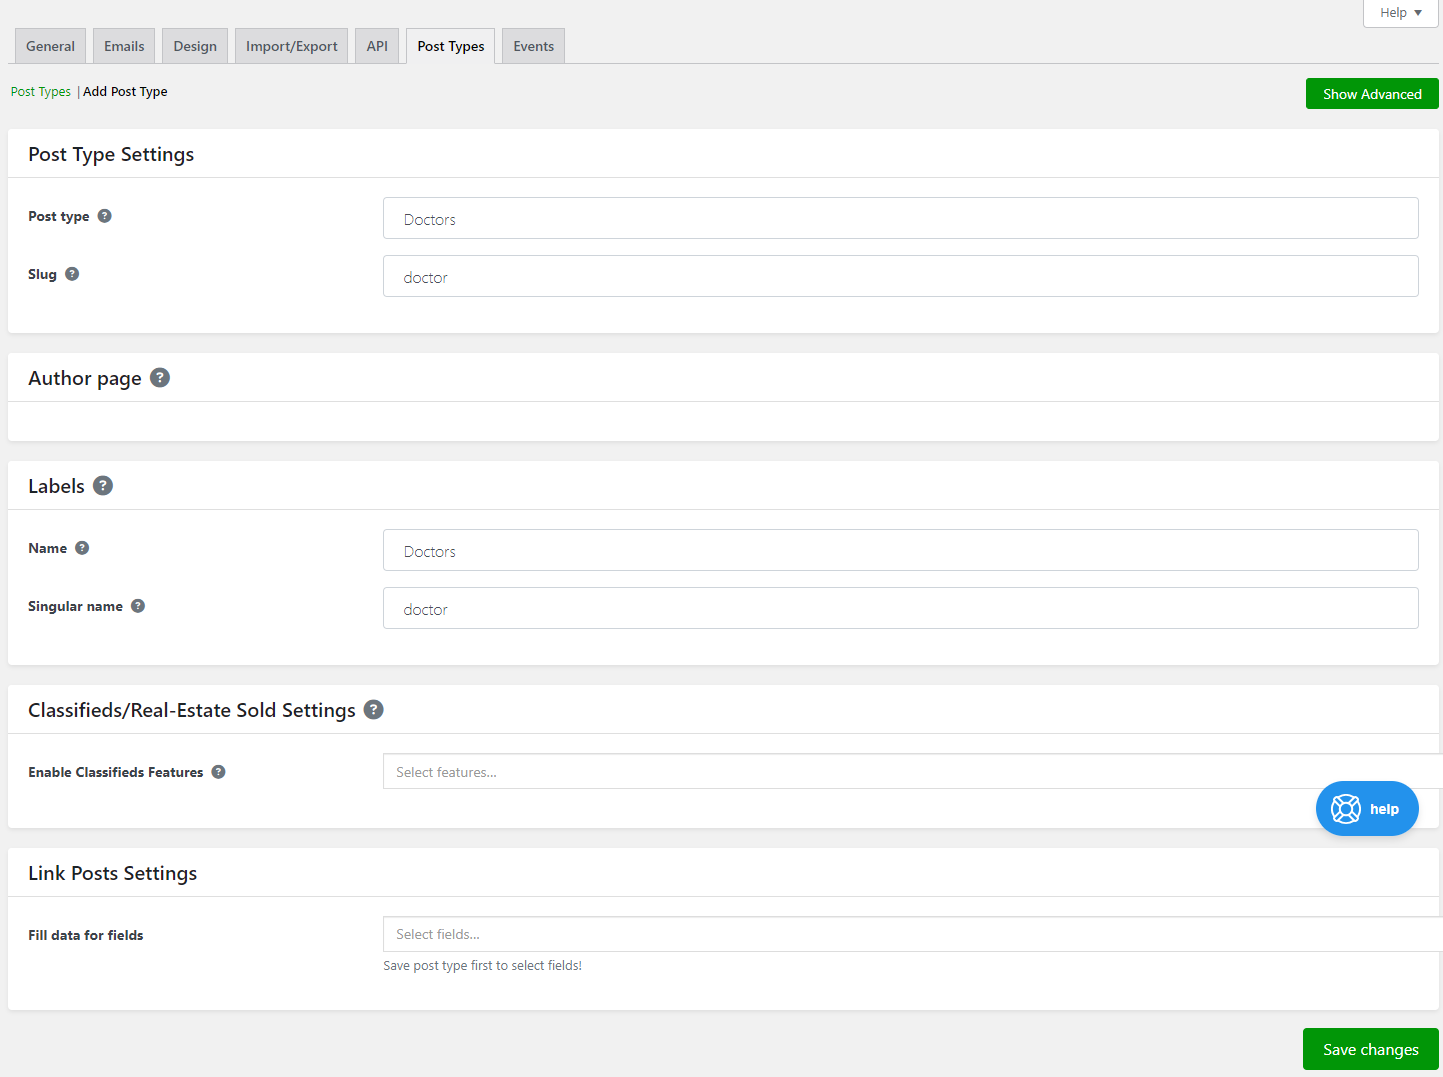
Once you’re ready, make sure to click on the Save Changes button to continue.
Similar to what we mentioned earlier, add a custom field to the doctors’ add new listing form by navigating to Doctor → Settings → Custom Fields and add the Link Posts: Property field to the form.
This way, when a user adds a new listing to your site, they will be presented with the option to select the property or hospital they operate out of.
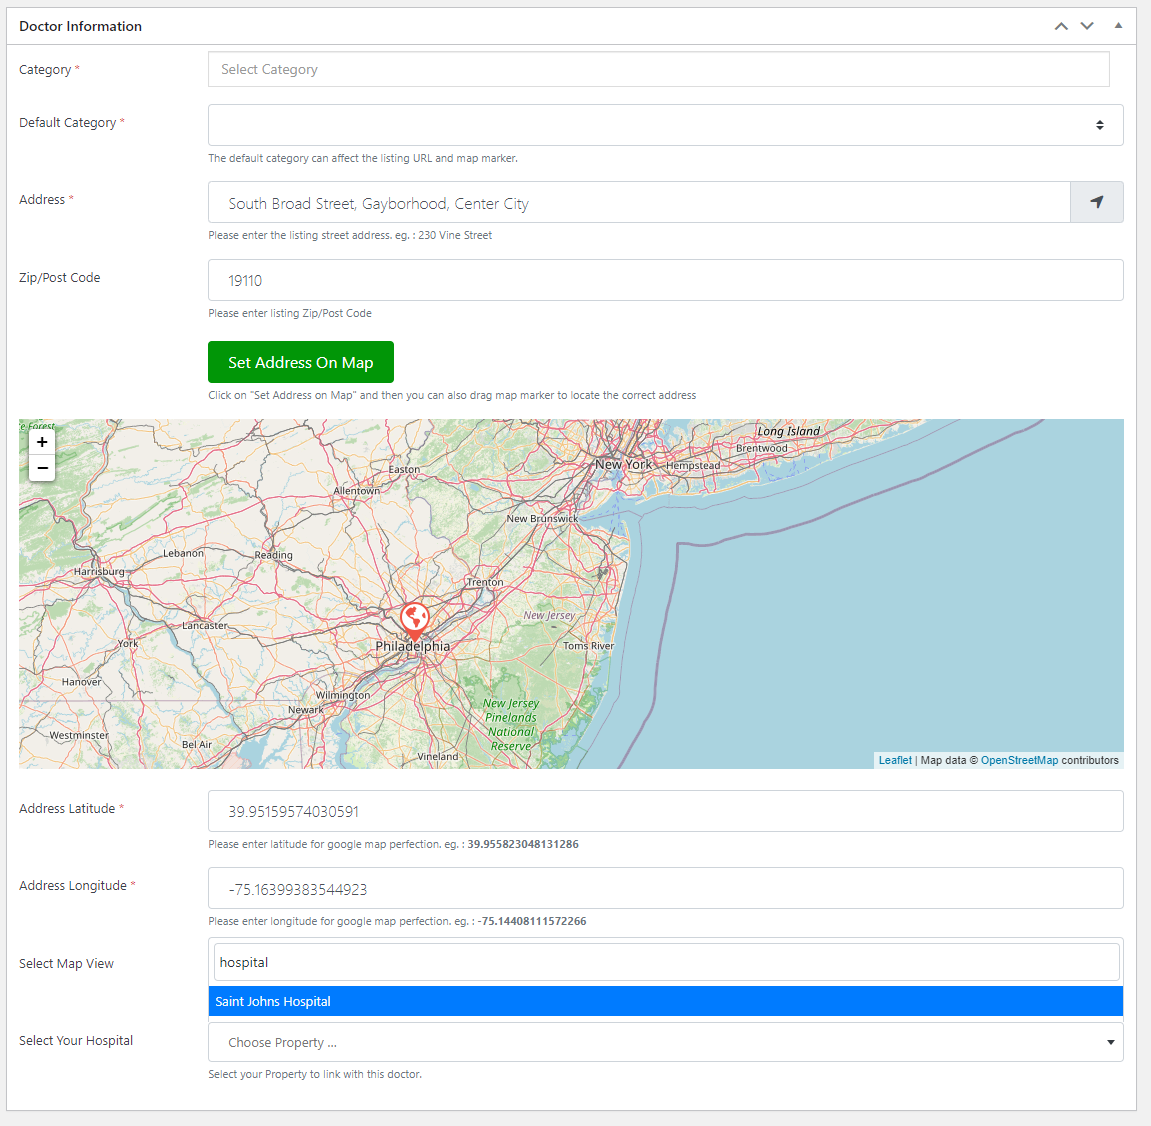
Now to display it on the main hospital page of your listing, you will have to add it to the tab display.
For this, navigate to Properties → Settings → Tabs and add the Link From: gd_doctors shortcode to the tab display.
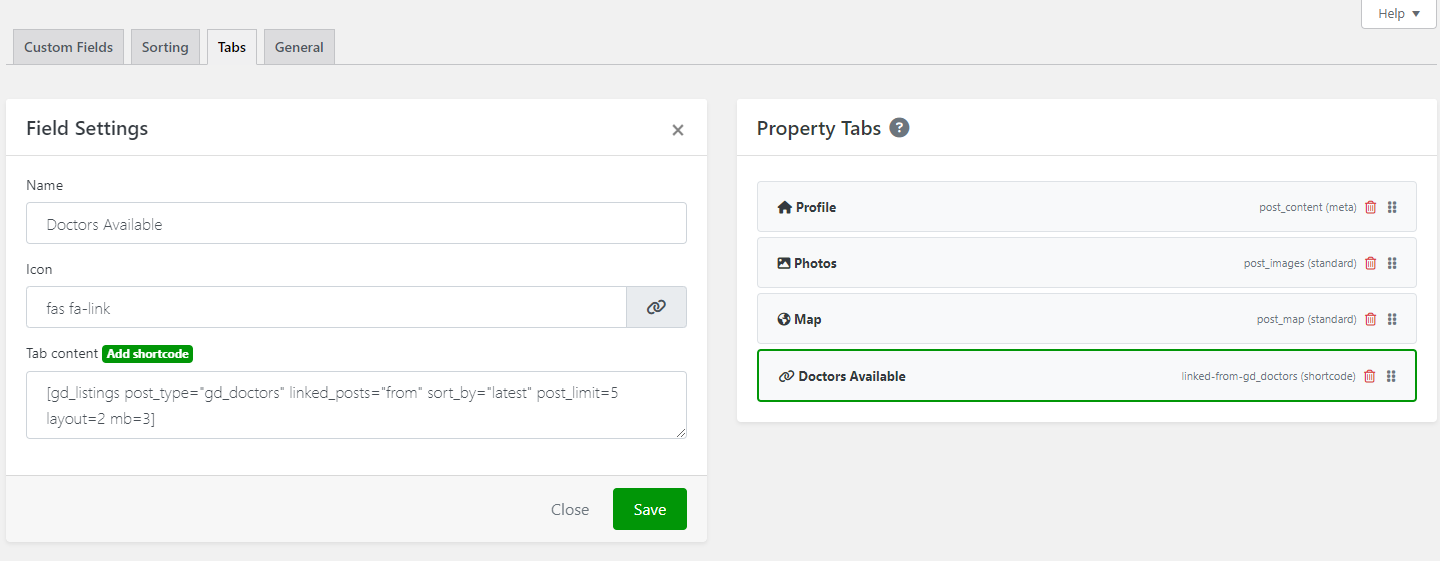
This will showcase all available doctors in a hospital on the listing details page on your WordPress site.
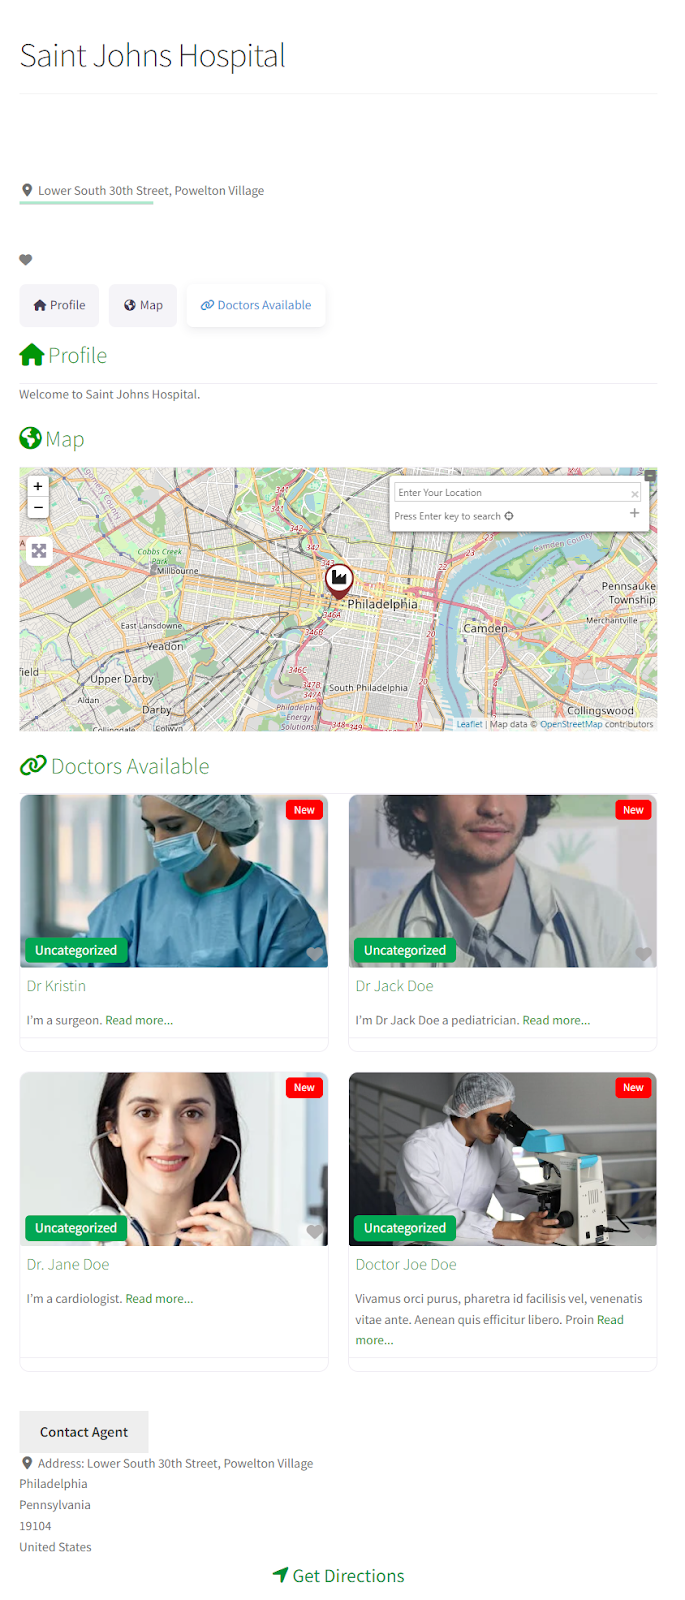
Conclusion
Linking different listing types is a great way to add to the overall user experience on your WordPress directory website.
It helps present more details about a venue, business, or event in a professional way on top of encouraging your site visitors to quickly take action.
The best way to link different listing types in WordPress is by using the GeoDirectory plugin.
This is because it’s very easy to use and lets you create custom post types so setting up any type of listing is possible with the robust plugin.
In addition to this, it also lets you add custom fields to the new listing form without having to touch a single line of code.
Ready to start linking different listing types in WordPress? Get GeoDirectory today!

Recently we built Blockstrap, which is both a plugin (providing the page building blocks) and a block theme (FSE – Full Site Editing) that combines the power of WordPress’s new Site Editor and Bootstrap 5.
We built Blockstrap as the framework for our new wave of Directory Themes, which soon will include a Generic Business Directory and Events Theme, a Real Estate Theme, a Job Board Theme a Classified theme, and many more Directory Templates for WordPress,
All these themes are specifically designed to create a pixel-perfect Directory site using Geodirectory.
In this tutorial, you will find a step-by-step guide to building a Directory Website using the Blockstrap Theme, the Directory Child Theme, and our Geodirectory plugin:
- Install the Blockstrap/Directory Theme
- Install and setup GeoDirectory
- Design the Directory Website using the Block theme Builder
In this guide, we’ll show you how to make a cool online directory using the Directory Theme and the GeoDirectory Plugin.
With this setup, you can easily add features based on location, make your site look awesome, and add different kinds of content that changes dynamically.
But for now, we’re going to keep things simple and easy to understand.
In this tutorial, we’ll cover:
Installing Theme and Plugins.
1. Install the Blockstrap Theme and its Directory Child Theme
First, Let’s Install the Directory theme. Since it’s a child theme of Blockstrap it will automatically install the main theme too.
Installing the Blockstrap theme will also prompt you to install the Blockstrap plugin.
the Blockstrap plugin is our page builder, needed to add the collection of Blockstrap blocks to enhance the design of your directory website.
If you’re curious about the three 1-star reviews for the Theme, please note that these reviews are actually for a very old version of this theme built by other developers, not the current one. We acquired the original “Directory” Theme and its URL (wordpress.org/themes/directory/) because we appreciated its concept and wanted it for our new product. Unfortunately, this meant inheriting its past negative reviews.
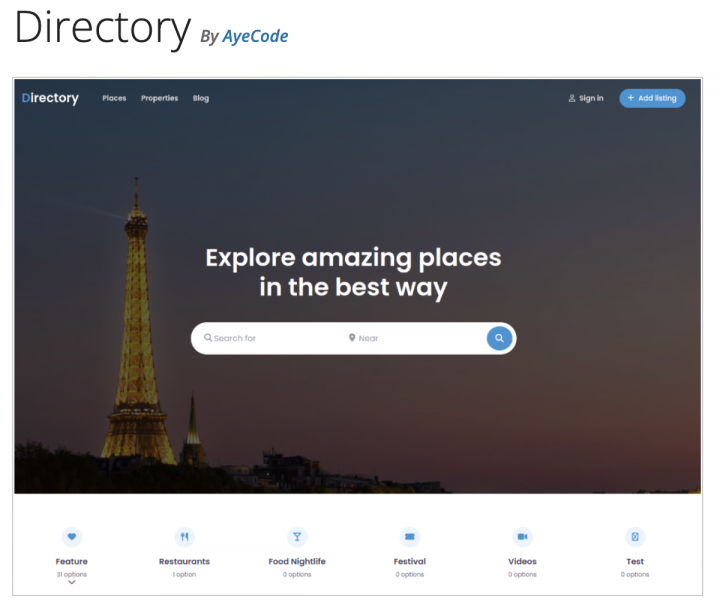
You can go to your WordPress website and from
WP-Admin >> Appearance >> Themes >> Add New: Search Directory and install the first theme option.
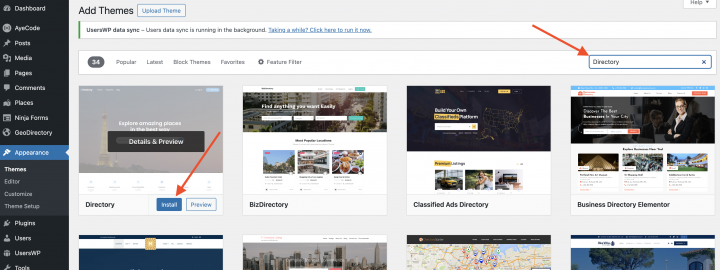
2. Install GeoDirectory
Here’s what to do:
- Go to “Plugins” and then “Add new”.
- Search for GeoDirectory.
- Install and activate it.
That’s it! The plugins are all set up now.
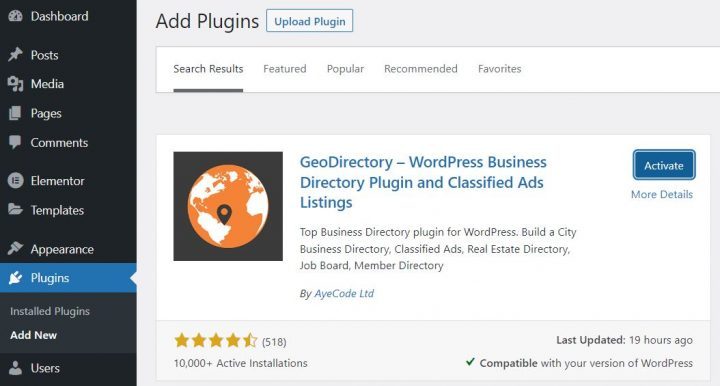
3. GeoDirectory Install Wizard
For GeoDirectory, you must complete the Setup Wizard to configure the Google Maps API key and import a few dummy listings.
Choosing the Map System (Google Maps or OpenStreetMap)
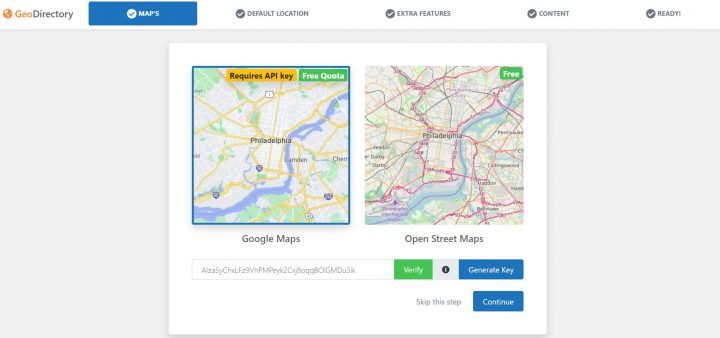
In the first step of the setup, you choose between two map systems: Google Maps and OpenStreetMaps. For this guide, we’re going with OpenStreetMaps.
If you prefer Google Maps, there are a few extra steps:
- Click on the “Generate Key” button and follow the instructions provided here to create a valid API key.
- These are the important steps:
- Activate the Keys.
- Create a new project or select an existing one.
- Obtain the Key.
- Set up a billing account.
- Limit the API key (so it only works from your website’s URL).
Step four is essential, but you only pay if you exceed $200 a month. However, the free credit usually covers the needs of most directories.
Now, let’s move on to setting the default city.
Setting the default city
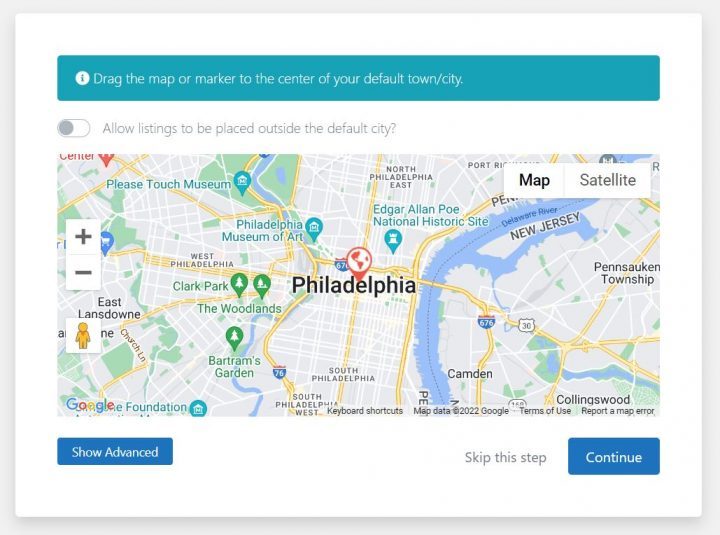
Afterward, you’ll select the default location, which is the main city featured in the directory.
We’ve decided on Philadelphia as the default city, but you’re free to choose any location you prefer.
If you’re creating a directory covering multiple cities, you’ll require the Location Manager add-on.
Adding extra features
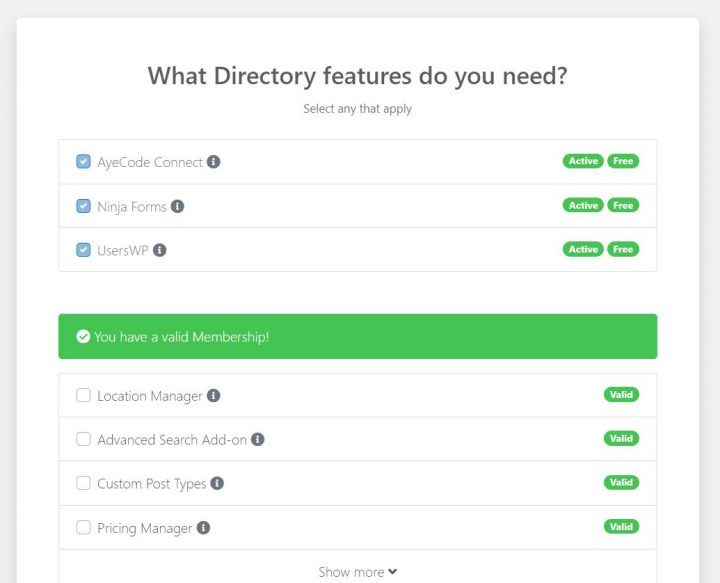
In this step, we’ll set up UsersWP, a plugin for user registration. This allows users to sign up and log in to your website.
UsersWP is essential for users to manage their listings, create profiles, and access features like reviews.
Additionally, we’ll install Ninja Forms, which adds contact forms to all listings. These forms send emails directly to the listing owners. (NOTE: BlockStrap has a simple contact form that can be used for this, Ninja forms is useful for more advanced forms)
Note that AyeCode Connect isn’t required for this tutorial unless you want to add premium GeoDirectory add-ons directly from your WordPress Dashboard.
Adding Dummy Data
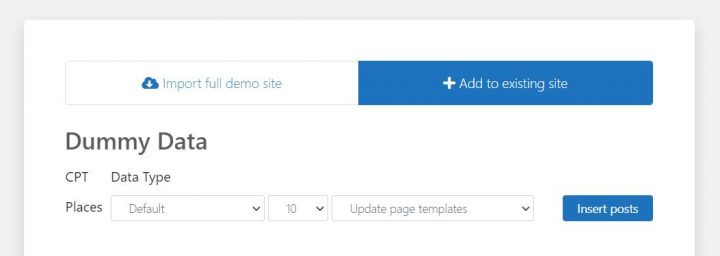
The last thing to do in the installation wizard is to add some sample listings. This also creates categories for the listings, but you can always change them later if you want.
Design the Blockstrap/Directory Theme Directory Website
Now that we have installed the theme and plugins, and completed the preliminary setup of GeoDirectory, we can begin designing our directory website.
Our Blockstrap’s child theme called the Directory theme, already provides a prebuilt block template for Geodirectory pages.
In this article, we will customize these prebuilt templates directly.
1. Blockstrap/Directory Home page design
To customize the homepage design.
Go to Appearance >> Editor >> Click Templates
Now select the Front page template and click the edit icon.
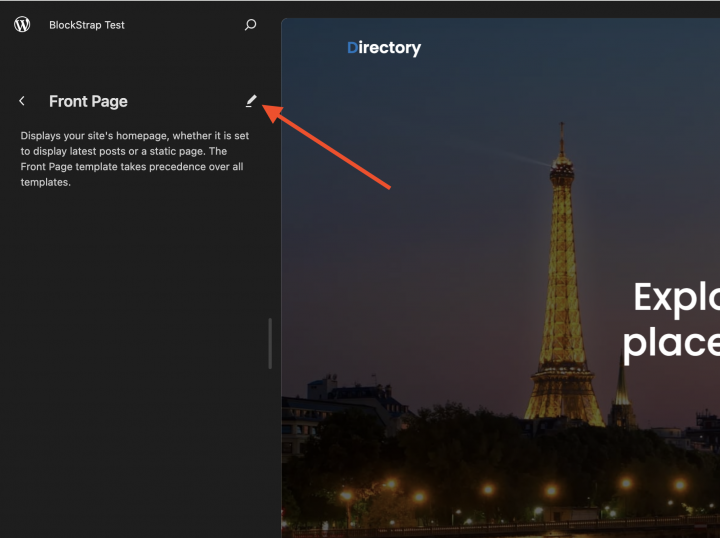
before editing the homepage template let’s first create a Logo for the website.
1. The Logo
First things first, we need a logo for our website.
You don’t have to hire a designer to create the first version of your logo.
One of the biggest mistakes you can make when starting a new directory is spending too much time and money before testing if people need what you intend to build.
You can make a logo in just five minutes using an app like Canva, which is amazing and free (or cheap for what it offers if you choose a premium plan).
For a basic version of your product (called MVP, or minimum viable product), a logo made with Canva will do just fine.
There are lots of logo templates to pick from, and it’s okay if your first logo isn’t perfect or super unique.
If your project starts to do well, you can always work on improving or completely changing the logo later on.
A regular logo usually isn’t why a project fails.
We’ll use this logo when we create the header for the website.
The Header
Now let’s add this logo image by selecting the proper block from the left side as mentioned in the below screenshot.

Now Let’s add a few required menu items. Like Home, Places, and Blogs, Contact, and About in our case.
You can use the BS > Nav item block to add the new menu item.
PRO TIP: If you decide to use the transparent header for the home page, you’ll need to add the logo to both the regular header and the transparent header.
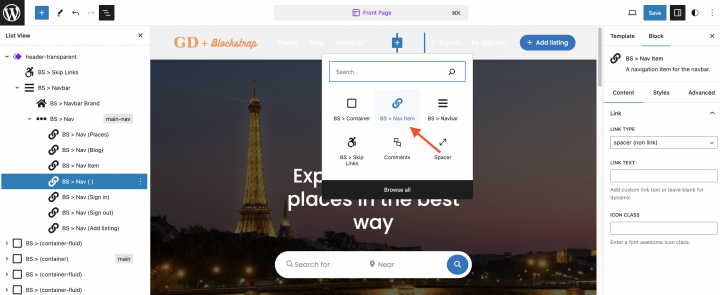
The Content
This is how the default homepage looks with the Blockstrap’s Directory Child Theme.
It already seems complete in itself but we will make some minor changes to it.
The gd_location shortcodes belong to the Geodirectory Location Manager addon. since we are not using this addon at the moment I am removing these shortcodes that you see in below screensort.
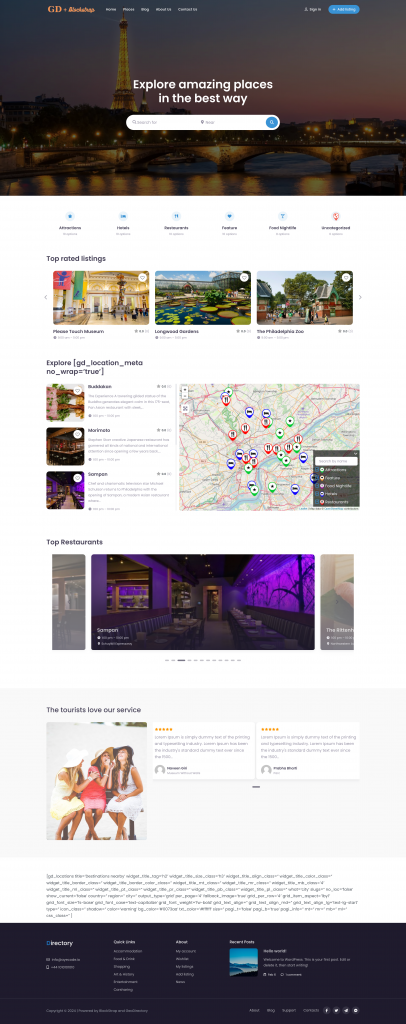
Now this is how our homepage looks now.
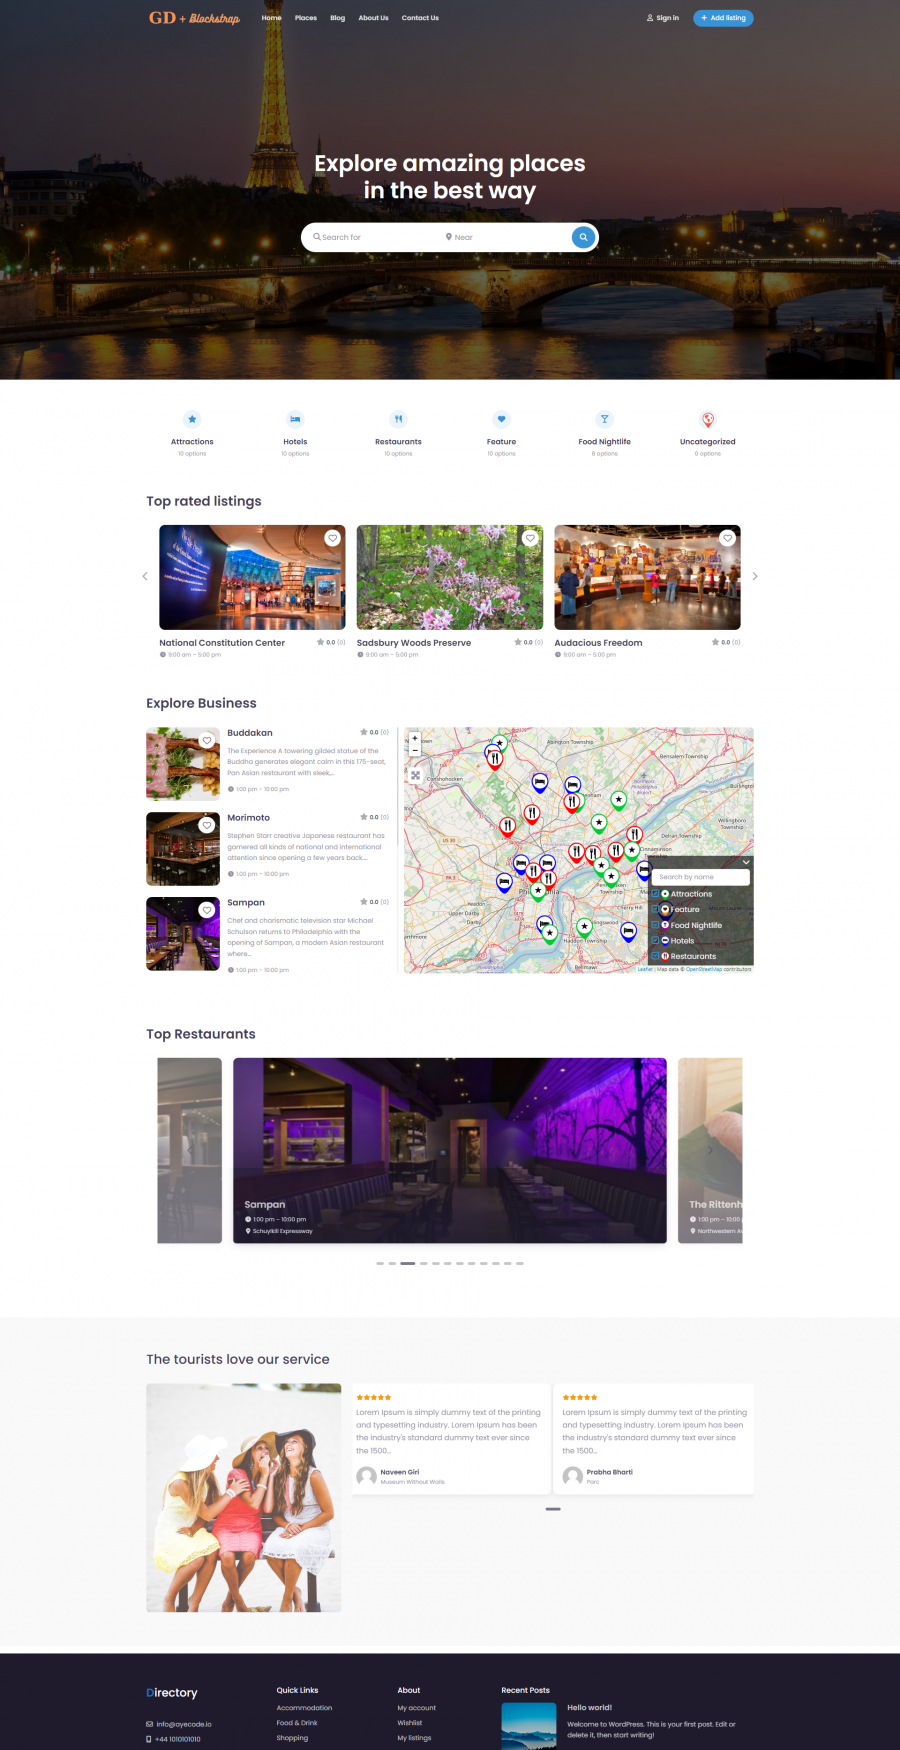
If you want to add a new section or make any changes to any page content. You can use the Blockstrap theme inbuilt blocks that start with BS >
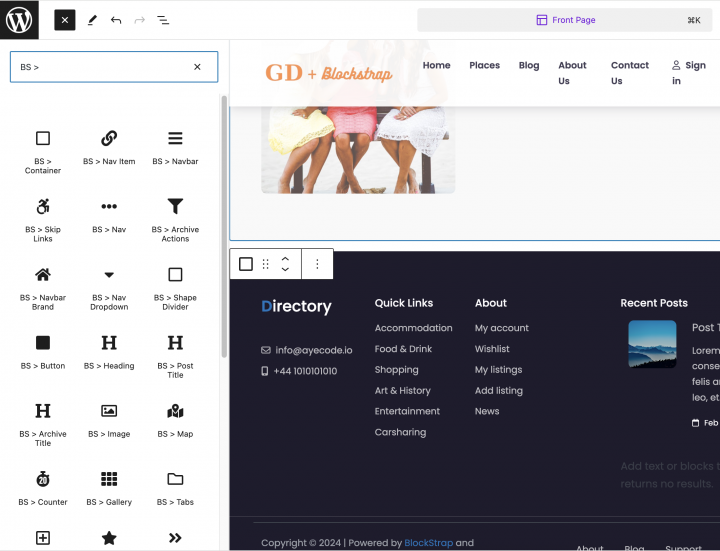
2. Blockstrap/Directory Website Listings and Search page design
As mentioned earlier Blockstrap and Directory themes already have prebuilt templates for GD Pages.
All these templates are complete in themselves so we aren’t required to make any changes to them.
Since inner pages use a hero header. we have to customize the Archive page header section and update it with the new logo and menu items.
Let’s Go to Appearance >> Editor >> Click Templates >> Select GD Archive for Archive page layout.
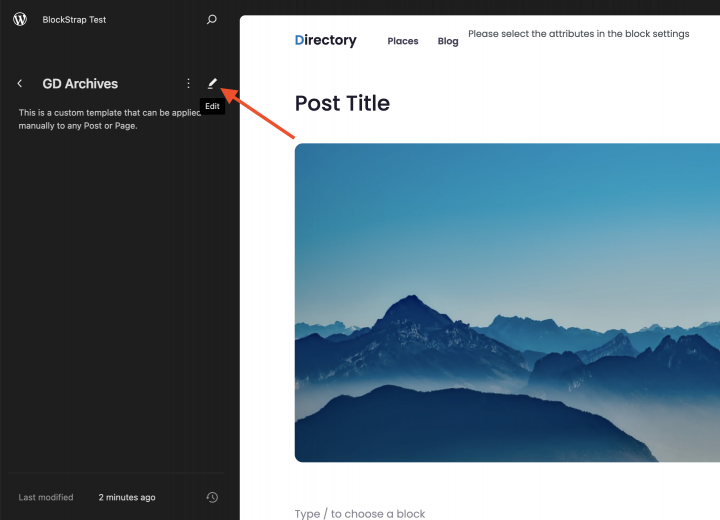
Similar to the homepage we will upload the new logo and menu items here on the GD Archive page header.
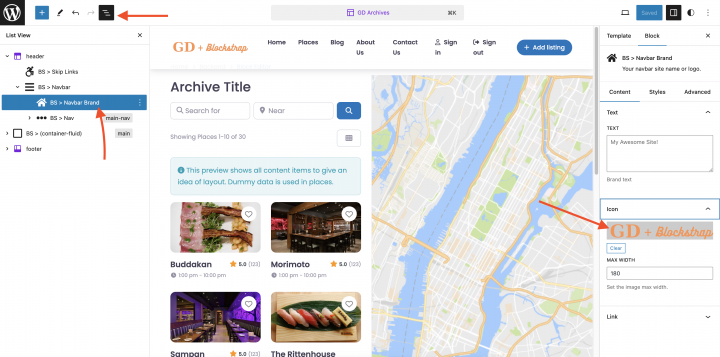
This is how the GD Archive page looks with the default design.
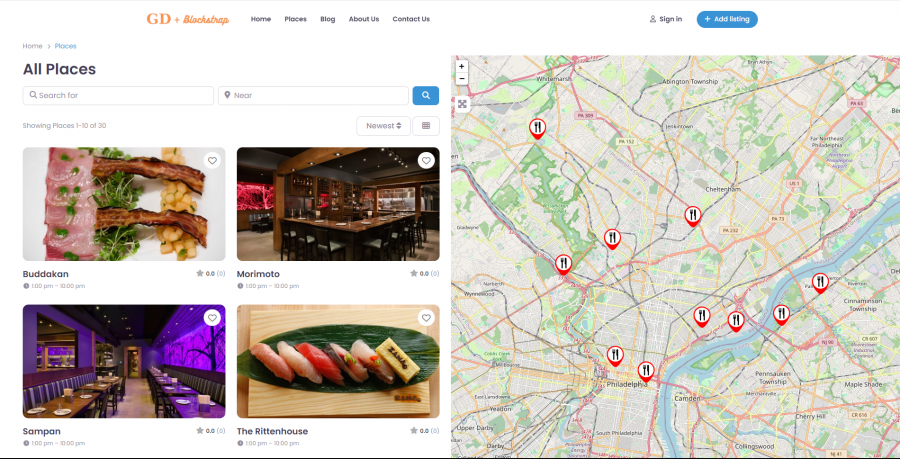
similarly, for the GD Search page select the GD Search Archive template and make the necessary changes in it.

I am keeping the layout to default for this article.
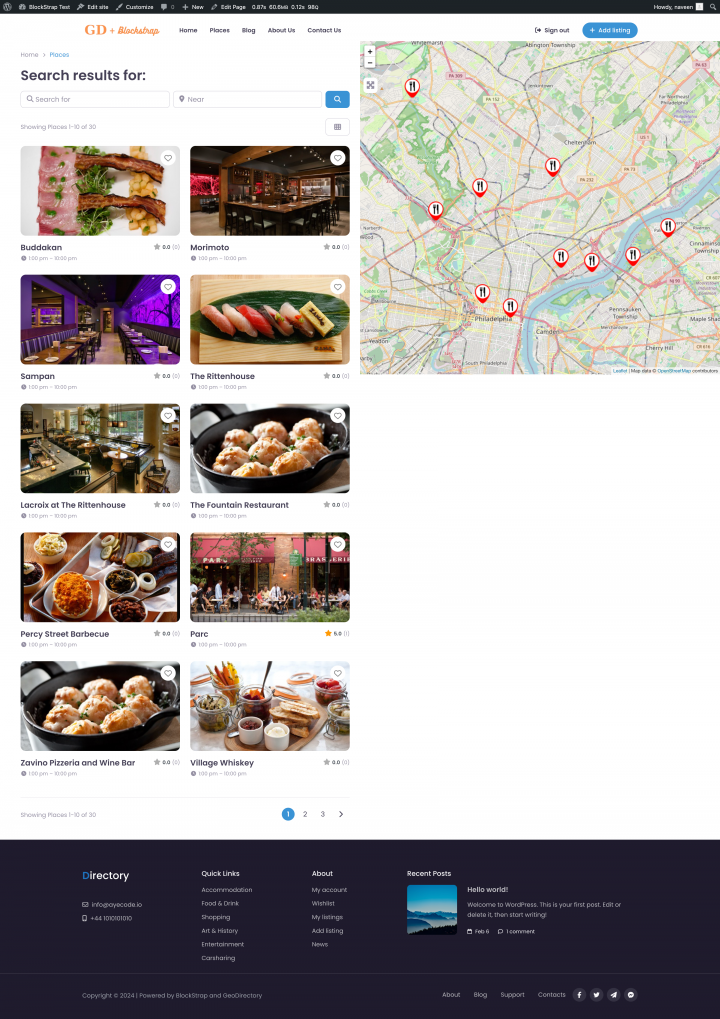
3. Blockstrap/Directory Website single Listing page design
To customise the GD Detail page select the GD Single page template and make the necessary changes in it.
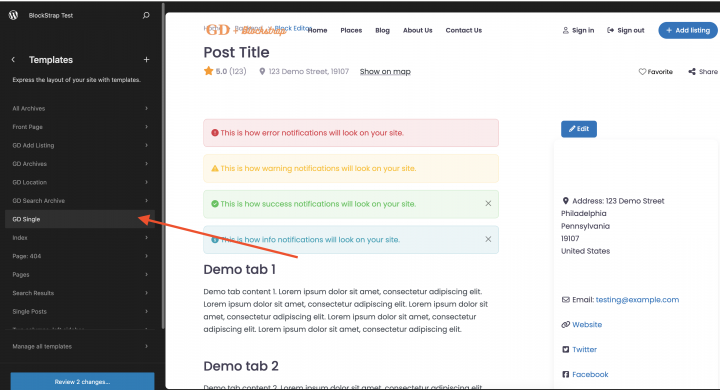
This is how the default template of the GD Details page looks. which seems complete and contains all the required elements. So I am not going to edit it.
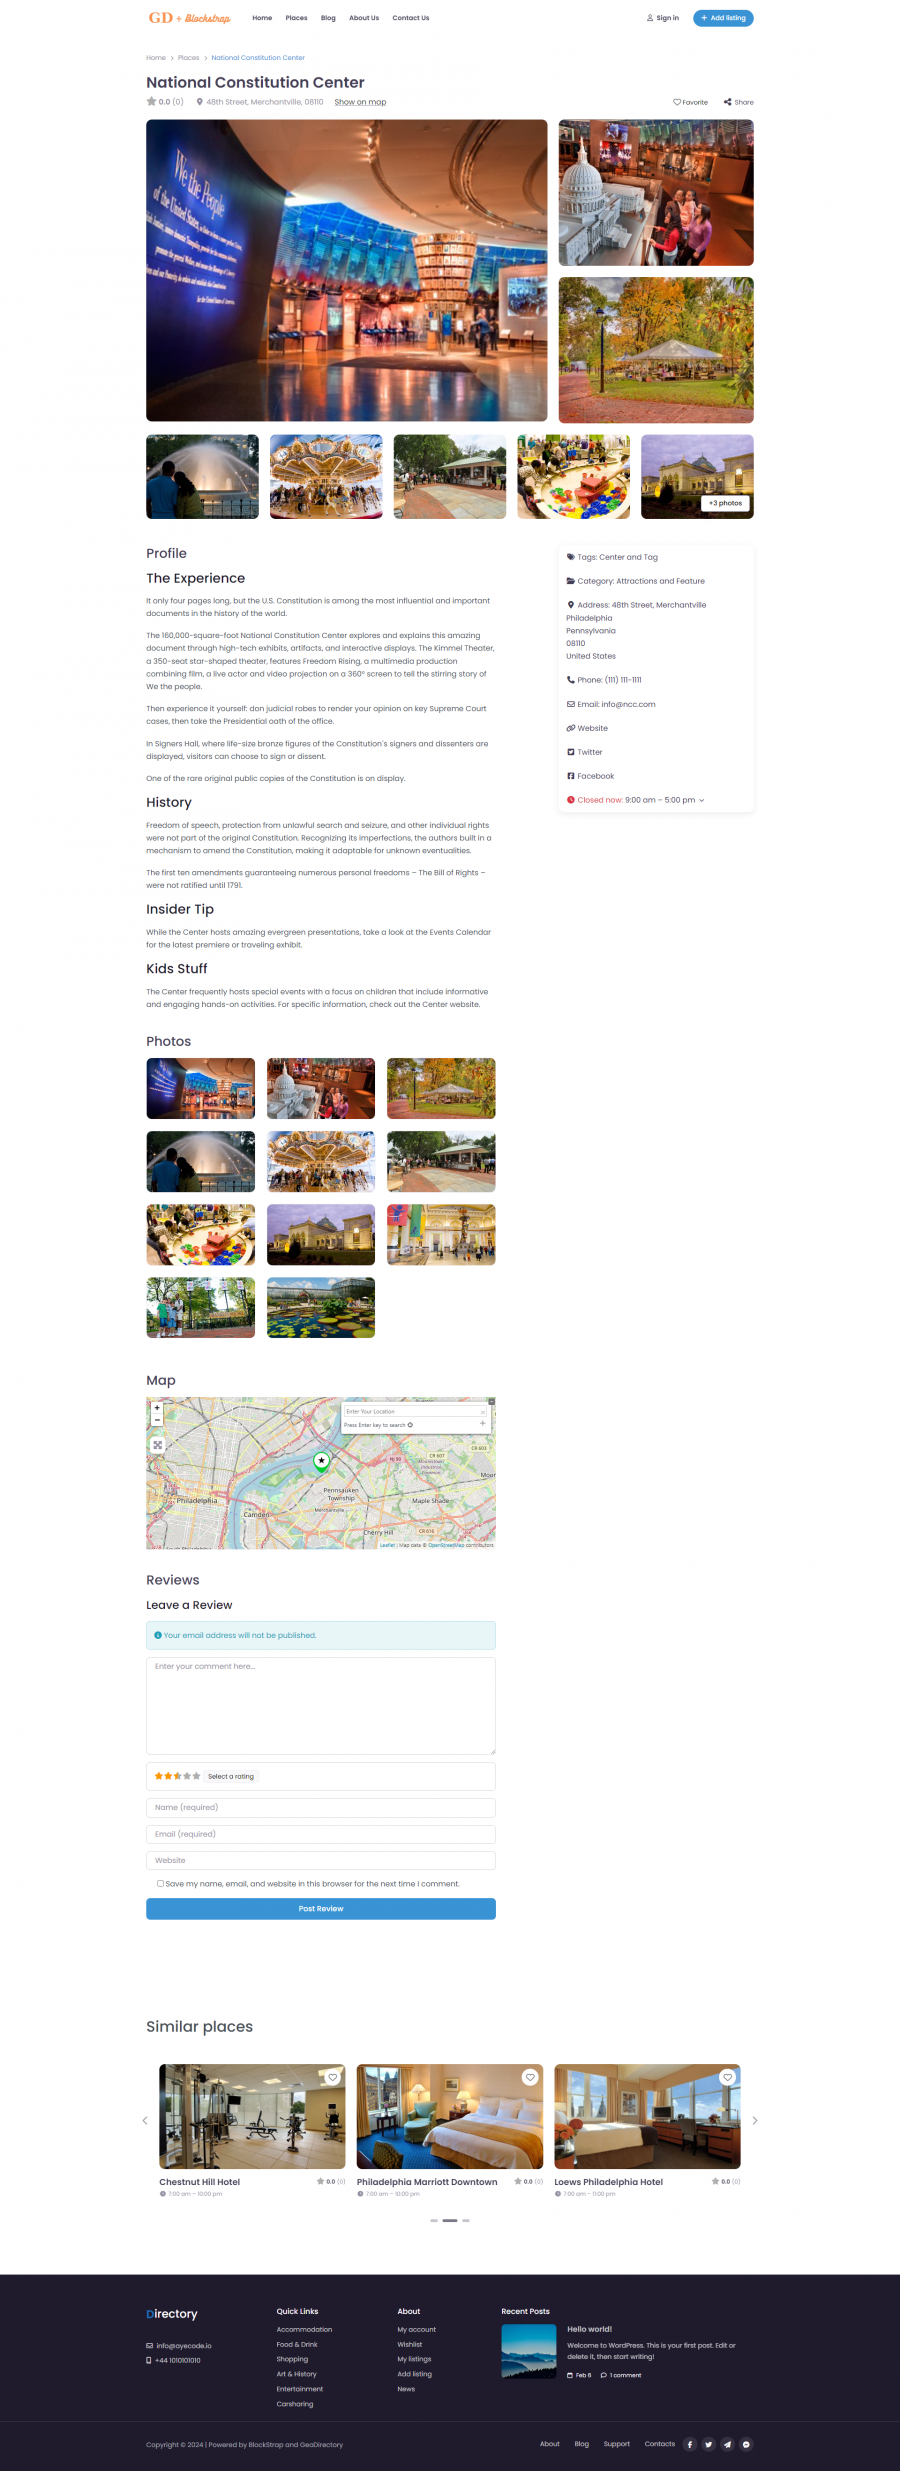
Adding Premium Features to your Blockstrap/Directory Website
If you wish, now you can add premium features to your directory, such as:
- Paid Listings: with the GeoDirectory Listing Price Manager add-on, You get to choose how much it costs to add a listing. You can set different prices for different options. For instance, you might offer more features for paid listings, like allowing more pictures, while limiting features for free ones. You can also decide which special fields are available and how long the descriptions can be.
- Claim Listings: This feature is super important for a directory. Here’s how it works: First, the admin sets up the database. Then, they invite business owners to manage their free listings. If a business owner wants full control, they might need to upgrade to a paid listing first.
- Advertising: selling ads is another form of monetizing an online directory. If your website has many visitors, you can use ad networks. But if it doesn’t, you can sell ads directly. This means businesses can pay to display banners in specific areas of your site, or their listings can appear as ads, such as at the top of search results.
These are just three examples. However, a directory website offers many ways to make money online.
You can create a worldwide market for handmade items, sell tickets to events, or offer discount coupons.
If you’re interested in getting started, dive into this resource: How to create a directory website from scratch.
This tutorial is versatile and can be adjusted to work with any theme or page builder.
The options for what you can do with your website are endless.
Conclusion
We published a large number of tutorials, about building a Directory with the most prominent themes and page builders.
If you read any of them, you will notice that building with the Blockstrap framework and its directory child theme, is easier.
The result is way better looking.
And least but not last, if you test a Blockstrap Directory Website, you will also notice that it is a lot faster than any other we created tutorials for, up to now.
The best thing, both the Blockstrap Theme and Plugin and the Directory Child theme are 100% free!
So, what are you waiting for? Start your Directory Website with Blockstrap and the GeoDirectory Plugin and start making money online now!