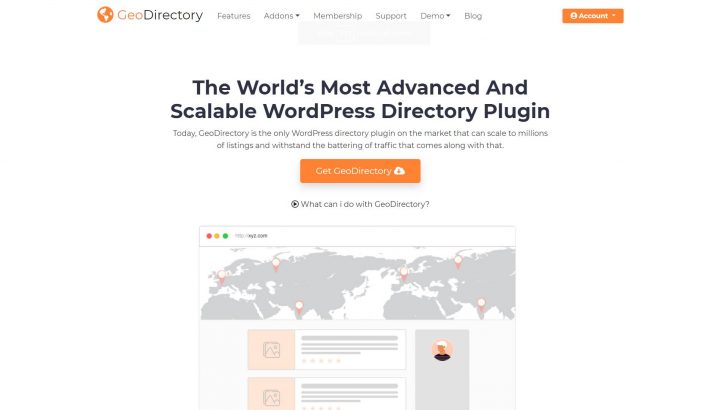
The World’s Most Advanced And Scalable WordPress Directory Plugin
Today, GeoDirectory is the only WordPress directory plugin on the market that can scale to millions of listings and withstand the battering of traffic that comes along with that.
Get GeoDirectoryWhat can i do with GeoDirectory?

When you learn how to make a directory website with your chosen directory listing software and you get set up, it can be frustrating to realize that’s only about half the battle.
You also need to know how to make money with your WordPress website.
What can make matters worse is creating a plan to monetize your website only to learn that the directory listing software you’re using doesn’t support the features you need.
Building and monetizing your online directory can seem like an uphill battle, but it doesn’t have to be with the proven strategies outlined below.
How to Make a Directory Website with WordPress
Before you can start monetizing your online directory, you need to build one.
One of the best ways to create an online directory website is to build it on top of a self-hosted WordPress site.
WordPress is well-maintained and frequently updated with security patches. It’s also infinitely scalable if your hosting plan includes enough resources.
Regular (automatic) maintenance on your site with plugins such as for database and image optimization, caching, and Domain Name System (DNS) also help further boost the performance of your website.
It’s also essential that your website’s theme and any plugins you install are cleanly coded and built for efficiency. Otherwise, your site can become bloated and slow to load.
After installing WordPress, you can add a plugin for creating an online directory.
The Best WordPress Directory Plugin to Use
When looking for directory listing software for your WordPress site, you must pick an option with all the features you need.
Not only that, but the directory plugin you choose also needs to be secure, fast, highly customizable, and straightforward.
Our GeoDirectory plugin covers all these areas. It also includes:
- Automation
- Supports millions of listings
- Great search functionality
- Importing from CSV
- No coding required
- Each listing can have its page
- Unlimited custom fields
- Add-ons to extend the core plugin,
- And the list goes on
GeoDirectory covers the features that other options don’t support. We also have a premium version with extensive features.
If you need to convert your existing directory listing software to GeoDirectory, such as switching from phpMyDirectory, use the Directory Converter add-on.
Online Directories: How to Make Money with Your Website
Now that you know how to make a directory site, it’s time to learn how to make money with your directory website. There are so many ways to do this, and you’re only limited by your level of creativity.
Check out 8+ Ways to Monetize a Directory Website for several proven strategies.
Little-Known and Unique Ways to Monetize Your Online Directory
Below are even more strategies to monetize your online directory.
These suggestions are often overlooked but are quick to implement with minimal effort for the maximum possible Return on Investment (ROI) and revenue.
1. Create Related Product Add-Ons
Depending on the type of online directory you have set up, you can sell complimentary products or services.
An excellent place to add these related products and services is as upsells during the checkout process.
By that point, your visitors are sure they’re purchasing to become customers, so it’s a great time to show them more items they may be interested in.
You can also add a sidebar to your site and place related products and services there.
Print-on-demand merchandise services like RedBubble, Spring (formerly TeeSpring), and VistaPrint can help you create these products that are made to order.
Then, you can sell them with WooCommerce, or if you don’t want to develop an entire e-commerce storefront, you can use our Payments Plugin GetPaid. Both are fully compatible with GeoDirectory.
Below are examples of products and services you could offer your customers for different directories.
Feel free to use them as suggestions and for inspiration.
Some suggestions offer businesses space in a listing, to sell their products for a commission.
For such use cases and similar ones, use the GeoMarketplace add-on.
Hotel Directory
Consider what travelers need up to and including during their stay at a hotel they selected through your directory.
This also includes what they would need to sightsee or conduct business.
You could sell travel-sized personal care products, souvenirs, travel mugs, travel insurance, and anything else you think will be relevant.
On the other hand, as a directory developer, your actual client here is the Hotels, not the traveler.
So think about what you can upsell to the hotel too.
Social media management, reputation management, professional photography (not a photographer? You can always outsource and take a commission), and website development.
Those are just a few options you can consider as upsells for many businesses.
Every business that added itself to your directory is actively investing in Marketing.
Be creative and sell them something else.
Travel Directory
Similarly, you can consider your customers’ travel requirements and tailor some products or services based on those needs.
You could offer the same options as the above, as well as luggage and luggage accessories, passport holders, eye masks, neck pillows, travel agent services, and the like.
You can partner with Tour Organizers in all destinations covered by your directory, sell their tours, and get paid a commission for every guest referred.
Restaurant Directory
Customers of a restaurant directory can often use gift cards, but you can also get creative with your extra services.
For example, you could use the same concept as Uber Eats and offer premium priority pick-up and delivery for a fee.
This could be a good business plan for a directory serving small cities where this kind of service is not offered by the more prominent apps.
Nevertheless, your clients are the Restaurants in your directory, not just the website visitors.
What could you sell to the restaurants?
Any service mentioned above for Hotels is valid here, too.
However, with a bit of creativity, you can find plenty more.
Restaurants today need Digital Menus with QR codes, but many restauranteurs still don’t know how to operate a computer, so they might need someone to edit it.
You can charge an annual fee to take care of that and more.
Business Directory
There are other options beyond letting business owners claim their pre-populated listing with the Pricing Manager, and Claim Listings GeoDirectory add-ons.
Businesses willing to pay to be listed on your directory could be willing to pay for someone to manage their AdWords account or to help them create sponsored posts on Facebook and Instagram.
Owners of small businesses don’t have time to become online marketers.
They might not even know they need to do online marketing. You can sell them a service and create win-win opportunities and long-lasting business relationships.
Real Estate Directory
If your target audience consists of real estate agents, you could offer templates for presentations and open-house marketing material.
On the same note, offering branding design or marketing services is another option.
If your target audience is focused more on home sellers, you could sell ad space for cleaning companies to promote their products and services.
That way, your customers can prepare their homes for showings at open house events.
The Advertising add-on can enable this functionality in your online directory.
Offering home staging services is another option.
If your target audience revolves around home buyers, you could similarly offer space on your site to contractors.
They can sell their services as products on a listing.
Last, you can refer leads to RE agents and claim a portion of the commission for each home transaction facilitated by your directory.
Marketplace Directory
If you own an online marketplace directory, you could create your line of signature products and sell them similar to Costco with their Kirkland brand.
Amazon does the same thing.
Beyond that, you could sell ad space and let companies advertise items they want to promote or newly launched products.
Job Board
For job boards, you could offer professional résumé templates and coaching.
If you want to target businesses, they could sell related products in your directory on job listings.
For example, if you build a job board for restaurant personnel, you can be sure a good portion of your visitors will be Chefs.
Selling professional knives could be an idea.
No need to create an inventory. You can use the dropshipping method to avoid that and only get paid every time a sale is closed.
Other products could include business casual wear, printing services for business cards, steel-toed boots for construction workers, and other similar items that prospective candidates may need if they get the job.
Events Directory
Apart from selling tickets with the Event Ticket Marketplace add-on, and depending on the type of event, you could let companies sell their products on a listing for a commission, such as quality headphones for silent discos.
You can have businesses sell the products they would have at the events directly on the listing.
For example, suppose your Events Directory promotes wine tastings. In that case, you could invite the wine-tasting organizer to sell the wine online so visitors who could not participate in the tasting can still buy the wine.
Similarly, event-goers could pre-pay for any merchandising, like a t-shirt for a concert and other similar items.
2. Sponsored Blog Posts
Another option is to write content for your blog that’s informative and helpful.
Then, once you have established a following, you could invite brands to sponsor single blog posts.
You could display the business’ logo with a caption or label that reads, “This article is sponsored by” or something similar.
When visitors see that such valuable content was provided (in part) by a specific company, it helps build a sense of trust and loyalty to the brand because of their perceived generosity.
This strategy helps combat “advertising blindness,” a phrase used in marketing to describe visitors who are so used to seeing ads that they ignore them completely.
You can use the Advertising add-on to set this up for your online directory.
3. Sponsors for Your Newsletter
Similarly, you could also have businesses sponsor your newsletters.
Instead of just placing the company’s logo in the email, you could also arrange to offer a coupon code that’s entered in during checkout on the business’ website.
Offering deals that can only be accessed through the newsletter is a great way to entice readers to sign up as well as accept the offer.
This type of lead generation requires users to double opt-in, which means they must agree to sign up for your newsletter, then decide to pass on their information again to the third party when they checkout.
This means that it’s a strategy that’s potentially GDPR-compliant as long as the rest of the site requirements are met.
4. Offer Exclusive Listings or Memberships
Offering exclusive listings or membership to your directory can increase its value, which means you can charge more.
Not only that, but you can use our Embeddable Ratings Badge add-on to let members display their status in your directory on their website as social proof that they’re an ideal business to patronize.
This strategy works well for SuperLawyers.com where only the top 5% of lawyers can be listed in the directory. They’re given an embeddable badge to easily add to their site to show that they’re an exclusive, trusted member.
With the Embeddable Ratings Badge add-on, you can choose who gets access to the badge and if you want to let users customize the design of their badge. That way, it’s styled in a way that’s best suited for their site.
Not only does that help with brand awareness for your directory, but it’s also a strategy that gets your site backlinks to drive more visitors to your directory and improve your domain score for better Search Engine Optimization (SEO).
5. Publish Paid and Honest Blog Reviews
Another option is to publish honest reviews on the blog of your directory.
These can be paid reviews regardless of the star rating.
You could also include a coupon or offer from the business to add value for the reader and to the company advertising on your directory.
Reviews can be public but also private only for the business owner.
These are called mystery shopper reviews and are very useful for business owners (especially for those with a standardized service), to evaluate the quality of work provided by their teams.
You can use GetPaid to handle the payment for the review.
6. Premium Listing Upgrades for Added features
Letting your visitors sign up to publish a premium listing is a great way to monetize your site.
You can increase the overall value by letting your customers access many more custom fields that offer greater details.
Using the Pricing Manager add-on, you can accomplish this and offer custom fields and options like adding more images, categories, tags, a longer descriptions, telephone numbers, and more.
You can create whatever custom field you want, then offer it as a premium listing upgrade.
For example, if you have a business directory, users can publish free listings with basic details such as the company’s name and a brief description. Still, they can get more value if they upgrade since they can also include contact details for lead generation.
7. Create Services Based On Customer Feedback
One of the most overlooked ways to monetize your online directory is to find the best methods by listening to customer feedback.
You can also search social media to do some market research.
You can search for what customers want in the online directory you created.
Reddit and Quora are great places to find what questions people are asking and what objections they may have that keep them from upgrading.
Once you have these details, you can tailor your monetization strategy to your target audience’s specific needs to increase sales.
You can also use what you find to point out gaps in your niche and fill them with a product, service, or automation.
It’s also a great idea to research statistics that may be available and relevant to your directory.
So much data is available online, so it’s worth the effort.
For more data, you can use Google Analytics or a similar tool to see details about your current audience to help you better understand your users and what they may need.
Using a heatmap tool such as CrazyEgg or Hotjar can help you collect data on how your audience is interacting with your directory website.
You’ll find out where users hover their mouse, what they’re selecting, where they spend most of their time browsing on each page, and more.
Heatmaps help you see where customers expect to go on your site but where they may have run into issues along the way, such as when people hesitate, then abandon the page, for example.
Adjusting your current services to make them easier for users, based on the data you collect and find, can help increase user retention and satisfaction.
When users see the improvements they’ve been wanting without having to put in any effort to offer feedback or complain. It sends a message that you understand them so well that you can anticipate their needs.
This can help build trust and loyalty between your customers, visitors, and your online directory website.
When this happens, they’re more likely to make future purchases and remain customers.
Wrapping Up
You now know how to make a directory online and make money with your website.
You also understand what directory listing software is best to use.
Setting up an online directory and monetizing it doesn’t have to be complicated.
GeoDirectory is a no-code option that’s robust, secure, user-friendly, fast, and reliable, and it also scales well.
Over to you: Were you able to set up your online directory? Do you have any questions or features you’re looking for but aren’t sure how to create? Feel free to share your thoughts in the comments below.
You can get GeoDirectory here today:
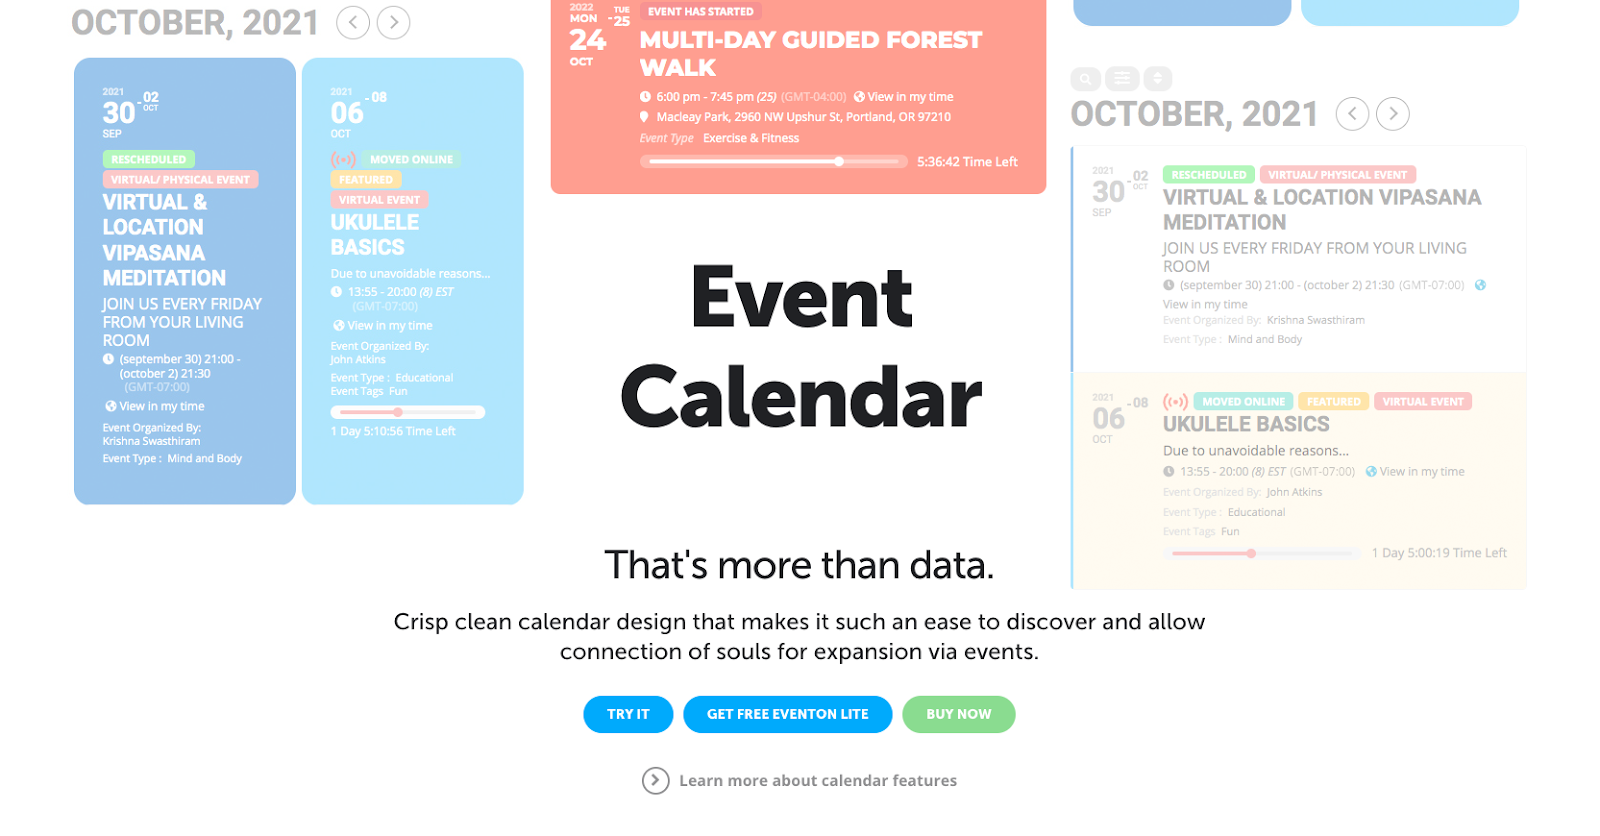
Are you looking for the best event calendar plugin for WordPress to keep your customers informed about upcoming events?
Whether it’s a music concert, an art exhibition, or any other type of event, having the right tools can make all the difference.
In this blog post, we will compare eight of the most popular WordPress event calendar plugins on the market today and help you choose one that suits your needs.
We’ll take a look at each plugin in detail – from its features, pricing plans, and drawbacks – so that you can decide which one is right for your business.
Ready? Let’s go.
What’s a WordPress event calendar plugin?
A WordPress event calendar plugin is a tool for creating and managing events on your website.
With the right plugin, you can easily list upcoming events, give visitors important details about those events, set ticket prices, and even take payments.
By events, we mean any type of event, such as webinars, workshops, conferences, online courses, and more.
Having a WordPress event calendar plugin can give your website visitors an easy way to learn about upcoming events without having to search all over the web or social media for information.
What to look for in a good WordPress event calendar plugin
The best WordPress event calendar plugin will make it easy for you to manage your events, add key details about the event, and publish them on your website.
Look for a plugin that has features like:
- Include important event details (date, time, attendees, equipment, staff, logistics)
- Display availability for client bookings or events
- Allow clients to self-book at available times
- Request and store customer data in a database
- Record events in the calendar
- The ability to customize the looks of your events page
- Send confirmation notifications for event creation
- Send updates for event changes
1. GeoDirectory Event Calendar Plugin

Plugin insights
- Rating: 5/5
- Downloads: 1M+
- Price:
First up is GeoDirectory and its powerful Event Calendar add-on.
Founded in 2011 by AyeCode, GeoDirectory has become one of the leading WordPress directory solutions, with more than 1 million downloads worldwide.
The GeoDirectory Event Calendar plugin is designed to work seamlessly with the GeoDirectory plugin, allowing you to easily add events to your directory listings via Custom Post Types (CPTs).
You can add unlimited custom fields to your events out of the box with the easy form builder.
GeoDirectory Events is the best option, especially for user-generated content Event Directories, where users submit their events and sell tickets for them.
Key features:
- Recurring events made easy – create events and set custom dates for them that repeat on any day, week, month, year, or even custom dates, so you don’t have to manually enter them every time.
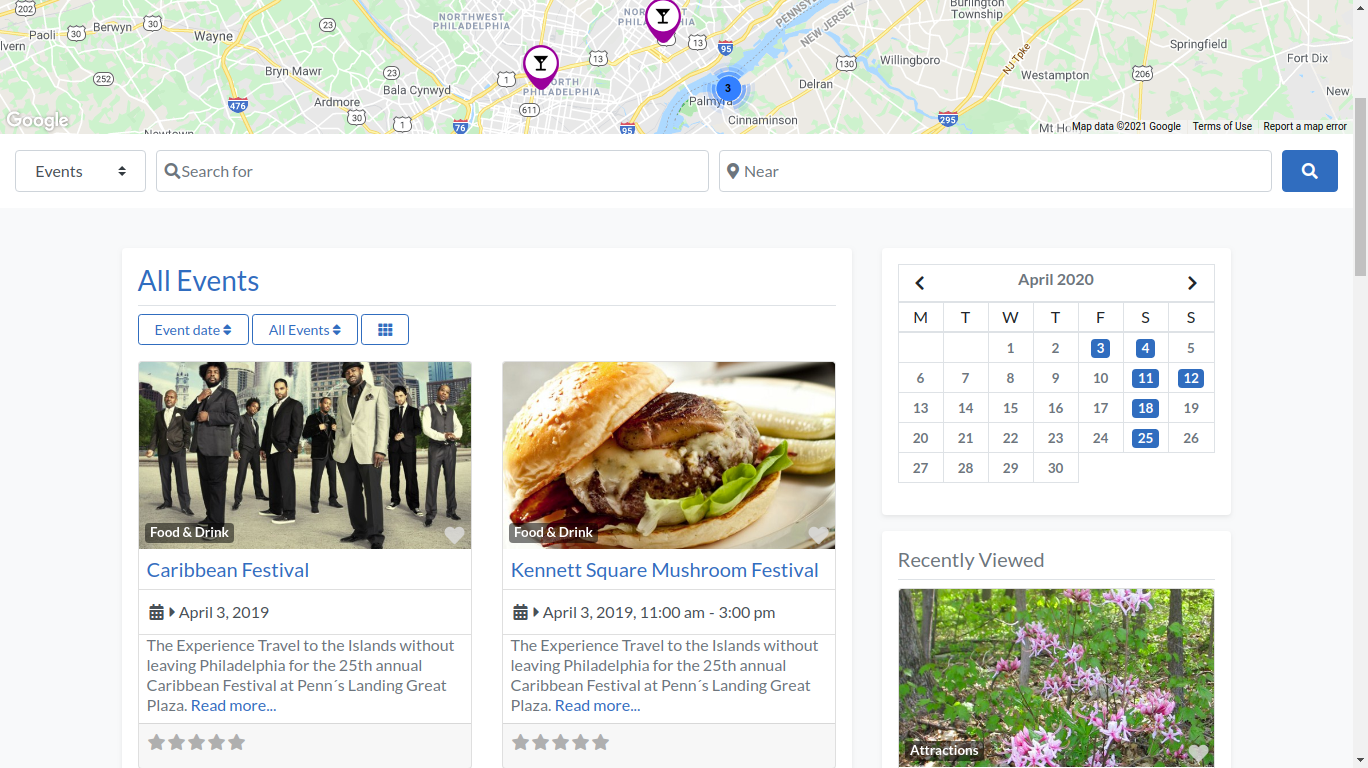
- Events locator – Events are conveniently displayed on an interactive map (that shows distance and driving directions), so visitors can easily search for events by location. Great for people organizing real-life events in multiple locations.
- Filterable calendar display – Visitors can easily search for events in the calendar display (using widgets) and sort them by selecting “upcoming,” “today,” “past,” or “all.”
- Set prices for events – the pricing manager add-on allows you to set prices for your events and enable/disable features per price.
- Events ticket marketplace. Allow event organizers to sell tickets for their events while you collect a commission for each ticket sold.
Cons
- Some features require paid add-ons – such as the pricing manager and CPTs.
Best for: businesses offering paid, repeat, location-dependent, or remote events that want to enable search and filtering on the calendar display.
2. Timely All-In-One Events Calendar

Plugin insights
- Rating: 4.7/5
- Downloads: 90,000+
- Price: Free (premium add-ons start from $98/year)
Next up is Timely All-In-One Events Calendar, a popular event calendar plugin that’s been around since 2012.
The plugin is designed to make event creation and management easy and efficient.
It offers multiple display themes that can be easily customized using the inline calendar theme editor – so you can change the calendar’s appearance without code or an API.
Key features:
- Translatable dashboard in multiple languages – makes it easy for non-English speaking users to manage their events.
- Handy filtering solution (paid) – allows visitors to filter their events by location, category, or venue/ organizer.
- Convenient media library – allows you to quickly upload and attach photos and videos to your events.
Cons
- Filtering options are paid
- Limited support and knowledge base for users
Best for: businesses that want a lot of control over the look and feel of their events calendar and need advanced filtration options.
3. MotoPress Events Calendar

MotoPress Events Calendar is an intuitive WordPress plugin designed to simplify event management. With a visual interface inspired by Google Calendar, you can create, organize, and display unlimited events without coding.
Whether you run a fitness studio, educational center, or event space, this calendar builder gives you complete control over your schedules and appearance.
MotoPress Events Calendar helps you stay organized and lets your visitors easily browse and interact with your events.
Key Features:
- Visual calendar builder: Create and manage events in a drag-and-drop interface that looks and feels like Google Calendar.
- Recurring events: Save time by setting up automatically repeating events.
- Unlimited calendars and events: Manage multiple schedules from a single dashboard.
- Easy front-end navigation: Visitors can browse events for a seamless user experience.
Cons:
- Lacks built-in payment integration for paid events.
- Limited integrations with third-party booking or ticketing plugins.
Best for: Wellness studios, tutors, community centers, and event venues that need a flexible, visually organized way to showcase their schedules online.
4. Event Espresso
Plugin insights
- Rating: 4.3/5
- Downloads: 1,000+
- Pricing: $79.95/year + Personal support license, $299.95/year + Developer support license, $299.95/year + Everything support license
The authors of Event Espresso claim their plugin lets you submit and register events on any website.
Using this premium WordPress event calendar, website administrators can easily manage their events and set different ticket prices and options.
It also lets you create groups when signing up, set different times and dates for events, and set up several types of tickets for users.
The plugin is known for its sophisticated payment processing capabilities, which collect all revenue from every port and integrate it into one single system.
Participants can even pay their invoices offline – this plugin also controls all payments.
Key features:
- Drag–and–drop ticket ordering makes it easier for customers to select the tickets they need.
- Create promo and discount codes to incentivize customers to book their tickets.
- Allow comments on events – let customers share their thoughts and reviews; promotes engagement.
- Printable tickets – customers can print them as proof of purchase and identification.
Cons
- Too many features are sold as add-ons
- Not fully compatible with Elementor
Best for: larger businesses that need a wide range of payment, promotion, and ticketing options.
5. Sugar Calendar

Plugin insights
- Rating: 4.3/5
- Downloads: 2,000+
- Pricing: $49–$199/year or $449 for a one-time payment
Sugar Calendar is a WordPress event calendar plugin with great customization options and flexibility.
It has a simple admin interface and filtering functionality within the WordPress dashboard.
With the calendar widgets, clients and site admins can view a list of upcoming and past events across various event categories.
When you enable Visitor Conversion mode, your event appears instantly in your visitors’ time zones. To make it even more friendly for a global audience, it’s also translation-ready, making it perfect for international websites.
Key features:
- Event ticketing functionality through Stripe – allows customers to purchase tickets directly.
- Single- and multi-day events – allow you to create and manage them easily.
- Event timezones – adjust event times based on the local timezone.
Cons
- Ticketing and recurring events are premium add-ons available only for Professional and Ultimate plans.
- You can’t buy premium add-ons separately.
- A free version is not available.
Best for: membership sites, WooCommerce stores, community websites, and other businesses looking for a powerful event calendar plugin with ticketing capabilities.
6. Booknetic

Plugin insights
- Rating: 4.95/5
- Downloads: 6,000
- Price: $79 (regular license), $489 (extended license)
While this WordPress plugin offers many features, working with it is still easy and quick, as it doesn’t require coding or design skills.
Booknetic syncs with 3rd-party software, such as Zoom, Google Calendar, and more, saving you time.
On top of that, you can create the perfect form for your clients with the intuitive drag-and-drop editor.
There’s also the neat waiting list, which increases the hype for everyone on an upcoming event.
You can also add third-party tools like Zapier, Automate, and HubSpot to expand its functionality.
Key features:
- Email and SMS notifications – keep your customers up to date on their bookings.
- Insightful reporting – provides detailed information on the performance of your events.
- Custom(izable) forms – let you create forms with the drag-and-drop editor.
Cons
- No free trial for the premium version
- More expensive compared to other plugins
Best for: businesses that want more flexibility and control over the appointment scheduling and booking process with tons of features.
7. EventON
Plugin insights
- Rating: 4.5/5
- Downloads: 58,000+
- Price: freemium ($25/license)
You’ll love EventON if you prioritize customizability and aesthetics.
With this plugin, you can create unlimited events with or without end dates or times, and the list is minimal and clutter-free.
With Zoom and Jitsi integrations, an event attendance mode, and Live Now animations, the event calendar plugin supports virtual and in-person events.
Customizing your calendar is easy with the shortcode generator.
The calendar can be set to auto-delete past events to keep it clean and up-to-date.
The software also includes support for right-to-left (RTL) languages, health protocol guidelines, and multi-day events.
Key features:
- Featured image for events – helps customers picture what to expect and makes it easy to recognize events.
- RTL language support – helps reach broader international audiences and deliver a better experience.
- Gutenberg compatible – allows you to create a beautiful event calendar with the popular Gutenberg block editor.
Cons
- No free trial (but you can see the live demo)
Best for: blogs, eCommerce sites, and event sites that prioritize aesthetically pleasing visuals over advanced features.
8. Calendarize it!
Plugin insights
- Rating: 4.5/5
- Downloads: 12,000+
- Price: $29/license
Calendarize it! It is a flexible, feature-packed WordPress event calendar plugin.
You can create multilingual calendars with translation plugins like Weglot, and template building is made easy with the plugin’s integration with page builders like WPBakery.
Upon purchasing the license, you’ll have access to free add-ons.
Among the most interesting features are the accordion upcoming events widget, advent calendar, author filtering, and event countdown.
The premium add-ons are for WordPress websites that want to sell tickets online.
These add-ons let you manage ticket sales, accept payments, and advertise upcoming events more efficiently.
Key features:
- Social sharing panel – lets customers share events on different platforms, including Twitter and Facebook.
- Event countdown – encourages customers to buy tickets before the event date.
- RSVP events – allows customers to easily confirm their attendance at events
- Custom taxonomy labels – help you rename and organize your event categories.
Cons
- Premium add-ons are sold separately between $10 and $89 each
Best for: blogs, online magazines, or any other community-driven website that needs to display events in a visually appealing way and wants more customization options.
Parting words
No matter the type of website you run, there are plenty of WordPress event calendar plugins that can fit your needs.
The plugins on our list range from free to premium and from robust to easy to use. Be sure to pick the one that best fits your budget, website type, and audience size.
And if you’re looking for a more customizable option with robust search and ticketing capabilities, GeoDirectory and its Event Calendar add-on is your best bet to take your website to the next level.
Good luck! We hope that you find a plugin that works best for you.
Online directory websites are a valuable resource for individuals and businesses alike.
These websites provide a comprehensive list of businesses, organizations, and individuals, often organized by category or location.
This blog post will answer some of the most frequently asked questions about online directory websites.
Whether you’re looking for information or want to increase your visibility online, this post will provide the answers you need.
Let’s get started!
1. What is a business online directory website?
A business online directory website is a website that uses directory software to create an online directory.
The final goal is to list businesses, often organized by category or location.
These directories provide information about the products or services offered by the businesses listed, as well as contact details and other relevant information.
Business directory websites help people find the information they need about businesses in their area or within a specific industry.
They can also be a valuable tool for businesses looking to increase their visibility and attract new customers.
2. What is business directory software?
A business directory plugin is a type of software that allows users to create and manage an online directory website of businesses, organizations, or individuals.
This type of software typically includes features such as adding, editing, and deleting listings, categorizing listings by location or industry, and searching for listings based on various criteria.
Some business directory software may also include additional features such as ratings and reviews, payment processing, and integration with other tools or platforms.
Business directory software is indispensable for individuals or businesses creating and managing an online directory website.
3. What is a web directory example?

A web directory is an online directory that lists websites, often organized by category or subject.
A web directory example could be a directory that lists websites related to travel, such as hotels, airlines, and travel agencies.
The directory would provide brief descriptions of the websites and their services and links to them.
This type of directory can be helpful for people looking for information on a specific topic, such as travel, as it provides a curated list of websites in one place.
Other examples of web directories include directories of online stores, blogs, and forums.
Here are some specific examples of web directories:
- Yahoo! Directory: This was one of the oldest and most well-known web directories. It was organized into categories and subcategories, making it easy to find websites on various topics. The directory was shut down in 2014.
- DMOZ (The Open Directory Project): This directory was a collaborative effort by a community of editors who work to categorize and list websites on a wide range of topics.
- Best of the Web: This directory focuses on high-quality websites and provides brief descriptions of the sites to help users find the information they need.
- JoeAnt: This directory is organized into categories and subcategories and allows users to rate and review the websites listed.
- WebWorldIndex: This directory is a human-edited directory that lists websites on a wide range of topics. It also allows users to submit their websites for inclusion in the directory.
- Business.com: This directory focuses on businesses and provides information on various industries and companies. It also offers tools and resources for businesses looking to increase their online presence.
4. Is the online directory website business model profitable?
It can be profitable if the webmaster successfully promotes the directory, reaches a good distribution level, and generates consistent traffic.
The online directory website business model can be profitable only if it is well-managed and successfully monetizes its traffic and user base.
As with any business, the level of profitability will depend on several factors, including the size of the user base, the quality of the directory’s content, and the effectiveness of its monetization strategies.
To be profitable, online directory websites must attract a sufficient number of users and generate enough revenue through advertising, subscriptions, or other sources to cover its costs and generate a profit.
Additionally, the directory must compete with other directories in the market and provide value to its users to retain them and continue to grow its user base.
Mastering SEO (search engine optimization) is the surest way to build a profitable business around an online directory website.
5. How do online business directories make money?

Online business directories can make money through various monetization techniques.
One way is through advertising, where the directory sells ad space on its website to businesses looking to increase their visibility.
Another way is through subscription fees, where users must pay a fee to access certain features or information on the directory.
Additionally, some directories may offer premium listings, where businesses can pay to have their information prominently displayed or highlighted in the directory.
Another way for directories to make money is through commissions for leads.
In this case, they earn a commission for each customer referred to a business through the directory.
Overall, online business directories can generate revenue through one or a combination of these methods.
6. How do you start a profitable online directory?

To start a profitable online directory, you must carefully plan and execute a sound business strategy.
Here are some steps to follow:
- Identify a specific niche or market to focus on. This will help you to differentiate your directory from others and attract a targeted audience.
- Develop a comprehensive list of businesses, organizations, or individuals to include in your directory. This will be the core of your directory and should be updated regularly to ensure it is accurate and up-to-date.
- Create a user-friendly and engaging website to host your directory. This will be your business’s face, so make it visually appealing and easy to navigate.
- Implement effective monetization strategies. This could include selling advertising space, offering subscription plans, or offering premium listings.
- Promote your directory to attract users and increase visibility. This could include marketing efforts such as search engine optimization (SEO), social media marketing, or content marketing.
- Monitor your performance and make adjustments as needed. This could include regularly updating your content, improving your website, or refining your monetization strategies.
This is the best way to create a profitable online directory that provides value to its users and generates revenue for your business.
7. How do you create a successful directory?

The key to creating a successful directory is to focus on providing value to your users.
This means offering a comprehensive and up-to-date list of businesses, organizations, or individuals, along with relevant information and details.
It also means creating a user-friendly and engaging website that is easy to navigate and search.
By providing value to your users, you will be able to attract and retain a loyal audience, which is essential for the success of your directory.
In addition to providing value to your users, building a solid brand is essential.
This means creating a consistent and professional image for your online directory website.
This could include developing a unique logo and color scheme, creating engaging and informative content, and promoting your directory through various channels.
By building a solid brand, you will be able to establish your directory as a trusted and reliable source of information, which will help to attract and retain users.
8. How much should you charge for a directory listing?

The amount you charge for a directory listing will depend on several factors, including the size and scope of your directory, the value of the listing to the business, and the competition in the market.
In general, you should aim to charge a fair price that reflects the value of the listing to the business and allows you to generate a profit.
One approach is to offer different pricing tiers for listings with different levels of visibility and features.
For example, you could offer a basic listing for free or a low fee, allowing businesses to upgrade to a premium listing for a higher price.
This allows businesses to choose the level of exposure and features that best meets their needs and budget.
Regularly reviewing and adjusting your pricing is also essential to ensure it remains competitive and fair.
This could involve conducting market research to understand the pricing of similar directories and regularly soliciting feedback from your customers to ensure they are satisfied with the value they receive for their listing fee.
Overall, the key to setting a fair price for directory listings is to assess the value of the listing to the business carefully and regularly review and adjust your pricing to reflect market conditions and customer feedback.
9. How do I promote my website directory?

There are many ways to promote your website directory and increase its visibility.
Here are some tips:
- Optimize your website for search engines. This involves using keywords and other techniques to improve your website’s ranking in search engine results pages (SERPs), making it more likely that users will find your directory when searching for relevant terms.
- Use social media to promote your directory. Share links to your directory and its content on social media platforms such as Facebook, Twitter, and LinkedIn to reach a wider audience and drive traffic to your website.
- Engage with your target audience. Comment on relevant blog posts and forums, join industry groups and associations and attend industry events to raise awareness of your directory and its value proposition.
- Offer valuable content. In addition to listing businesses, organizations, and individuals, consider offering articles, blog posts, videos, or other content that provide value to your target audience. This can help to establish your directory as a trusted and authoritative source of information.
- Collaborate with other websites and directories. Consider partnering with other websites or directories that serve similar audiences to cross-promote each other’s content and drive traffic to your website.
By following these tips, you can effectively promote your website directory and increase its visibility and reach.
10. Are directories good for SEO?

Yes, directories can be good for SEO.
Search engines crawl and index websites, including directories.
Good quality directories can help improve a website’s visibility in search engine results pages (SERPs) by providing additional inbound links.
This can help to improve the website’s search engine ranking and make it more likely that users will find the website when searching for relevant terms.
In addition, directories can provide valuable information and context about the website and its content, which can help search engines understand its relevance and authority.
This can improve the website’s ranking and visibility in search engine results.
However, it is essential to note that not all directories are equal in terms of their value for SEO.
Some directories may be more reputable and authoritative than others, providing more value in improving a website’s search engine ranking.
Therefore, it is critical to carefully research and evaluate the directories you consider using for your website’s SEO.
11. How do I sell my business directory?

If you are looking to sell your business directory, there are a few steps you can take to maximize its value and attract potential buyers. Here are some tips:
- Gather all relevant information and documents. This could include financial statements, user data, and contracts with advertisers or other partners.
- Create a detailed and professional business plan that outlines the current state of your directory and its future potential.
- Consider engaging the services of a business broker or advisor who can help you to find potential buyers and negotiate a sale. This would include listing on sites like Flippa.com, MicroAcquire, or Empire Flippers.
- Reach out to potential buyers, such as other directory websites or businesses in related industries, and present your directory and its value proposition.
- Negotiate the terms of the sale, including the purchase price and any ongoing obligations or commitments.
- Finalize the sale and transfer ownership of the directory according to the terms of the agreement.
By executing this strategy, you can effectively sell your business directory and maximize its value.
Would you like us to answer more questions about Online Business Directories? Ask your questions in the comment below, and we will update this article!
You can get GeoDirectory here today:
Want to create a restaurant directory in WordPress?
You are a passionate foodie and want to build a side hustle to generate extra income.
You have tried many of your city’s restaurants and have a blog where you review your own restaurant experiences.
Or you are an Airbnb Host and want to build a restaurant directory to recommend the best gourmet experiences to your guests (and collect commissions for every customer referred).
You are in the right place; whether you’re driven by a specific reason to start a restaurant directory, we have the best restaurant directory plugin and themes for you.
This tutorial will teach you how to build a Restaurant Directory Website with WordPress from A to Z.
Alternatively, you can add a directory to your existing WordPress-based food blog. It is very easy.
While at it, I will also show you how to add a marketplace.
Where restaurant owners can sell their menu items for pick up or delivery.
You collect a commission for each item sold on your restaurant directory and decide the percentage to retain.
But first of all, let’s see what a Restaurant Directory is.
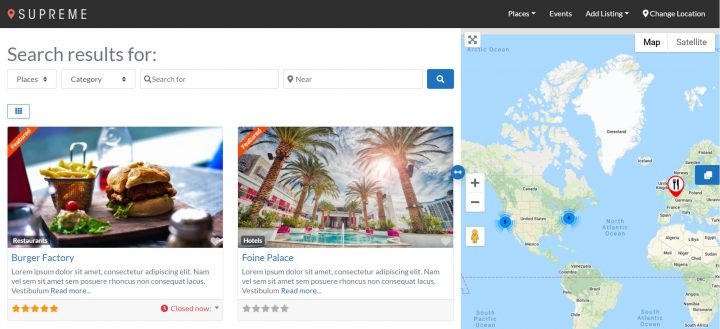
A Restaurant Listing website quick overview

A restaurant listing website lists restaurants in an area (it can be as small as one street or as big as the entire globe), along with basic information about them.
The most modern and profitable directories allow you to order from their restaurants’ menus for delivery or pickup. I’m talking about sites like Deliveroo, Uber Eats, and Grubhub.
If you’re going to eat at a new place, you can use a restaurant listing website to research the restaurant and decide if it’s the right place.
The site will tell you about the menu, hours of operation, how many people are allowed in at once, and what the atmosphere is like.
It’ll also give you reviews from other users who have eaten there before, so you can get an idea about whether or not this is something that would be right for you.
Some of these websites also list the types of food served and whether or not they are vegetarian, vegan, or gluten-free.
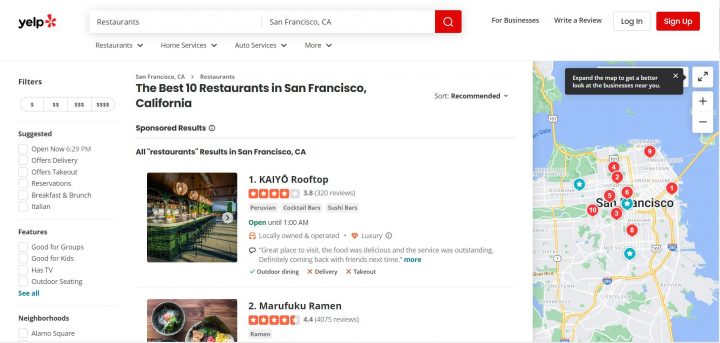
Examples include Yelp, TripAdvisor, OpenTable, and Zomato.
You can also find coupons and discounts on these sites!
What are the essential features that a Restaurant directory website should have?

The essential features that a restaurant directory website should have are:
- A database of restaurants where users can search for the one they want to eat or drink at and see the location filtered by “Open Now.”
- Reviews from other users are written by people who have been there, so you know what to expect before you go.
- A map showing all the restaurants in one place, with pins indicating where they are located and the option to get directions.
- It should have a user-friendly interface.
- It should seamlessly work on all devices.
- It should provide users with detailed information about restaurants (e.g., contact details, menu items, etc.)
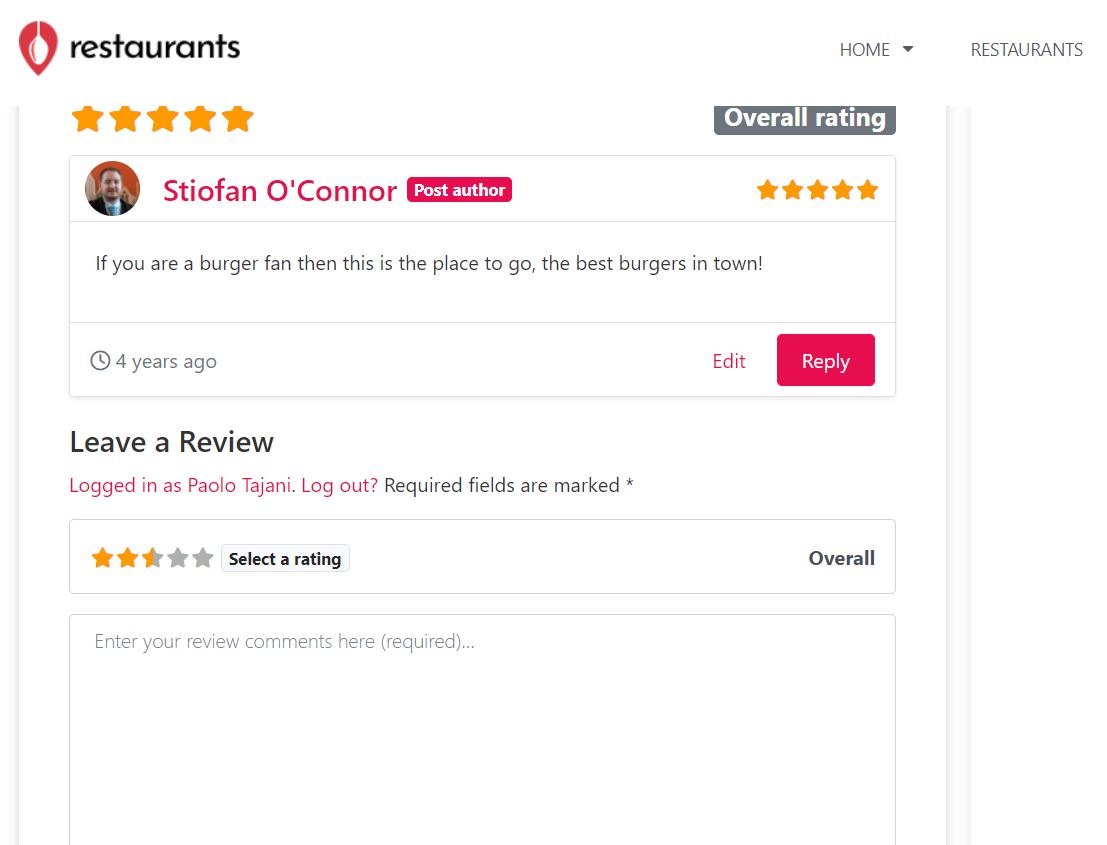
- A rating system for restaurants. With fair and unbiased rankings.
- Photos of each restaurant’s interior and exterior so users can see what they’re getting into before they commit to going there!
- Contact information of each restaurant so you can make reservations or ask questions if you need more info about their menu, hours of operation, etc.
- Some advanced search filters like open now, different types of cuisine, price, take-out, and Dine-in options.
- To engage visitors, they should be allowed to add their favorite restaurants to a list.
How to Start Building a Restaurant Directory
You know how it goes: you start with a plan to make a site that lists all of the restaurants in your city, and then you realize that there are so many challenges.
First, how do you organize all of this information?
How do you show it in an easy-to-use format?
How do you make it look good?
And even if that works perfectly, how do you get people to visit the site?
The easiest solution is to hire someone else to build your website.
But let me tell you the most exciting part, you can easily do it yourself in a short period using WordPress and Geodirectory, the best restaurant directory plugin for WordPress.
Our Directory Plugin will allow you to create the perfect restaurant directory website for your community’s needs or interests.
GeoDirectory is excellent for creating restaurant directory websites.
It allows you to easily create restaurant listings with their addresses, phone numbers, social media links, hours of operation, and customer reviews.
You may accept listing submissions from restaurant owners, who will also be able to edit or delete their listings if necessary.
The plugin also has features that make it easy to add helpful information about each restaurant, like whether or not they serve gluten-free options or have outdoor seating.
And if you want even more customization options or need help getting started with the initial setup, we recommend buying a premium membership!
Prerequisites for Launching a Restaurant Directory
When you’re ready to launch your restaurant directory, there are a few things you’ll need to do first.
1. Select a Domain Name.
The first thing you must do when beginning your site is select a domain.
It is the website’s URL, so make sure it is memorable and unique.
You can purchase it from any domain registrar, such as GoDaddy or Namecheap.
2. Webhosting.
Next, you’ll need web hosting.
This is where your website lives online.
There are many different types of hosting available; selecting one that provides unlimited bandwidth and storage space is ideal.

We recommend Cloudways and its Vultr High-Frequency 1GB plan, which costs only $13 per month and is an excellent choice for 99% of Local Restaurant Directories.
3. The restaurant directory plugin for WordPress: GeoDirectory and its GeoMarketplace add-on (to allow restaurant owners to sell directly)
You’ll need a directory plugin that can scale to your desired listings and handle the traffic.
GeoDirectory is the way to go.

GeoDirectory is suitable for all directory listing types and works perfectly fine with any page builder and WordPress theme.
This tutorial will show you how to build a Restaurant Directory Website using GeoDirectory and Elementor Pro.
If you prefer not to use Elementor PRO. In that case, there is an alternative: The Kadence theme, for which there’s a dedicated restaurant website demo that you can import with one click and then personalize according to your unique brand voice.
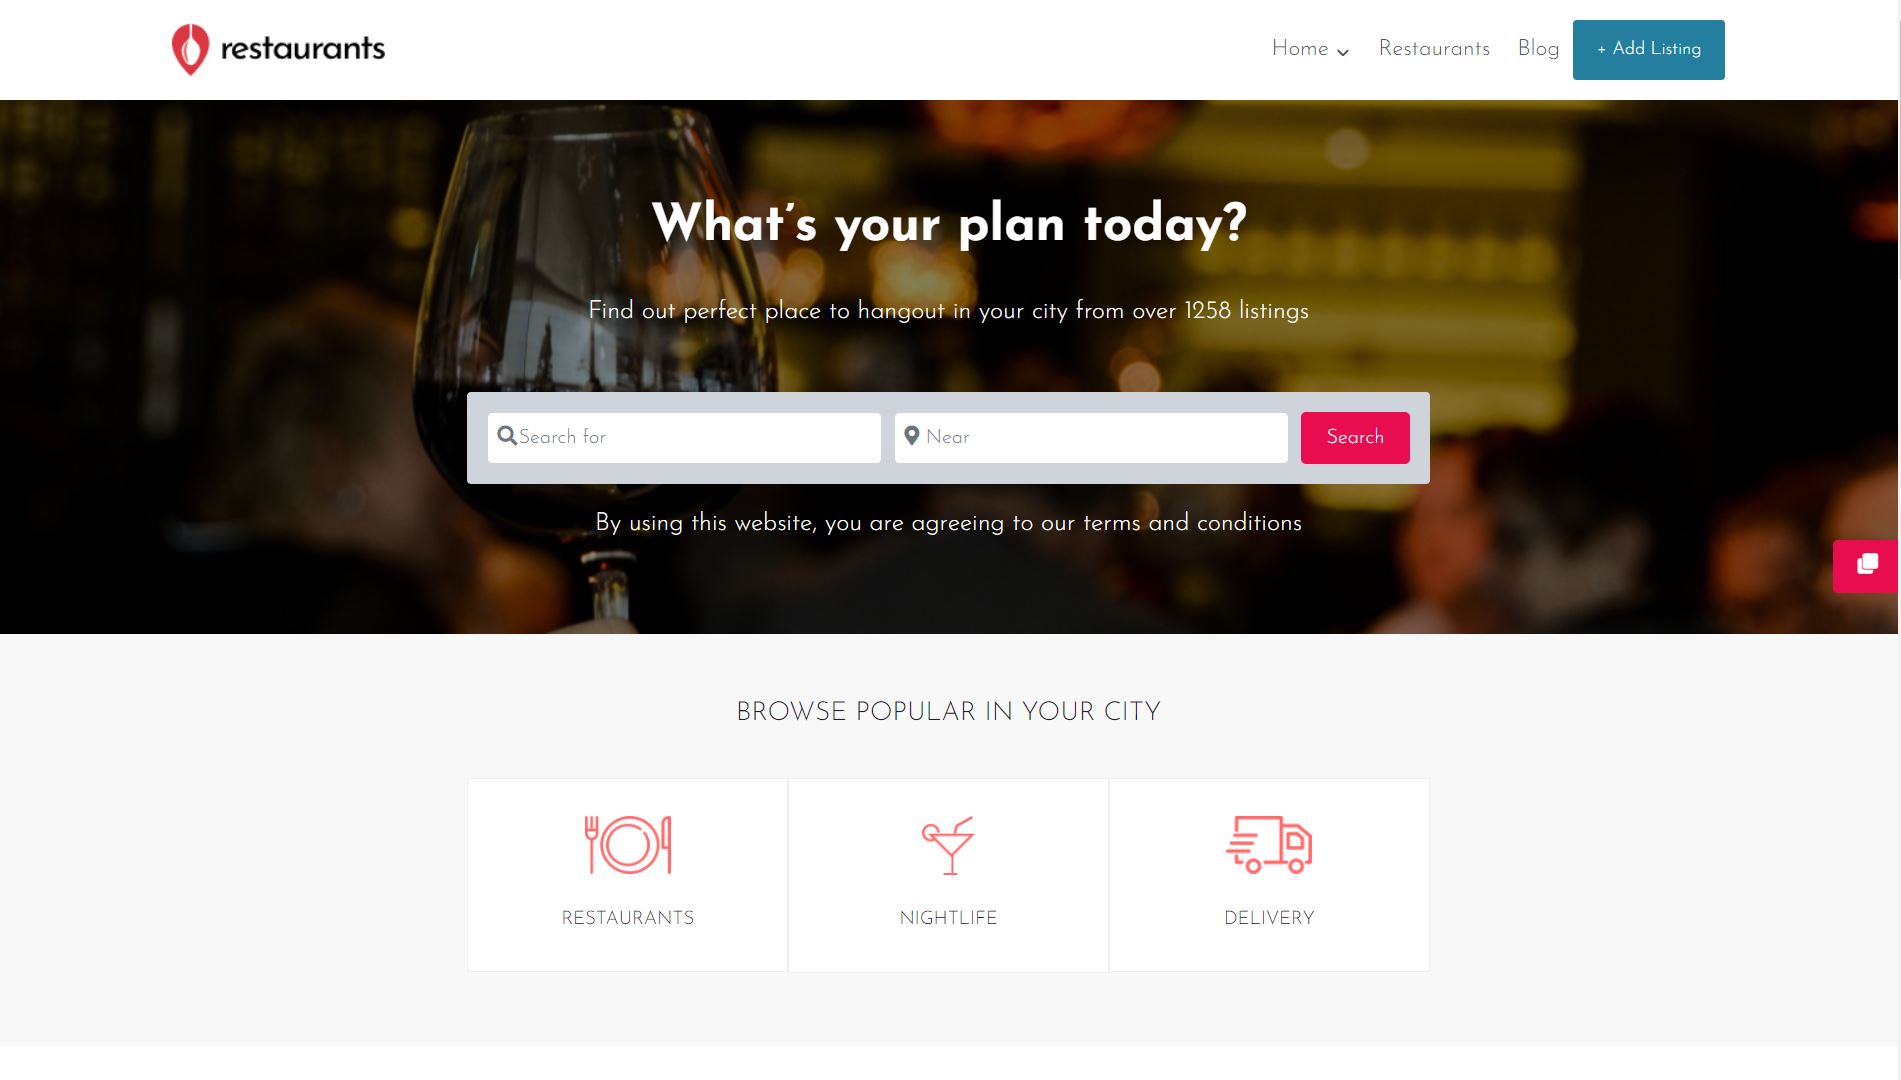
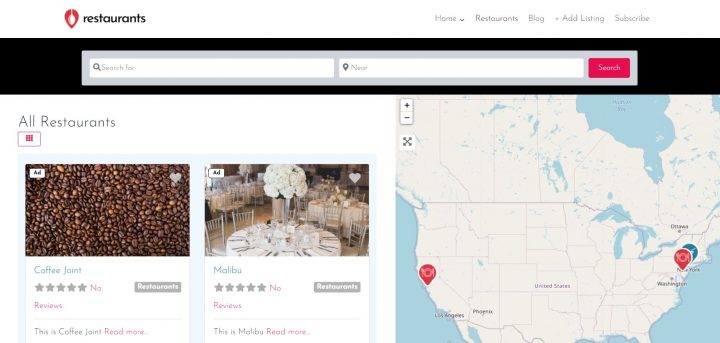
In fact, we have two ready-to-use demo Geodirectory sites for your restaurant directory that you can import and personalize afterward. You can see them here:
You’ll probably notice that they are almost identical.
Method 1: Elementor Pro + GeoDirectory

GeoDirectory is the Best Elementor Directory Plugin, so it’s perfect to create a Restaurant Directory with Elementor. Let’s explore how to do this.
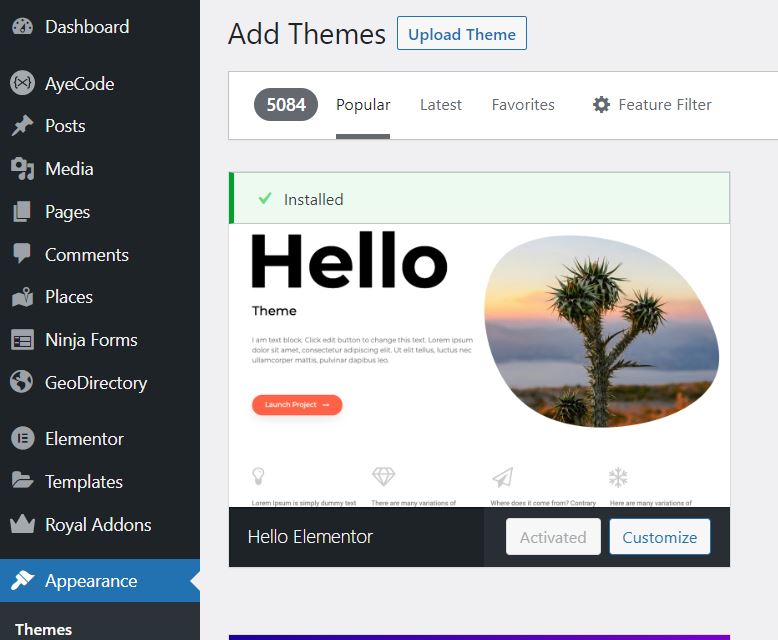
Once you have selected your web hosting and have WordPress set up and ready to be used, you can install any WordPress theme, but we have selected the “Hello Theme” for this tutorial.
You can install the theme as follows: Go to Dashboard > Themes > Add New Theme > search for “Hello by Elementor,” click on install, and activate.
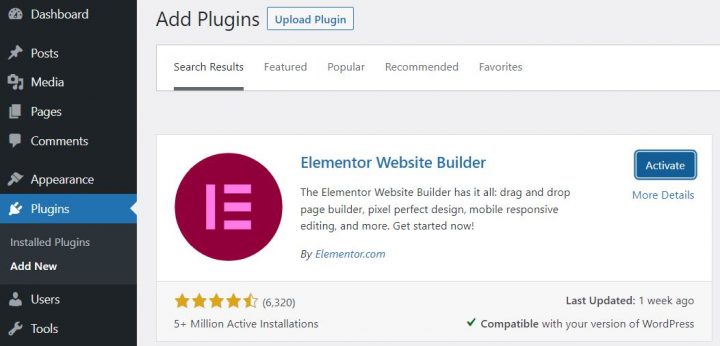
Then install Elementor.
Install Elementor and Elementor Pro plugin
Go to: Dashboard > Add New plugin > Search Elementor > Click on install and activate.
Now go to Elementor.com and get the Elementor Pro plugin if you don’t already own a license.
Next, upload the Elementor Pro plugin to your WordPress website, as we usually upload any plugin.
Go to: Dashboard > Add New plugin > Upload the “Elementor Pro” zip folder.

After installing it, activate it.
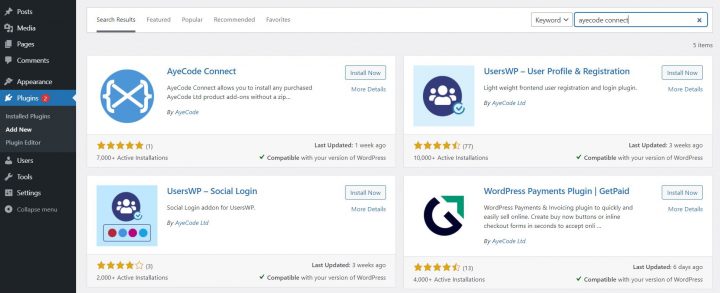
Install AyeCode plugin
The free AyeCode Connect plugin connects your website to the GeoDirectory website and allows you to import the demos.
It will let you automatically sync license keys of purchases as well as remotely install and update purchased products.
So, let’s install the AyeCode plugin.
Go to plugins > Click on Add New plugin > search “AyeCode Connect”, click on install, and activate.
After activation, you’ll find two tabs under the AyeCode menu.
- AyeCode
- Import Demo Data
Now, click the connect site button to connect your website with GeoDirectory. If you already registered, log in using this Connect button.
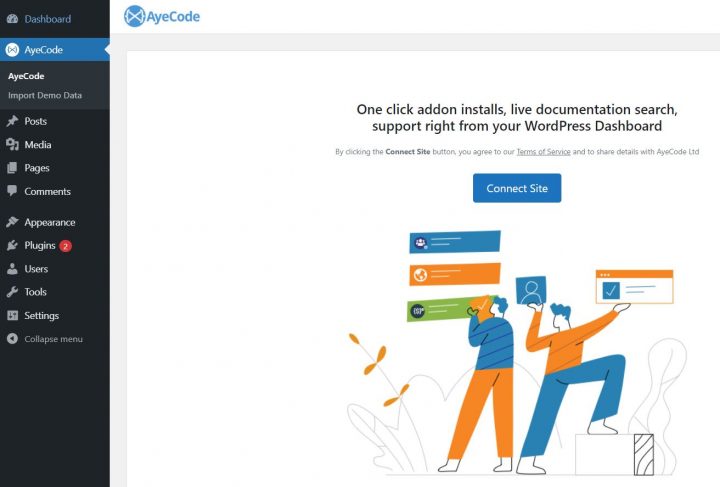
Why do you need to register?
We require registration to import a demo because some may come with premium add-ons.
Connecting your account allows you to verify if you have a license for these add-ons.
If so, we will install them automatically. However, if you do not have a license, we will install the demo anyway, but exclude any premium add-ons.
Import Elementor Demo for the Restaurant Directory
Now, you can import the Restaurant directory demo created for the Elementor Pro website builder.
Go to AyeCode > Import demo Data > Elementor restaurant directory.
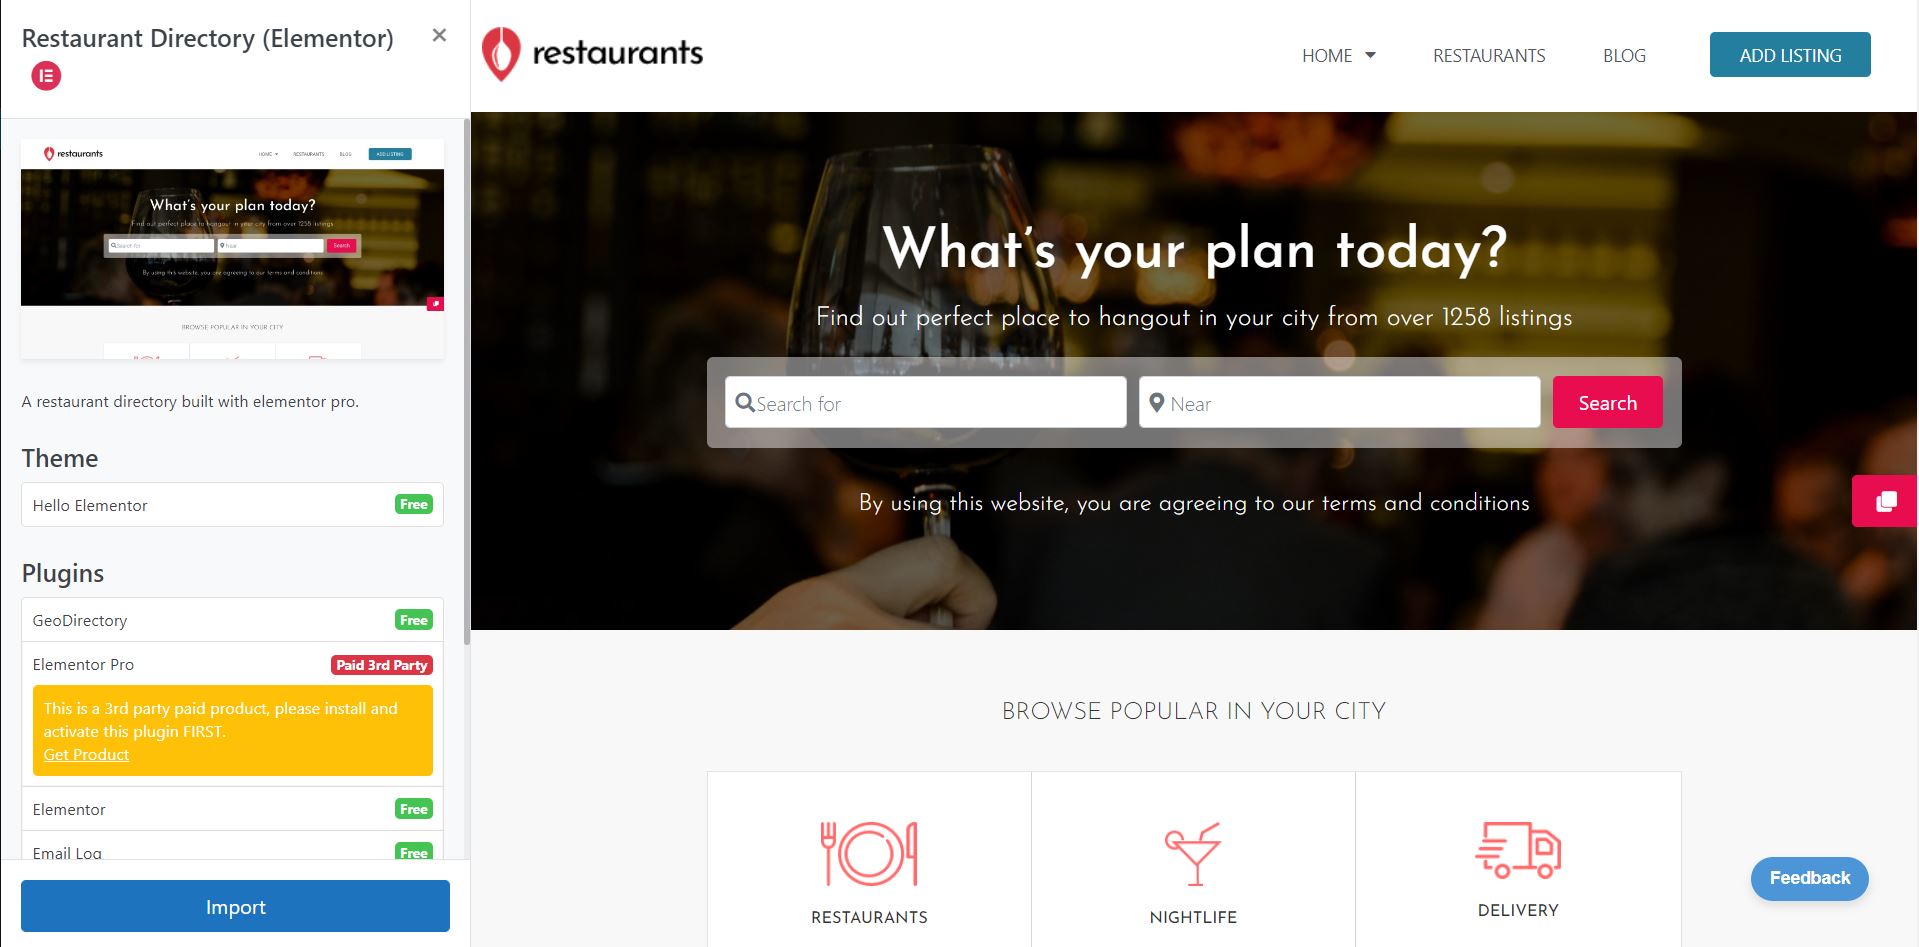
Click on View to start importing the demo.
You’ll notice some paid add-ons installed on the restaurant directory demo.
If you have already paid for a GeoDirectory membership, these add-ons will be automatically installed; otherwise, the demo will be installed without the paid add-ons, which are not essential for this tutorial.
After clicking import, you will get a site identical to our demo. installed on your server in a matter of a couple of minutes.
The listings are dummy data that are there to help you get started.
You are ready to start customizing your restaurant directory with your logo and branding. Modifying all pertinent information and adding your actual listings.
You can add your listings one by one or in bulk via CSV file import.
Method 2: GeoDirectory + Gutenberg and the Kadence Theme
This method will work if you don’t want to install Elementor and Elementor PRO on your website.
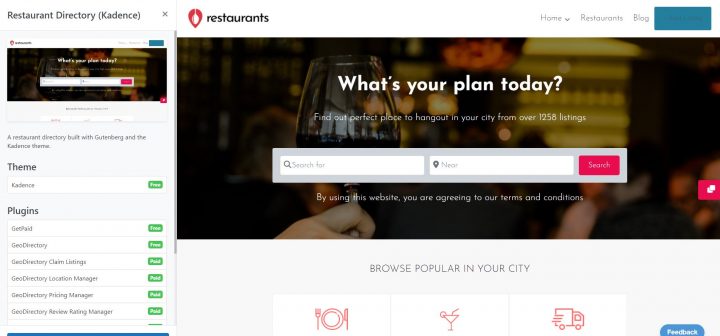
You can import the Gutenberg Demo that uses the Kadence theme, which is free.
Get your WordPress Webhosting
The first step is like the previous method: You’ll get web hosting for your website. Once you have selected your web hosting, the next step is installing WordPress. Most web hostings come with a one-click WordPress installation.
Install the AyeCode connect plugin
Install the AyeCode connect plugin as we have installed it in the previous method.
Connect with the AyeCode website
After installing the AyeCode plugin, you’ll be asked to connect it to your GeoDirectory account (you can create one for free), so you can import the demo.
Import the Gutenberg Demo
We’ll import the Gutenberg demo for the restaurant directory in this step.
Go to Dashboard > AyeCode > Import Demo Data > Import the Kadence restaurant directory demo.
After installing either demo, you can easily personalize the demo content per your brand’s requirements.
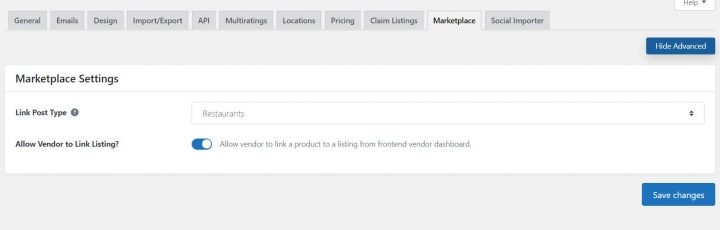
Now let’s explore how you can configure and customize GeoMarketplace to enable restaurant owners to sell their menu items via WooCommerce.
Monetizing the directory – How to configure GeoMarketplace and allow restaurant owners to sell Menu Items directly from their listing

As previously mentioned, GeoMarketplace integrates GeoDirectory, WooCommerce, and MultiVendorX, allowing listing owners to create and sell products directly from their listings.
With GeoMarketplace, each listing becomes a shop, where the listing owner can sell their products, and the directory admin can earn a commission from each sale.
In this case, the restaurant owners can create their menu items and sell them for pick up or delivery.
Prerequisites for the restaurant’s menu items marketplace
Install Woocommerce (free)
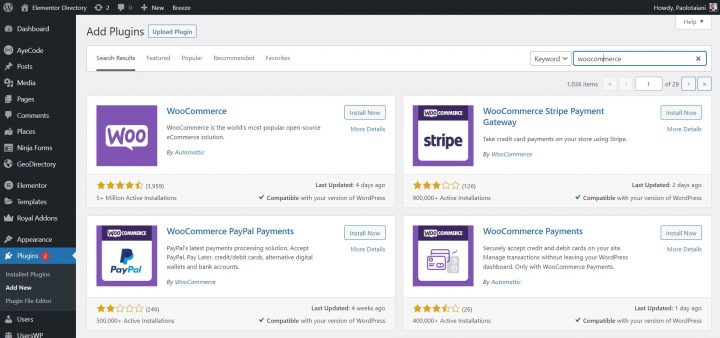
First, you’ll have to install WooCommerce.
Go to Plugins > Add New > Search WooCommerce > Install and Activate.
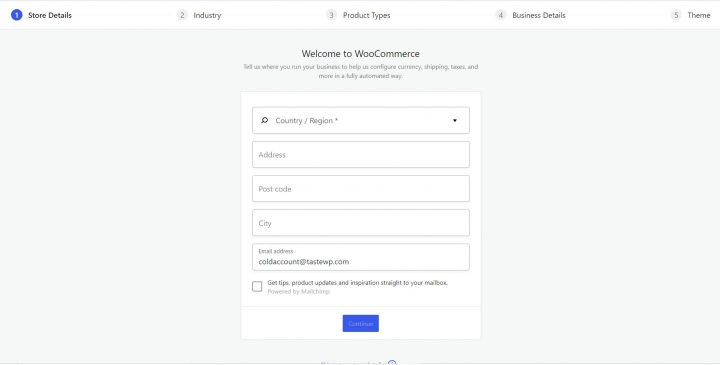
Configure WooCommerce according to your needs. The store details will include your industry, product types, categories, shipping, and tax details.
Install WCMarkeplace (free)
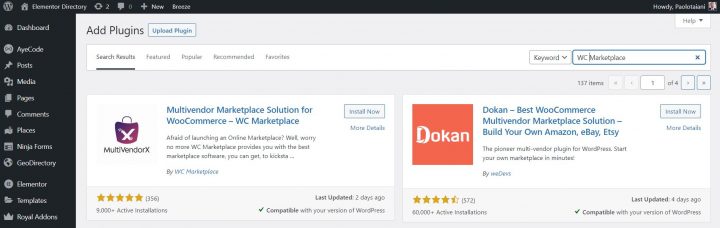
WooCommerce will set up your basic store settings, but it allows only a single vendor to sell products; therefore, you’ll have to install a marketplace plugin to make your store sell with a multiple-vendor setup.
GeoMarketplace works fine with most multivendor marketplace plugins, such as Dokan, WCFM, and WCV.
Still, for this tutorial, we have selected WCMarkeplace.
Go to Plugins > Add New > Search MultiVendorX > Install and Activate.
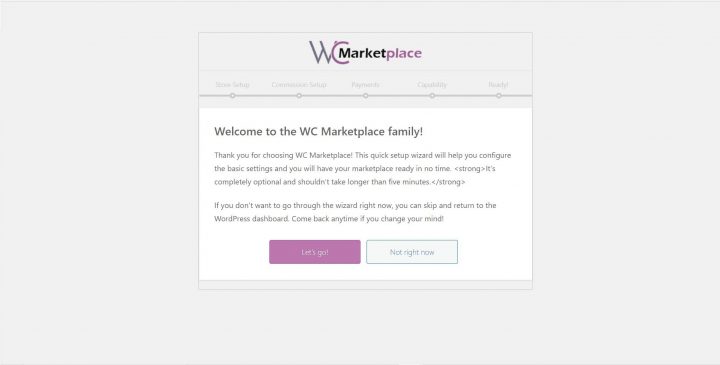
You can set up the percentage of the site’s admin from the commission on sales. Payment distribution of vendors and allowing vendors to edit and publish their products.
Install GeoMarketplace (premium)
The GeoMarketplace plugin is the last piece of the puzzle. It connects the three previous plugins and makes them work as one.
You will need a paid license to download and install this plugin on your server.
Suppose you have the AyeCode Connect plugin installed and your account connected to our website. In that case, you can go to GeoDirectory > Extensions and install and activate the GeoMarketplace add-on.
If you downloaded the GeoMarketplace plugin to your desktop, go to Plugins > Add New > Upload Plugin > in this step. After that, activate the plugin.
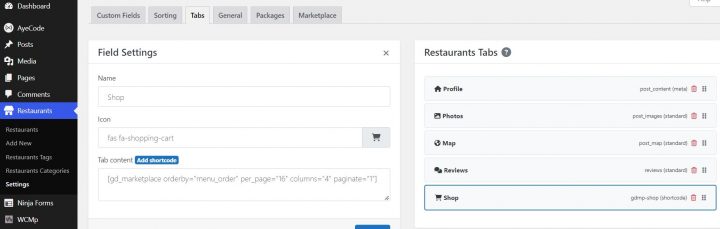
Now we can add the “Shop” Tab to the restaurant listings. This is where the Menu Items will appear.
To do so, go to:
Restaurant > Settings > Tabs > Insert “Shop” tab > click save.
How can users add a listing, sign up as vendors, and create menu items to sell
To allow users to sign up as vendors and access the vendor’s dashboard after their vendor application is approved, you’ll have to create two links, “Vendors Registration” and “Vendors Dashboard,” and add them anywhere on your website.
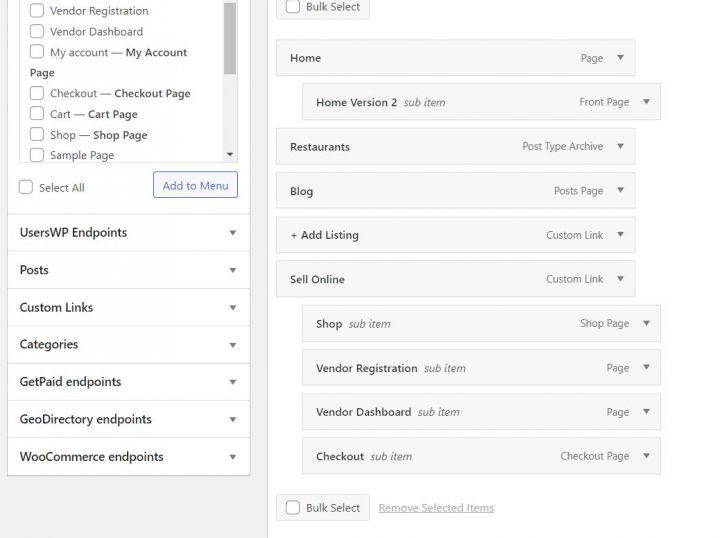
We added them to the main navigation menu through Appearance > Menus in this example.
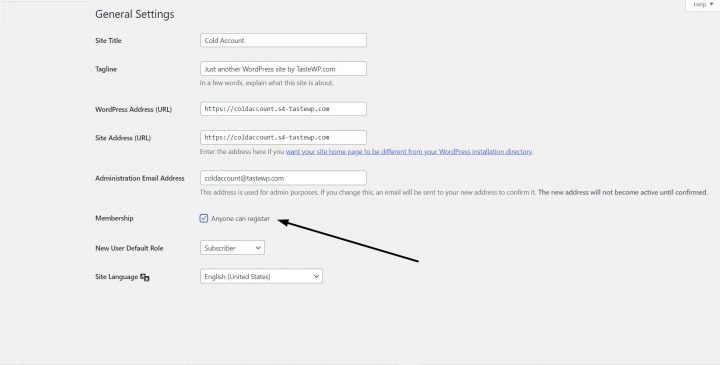
Now you must ensure users can register: Go to the WordPress General settings and enable the “anyone can register” option.
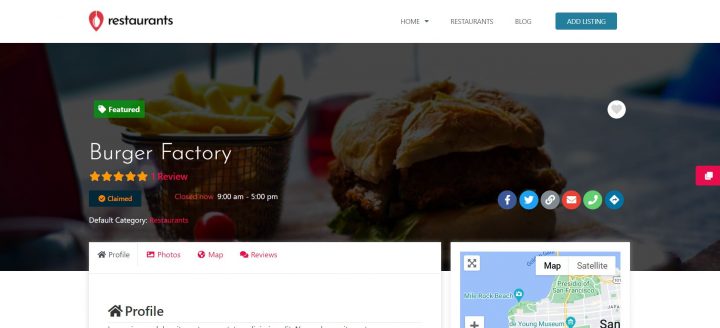
Create the Listing
The restaurant owner will go to the Add Listing page and create a listing.
In GeoDirectory > General > Show Advanced > Enable Allow posting without logging in?
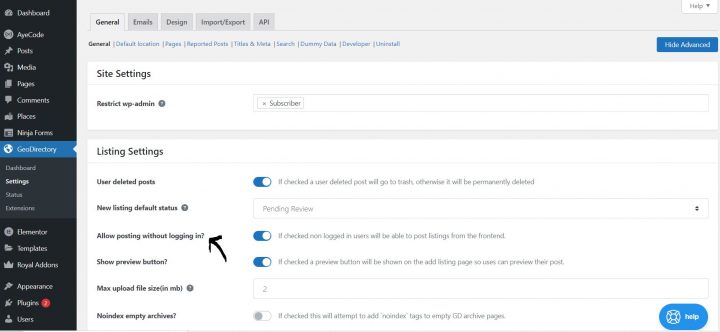
Non-logged-in users will be able to post listings from the front end.
The add listing form will also ask for an email and username, which will be used to create the user.
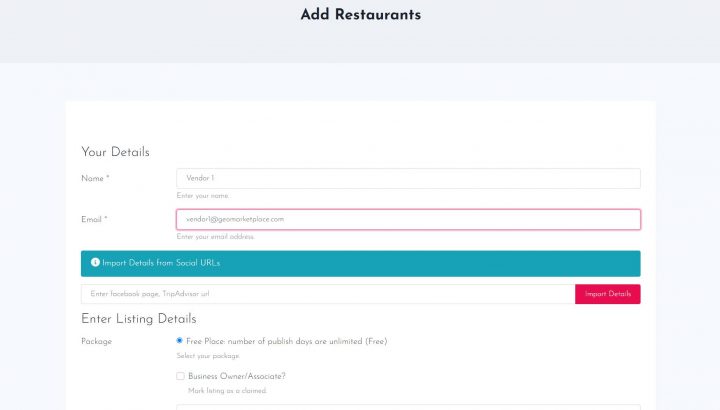
After adding all the restaurant’s details and submitting the form, the system will send an email to the user with a link to set their password and another email to let them know that the listing has been submitted and needs admin approval.
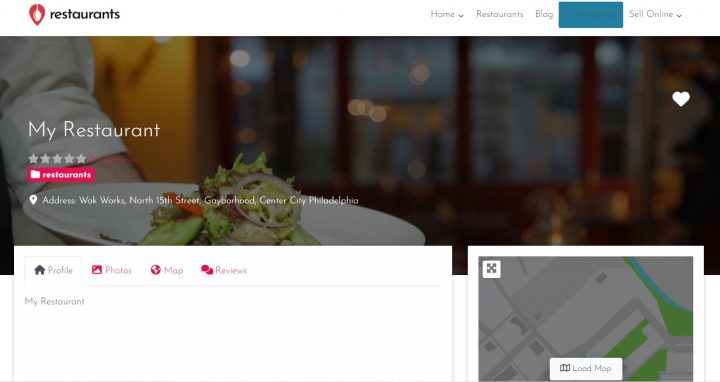
After approval, the restaurant listing is live.
Once approved, the listing owner can start creating the menu items.
But first, the restaurant owner must apply as a vendor and get the admin’s approval.
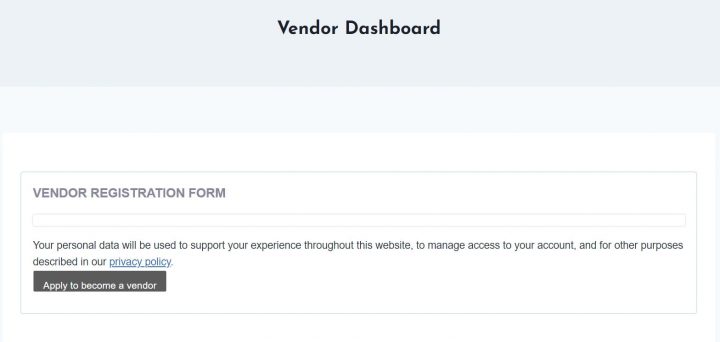
After logging in with the newly created password, the restaurant owner may proceed to the vendor dashboard and click the “Apply to become a vendor” button.
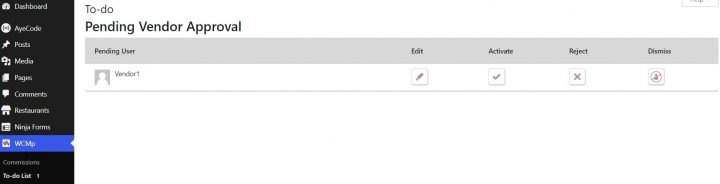
The site owner can access the vendor application under the WCMp To-do list.
Once the site owner has approved the vendor’s application, the vendor can proceed to create their products.
Create an orderable menu item and list it for sale
Once the site owner has approved the vendor’s application, the vendor’s dashboard will appear differently.
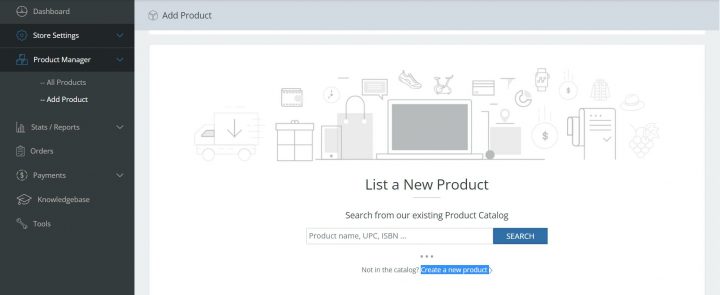
To add products, the Restaurant owner (from now on, the Vendor) will proceed to Product Manager > Add product > create a new product.
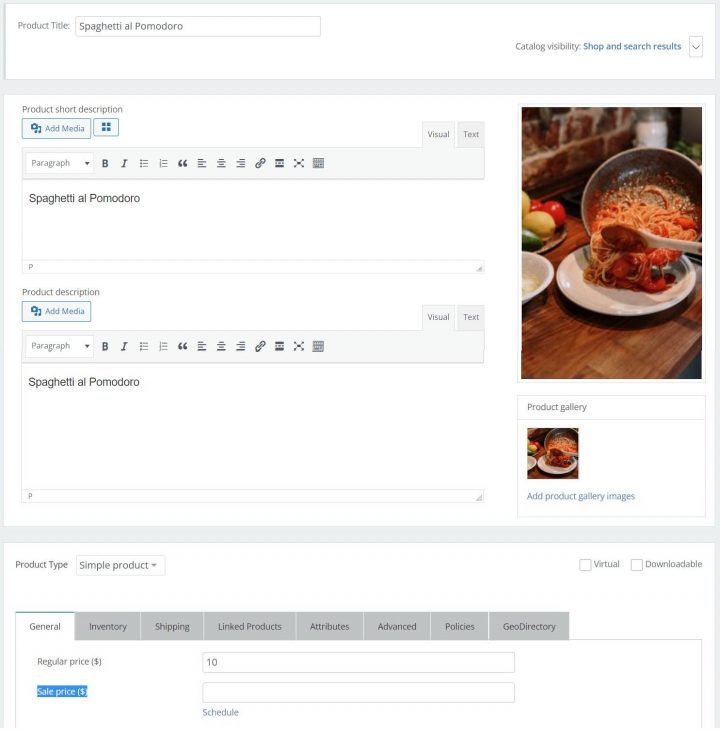
The vendor will select the category where this item will be listed.
We have selected “uncategorized” for this tutorial, but you can create and select as many categories as possible. Examples could be Entrees, Main Courses, Desserts, or Beverages.
Next, product details need to be added. Things like product title, description, price, and images. If the product is downloadable or virtual, we’ll leave this last option blank as we add a physical product.
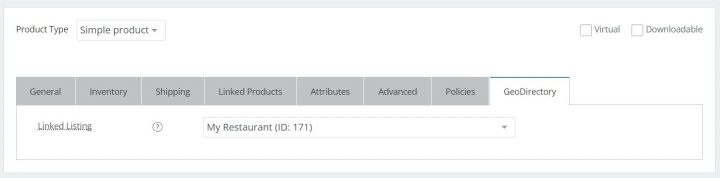
Finally, the vendor will click the GeoDirectory tab and select the listing to link the product to.
In this case, it’s “My Restaurant”, and click on submit.
After the vendor submits a new product, the administrator should review and approve it. There is an option to Auto Approve to save time if needed.
The site admin will receive another task on the “To-do list.”
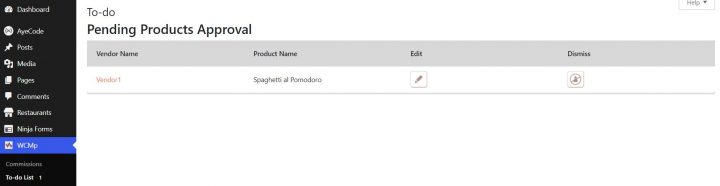
The product finally appears under the new listing tab “shop,” and the directory visitors can buy it.
Now, for every item sold, the admin will collect a commission.

However, this is not the only way to monetize a directory website.
Monetizing the directory – what are my other options?
Sell Premium Listings
If you have several listings and decent traffic, you may sell premium/featured listings offering more visibility in category pages and search results.
Other perks for premium listings? Add more pictures, one or more videos about the restaurant, a longer description, and a link to their website or social media accounts.
You could limit free listings to be contacted through the directory and allow premium listings to be contacted directly.
Premium listings could include extra services, like photography, website development, SEO (search engine optimization), social media management, and more.
You will need our premium Pricing Manager Add-On to start selling premium listings.
Paid Claim Listings
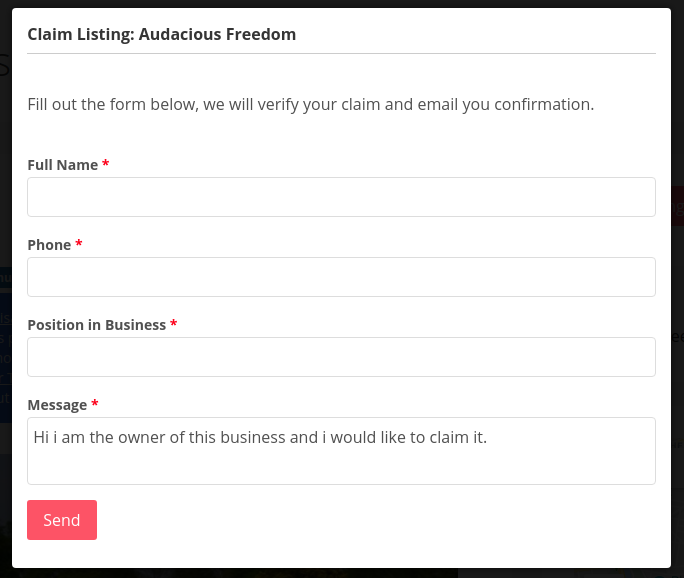
If you add the restaurants’ information to your directory, and restaurant owners realize that you can send enough customers. In that case, they might want to improve the information you added about them on their listings.
In this case, you may offer them to claim their listings to be able to modify any pertinent data autonomously.
The claim listing process can be free, but you can also force an upgrade to claim and, in that case, charge a fee for restaurant owners to manage their listings.
To start charging for allowing business owners to claim their listings, you will need our premium Pricing Manager and Claim Listing add-ons installed.
Sell Ads
Besides selling premium listings, you may also sell advertising spaces throughout your directory website.
You may add ads on the top of the sidebar of search results. The ads can be made to look just like listings.
You can show ads on free listings, but not on paid listings.
You can sell ads on your blog, home page, or, depending on your website, wherever they will get more impressions.
You will need our premium Pricing Manager and Advertising add-ons to sell ads on your business directory website.
Here ends our tutorial; creating a restaurant directory using the GeoMarketplace plugin is not difficult. Try yours now, and let us know if you have any questions in the comments section.
Obviously, with GeoDirectory, you can build any kind of Directories. Check this tutorial on: “How to create a Directory Website with the Kadence Theme“.

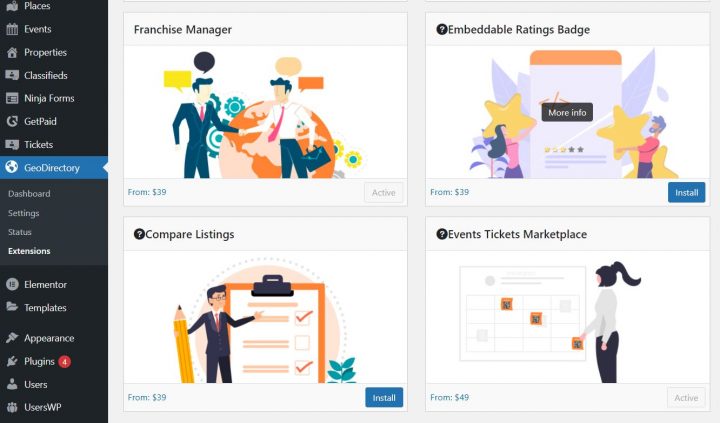
Today we released the highly anticipated Events Tickets Marketplace plugin for GeoDirectory.
This plugin can be used to sell Events Tickets on your website in multiple ways.
For example, you can sell tickets for one specific event on a website that you can build with no-code using WordPress and GeoDirectory.
If you organize events for a living, you can sell tickets for all your events from your business website, and stop paying commissions to Eventbrite or TicketMaster.
You can also allow other users to submit events into your Directory of Events (Free or Paid) and let them sell tickets for their own events, while you can collect a commission of their sales and create your own Eventbrite or TicketMaster.
Let me quickly show you how to start selling tickets online.
How to sell Events Tickets on a WordPress Website independently
I’m assuming you already have a WordPress website installed on your server and you want to start selling tickets for your events.
This is how you do it.
Other than the new Events Tickets Marketplace plugin, You will need the following plugins (which will auto install):
- GeoDirectory (Free)
- Events Calendar for GeoDirectory (Free)
- GetPaid (Free)
- GetPaid Item Inventory (Free)
- GetPaid Wallet (Free)
You have installed all the plugins.
Let’s configure GeoDirectory
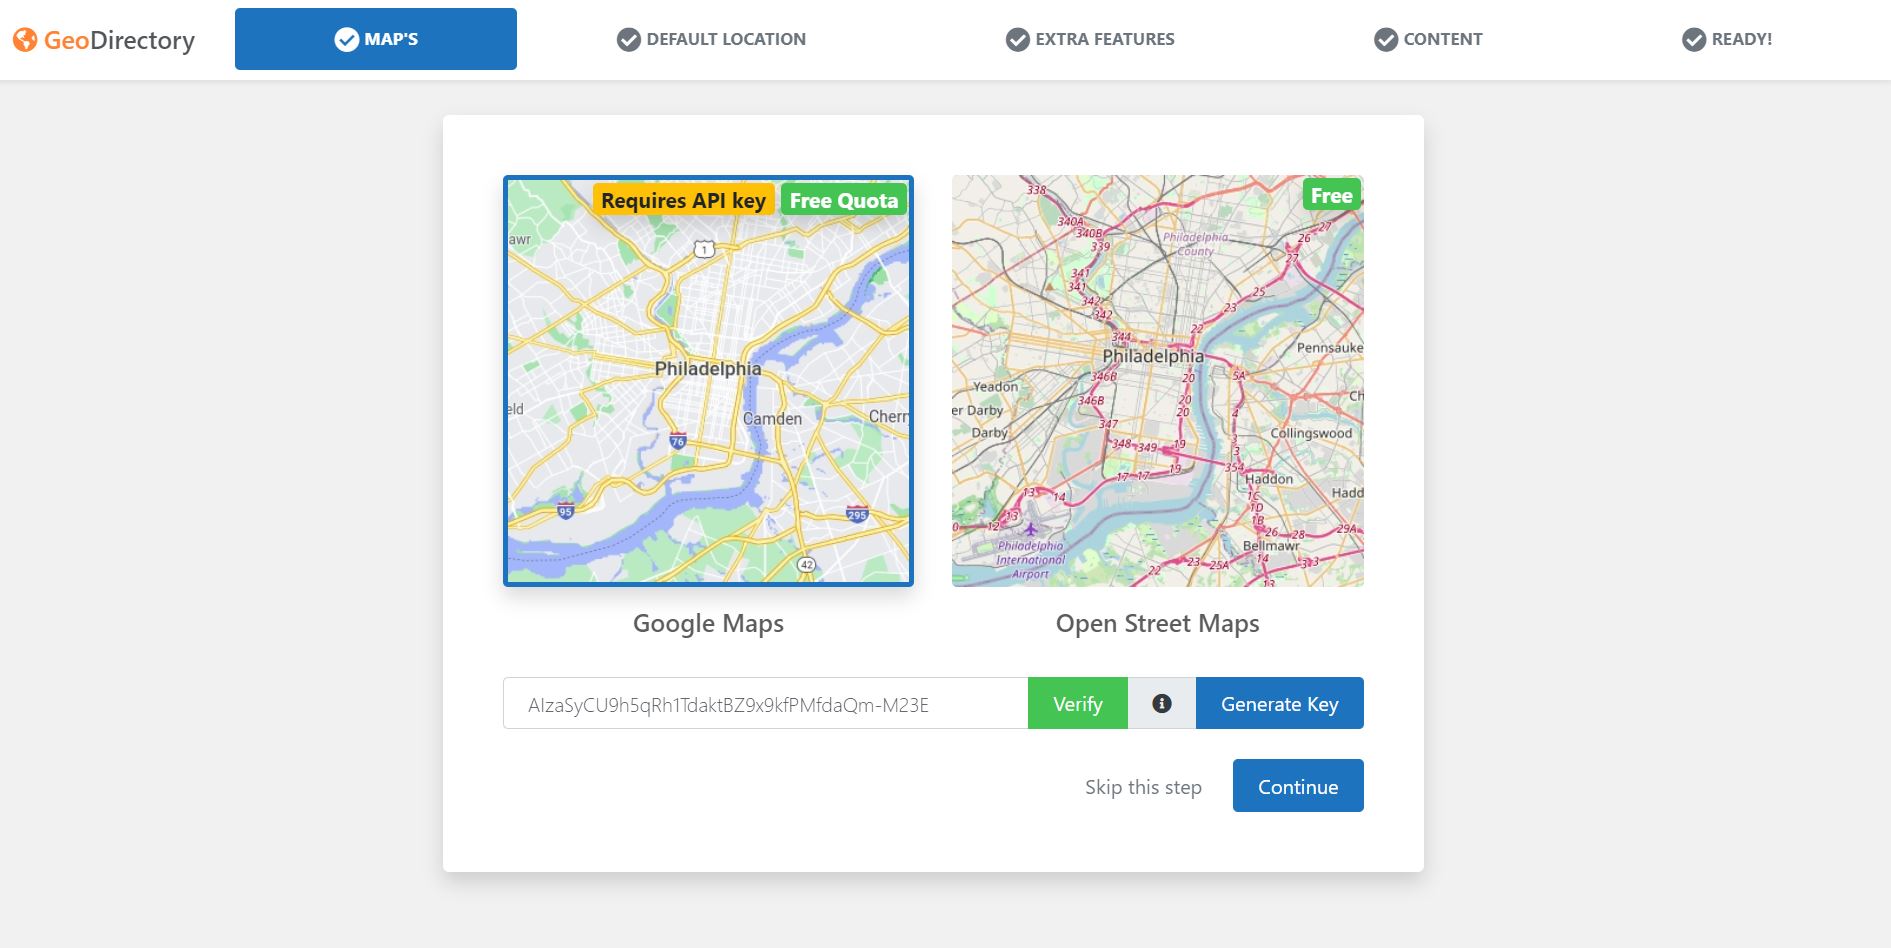
Run the setup Wizard for GeoDirectory.
Create a Google Maps API key and set the city that will host your Event as the Default City.
If you don’t want to deal with Google Maps API Key, you may use OpenStreetMap, which doesn’t require an API key.
Finally, create at least 1 Event Category.
Let’s configure GetPaid
Run the setup Wizard for the GetPaid plugin and select how you want to get paid.
PayPal and other common payment gateways are pre-installed, if instead, you want to take advantage of Stripe, you will need the free Stripe Payments plugin for GetPaid too.
Connect your Stripe account, set the country and the currency of your GetPaid Store.
Last Go to Tickets > Settings
and set the commission to 0 (unless you need to pay yourself a commission).

By default, the commission is set to 10%.
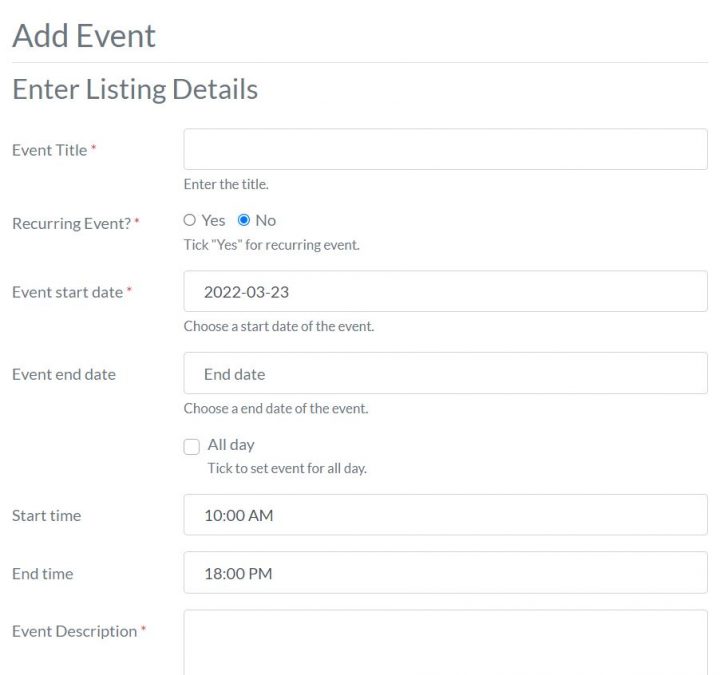
Now you can start creating your event. 1st make sure the default Events custom fields allow you to show all information that you need to display.
Proceed to add your event and publish it.
After you publish your event, we need to add the ticket management block/widget to your Event details page on the front end. In this case, we need to go to Appearance > Widgets and we will add the block GD > Sell Tickets to the top of the GD Sidebar.
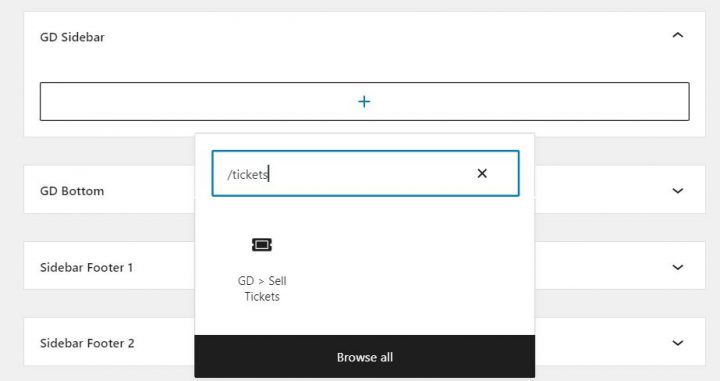
The result will look like this:

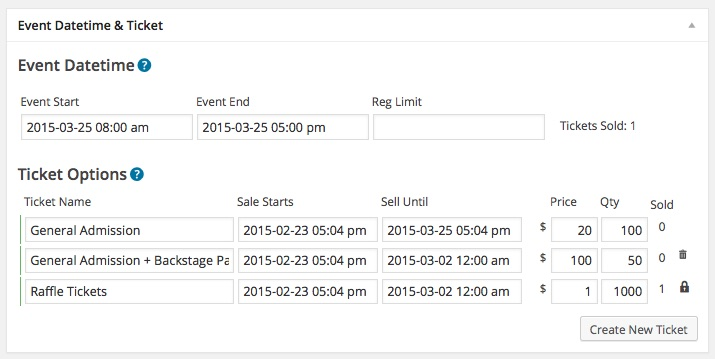
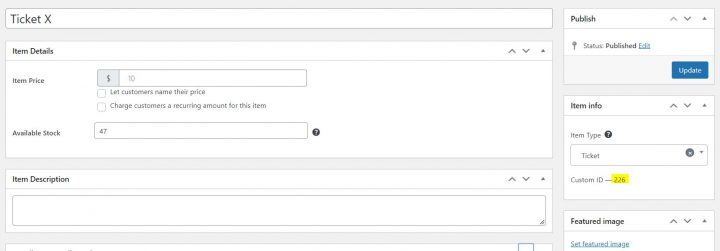
Now click the Sell Tickets button and create your tickets. You can create an unlimited number of ticket types and set both the price and quantity available for each of them.
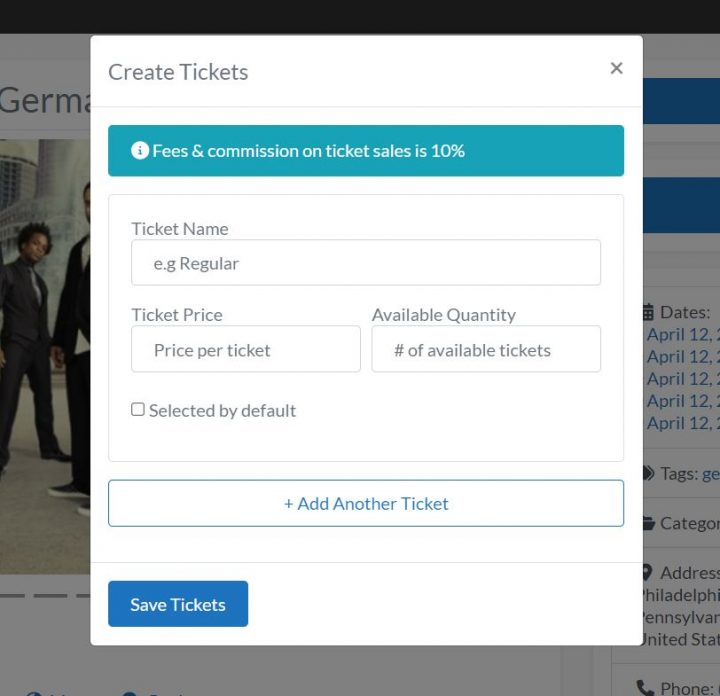
Example:
- Kids: $10 / 50 seat avail
- Adults: $20 / 100 seat avail
- Seniors: $15 /50 seat avail
You are now ready to sell tickets online, if you visit the front end detail page of your Event, you will see that the sell ticket button is no longer there and you have 2 other buttons instead:
- Buy Tickets (this button is visible to anyone)
- Ticket Management (this button is only visible to the Event Owner)

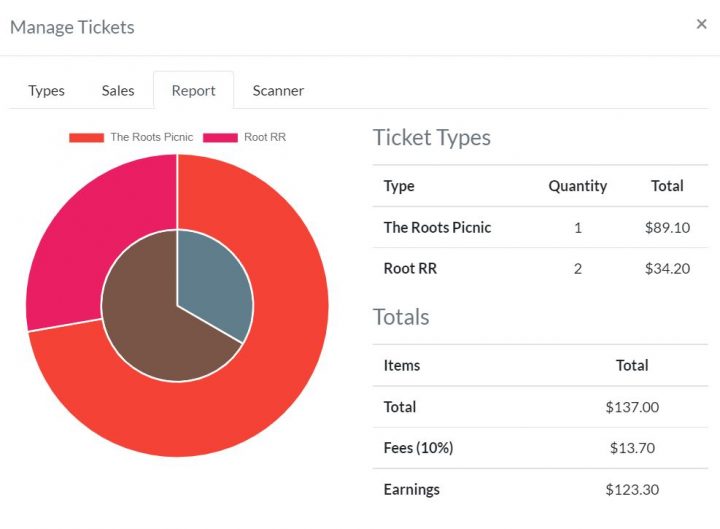
The ticket management button, which is only visible to the event owner, opens a popup with options to create new tickets, a list of tickets sold, ticket sale insights, and the ticket scanner to validate its QR code.
If instead, you click the Buy Tickets button, which is visible to anyone, the checkout form will pop up with the option to select the date (for recurring events), the ticket type, and the quantity.
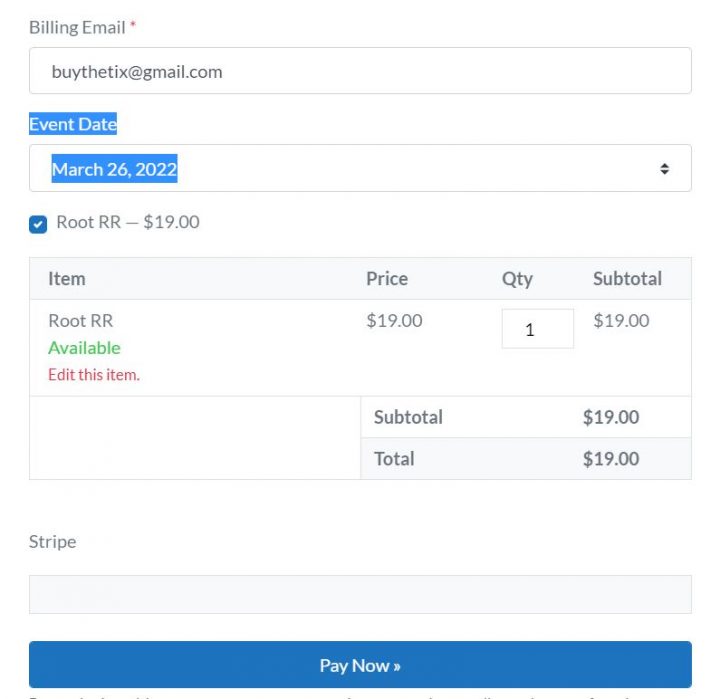
At this point, the total amount is calculated and the buyer needs to pay with his credit card.
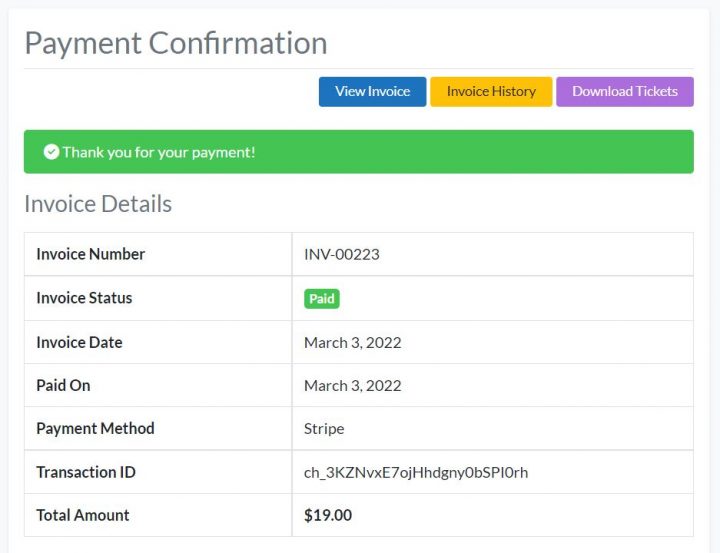
After the transaction is completed, the buyer will be able to download the tickets and show them at the event on their mobile device or with a hard-printed copy.
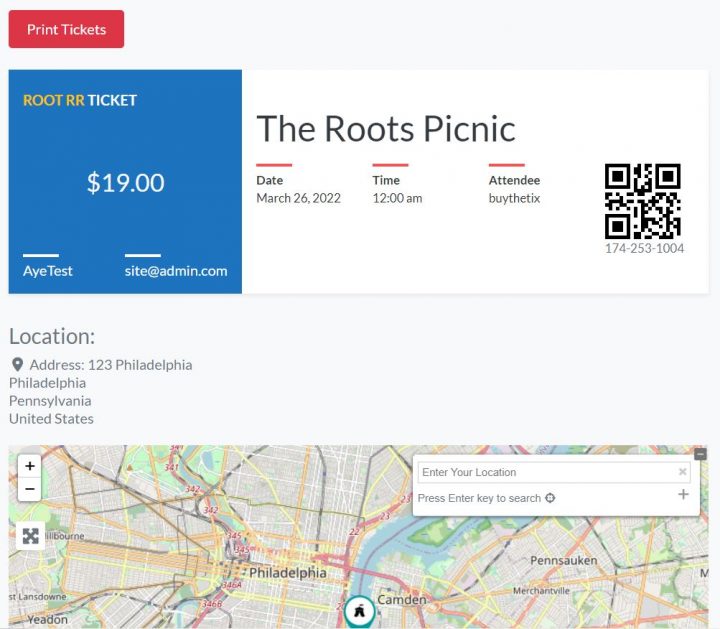
As previously mentioned, the tickets come with a unique QR Code that can be scanned to see if the ticket is valid or not.
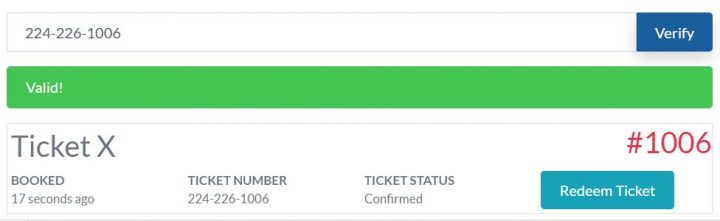
Of course, you can redeem the tickets so you’ll know which one has been used and which are still valid.
Landing page for Events
What if I don’t want to use the GeoDirectory Event detail page template to promote my event and I prefer to create a Landing Page with my favorite page builder?
That’s totally possible, but you still need to create the event via GeoDirectory first.
Let’s say you want to use an Event Landing page from the Elementor PRO Library.
This one for example.

After you created your event via GeoDirectory and created the ticket, all you need to do is to replace the Register Now buttons with the GD > Sell Ticket widget. The only difference with what we did earlier, you’ll need to add the ID of the ticket to sell.
You’ll have to modify the style of the widget to match the original look of the button.
By using the GD > Sell Tickets widget, it will ensure that when the event is started, the button will become inactive and it will no longer be possible to buy tickets.
If that’s not a viable option and you want to use the original Register Now buttons, you can edit them via Elementor and make their links point to:
yoursite.com/#getpaid-item-XYZ|0
Where XYZ is the ticket ID. You can verify the ID of your ticket on the Items list of GetPaid.
Clicking the button with that link will open the ticket check-out form.
This second method will not stop selling the tickets after the event has started though.
Directory of Events with Tickets Marketplace
Because GeoDirectory allows users to submit their own events (if you wish), your events owners will also be able to create tickets for their own events.
As previously mentioned, you can charge a commission for each sale, which means that you now have an extra tool to monetize your directory.
Soon we will create a tutorial to show you how easy it is to create a Tickets Marketplace from start to finish.
Events Tickets Marketplace: Included in all memberships
We hope you enjoyed this tutorial.
If you are a GeoDirectory active member, you will find the plugin in your account area.
We are curious to hear your feedback and we are eager to improve this plugin indefinitely, so don’t hesitate to share your ideas in the comments down below!
In this latest release of GeoDirectory, we focused on improving the website admin experience, rather than adding new features. At the same time, we did our best effort to make GeoDirectory fully compatible with the new Full Site Editor recently introduced by WordPress 5.9 in Beta.
Unfortunately, we will have to postpone 5.9 full compatibilities for a while longer, because currently, the WordPress full site editor does not treat blocks exactly like the Gutenberg editor, breaking most blocks added by plugins.
That said, we are not too far from being compatible and we are prepared to complete the job, as soon as the WordPress core development team will address all the issues we encountered.
Our main objectives for this release were:
- an improved setup wizard
- a better organized and neatly looking settings pages
- an upgraded custom post type settings UI
- Compatibility with WP 5.9
We were able to complete the 1st three points and as mentioned above, we will complete the fourth point as soon as possible.
1. Improved setup wizard
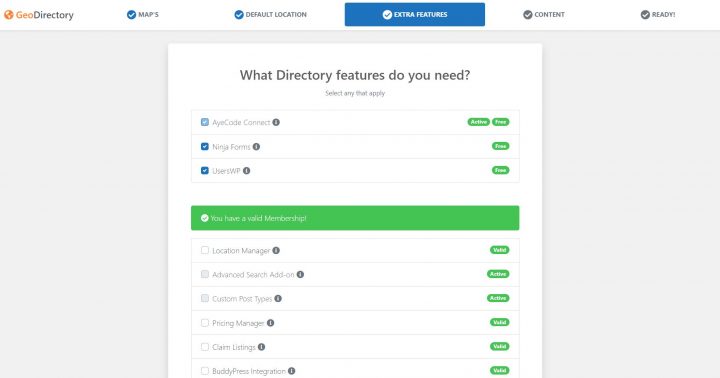
We tried to make the setup wizard more efficient. It will be easier now to set up the Google Maps API KEY without errors, add extra features, create dummy listings for different industries, and so on.
2. Better organized and neatly looking settings pages
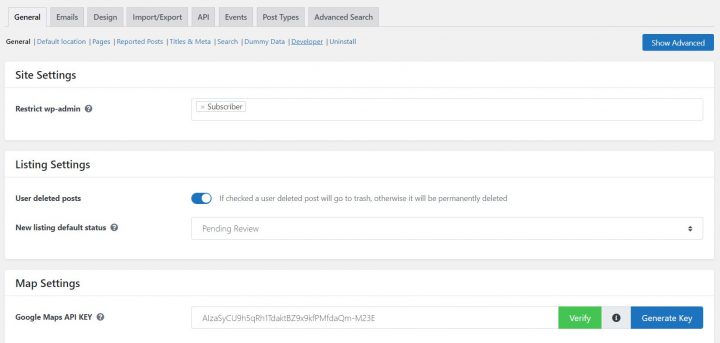
We added Bootstrap to all our settings pages to make them more organized, better looking, and easy to navigate.
We also improved the settings that historically created more support requests.
For example and as mentioned above for the setup wizard, we put a lot of effort into making the Google Maps API KEY generation and validation a lot easier.
Now there is a verify button that allows seeing if the key is working and if not, what is not working and how to fix it.
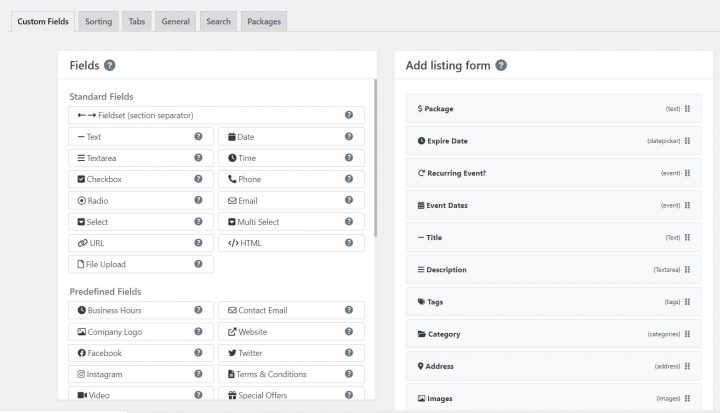
3. upgraded custom post type settings UI
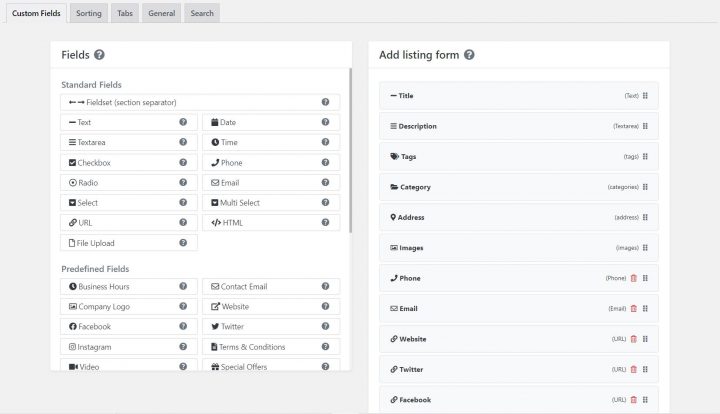
This is where we put a lot of effort, to make it easier to create and manage:
- the custom fields of the add listing form builder
- the listings sorting options
- the listing detail page tabs builder
- the advanced search form builder
We took inspiration from the most recommended form builders user interfaces and now adding custom fields to the add listing page should be more intuitive and user-friendly.
These improvements were long due and will make it easier for new users to set up GeoDirectory and more enjoyable for current users, to manage their online directories.
For additional information about this release, please have a look at the changelog: https://wpgeodirectory.com/change-logs-v2/#v2.2
In the next releases, we will solely focus on highly anticipated new features, such as the booking plugin.

GeoDirectory version 2.1.1.0 introduces a new, highly anticipated feature:
Conditional Logic for Custom Fields
This new feature allows you to create dependencies between fields, based on the conditions that you set.
Dependent fields will only be displayed and editable, if the input entered on the fields they depend on, matches the right conditions.
This feature is fundamental for business directory listings, with many custom fields making it possible to select preset fields only when these apply.
An easy-to-understand example is represented by custom fields for Car Classified Listings.
Presumably, you will have a field labeled “Brand”, where users will select their car manufacturers such as Ford, GMC, or Lamborghini.
And you will have a field labeled “Models“, where you select the model of the selected Brand of cars. If you select Ford, this field will display models such as C-Max, Fiesta, Focus, Fusion, Mustang, and so on.
If you select Lamborghini, this field will display models such as Huracan, Aventador, Gallardo, Murcielago, Diablo, and so on.

To create this example, we added 3 custom fields to our setup. Brands, Ford Models, and Lamborghini Models.
On the Ford Models Field, we set the condition to show only when you select the Ford option in the Brands field.
On the Lamborghini Models Field, we set the condition to show only when you select the Lamborghini option in the Brands field.
It is as easy as that.
Another case in point would be Real Estate Listing.
Let’s show a full tutorial, including how to set up the fields, using our WordPress Real Estate Theme.
Conditional Fields for Real Estate Listings
Our Real Estate listing demo includes a field labeled Property Type with options such as Houses, Apartments, and Land and another field asking for furnished/unfurnished status. Obviously, the second field never applies to Land properties.
In this case, we will add a Conditional Logic to the Furnishing select custom field by doing the following:
1. Open the Furnishing Select Field.
2. Click the “+ Conditional Field” link at the lower-left corner of the custom field options.
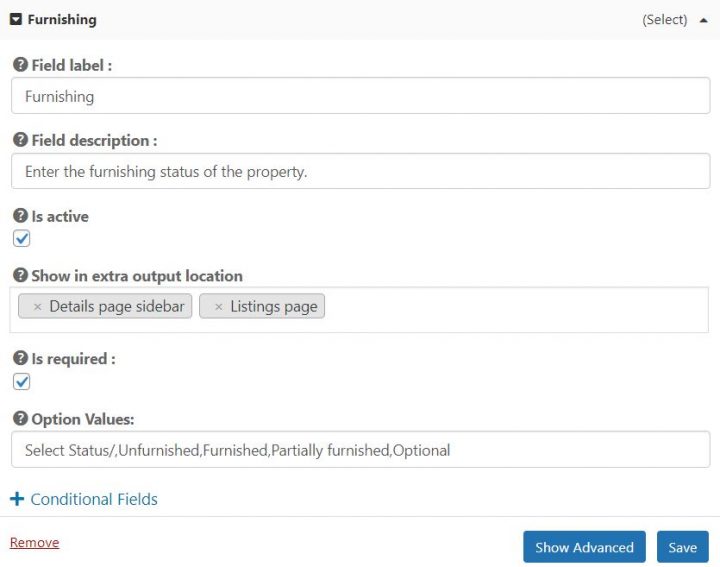
3 After clicking on it, a new set of options will appear.
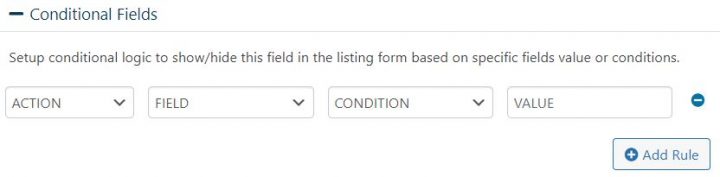
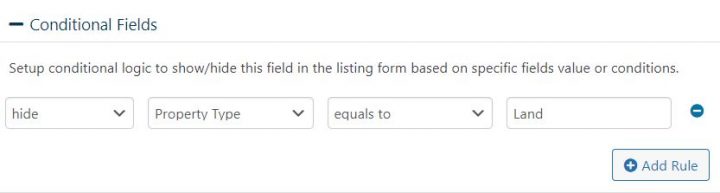
4 For our example, we will need to set them as follows:
- ACTION = HIDE
- FIELD = Property Type
- CONDITION = equals to
- VALUE = Land
and save the custom field. Below you can see what this will look like.
After doing that, this is the result on the Front End:
The same conditions can be added to other fields like the bedrooms or bathrooms fields, which are not needed if you are listing a piece of land.
You can also add multiple conditions if you need to do so.
The available options are:
- ACTION = SHOW/HIDE
- FIELD = All your fields
- CONDITION = empty, not empty, equals to, not equals, greater than, less then, contains.
- VALUE = accept text
And you can add as many as you wish for each field.
What are you going to build with GeoDirectory conditional custom fields?
Let us know in the comment down below…
Are you looking for a WordPress Store Locator plugin to help you increase sales at your store or shop?
If yes, you should check out these top plugins that can help you boost your business.
A WordPress store locator plugin is a great way to ensure that customers know exactly where to go when they want to buy from you.
If your business has more than one location, you should consider installing a where-to-buy store locator plugin.
These allow you to list all your locations on a single page so visitors can browse them all at once.
You can also add maps showing where they are located to each listing.
There are thousands of free and paid WordPress plugins available today. The problem is finding the right one. That’s where our experts come in.
They scour the web to find the best WordPress plugins every day. And they share their findings with you.
Some of the top WordPress plugins can help businesses improve their visibility and increase sales.
WordPress Store Locator Plugins Compared
That said, which store locator WordPress plugins are the best?
In theory, any Google Maps plugin that allows adding more than one location could be used as a Store Locator.
However, that might not be enough for everyone.
This article will look at some of the most popular out there.
In addition, we will be paying particular attention to their Rich Snippets support.
From the point of view of a local business, Rich Snippets are crucial for SEO as these help search engines display beneficial results about your business.
For instance, if you run a restaurant, Rich Snippets will highlight Menus, Service Hours, Specials, etc.
GeoDirectory

| Active Installs | Ratings | Updates | Support |
|---|---|---|---|
| +10000 | 4.7/5 | Weekly | Within 24 hrs |
Our flagship plugin, GeoDirectory, is by far the most sophisticated shop locator plugin on this list.
Integrated with Google Maps and OpenStreetMap, it has many features that are otherwise not found in most Store Locator WordPress plugins.
For example, it is fully integrated with Elementor and Elementor PRO.
Please don’t take our word for it, though.
Consider this.
Major Features
This is entirely free.
GeoDirectory has numerous custom extensions that offer seamless integration with third-party plugins and extended features.
- Google Maps and the OpenStreetMaps API
- Custom Google Map icons
- Search for physical stores near your current locations (proximity)
- Search Radius
- Physical store location pages, each with its map, custom image gallery, contact details, dedicated contact form, and customer reviews
- Full support for WordPress REST API
- Unlimited custom fields for displaying location info
- A wide range of widgets that can be used as shortcodes or Gutenberg blocks in virtually any content field
- Ability to add unlimited locations and location metadata
- CSV manager for export, import, and bulk editing of store listings
- Rich Snippets Support – Yes! 🙂
- Responsive design that works with any page builder plugin like Elementor, Divi, Oxygen, Bricks, Breakdance, and Beaver Builder (just to name a few)
- Integration with WPML multilingual plugin
For example:
- GeoLocation
- Advanced search
- Custom Post Type to handle different types of stores
- Claim listing for the business owner
- Custom-designed Google Maps
- Events locator (Now a free plugin)
- SEO Location Manager for multi-city store locating capability
- Map Marker Clusters and many more.
If you are building a business directory website (generic store locator for your city), you can even charge business owners to submit their listings on your map.
If you need to build an advanced Store Locator on your WordPress website, GeoDirectory should be your first choice.
WP Store Locator
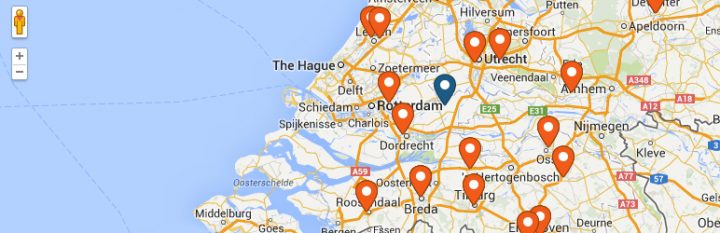
| Active Installs | Ratings | Updates | Support |
|---|---|---|---|
| +60000 | 4.8/5 | Rarely | Within 24/48 hrs |
The WP Store Locator is a free plugin that adds all your locations to a map you can fully customize.
The map and navigator can be in whatever language you choose.
You can add custom labels for each location and help users find nearby locations using multiple filters, such as proximity radius or category.
WP Store Locator allows you to display any number of stores and change the frontend language from the admin panel.
The shortcodes are highly customizable, so you can choose what to display on the front end of your site.
Be it opening or closing hours, alternate addresses, landmarks, phone numbers, etc.
This WP plugin has custom markers that users can drag on the map to set their desired location.
Beyond that, marker clustering is also available should there be multiple stores nearby.
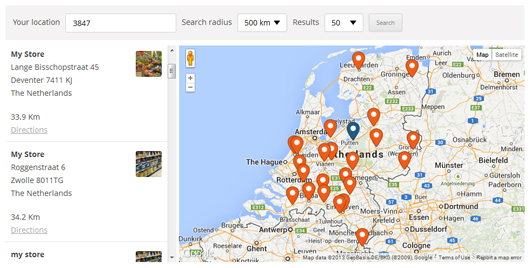
Overall, this is a very feature-rich plugin that can fit the needs of any user.
However, the biggest downside is that some features that are otherwise available out of the box in most plugins require you to rely on add-ons.
For instance, bulk import, detailed statistics, and search widgets are mainly managed using add-ons with WP Store Locator.
Major Features
- Support localization and works well with multilingual plugins
- Ability to showcase marker cluster on the frontend
- Supports Geolocation via Google Maps API
- Comes with custom filters to sort CPTs based on user requirements
- Supports Rich Snippets – No (Partial Support; but single entry pages do not use Local Business Rich Snippets)
Yoast Local SEO for WordPress
Yoast has become the de facto leader when it comes to WordPress SEO.
Their main SEO plugin is free and backed by the Local SEO plugin, primarily meant as a store locator.
Local SEO by Yoast allows users to filter stores and other locations by radius and ZIP codes.
You can add your store’s address to the store locator page, specify the opening and closing hours, and add any custom info using shortcodes.
The plugin also supports custom widgets that display store location info in the sidebar or footer.
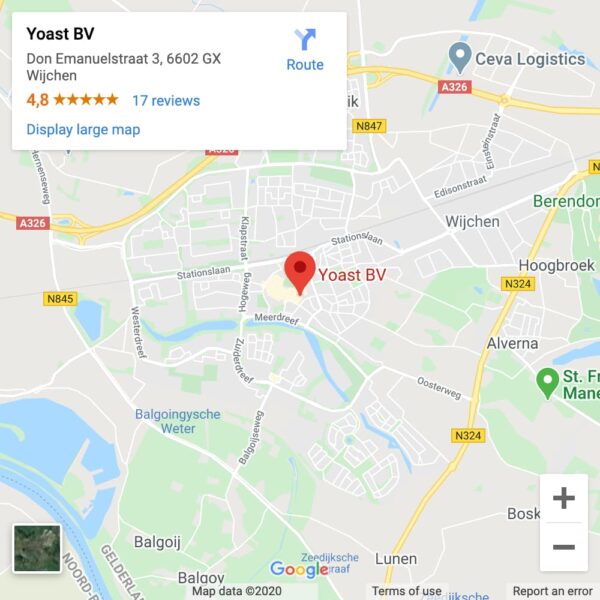
That said, Yoast’s biggest issue with Local SEO is the absence of a free version.
More importantly, this is not a bonafide store locator plugin per se.
Instead, it is a companion plugin for the mainstream Yoast SEO plugin.
It offers seamless integration with Yoast SEO, handling metadata and XML sitemaps, etc. Still, it does not boast any additional features other plugins offer.
Lastly, it is worth mentioning that if you have virtual locations for your store, this particular plugin might not be the best fit for you.
Price – $79 + VAT
Major Features
- Offers tight integration with the Yoast SEO plugin
- It integrates well with WooCommerce and can add location-specific features to WooCommerce products.
- Supports KML file generation and can add the relevant info to your search engine XML sitemap automatically
- Supports Rich Snippets – Yes
Locatoraid Store Locator

| Active Installs | Ratings | Updates | Support |
|---|---|---|---|
| +2000 | 4.5/5 | Rarely | Within a week |
Locatoraid Store Locator is another lightweight plugin that includes many configurable styles for front-end display.
Regarding modus operandi, Locataraid follows the same approach as all other plugins on this list.
It lets you add locations your customers can browse through, supports custom shortcodes for the more straightforward display of store locations, and can insert maps with text search, radius and proximity search, etc.
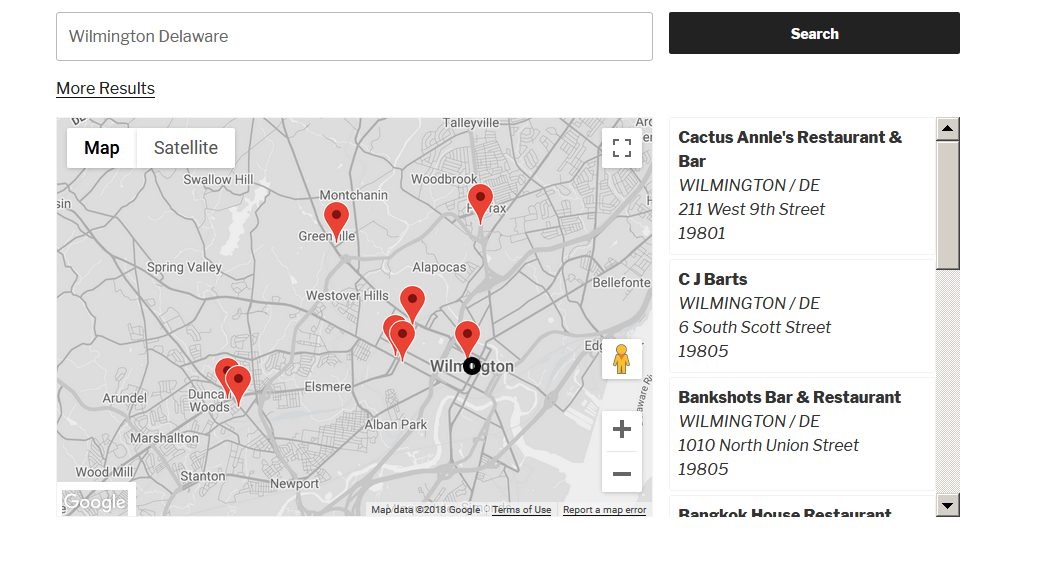
In addition to all of that, Locataraid also comes with custom widgets and highly tweakable map styles.
On the downside, though, geolocation is hard to set up, and Locataraid seems to mainly require users to manually type in their address or ZIP code to fetch nearby store locations.
It might be time-consuming and a minor hindrance for some users.
Major Features
- Tweakable and customizable map styles
- Supports multiple locations and custom fields
- Ability to bulk import locations in a few clicks
- Supports Rich Snippets – No (Partial Support; single entry pages do not support Local Business Rich Snippet fully)
Agile Store Locator
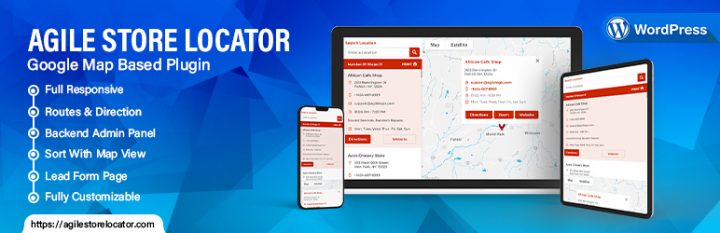
| Active Installs | Ratings | Updates | Support |
|---|---|---|---|
| +10000 | 4.9/5 | Frequent | Within 48 hrs |
Agile Store Locator is a handy WordPress plugin that renders maps on your website’s front end using Google Maps.
This WP plugin supports Geolocation and custom fields and offers decent customization features for the maps display.
That said, the free version only seems to be able to search for or locate stores based on manual input—ZIP code, city, country, etc.
Major Features
- Google Maps and Google Geocoding API
- Support for custom fields
- Multilingual support
- Ability to display maps in different languages
- Rich Snippets Support – No
WP Go Maps (formerly WP Google Maps)
| Active Installs | Ratings | Updates | Support |
|---|---|---|---|
| +400000 | 4.8/5 | Frequent | 48/72 hrs |
WP Go Maps is not a Store Locator plugin per se, but rather a mapping plugin that supports Google Maps and Open Street Maps.
It is extremely popular, with over 400,000 active installs.
The free version allows users to create one map by simply right-clicking on the map and adding unlimited map markers with all the information they need to find store locations.
The free version allows your website visitors to search by address and radius.
Free version notable features include:
- Unlimited map markers by simply typing in the address
- Elementor Map block
- Edit your map markers with the click of a button
- Drag map markers to an exact location
- Support for translations
- Define your width, height, and zoom level for your map
- Add animations to your map markers!
- Restrict a store locator search by country
- Add Polygons to your Map
- Add Polylines / Routes to your map
- Google Maps Autocomplete
- Set the max zoom level for your map
- Serve your map marker data via your database or an XML file
Store Locator Plus for WordPress

| Active Installs | Ratings | Updates | Support |
|---|---|---|---|
| +7000 | 4.3/5 | Frequent | unreliable |
Store Locator Plus lets you create a location search on your website, regardless of the number of stores you need to manage.
You can create a page without unique settings, specify your default location, and add a shortcode to the location search page.
This particular plugin is ideal for people who wish to add a simple search bar to their site to locate stores.
If you are looking for highly customizable options, Store Locator Plus for WordPress is probably not the first choice you think of.
Add custom add-ons (paid extensions) to this plugin for additional features.
Such as enabling or disabling search options, categorizing locations, creating SEO-focused pages for each area, and so on.
You must implement a few add-ons or extensions to get the most out of this plugin.
For instance, extensions are necessary to integrate social media links with store locations or add custom fields to your location data.
Store Locator Plus also works seamlessly with Gravity Forms and Event Location Manager to link events to the location of your business.
Lastly, it supports multiple countries and languages without any paid add-ons.
Major Features
- Support for multiple countries and locations
- Localized in various languages
- There is no hard limit on the number of locations that you can add
- Easily customizable with HTML and CSS tweaks
- A wide range of paid add-ons and extensions to get the most out of your site
- Support for WordPress REST API to help use WP as a headless CMS, integrate with mobile apps, and so on.
- Does not support Rich Snippets
WARNING: This plugin was suspended for a long time from the wp.org plugin directory for security issues.
It appears that the problem was solved now, but handling the situation was quite unprofessional.
To Sum it up…
In this article, we have compiled some of the most popular WordPress plugins that may help you build store locator functionality on your website.
Each has its features and abilities, but most users will be satisfied with any of the above plugins.
Which one should you use? Yes, it depends on your requirements.
For instance, if integration with Yoast SEO is the only aspect of your search, Local SEO by Yoast is an obvious choice.
On the other hand, if the widest selection of features in the free version and a stellar array of premium extensions is something you’re looking for, GeoDirectory is what you should choose for your site.
Which store locator WordPress plugin do you prefer and why? Have your say in the comments below!
At AyeCode, We Love Affiliate Marketing!
Affiliate Marketing is one of the things, which made GeoDirectory as successful as it is.
When in 2011 we launched GeoTheme, the predecessor of GeoDirectory, our affiliate program, and a few awesome affiliate marketers, gave our first product the visibility that it needed to take off.
It helped us create an audience.
Affiliate marketing is definitely one of the reasons why we have been profitable since day one, and we have been growing ever since.
Today, we still rely on Affiliate Marketing, and we pay five figures per year to our partners in affiliate commissions.
Currently, we have 277 affiliates, but 7 of them, are accountable for 80% of the revenues generated by our affiliate program.
This means that you don’t need too many of them, you need a few good ones.
BTW, if you want to join our Affiliate Program, we do offer a 30% commission for each sale and you can register here.
What is Affiliate marketing?
In case you don’t know, affiliate marketing for the eCommerce industry consists of offering a commission for each sale referred by a third-party website.
An Affiliate plugin will help you automate this process.
Website owners who want to promote your products can register on your website’s affiliate program.
The plugin will provide “special links” to your partners and will track anytime a visitor lands on your store, after clicking on one of these special links on a partner’s website.
If the same visitor purchases one of your products or services, or a premium listing, the affiliate plugin will record the commission.
At the end of the month, you can generate a payout report of all commissions and pay your affiliate partners.
Should you start an Affiliate program for your directory?
If you are selling premium listings, absolutely yes! Do it now…
If you haven’t, you are not taking full advantage of your online business.
Seasoned Directory Developers know how challenging monetizing a directory can be. Especially when it is newly launched.
A well thought Affiliate Marketing Program can greatly help you with that.
For example, in the case of a Local Business Directory, you could contact every Local SEO, Web Developers, and Marketing agency in your area and let them know they can earn a percentage for each premium listing that they buy for their local clients.
Their clients are your clients!
Other than sending you targeted traffic, affiliate partners will improve your backlink profile, and as a consequence, your SEO (Search Engine Optimization).
Most affiliate partners will cloak the affiliate links on their websites. Some will add the “nofollow” tag to them.
However, a good percentage will still give you a 100% “dofollow” link and each backlink can make a big difference for your website’s rankings.
What Affiliate Plugin should I use with GeoDirectory?
Until recently, you only had one choice. However, you had to buy that plugin and our integration add-on just to get started.
Unless your directory was already generating decent revenues, the initial investment could appear a bit high.
Today the answer is a no-brainer. You should use SliceWP!
SliceWP is the newest Affiliate plugin for WordPress, its core plugin is free, it is incredibly easy to use and its developers, just made it fully compatible with our GetPaid plugin.
As a consequence, it is compatible with GeoDirectory too!
The free plugin is more than enough to get you started and if you manage to attract a few good affiliate partners (3 or 4) they will have a huge impact on your revenues.
I’m sold, show me how it’s done!
This is the easy part. It will literally take minutes.
I’m assuming you already have GeoDirectory installed and you are selling Paid Premium listings using the GeoDirectory Pricing Manager Add-on and the GetPaid plugin.
1. Install SliceWP

Go to Plugins > Add New, search SliceWP, click on Install Now and Activate. This will launch the setup wizard.
2. Complete the Setup Wizard
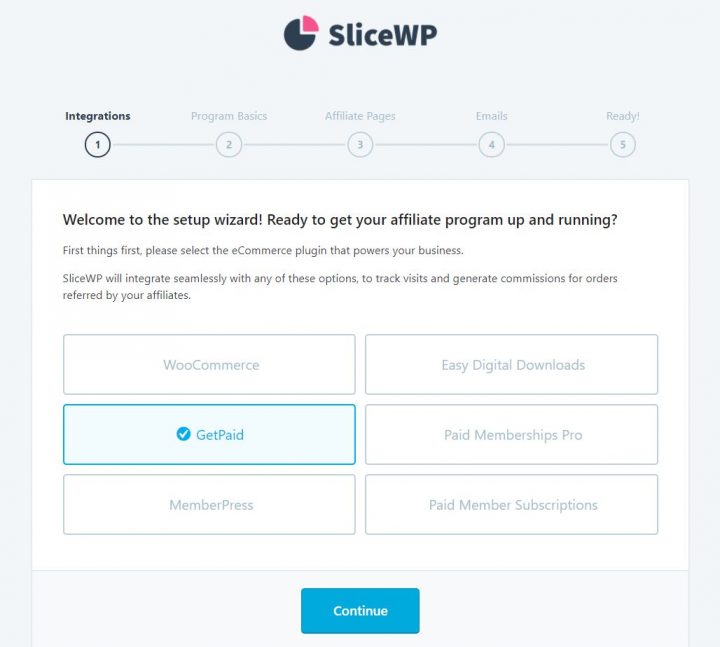
- Select GetPaid
- Set your Sale Commission Rate, Subscription Commission Rate, Currency, Cookie Duration and Allow visitors to register as affiliates.
- Create the pages needed: Affiliate Register Page, Affiliate Login Page, and Affiliate Account Page
- Enable the notifications needed (all 4)
- All required options are now setup. You are almost done, click Review Settings to fine-tune your configuration of SliceWP
Here you can add the final touches through options that are not required like:
- Exclude Taxes
- Reject Commissions on Refund
- Zero Amount Commissions
- Affiliate Own Commissions
And a few other options.
From now on, every sale referred by an affiliate partner will be tracked and a commission will be recorded.
This is how commissions will look like on the backend:
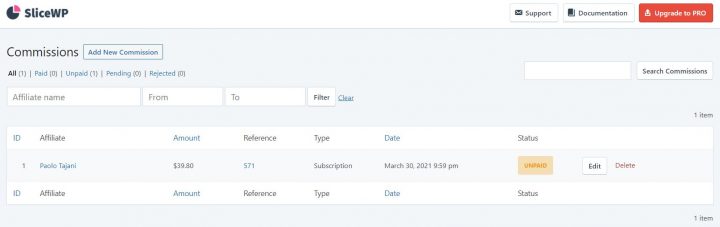
This is how the affiliate account will look like on the frontend with the starter theme:
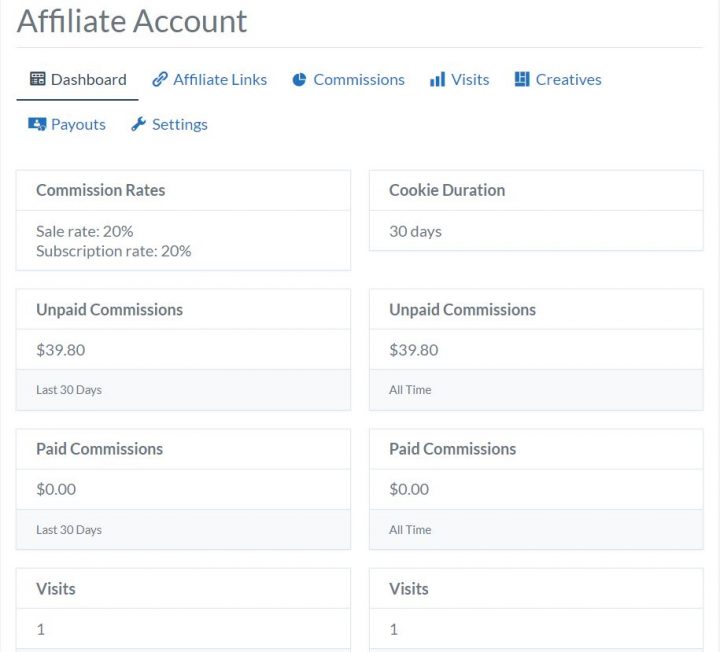
As the site admin, you will be able to moderate the affiliate partners’ registration. You can track referrals, visits, and you will be able to add creatives (Marketing material like logos and banners.)
Payout files are easy to create by start and end dates and you can set a minimum amount.
SliceWP Premium Features
If this is not enough, you have several premium add-ons to choose from.
For a very reasonable price, you can add extra features like:
- Lifetime Commissions
- Custom Affiliate Fields
- Recurring Commissions
- Product Commission Rates
- Affiliate Commission Rate
and much more.
That’s it!
If you wish to test it, you can do so on this demo: https://demos.ayecode.io/starter/
You can register a new affiliate here:
https://demos.ayecode.io/starter/affiliate-registration/
You can login as affiliate here:
https://demos.ayecode.io/starter/affiliate-login/
And you will find the affiliate account page here:
https://demos.ayecode.io/starter/affiliate-account/
We hope you will enjoy using SliceWP, if you have any questions about it, please leave it in the comments down below.
Disclaimer
AyeCode is not currently affiliated with SliceWP, nor do we own any interest in it. We are suggesting to our audience purely because we like it, and because its developers were kind enough to make it compatible with GetPaid.
We think it is a fantastic addition for any Online Directory Developer.

Have you ever wanted to create a real estate website for your agency?
Not everyone knows that you can easily start a professional real estate listings website for your city using WordPress, without investing much time or money
Now you can, with GeoDirectory and the AyeCode Connect plugin, it’s super easy to import a full demo like this one, within a maximum of 5 minutes.
You’ll only need to choose between, Elementor PRO which starts at $49, or Gutenberg, and the Kadence Theme, which are totally free.
Why did we create 2 very similar templates, one for Elementor and one for Gutenberg and the Kadence Theme?
The answer is very simple, while Elementor is undoubtedly the most versatile page builder, it comes with a few drawbacks.
Websites built with Elementor require heavy optimization and high-performance hosting to load as quickly as websites built with Gutenberg and the Kadence theme on regular hosting.
Gutenberg and the Kadence theme are not yet on the same level as Elementor in developing complex designs.
However, they are getting very close and websites built with them, perform a lot better, even on regular WordPress hosting plans.
Speed Test Results


After importing the demos
In both cases, after importing the demo, all you need to do is to personalize the website by adding your logo.
Edit the dummy listing with real information about your real estate listings.
After that, you can focus on growing your Real Estate listings directory and start earning online and offline revenues.
It’s never been easier.
In this post we will show you how easy it is with 2 full tutorials:
GeoDirectory + Elementor PRO
1. Setup WordPress Hosting
You can skip this step if you already have a blank WordPress site setup or if you are using another Hosting provider.
in this example, I’m using Cloudways, which is our go-to WordPress hosting provider. We are using the Vultr HF option, with 2GB of RAM. It only costs only $26 /mo for unlimited sites.
First of all, we need to create a new application. After logging in to my Cloudways account I navigate to Applications and click on the green + Add Application button.
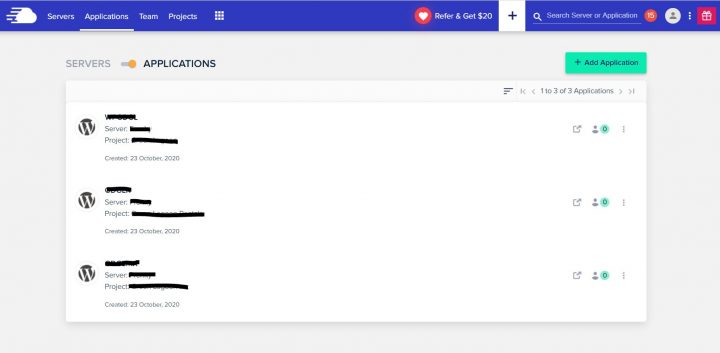
You need to select the server for your new application, I have only one on this account so I select it, and click on Add Application
Next, you add the Application which is the latest version of WordPress, give the app a name, in this case, I’m calling it GeoHome EL.
Finally, select one of your projects as an app category and click on Add Application again.
You will land on this page:
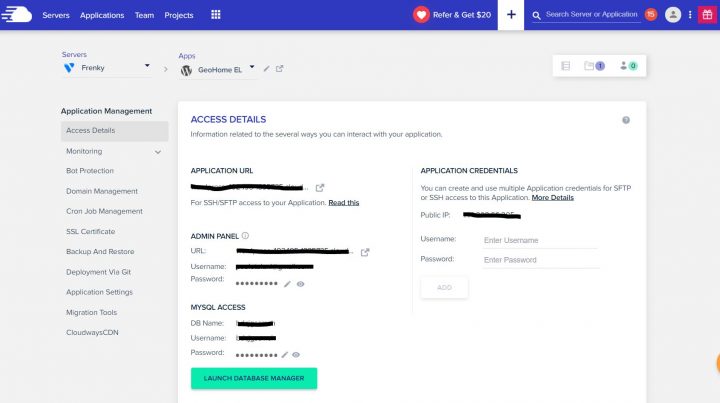
By clicking on the Application URL, you find your new WordPress website.
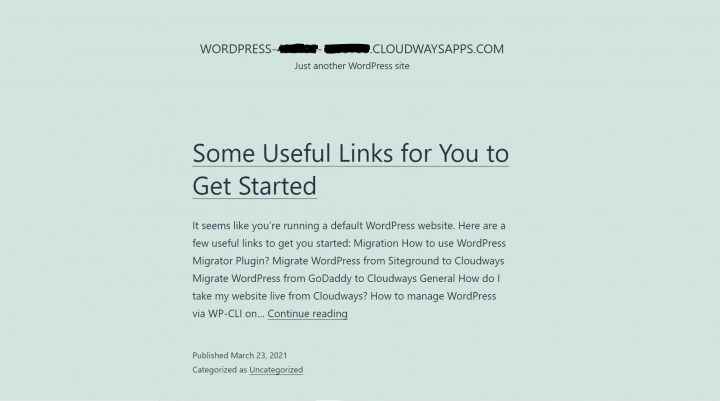
Creating a new WordPress website with Cloudways, is as easy as that.
2. Install Elementor and Elementor PRO
From the application page, click ADMIN PANEL > URL (or navigate to the wp-login.php page if you know what that is).
Copy the username and password from the application page and login.
Go to Plugins > Add New, search for Elementor, click Install Now and Activate.
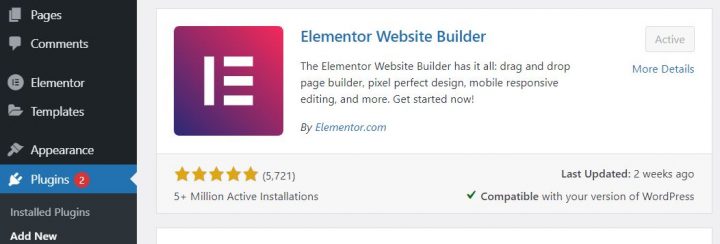
Now click Add New > Upload Plugin and install Elementor Pro, by selecting the ZIP downloaded from Elementor.com.
If you don’t have Elementor Pro, you must buy it here:
3. Install the AyeCode Connect Plugin.
Click Plugins > Add New.
Search: Ayecode Connect.
Click on Install Now and then on Activate.
You will find a new “AyeCode” WordPress menu, with 2 submenus.
- AyeCode
- Import Demo Data.
4. Connect with the AyeCode website
Click the Connect Site button and Register (or log in if you already have an account with us). Registration is totally free.
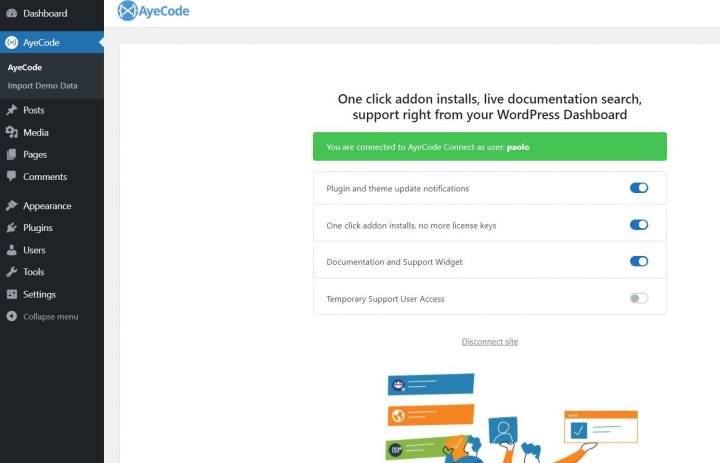
Why do we make you register?
If you are wondering why we require registration to import a demo, that’s because some demos may come with premium add-ons.
By connecting your account, we will be able to verify if you have a license for these add-ons, and in that case, we will install them automatically.
If you don’t have a license we will install the demo anyway, without the features included in the premium add-ons.
5. Import the Elementor Demo
Navigate to AyeCode > import Demo Data. Currently, you will find 5 demos to import. What we need today, is the demo called: Real Estate (Elementor)
Click View.
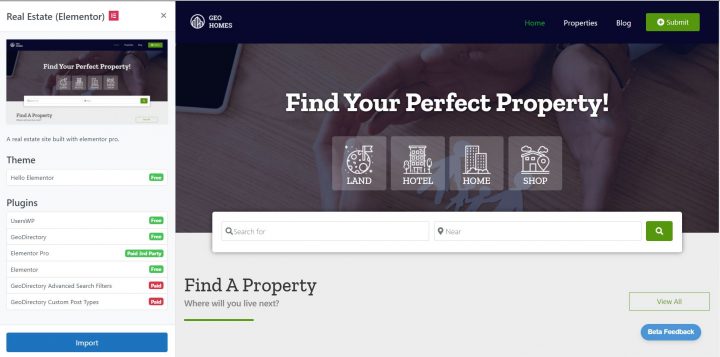
As you can see there are a couple of Paid Add-ons installed on this demo. If you have an AyeCode license they will be automatically installed.
If you don’t, the demo will be installed without those features.
Click Import and the job is done. Your site will look like this: https://demos.ayecode.io/elementor-real-estate-directory/
GeoDirectory + Gutenberg and the Kadence Theme
Now let’s see how we can do the same, using Gutenberg and the Kadence Theme instead of Elementor PRO.
This is even easier because we don’t have to install anything apart from the AyeCode Connect plugin.
1. Setup WordPress Hosting
This step is identical to the 1st step of the previous tutorial.
2. Install the AyeCode Connect Plugin.
Same as above, do this by replicating the steps outlined in point 3 of the Elementor Tutorial.
3. Connect with the AyeCode website
Follow the steps as explained in point 4 of the Elementor Tutorial.
4. Import the Gutenberg DEMO
Navigate to AyeCode > import Demo Data. Currently, you will find 5 demos to import. This time we will use the demo called: Real Estate (Kadence)
Click View.
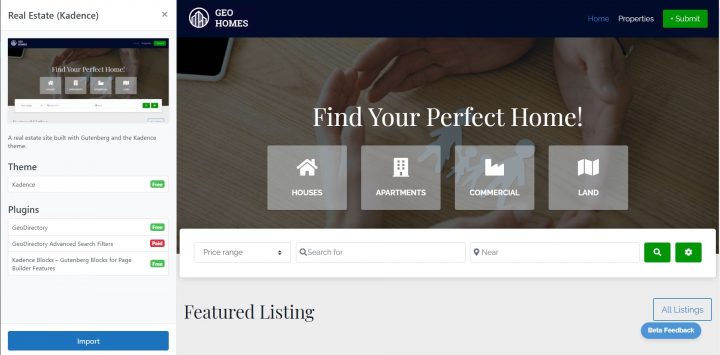
As you can see, apart from 1 GeoDirectory add-on, everything here is free of charge and nothing needs to be installed in advance.
Just click Import and the job is done. Your site will look like this: https://demos.ayecode.io/kadence-real-estate-directory/
Now you can customize your website with your logo, change colors if needed and edit the dummy listings with your real estate listings.
Finally, you can focus on growing your new online business.
We hope you will enjoy these new templates.
In the next few weeks, we will release new templates for both Elementor PRO and Gutenberg and the KadenceWP Suite, such as a Doctors Directory, Hotels Directory, Restaurant Directory, Yoga Studio Directory, and many more.
Obviously, with GeoDirectory you can build any kind of Directories. Check this tutorial on How to build a Kadence Directory Website.