The World’s Most Advanced And Scalable WordPress Directory Plugin
Today, GeoDirectory is the only WordPress directory plugin on the market that can scale to millions of listings and withstand the battering of traffic that comes along with that.
Get GeoDirectoryWhat can i do with GeoDirectory?
How Frey Turned a Simple SEO Test into a $2K/Month Directory Business and Now Leads a Growing Community of Builders
When Frey Chu first launched a directory website in 2022, it wasn’t part of some master plan. He was just learning SEO, testing ideas, and needed a project to practice on. That test site turned into a niche directory that now brings in over $2,000 per month, mostly on autopilot, and pulls in around 60,000 monthly visits.
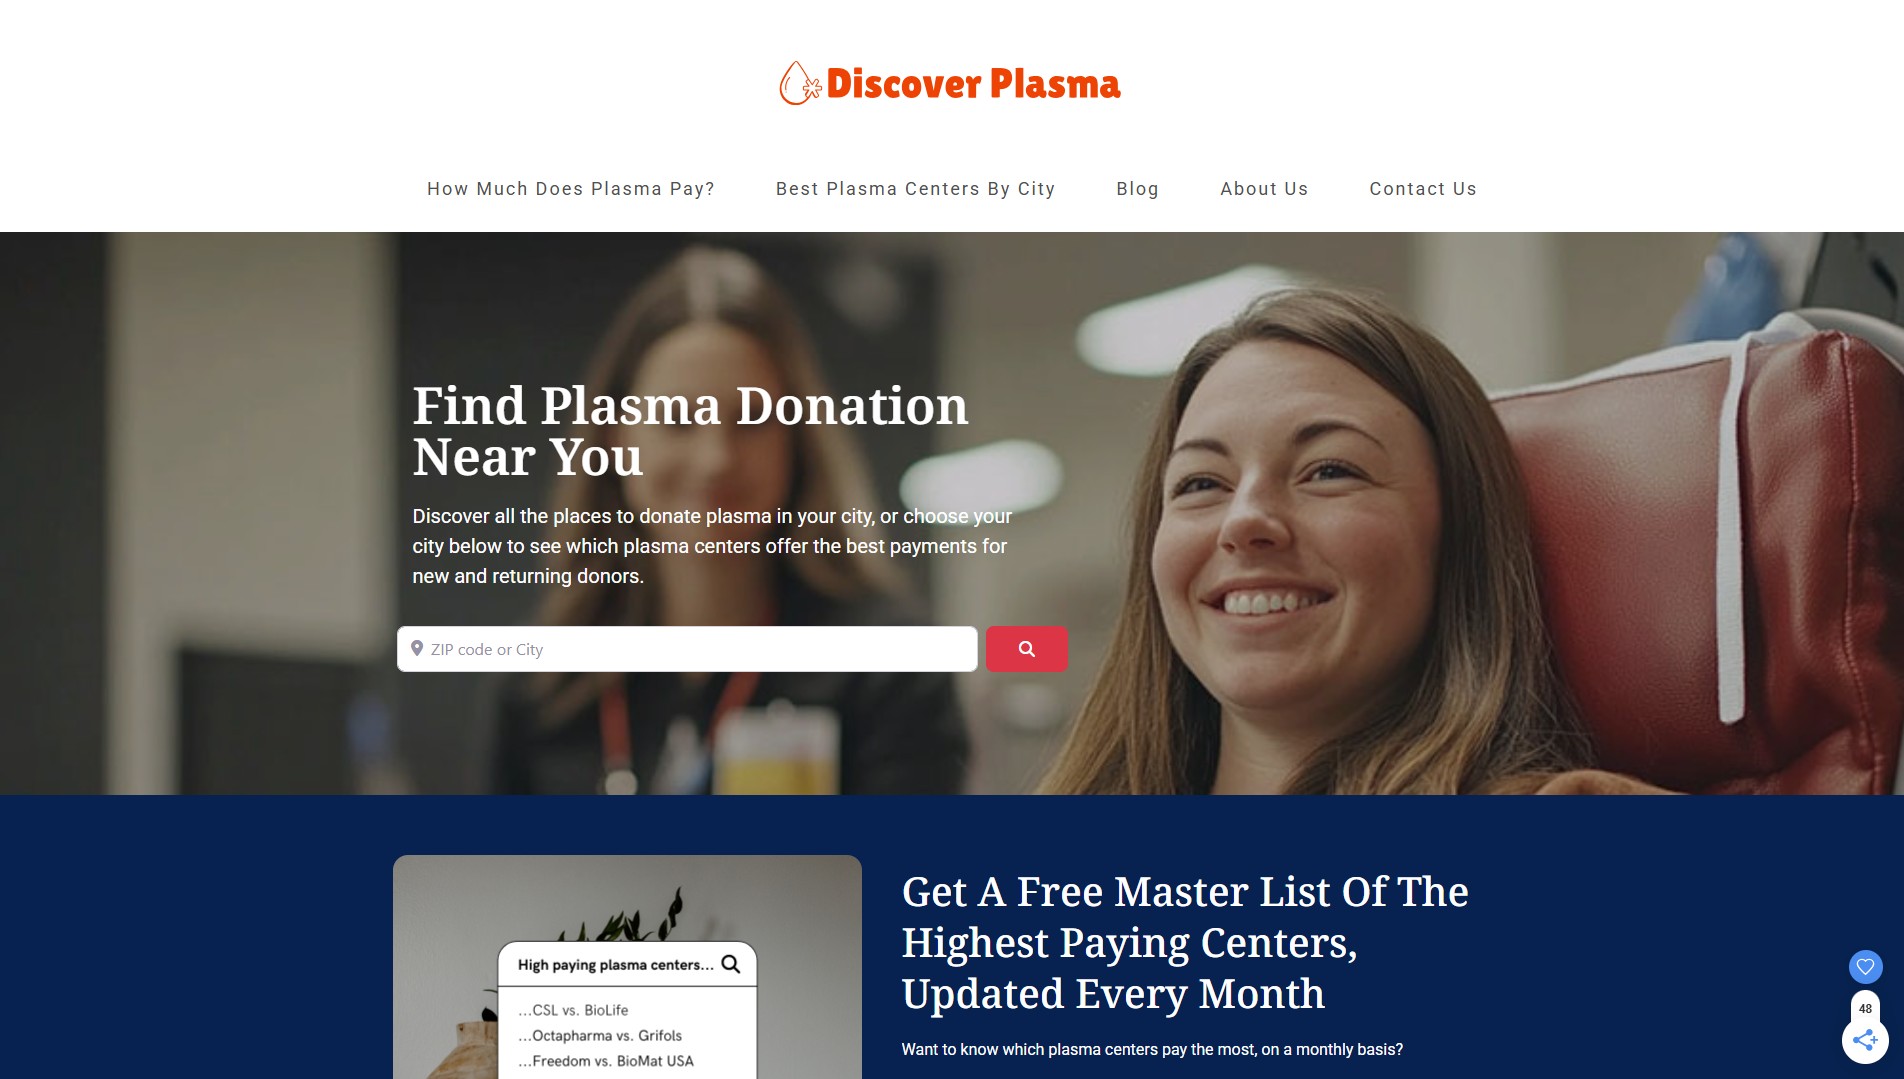
Since then, he’s gone all in. Frey has built several high-traffic directories in weird, unsexy niches (his words), including porta potty rentals, flea markets, liquidation stores, and a national healthcare directory called Discover Plasma using GeoDirectory.
No code, no team, just smart research, solid SEO, and a ton of manual work that most people won’t do. He scrapes data, cleans it himself, checks individual listings on Google Maps, and enriches each one by hand because that’s what makes his directories useful.
Now, through his YouTube channel, Frey documents everything from choosing a niche and validating it with real user intent to monetizing through ads and featured listings.
His practical, transparent style has earned him a fast-growing audience and a thriving private community: Ship Your Directory, where builders swap ideas, review sites, and share behind-the-scenes progress.
He’s not pitching courses or get-rich-quick systems. He’s showing the actual work. Whether you’re trying to hit $500 per month or scale to five figures, Frey’s approach has helped a new generation of directory builders rethink what’s possible with SEO and a laptop.
We asked him to tell us how it all started, what makes a directory work, and why boring might actually be better.

The Frey Chu Story
Q: You went all in on directories after quitting your job. What was the a-ha moment that made you take the leap?
I went all in on directories because I saw that the first directory I built was pretty successful. It was getting a stable amount of traffic—around 60,000 to 80,000 monthly visitors. And I asked myself, what if I could replicate this in other directory niches?
Because that first one found traction, I felt pretty confident—whether that’s a good thing or not—going into more directory projects. The real a-ha moment for me came when I started to truly understand SEO and what actually moved the needle in driving organic traffic. I felt like I knew the core elements that made a difference.
Also, I noticed that a lot of the biggest internet businesses are directories. They’ve been around forever. Some are huge, others are super niche, and yet the category itself is still very underrated. There are so many ways to monetize and so many niches that are overlooked. That combination of things—that was it for me.
Q: Most people chase trendy niches, but you often pick boring ones. Why do you think they perform better?
I think boring, location-based niches tend to win over time. The big reason is that I believe they’re going to outlive info-style directories, especially in the next few years as AI keeps improving. A lot of info will get answered by AI directly, but AI can’t replace hyper-curated local information that easily.
Also, I got a taste of the passive side of these kinds of niches with my first directory. Once it’s built and starts ranking, you can get away with checking in maybe once a month—sometimes less. That hands-off model really worked for me.
Trendy niches are fun but can be exhausting. Like, if you build an AI tools directory, you’re constantly updating it because things move fast. And I just prefer not to be stuck in that cycle of endless maintenance.
Q: You said your first successful directory was basically copy and paste from Google Maps. What made it stand out despite the simplicity?
Yeah, that’s true. My first directory really was a copy-and-paste from Google Maps, but with extra enrichment that people actually cared about. Google Maps can be useful, but it takes time—you have to click into business profiles, read reviews, maybe even search for keywords in those reviews. That’s a lot of work.
So I just took all that friction away. I put everything people were looking for in one place. And the format mattered too. I used a pillar page style, which is basically a long-scroll page where everything is right there. It’s not the prettiest on mobile, but it works insanely well because users don’t have to dig for info.
Q: What’s the biggest misconception people have about building a directory website?
There are a couple big ones. First, that directories are fast cash-flow businesses. I get why people think that, but SEO isn’t fast. It’s not like running Facebook ads or building a personal brand on TikTok. SEO takes time.
Another one is that picking a niche is easy. I actually think it’s the hardest part. I spend a ton of time researching before I even buy a domain. You’ve got to look at competition, social signals, audience demand, whether you’re solving a real problem, and how you’ll make something better than what’s already out there. It’s not just about picking something random and hoping it works.
Q: How do you identify a niche with strong SEO potential but weak competition?
I use Ahrefs for keyword research. A basic approach would be finding low keyword difficulty with high monthly volume, but that only gets you so far. Once you know SEO better, you realize keyword difficulty isn’t always accurate.
So I also look at backlinks, how much topical authority a site has, how many indexed pages they’re working with. If I see mom-and-pop-style directories ranking on page one, that’s a really good sign that competition isn’t too fierce. It’s about putting together the full picture.
Q: What’s your current process for validating a niche before you commit to it?
I check four places: Ahrefs, Google search results, Reddit, and Google Maps. Ahrefs gives me data on search volume and competition. Google tells me if any small sites or indie directories are already ranking, which can be a good sign that it’s winnable.
Reddit and Google Maps are all about understanding if there’s a real problem. I’ll read threads, comments, reviews—just trying to listen. Are people constantly asking for recommendations? Are they repeating the same pain points? That’s the kind of social signal that tells me the niche has depth.
Q: Once you’ve found a promising niche, what’s your go-to tech stack for getting a directory off the ground?
It changes depending on the niche and how complex the build is, but I usually scrape data with something like Outscraper. For the site itself, WordPress is a go-to. I’ve used GeoDirectory for larger builds where I’m launching thousands of listings, and it’s been solid.
If you’re building something more complex or large-scale, I’d still say WordPress is hard to beat. But I’m also starting to experiment with AI coding tools, which I think are going to be big for scalability.
Q: Many beginners get overwhelmed by tools and costs. How lean can someone start and still be effective?
Pretty lean. When I started, I was manually scraping. You don’t need a crazy tech stack. WordPress alone can get you far.
The most expensive thing I pay for is Ahrefs, and honestly, I’d recommend that over anything else if you’re going to spend money. It’s not just for keyword research—it helps with competitive analysis, tracking, content ideas, all of it.
You could probably launch a directory for around $300 to $500. It can go up if you want to automate more or build something huge, but if you’re scrappy, you can absolutely stay lean.
Q: You’re very data-driven, but also talk about empathy for the user. How do you strike that balance when designing your directories?
It’s something I had to learn. I used to build directories just based on my own interests, and most of them flopped. Now I approach it like 70% data, 30% empathy and intuition.
Even if the numbers look good, you still need to understand what people are struggling with. That’s why I spend so much time on Reddit and Google Maps—just reading, listening, watching for patterns.
The data tells me where the opportunity is. Empathy tells me how to actually deliver value so people trust the site and keep coming back.
Q: From your experience, what separates a directory that ranks from one that gets ignored?
It really starts with the idea. There are so many tools out there now—AI tools, WordPress, plugins—that anyone can throw up a site. But if your idea is too competitive and you’re not strong at SEO, you’re probably not going to get very far.
That’s where I see most people give up. They put in all this work and then get discouraged when no traffic comes in. Another thing is expecting results too quickly. SEO just takes a while. If you think you’re going to rank and get traffic in two weeks, you’re going to be disappointed.
Q: What’s your approach to enriching listings so they actually help the end user?
I touched on this earlier, but enrichment starts by paying attention to what people are already saying. On Google Maps, I’ll look at review tags—if the same stuff keeps coming up, it’s a signal that people care about it.
If there’s a fragmented search result, where Google is showing a mix of categories, that tells me people are having trouble finding what they want. I try to fill in that gap. Reddit works the same way. I’ll scroll threads, see what problems come up again and again, and then turn those into data points I include in the directory. It’s about saving people time and frustration.
Q: Programmatic SEO seems to be gaining popularity. Have you found it as effective as the more manual approach?
Yes and no. Programmatic SEO is amazing for scale. You can publish thousands of pages in a day. But I’ve actually had more success with the manual approach because I can focus more on quality.
If your programmatic pages are thin or generic, they’re probably not going to rank. But if you’ve got the basics covered—like name, address, hours, phone—and then you add real enrichment on top of that, it becomes powerful.
I think of it like two buckets: info people need to know (like hours, phone, etc.) and info they want to know (like if the place has vegan food, sells beer, is kid-friendly). That second bucket is where you win.
Q: Your directories are often monetized through ads and featured listings. What determines which model you go with?
If the niche has high search volume and I know I can get 10K to 50K visitors a month, ads are usually the play. That’s where the traffic volume makes sense for ad revenue.
For featured listings, the search volume doesn’t matter as much. What matters is whether the average order value of the product or service is high enough that it’s worth it for the business to pay.
Like, I wouldn’t target yoga studios for featured listings. A class might be $25, and the marketing budget is probably tight. But something like luxury porta-potty rentals—those can run a couple grand per rental. That kind of business is much more likely to pay for visibility.
Q: Have you found that business owners are receptive to paying for visibility in directories today?
They can be, but there has to be alignment. Getting traffic to your directory is one thing. Getting that traffic to turn into actual leads is another.
If you can help a business get qualified leads—especially with clear search intent behind them—then yeah, it becomes a no-brainer. But you really have to make it worth their while. Not just traffic for traffic’s sake.
Q: If someone wanted to build a niche directory but had zero technical background, what would your advice be?
Honestly, the tech part is probably the easiest part of the whole thing. There are so many tools out there that make it easy to build a site, even if you don’t have a background in coding.
The harder parts are choosing the right niche, learning SEO, doing the research, and enriching the data. Those are the things that really make or break a directory.
So I’d say: focus on learning SEO fundamentals first. You can figure out how to use WordPress or a no-code tool pretty quickly. But even the most beautiful site won’t get traffic if you don’t understand how to make it rank.
Q: You’ve worked with scraped data at scale. What would you say is the biggest mistake people make when importing listings?
The biggest mistake is skipping quality data enrichment. People get excited about launching hundreds or thousands of listings, but then the pages are basically just name, address, phone number, and hours.
That’s not enough anymore. Google’s smarter, crawl budgets are tighter, and thin pages just don’t perform. You have to go beyond the basics—figure out what people are actually searching for and give them that info.
Otherwise, there’s no reason for someone to use your directory instead of just opening Google Maps.
Q: What’s the story behind your most successful directory? What niche is it in (if you’re comfortable sharing), and what do you think made it work so well?
It was the first directory I ever built, and it’s in the thrifting niche. I won’t share the actual URL because I’ve had a few copycats when I did that in the past, but it’s been bringing in a couple thousand dollars a month passively for about two years now.
What made it work is that I didn’t build it with the intention of making money. I just wanted to see if the SEO stuff I’d been learning on YouTube actually worked.
So I treated it like a skill-building exercise. I was super intentional with every little thing—on-page SEO, backlinks, structure. I also found a competitor getting over 100,000 monthly visitors and thought, I can do better. I changed the format, used the pillar page structure, and it ended up working way better than I expected.
Q: You’ve mentioned WordPress a few times. What do you look for in a good directory plugin?
User-friendly interface is a big one for me. I’m not super technical, so I want something that’s easy to work with. Good customer support matters too, because sometimes I need help figuring stuff out and I don’t want to be stuck.
I’m also willing to pay more for a plugin if it gives me flexibility and can support multiple projects. I care more about value than just the price.
And lastly, I want to know that other people have used the plugin successfully—especially with SEO. If it’s not SEO-friendly, it’s kind of a dealbreaker.
Q: When choosing a directory plugin, how important is scalability and SEO structure for you?
Both are huge. If I’m just building a tiny site, I might not use a plugin at all—I’ll just create the pages manually.
But if I know the site will have thousands of listings, then scalability becomes essential. That’s why I chose GeoDirectory for one of my healthcare directories. There was no way I could do that one page at a time.
SEO structure is everything. I need full control over meta descriptions, slugs, featured images, alt text—everything. If a plugin doesn’t let me do that, I won’t use it.
Q: What’s one feature you wish more directory tools had out of the box?
This is kind of niche to how I build directories, but I really wish more tools supported pillar page formatting. Most directory plugins assume you want individual listing pages, but I’ve had great success just using one long-scroll page for everything.
It works insanely well for certain keywords—some of my pillar pages rank #1 and get tens of thousands of monthly visitors. But I’ve had to work around the tools to make it happen.
Another thing: I wish more tools let you customize your location pages. A lot of traffic flows through those pages, but most plugins don’t give you much control there. (Editor’s Note: GeoDirectory gives you complete control of the location pages!)
Q: What’s a weird or unexpected idea you’re currently testing?
I’m really fascinated by luxury porta-potties. I know it sounds weird, but I think there’s legit opportunity there. You can rent one out for $1,000 to $2,000 a day if you’re the business owner, and it’s such a boring topic that not many people are talking about it. That makes it interesting to me.I’ve got a vault of hundreds of directory ideas—some of them are random, unexpected, or even borderline inappropriate—but they’re all based on search data and underserved niches. Running Ship Your Directory Pro also gives me a front-row seat to seeing some pretty odd but brilliant ideas that people come up with. So I don’t mind weird. The boring stuff is often the goldmine.
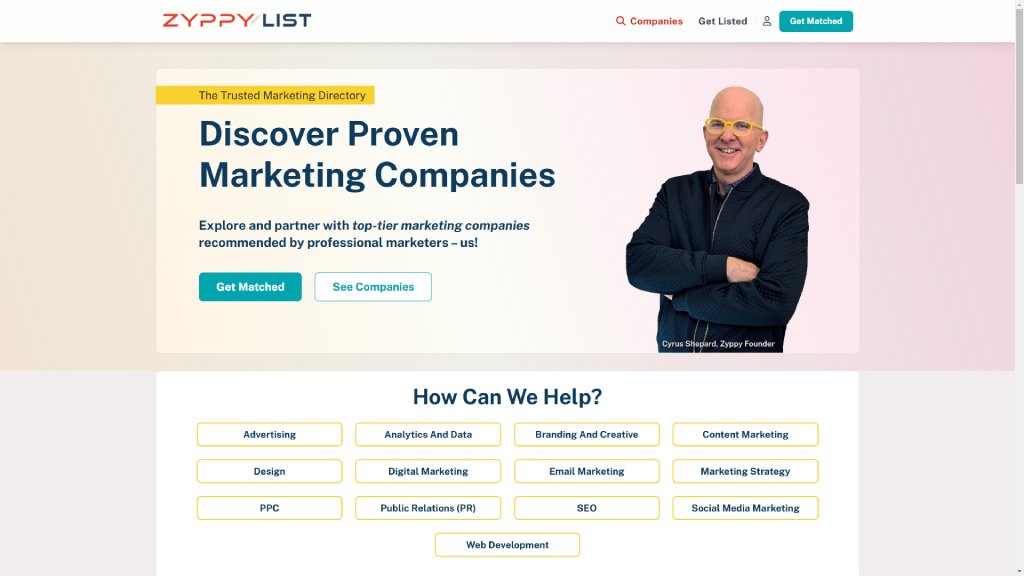
In the third post of the “Founder Story” series, we highlight Zyppy List, a thoughtfully curated directory built to connect businesses with trustworthy marketing agencies.
Cyrus Shepard, an experienced SEO professional, created Zyppy List after realizing how unreliable most marketing directories were, often packed with unvetted listings and low-quality results.
Drawing from his 15 years in SEO, Cyrus wanted to build something better: a resource that helps companies find reputable marketing services based on real-world reputation and trust. Zyppy List isn’t just another directory; it’s a handpicked collection of firms evaluated with care, offering real value to both users and agencies.
What began as a side project now serves as a growing network of professionals with a clear mission: to spotlight the best in marketing, cut through the noise, and raise the bar for online directories.

The Zyppy List Story
Q: What inspired you to start the Zyppy list? Was there a specific moment or need that sparked the idea?
I run a marketing consultancy and found myself searching other online marketing directories when I needed specific expertise. Sadly, the quality of these directories is generally terrible and untrustworthy. I wanted to build a directory to help out the firms providing honestly good marketing services and vet those companies on real-world reputation – hopefully a win-win for users and agencies alike!
Q: For those who don’t know you, can you tell us a bit about your background before launching Zyppy?
I’ve worked in Search Engine Optimization (SEO) for 15 years, specializing in teaching SEO to others, running experiments, and large-scale technical issues. I’ve worked with several startups in an SEO capacity, and also as a Google Quality Rater.
Q: What’s the main purpose of the site today? Who is it for?
Marketing agencies and consultancies is a multi-billion dollar industry, from Fortune 500 companies all the way down to mom-and-pop stores on the corner. The problem is finding folks you can trust to actually deliver results. People searching for marketing services always need recommendations. That’s whom we hope to serve and the marketing companies themselves.
Q: The directory feels curated—what’s the process for selecting which sites or tools get listed?
Our directory is highly curated, and we have a 20-30% rejection rate. Every company that applies gets thoroughly evaluated. We’ve even hired one of the companies before making a decision! Our evaluation process relies on real-world reputation metrics. We look at everything from customer reviews, LinkedIn profiles, publications, news mentions, and everything else. We also have a ranking system in the backend, so if a provider seems solid but hasn’t, for some reason, built up a lot of reputation metrics, we can give them a chance by simply giving them a lower reputation score, which ranks them in search but in a lower position.
Q: Are there any criteria that define what makes a site “Zyppy-worthy”?
At the end of the day, we ask how much we trust these providers. Would we trust this provider enough to recommend them to our parents (who know nothing about marketing)? We don’t let them in if we can’t answer “yes” to that question.
Q: How do you see Zyppy evolving over time? What’s the long-term vision?
Short term, we’d like to populate Zyppy List with 1000 of the best marketing companies in the world. Longer term, we’d like to compete against the big online directories that offer poor results, but nonetheless dominate Google search results.
Q: What’s been the most rewarding part of building this project so far?
Connecting with talented companies all over the world is hugely gratifying. We also modified GeoDirectory’s review system so that professionals can “Endorse” other companies. Watching folks give and receive endorsements is one of the best parts of the job.
Q: On the flip side, what’s been the most challenging?
While I have a strong network in the SEO space, reaching marketing companies in other disciplines (e.g., advertising, design) has proven challenging. This is a business problem and we’re taking steps to expand our reach.
Q: Is this currently a side project or are you focusing on it full time?
I work on Zyppy List 1-2 hours a day, so definitely a side project!
Q: How have you approached growth and visibility for the site so far?
The challenge of Zyppy List as a marketplace is two-fold. We need to attract enough qualified marketing companies into the pipeline to make the directory valuable, and we need to generate enough qualified traffic to make inclusion valuable to the companies. The first step is reaching that 1000 company goal. Then, we have traditional SEO challenges such as brand visibility, link building, and on-page SEO. It’s a balancing act, but every new company pushes the flywheel more.
Q: Are you monetizing the directory yet, or is that planned for the future?
The directory is “lightly” monetized. Pro members can place themselves in more categories and increase their visibility, among other benefits. We may offer advertising in the future, or access to premium leads through our matching service.
Q: What feedback have you received from users or peers since launching?
The feedback has been amazing. I’m so grateful for the support of the marketing community!
Q: What advice would you give to someone thinking about starting a curated directory or niche content site?
First, use GeoDirectory! Not kidding. The CMS has been amazing. Second, think carefully about your long-term business plan. Too many directories falter after a solid launch and languish with thin content and no real market penetration. Finally, invest in design and unique content. My wife is a talented graphic designer and this really made a difference when building out the site.
Q: Finally, where can people follow your work or get in touch if they want to suggest a site or collaborate?
Follow me on Linkedin or subscribe to my SEO newsletter! Thanks.

If you’re wondering how to make money with websites, creating an online directory is one of the easiest ways.
It’s even how Elon Musk got started and funded X.com, which later became PayPal.
But now, you must know how to build a paid directory website.
You can do this well with WordPress and our GeoDirectory plugin, the leading WordPress directory plugin.
Without further ado, here’s how to make money with a directory website.
How to Build a Paid Directory with WordPress
Before you can make money from your online directory, you need to build one.
Once you have a hosting plan with WordPress installed, you can install and enable the GeoDirectory plugin.
For details, check out our guide: How to Create a Directory Website with WordPress.
You can also take a look at specific use cases and how to build them for inspiration, including:
- How to Create a WordPress Real Estate Listings Directory in Minutes
- How to Create a Restaurant Directory in WordPress with a Marketplace of Orderable Menu Items
- Create an Airbnb-like listings Page with GeoDirectory and Avada
How to Monetize an Online Directory with GeoDirectory
Now that you have one set up, you must decide how to make money with your online directory.
Below are the most dependable ways to make money with your directory website.
You may need some add-ons, which will be noted depending on your decision.
1. Sell Premium Listings

With the Pricing Manager add-on for GeoDirectory, you can sell premium listings that let users see more fields when creating listings.
They can help offer the correct details others search for to make more thoughtful connections.
You can give users the option to include fields like more pictures, categories, tags, a longer description, and extra custom fields.
You can also set up premium listings to be “featured,” which means you can automatically display those listings in the prominent places of your site that make sense for your specific directory.
This can mean at the top of category pages and using widgets for other areas of your site where you may need them.
You also have the option to set premium listings to have the ability to hide these “featured” listings automatically.
For example, free listings on a real estate directory could see a “Similar Places” section where premium listings are featured. This could be hidden when a user upgrades.
The pricing manager also lets you enable subscriptions.
It’s available in case you know your type of directory needs to let your users have the option to set their premium listing on a subscription basis, with recurring payments, where their “featured” status continues.
This works well for job boards or real estate listings, for example.
The options for potential use cases with this plugin and add-on are extensive.
This potentially helps you adapt it to your creativity.
You could create a unique directory that stands out from others.
This would be your foundation for a loyal fanbase dedicated enough to reliably generate more sales for you.

2. Sell Advertising Space on Your Site

Installing the Advertising add-on for GeoDirectory allows you to display and monetize ads on your site from a network such as Google Adsense, Ezoic, or Mediavine.
This is the easiest way to sell ads because the network does the heavy lifting of finding the advertisers, and you sell space to the ads network.
However, you can also sell ad space directly to your users.
You can create several advertising zones on your website and let users buy ads to display in one or more of them.
They can upload their images, banners, or HTML/text, and you can set the ad price based on the number of impressions, clicks, or time spent on your website.
When you include the Pricing Manager add-on for GeoDirectory, you can sell premium listings that display or hide ads on different parts of your site, depending on your needs.
With this add-on, listings marked as ads can appear on the sidebar of your site’s organic search results page, similar to Google.
3. Set Your Price for Businesses to Claim Their Listing
With GeoDirectory, you can create free listings with minimum details, such as business name, telephone, logo, and a brief description.
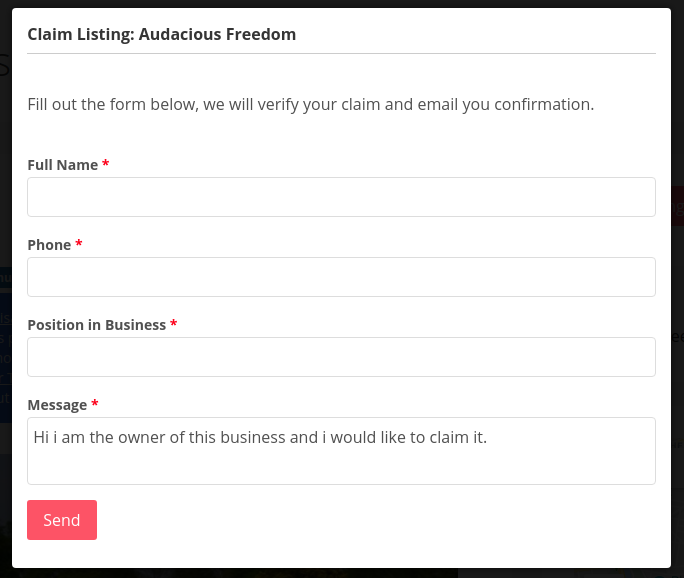
Then, you can use the Claim Listings and Pricing Manager add-ons to set a price for business owners to claim their listings and improve the data shown to your directory visitors.
Business owners can claim their listings by upgrading to a premium listing, which allows them to control the content of the listings on your online directory.
After paying and becoming the listing owner, they can add a longer/better description, more pictures, links to their website and social media account, and whatever custom field you make available only to premium listings.
4. Create a Marketplace that Sells Event Tickets
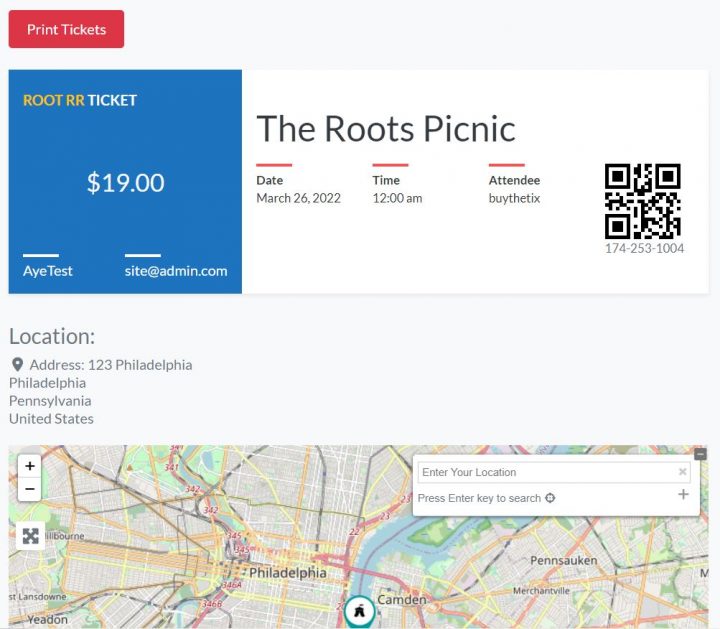
If you intend to build a directory of Events, you can do so with GeoDirectory and the free Events Calendar Plugin for GeoDirectory. Your visitor will be able to submit event listings.
The Events Ticket Marketplace add-on extends a GeoDirectory Events Directory, enabling event organizers, so they’re able to sell event tickets.
There are different options for how to build a paid directory in this case.
Let event organizers upgrade to a premium event listing and keep 100% of their ticket sales revenue.
You can also offer free event listings and charge a commission for each ticket sold.
5. Collect Commissions on a Listing’s Product Sales (Marketplace)
You can set up your directory to let users sell products through their listings on your site.
You can also set your commission rate on those sales.
The GeoMarketplace add-on, free WooCommerce, and MultiVendorX (formerly WC Marketplace) plugins allow you to do this.
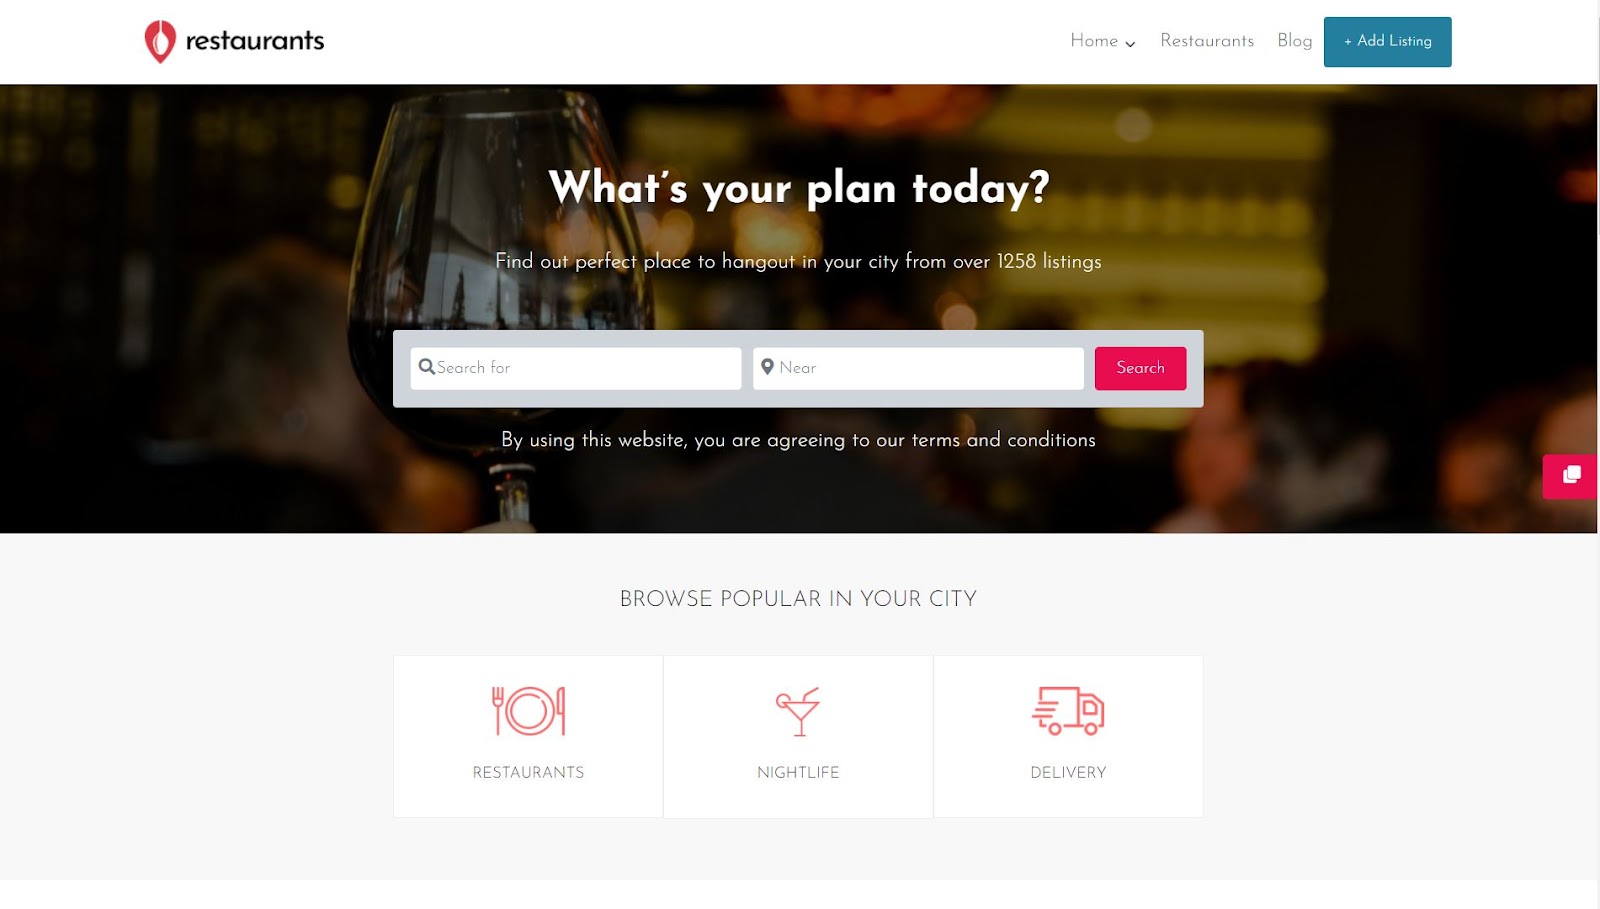
This solution can be applied to various directory sites; for example, you could create one for restaurants where owners can sell their dishes for pick up or delivery.
Or, you could create a site like Etsy where listing owners can sell handcrafted products.
Another example is setting up a marketplace where users can search for the closest shop to buy a specific product they have in mind. This way, they can buy it online but pick it up physically at the store the same day.
6. Use Affiliate Links
Another option is monetizing the content in your directory’s listings or on the blog with affiliate links.
Several options exist for partnering with companies to create affiliate links for their products or services, such as Amazon Associates, CJ, ShareASale, or Clickbank.
You can join the booking.com affiliate program if you create a hotel directory. By integrating links to their hotel’s booking system into your online directory website, you may earn a commission for each booking made through your directory.
7. Sell Leads
Not every business participates in an affiliate program that will recognize a commission for every product sold or booking made by a visitor referred from your directory website.
To these businesses, you can sell leads.
But what is a lead?
Business leads are consumers interested in what your company offers.
How do you get the leads? A customer contacting a business through a listing on your website is a lead.
Instead of allowing customers to contact businesses directly through the contact form, you can use our Pay Per Lead add-on.
This system sends emails to listing owners without the sender’s contact details, so they can’t reach out until they pay to unlock the lead.
At that point, you have valuable leads to sell.
When a lead comes in, the business owner will receive a notification that a potential customer is interested in their services.
To access the contact details of the potential customer, they will need to pay whatever price you set for each lead, for example $5 per lead (or adjust the price based on their industry) or a percentage of the customer’s budget.
This GeoDirectory add-on allows you to automate lead notifications while keeping contact details hidden until the listing owner pays to unlock the lead.
You can manage payments easily using our GetPaid Payment form plugin.
8. Sell Extra Services for Listings
Many businesses need help with online marketing, especially in most locations outside major cities.
Every business owner who submits a free or paid listing into your directory is a lead. They are looking for extra visibility, and you can help them to get it.
So, you could sell marketing services for local business listings in your online directory.
You could sell extra digital marketing services such as:
- Letting users create premium listings that act as mini websites for businesses that don’t have an online presence.
- Website development to build a website and expand their information from the listing.
- Social media management and creating web 2.0 pages, including Facebook, Instagram, Twitter, LinkedIn, Google My Business, Yelp, Trip Advisor, and similar sites.
- Search Engine Optimization (SEO) services.
- Photography and Videography.
- Copywriting for the listings or their website
- Ads management.
- Reputation management.
And much more.
9. Sell Your Online Directory
Now that you’re set with knowing how to build a paid directory with a WordPress online directory plugin, you can grow your business.
Once you reliably generate monthly sales from it, you could choose to sell it.
There are plenty of websites where you can sell it, like flippa.com, empireflippers.com, or microacquire.com.
You could keep it as a recurring revenue stream or decide to use the profit from the sale to start something new, like Elon Musk did when he used his share of the online directory Zip2’s sale to fund x.com and eventually create PayPal.
Back then, Zip2 sold for $307 million, and the need for online directories still very much exists.
For details, check out Online Directory Business Model Explained.
After Finding Out How to Make Money with Websites and Directories
You can generate extra sales if you know how to build and monetize your directory with a WordPress business directory plugin.
Do you have any questions about how to make money with websites, how to build paid directory sites, or anything similar? Let us know in the comments below.
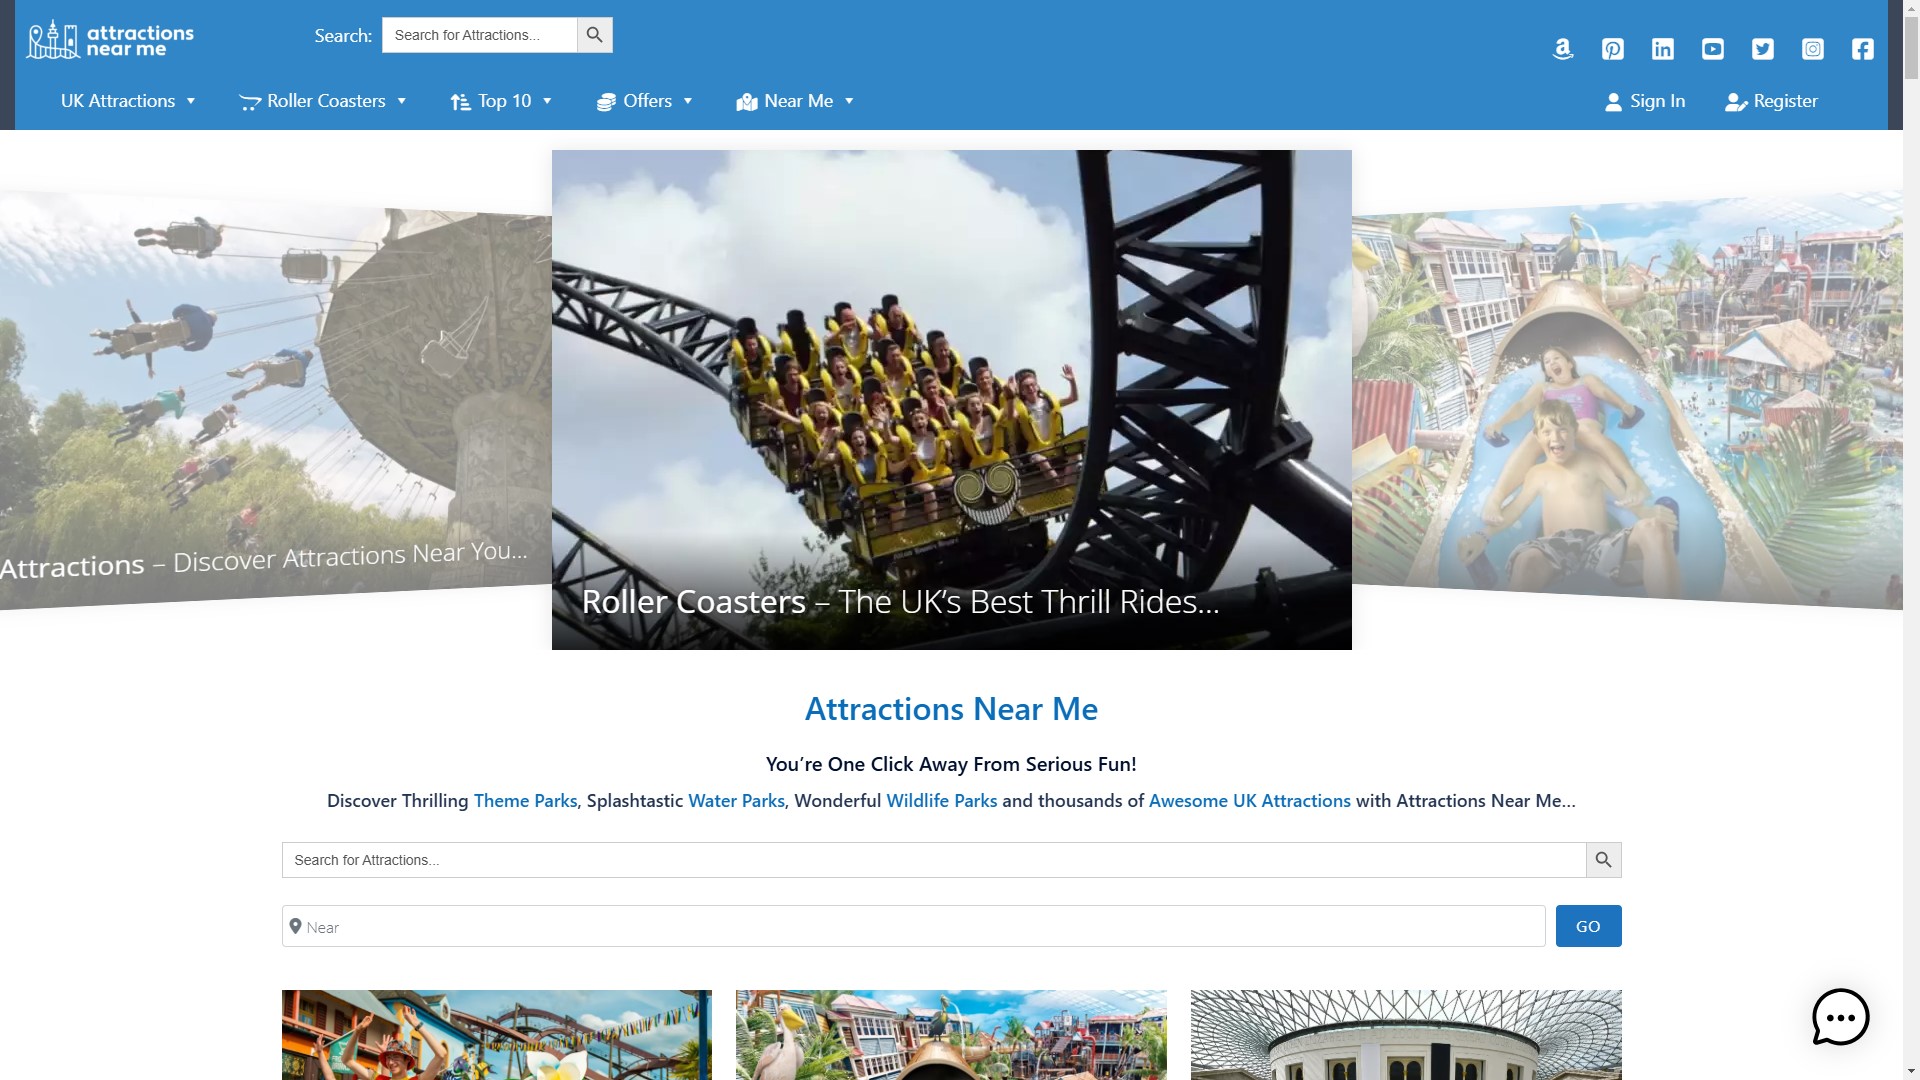
Meet Dan, the visionary behind AttractionsNearMe.co.uk
In the second post of the “Founder Story” series, we explore AttractionsNearMe.co.uk, the go-to guide for anyone exploring fun, family-friendly experiences across the UK. From big theme parks to hidden countryside spots, Dan saw a simple need: people wanted an easy way to find deals, honest reviews, and up-to-date info for their next day out.
With a love for family adventures and a passion for sharing valuable tips, he launched AttractionsNearMe.co.uk as a straightforward directory to help others plan great outings. What started as a small personal project has become a thriving community, connecting families and friends with top attractions while keeping things practical and budget-friendly.
Dan’s story shows what dedication and a clear vision can do. By focusing on reliable info and ease of use, he built a platform that genuinely helps people. Whether you’re looking for roller coaster reviews or special offers, it’s all there in one place. He’s faced the usual challenges of running a niche site but stayed committed to making it a valuable resource.
Stay tuned to learn how Dan turned his passion into a tool helping people discover and enjoy the UK’s best attractions!

The Attractions Near Me Story
Q: Can you share the story behind AttractionsNearMe.co.uk? How did the idea originate, and what inspired you to start it?
I always had a love for theme parks and attractions, feeling the rush of riding the roller coasters and the thrill of the big rides. My first trips as a child were to parks like Blackpool Pleasure Beach and Flamingo Land Resort, as I got older, I discovered more parks further afield that had new attractions for me to experience.
I visited theme parks on a regular basis and it irked me to pay the gate price when there were so many discounts and promotions available. It didn’t take me long to discover that there was always a pattern to the promotion offers that the theme parks and attractions ran.
The patterns not only included key dates such as January Sales, Black Friday etc. but they also would be newspaper promotions, offers on drinks and snack packets and supermarket loyalty reward programs.
I started paying more attention to the savings that I made and when and where I sourced them from and it was thanks to this knowledge that I became known as the go to person when anyone was planning a day out. My friends and family would ask me for recommendations on where to visit, when was the best time to go, where to buy the cheapest tickets etc.
It was when I was working on a project at work that Attractions Near Me came about, we were building websites for our customers to help them sell their products online and the company that we were working with wanted to charge a small fortune for SEO (Search Engine Optimisation).
I wanted a way of testing how well a website would perform without spending this money if it was built in a structured way that followed Google’s guidelines. To avoid any conflict of interest I decided to base this website on my knowledge of theme parks and attractions.
Q: When you first launched AttractionsNearMe.co.uk, was it intended as a directory, a blog, or something different?
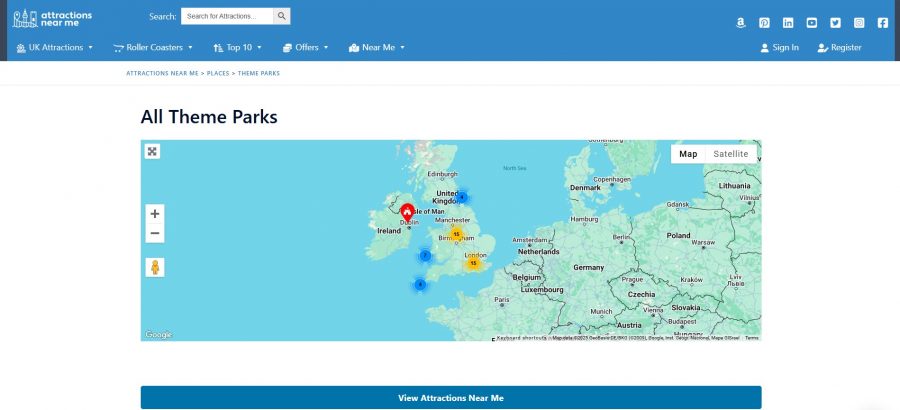
When I first launched Attractions Near Me, I immediately installed Geodirectory so that I could build an easy-to-use directory to help users locate theme parks and attractions across the UK.
I knew that in order to rank well on Google the directory listings would need to be more than just a Business Name, address and telephone number, so I took the time to visit each of the attractions and see in person what they had to offer, this also allowed me to capture photos and videos which I could use for my directory listings.
Whilst doing this I also created a blog to share the best deals and discounts for people visiting these attractions.
Q: What business model did you adopt at the beginning? Has it evolved over time?
For a good number of years, Attractions Near Me was a hobby that I did in my spare time, it was a way of sharing our adventures and helping members of the public discover new places to visit.
It wasn’t about making money, it was about having fun, sharing our experiences and helping others. There was no business plan, we were just having a good time and helping others have a good time too.
We still follow the same ethos today, but the website is now a much bigger entity than I could ever have imagined, competing with some of the big businesses in the travel industry.
Q: Did you build the platform in-house or outsource the development? What influenced your decision?
The website was built in-house using WordPress so I could install free plugins and run the site for very little cost. The reason for this was to test the theory of whether a website built using very limited resources could still rank well on Google.
Q: What was the biggest challenge you faced in the early days of AttractionsNearMe.co.uk? How did you overcome it?
The biggest challenge I faced was acquiring images that I could use on the site, this often meant having to visit an attraction before I could list it.
Nowadays, attractions approach us asking to be included in the directory, often supplying us with high-quality images taken by professional photographers.
Q: At what point did AttractionsNearMe.co.uk start gaining significant traction, and what do you think contributed most to this growth?
One of the major turning points for Attractions Near Me was when we had the first Covid lockdown in March 2020. Like everyone else in the UK, it stopped us from being able to get out and visit attractions but it became apparent to me just how difficult things were for attractions, especially those with animals to feed and support.
With our interest in Theme Parks and Attractions, we came across a Facebook page for ‘The Bird and Sea Lion Show‘ at Flamingo Land Resort. It was not common knowledge that they were a small company that operated the bird and sea lion shows within the North Yorkshire Theme Park and Zoo.
Sadly, with no income coming in they were starting to find the costs almost impossible to cover.
We agreed to help support the ‘The Bird and Sea Lion Show‘ and in return, they presented a live Sea Lion Show using our Facebook Page, bringing joy and entertainment to families and their children across the UK.
The event proved really popular with over 4K people tuning in to watch the live show, increasing our Facebook following from 2.5K to over 6K overnight.
In the process, we raised enough money to support the ‘The Bird and Sea Lion Show‘ and help see them through this tough period.
Following on from our initial Live Show we have maintained our partnership with ‘The Bird and Sea Lion Show‘ and the animals who are involved in the shows have made regular appearances on our Facebook Page.
Flamingo Land Resort is our local park and we have been watching both the Bird and Sea Lion shows since we were children and like many other families, we now take our own children to watch the shows.
Q: Securing the first paid listing can be a milestone for directory businesses. What was your experience with this, and how did you convince businesses to join?
We are currently in the early stages of introducing paid listings. Historically, rather than selling paid listings, we utilised affiliate links.
Q: Did you start with free listings, paid listings, or a combination of both? What strategy worked best for you?
When building a directory from the ground up no one wants to pay for a listing without any potential return on investment, and our opinion was that we wouldn’t get anywhere if we didn’t have any places listed on our website.
To overcome this challenge, we listed all of the places that we had visited and added affiliate links where they were available.
Regardless of whether we got any contribution from the company that we were listing, we would still include them anyway because it was important to us that we covered the whole market.
Q: Community engagement is often crucial for directory success. How have you fostered and maintained a connection with the attractions community over the years?
Over time, we have built relationships with lots of people in the attractions industry.
Our contacts cover a wide selection of job roles ranging from zoo keepers, maintenance teams and ride operators to attraction owners and company directors, with many now also being friends as well as business associates.
We also work closely with marketing teams and marketing agencies covering attraction news, offers and events. We spend a lot of time travelling, experiencing new attractions and attending trade shows.
This is one of my favourite parts of the job as we have a lot of fun and we get to meet lots of like-minded people. We are also members of the Roller Coaster Club of Great Britain RCCGB and the European Coaster Club ECC.
Q: What have been some of your most effective strategies for driving traffic to the website?
We utilise a number of strategies to help drive traffic to our website.
I believe that one of the keys to our success is that our unique content combined with accurate and informative information not only appeals to our audience but also the search engines, helping drive a lot of organic traffic to our website.
I think that the way Geodirectory structures the data also helps with this. In addition to traffic coming from the major search engines we have a lot of people subscribe to our email newsletters and also, a healthy number of followers on our social media channels.
Q: Maintaining quality and accuracy in listings is vital for trust. How do you ensure this on AttractionsNearMe.co.uk?
We regularly review our attraction listings to ensure that the details are up to date.
We stay informed by closely monitoring any new developments in the industry using a combination of social media, press releases and trade memberships.
Thanks to our close working relationships, the attractions also proactively advise us when anything of note is happening that may require an update to their listing.
Q: Can you share some of the biggest mistakes you’ve made while running AttractionsNearMe.co.uk and how you’ve learned from them?
By far, the biggest mistake that we made was to employ someone to help improve our domain rating, it quickly increased but unfortunately, unbeknown to us they had utilised some underhand tactics which Google quickly picked up on and penalised us for.
Q: Would you be open to sharing a ballpark figure for AttractionsNearMe.co.uk’s annual revenue?
I first started the website as a hobby, and it was 5 years before it made any money. Since then, our turnover has doubled year on year, and is now into 5 figures, but I am unsure how long this trend is going to continue.
The large majority of revenue that we have generated has been reinvested back into Attractions Near Me on key elements such as improved hosting, professional versions of our website plugins, marketing and graphic design.
This year we are working with a number of professionals to help take the website to another level.
Last year we bought the https://www.attractionsnearme.com/ domain and we are investing a lot of money into building a new Worldwide directory applying what we have learnt from our UK website with GeoDirectory again acting as the heart of our new website.
Q: What tech stack is AttractionsNearMe.co.uk built on, and has it changed over time? If you could start over, would you choose a different technology or approach?
Attractions Near Me is built using WordPress, with Geodirectory as one of our core plugins. We recently transferred our website hosting from Hostgator to Cloudways Digital Ocean, which has led to significant performance improvements. To further improve performance, we also use Cloudflare and WP Rocket.
Q: What role does SEO play in your business strategy, and how have you stayed ahead of competitors in search rankings?
We have always monitored the performance of our website but never invested a great deal in SEO. Recently, we have seen an increase in the number of competitors, so to remain competitive SEO is one of the key areas that we will be investing in this year.
Q: Are there specific tools, platforms, or software that have been indispensable to running AttractionsNearMe.co.uk?
The key tool behind our website is Geodirectory. We have utilised this software from the very beginning and it really is a fantastic product, we have found that the customer support is superb and they really understand the key role that the software plays in our business.
Other notable pieces of software include WPRocket, which does a great job of optimising our website performance and the Sydney Theme from AThemes.
Q: Looking back, what advice would you give to someone starting their own directory or niche website today?
I think the best advice I could give is to lay out a plan of what you are looking to achieve before you start. It is important to have a structure that is easy to navigate for both your users and the search engines.
Q: What trends or opportunities in the directory business do you think entrepreneurs should focus on in the coming years?
If you are looking to build a directory then you need to focus on an industry that you are either knowledgeable about or have a passion for, or even better still a combination of both.
Q: If you could change one thing about how you’ve built or managed AttractionsNearMe.co.uk, what would it be?
I would put more emphasis on the directory structure, as Attractions Near Me has evolved over time I feel that our menu structure has become too complex and not as user-friendly as it should be, this is something that we are now planning to rectify.
Q: What’s next for AttractionsNearMe.co.uk? Are there any exciting updates, features, or expansions on the horizon?
We are in the process of implementing an AI Chatbot on AttractionsNearMe.co.uk to help users quickly locate the information that they are looking for. We are planning to invest in our SEO and also looking at the possibility of expanding our team.
Our main objectives for 2025 are to increase the following on our YouTube Channel and continue building a new website covering the many Theme Parks across the world using what we learnt from building our UK website.
You can follow our progress at https://www.attractionsnearme.com/
Introducing “Founder Stories”
Welcome to our “Founder Stories” series, where we dive into the inspiring journeys of entrepreneurs who have built successful directory websites, some with the help of GeoDirectory and others carving their own unique paths.
These are not just stories about creating websites. They’re about transforming lives.
You’ll meet founders who escaped the rat race, achieved financial freedom, and crafted extraordinary lifestyles. Some have built thriving local businesses, while others have made life-changing money.
Through these interviews, we aim to inspire, motivate, and showcase the endless possibilities of building a directory website. Whether you’re just starting out or dreaming of a similar escape, these real-life stories prove that success is within reach.
Stay tuned for insights, tips, and a behind-the-scenes look at how these founders turned their visions into reality!
Meet Ian Hodge, The Co-Founder of SayulitaLife.com
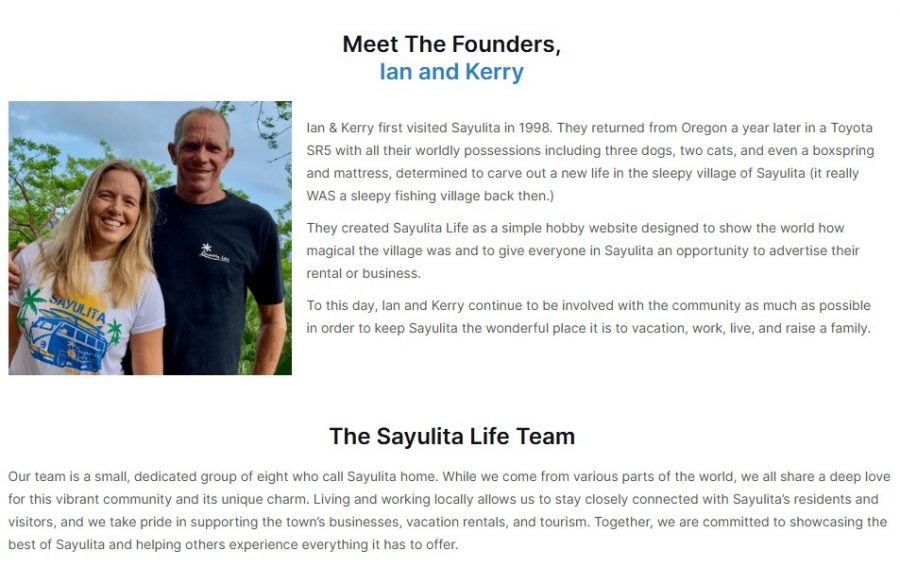
For our first “Founder Stories” interview, we’re excited to introduce Ian Hodge, the co-visionary behind SayulitaLife.com, the go-to directory for all things Sayulita.
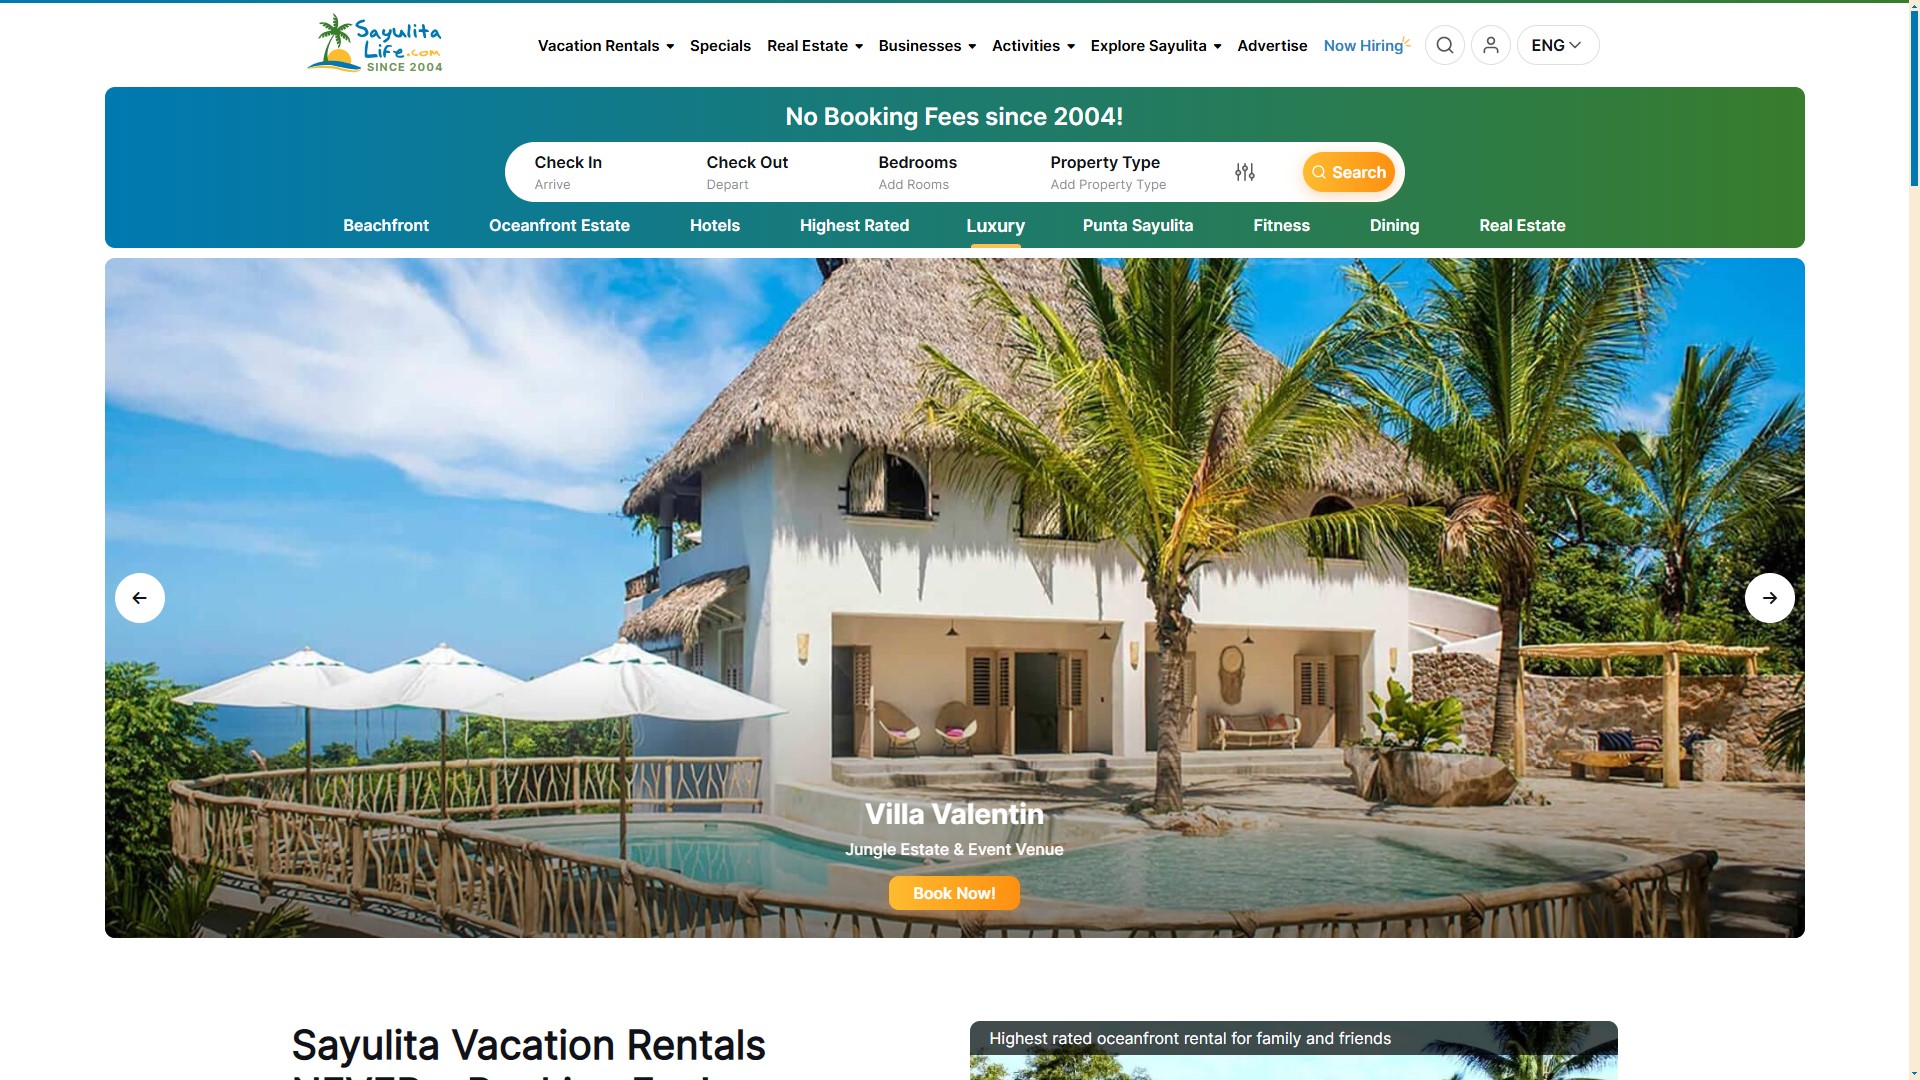
Nestled on Mexico’s Pacific Coast, Sayulita is a charming beach town known for its laid-back vibe, stunning surf, vibrant local culture, and bustling art scene. Over the years, it has transformed from a sleepy village into a hotspot for travelers seeking adventure, relaxation, and a slice of paradise.
Recognizing the need for a dedicated platform to connect locals, businesses, and visitors, Ian and his wife Kerry launched SayulitaLife.com in 2004. What started as a simple directory has grown into a powerhouse platform that not only supports the local community but also outranks global giants like Airbnb, Booking.com, and VRBO for Sayulita-related searches.
Their endeavors have become the ultimate resource for vacation rentals, real estate, dining options, surf lessons, wellness retreats, and all things Sayulita. It’s a testament to the power of a niche directory and Ian’s relentless dedication to building something that truly serves its audience.
The couple’s journey from the daily grind to creating a life in this idyllic beach town is nothing short of inspiring. SayulitaLife.com has not only revolutionized how people experience Sayulita but has also given Ian and his family the freedom to enjoy a lifestyle many only dream about.
Stay tuned to learn how Ian and Kerry built this incredible directory, the challenges they overcame, and how it continues to shape both their life and the Sayulita community!
The Sayulitalife.com Story:
Q: Can you share the story behind SayulitaLife.com? How did the idea originate, and what inspired you to start it?
The idea for SayulitaLife.com originated from a small village where my wife Kerry and I were living. At the time, we needed to create tourism and some form of business to support ourselves and make it possible to stay in the area.
Back then, there wasn’t a town website or anything like it available. This was before Airbnb even existed. So, we decided to create SayulitaLife.com. It wasn’t just about building a website; it was about building a lifestyle business that allowed us to live and thrive in the place we loved.
Q: When you first launched SayulitaLife.com, was it intended as a directory, a blog, or something different?
SayulitaLife.com was created as a website for the town to do something good for the community, bring people to Sayulita, and give it an online presence.
At the last minute, Kerry suggested, “Oh, we should put some houses on there and charge for the listing,” which we did. But the idea from the start was really just to do something good for the town and help attract tourism
Q: What business model did you adopt at the beginning? Has it evolved over time?
The business model for SayulitaLife.com has remained consistent since the beginning. Businesses pay a flat annual fee to be listed on the website, and they can generate as much business as possible from their listing. This model is still in place today.
However, not every business pays the same fee. There are different categories, and pricing is tailored based on the type of business.
For example, a small taco stand like Maria’s Tacos won’t generate as much revenue as a large wedding catering company, so it wouldn’t be fair for them to pay the same price.
Additionally, we offer a variety of add-ons for businesses that want more exposure, allowing them to boost their visibility on the site.
Our core philosophy has always been customer-focused. We do whatever it takes for our clients’ success.
The model has proven to be sustainable and highly effective for both us and our clients.

Q: Did you build the platform in-house or outsource the development? What influenced your decision?
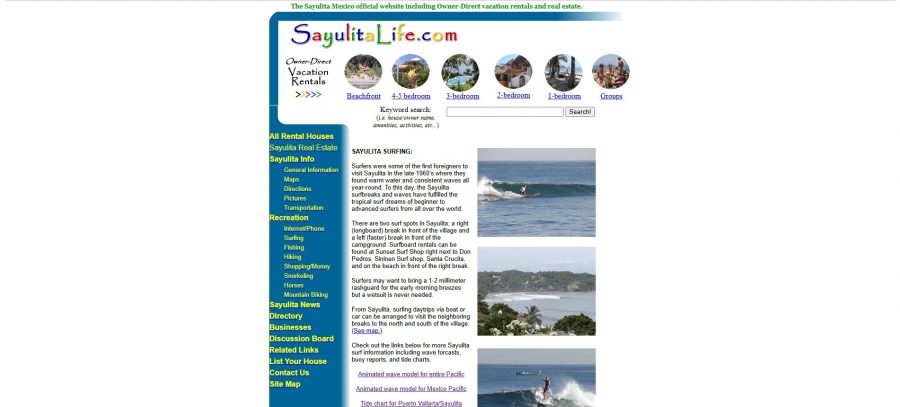
The very first version of SayulitaLife.com was built entirely by me using Dreamweaver, a tool that some might not even remember today, and hand-coded HTML. It was a simple yet functional platform created from scratch.
As the site grew, we transitioned to working with programmers and moved onto a PHP framework, one of the few that was available at the time. This shift allowed us to expand the platform’s functionality and handle the increasing needs of the business.
I sure wish GeoDirectory would have been around back then!
Q: What was the biggest challenge you faced in the early days of SayulitaLife.com? How did you overcome it?
That’s a great question. When we started SayulitaLife.com, it was during an interesting time. The internet bubble had burst in 1999 and 2000. We were building from scratch in a town that was just starting to boom, and we weren’t aiming to make millions. Because of that, we didn’t face many challenges initially.
However, one significant issue we encountered was fraud. People would copy our code, steal our pictures, and even contact our advertisers to create copycat businesses. To combat this, we had to find ways to protect our content.
We started adding a big, unsightly logo across our original pictures to prevent theft. While it didn’t look great, it worked. We also had to hide our code, copyright our images, and even hire lawyers when necessary. Those weren’t the fun or exciting parts of starting a business, but they were necessary to protect what we had built and ensure our platform’s integrity.
A local realtor once beat us to it and registered (or can I say “stole”?) our name on a social media platform, using it to promote the SayulitaLife-style. However, the name we ultimately came up with turned out to be even more advantageous in the long run.
Thanks to our extensive efforts, it has driven tens of thousands of locals and tourists to SayulitaLife.com, creating even more success for our clients.
Q: At what point did SayulitaLife.com start gaining significant traction, and what do you think contributed most to this growth?
We gained significant traction within the first year of launching SayulitaLife.com. Having previously owned a vacation rental business, we already understood the market and our clients. We knew that if we provided homeowners with the right tools, they could book their homes themselves.
This was before Airbnb existed, and back then, most people relied on rental managers. We simply showed them how to take control and handle bookings on their own.
Traction came quickly, definitely within the first 12 months. However, traction is a relative term. We weren’t trying to make a fortune; every peso or dollar we earned felt like a win.
We didn’t have strict goals or quotas. Instead, we focused on what we loved, building something for Sayulita, working for ourselves, and enjoying the process. What we created was a lifestyle business long before that term became popular.
We were effectively digital nomads before we even knew what that meant. It was the best plan for us, combining our passion for the town with the freedom of self-employment.
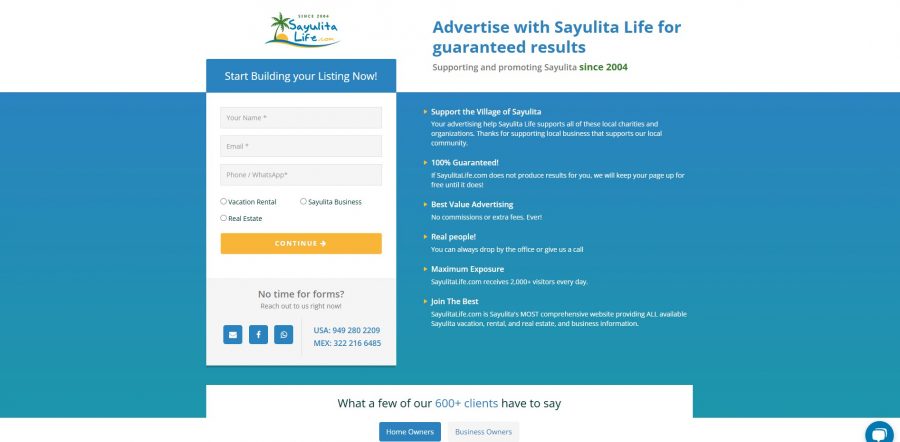
Q: Securing the first paid listing can be a milestone for directory businesses. What was your experience with this, and how did you convince businesses to join?
When SayulitaLife.com started, it was focused on vacation rentals rather than businesses. Most of the vacation rental owners in town already knew and trusted us, as we had built a solid reputation within the community. This made it easier for us to secure their support than it might be for someone starting without that connection.
We also structured our payment system to make it risk-free and appealing for owners. For example, we began in May and allowed them to defer payment until the following October or November, aligning with the start of the tourist season. This approach ensured they wouldn’t have to worry about paying us before seeing results.
Our rates were also very affordable, which further encouraged participation. With trust from the local community, fair pricing, and a strategy tailored to the town’s seasonal nature, we got things rolling without too much difficulty.
Q: Did you start with free listings, paid listings, or a combination of both? What strategy worked best for you?
We’ve never offered free listings for vacation rentals, but when we started adding businesses to SayulitaLife.com in the early 2000s, we listed every business in town for free. At the time, there were only about 25 businesses in Sayulita, so we put them all on the site to help them out and promote the town.
Our goal was to generate tourism for Sayulita. We believed that if potential visitors saw there were restaurants, shops, boutiques, and even car rentals, it would make the town more appealing.
Sayulita wasn’t anything like it is now, and international travel wasn’t as common. We were trying to convince people to visit the town, and featuring local businesses made Sayulita look more vibrant and welcoming as a whole.
For the first year, all those listings were free. After that, we started charging businesses an annual fee. This strategy supported the town and helped establish SayulitaLife.com as a trusted resource for visitors and locals.
Q: What’s the percentage of businesses versus vacation rentals on SayulitaLife.com today?
Today, the split between businesses and vacation rentals on SayulitaLife.com is approximately 30% businesses and 70% vacation rentals.
While the platform initially focused on vacation rentals, the addition of local businesses has grown steadily over the years. We also offer a For-Sale-By-Owner for those looking to sell their homes and/or properties.
Q: Community engagement is often crucial for directory success. How have you fostered and maintained a connection with the Sayulita community over the years?
SayulitaLife.com has always been about supporting the town, and that commitment extends far beyond the website itself. Over the years, we’ve contributed to (I think) every single charity in Sayulita, often multiple times. We donate money monthly, provide larger contributions when needed, and support anyone in need.
Our dedication to the community goes beyond financial contributions. Our entire team volunteers our time for various causes. We’ve participated in trash pickups, served as auctioneers at charity events, and supported initiatives for private and public schools, spay and neuter clinics, recycling programs, and more.
Whatever the need may be, everyone in Sayulita knows that SayulitaLife.com is there to help, offering genuine support straight from the heart. Over the years, we’ve given back over a hundred thousand dollars to the town, reinforcing our mission to make Sayulita a better place for everyone.
Q: What have been some of your most effective strategies for driving traffic to the website?
The most effective strategy has always been simple: build a good website. That was true 25 years ago when I first got into web design, and it’s still true today. There’s no need for tricks or gimmicks. Instead, focus on following general SEO best practices and strategies, but don’t become obsessed with it.
We’ve never been overly focused on SEO, yet our site performs incredibly well. Google has always favored us because we’ve built something people genuinely use and love. Sometimes, we can publish a new page, and it gets indexed in less than 24 hours. It’s amazing, and it’s a reflection of the trust we’ve earned over the years.
The key is to build a website that serves its users well. When people find value in your site, it naturally grows, and search engines will favor it because users do. Ultimately, it’s about creating something valuable, taking care of it, and treating people right. That’s the foundation of long-term success.
Q: Maintaining quality and accuracy in listings is vital for trust. How do you ensure this on SayulitaLife.com?
We’re small enough to personally vet every person who lists with us. We make it a point to know them, understand their business, and ensure they align with the community values. Business owners absolutely have access to modify their profiles on the site, but we maintain strict standards.
If someone operates unethically or doesn’t fit our values, they’re off the platform. We don’t deal with shady operators. While a few may have slipped through the cracks over the years, it’s rare.
Most people with bad intentions aren’t interested in being part of a community directory. They’re often focused on making quick money in one season and then moving on. This approach has helped us maintain trust and quality within our directory.
Q: Can you share some of the biggest mistakes you’ve made while running SayulitaLife.com and how you’ve learned from them?
Looking back, I should have gone global. If I had, we’d probably be having this conversation on my yacht right now. We were ahead of the curve, even before Airbnb. We had the idea, but we didn’t move fast enough with it.
Honestly, we weren’t incentivized. We were more focused on enjoying the surf, sand, and palm tree lifestyle.
One advice I’d offer from my experience is to choose your brand name very carefully. Your brand name matters a lot, especially if you plan to expand. And if you do decide to go outside your original market, don’t be afraid to adapt or modify your brand name to fit the new location. It’s a small step that can make a big difference.
Q: How do you avoid churn?
We do not lose clients. If someone is hesitant about staying with us, we make it a priority to address their concerns. We’ll call them, visit them in person, take them out to lunch, or do whatever it takes to keep them on SayulitaLife.com and ensure it works for them.
If necessary, we’ll go the extra mile by sending a photographer to re-shoot their property, rewriting their listing descriptions ourselves, or even posting their PDF menus online. We have a team dedicated to helping our clients succeed, and we’ll do whatever it takes to support them.
Q: Would you be open to sharing a ballpark figure for SayulitaLife.com’s annual revenue?
When it comes to a ballpark figure for SayulitaLife.com’s revenue, I think it depends on how you measure success, whether in dollars or lifestyle. The business provides enough to support my family, my children, and all of our employees and allows us to do good for the town.
It’s a small town, so the income we need to live comfortably is much less than you’d need in places like New York, Rome, Hong Kong or Paris. We have always focused on building a comfortable and sustainable lifestyle rather than chasing massive profits.
We keep our exact figures private, but I can tell you the business generates more than six figures annually. For me, real success is having the freedom to work when I want, where I want, while being able to give back to the community, which means so much to us.
Q: What tech stack is SayulitaLife.com built on, and has it changed over time? If you could start over, would you choose a different technology or approach?
Starting over back then, the only options we had were straight HTML and PHP. The website is so highly customized that it requires regular tweaking, making it difficult to transition to other platforms.
The customization has been key to meeting our specific needs, and while other technologies might offer certain advantages, maintaining control over the details has been essential to the website’s success.
Maybe someday I’ll have to rebuild or convert it, but for now, I’d still approach it the same way. If we ever decide to transition in the future, now we know who we will contact.
Again, where was GeoDirectory when I needed them? ☺
Q: What role does SEO play in your business strategy, and how have you stayed ahead of competitors in search rankings?
SEO doesn’t matter as much as it used to, especially for SayulitaLife.com. Many people who come to Sayulita are return visitors, and everyone already knows about us. Our clients know us, the community knows us, and most people looking for Sayulita-related information eventually find their way to SayulitaLife.com.
That said, SEO is still important, and we rank very high. Higher than anyone else. Searching for anything related to Sayulita will almost always lead you to our site, and from there, hopefully visitors will book through one of our clients. In the end, we stick to the basics. Even today, standard, solid SEO practices remain the best approach to follow.
Q: Are there specific tools, platforms, or software that have been indispensable to running SayulitaLife.com?
For any business, having the right tools in place is critical, especially for managing your CRM and customer journey. We use tools like HubSpot and MailChimp to manage communications and send out the large volume of emails required for our business. If you’re sending out a significant number of emails, having a reliable system is essential.
For images, we rely on Cloudinary to handle and optimize them efficiently.
As for SEO tools, Google offers valuable tools, such as Google Search Console Tools, and PageSpeed Insights, which are helpful for monitoring and improving site health.
One challenge we face is, in fact, site speed, mainly because our platform runs on older PHP technology. However, we continually work to address these challenges and optimize performance wherever possible.
Q: Looking back, what advice would you give someone starting their own directory or niche website today?
Realize that you’re not going to make money right away. Starting a directory site means dedicating yourself to truly understanding your clients, learning about their needs, and genuinely caring about them and your community.
I believe there’s massive potential for small niche sites out there, and they can work in just about any area. My wife and I travel a lot with our children, and I’m often surprised by how many places don’t have a local site like SayulitaLife.com.
Instead, I’m forced to rely on big corporate websites to find adventures, read about restaurants, or book accommodations.
There’s so much opportunity for smaller, community-focused directories. If you work hard, get to know your clients, and stay dedicated to the success of your community, your efforts will pay off.
It’s about building something that truly supports the people and places it serves, and when you do that, it will work.
Q: What trends or opportunities in the directory business should entrepreneurs focus on in the coming years?
When creating a directory site, you must look at where the money is in your chosen area. Identify who’s making money in the community. Is it carpet cleaning businesses, contractors, developers, vacation rentals, or restaurants? The answer will vary from one community to another.
In most cases, especially in areas with significant tourism, vacation rentals tend to be the most lucrative. That’s where large companies are often making the biggest commissions.
If you focus on those areas and provide value to the businesses that generate the most revenue, you’ll likely find the greatest opportunity for success.
Q: If you could change one thing about how you’ve built or managed SayulitaLife.com, what would it be?
That’s a great question, and honestly, I’m stumped for an answer. If I could change one thing about SayulitaLife.com, I’m not sure what it would be. I’d have to ask Kerry and our partner Joanna to see what they think.
One thing that does come to mind is the name. Looking back, I might have called it VivaSayulita.com instead. When we built the site, we primarily targeted Americans and Canadians, the primary visitors with spending power. However, a name like VivaSayulita might have felt more inclusive and patriotic, especially from a Spanish perspective.
That said, changing the name now would be a monumental task. For better or worse, the name SayulitaLife.com has become synonymous with the town and its community, so it’s a more theoretical than practical change.
Q: What’s next for SayulitaLife.com? Are there any exciting updates, features, or expansions on the horizon?
We’re constantly making changes and improvements. Design changes and navigation updates are two areas we focus on the most, ensuring the website remains user-friendly and visually appealing.
Internally, we’re always working to improve the customer journey. That includes staying in regular contact with our clients and listening to their feedback. The goal is to address their needs proactively because, by the time a client is upset, it’s already too late.
This approach isn’t unique to SayulitaLife.com. It applies to every business. There’s always room for improvement, and change is a constant part of growth and success.

Did you know that around 92% of consumers use online directories to find local businesses?
Among them, the Yellow Pages website stands out for its efficiency and reliability. The success of this platform is both impressive and inspiring.
Now, you must be wondering how to create your own Yellow Pages website.
Well, don’t worry; we’ll guide you through the procedures.
In this guide, you will discover:
- Step-by-step instructions for developing a YP-style website.
- Expert tips to design a directory-style website.
- Essential tools & software needed to create a robust online directory.
- Proven strategies for monetizing your website effectively.
As you embark on this exciting journey, take a look at GeoDirectory.
This WordPress Yellow Pages plugin offers the ease and functionality required to bring your vision to life without needing advanced technical skills.
Just think of it as your secret weapon in this exciting endeavor!

A Brief Overview of the Yellow Pages Website
The concept of a YP website stems from the traditional Yellow Pages Book directories, which were once a must-have in every household and business.
These print directories provided a detailed listing of local businesses, services, and their contact details.
Moving this concept into a digital format, the YP website aims to transform these listings into an extensive online directory.
This, in turn, enables consumers to find out local businesses and services conveniently.
Why It’s Beneficial to Create a Yellow Pages Website?
No doubt, creating a directory website of this kind, can be a highly beneficial and lucrative venture for several reasons. Here are a few major ones:
- Digital Accessibility: allows users to easily find local businesses and services from any device at any time.
- Wider Audience Reach: Unlike the localized nature of printed directories, has the potential to reach a global audience.
- Monetization Opportunities: According to Semrush, yellowpages.com received around 11.89M visits in September 2023. Such websites can become lucrative through various revenue models, like ad fees, premium listings, etc.
- Community Support & Development: it can play a crucial role in supporting and promoting local economies by highlighting local businesses.
- Adaptability & Scalability: Digital platforms are easily adaptable and scalable, allowing for growth and changes in line with market and technology trends.
Essential Tools for Yellow Pages Website Development in WordPress
Creating a comprehensive online directory for businesses and services requires a blend of the right tools and technologies.
These tools not only facilitate the development process but also ensure that the website is user-friendly, efficient, and scalable.
Here’s what you’ll need at hand for the development of this kind of WordPress website:
- Domain Name: Your domain name is your digital address. Choose a name that’s easy to remember, relevant to your Yellow Pages content, and aligns with your branding strategy.
- Reliable Hosting Provider: A good hosting provider ensures your site is always accessible and loads quickly. Look for a host with strong uptime records and scalability options to accommodate your website’s growth. We recommend CloudWays
- WordPress Theme: Choosing a WordPress theme specifically designed for GeoDirectory is crucial. Themes like ‘Hello for Elementor,’ ‘Kadence,’ or ‘Blockstrap’ offer out-of-the-box designs and functionalities tailored for a YP-style website built around GeoDirectory.
- Directory Plugin: The key component is a directory plugin. It allows you to create listings, set up location-based searches, and include features for user reviews. For creating a detailed and user-friendly directory, we recommend using the ‘GeoDirectory’ plugin.
- SEO Tools: For any website, especially a directory site, SEO is critical. Tools like ‘Yoast SEO’ or ‘Rank Math’ help optimize your content, generate sitemaps, and ensure your site is search engine friendly.
- Backup Solutions: Regular backups are crucial. Plugins like ‘UpdraftPlus’ or ‘BackupBuddy’ ensure that you have a recent backup of your website, which is essential for recovery in case of any mishaps.
- Security Plugins: Protect your website from malicious attacks and unauthorized access with security plugins. Look for features like firewalls, malware scanning, and login security options.
- Analytics & Tracking: Integrating analytics tools like ‘Google Analytics’ helps you understand user behavior, track traffic, and measure performance. This data is essential for informed decision-making and site optimization.
- Payment Gateway Integration: If your directory site includes premium listings or other paid features, secure payment gateway integration is a must. Ensure that the gateway is reliable and supports multiple payment methods. GetPaid, the default payment processor of GeoDirectory, supports several payment gateways, including Stripe and PayPal.
- User Registration & Management: A robust system for user registration and management is essential for personalized user experiences. This includes user profiles, personalized dashboards, and management of listings and subscriptions.
Pro Tip: While integrating these tools, maintain a focus on mobile responsiveness and page loading speed.
Optimizing for these factors is key to enhancing user experience and retention.
Choosing the Right Page Builder
According to a survey, 48% of people determine the credibility of a website based on its website design. Hence, choosing the right website builder for creating your Yellow Pages website is essential to ensure it’s functional yet visually appealing.
Here’s what to consider when choosing the right page builder:
- User-Friendly Interface: Choose a page builder with an intuitive, drag-and-drop interface. This makes designing and managing your site easy, even for those with minimal technical skills.
- Customization Capabilities: Opt for a page builder offering extensive customization. This is essential for tailoring the look and functionality of your site to match your specific requirements.
- Responsive Design Compatibility: Ensure the page builder supports responsive design, allowing your site to look great and function well on all devices, including smartphones and tablets.
- SEO-Friendliness: Select a page builder optimized for SEO, helping your website rank higher in search engine results through fast loading times and clean code.
- Compatibility with Plugins: Choose a page builder that works seamlessly with key WordPress plugins, enabling additional functionalities like maps, reviews, or advanced search options.
3 Popular Website Builders Available on the Web
Still not sure which page builder is best for creating a Yellow Pages website? Well, no need to scratch your mind; we’ve listed down some of the best page builders for this task:
1. Elementor
Elementor stands out for its intuitive drag-and-drop interface, making it a favorite for crafting websites on WordPress. It offers various widgets and templates, specifically beneficial for directory-style layouts.
2. Blockstrap Page Builder
Using Blockstrap, a WordPress theme based on Bootstrap and developed by the creators of GeoDirectory, for a Yellow Pages website is highly effective.
Blockstrap is optimized for speed, ensuring quick load times, crucial for user engagement and SEO.
Its full integration with GeoDirectory makes it ideal for managing extensive business listings, providing seamless functionality and ease of use.
This integration ensures that the site operates efficiently, offering a smooth and user-friendly experience for both visitors and administrators.
3. Divi Builder
This page builder is particularly suited for those who seek a high level of customization and control over their website’s design.
With Divi, you can craft trailer-made layouts for your directory, thanks to its myriad of design options and real-time editing features.
Step-by-Step Guide to Create Yellow Pages Website Using GeoDirectory
Creating a Yellow Pages website involves setting up a platform where businesses can list their services, and customers can find and review these businesses.
WordPress, with its versatility and user-friendly interface, is an ideal platform for this purpose.
Let’s assume you have secured a domain name and your hosting provider has made your website live.
Following this, you can embark on the journey of setting up your Yellow Pages website on WordPress by following these steps:
Step 1: Install and Activate GeoDirectory Plugin
GeoDirectory is a powerful, scalable, and user-friendly WordPress plugin designed to create sophisticated business directories. Here’s how to install and activate this plugin:
- Access Your Dashboard: Begin by logging into your WordPress admin dashboard.
- Navigate to Plugins: On the left-hand menu, click on ‘Plugins‘ and then select ‘Add New‘ to open the plugin installation interface.
- Search for GeoDirectory: In the search bar, type “GeoDirectory” and press enter. You will be looking for the “GeoDirectory – Business Directory Plugin.”
- Install the Plugin: Among the search results, find “GeoDirectory – Business Directory Plugin” and click on ‘Install Now.’ This will download and install the plugin on your WordPress site.
- Activate the Plugin: After installation, a new option, ‘Activate,,‘ will appear in place of ‘Install Now’. Click on this to activate the GeoDirectory Plugin on your site.
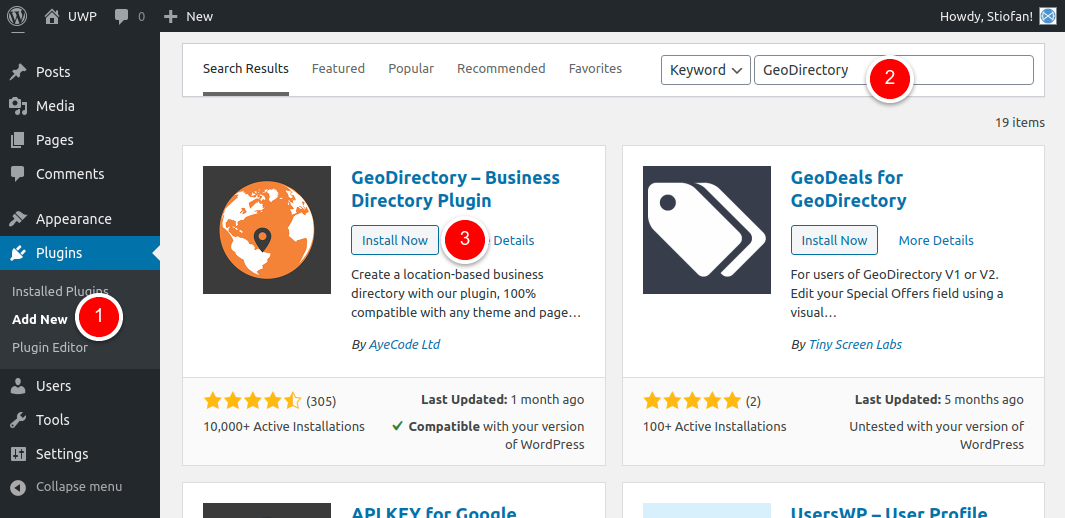
The core plugin is free and offers sufficient features to get started with a single location directory.
However, if you want to enhance the functionality of your site, it’s wise to install additional free and paid extensions.
Pro Tip: Install the ‘AyeCode Connect’ helper plugin. The tool will help you seek support for GeoDirectory and troubleshoot any issues related to the setup of your website.
Step 2: Run the Wizard
Upon activating GeoDirectory, you’ll be prompted to run a setup wizard. This step is crucial as it simplifies the initial configuration process. The wizard guides you through:
- Key Configurations: Location, country, region, etc.
- Geo-Location Settings: Essential for enabling location-based searches.

Step 3: Set Up Your Categories
Establishing a well-organized category framework is crucial for keeping order and enhancing the user experience on a Yellow Pages directory website that features numerous listings.
To begin with, go to your WP dashboard and click CPT > CPT Categories.
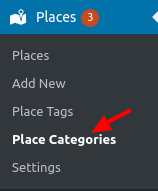
Here, you can tailor your categories as follows:
- Name: Choose a name for your category, like ‘Restaurants,’ ‘Home Services,’ or ‘Healthcare Facilities.‘ This is the primary label that will represent the category across your directory.
- Slug: Formulate a slug for the category. It forms part of the URL and should be simple yet descriptive, such as ‘restaurants,’ ‘home-services,’ or ‘healthcare.’ This slug is vital for web navigation and SEO.
- Parent Category: If your new category is a subset of a broader category, assign it as a subcategory. For instance, under the ‘Healthcare’ parent category, you could have ‘Dentists,’ ‘Hospitals,’ and ‘Pharmacies’ as subcategories.
- Description: Provide a concise, optional description for the category. This brief overview gives users a quick insight into what types of listings the category includes.
- Category Top Description: Draft a short introduction that will be displayed at the top of the category’s listings page. This description sets the context for the entire category.
- Default Listing Image: Select a representative image for listings in this category. It can be a symbol, a photo, or a graphic that visually encapsulates the essence of the category.
- Category Icon: Choose an icon that visually symbolizes the category. This icon aids in easy identification and navigation within the directory.
- Category Color: Pick a distinctive color for the category. This color aids in visual differentiation and helps users associate categories with specific colors for quick recognition.
- Schema Type: Opt for an appropriate schema type for your category, if available. This selection helps search engines better understand and categorize the listings, potentially improving SEO performance.
Step 4: Create Directory Related Pages
A Yellow Pages website is a combination of several directory listings.
Some of the most important pages include listing submission forms, listing single pages, and listing archives.
Thankfully, all these pages are automatically generated by the GeoDirectory plugin.
But still, customization is important to ensure the style of these pages matches your website’s design. This might include:
- Editing the Page Layout
- Adding or Removing Fields
- Modifying the Appearance
Step 5: Get Listings
A directory relies heavily on its listings for relevance.
However, attracting businesses to list can be challenging if the directory isn’t well-known.
An effective strategy to kickstart the initial batch of listings is by contacting local businesses and presenting an introductory discount.
Alternatively, you can provide free listings to your intended customers and then give them the option to claim these listings at a cost.
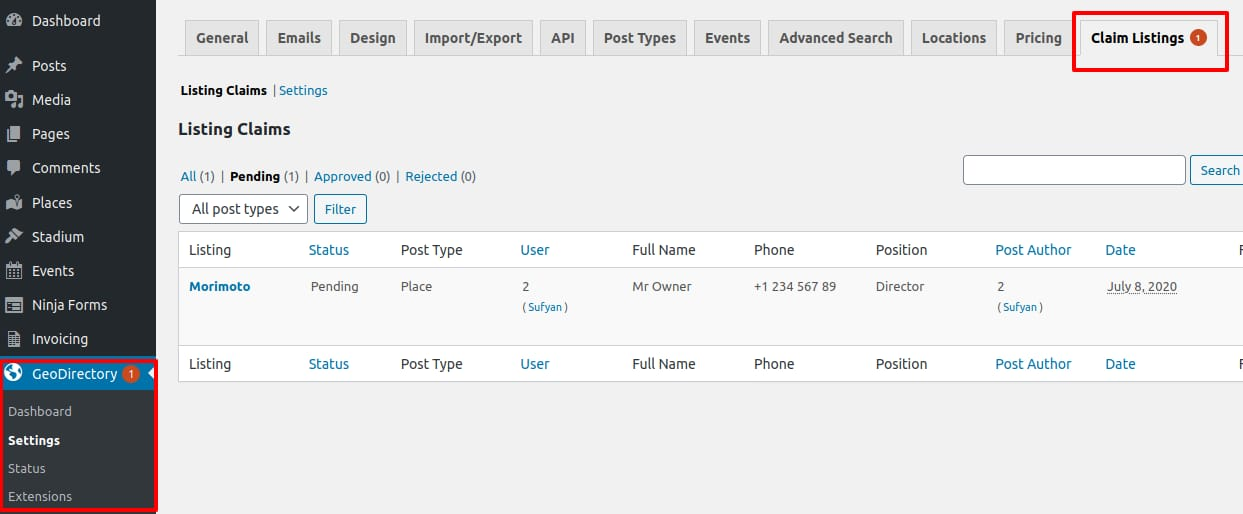
Following the above simple guide, you can easily create and manage your Yellow Pages website on WordPress.
5 Tips to Design Your Yellow Pages Website
Yellow Pages website on WordPress involves more than just listing businesses and services.
It’s about providing a seamless, intuitive, and engaging user experience that makes finding information easy and efficient.
Here are five pro tips to design your Yellow Pages website effectively:
1. User-Centric Design
Prioritizing user experience is paramount when developing your Yellow Pages website. Here’s how to achieve it:
- Intuitive Navigation: Craft a user-friendly navigation system that guides visitors effortlessly through your site. Ensure that categories are logically organized, and primary features are easy to access.
- Clear Categories: Divide listings into clear and concise categories. Users should be able to quickly identify the section they need, whether it’s restaurants, medical services, or local events.
- Prominent Search Bar: Place a prominent search bar at the top of your website, ensuring it’s easily visible and accessible. Implement auto-suggestions and predictive search features to help users find what they’re looking for more efficiently.
2. Mobile Responsiveness
In today’s digital landscape, a responsive design is non-negotiable. Make your Yellow Pages website accessible on all devices to attract a wider audience. Here’s how:
- Responsive Theme: Choose a WordPress theme that adapts seamlessly to various screen sizes. This ensures that your site looks and functions beautifully on desktops, tablets, and smartphones.
- Touch-Friendly Navigation: Optimize your navigation menus for touch-screen devices, ensuring that buttons and links are easily clickable.
3. Advanced Search Features
Enhance the search capabilities of your Yellow Pages website to deliver precise results.
Consider implementing the following:
- Robust Search Options: Offer advanced search filters, allowing users to refine their queries based on criteria such as location, price range, and ratings.
- Location-Based Searches: Enable location-based searches to provide users with results specific to their geographic area. This feature is especially valuable for users seeking local businesses and services.
You can try out GeoDirectory to enhance the search capabilities of your Yellow Pages site. Its advanced search features allow users to refine their queries based on location, price range, and ratings. With GeoDirectory, you can enrich the user experience and prompt users to visit again.
4. User Engagement
Encouraging user-generated content can significantly enhance your website’s trustworthiness and engagement. Here’s how to achieve this:
- Reviews and Ratings: Enable users to leave reviews and ratings for businesses. Encourage feedback and provide a platform for genuine customer experiences.
- User Profiles: Allow users to create profiles and engage with the community. This fosters a sense of belonging and encourages active participation.
5. Regular Updates & Maintenance
To keep your Yellow Pages Directory Software reliable and up-to-date, consistent upkeep is crucial.
Consider the following maintenance practices:
- Listing Updates: Regularly update business listings, ensuring they reflect the latest information, such as contact details, operating hours, and services offered.
- Broken Link Checks: Conduct routine checks for broken links and fix them promptly to maintain a seamless user experience.
- Routine Maintenance: Perform routine maintenance tasks, such as software updates and security patches, to keep your website running smoothly and securely.
3 Effective Strategies to Drive Traffic to Your Yellow Pages Website
You’ve taken the first step by creating your Yellow Pages website. But the real challenge? Driving traffic to your online business directory.
That said, let’s explore 3 effective strategies to drive traffic to your new website:
Strategy 1: Optimize Your Website for Search Engines
First, performing SEO for your directory website is key. This strategy involves:
- Keyword Research: Identify relevant search terms.
- Content Optimization: Integrate keywords into content, meta tags, and headers.
- Backlinks: Build high-quality links from local directories and industry websites.
Strategy 2: Leverage Social Media Marketing
Engaging with your audience on social media platforms is an effective way to drive traffic to your Yellow Pages website. For this, you’ll need to create a marketing strategy for your online directory. Here’s how to do so:
- Social Media Presence: Build and maintain profiles on essential social media platforms to connect with your audience.
- Engaging Content: Regularly post content that is relevant and engaging to keep your audience connected and interested.
- Community Interaction: Foster audience engagement by encouraging user-generated content through contests and reviews.
- Localized Ad Campaigns: Use targeted social media advertisements to reach specific local audiences effectively.
- Website Accessibility: Ensure your social media profiles and posts prominently feature links to your website for easy access.
Strategy 3: Harness Paid Advertising Campaigns
To accelerate traffic growth, consider running targeted paid advertising campaigns. Here’s how to do so:
- Ad Platforms Selection: Opt for platforms like Google Ads and popular social media channels based on where your target audience is most active.
- Precision Targeting: Use relevant keywords and demographic filters to target local users effectively.
- Compelling Ad Creatives: Create engaging and visually appealing ad content to attract and retain user attention.
- Performance Tracking: Regularly monitor and analyze ad metrics for insights into campaign effectiveness.
- Campaign Optimization: Make data-driven adjustments to improve your strategies and enhance ROI.
Pro Tip: Be sure to combine all these strategies to achieve maximum results. By doing so, you can create a well-rounded approach to drive traffic to your Yellow Pages website.
Monetizing Your Yellow Page Website
Did you know that the global business directory software market is projected to reach approximately $1,323.35 million by 2030?
That said, creating a Yellow Pages website is a lucrative opportunity. Here’s how you can monetize a directory website.
Featured Listings: Charge businesses for placing their listings at the top of search results or in highlighted sections. This premium positioning makes businesses more visible and, thus, can lead to more customer engagement.
Subscription Models: Offer tiered subscription plans to businesses, providing them with different levels of exposure and features. Higher tiers could include additional services like more detailed profiles, customer reviews, or increased visibility.
Banner Advertisements: Sell advertising space on your website to businesses or third-party advertisers. You can offer various sizes and positions for banners, with pricing based on the visibility and traffic of the ad’s location.
Pay-Per-Click Advertising: Implement a pay-per-click model where businesses pay each time a visitor clicks on their listing or ad. This model is attractive to advertisers as they pay only for actual leads or potential customers.
Affiliate Marketing: Partner with businesses and earn a commission for every referral or sale made through your website. This method works well if your Yellow Pages site targets a specific niche or industry where related products or services can be promoted.
GeoDirectorty features addons for monetization like the Pricing Manager, which will allow you to easily handle Featured Listings & Subscription models, while the Advertising manager will allow you to sell Banners and Pay-Per-Click Ads.
GeoDirectory – Your Own Yellow Pages Website Is Not Far Away
Creating a successful Yellow Pages website involves a strategic approach that balances user-friendly design, robust functionality, and effective marketing.
By following the above-mentioned guide, you can build a business directory Yellow Pages website that stands out in the digital landscape.
Key Takeaways:
- Optimize your site for mobile access and user-friendly experience.
- Regularly update and verify listings for accuracy.
- Utilize robust hosting for reliability and speed.
- Integrate advanced search features for ease of use.
- Offer premium listings for additional revenue.
While embarking on this venture, consider the power of GeoDirectory.
Its robust features and user-friendly design make it an excellent choice for anyone looking to create a comprehensive and dynamic directory.
So install and simplify your yellow pages website creation task.
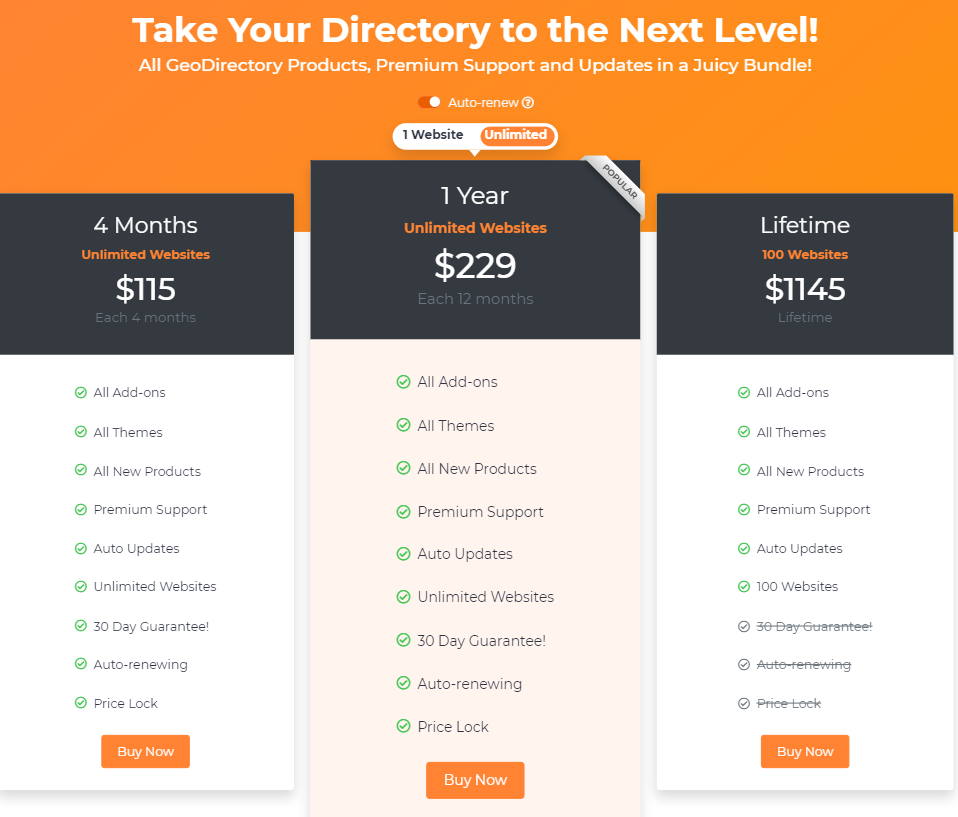
Frequently Asked Questions – (FAQs)
How does the Yellow Pages get information?
Yellow Pages Script typically gathers business information from various sources, including public records, business registration entities, and directly from businesses themselves.
They may also update their listings based on information provided by customers or through their own research efforts.
Does Yellow Pages help SEO?
Yes, listing a business on the Yellow Pages Directory Site can positively impact its SEO.
The Yellow Pages website is a high-authority domain, and having a business listed there creates a backlink to the business’s website.
This can enhance the business’s online visibility and credibility, potentially improving its ranking in search engine results.
Is it free to add your business to Yellow Pages?
Many Yellow Pages software offer a basic listing option for free, which typically includes fundamental business details like name, address, and contact information.
However, additional features like advertisements, enhanced listings, and extra services may incur charges.
Did you know that Elon Musk, the richest man on the planet, started his Business empire with an Online Directory Business?
He launched Zip2 with Venture Capital from Angel Investors in 1996 and this is how it looked like back then:
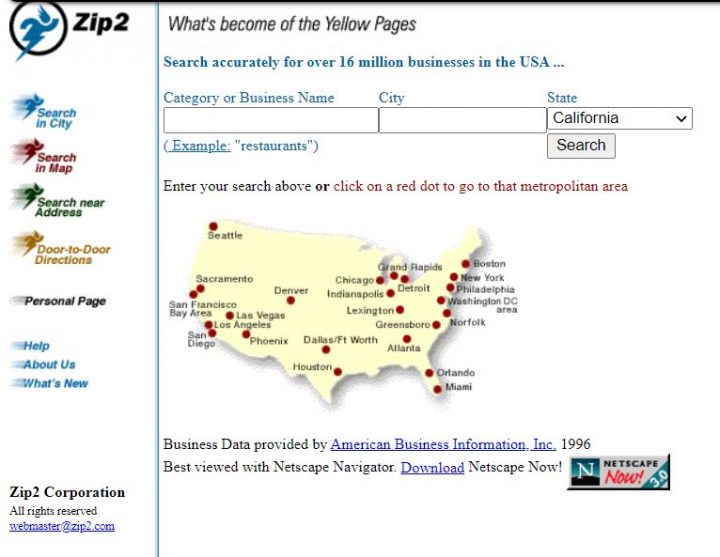
He admitted it was online during the day and he’d work at night to improve its code 7 days a week.
He’d sleep on a couch in the office he and his brother rented in Palo Alto and shower at the YMCA.
The company’s business model was to create a database of physical businesses that could be searched by business name, category, or location.
They’d sell the service to major newspapers and media publishing companies.
After landing contracts with the New York Times, Chicago Tribune, and other major publishers, they sold the company to Compaq, after only 3 years of operations, for $307 million dollars cash in February 1999.
It was definitely easier to make money online back then.
For his 7% stake, Elon received $22 million and that’s the money he used to create PayPal.com.
The rest is history.
Since then, the need for online business directories hasn’t lowered.
In an ever-growing sea of brands, competitors, and products, it can get confusing really quick, when looking for something and getting a gazillion options in return.
We also live in the digital age. And information has never been more accessible.
Online Business Directories still help internet surfers today.
You can swiftly find the companies you’re looking for with a few clicks.
But what if you’re not looking for companies? Looking for shoes? Cars? Places for rent? Talents for Hire?
The most popular old-school directory/classified website, Craiglist, covers a multitude of categories, but newer successful directories focus on verticals.
They are becoming more and more specialized.
The unbundling of Craiglist has carved out niche products and services from a broader horizontal network. That’s the direction to take.
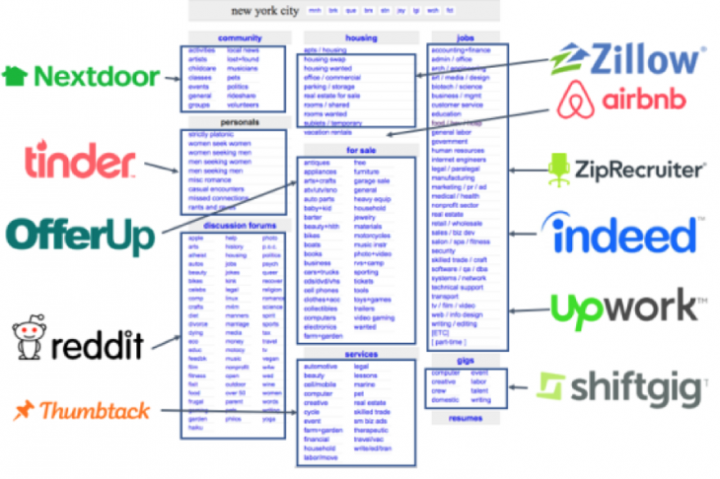
A website that is being unbundled right now is Reddit.
In its subreddits, you can find countless ideas that could lead you to a successful niche, for a new online directory.
Guess what, there is a directory of subreddits that you can use to start looking for niches to unbundle from Reddit.com. It’s called redditlist.com.
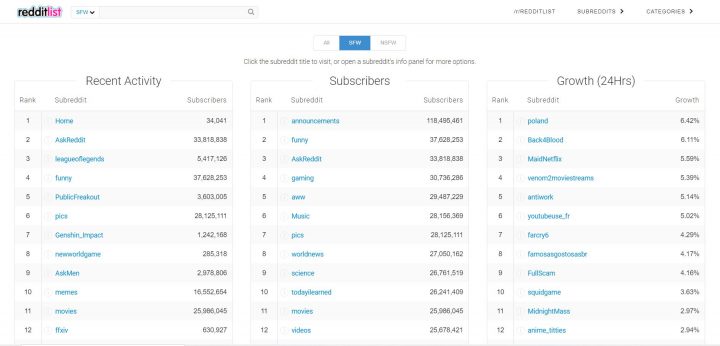
As you can see, Online directories are ubiquitous and can be very profitable and worthwhile to start up.
In this guide, you’re going to learn everything you need to know about them and we’ll show you 12 examples of modern business directory verticals.
Let’s get to it.
What is an online business directory and how does it work?

Businesses listed in an online business directory are arranged in categories, subcategories, locations, and other kinds of taxonomies.
So that information can be found quickly and easily.
As a user, you can easily search for information about a business you’re interested in, based on simple and advanced search criteria.
The goal of a directory website is to create as many business profiles as possible.
A reliable directory will gather information and depend on the companies to improve the data themselves, as it’s in their best interest to be presented accurately and honestly.
The company that runs the directory then drives traffic to its pages, mainly through SEO and social outreach for applicants and surfers.
In a nutshell, think of online business directories like the yellow pages or printed local business directories back in the day.
Your go-to “dictionary” for any company, in any niche, for any reason.
How do business directories earn money?

Like all businesses providing value, everything comes at a price.
Online business directories primarily earn their revenue by selling visibility through promoted/featured listings and ad slots on websites.
Depending on their niche and business models, there can be other forms of monetization:
- Affiliate marketing
- Direct sales of goods and services
- Selling leads
- Earning commissions for sales of goods or services promoted (Freelancers, Event Tickets, Rentals)
Promoted/Featured listings
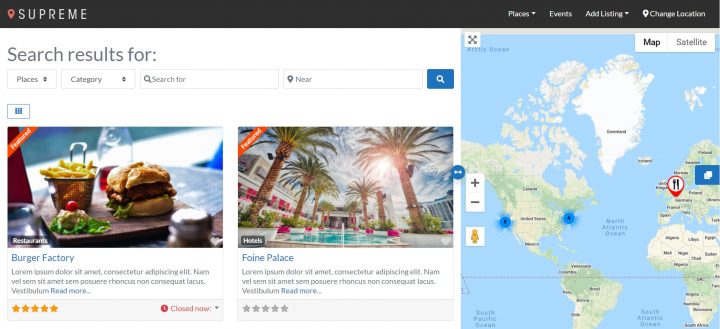
For promoted/featured listings, companies can essentially pay the directory to show their name at the top of search results for their category.
This is usually a recurring revenue business model since by paying a (typically) monthly membership fee, companies can get featured on a said number of listings and categories on the first page, depending on the tier of the plan.
So for instance, an online directory business may choose to tier their membership plans by Bronze, Silver, and Gold.
- Bronze ($30/month)
- Featured listing in 1 category
- 2 uploadable pictures
- Silver ($50/month)
- Featured listings in 3 categories
- 5 uploadable pictures
- Link 1 social media account
- Gold ($100/month)
- Featured listings in 5 categories + 1 rotating Ad slot
- 10 uploadable pictures
- Link 5 social media accounts with active feed updates
And so on.
Fixed ad slots on websites
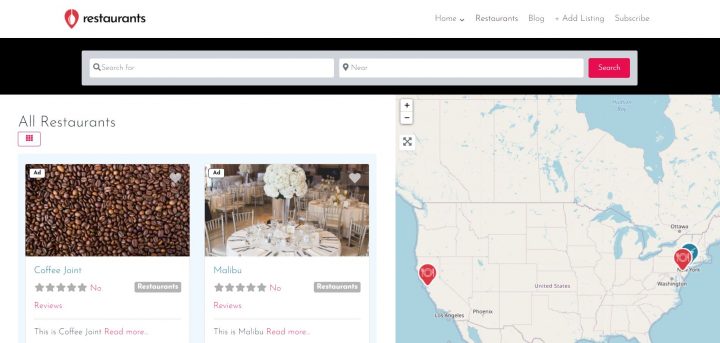
Secondly, businesses can also pay for ad slots on the directory website if they have a lot of organic traffic.
The transaction here is simple.
For a flat rate, a company can reserve a spot on, say, the top right blank space of the website to place an ad for their business for users to see.
The other method of charging ad slots is by CPM (cost per 1000 impressions) or CPC (cost per click).
That means that you’ll only be charged if your positioned ad on the directory website gets 1000 impressions, or, a user clicks on the ad because they’re interested.
Monetizing your online directory is definitely worthwhile.
There are top directories out there raking in millions per year at a stupid high-profit margin.
That’s because of the popularity and organic traffic they were able to accrue.
How do I set up an online business directory?
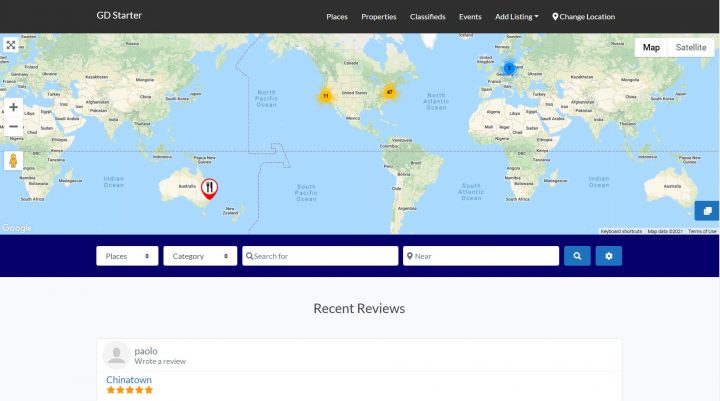
It’s not rocket science, we can tell you that much.
In fact, Content Management Systems like WordPress have made it ridiculously easy.
If you want to create an online business directory, you can easily install a special Directory Plugin for WordPress like GeoDirectory for as low as $199 USD a Year.
No coding.
No hiring expensive programmers.
It’s there: done and ready and can be set up in minutes.
If that isn’t an option, like if you’re trying to stand out, but don’t have the technical knowledge to do so.
Then there are professional freelancers available on platforms like geodirectryexperts.com (alternatively Upwork or Fiverr) who can take care of the programming aspect.
Just note that although setting it up is fairly easy, running an online business directory isn’t a walk in the park.
Here are some stakeholders to keep in mind when building out the strategy and structure for growing your directory business.
- Administrator: the owner of the website with full control over the entire website—every single feature.
- Business Owners/Vendors: the customers of online business directories: they post business listings on the directories and often pay for top listing positions and ad placements.
- Business listing: the listing of a company, service, or product posted by a vendor or on behalf of the vendor by the admin team.
- Category/subcategory: an advanced and convenient categorization structure that makes filtering through results easier and more relevant.
- Clients/users: the people who visit an online business directory to find a business of interest and obtain the right contact information to reach out and learn more.
The most important part of running an Online Directory is definitely the marketing aspect. If you want to succeed. You must master how to boost your directory traffic with SEO or Social media marketing. Those who master both have a 100% success rate guaranteed.
How do I market an online business directory website?
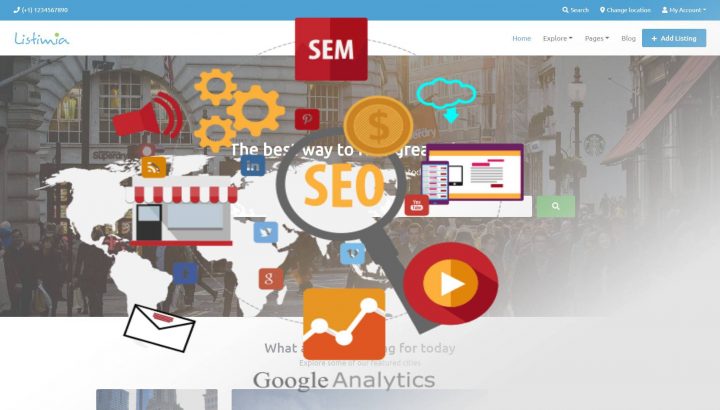
Marketing a business directory website isn’t the hardest thing to do, but consistency is key.
Ideally, you want to have a good amount of site traffic so that your vendors have a legitimate incentive to pay you a subscription fee to use your platform and audience.
In order to attract that traffic to your website, you need to have a large number of business listings that help users find what they’re looking for.
Alternatively, you need excellent content tailored around the niche of your directory.
That takes work.
It’s easy to want to rush things to get rich as fast as possible.
However, slapping your pretty membership structure on the front page for promoted listings and ad placements on a website with no traffic… It won’t get you any registrations soon.
Keeping website visitors engaged is a difficult task when you need to strike a balance between the number of business listings and the number of visitors.
As a result, there is a good chance that the online business directories won’t attract both vendors and users if the promotion isn’t done right.
That’s why you’ll need a smart strategy to market a business directory website.
- Fill out business listings yourself to begin—the Internet has a lot of information available. If you’re too busy to input all the data yourself, hire a data entry operator or invest in a data-scraping tool.
- Invite all business owners (whose listings you have created) to claim and verify their listings. Along with verification, ask them if they would like the listing removed or if some changes should be made.
Never forget to let them know that it’s completely free, a promotional plus, and that you appreciate presenting them on your website.
They’re the reason your website exists, so be an honest suck-up if you have to.
Besides, no one minds a free listing.
In fact, it is likely that some of them will contact you to suggest edits to their listing. Establish a relationship with them.
- As soon as you have a reasonable number of businesses listed in the business directory, focus on attracting traffic to the directory by using strategies such as:
- Search engine optimization
- Online marketing using social networks
- Sending email messages
- Paid advertisements
- Business directories can at times be a little boring. Consider adding sections such as:
- Your industry’s latest news.
- Videos
- Tips, tricks, advice.
- A community of consumers of that industry’s products.
Such content, if keyword-optimized, can also help your business directory win points with search engines so you can attract organic traffic and build site authority.
Since users like to search for that kind of stuff, you’d be readily available with the answers (so search engines will push your content to the top, and with that, comes great exposure to your site).
As soon as your directory will start generating enough traffic, monetizing it will become a lot easier.
It could take a while for the right balance between visitors to the website and registered vendors to appear.
A large number of online business directories fail because they want to generate revenue from day one.
Alas, it doesn’t happen so quickly with new brands.
If you already have an audience instead, monetizing it with a directory will be a lot easier.
What are the types of online business directories?
1 Business Directory Website
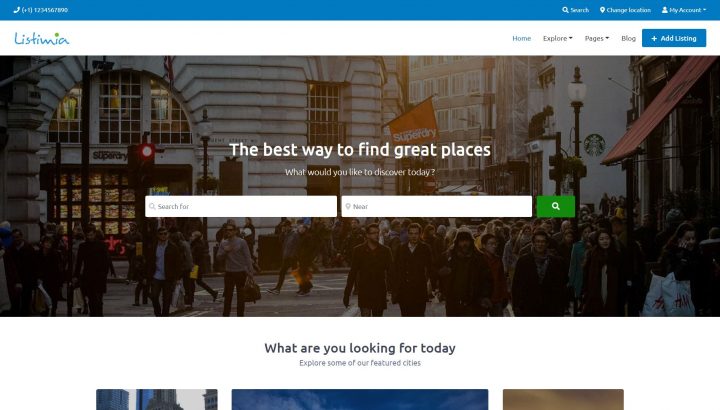
Let’s start with the most traditional type of online business directory.
The go-to industry example is Yellow Pages.
This list contains a range of niche businesses within a certain geographic area. Usually, businesses are grouped by type, location, activity, and size.
The location, phone number, type of products or services, number of employees, serving area, and professional affiliations can all be found in a business directory.
Users can easily find local businesses, products, or services in a targeted manner.
A business listing website is one of the best ways to increase online visibility.
Businesses will also be able to increase their search rankings and authority with search engines with a listing in a top online business directory.
As a result, potential customers have a greater chance of finding them online.
If your site has good traffic, that’s why it’s easy to sell premium listings to business owners.
The Yellow Pages model is also subject to unbundling. Today, directories about verticals are more attractive than generic online directories.
To build a Business Directory website, you can easily start using the Listimia theme for GeoDirectory. Read more about that here.
2 Real Estate Listings Portals
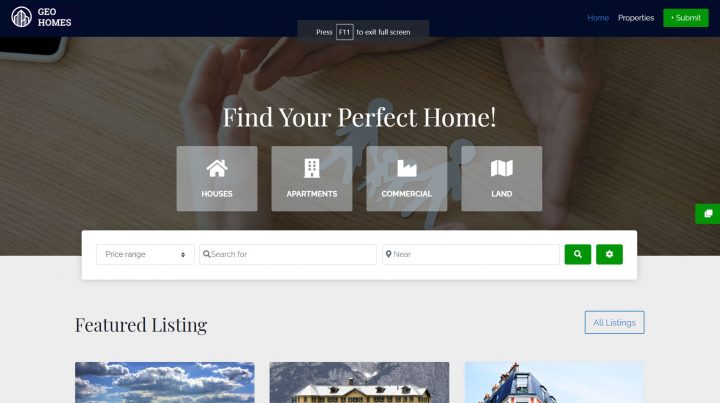
Many people visit the internet when they want to find the perfect property today.
Therefore, having a great real estate web directory is critical for real estate agents or service providers.
Think Zillow.com.
Most real estate directories make money offering services for both homebuyers and sellers, like featured listings and real estate agent ads.
They also sell leads to real estate professionals and homeowners (especially for rentals).
Offering real estate agents high-quality advertising and marketing services (customized websites).
They may also offer mortgage services as partners or affiliates.
In this market, there are still big opportunities in hyperlocal niches.
If you wish to start a Real Estate Listings Directory, you can use the GeoDirectory Real Estate template that can be installed with 1 click in less than 2 minutes. Read more about the GeoDirectory Real Estate Theme here.
3 Short Terms Rentals
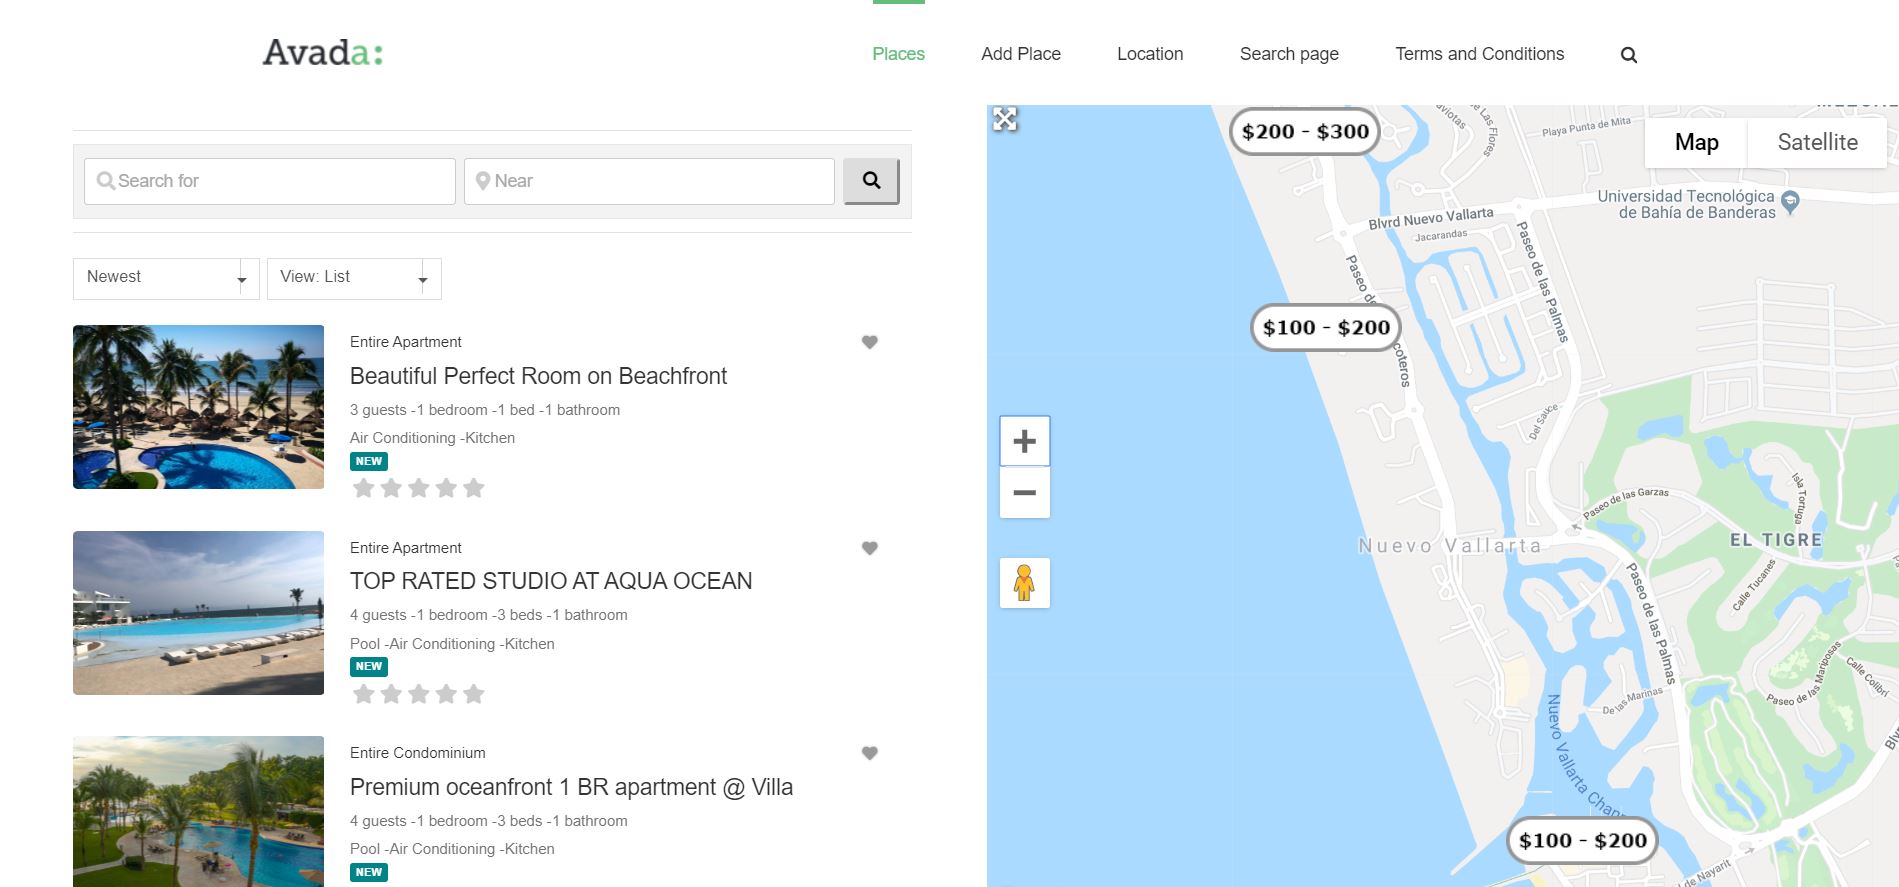
To go even more niche, renting housing spaces fall under the real estate umbrella.
You can rent a hotel room through Booking.com or Expedia.
Rooms, apartments, and houses for rent with Airbnb and VRBO, and even office space for rent with WeWork.
4 Job boards
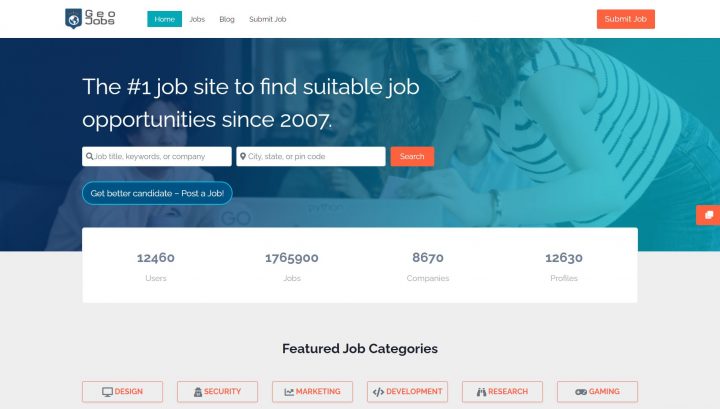
Companies like Indeed, Monster, Glassdoor, and Ziprecruiter found success by creating a job listing catered to unemployed folk looking for job opportunities.
Their revenue comes from corporations buying job postings.
Don’t be intimidated by the industry giants.
New job boards are flourishing in the post/covid era. Remoteok.io, which has attracted 10,000 registered remote worker profiles in one year, has provided remote jobs to thousands of people globally.
Starting a Job Board Directory is simple with GeoDirectory and the 1 click demo install WP Job Board Theme provided.
5 Freelancers
As it turns out, there’s a great demand for quick talent that comes with no conditions and logistics.
Pay a professional, get the job done, and keep them condition-free for as long as you need.
Fiverr, Upwork, and Codeable (for WordPress) offer a vast network of outsourceable talent through text search and advanced filters.
Examples are by service required, country (so you can work with someone who knows your culture), niche, seller level (for more premium services), and more.
These companies make money by taking a cut of the transactions between buyers and sellers by directing them to the right talent and providing insights to aid decision-making.
6 Home Service Providers
Generally, they make money by charging companies and professionals to list their services on the site.
Additionally, they often sell leads, tools for professionals, and even furniture.
The difference here from Freelancing directories is that these businesses are more hands-on and local, while freelancers tend to be remote.
So think Angie, Thumbtack, Houzz, and HomeAdvisor.
7 Events Directories
All things events.
If there’s a social event happening locally or at a concert, these companies allow hosts and vendors to sell tickets to those events to interested audiences.
To keep the lights on, they’ll take a cut to ticket buyers for compensation for enabling their concert dreams.
The common names in the industry are Eventbrite and Ticketmaster.
However, also businesses like Meetup.com should be considered an Event Directory, where you can connect with people of similar interests.
If you’re curious, group organizers pay Meetup a monthly fee to run their groups and events.
8 Doctor Directories
Using these directories, patients can connect with doctors.
Companies in this sector mainly make their profits by charging doctors for listings themselves.
Another option is to offer services to health professionals so that they can more easily communicate with their patients, nurses, and other teams.
We’re talking Webmd care, HealthGrades, and Doximity.
9 Travel and Experiences (Restaurants/Hotels/Trips)

Travel and experience directories help users connect with places before they get there.
They facilitate the decision-making process for the next trip by displaying user reviews, selling ads, and promoting featured listings.
Of course, they take a commission from bookings and reservations.
We’ve all probably heard or even used examples like Yelp.com and Tripadvisor.com.
However, there are also successful new players in this niche like Nomadlist.com
You can create a Yelp Clone using our Whoop Theme or a WordPress Restaurant directory using our Geo Restaurants 1-click demo import template.
10 Software/Apps Directory
Some of these directories sell ads, featured listings, and recommendations.
They’re the middlemen between a tech vendor and a client looking for a software service.
With the right filters, suggestions are provided.
Many software companies pay for listings and work for organic positions (by fostering good reviews) on these directories, like Capterra, to gain maximum exposure and acquire more clients.
G2 is another example but it has an interesting business model since it sells data instead of products back to the SAAS owners that are being reviewed on their site.
11 Generic Classifieds
These are directory websites that enable a private individual to sell used items.
This business model is more environment-friendly and cost-savvy for individuals on a low budget.
The best examples are eBay, which gets a % of each sale.
Other sites like Craigslist, though, may model their revenue income as pay-per-listing.
For a generic Classifieds portal, the GeoDirectory Supreme Directory theme will be a great fit and provide a great WordPress Classifieds Theme. You can install a demo in less than 2 minutes.
12 Cars
Companies like Autotrader or cars.com are online directories that help users buy and sell cars.
Simple as that.
They typically charge users to submit their listings in exchange for exposure and potential buyers.
There is also usually an option to sell ads to try scaling or fast-tracking a sale.
Conclusion
There are many more options, you just need to look for them and be disruptive.
The directories business model isn’t getting any smaller.
And with rising competition, they’ll only be more useful.
But for every online business, you need an audience.
Either you already got one or you’re growing one with SEO and marketing.
It can’t happen without it.
So, what Online Directory are you thinking to start?
According to the Business Listings Trust Report, a staggering 94% of consumers have used an online directory to find information about a local business in the last 12 months.
This underscores the crucial role of the right WordPress classifieds plugins in today’s digital marketplace.
In a world where first impressions are digital, these tools are indispensable for crafting compelling and organized online directories.
Get ready to explore:
- The essence of a classified ad plugin.
- The vital role of these tools in the digital ecosystem.
- Key considerations before making your choice.
- A comprehensive list of the top 9 classified ad software plugins.
- Essential takeaways for an informed decision-making process.
P.S., in this realm of elite tools, GeoDirectory stands out. It’s not just about listing businesses; it’s about creating a vibrant, user-friendly search network.
Whether you need to build a City Directory or you want to Create a Classified Ad Website, GeoDirectory transforms any WordPress theme into an interactive community hub. Let’s discover how it claims its spot in this prestigious list.
What is a Classified Ad Software Plugin?
In the digital age, where information is at our fingertips, the way businesses connect with potential customers has evolved dramatically.
Enter classified ad software plugins – the game changers in digital marketing and online directories.
At its core, a classified ad software plugin is a tool that integrates with your website, specifically designed for creating and managing online directories and listings.
Think of it as a digital bulletin board but with far more sophistication and capabilities.
These plugins allow website owners to effortlessly set up and run a space where businesses can advertise their services, and consumers can browse through them with ease.
Why Are These Tools Important?
In an online world brimming with content, standing out is not just important—it’s essential.
Classified ad software plugins play a crucial role in this endeavor, especially for websites focusing on business directories, job boards, and similar listings.
Here’s why these tools are indispensable in today’s digital landscape:
- Enhancing User Experience: The modern consumer values efficiency and accuracy. Classified ad plugins organize information in a way that’s easy to navigate, making it effortless for users to find what they’re looking for. This enhanced user experience keeps visitors on your site longer, reducing bounce rates and increasing engagement.
- Boosting SEO Efforts: Search engines love well-structured and relevant content. By organizing listings in a clear, searchable format, these classified ads plugins help improve your website’s SEO. Better SEO means higher rankings, which leads to more visibility and traffic.
- Facilitating Business Growth: For businesses listed on your directory, these plugins are a gateway to growth. They provide a platform for businesses to reach their target audience, showcase their offerings, and ultimately drive leads and sales.
- Versatility and Customization: Whether you’re running a local business directory or a nationwide job board, these plugins offer the flexibility to cater to various niches. Customizable features ensure that you can tailor the classified listings to suit the specific needs of your audience and the businesses featured.
- Data Insights and Analytics: Understanding your audience is key to any successful online venture. Many classified ad plugins come with built-in analytics, giving you valuable insights into user behavior, popular listings, and the overall performance of your directory.
In the context of GeoDirectory, these benefits are amplified.
It’s not just a plugin; it’s a comprehensive solution that transforms any WordPress site into a powerful, scalable directory.
Its robust set of features, combined with ease of use, makes it a standout choice for anyone looking to build a professional-grade directory.
Key Considerations Before Making Your Choice
When it’s time to choose the right classified ad software plugin, the decision might feel like navigating a maze.
But fear not! We’ve got the breadcrumbs to lead you out. Here are some crucial factors to consider:
- Compatibility and Ease of Use: First things first, ensure the classified ads WordPress plugin plays nice with your website’s theme and other plugins. You want a tool that’s easy to integrate and manage. A smooth user experience for you means a smooth experience for your visitors.
- Customization Capabilities: Your directory, your rules. Look for a plugin that allows you to customize fields and layouts. This flexibility lets you tailor the directory to fit your specific needs and the unique flavor of your brand.
- Scalability: Think big. Even if you’re starting small, choose a plugin that can grow with your business. You don’t want to outgrow your software just as things are getting exciting.
- SEO Friendliness: This is non-negotiable. A good plugin should boost your site’s SEO. It’s all about being found online, right? Look for features like optimized URLs and metadata fields.
- Support and Updates: A plugin without support is like a ship without a captain. Ensure there’s a dedicated team behind the software, ready to help and regularly rolling out updates.
And here’s where GeoDirectory shines.
It checks all these boxes and more. It’s a plugin that doesn’t just fit in; it stands out.
Easy to use, customizable, scalable, SEO-friendly, and backed by stellar support – it’s the kind of tool that doesn’t just meet expectations, it exceeds them.
Navigating the world of classified ad software can feel like a treasure hunt.
You’re looking for that perfect gem that’ll transform your website into a bustling marketplace or a thriving community hub.
Here are the top 9 classified ad software plugins that are worth their weight in digital gold:
Key Takeaways
- For creating a comprehensive business directory with intuitive mapping and monetization options, use GeoDirectory.
- For building a versatile and user-friendly directory with a range of customizable features, use Classified Listing.
- For crafting professional business directories with advanced features and design options, use Directorist.
- For a simple, mobile-friendly solution compatible with any WordPress theme, use WPAdverts.
- For creating a wide variety of classified featured ads with live chat and multiple mapping sources, use AWP Classifieds.
- For designing any type of directory website with a powerful listing plugin and drag-and-drop builder, use uListing.
- For a directory plugin that’s adaptable for any type of website with customizable features and templates, use Business Directory Plugin.
- For an all-in-one solution for various types of directory websites with extensive customization and functionality, use Advanced Classifieds & Directory Pro.
- For an easy-to-implement solution to transform a WordPress site into a diverse directory, with Google Maps and Mapbox integration, use Web 2.0 Directory Plugin.
#1. GeoDirectory
GeoDirectory, a trailblazer in the realm of directory software, has been revolutionizing the way businesses get listed online since 2008.
Crafted to seamlessly integrate with any WordPress theme, this WordPress classified plugin is a testament to versatility and user-friendliness.
It’s designed to work harmoniously with popular page builders like Elementor, Divi, and Beaver Builder, ensuring that customization is a breeze.
Key Takeaway: GeoDirectory stands out for its ability to turn any WordPress site into a highly functional, scalable directory, catering to a wide range of listing types.
Key Features
- Customization Freedom: Easy editing and customization of PHP templates in your child theme.
- Extensive Design Options: Offers over 40 widgets, shortcodes, and blocks for maps, categories, listings, and more.
- Advanced Features: Includes business hours display, proximity search, and customizable ratings & reviews.
- Dynamic Badging System: Unique badges for classified listings based on custom field values.
- Ninja Forms Integration: Unlimited contact forms with easy form building and advanced CRM integrations.
- SEO Optimization: Built-in integrations with major SEO plugins like Yoast and RankMath.
- Professional Features: Scalable design, secure code, CSV import/export/edit, and Google Analytics integration.
- Developer-Friendly: Extensive hooks and filters, clean code, and API calls for extended functionality.
Pricing
GeoDirectory offers versatile pricing options tailored to different needs:
- 4-Month Plan: Priced at $115, this plan includes all add-ons, themes, new products, premium support, auto-updates, and unlimited websites. It’s auto-renewing with a 30-day guarantee and a price lock feature.
- 1-Year Plan: For $229 (unlimited websites) or $139 (1 website), this plan offers yearly access to all features included in the 4-month plan, ensuring a full year of comprehensive directory tools.
- Lifetime Plan: At $1145 for up to 100 websites, this one-time purchase gives you lifetime access to all of GeoDirectory’s features, excluding the 30-day guarantee and auto-renewal options.
Pros
- Highly customizable and compatible with major WordPress page builders.
- Rich in features for both users and administrators.
- SEO-friendly, enhancing the visibility of listings.
- Developer-friendly with extensive support for customization.
Cons
- Might have a learning curve for beginners.
- Requires familiarity with WordPress to maximize its potential.
#2. WPAdverts
WPAdverts stands out as the most accessible and popular 5-star plugin for classifieds on WordPress.
Renowned for its ease of use and compatibility with any WordPress theme, WPAdverts is the go-to choice for creating both paid and free classifieds, and it’s optimized for mobile devices, ensuring a flawless experience across all platforms.
Key Takeaway: WPAdverts is the epitome of simplicity and efficiency in classified ad software, offering an intuitive experience for users of all skill levels.
Relevant Features
- Seamless WordPress Integration: Offers powerful control with built-in search and user management.
- Customization Options: Includes grid or list views, categories, sub-categories, and secure moderation tools.
- Decade of Expertise: Over ten years of experience in supporting thousands of customers.
- Uncompromised Security: A focus on security as a top priority for web development.
- High Compatibility: Works with any WordPress theme and plugin, ensuring maximum flexibility.
- User-Friendly Setup: Simple upload and activation process with familiar WordPress admin controls.
- Multiple Extensions: Premium extensions available for enhanced customization.
- Exceptional Support: Rated “Perfect” by customers, offering responsive and helpful assistance.
- Optimized Performance: Expert coding for a light, fast, and SEO-friendly plugin without bloat.
- Responsive Design: Ensures a great look on all desktop and mobile devices.
- Developer-Friendly: Extensive documentation and customization options for developers.
Pricing
WPAdverts provides various pricing packages:
- Start-Up: $59 per year, ideal for new websites and small-scale projects.
- Professional: $149 per year, the most popular option, offering a balanced range of features.
- Professional Plus: $299 per year, offering additional extensions and support for larger projects.
- Lifetime: A one-time payment option is also available for long-term investment.
Pros
- High compatibility with any WordPress theme and plugin.
- User-friendly and easy to set up.
- Strong focus on security and performance.
- Excellent customer support and extensive documentation.
Cons
- The need for extensions for advanced features may increase the overall cost.
- May not offer as many out-of-the-box features as some competitors.
#3. AWP Classifieds
AWP Classifieds recognized as a top-tier WordPress classifieds plugin, is designed to quickly and easily get classifieds up on your website.
Catering to a variety of classified categories like personal, pet, local, car & motorcycle, and job classifieds, it’s versatile and user-friendly.
AWP Classifieds excels in keeping users engaged, making money on your site, and ensuring quick setup with awesome support.
Key Takeaway: AWP Classifieds is a robust solution for anyone looking to create a diverse range of WordPress classified ads with ease and efficiency.
Relevant Features
- User-Friendly Design: Focuses on ease of use and setup, offering an intuitive experience for both website owners and users.
- Monetization Options: Integrates with major payment gateways and allows for featured listings and banner, featured ads.
- Customization Simplicity: Offers settings and sensible defaults for easy configuration.
- Responsive Support: Boasts over 200 5-star reviews for its customer support.
- Compatibility: Ensures smooth operation with well-written themes and common plugins like Yoast SEO.
- 14-Day Risk-Free Trial: This free classifieds WordPress plugin encourages starting your classifieds website with a trial period to gauge its suitability.
Pricing
AWP Classifieds offers different pricing tiers:
- Basic Plan: $49.50 per year, offering essential features for classified ads on one site.
- Pro Plan: $149.50 per year, the most popular option with additional features and support for up to 5 sites.
- Elite Plan: $249.50 per year, providing all pro features, priority support, and use on unlimited sites.
Pros
- Easy to use and set up, making it suitable for users of all skill levels.
- Offers a variety of monetization options for revenue generation.
- Compatible with major WordPress themes and plugins.
Cons
- Advanced features and broader site support require higher-tier plans.
- May require additional customization for specific classified Google AdSense ad needs.
#4. uListing
uListing, a groundbreaking WordPress plugin by StylemixThemes, revolutionizes the way directories are created on classified ads websites.
Built on Vue.js, it’s compatible with WordPress 4.6 and higher, making it a robust tool for building a variety of directory listings such as real estate, jobs, events, vehicles, and more.
uListing stands out for its versatility, allowing users to create directory websites similar to popular platforms like Yelp, Zomato, TripAdvisor, and Airbnb.
Key Takeaway: uListing is the go-to classified ads plugin for anyone aiming to create diverse directory listings with minimal hassle, offering extensive customization and user-friendly features.
Relevant Features
- Diverse Directory Options: Allows the creation of various types of directories, including business, coupon, job boards, and real estate or vehicle dealerships.
- Simplification of Tasks: Manages categories, sorting, search and filtering options, payment features, and featured listing management.
- Unlimited Listing Types: Add different types of listings for products or services on your site, enhancing flexibility.
- Customizable Inventory Page: Utilize a drag and drop builder to create inventory pages with various layout options.
- Rich Single Page Design: Create detailed single pages for properties with integration for amenities, galleries, and contact forms.
- Listing Cards and Preview Options: Set up customizable listing cards with grid or list view options.
- Advanced Search Features: Includes unlimited search fields, autocomplete suggestions, radius search, and geolocation.
- User-Driven Listing Order: Allows sorting by price, property square, or upload date.
- Frontend Submission Form: Users can submit their listings, reducing the workload and bypassing the need for admin access.
Pricing
uListing offers various pricing plans:
- Annual Plans:
- Single Site: $54.99
- 5 Sites: $99.99
- 25 Sites: $299.99
- Lifetime Plans:
- Single Site: $149.99
- 5 Sites: $299.99
- 25 Sites: $999.99
All plans come with 1-year updates and support for annual plans and lifetime updates and support for lifetime plans, along with a 14-day money-back guarantee.
Pros
- Suitable for creating a wide range of directory types.
- User-friendly with drag-and-drop builder for customization.
- Offers advanced search and sorting capabilities.
Cons
- May require a higher budget for the more advanced features in the premium plans.
- The wide array of features might be overwhelming for beginners.
#5. Classified Listing
Classified Listing, offered by RadiusTheme, is a versatile WordPress plugin designed to create a range of directories on your website.
This tool is tailored for building classified ads, business directories, and specialized listings like restaurants, local businesses, real estate, and hotels.
It’s a comprehensive solution for anyone looking to establish a classified ads website, job directory, local business directory, or service directory, boasting full responsiveness and compatibility with any standard coding WordPress theme.
Key Takeaway: Classified Listing is a dynamic and fully responsive plugin, ideal for creating a classified listing website or a detailed business directory, offering extensive customization and interactive features.
Relevant Features
- Diverse Directory Creation: Enables the building of various directory types, including classified ads and specific business directories.
- Multiple Promotion & Membership Features: Includes options for ad promotions like Top, Featured, and Bump Up, allowing revenue generation from user posts.
- Live Chat Between Buyers & Sellers: Facilitates direct communication within the platform, enhancing user interaction.
- Advanced Search Features: Offers radius search, Ajax auto-suggestion, and filtering by custom fields for efficient navigation.
- Unlimited Custom Fields: Allows the creation of unlimited custom fields, set category-wise, for detailed listing information.
- Multiple Payment Gateway Support: Integrates with various payment gateways including PayPal, Stripe, and WooCommerce for flexible transaction options.
- Front-End Listing Submission & Management: Empowers users with front-end control over their listings, including addition, editing, and account management.
- Developer Friendly: Offers template file override options and enhances core features with filter hooks.
- Elementor Widgets & Gutenberg Blocks: Provides compatibility with popular page builders for customizable and intuitive design options.
Pricing
Classified Listing offers several pricing plans:
- Yearly Plans:
- Personal: $39/year for 1 site or domain.
- Professional: $149/year for 5 sites or domains.
- Agency: $419/year for 100 sites or domains.
- Lifetime Plans:
- Personal: $199 for 1 site or domain.
- Professional: $349 for 5 sites or domains.
- Agency: $489 for 100 sites or domains.
Pros
- Offers a wide range of directory types and customization options.
- Includes live chat for direct communication between buyers and sellers.
- Supports multiple payment gateways and has robust search features.
Cons
- The variety of features and settings might be overwhelming for beginners or those new to WordPress plugins.
- Integration with specific themes or external systems may require additional customization or technical support.
#6. Directorist
Directorist is a standout player in the world of WordPress directory plugins, revered for its user-centric design.
Catering to over 10,000 businesses globally, Directorist streamlines the process of building online business directories efficiently.
Key Takeaway: Directorist is designed for those seeking a directory solution that balances advanced features with user accessibility.
Relevant Features
- User-Friendly Design: Ideal for beginners, requiring zero coding skills for operation.
- Extensibility: Compatible with popular page builders like Elementor for enhanced functionality.
- Monetization Capabilities: Offers features to generate revenue and expand your business.
- Theme Compatibility: Seamlessly integrates with various WordPress themes, including Elementor and Divi.
- Advanced Functionalities: Built to support scalable directory listing businesses.
- Translation Ready: Offers easy translation to cater to a global audience.
- Custom Fields and Advanced Search Filters: Tailor your directory to meet specific needs.
Pricing
Directorist offers flexible pricing plans:
- 3-Month Plan: $67 for three months, offering all extensions, themes, and upcoming products with unlimited sites license and priority support.
- 6-Month Plan: $103 for six months, including all features in the 3-month plan with a renewal discount option.
- 1-Year Plan: $149 annually, providing comprehensive access to Directorist’s features and a renewal discount.
- Lifetime Plan: Ranges from $339 to $824 as a one-time payment, depending on the number of sites. Includes all extensions, themes, and no renewal requirement.
Pros
- Highly extensible and beginner-friendly.
- Comprehensive monetization features.
- Compatible with a wide range of themes and page builders.
Cons
- The variety of features might be overwhelming for new users.
- Pricing may be higher compared to some other plugins, especially for the lifetime plan.
- There were some concerns due to security issues and vulnerabilities.
#7. Business Directory Plugin
Business Directory Plugin, a versatile WordPress tool, is your go-to for creating a myriad of directory types on your website.
Whether you’re aiming to set up local business directories akin to Yelp or Yellow Pages, staff directories for team listings, or specialized directories for restaurants, hotels, and travel reviews, this classified listing plugin has got you covered.
Its ease of use and comprehensive features make it an ideal solution for anyone looking to establish an online directory, be it for businesses, services, or community members.
Key Takeaway: Business Directory Plugin is an adaptable and user-friendly plugin, perfect for crafting any type of directory website. It offers a wide array of customizable features and templates to suit your specific needs.
Relevant Features
- Versatile Directory Options: From local business directories to staff and member directories, create various types tailored to your requirements.
- Free & Paid Submissions: Boost traffic with free listings or generate revenue through recurring subscriptions and multiple payment gateways.
- Responsive Designs: Ensure a seamless experience on all devices with mobile-friendly listings.
- Google Maps Integration: Enhance your directory with map listings, offering advanced search capabilities by location.
- Rating & Reviews System: Build a review site with ratings that show up in Google search results.
- Full Field Control: Customize with specific form fields like phone numbers and social media links.
- Easy Setup & No Coding Required: Set up your directory effortlessly with a platform that requires zero coding skills.
- Revenue Generation: Create multiple income streams through advertisements, listing sales, or service promotions on your directory website.
Pricing
Business Directory Plugin offers three pricing plans:
- Basic Plan: $99/year for 1 site. Includes unlimited listings, PayPal integration, ratings and reviews, and more.
- Pro Plan: $149/year for 3 sites. Adds features like Stripe and Google Maps integration, city/zip code filters, and priority support.
- Elite Plan: $249/year for 25 sites. Offers all Pro features plus WordPress Multisite, Payfast, and all directory themes.
Every plan comes with a 14-day, no-risk money-back guarantee, ensuring that you can try the wordpress business directory plugin with confidence.
Pros
- Wide variety of directory types and customizable options.
- Integrates Google Maps and offers advanced location-based search features.
- Flexible payment options with free and paid listing capabilities.
Cons
- The Elite plan might be costly for small businesses or individuals.
- Some features might require technical understanding for maximum utilization.
- The plugin design is extremely outdated.
#8. Advanced Classifieds & Directory Pro
Advanced Classifieds & Directory Pro (ACADP) is a comprehensive WordPress plugin designed by PluginsWare.
It’s an all-in-one solution for creating various types of directory websites like classifieds, vehicle dealerships, pet listings, real estate portals, wedding sites, restaurant guides, and more.
With its impressive track record of over 75,000 downloads and powering over 3,000 websites, ACADP stands out with its high user rating of 4.9.
It’s a powerful tool for anyone looking to build a versatile and feature-rich directory WordPress website.
Key Takeaway: ACADP is a robust and flexible plugin, ideal for crafting an extensive range of directory websites. It’s packed with features that allow for extensive customization and functionality, making it a go-to choice for WordPress users.
Relevant Features
- Unlimited Everything: Enjoy the freedom to create unlimited listings, categories, locations, and custom fields.
- Front-End Listing Submission: Allows users to submit listings directly from the front-end of your website.
- Versatile Display Options: Choose between grid, list, or map views for your listings.
- Advanced Search & Filtering: Offers detailed search capabilities including keyword, location, category, price, and custom field filters.
- Monetization Options: Generate revenue with paid listing plans, featured listings, and flexible pricing for different advert durations.
- Multimedia Integration: Add images and videos from platforms like YouTube and Vimeo, enhancing the visual appeal of your listings.
- Customizable Layouts & Settings: Tailor the appearance and functionality of your directory to suit your specific needs.
- Multifunctional Widgets: Includes a variety of widgets for search, categories, locations, and more, simplifying content management on your site.
- Advertiser & User Panel Functions: Users and advertisers have personal panels for managing profiles, listings, and purchasing promotions.
Pricing
Advanced Classifieds & Directory Pro (ACADP) by PluginsWare offers two main pricing plans:
1. Starter Plan:
- Cost: Free
- Features: Unlimited listings, categories, locations, custom fields; grid, list, map display options; advanced search form; front-end listing submission; featured listings; Gutenberg blocks; shortcode builder; sidebar widgets; email templates; spam blocking with reCaptcha.
2. Professional Plan:
- Cost: $95.88 per year
- Features: Includes all Starter features, plus paid listing plans, PayPal and Stripe payment gateways, WooCommerce integration, listings slider/carousel, CSV import/export, multi-categories, and honeypot spam blocking.
Pros
- Provides limitless options for listings, categories, and customizations.
- Supports advanced search functionalities and multimedia integration for a rich user experience.
- Offers multiple monetization avenues and personal panels for users and advertisers.
Cons
- The sheer number of features may be overwhelming for beginners or those seeking a simpler solution.
- Customizing and managing advanced settings might require a moderate level of WordPress proficiency.
#9. Web 2.0 Directory Plugin
Web 2.0 Directory Plugin, available for $49, is an exceptional tool for building an online WordPress directory website.
It’s especially user-friendly, making it easy to convert any existing site into a fully-featured directory business website.
This plugin is versatile, and suitable for various purposes such as classifieds, events directories, car dealerships, restaurant guides, real estate portals, and more.
It’s a perfect solution for creating local directories, building Yellow Pages websites, or business listings with ease.
Key Takeaway: Web 2.0 Directory Plugin is a cost-effective, feature-rich plugin that enables the creation of diverse directory websites with minimal effort. It’s ideal for users seeking an easy-to-implement solution for transforming their WordPress site into a directory.
Pricing: $49
Relevant Features
- Versatile Directory Creation: Suitable for various types of directories, including classifieds, events, vehicles, restaurants, and more.
- Google Maps and Mapbox Integration: Enhances directory listings with map functionality, aiding in location-based searches.
- Front-end Submission and Dashboard: Allows users to submit and manage listings directly from the classified website front-end.
- Multiple Revenue Options: Supports both free and paid listings, with features like listing packages, claim management, and location-based directories.
- Advanced Customization: Offers SEO-friendly pages, multimedia attachments, custom fields, and icons, along with color customization.
- Payment Addons: Includes PayPal and Stripe for secure transactions.
- Ratings Addon: Incorporates a 5-star ratings system for listings.
- Search Forms Builder: Enables creation of detailed search forms, enhancing user navigation.
- CSV Import/Export Tool: Facilitates easy data management.
- 6 Months Support & Lifetime Updates: Ensures ongoing assistance and access to the latest features.
Pros
- Offers a wide range of directory types and extensive customization options.
- Integrates with Google Maps and Mapbox for enhanced location functionality.
- Provides front-end listing submission and user dashboard for easy management.
Cons
- The initial setup might require some time to familiarize with all the features.
- Advanced customization options could be overwhelming for beginners.
Elevate Your Directory Game with GeoDirectory
Wrapping up, you now have a treasure trove of insights on the top classified ad software plugins.
Each plugin brings something unique to the table, whether customization, user-friendliness, or diverse functionalities.
Remember, the right tool can transform your website into a dynamic, user-centric directory.
- Versatility in Directory Types: From local businesses to job boards.
- Monetization Opportunities: Leverage listings for revenue.
- User Engagement: Enhanced with responsive designs and interactive features.
- Ease of Setup: Simplifying directory creation for all skill levels.
- Integration and Customization: Tailoring to specific needs and preferences.
GeoDirectory, standing tall amongst its peers, is your ace in the hole.
It’s not just about adding listings; it’s about creating an engaging, searchable network that connects businesses with their audience.
If you’re looking to build a directory that’s not only functional but also scalable and SEO-optimized, GeoDirectory is the way to go. It’s the perfect fusion of simplicity, power, and flexibility to elevate your directory game.
Do you remember when you had to flip through thick, dusty phone books to find a plumber? Or, even worse, when you had to ask your nosy neighbor for recommendations? Ah, the good old days.
But we’ve come a long way since then, and now we have the power of directory websites at our fingertips. They’re a real game-changer. So, if you’re looking to build your own directory website and join the ranks of these digital superheroes, you’re in the right place.
Today, we’ll examine the nine most powerful directory website builders of 2025. Ready? Let’s go!
What to look for in a good directory website builder
Let’s talk about criteria for a moment. What should you look for when selecting the best directory website builder? The answer can vary depending on your budget, requirements, and capabilities.
However, there are some core features that every good directory website builder should have:
- Simple setup: You’re building a directory website, not a spaceship! Your website builder should be easy to use, even for tech-challenged users.
- Easy system management: Your team has got enough on their plate, so your website builder should make their life easier, not harder.
- Preset essential pages: Nobody has time to create every page from scratch. Your website builder should have all the essentials in place from the start.
- SEO friendliness: You want people to find your directory. Your website builder should support SEO optimization so your directory is easy to find.
- Plugins and integrations: Your directory has specific needs, and your website builder should be able to accommodate them. Think of it like a buffet—the more options, the better!
- Monetization: Show me the money! Built-in payment processing is a must if your directory needs paid features.
- Reliable support: You don’t want to feel lost and alone when things go wrong (and they will). Your website builder should come with a helpful and easy-to-reach support team.
Remember, these criteria are essential for any directory website builder, free or paid. And if your website builder can’t deliver on these, well, it’s time to say, “Bye, Felicia!”
Self-hosted vs SaaS directory website builders: The pros & cons
Now that we’ve talked about criteria let’s talk about the two main types of directory website builders.
Self-hosted
Pros:
- Complete control over your website, design, and features. It’s like having your little corner of the internet!
- You own your data, so you don’t have to worry about anyone else holding your precious information hostage.
- You can customize your website to your heart’s content, like having your own playground.
Cons:
- Technical aspects can be a pain, which means you’ll need to have some technical know-how or hire someone who does.
- You’ll need to pay for web hosting, which can add up over time.
- You’ll be responsible for website security, which can be a bit scary if you’re unfamiliar with keeping your website safe.
SaaS
Pros:
- There are no technical aspects to worry about, which means you can focus on building your directory instead of worrying about the technical stuff.
- Built-in customer support means you don’t have to hunt for help when you need it.
- A more straightforward approach means you can get your directory up and running quickly.
Cons:
- You don’t have complete control over your website, so you’re at the mercy of the provider’s updates and changes.
- You don’t own your data, so you’re renting a piece of the internet instead of owning it.
- You’re stuck with the provider’s pricing and features, so you might not have the flexibility you need to build the directory of your dreams.
So, which is the better option? Well, it depends on what you value most. If you want complete control and ownership of your website, a self-hosted online directory builder like GeoDirectory might be the way to go. But if you want a simpler approach, SaaS might be your better choice.
1. GeoDirectory
Founded in 2014 by AyeCode Ltd, GeoDirectory is the world’s most powerful and versatile WordPress plugin that lets you easily build a directory listing website, no matter what theme you’re using.
The free version of GeoDirectory has enough features to get you started, but if you need more functionality, you can choose from a library of free and premium add-ons. You can also use any good WordPress theme or select from the free and paid options built explicitly for use with this plugin.
In April 2019, the developer team rewrote GeoDirectory from the ground up to create a feature-rich directory builder that’s easier to customize with an improved code base.
Key features
- There is support for both single and multiple locations, as well as the ability to create a global directory and integrate with the WPML plugin for multilingual support.
- Intelligent location switching detects your website visitors’ location and suggests the most relevant listings.
- Google Maps integration adds interactive maps to your listings and makes it easier for visitors to find businesses or other entities.
- Editable front-end submission forms that can be customized to capture the data you need, including custom fields.
- Paid listings support with the Pricing Manager add-on, which lets you monetize your directory with free trials, recurring payment plans, and customizable pricing packages.
- The ability to create listings for business owners to claim with the Claim Listings add-on, which adds a verified badge and email notifications to keep everyone in the loop.
- Event management with the Event Manager add-on, which lets you create a promotions website for recurring events with advanced filtering and calendar views.
With GeoDirectory, you can get started for free and pay for any extra features as needed. So why wait? Start building your online directory today!
Some caveats
- Depending on your needs, paid add-ons could be expensive. Tip: You’re probably better off purchasing a membership plan and saving 90% on all included add-ons.
- Some of the themes don’t look as modern
2. eDirectory
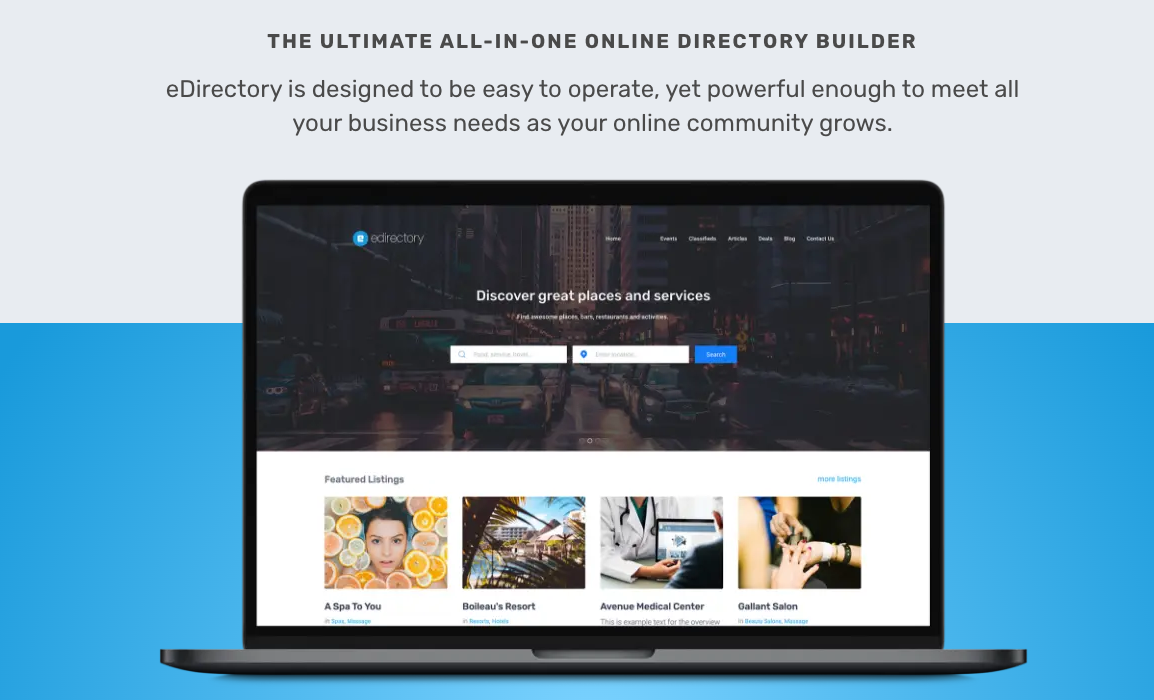
With thousands of users in all industries, eDirectory has been around since 2003, operating in 68 countries as the backbone for Buyer’s Guides, Local Search Sites, Product Directories, Yellow Page sites, and other online directory-style sites and apps. They offer many helpful features, including support for posting deals, events, and classifieds. You can even make extra cash with banner advertisements and multiple payment gateways.
eDirectory also offers robust SEO capabilities, a great bookmarking system, and search and filtering options for a seamless user experience. Plus, you can create mobile apps and track site activity with analytics and reporting tools.
Key features
- Integrated mapping to provide users with location-based listings
- Newsletters for keeping users up-to-date on the latest listings and events
- Social network integration for easy sharing and promotion
- Open API for developers who want to customize and extend eDirectory’s functionality
- Multiple niche themes to help you create a directory that fits your needs
- Package builder for creating custom pricing plans
- Site management tools to keep your directory running smoothly
- User backend for easy management of user accounts and listings
- Robust technology stack for fast and reliable performance
- Sponsor backend for managing paid listings and advertisements
Some caveats
- Support has been reported to be slow and unresponsive at times
- Buggy software
- Can be taxing on servers (slow performance)
- Few software updates
3. Brilliant Directories
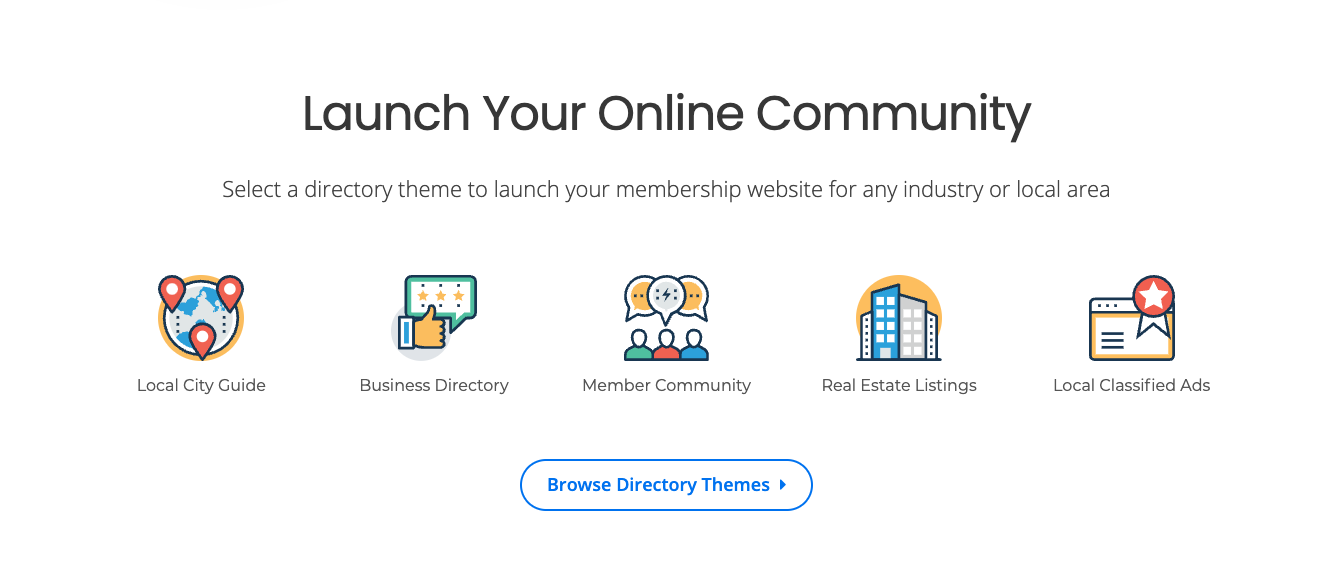
Brilliant Directories is another popular choice for organizations with over 10,000 users.
This website builder offers member management, payment processing, and SEO tools, along with an extensive range of directory options. With Brilliant Directories, you can create a custom directory that meets the unique needs of your organization, all while enjoying top-notch website support.
Key features
- Robust membership system with customizable plans and recurring subscriptions
- Efficient member list management with self-service profiles and staff accounts
- Multiple revenue generation options such as banner ads, classified ads, events and news promotion, lead capturing, and selling
- Mobile-friendly design with excellent mobile responsiveness
- SEO-friendly coding for better search engine visibility
- Email newsletter facilitation, PDF downloads, job listing postings, and product and deal publishing
- Elegant and industry-specific design options for local city guides, business directories, member communities, real estate listings, and local classified ads.
Some caveats
- Storage options can be limiting when growing your directory site (paid increased storage add-ons available)
- Admin interface could be more intuitive
4. 360directories

360Directories is a versatile and scalable directory website builder that can cater to the needs of many industries, including restaurant directories, social communities, city guides, TV and radio stations, and membership management, among others.
This platform offers customizable templates, mobile responsiveness, and marketing tools to help you create a professional-looking website that delivers real value to your users. Plus, it is highly scalable, so it can grow with your business no matter how large or complex your directory becomes.
Key features
- SEO practices for improved website traffic
- Mobile-friendly design for easy site access on all devices
- Support for popular payment gateways for easy online payments
- Member management tools to control membership and draw paying members
- Network site management for easy management of multiple sites
- Social media integration to boost interaction and sharing of posts
- Support for coupons, events, and blogs to boost SEO
- Easy customization of designs and templates for branding and custom developments.
Some caveats
- Customer support can be unresponsive
5. Wild Apricot
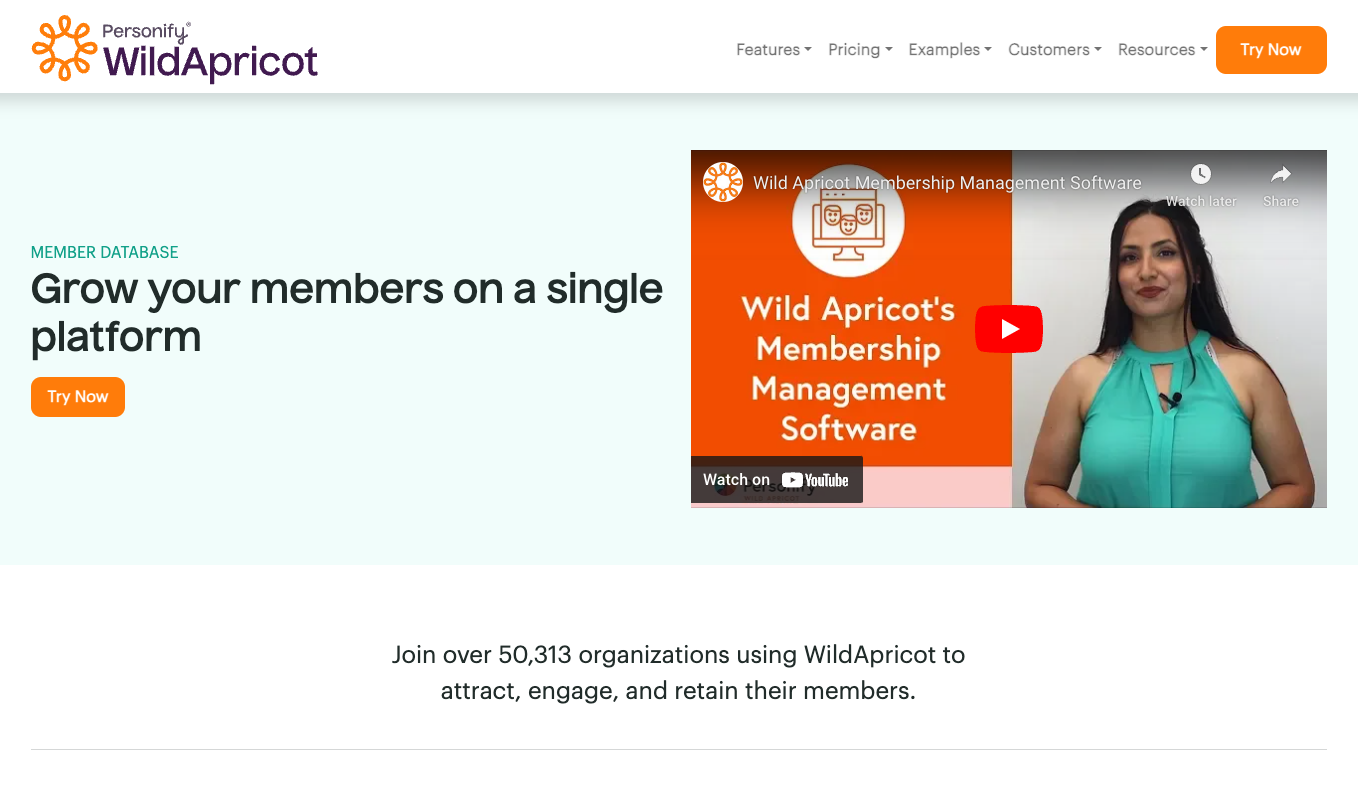
Wild Apricot is a unique directory website builder that specializes in creating membership websites. It includes a searchable member directory, making it easy to find members as your community grows. It also has features for event registration, online payments, email communication, and website editing.
The great thing is that you can either create pages within Wild Apricot or integrate them with your current website. So, if you’re looking for a user-friendly directory website builder that’s perfect for managing your membership website, Wild Apricot is worth checking out.
Key features
- Drag-and-drop website builder: Easily create and customize your directory website without needing any coding knowledge. You can tailor your member directory to fit your organization’s unique needs by customizing the fields and settings for your directory.
- Secure payment processing for online payments of membership fees and other transactions, with support for various payment gateways.
- Members-only areas: With Wild Apricot, you can create members-only sections of your directory website, where members can access exclusive content, resources, and events.
- Free set-up guide which is great for news users who need their directory website up and running quickly and smoothly.
- Integrations with WordPress and more: Wild Apricot integrates seamlessly with popular content management systems like WordPress, as well as other tools and platforms such as PayPal, Eventbrite, and Facebook.
Some caveats
- Users have reported the software to be buggy
- Bit of a learning curve to get adjusted to the software
- Limited customization features
- Mediocre customer support ratings
6. Goclixy
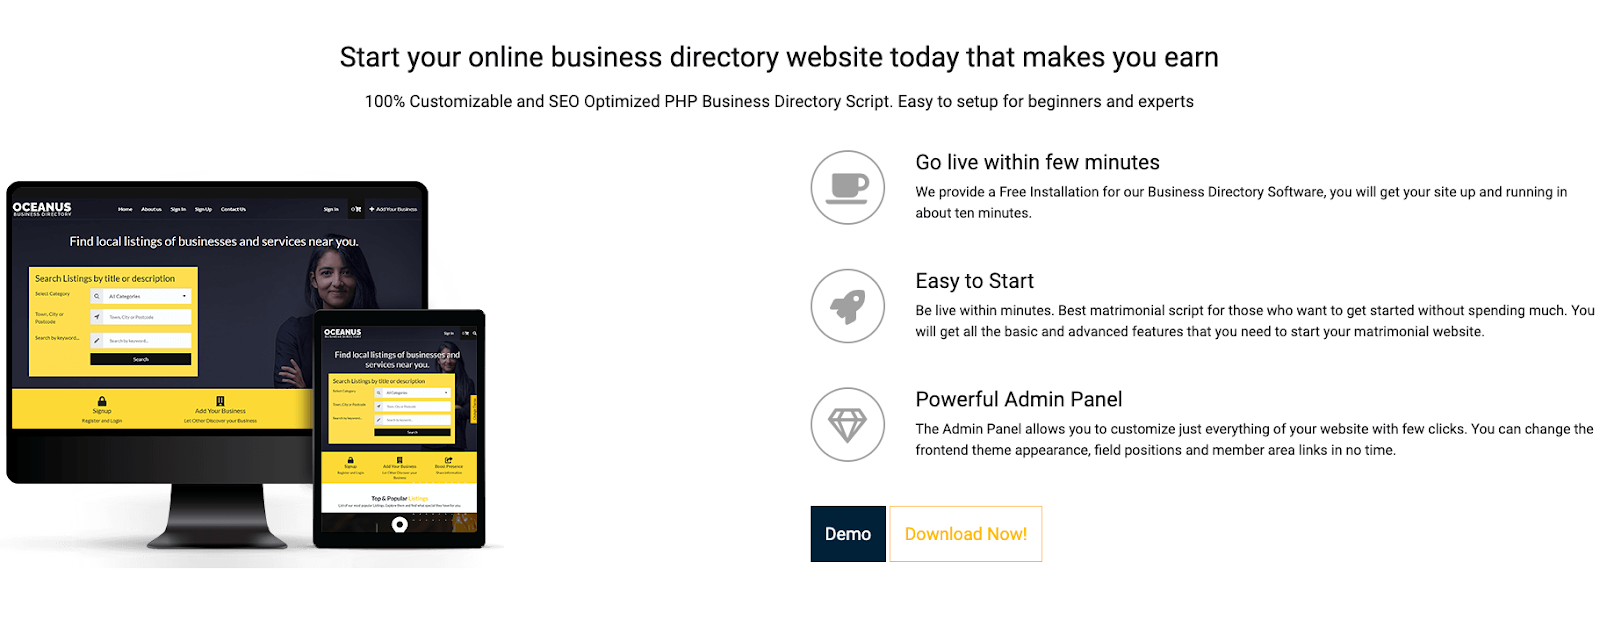
GoClixy is an incredibly user-friendly directory website builder that provides everything you need to create your own business directory page, whether you’re a beginner or an expert web developer.
It only takes a few minutes to get your project online with GoClixy, and the layout is 100% adjustable, giving you the freedom to create your dream webspace without any programming knowledge. Plus, GoClixy supports multiple languages, payment gateways, bookings, subscription plans, and eCommerce, making it a versatile tool for all your directory needs.
Key features
- Featured listings to highlight top businesses or services
- Membership tiers to cater to different needs
- Banner and AdSense advertisements for additional revenue streams
- Support for multiple languages to reach a wider audience
- Option for rewards and incentives for member referrals
Some caveats
- The limited number of themes available compared to some other builders.
- Support is only available during business hours, which may not be ideal for those in different time zones.
7. Workfolio
Workfolio is a cloud-based directory management software designed to help businesses store and edit client and employee information in one central location for future use. It offers features such as customizable templates, resume importing, social sharing, SSL certifications, and career tools.
Organizations can personalize the interface with custom themes, fonts, and colors to reflect their brand identity. It allows businesses to maintain public profiles, CVs, member accounts, employee information, and more. The software is beneficial for medical, healthcare, legal, consulting, and educational industries to create, publish, and maintain custom directories.
Key features
- Access controls/permissions: Set up different levels of access for members so they see only what’s relevant to them.
- The member portal is a dedicated space where members can access and manage their profiles, applications, and other information.
- Create different member types with varying levels of access and permissions.
- Profile change approvals: Let administrators approve or reject changes made to member profiles before they go live.
- Profile templates make it easy to get set up quickly
- Profile visibility controls
Some caveats
- Some users may find the interface and feature overwhelming or complicated – it’s more than just a directory builder, which is more than what you may be looking for.
- Workfolio’s pricing may be a bit steep for smaller businesses or organizations on a tight budget.
- It may not be as suitable for industries outside of healthcare, legal, consulting, and education.
8. MarketGrabber
MarketGrabber is a directory website builder that’s designed to help you create various ventures such as job boards, classifieds, real estate, and events pages. It offers everything you need to build a successful directory website, including advanced listing and search features, eCommerce capabilities, search engine optimization tools, hosting, and multiple revenue streams.
One of the great things about MarketGrabber is that it’s fully optimized for all devices and platforms, ensuring that your page will always perform flawlessly. You can also host the site on your server or use MarketGrabber’s hosting service, which includes installation, set-up, support, and updates.
Key features
- MarketGrabber Software provides full source code access for custom design and programming modifications.
- SEO-friendly URLs and admin-managed meta tags make search engine optimization easy.
- You can maximize revenue with integrated payment gateways or popular payment systems like PayPal.
- Create unlimited pricing plans and upsell customers to featured listings, photos, videos, web addresses, and coupons.
- Design and branding services are available to meet your requirements.
- Custom programming and design services are also available.
Some caveats
- No free version or trial
- Limited customization options
9. Bitrix24
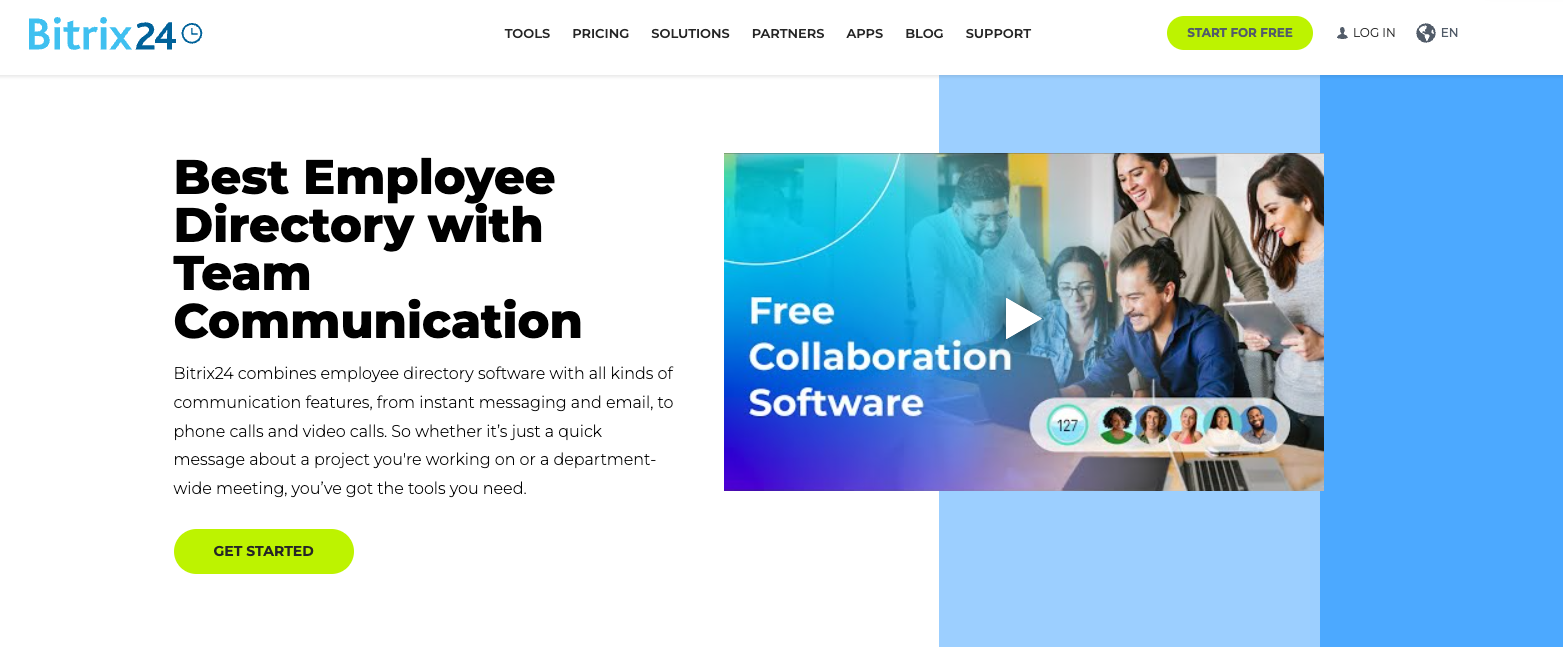
Bitrix24 is a unique directory website builder that not only helps you create a social media platform for your organization but also has an employee directory software part that keeps your business organized. This tool is particularly useful for big organizations that need to quickly find employees and see who is online or offline.
It offers video calls, conference chats, and social networking features that make connecting and collaborating with your team easier. This tool is perfect for businesses and organizations that operate remotely and need more control over their team to ensure consistently smooth operations. With Bitrix24, you can send notifications and have more control over your team.
Key features
- Easy search: Quickly find employees by name, position, or skills.
- Mobile app: Access the directory on the go with the mobile app available for iOS and Android devices.
- Customizable profiles: Customize employee profiles with contact details, job responsibilities, and more information.
- In/Out indicator: This handy indicator lets you keep track of who’s in or out of the office.
- Staff changes: Stay up-to-date with any staff changes by quickly updating employee information in the directory.
- Active Directory/LDAP/NTLM integrations for easy import of employees and synchronization with existing directory
Some caveats
- It’s way more than a directory builder and leans more toward a project management tool – which users may not be looking for
- Enterprise pricing may not be suitable for small businesses – especially those who aren’t looking for the full suite of solutions.
The verdict: Which website directory builder is the best for me?
All in all, there are many great options for building a directory website. Each platform has its unique strengths and weaknesses, making it important to choose one that best suits your specific needs.
So which one’s the best? After careful consideration, it’s clear that GeoDirectory stands out as the go-to choice for most businesses. Its comprehensive features, ease of use, and flexibility make it the ideal choice for creating a professional, high-quality directory website for beginners or experienced developers.

How to Monetize a Directory Website?
To monetize a directory website, follow these steps:
- Find an unexploited market niche.
- Create high-quality content for your database.
- Encourage and gather user-generated content through reviews.
- Master marketing and SEO to generate high traffic.
- Monetize your directory by:
- selling listings
- selling ads
- allowing business owners to claim and upgrade their listings
- using affiliate marketing
- Offering extra services to business owners (a highly underused technique)
- Work on improving your conversion rates.
Let’s dive into each step in detail. But first, why build a directory website in the first place?
Why Build an Online Directory?
Directory websites first appeared as a way to organize the internet itself, long before search engines were around.
They evolved from simple collections of links, like DMOZ, to today’s business listing directories with user reviews and specialized forums, such as TripAdvisor and Yelp.
One of the biggest initial challenges for directory publishers is finding effective ways to monetize their websites.
Now let’s explore the steps in detail on how to:
1) Find the right niche
2) Build the database
3) Encourage reviews
4) Boost visibility
5) Monetize your directory
6) Improve conversion rates
Lastly, we’ll share an Extra Tip on how to make money with business directory websites.
1 Find the right niche

The best way to make money online by building a directory website is to identify and capitalize on a profitable niche.
Key Qualities of a Profitable Niche
- Strong traffic potential
- Low to moderate competition
- High suggested ad bid rates
To find viable keywords that meet these criteria, use the free Google Adwords Keyword Planner.
This tool lets you search for keywords based on phrases, websites, or categories, giving you valuable insights into monthly search volume, competition level, and suggested ad bids.
When you find a niche with the key qualities mentioned earlier, you’re on the right path to earning online.
First and foremost, focus on creating value within that niche. Start small, aim high, and move quickly.
Tips for Building a Successful Directory
- If your directory is broad or covers high-competition categories, consider focusing on a specific geographic area you know well, potentially offering concierge services.
- A global directory can succeed if it’s highly specialized in an emerging market with minimal keywords.
To stand out, consider creative alternatives to overly competitive niches like hotels, restaurants, or real estate. Here are some ideas:
- Luxury Hotels with breathtaking views
- Directory of Restaurants specializing in raw food
- Doctors who prescribe a specific treatment
- Medical marijuana-friendly rentals (a potential niche in some U.S. states)
- Lawyers Directory specializing in niche areas, like LGBTQ+ divorce law
Choosing a unique, less-explored niche is often the key to a profitable directory.
Gay Divorce and Lesbian Lawyers, for example, are niches with the mentioned characteristics.
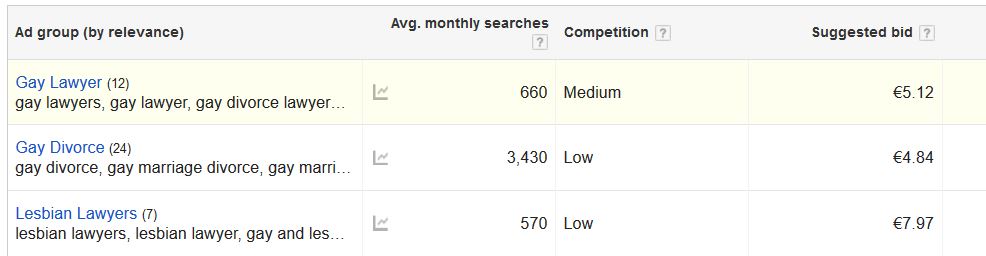
If, instead, you try to build a global directory with thousands of locations, categories, and custom fields, you’ll end up working on something too large to manage without a big team and will most likely struggle to succeed.
2 Build the database

Should I Build My Database or Wait for Users?
Is scraping an option?
These are common questions from our customers.
Don’t rely on visitors to build your database with user-generated content.
Your directory won’t grow quickly enough that way.
Start by adding listings yourself, and ask friends and colleagues to help with this task.
Avoid scraping.
The only information you can legally scrape includes basic details like business names, addresses, geo-coordinates, phone numbers, website links, and email addresses.
Everything else is likely used on other websites, making it ineffective for your goals.
Sure, with the rise of AI, you can generate “original” content. However, if you’re publishing content on topics you have no real experience with, it’s unlikely to provide genuine value.
Want Google to rank your listings? Ensure they contain richer content than other pages already ranking for similar topics.
This means better images, detailed business descriptions, services offered, current promotions, and numerous reviews.
Every piece of content should be original for the best results.
3 Encourage reviews
A large number of reviews provides a wealth of original content that both your visitors and Google will appreciate.
Getting those first user-generated reviews is often the toughest hurdle.
Start by personally reviewing every listing you’re familiar with in your directory.
Inviting people in your network to contribute their own reviews can help you cover more listings quickly.
Users are more likely to submit reviews in directories where they feel part of a community.
Adding a forum can be highly effective, but it requires active participation from you or someone you trust to build and nurture the community.
Here are some practical ways to encourage users to leave reviews on your directory:
How to Incentivize User Reviews for Your Directory
- Seed Initial Reviews Yourself
Start by personally reviewing familiar listings, and encourage friends or colleagues to contribute their own reviews. This will create a foundation and make the directory appear active. - Offer Small Rewards for Reviews
Provide incentives like a chance to win a monthly prize or other small rewards to motivate users. Even simple recognition, such as “Top Contributor” badges, can encourage users to participate. - Simplify the Review Process
Make it as easy as possible for users to leave reviews. A streamlined, intuitive process increases users’ likelihood of sharing their feedback. - Send Friendly Reminders
Send follow-up emails or notifications to users after interacting with listings, reminding them to leave a review. This gentle prompt can help increase participation. - Foster a Sense of Community
Users are more inclined to leave reviews in a directory where they feel part of a community. Consider adding a forum or discussion section where users can interact or feature top reviewers on your site. This not only builds community but also encourages others to contribute. - Encourage Honest, Quality Feedback
Let users know you value genuine reviews. Encouraging honest feedback helps build trust in your directory, making it more appealing to visitors and boosting credibility.
These strategies help directory publishers gather valuable, high-quality reviews, enhancing the site’s credibility and appeal to users and search engines.
4 Boost visibility
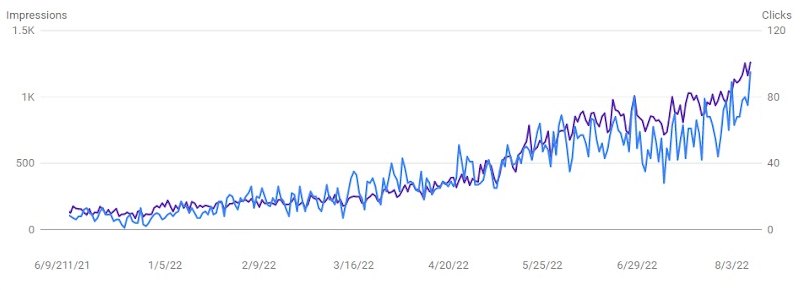
This is perhaps the most critical point.
The formula for making money online consistently relies on strong SEO and social media marketing.
If your directory website isn’t ranking well on Google for your niche, or you don’t have a substantial social media following, potential customers won’t see the value in paying to submit listings.
Without the ability to bring them traffic, and ideally, sales, you won’t appear valuable to them.
To succeed, you need to become proficient in SEO and establish authority in your niche.
The more traffic you bring to your site, the easier it will be to monetize your business directory or any online venture.
Focus on learning the essentials of SEO, especially content creation and white-hat link-building techniques.
Quality backlinks and excellent content are still the top factors in dominating Google search results.
Simply installing an SEO plugin isn’t enough; it’s just the first step.
Some niches allow you to publish shareable content, like stunning pictures and videos.
Leverage this to grow a community on social networks as well.
Finally, explore reputable SEO blogs that offer concepts and real-life examples to deepen your understanding and apply effective techniques to your directory website.
We have a guide on how to do effective SEO for Directory Website, start from there.
There are countless SEO blogs out there: The Search Engine Journal, Yoast.com, detailed.com, and Backlinko are just few examples.
5 Monetize your directory

There are several ways to generate revenue from a directory website.
The most common methods include:
- Selling Featured Listings
Offer premium listing options with extra features compared to free listings. Premium listings could allow for more photos, website links, phone numbers, social media links, inclusion in multiple categories, extended descriptions, and additional custom fields. - Selling Ad Space
Monetize your site by selling ad placements through networks like Google AdSense (PPC) or BuySellAds (impression-based). You can also sell ad space directly through your website. - Claim Listings and Featured Rankings for Business Owners
Allow business owners to claim their listings for a fee, giving them access to premium features and higher visibility, such as top positions in category archives, search pages, and sidebar features. Premium listings can also be ad-free for added value. - Affiliate Marketing
Use affiliate links within the directory to earn commissions on products or services that complement the businesses listed. - Offering Extra Services
Use the directory as a lead generator for additional services, such as marketing, web design, and social media management. Many businesses in your directory may need help with tasks like maintaining social media accounts, graphic design, photography, or even building a complete website.
Types of Listings
Your directory can include various types of listings, such as business listings, event listings, job listings, classified, or real estate listings.
The main difference lies in the custom fields and search options available.
You can charge a one-time fee for limited-time listings or set up recurring subscriptions that renew automatically until canceled by the publisher.
This approach essentially creates a subscription-based business model for your directory.
Additional Revenue Streams
- Blog Content
Maintaining a blog alongside your directory can help attract more traffic and provides additional space for ads and affiliate links, boosting revenue.
By offering these options, you diversify your income streams, making it easier to build a profitable directory website.
6 Improve your conversion rates

Converting Free Listings into Paid Listings
Converting free listings to paid ones can be challenging, especially in the beginning.
Here’s how to approach it effectively:
- Start with Reasonable Prices
Don’t aim for high prices initially; focus on building a base of featured listings. Setting competitive prices helps you attract your first paying customers. - Use Telemarketing
According to our statistics, telemarketing still has the highest conversion rate. Prepare a script, and aim to speak directly with the business owner or a top manager. - Present the Value
Introduce your directory and let them know their business is already listed for free. If the listing has any reviews, mention this to add value. Explain how a premium listing can boost their business with greater visibility, backlinks, more traffic, and potential new clients. Close the pitch by asking if they’d like to upgrade to a premium listing. - Expect Persistence
Getting one “yes” out of ten calls is a good start. Stay persistent, and don’t get discouraged if conversion takes time. - Offer Free Featured Listings to Market Leaders
Providing free premium listings to top businesses can encourage competitors to see the value of being listed on your site and motivate them to pay for the same benefits. - Address Common Questions
Be prepared to answer two key questions from potential customers:
- “Who are you?”
Establishing a connection can make a significant difference. If you know someone in common or can relate in any way, mention it (but be genuine). Even a small connection can increase trust. - “Who else has signed up?”
Offering free listings to well-known businesses allows you to confidently say, “All the major [hotels, restaurants, etc.] are already listed,” which builds credibility.
These steps can help convert free listings to paid ones, build trust with potential customers, and set your directory up for long-term success.
Extra Tip on how to make money with a business directory website
NAP Citations for Local SEO
If you don’t have a network to help influence business owners to buy premium listings or can’t find a niche where you can add value, consider selling NAP citation submissions for local SEO.
NAP stands for Name, Address, and Phone, critical components for local SEO, much like links are for organic SEO.
NAP citations are precisely what business directory websites provide.
Each listing on sites like Yelp, TripAdvisor, or even a Facebook page counts as a single NAP citation.
The key is to ensure that the business’s address and phone number are formatted identically to their Google My Business (GMB) listing.
When competing with others of similar review count and GMB quality (description, images, videos, offers, etc.), having a higher number and quality of NAP citations can make the difference in ranking within Google’s Map Pack.
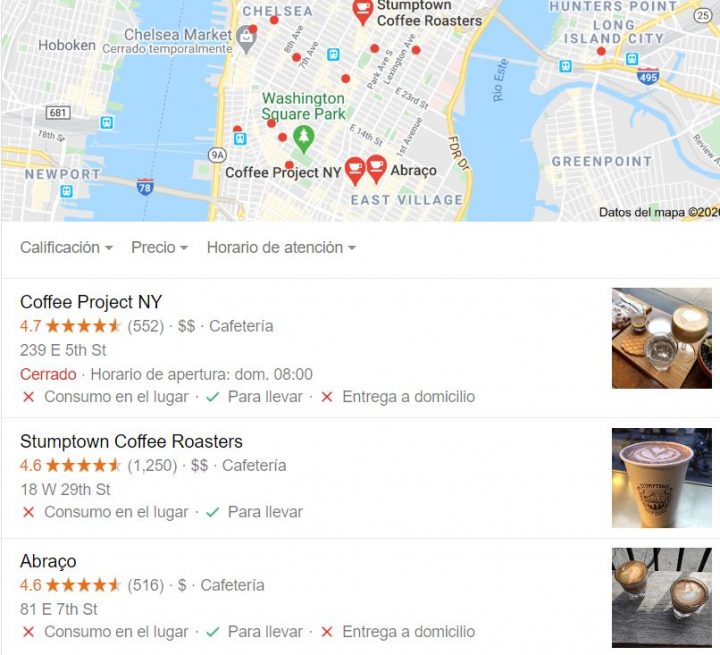
Appearing in the Google Map Pack can be crucial for local businesses, making NAP citations incredibly valuable.
How to Sell NAP Citations
- Build a Network of Local Directories
Start by creating around 20 high-quality local directories. Ensure they’re not all hosted on the same server, and aim for a Domain Authority (DA) of 20 or higher with good loading speeds. You can check DA on MOZ.com, and for an alternative metric, you can check Domain Rating on Ahrefs.com. - Optimize Your Directories
Ensure each directory has enough backlinks and quality content to maintain a respectable DA. The more valuable and well-structured your directories, the better they’ll serve as trusted NAP citation sources. - Target Key Directories
Identify the top 10-15 directories for the area you want to target, including well-known sites like Yelp, TripAdvisor, Yellow Pages, and HotFrog. This mix of large and mid-sized directories strengthens your NAP citation offerings. - Offer NAP Citation Packages
Create a page on your site where you offer to submit business listings to your directory network and other valuable directories, providing up to 40 NAP citations. This can be easily managed with the GetPaid plugin. - Set a Competitive Price
Charge between $50 and $99 per campaign for this service. You could earn between $18k and $35k annually with minimal daily effort with just one sale per day.
By offering NAP citation services, you provide a valuable SEO tool for local businesses while building a steady income stream from your directory network.
If you need an example, https://fatjoe.com/local-business-citations/
To Wrap it Up
Building a successful online directory website takes research, dedication, and patience. It may be challenging initially, especially if you’re starting from scratch, but the rewards can be well worth the effort.
We hope you found this article helpful. If so, please share it with others!
If you have questions about this topic or suggestions for improving this post, please leave a comment below!