The World’s Most Advanced And Scalable WordPress Directory Plugin
Today, GeoDirectory is the only WordPress directory plugin on the market that can scale to millions of listings and withstand the battering of traffic that comes along with that.
Get GeoDirectoryWhat can i do with GeoDirectory?
How to Create a Directory Website with Divi theme?
The easiest way to build a Directory Website using the Divi WordPress theme is to implement the following 3 steps:
- Install the Divi theme
- Install and setup GeoDirectory
- Design the Directory Website using the Divi theme
Before I describe the details of how to create a business directory step by step, I would like to quote a post published on September 11, 2023, on the official Elegantthemes blog, the developers of the Divi theme.
Is GeoDirectory the best WordPress plugin for creating a business directory website with the Divi theme?
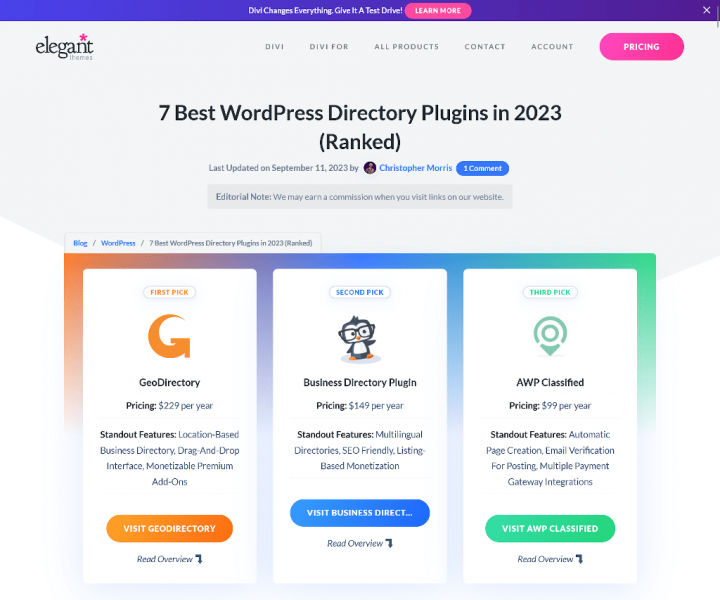
On the Elegant Themes blog, an article titled “7 Best WordPress Directory Plugins in 2023 (Ranked)” was published.
GeoDirectory plugin took the top spot in the ranking. In the article’s content, the author justifies why GeoDirectory is the best WordPress plugin for creating a directory website.
I encourage you to read this article. Below is a quote from the FAQ section of the mentioned article.
What is the best directory plugin for WordPress?
Quote from the FAQ section of the article: 7 Best WordPress Directory Plugins in 2023 (Ranked).
GeoDirectory is the best WordPress directory plugin. It offers customizable listings, advanced search, user reviews, Google Maps integration, monetization options, and great theme/plugin compatibility. You can create feature-rich directory websites easily with GeoDirectory.
My first WordPress site, created in 2013, was a business directory without any dedicated plugins.
I recall when the creators of WP GeoDirectory, Paolo Tajani, and Stiofan O’Connor, forked the “GeoPlaces” theme from Templatic and fixed all its issues.
They enhanced its performance and subsequently introduced GeoTheme over 10 years ago.
Later, adapting to the evolving WordPress ecosystem and drawing from their experiences, they shifted from theme development.
Building on its foundation, they crafted the GeoDirectory plugin, which facilitates the creation of directory sites of nearly any kind.
I’ve tested most of the plugins and themes for WordPress that allow for the creation of a directory website.
Both the aforementioned entry and my 11 years of experience confirm that WP GeoDirectory is the best plugin for this purpose.
Step-by-step guide on how to create a directory website using the Divi theme and the GeoDirectory plugin
Let’s see how we can build a Directory Website with GeoDirectory and the Divi theme in detail.
In this tutorial, we will:
Table of Contents
- How to Create a Directory Website with Divi theme?
- Installing Theme and Plugins.
- Design the Divi Directory Website
- Maximize Your Divi Directory Potential with DiviGeo
- Adding premium features to your Divi Directory Website
Installing Theme and Plugins.
1. Install the Divi theme
First, you will need to install a Divi Theme
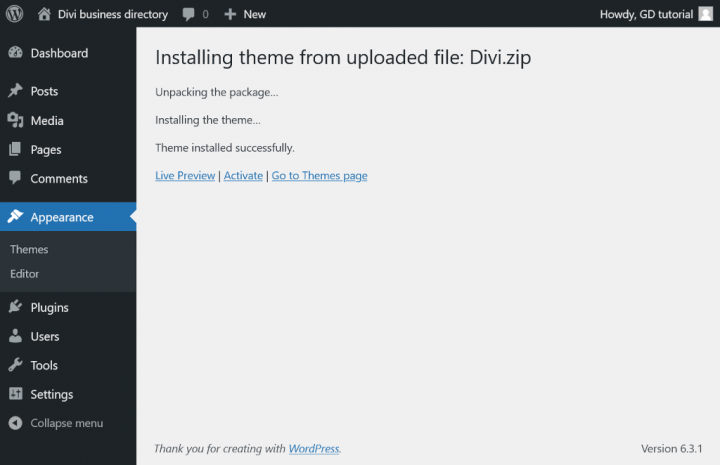
Go to Appearance >> Themes >>
Select Add New, Upload Theme, Install, and Activate the Divi Theme.
2. Install GeoDirectory
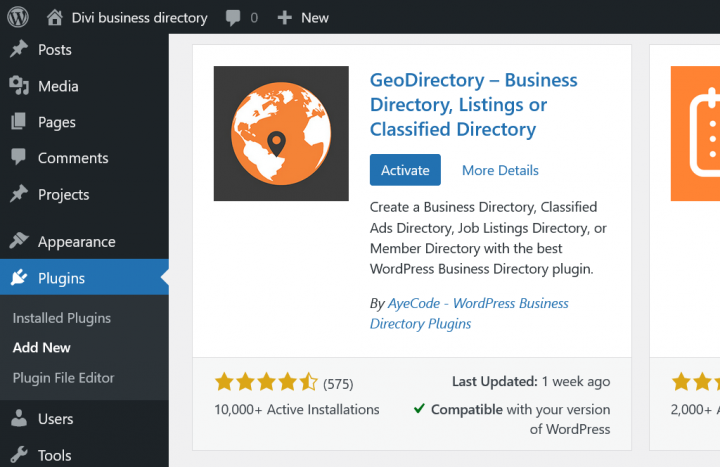
Now you need to install the GeoDirectory plugin.
Go to Plugins >> Add new, search GeoDirectory. Please install and activate it.
Done, once the Divi theme and GeoDirectory plugin are active, we can move on to the next step.
3. GeoDirectory Install Wizard
If you appreciate Divi Builder for its simplicity, you’ll surely appreciate the Setup Wizard built into the Geo Directory plugin.
Choosing the Map System (Google Maps or OpenStreetMap)
Now you have to complete the Setup Wizard to configure. You can choose between two mapping systems on the wizard’s first step. Google Maps and Open Street Maps (which doesn’t require an API key).
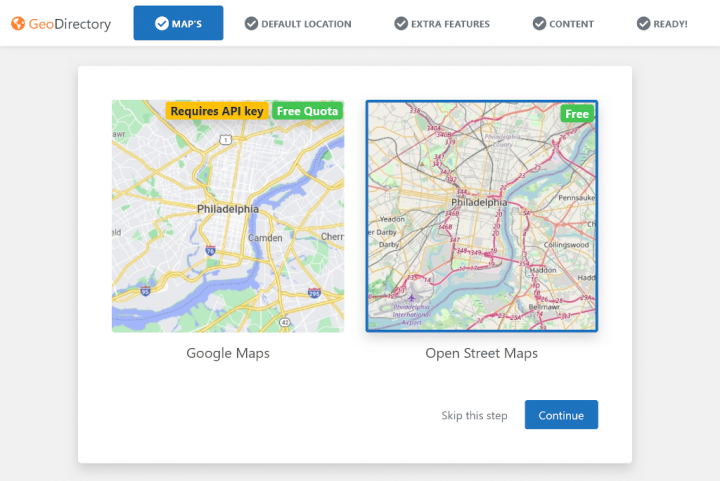
In this tutorial, we select OpenStreetMaps.
Select OpenStreetMap and click continue.
In case you wish to select Google Maps, do the following extra steps.
Click on the Generate Key button and follow the steps in this doc to generate a valid API key.
The essential steps are:
- Enable the Keys.
- Create or select an existing project.
- Get the Key.
- Activate a billing account.
- Restrict the API key (so it can only be used from the URL of your website)
About point four: it is a requirement. However, you only get charged if you pass the threshold, which is $200/month.
This free credit is more than enough for 99% of directories.
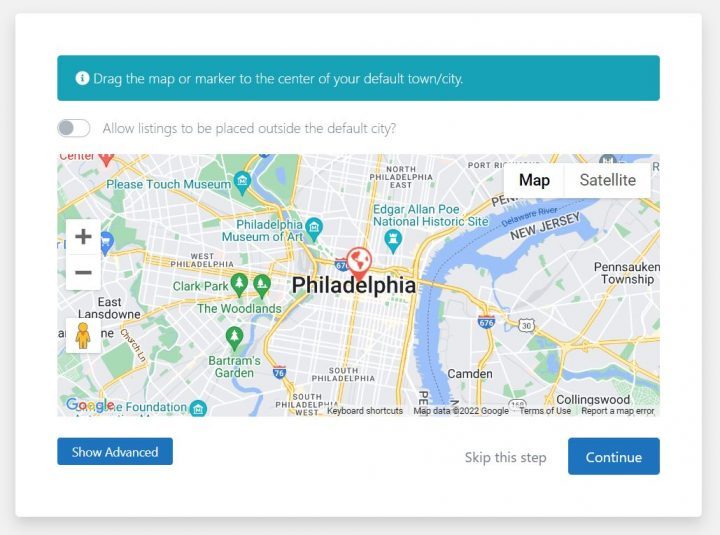
Setting the default city
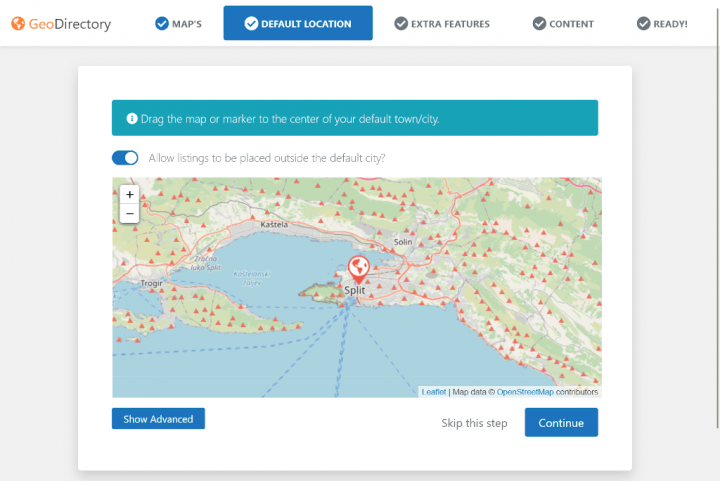
After that, you will set the default location. This is the city for which the directory is created. GeoDirectory uses Philadelphia as the default City.
Considering the niche I chose for this tutorial, we will set the default city to Split in Croatia.
You can drag the map marker to use whatever location you need, or use advanced settings by clicking “Show Advanced”.
If you need to add listings to more than one city, you will need the Location Manager add-on.
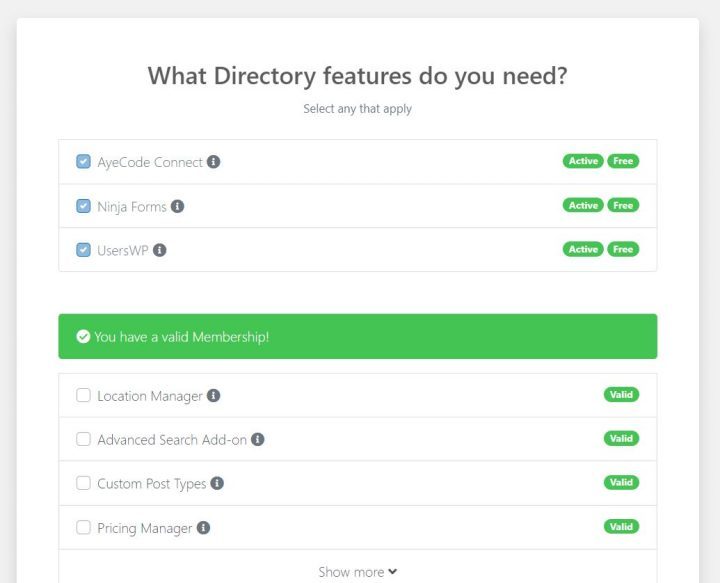
Adding extra features
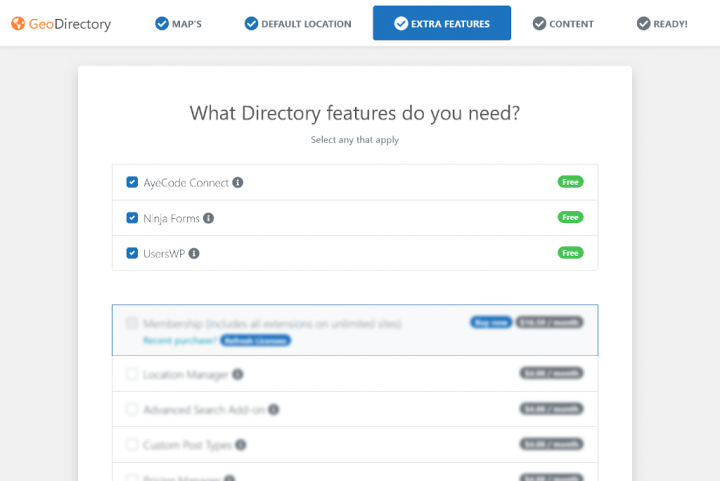
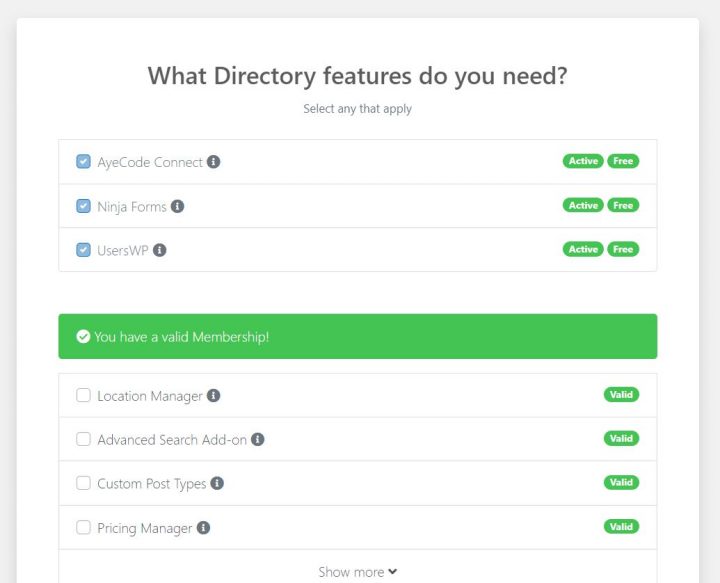
In this step, we will install our UsersWP, a user login plugin that lets users register and log into your website.
This is needed to allow users to add and edit their listings. It will also create user profiles where they can find their listings, reviews, and so on.
We will also install Ninja Forms so that all listings have a contact form that sends emails directly to the listing owners.
AyeCode Connect is not mandatory for this tutorial. It is mainly needed if you want to add GeoDirectory premium add-ons and install them directly from the WordPress Dashboard.
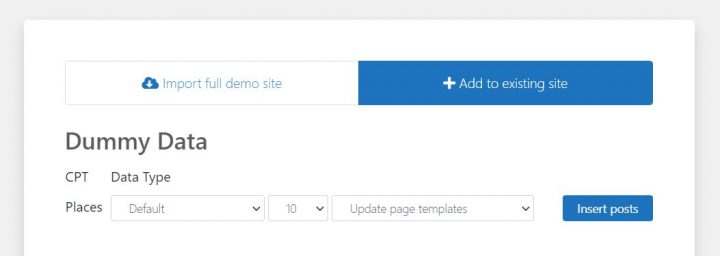
Adding Dummy Data
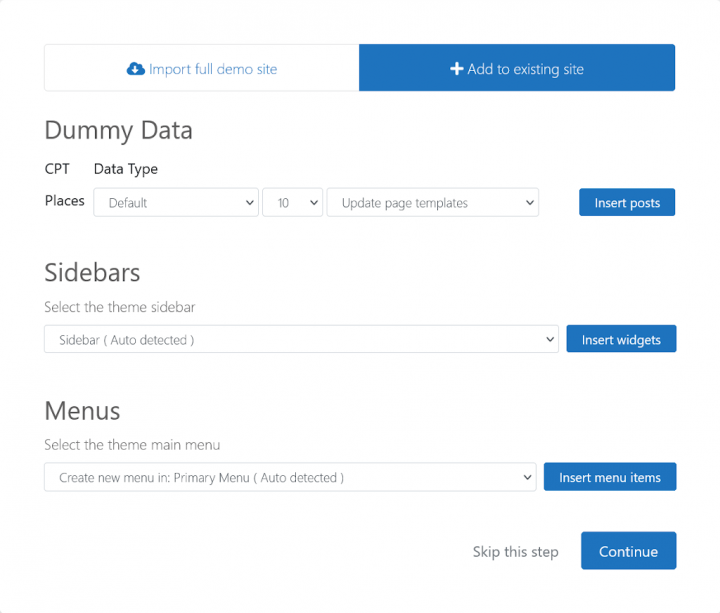
The last step to complete the installation wizard is adding some dummy listings. This will also add listing categories that you can edit later according to your needs.
You will not add sidebar widgets and menu items right now, as we will do that later.
Design the Divi Directory Website
Now that we installed the theme and the plugins and done the preliminary setup of GeoDirectory, we can start designing our Directory Website with the Divi Theme.
1. Divi Directory Website Home Page design
You can create a new page or use one WordPress creates by default, like the Sample Page.
Go to Pages, edit the Sample page, and rename it Home or create a new page for this.
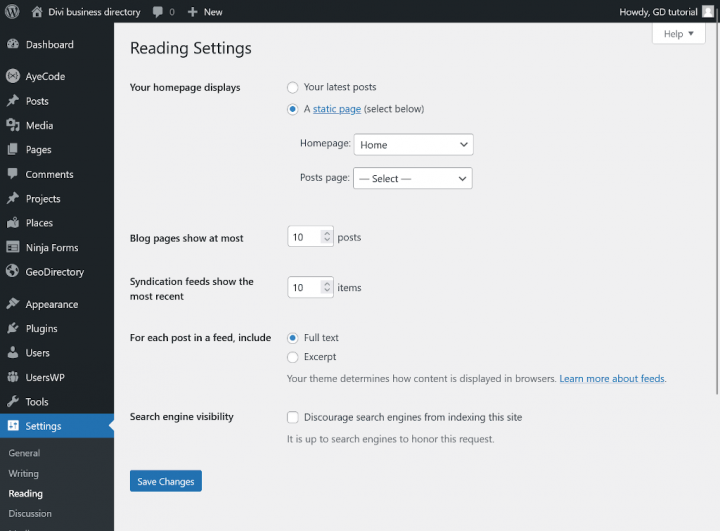
Next, go to Settings > Reading > Homepage Settings and select your Home.
We will select the Posts page later.
The Logo
Avoid spending on a designer for your initial logo.
Many make the mistake of investing heavily before assessing the market fit.
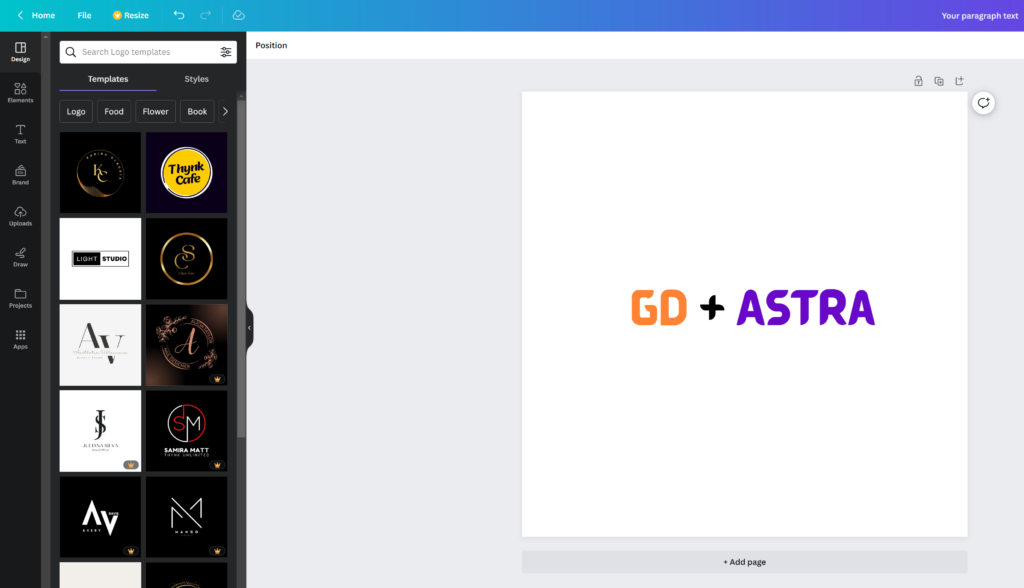
Use apps like Canva for quick, affordable, and quality designs.
For an MVP, a Canva-designed logo suffices.
While initial perfection isn’t crucial, you can enhance the logo if your project succeeds.
Remember, an average logo isn’t the reason for project failures.
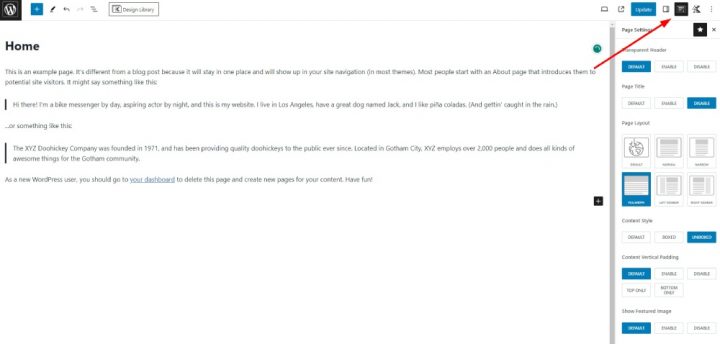
After designing your logo, go to Divi > Theme Options, click upload and select the logo you created with Canva.com.
Skip cropping (or crop the image as needed) and click Save changes in the upper-left corner of the screen.
The Navigation Menu
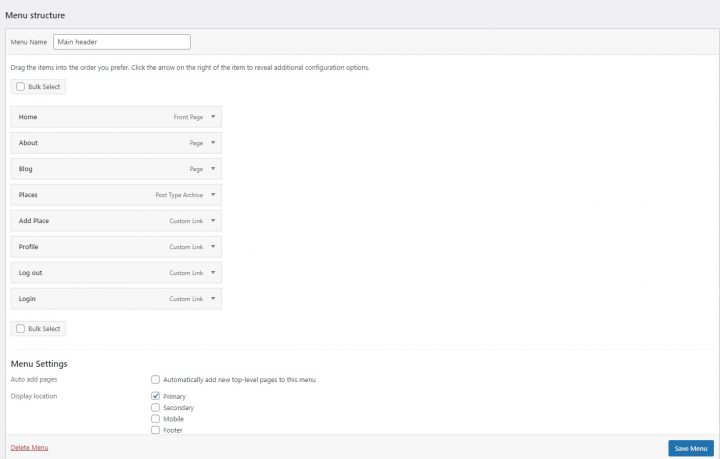
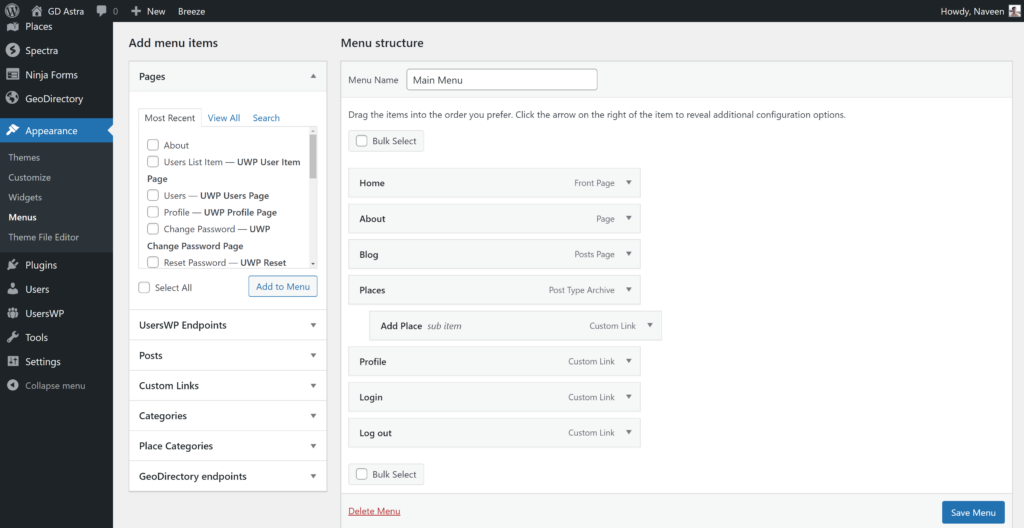
After creating and adding the logo, go to Appearance > Menus, and create your menu.
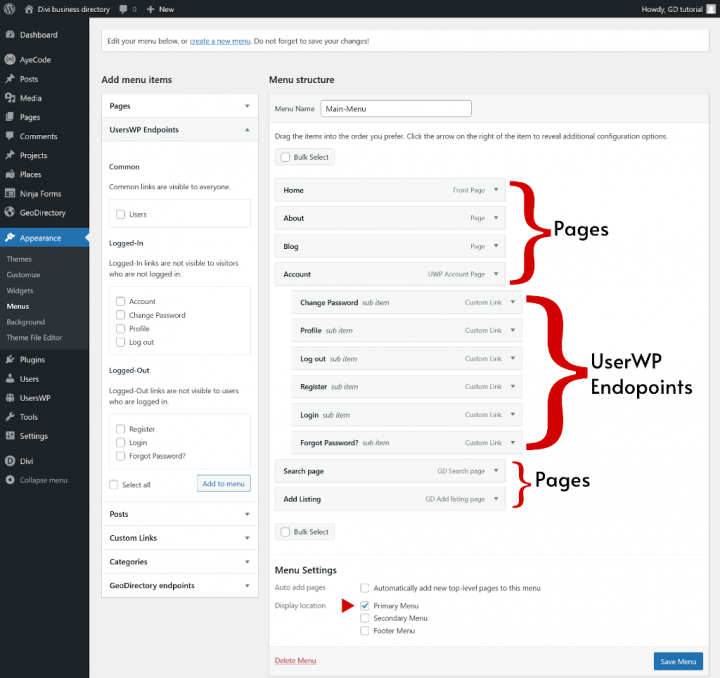
Add the links needed (from the left column to the right column) and save. In the Menu Settings > Display location section, you can check the “Primary Menu” option.
In this example, we’ll only have the header navigation menu.
We added twelve links:
- Home
- About
- Blog
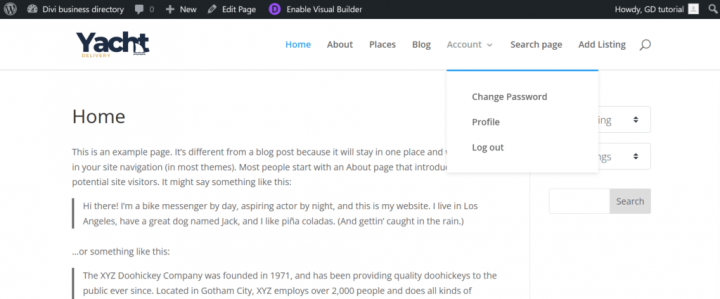
- Account
- Profile (Visible for logged-in users)
- Change Password (Visible for logged-in users)
- Log out (Visible for logged-in users.)
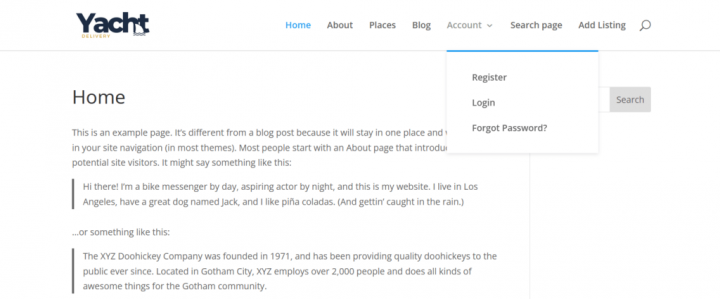
- Register (Visible for not logged in)
- Login (Visible for not logged in)
- Forgot Password? (Visible for not logged in)
- Search Page
- Add Listing
Links from UserWP Endpoints are dynamics, see parentheses above.
The Content
The Divi theme offers over 330 pre-made Layout packs.
For the purposes of this tutorial, I will choose a ready-to-use layout that allows for the creation of an attractive business directory without the tedious task of styling Divi modules.
For this tutorial, I chose premade Charter Divi Layout Pack.
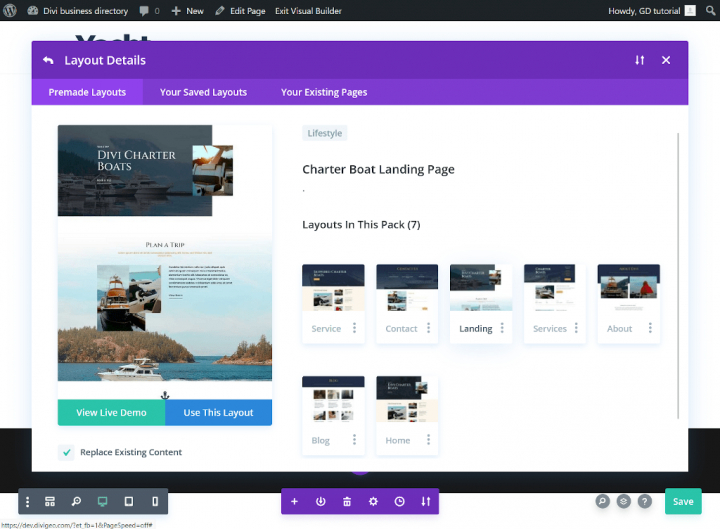
Go to your homepage, click ‘Enable Visual Builder’, and then click ‘Browse Layouts’.
In the premade Layout library, select the ‘Charter Boat Landing Page’ and click ‘Use This Layout.
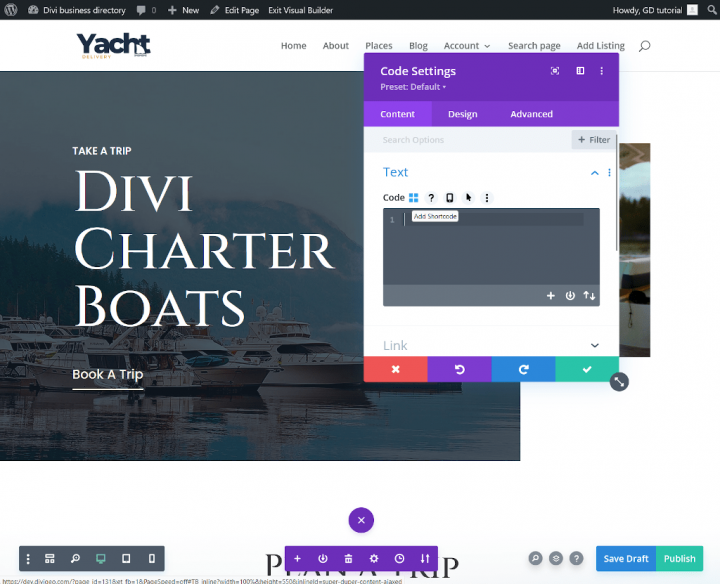
After the second text module, add the code module and click Add Shortcode.
Divi does not allow the use of Gutenberg blocks, but the creators of the GeoDirectory plug-in have implemented shortcode generator.
Thanks to which, you can easily add dynamic widgets using the Divi Code module.
So, the shortcode generator feature is your friend when creating a directory website in Divi.
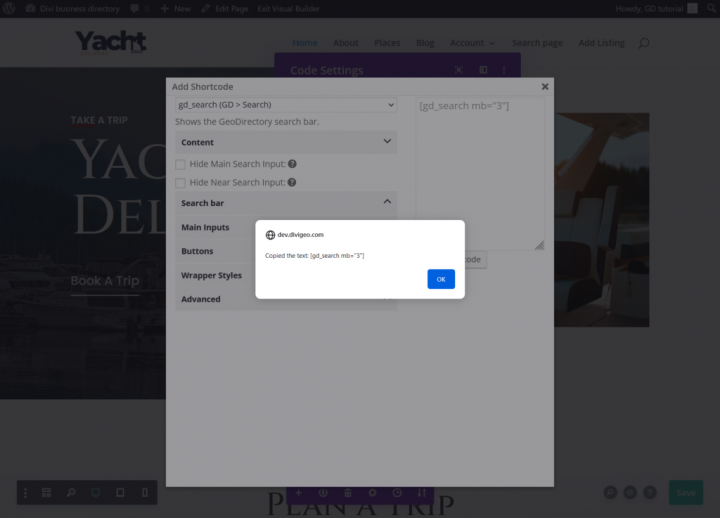
Select “gd_search “(GD > Search)” from the drop-down list and click Copy shortcode.
The copied shortcode is in the clipboard. Paste the copied code into the code module. And click on the check mark icon.
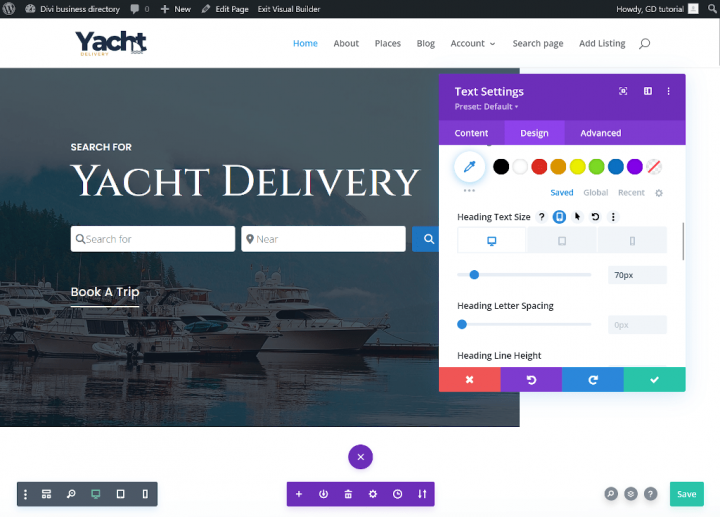
Change the first text module content to “Search for”.
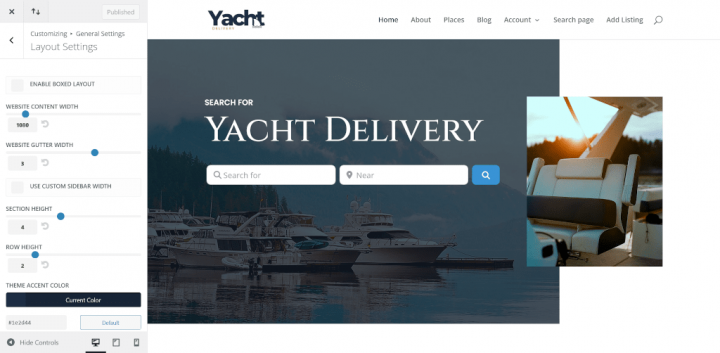
Change the header content in the content tab to Yacht Delivery. In the Design tab, change the h1 header font size to 70px and click the check mark.
Remove the “Book a Trip” button module.
So now our Hero section is completed.
In the next section, from the predefined Divi landing page template, change the content of the H2 header to “Listings Categories”.
Remove the text module under the heading (gold font) or change the content to your own, I will leave the Lorem Ipsum fragments to make the website design more interesting.
Delete the two-column row with photos and text, then add a new row with a code module. When adding, click ‘Add Shortcode’ in the same manner as you did for the search form.
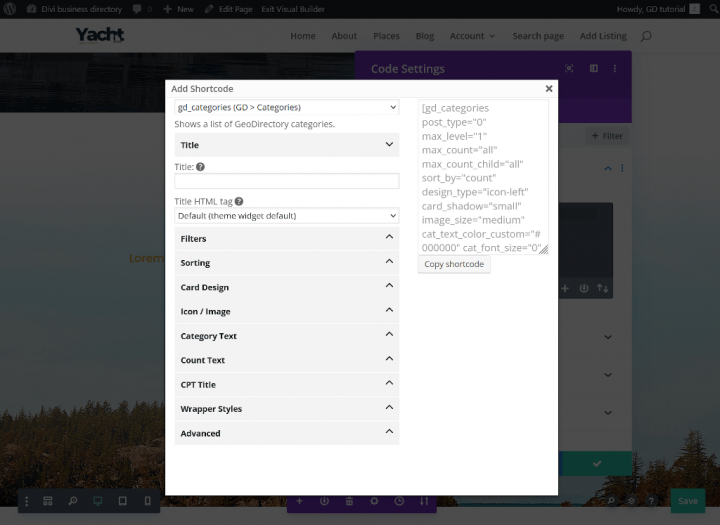
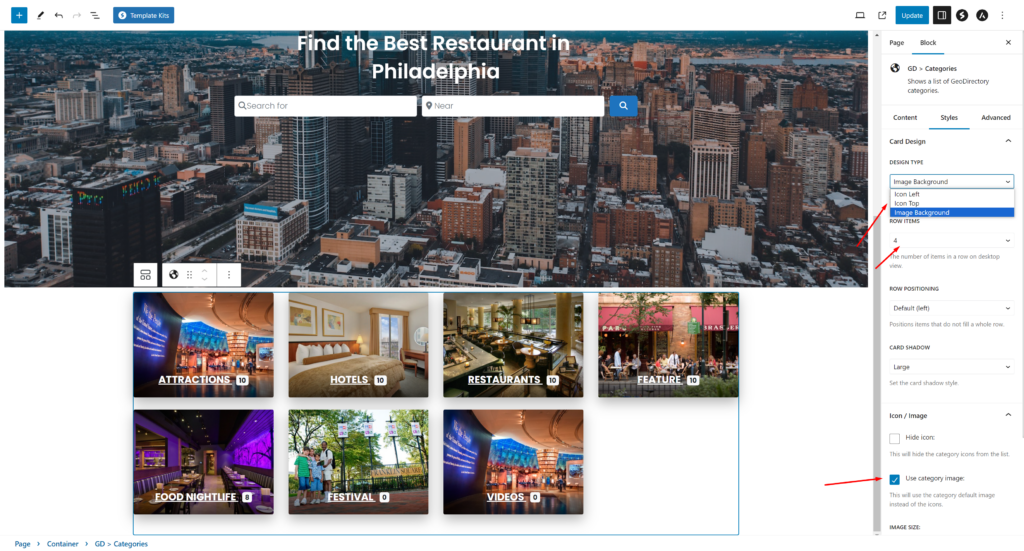
Select “gd_categories “(GD > Categories)” from the drop-down list.
The options I changed in the shortcode generator to achieve the appearance of the category columns as shown below:
Filters tab:
Max cats to show per CPT: 3
Mark: Hide Empty
Card Design Tab:
Design Type: Image Background
Row positioning: Center
Card shadow: Large
Icon / Image Tab:
Mark: Use category image
Image size: Large
You can also copy the shortcode below and paste it into the code module.
Generated shortcode:
[gd_categories post_type="0" hide_empty="1" max_level="1" max_count="3" max_count_child="all" sort_by="count" design_type="image" row_positioning="center" card_shadow="large" use_image="1" image_size="large" cat_text_color_custom="#000000" cat_font_size="0" badge_text_color_custom="#000000" badge_color="light" badge_font_size="0" title_tag="h4" mb="3"]

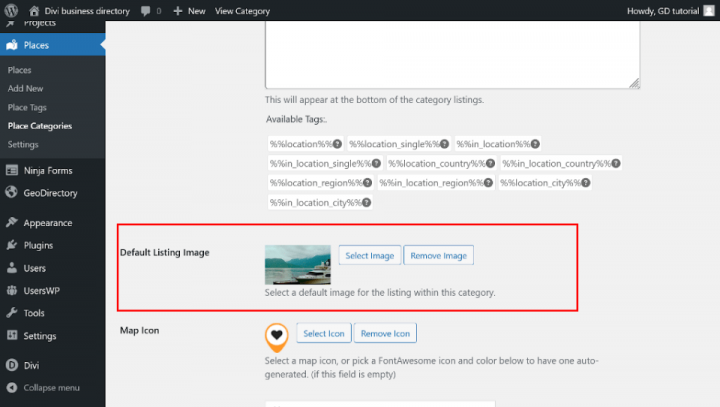
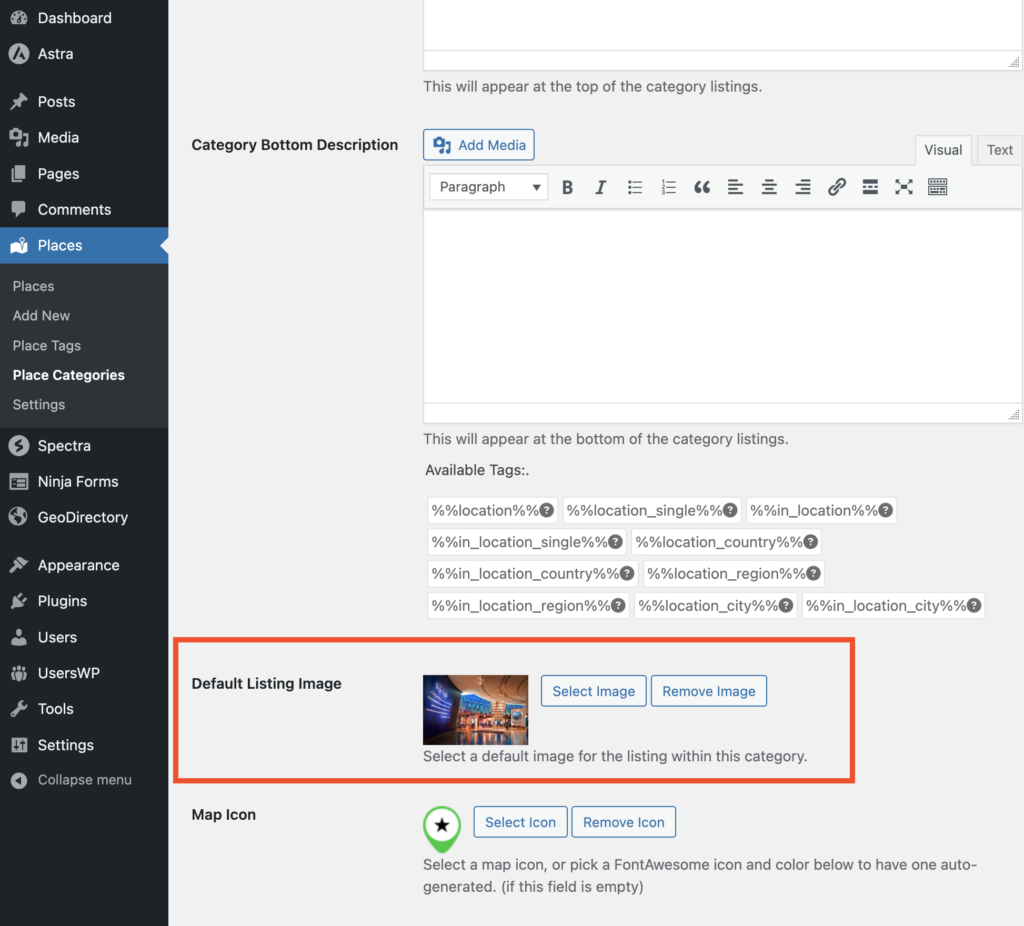
You can set the image to a category by editing the category from wp-admin -> places -> Place Categories.
Each category has an option to set a default image.
I also changed the category names to match the niche I chose for this tutorial.
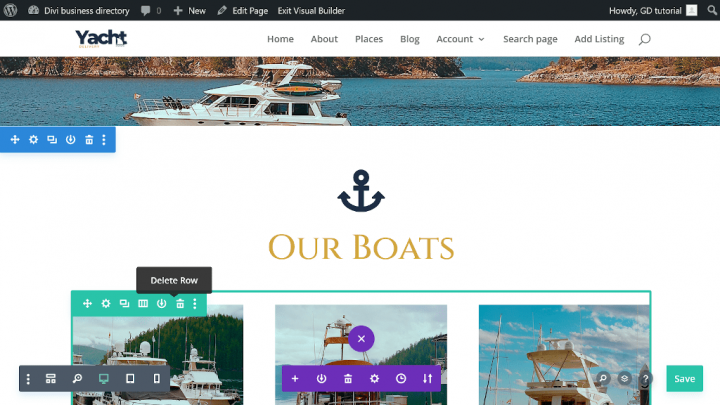
We will use the next section to show the latest entries.
Change Our boats heading to the Latest Yacht providers. Delete the row after the heading and add a new section with Divi code module.
Similarly to the search form and categories, we need to generate a shortcode that will show the latest listings.
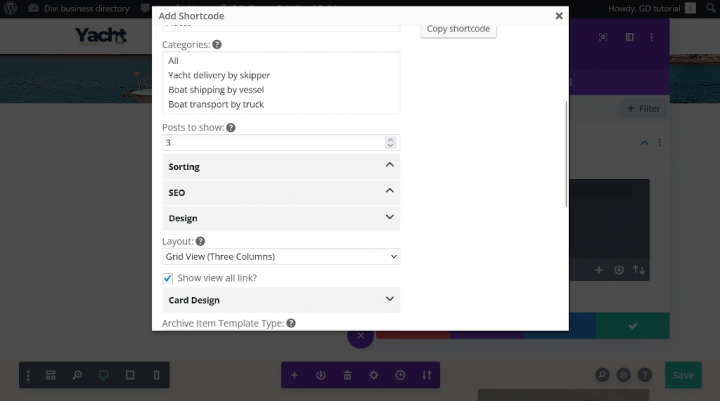
Select “gd_listings “(GD > Listings)” from the drop-down list.
The options I changed in the shortcode generator to achieve the appearance as shown below:
Filters tab:
Posts to show: 3
Design Tab:
Layout: Grid View (three Columns)
You can also copy the shortcode below and paste it into the code module.
Generated shortcode:[gd_listings post_type=”gd_place” post_limit=”3″ add_location_filter=”1″ sort_by=”az” title_tag=”h3″ layout=”3″ view_all_link=”1″ bottom_pagination=”1″ slide_interval=”5″ mb=”3″]
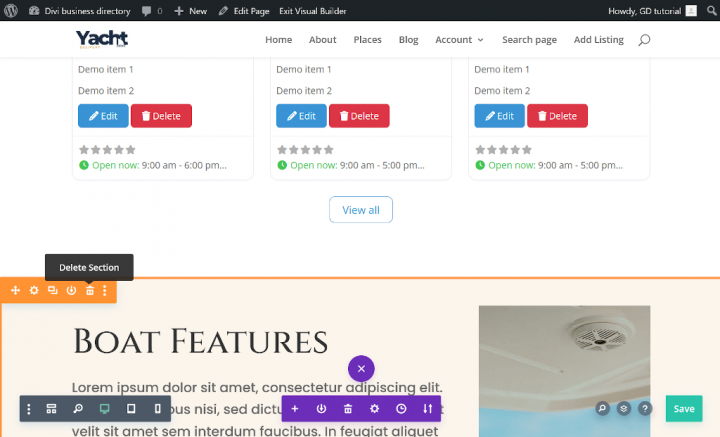
This section will not be needed, so delete it.
The next section will serve as our CTA section. Change the text to “Do you provide Yacht Delivery services?” In the design tab of the text module, change the size of the h2 header to 60px.
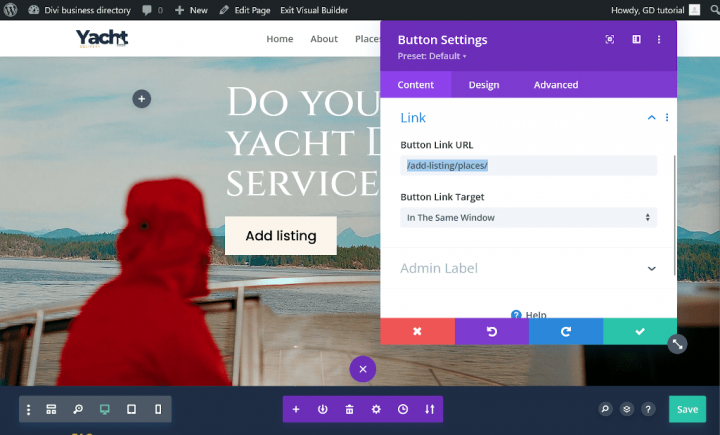
Edit button module text to add listing and set link to “/add-listing/places/”.
You can remove the next “FAQ” section, but I won’t, to make the project look more interesting.
I recommend populating the FAQ section with content related to the niche for which you are creating a business directory.
The more thematic content, the better for optimizing your website in search engines.
Similarly, with the next section, I will remove it in this guide, but you can use it to optimize your website for search engines.
I won’t remove the reviews section for a better homepage design. You can do as you wish.
Create Global footer
The homepage of the Divi Directory website is complete. Now, let’s create a global footer for our site.
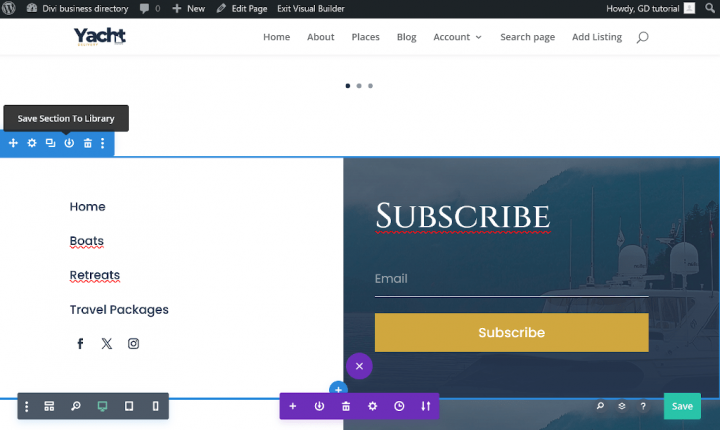
Click save Section to library icon, in the section name field, write “global-footer” and click save to library. After all, Save Your Homepage layout with the Save button In the lower-right corner of the screen.
Delete the section we saved in the Divi library and save the project again.
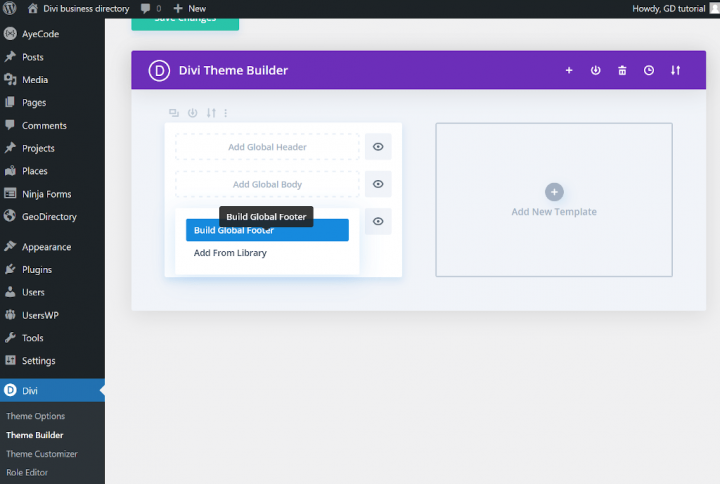
Go to the WordPress dashboard, then click on Divi > Theme Builder, click Add Global Footer and select Build Global Footer.
Insert a new section, click Add From Library, choose the section we created before and click Use This Section.
The global footer section is built with photo, four text modules and social icons modules.
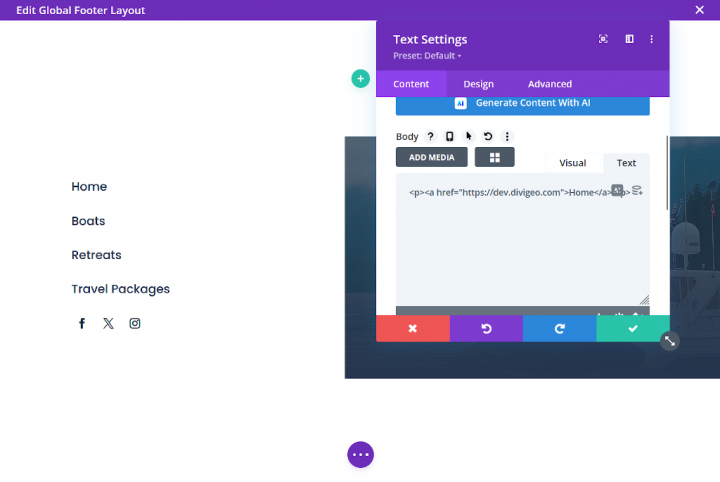
Change the content and links of text modules. I will use text modules to re-present the categories of my business directory on the website for easier navigation.
Enter the appropriate links in the Social Media Follow module.
Delete the empty section and save the global footer, then click close in the upper-right corner of the screen.
Very important: when you return to the Divi theme Builder, click the Save Changes button.
The home page and global footer of the directory website are done.
Divi Directory Website Listings and Search page design
Now you need to design two pages that are essential for any directory.
The listings page (general archive, categories, tags), and the search results page.
GeoDirectory creates them by default, but in this tutorial, we will make minor changes to the default pages.
We have to add a map, as well as a Text Module with a dynamic title.
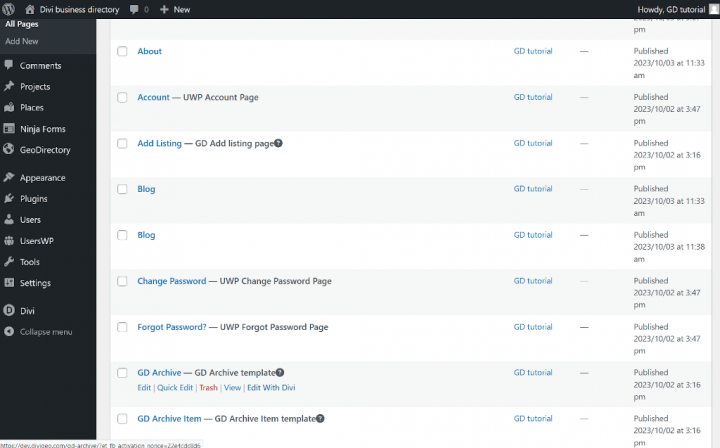
Go to the ‘All Pages’ tab in the WordPress dashboard, find the ‘GD Archive’ page, click ‘Edit With Divi’, and then edit the existing content.
Delete the text module, add the two code modules.
Now, use the shortcode generator in the same way you did for generating shortcodes for categories or recent listings.
From the dropdown list, select, copy and paste the following shortcodes in order:
GD > Map
GD > Notifications
GD > Search
GD > Loop Action
GD > Loop
GD > Loop paging
You can also paste the following shortcodes to code module.
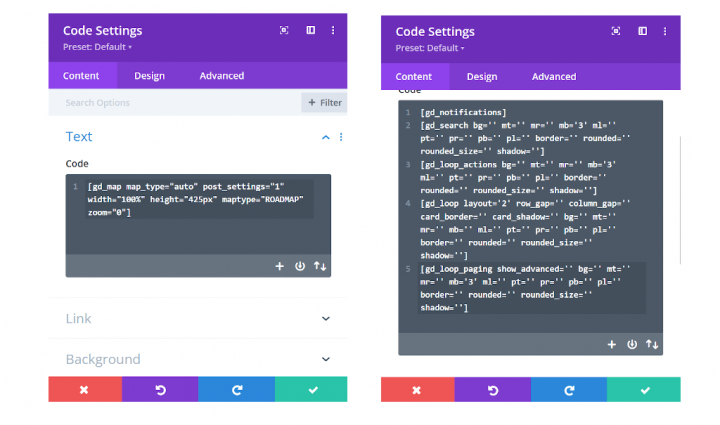
In the first code module, we need to add the shortcode responsible for the map:
[gd_map map_type="auto" post_settings="1" width="100%" height="425px" maptype="ROADMAP" zoom="0"]
Second code module:
[gd_map map_type="auto" post_settings="1" width="100%" height="425px" maptype="ROADMAP" zoom="0"] <br>
[gd_notifications]
[gd_search bg=” mt=” mr=” mb=’3′ ml=” pt=” pr=” pb=” pl=” border=” rounded=” rounded_size=” shadow=”]
[gd_loop_actions bg=” mt=” mr=” mb=’3′ ml=” pt=” pr=” pb=” pl=” border=” rounded=” rounded_size=” shadow=”]
[gd_loop layout=’2′ row_gap=” column_gap=” card_border=” card_shadow=” bg=” mt=” mr=” mb=” ml=” pt=” pr=” pb=” pl=” border=” rounded=” rounded_size=” shadow=”]
[gd_loop_paging show_advanced=” bg=” mt=” mr=” mb=’3′ ml=” pt=” pr=” pb=” pl=” border=” rounded=” rounded_size=” shadow=”]
Now, above the Divi code modules section, we need to add a new section with a Divi Heading Module.
To display the title of the archive pages, we will use Divi’s built-in option for displaying dynamic content.
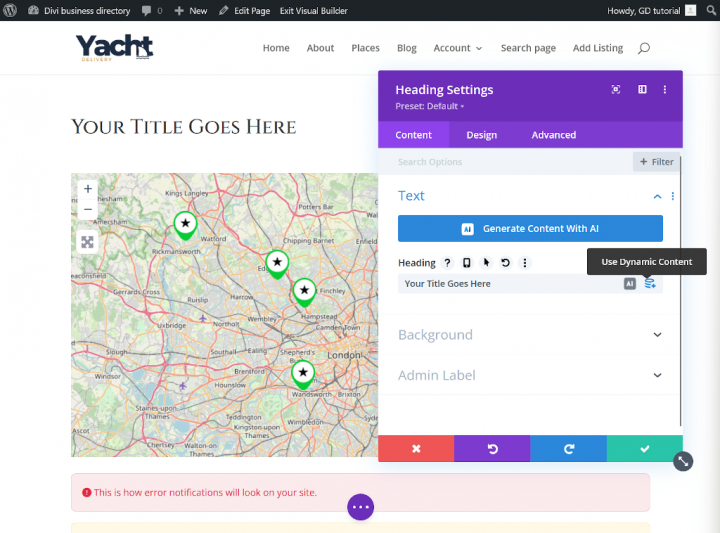
In the content tab, hover over the heading field and click Use Dynamic content on the right. Select Page/Archive Title from the drop-down list.
Click check mark and save Your GD Archive Divi layout.
Search page
For the search page, we repeat a similar process, but as with creating the footer, we will use the Divi Theme Builder.
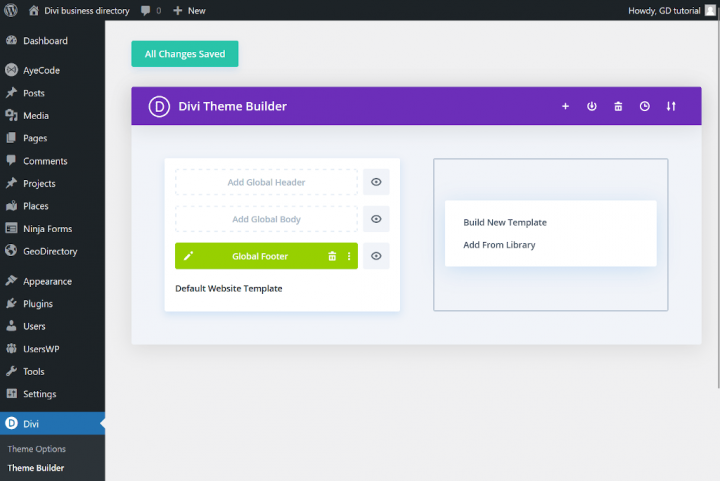
From the WordPress dashboard, navigate to Divi > Theme Builder. Click Add new template and then Build New Template.
You’ll see the Template settings. Under the Use on tab, find the Other section and select GD Search Results Page and click Create Template.
You’ll see a new Template responsible for the GD Search page.
Add Custom Body click Add from library in Your Existing page tab Click on GD Archive Layout and then use this Layout.
Click on the pencil icon and edit the Custom body. You do not have to do anything, just save Layout and save changes in Divi Builder Theme.
Just one more step and your directory website built with Divi will be fully functional.
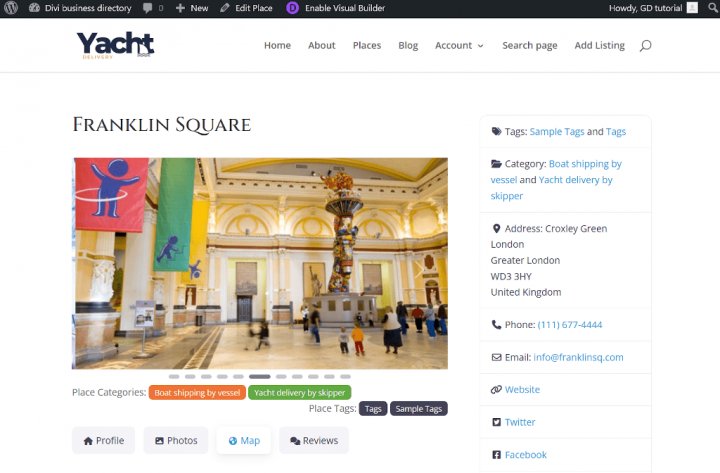
Single listing page
A single listing page is responsible for displaying a single entry in your directory website.
Similar to the GD archive and Gd Search page, the page template was created by the GD install wizard.
Go to pages in Your WordPress dashboard and edit with Divi GD Details page.
Delete content and add two columns row as shown in the image below.
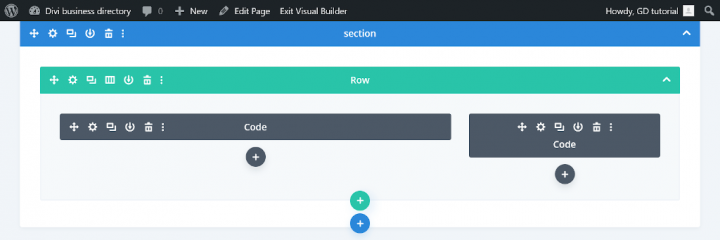
In the left code module, we will add shortcodes responsible for the post content and gallery.
In the right code module, we will add shortcodes that will be responsible for displaying post details such as phone number, address, social media links, and others.
You know how to use the shortcode generator, so generate, copy, and paste the following shortcodes. I have also prepared ready-to-copy shortcodes below.
Code module on the left
[gd_post_images title='' types='' fallback_types='' ajax_load='true' limit='' limit_show='' css_class='' type='slider' slideshow='true' controlnav='1' animation='slide' show_title='true' show_caption='true' image_size='' aspect='' cover='' link_to='' link_screenshot_to='' bg='' mt='' mr='' mb='' ml='' pt='' pr='' pb='' pl='' border='' rounded='' rounded_size='' shadow='' ]
[gd_single_taxonomies taxonomy=” prefix=” link_style=” link_color=” link_color_custom=” link_icon=’false’ mt=” mr=” mb=’2′ ml=” pt=” pr=” pb=” pl=” ]
[gd_single_tabs show_as_list=’false’ output=” tab_style=” disable_greedy=’false’ ]
[gd_single_next_prev bg=” mt=’4′ mr=” mb=’3′ ml=” pt=” pr=” pb=” pl=” border=” rounded=” rounded_size=” shadow=” ]
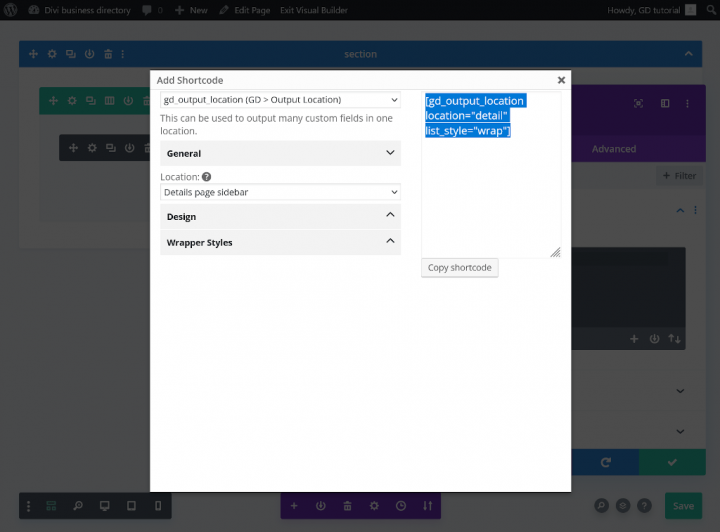
Code module on the right
[gd_output_location location="detail" list_style="wrap"]
Almost done!
Now, similar to when creating the GD archive page template, we need to add a Heading module that will be responsible for displaying the dynamic listing tittle.
Add a new Divi Heading module in the first column above the code module and set the Dynamic title as Page/Archive Title.
Click the check mark and save your layout. The single post page will look as follows.
Fine-tuning your Divi directory site
Your Divi directory website is almost ready, now we have set some options, tune up Your website.
Colors and Typography
The main color I chose for this website is a shade of navy blue. Hex code: #1e2d44.
Go to Theme Customizer > General Settings > Layout settings and change Divi theme accent color to: #1e2d44.
Now we have to change GeoDirectory plugin primary color.
In the theme customizer, click on AyeCode UI and set the primary color to: #1e2d44.
Now we need to set the global font. Go to Theme Customizer > General Settings > Typography and change the Header font to Cinzel.
As you can see, the font of the headers generated by WpGeodirectory did not change to the Cenzel font.
Go to the Additional CSS tab in the Theme customizer and paste the following CSS code.
h1, .h1, h2, .h2, h3, .h3, h4, .h4, h5, .h5, h6, .h6 {
  font-family: 'Cinzel', Georgia, "Times New Roman", serif!important;
}
Change BootStrap Version
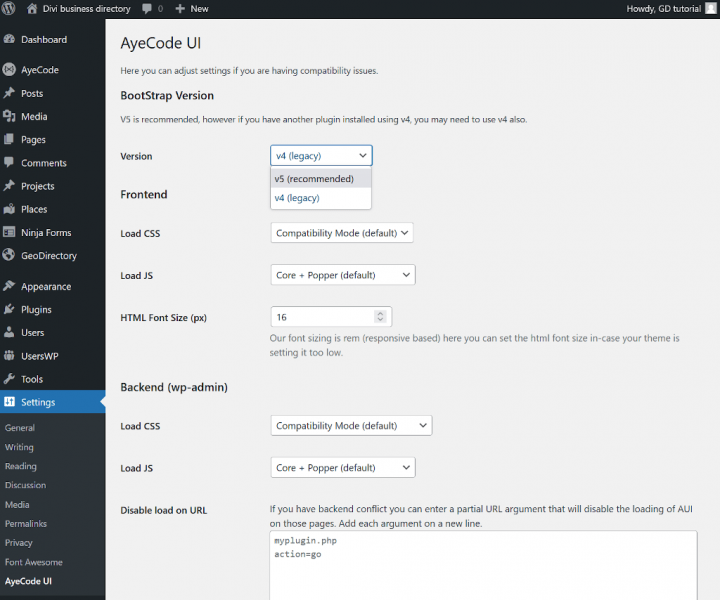
In the WordPress dashboard, click on Settings and AyeCode UI and change Version to BootStrap V5 and save.
Your Divi Directory website is done.
Maximize Your Divi Directory Potential with DiviGeo
This is a simple method to build a directory with GeoDirectory and Divi.
If you prefer not to tackle this project alone, or require something more sophisticated, don’t hesitate to reach out to me.
Visit my website, consider purchasing one of my pre-designed Divi Business GeoDirectory child theme DiviGeo, or hire me to create a unique website tailor-made for your needs.
Adding premium features to your Divi Directory Website
If you wish, now you can add premium features to your directory, such as:
- Paid Listings: with the GeoDirectory Listing Price Manager add-on, you can set prices for listing submission. For each price tier, you can enable/disable features such as: Restricting the number of pictures for free listings while allowing more pictures for paid listings. Allowing more or fewer tags and categories. Enabling or disabling specific custom fields. Submitting longer or shorter descriptions.
- Claim Listings: This is a fundamental feature for a directory, where the admin creates the database and invites business owners to take control of their free listings. The claim listing process may include forcing an upgrade to a paid listing to take over the listing’s ownership.
- Advertising: selling ads is another form of monetizing an online directory. If you have a lot of traffic, you can use Ads networks. Otherwise, you may sell ads directly, allowing businesses to add banners in specific areas of your website or allowing for listings to appear as ads, for example, on top of organic search results.
These are just three examples. However, a directory website offers many ways to make money online.
You can create a global marketplace of handcrafted items, or sell event tickets, or sell discount coupons.
Gain insights into the building process with these tips: Building a directory website: Tips and tricks.
The possibilities are Extensive.
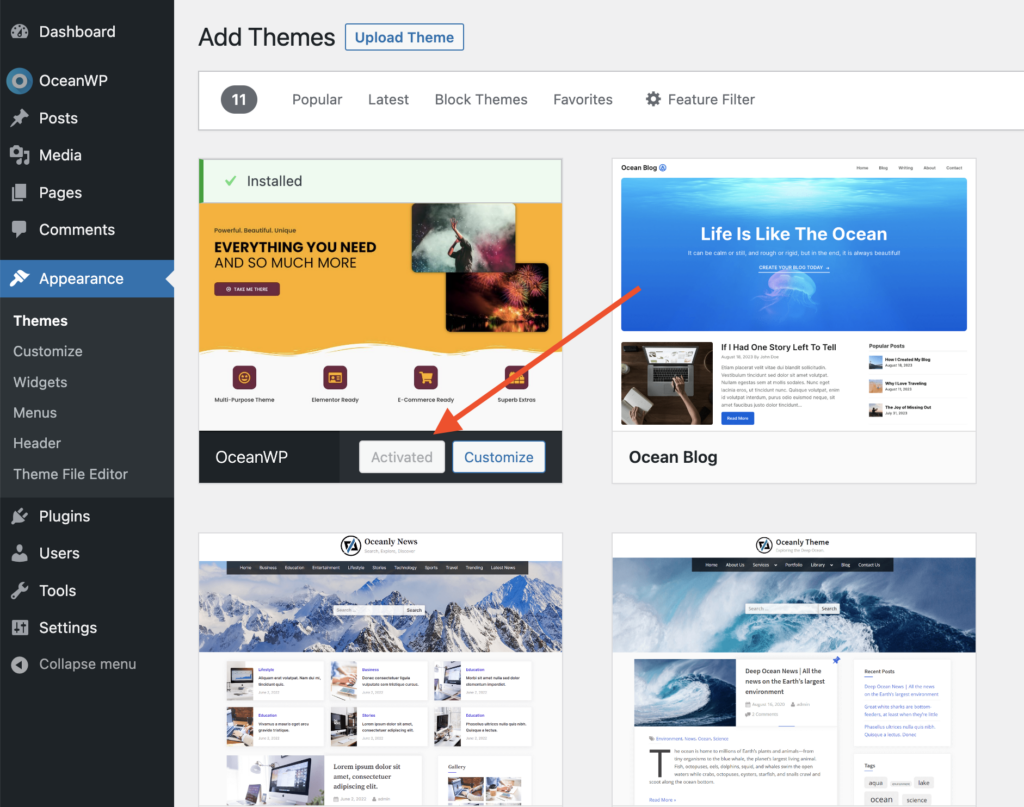
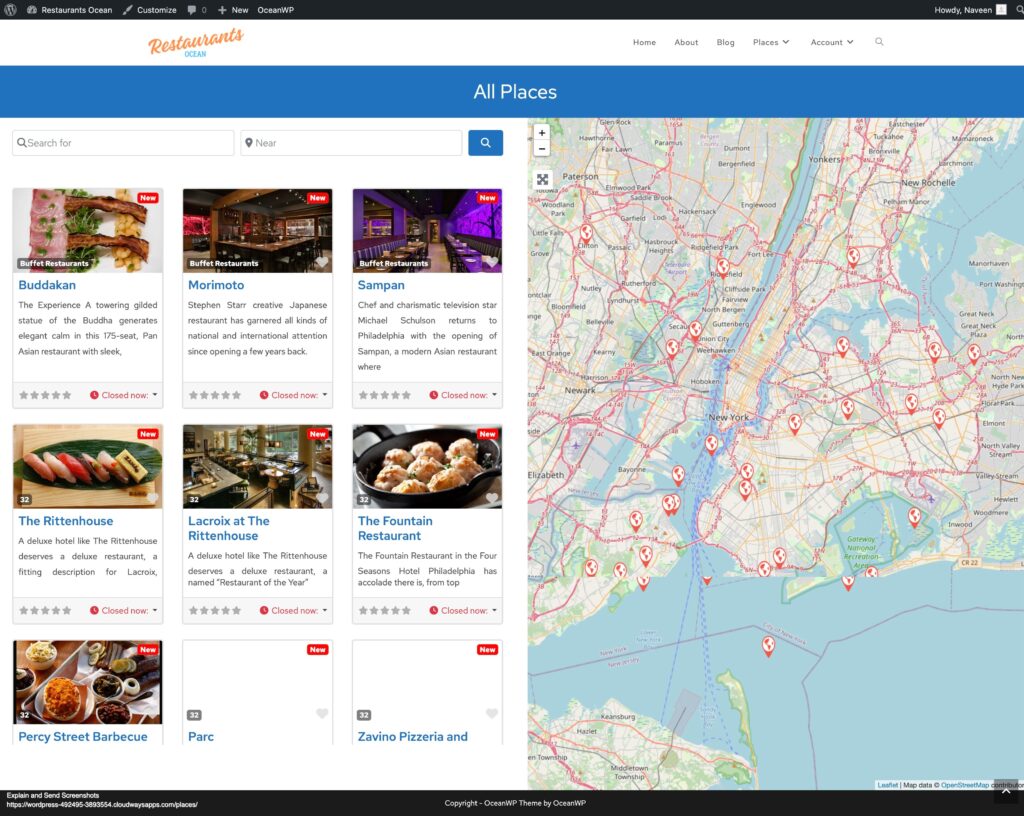
How to Create a Directory Website with OceanWP?
Here’s a step-by-step guide to building a Directory Website using the OceanWP theme:
- Install the OceanWP theme
- Install and setup GeoDirectory
- Install the Spectra Gutenberg Blocks Plugin
- Design the Directory Website using the OceanWP theme and the Gutenberg Editor
OceanWP Theme in combination with the GeoDirectory Plugin and a Gutenberg Blocks Plugin, offers a robust and flexible solution for crafting a dynamic online directory.
This trio allows users to seamlessly integrate location-based features, customize layout designs, and incorporate interactive content blocks, ensuring an intuitive and engaging user experience.
With this integrated approach, web developers and designers can easily achieve a professional-grade directory site tailored to specific niche markets or broader community needs.
Let’s see how we can do that in detail.
In this tutorial, we will:
Installing Theme and Plugins.
1. Install the OceanWP Theme
We need to install a Theme, and for this tutorial, you will install the OceanWP Theme.
Go to Appearance >> Themes
Select Add New, Install, and Activate the OceanWP Theme.
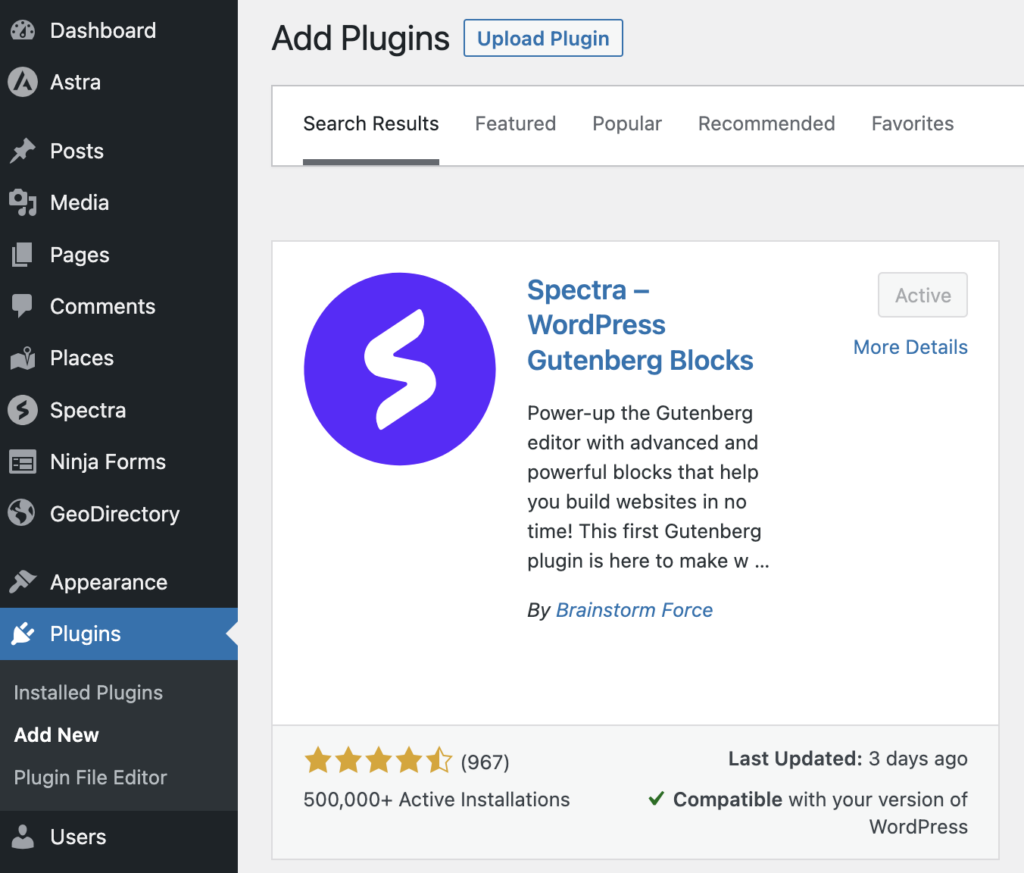
2. Install Spectra Blocks plugin
The default Gutenberg plugin is not enough to style a template so we will install the Spectra Blocks plugin. (check out this tutorial if you want to create a directory website with the Astra Theme and the Spectra Plugin instead)
This plugin provides customized Gutenberg blocks which are better than the default blocks and will help you design the page templates.
Go to Plugins >> Add new.
Search for Spectra Blocks. Install it and Activate it.
You can Skip all steps of the Setup Wizard.
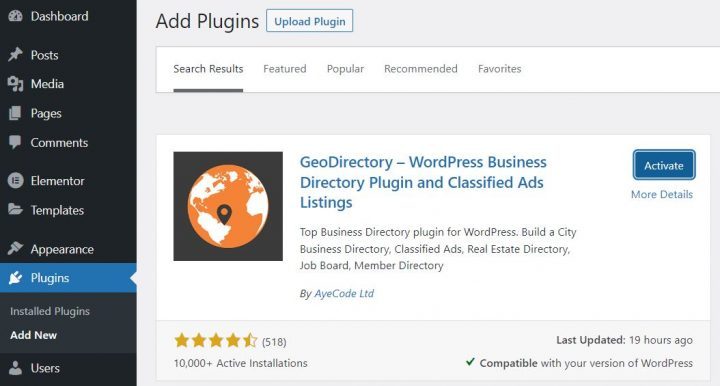
3. Install GeoDirectory
Finally, you need to install GeoDirectory.
Go to Plugins >> Add new, search GeoDirectory. Please install and activate it, and we finished installing the plugins.
4. GeoDirectory Install Wizard
For GeoDirectory, you will need to complete the Setup Wizard to configure the Google Maps API key and import a few dummy listings.
Choosing the Map System (Google Maps or OpenStreetMap)
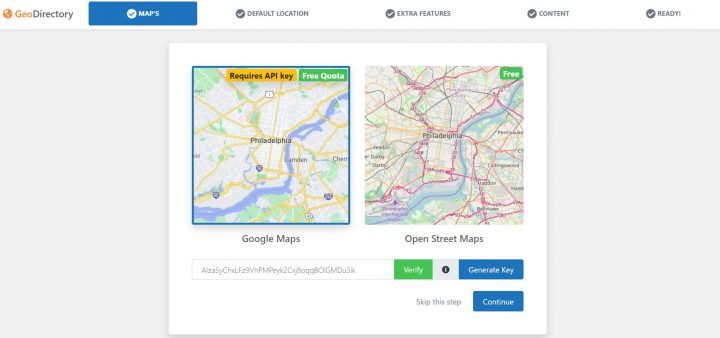
You can choose between two mapping systems on the wizard’s first step. Google Maps and Open Street Maps (which doesn’t require an API key).
In this tutorial, we select OpenStreetMaps.
In case you wish to select Google Maps, do the following extra steps.
Click on the Generate Key button and follow the steps of this doc to generate a valid API key.
The essential steps are:
- Enable the Keys.
- Create or select an existing project.
- Get the Key.
- Activate a billing account.
- Restrict the API key (so it can only be used from the URL of your website)
About point four: it is a requirement. However, you only get charged if you pass the threshold, which is $200/month.
This free credit is more than enough for 99% of directories.
Setting the default city
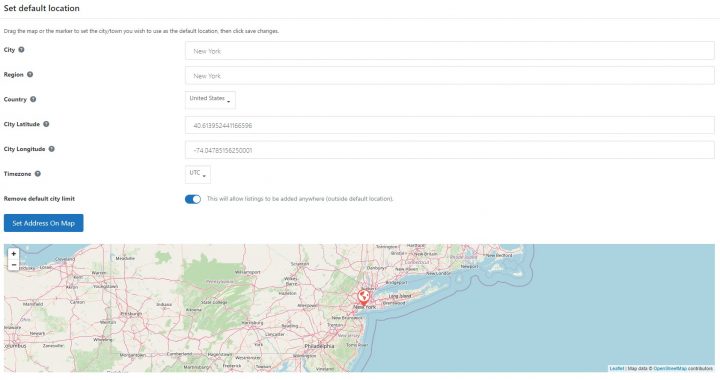
After that, you will set the default location. This is the city for which the directory is created.
We will set New York as the default city.
You can use whatever location you need.
If you need to add listings to more than one city, you will need the Location Manager add-on.
Adding extra features

In this step, we will install our UsersWP, a user login plugin that lets users register and log into your website.
This is needed to allow users to add and edit their listings. It will also create user profiles where they can find their listings, reviews, and so on.
We will also install Ninja Forms so that all listings have a contact form that sends emails directly to the listing owners.
AyeCode Connect is not mandatory for this tutorial. It is mainly needed if you want to add GeoDirectory premium add-ons and install them directly from the WordPress Dashboard.
Adding Dummy Data

The last step to complete the installation wizard is adding some dummy listings. This will also add listing categories that you can edit later according to your needs.
You will not add sidebar widgets and menu items right now, as we will do that later.
Design the OceanWP Directory Website
Now that we installed the theme and the plugins and done the preliminary setup of GeoDirectory, we can start designing our Directory Website with the OceanWP Theme.
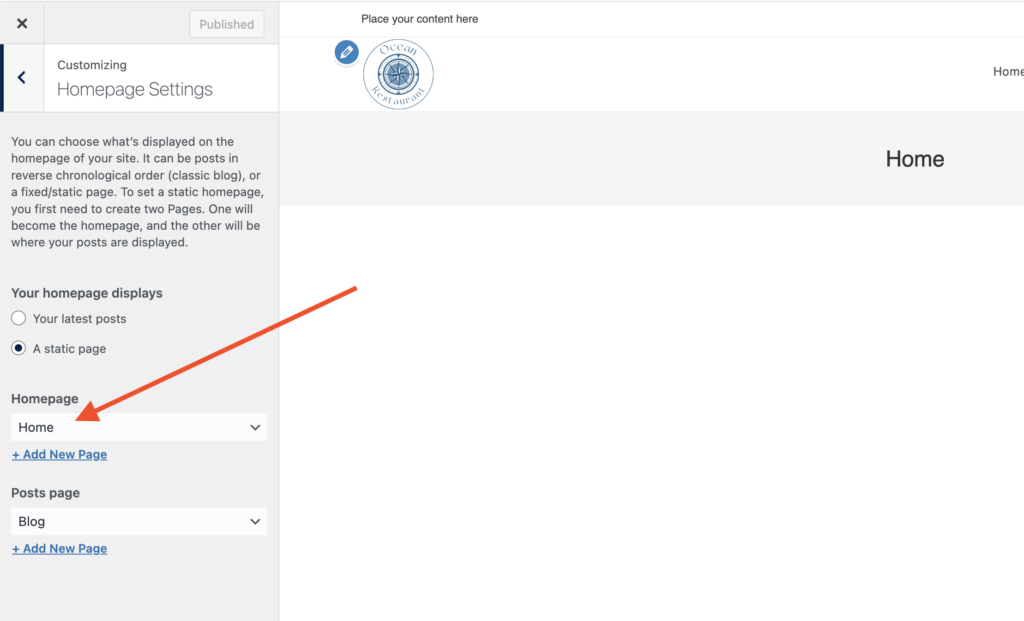
1. OceanWP Directory Website Home Page design
You can create a new page or use one WordPress creates by default, like the Sample Page.
Go to Pages, edit the Sample page, and rename it Home or create a new page for this.
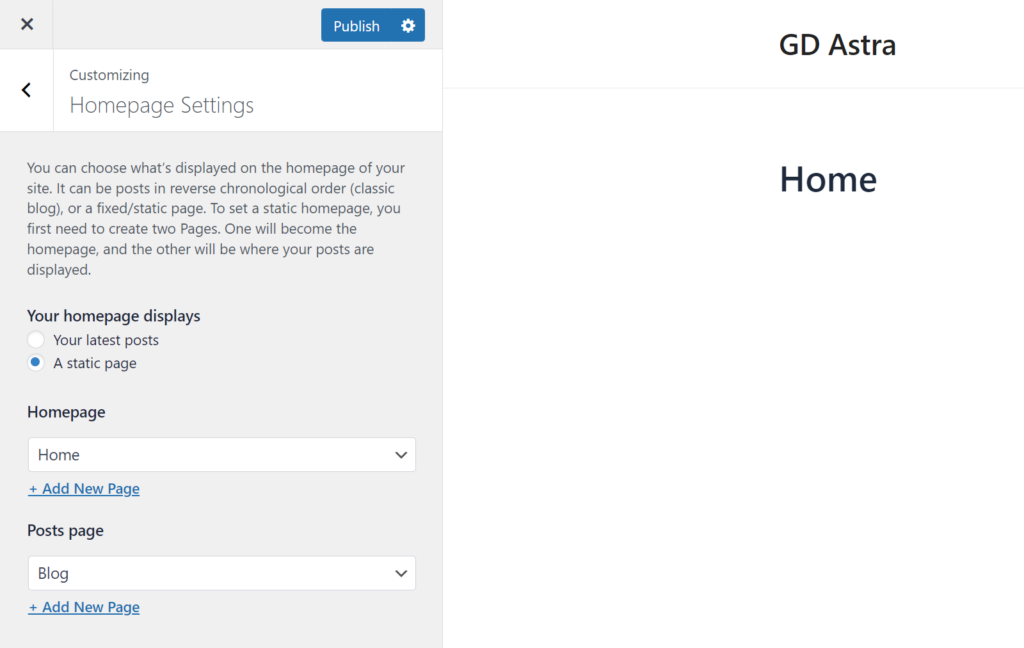
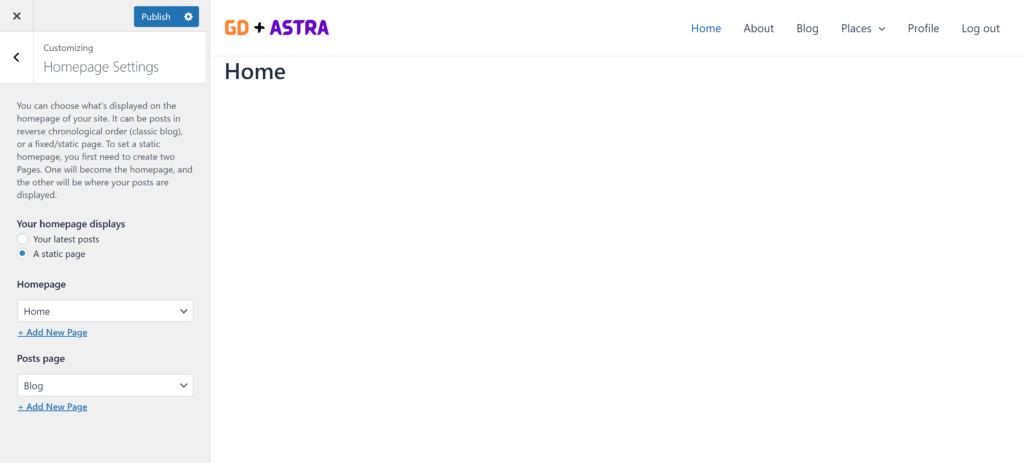
Next, go to Appearance > Customize > Homepage Settings and select your Home.
The Logo
First thing first, we will need a logo for our website.
You don’t need to invest in a designer to sketch the 1st version of your logo.
One of the biggest mistakes you can make when starting a new directory is investing too much time and money before testing the product market fit.
You can design a logo in five minutes with an app like Canva, which is cheap and surprisingly good.
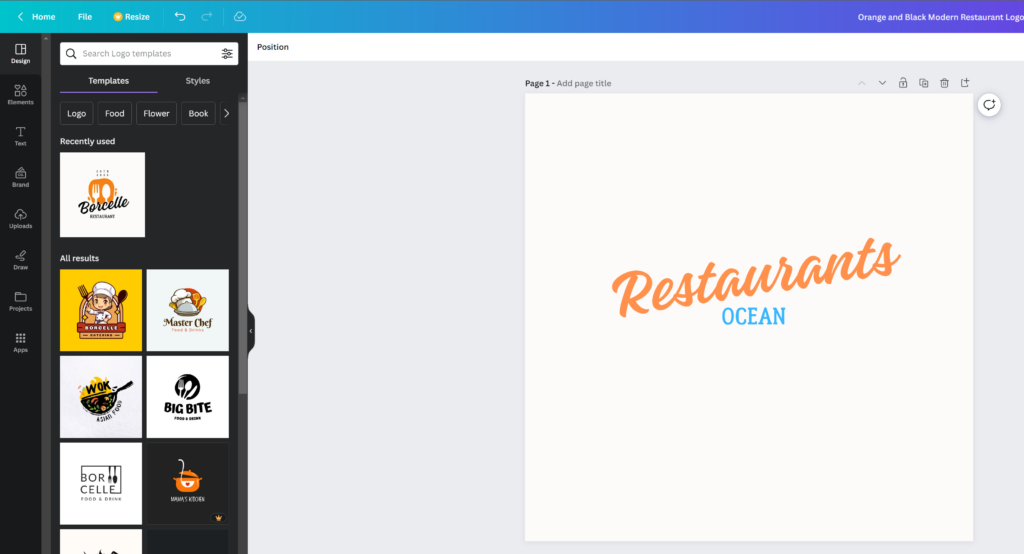
For an initial MVP (minimum viable product), a logo crafted using Canva is adequate.
Canva offers a plethora of logo templates, and it’s okay if your first logo doesn’t epitomize perfection or originality.
As your project gains momentum, you always have the option to refine or completely revamp your logo.
Remember, a project’s success isn’t determined by the perfection of its logo.
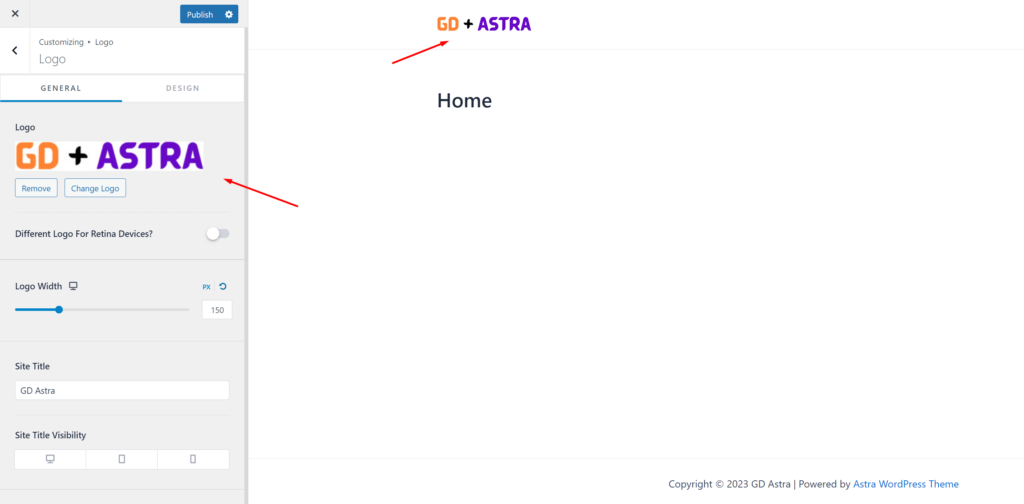
Now go to Appearance > Customize > Header > Logo, click Select Logo, and upload your PNG file. Skip cropping (or crop the image as needed) and click publish, You can also set the logo max height and width if your logo is bigger in size.
The Navigation Menu
After creating and adding the logo, go to Appearance > Menus, and create your menu.
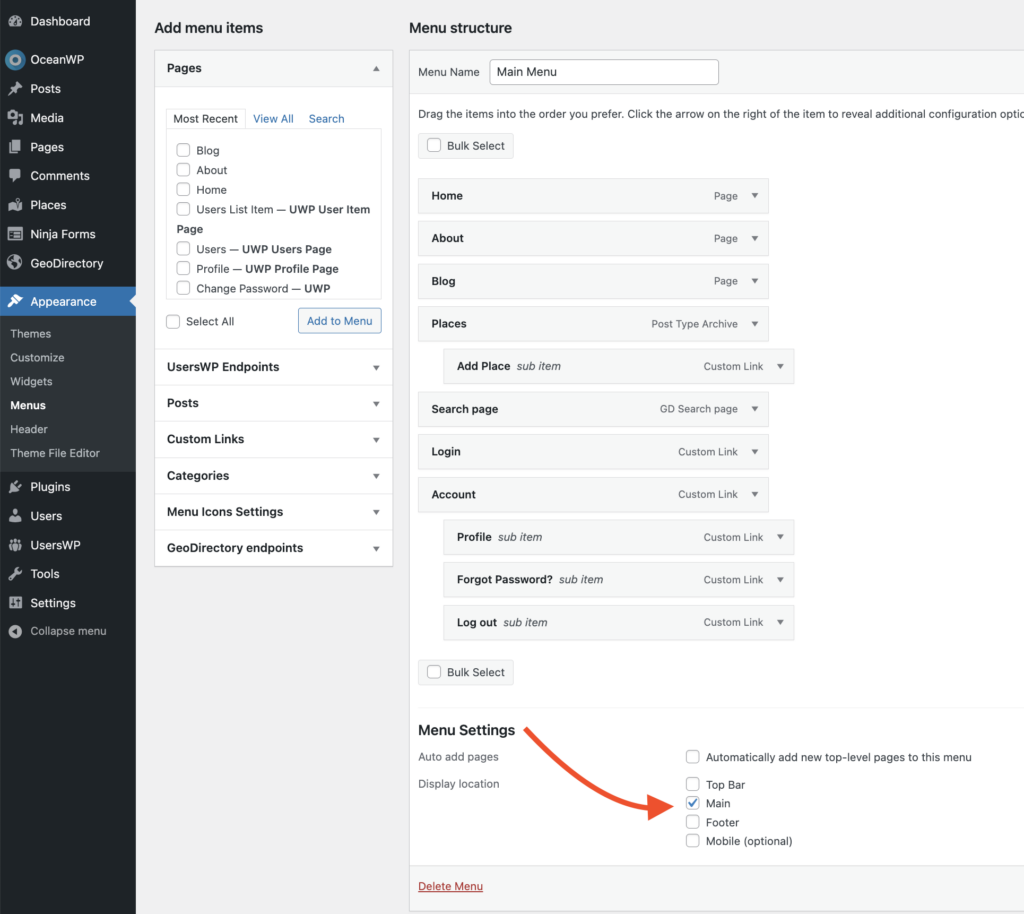
Add the links needed (from the left column to the right column) and save. In the Menu Settings > Display location section, you can check the “Main” option.
If you want, you can make the same menu appear on the footer or create another menu to appear there.
In this example, we’ll only have the header navigation menu.
We added seven main navigation links and a few sub-navigation links:
- Home
- About
- Blog
- Places and add places
- Search Page
- Login
- Account > Profile > Forgot Password > Logout
The Login link (from UsersWP Endpoints) will only appear for Logged-out users, while the log-out, account and profile links will only appear for logged-in users.
The Typography
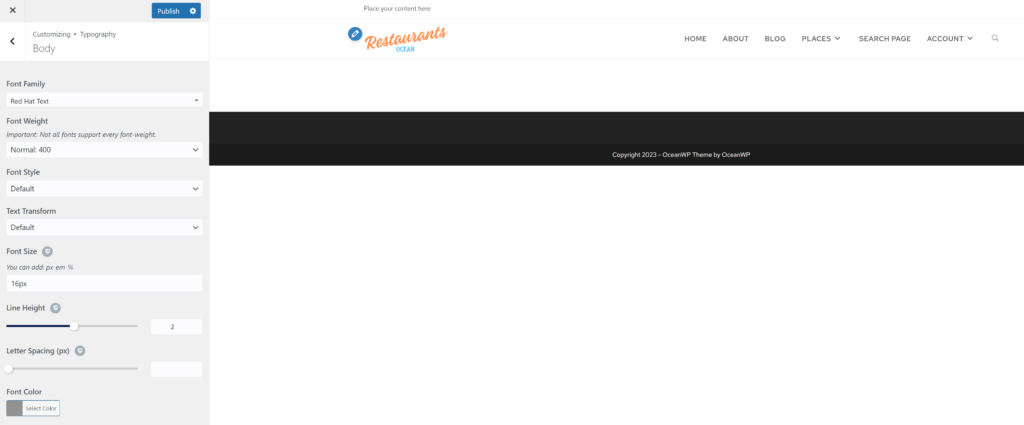
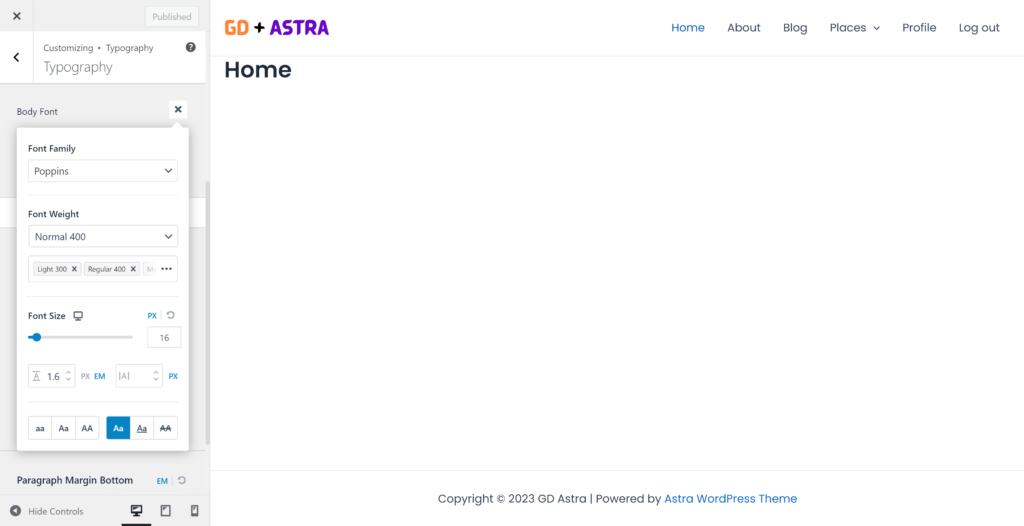
Now let’s define the Typography for the website text font and size. I am setting a global Font Family, Font Weight, and Font Size that will be applied to all site text.
we will go to the Appearance > Customiser > Typography > Body. we will set the Font Family: Red Hat Text and Font Weight: Normal: 400
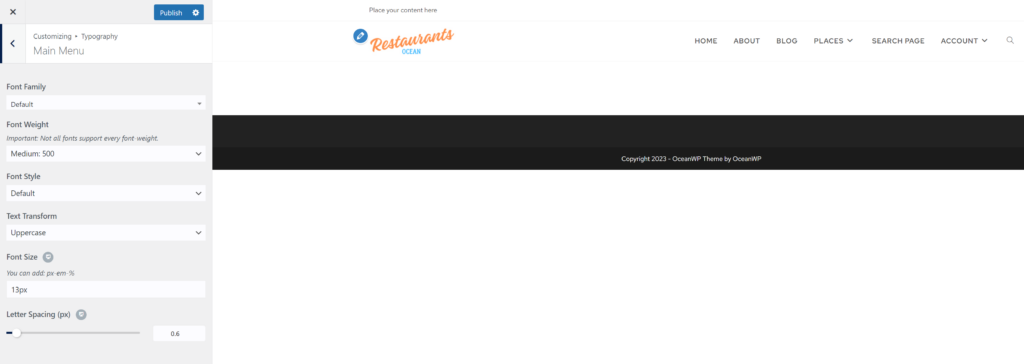
and in the Appearance > Customiser > Typography > main menu settings. we will set Font Weight: Medium 500, Font Size: 13px
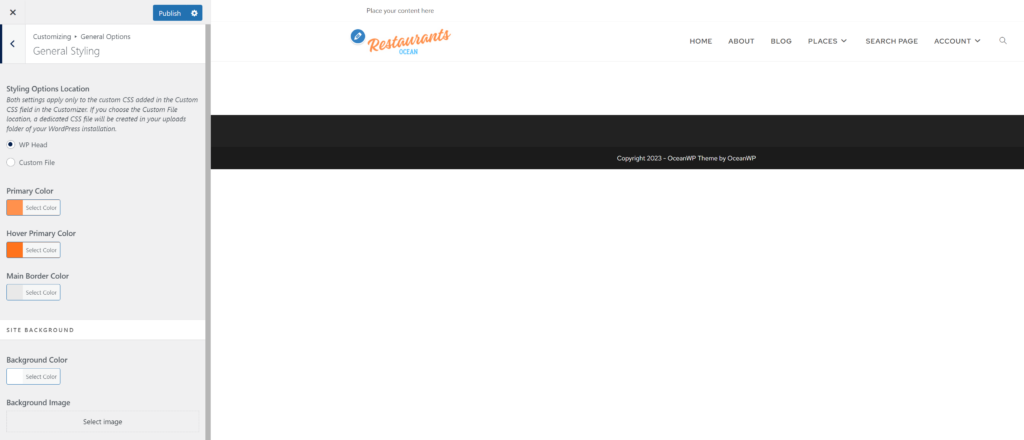
Now we will go to the Appearance > Customiser > General Options > General Styling Primary Color: #ff914d and Hover Primary Color: #ff731c
The Content
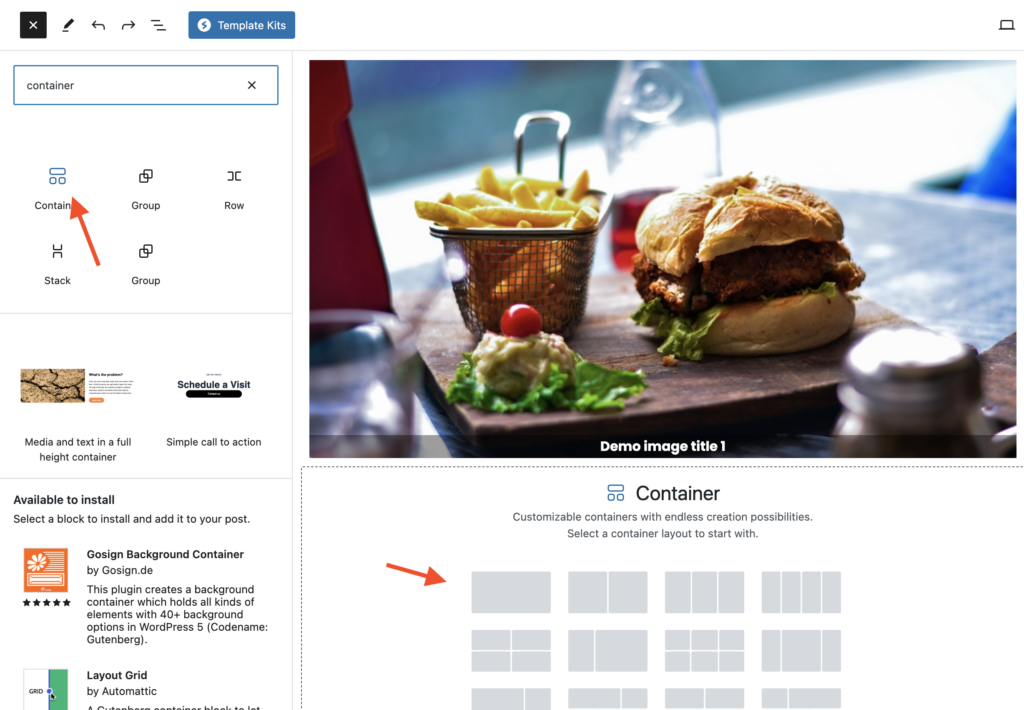
I will start building this page from scratch using the Spactra Blocks plugin.
we need a hero header on the homepage for that let’s add a container block provided by the spectra blocks plugin.
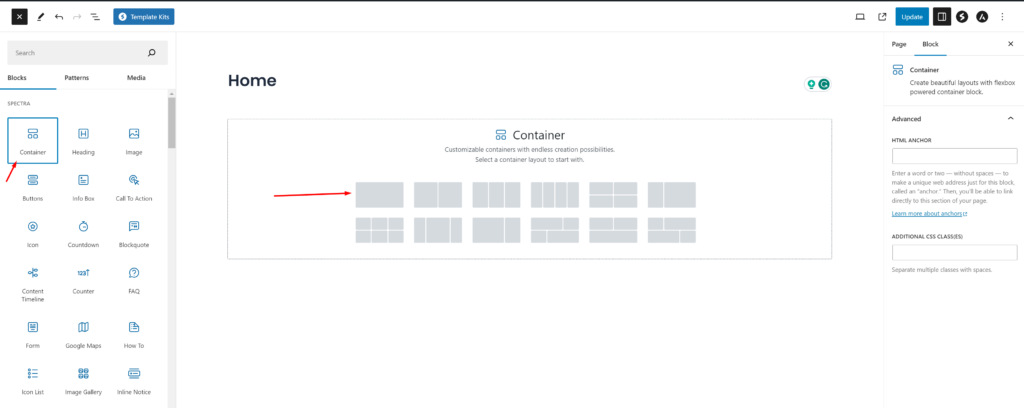
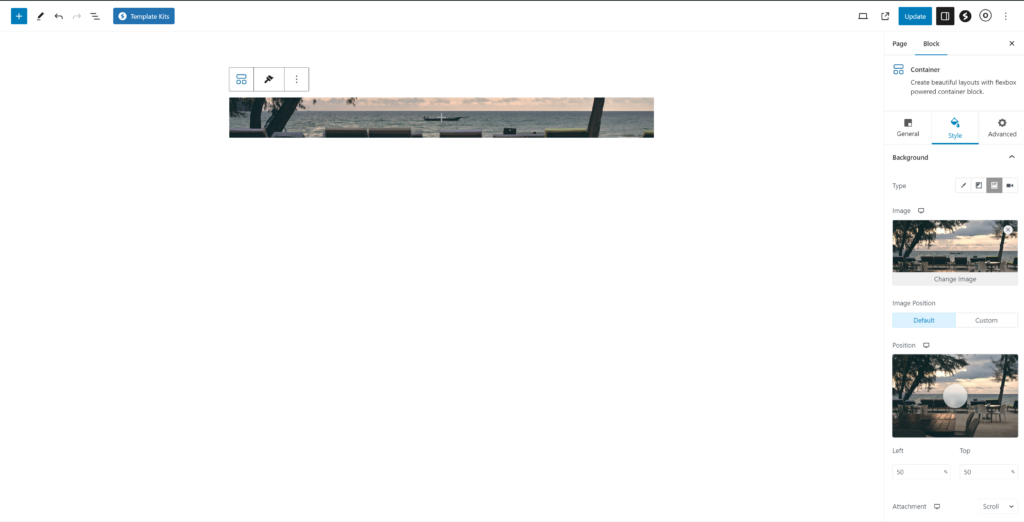
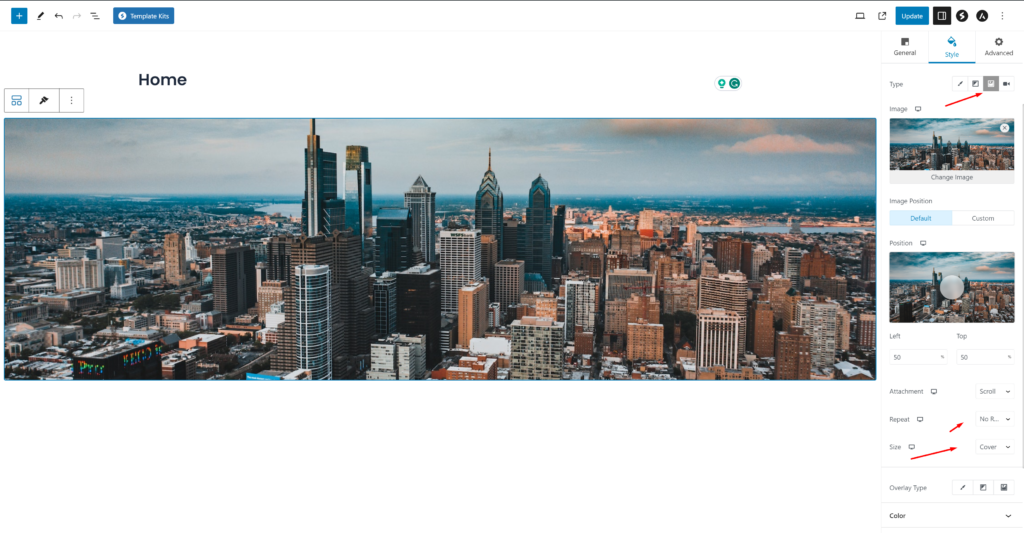
Next, click Style from the top tabs. Select > Type Images as the Background Type.
For the Hero Section, we need an image and we will download a free image from Pexels.com (Thanks, @Kelly).
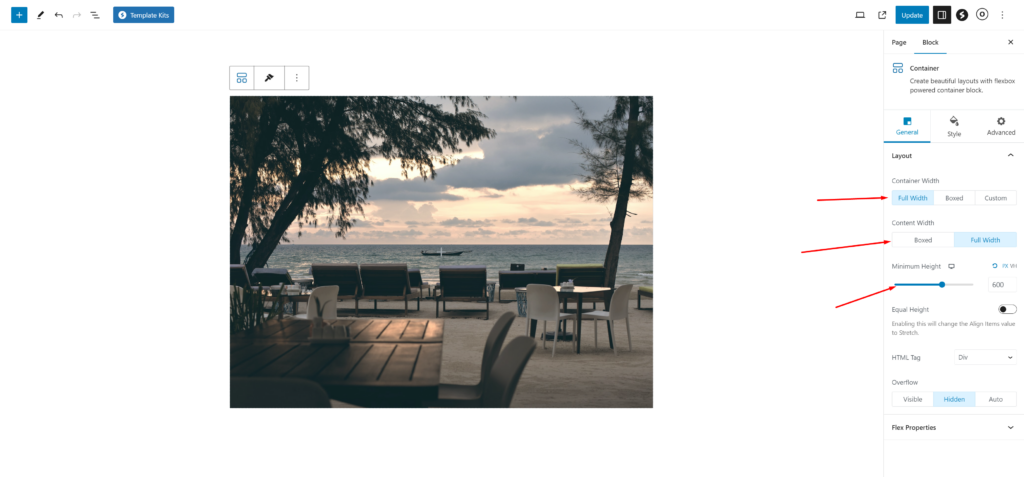
Click on the added section and select Full Width in the Content Width option as mentioned in the below screenshot.
From the style tab of the container block setting select Repeat to No Repeat and Size to Cover.

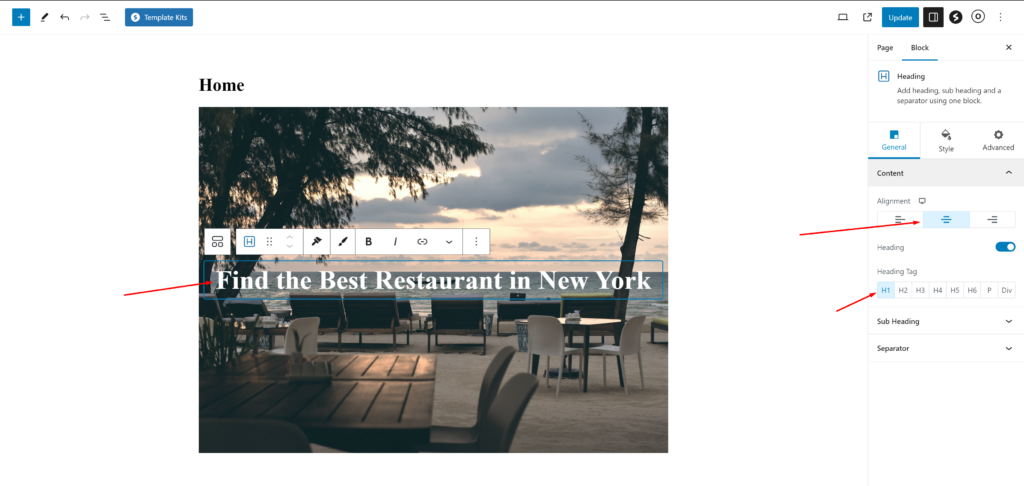
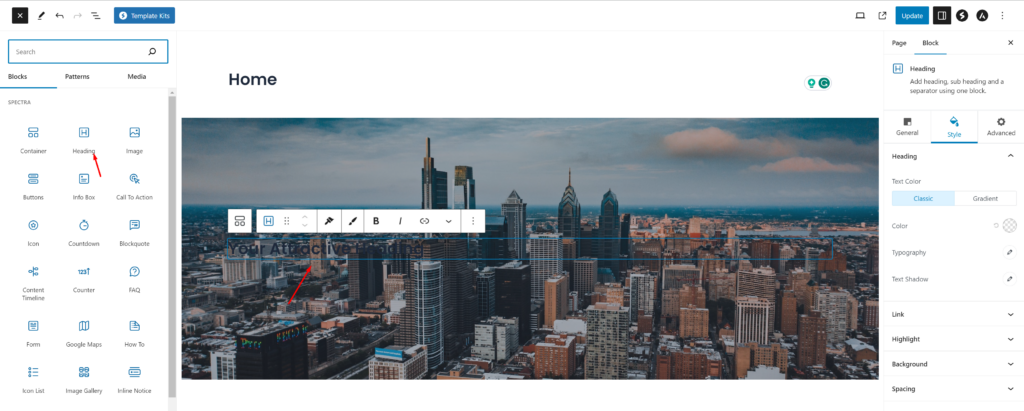
Drag and Drop a Heading Element inside the Hero Image.
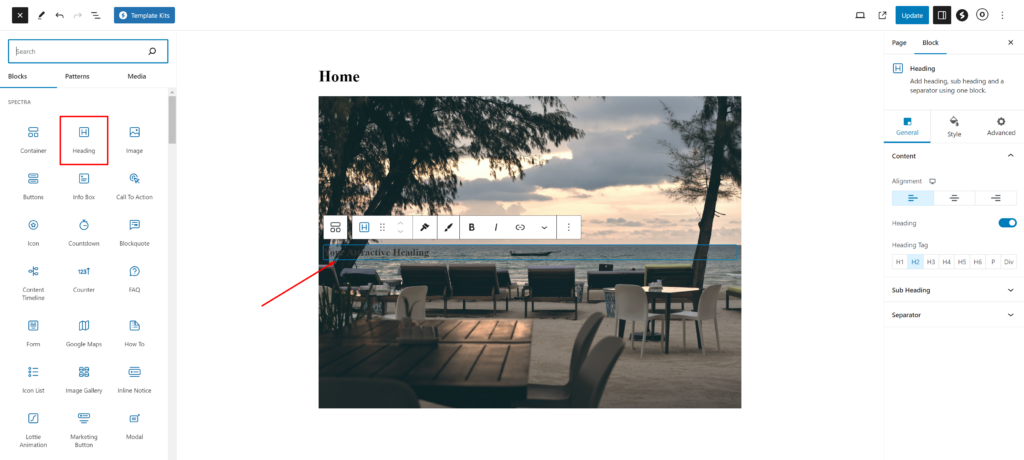
It’s time to give a title to our Homepage Hero Image.
From the Style tab, change the text color to white (#FFFFFF) to improve the contrast and readability.
In this tutorial, I will use something simple like “Find the Best Restaurants in New York” You can add whatever slogan you want here.

Don’t forget to center the text using the alignment option.
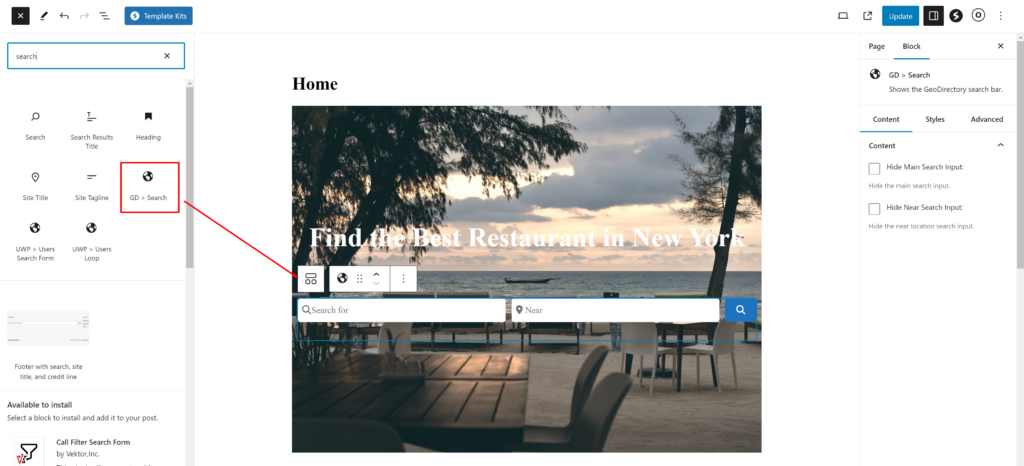
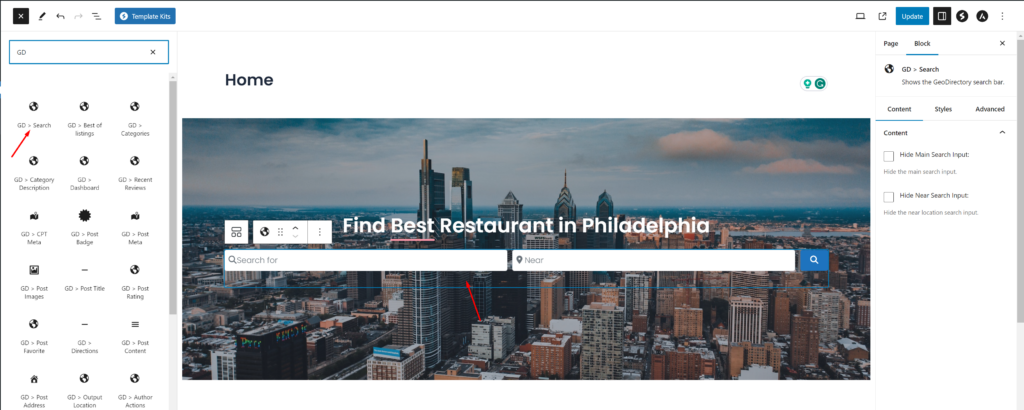
In order to add GD search on the homepage header, Drag the GD > Search block inside the hero container.
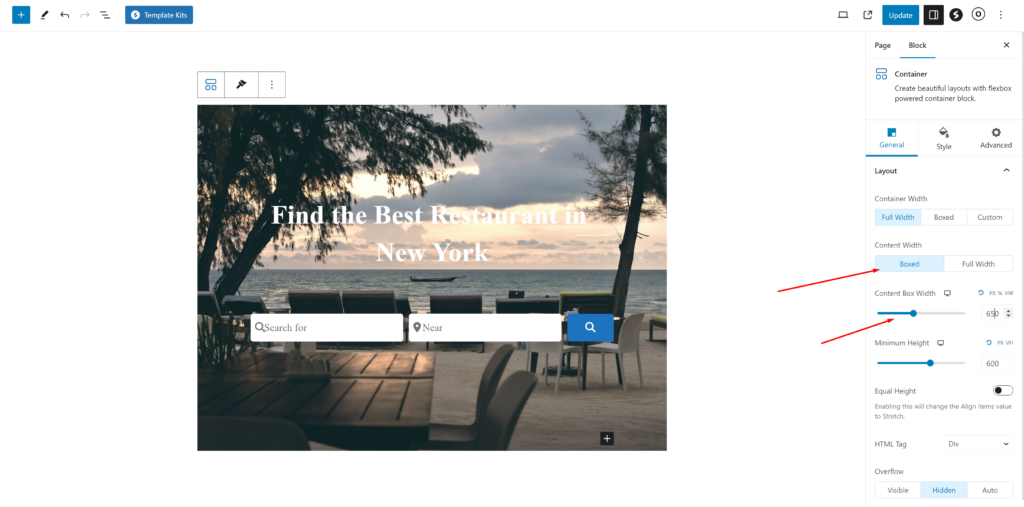
Next, add some minimum height to this hero container. I will set it to 650 x 600 px in width and height and also make the container width: Boxed and content width: Boxed.
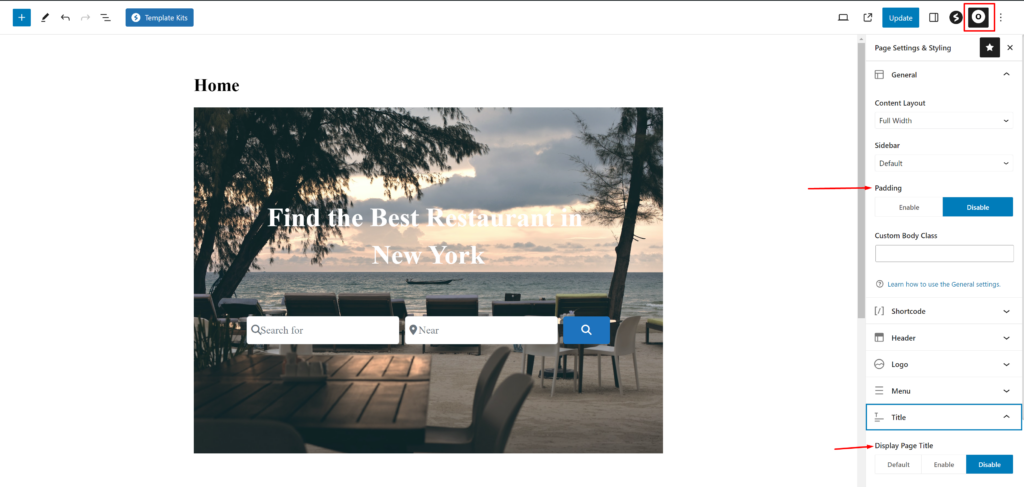
it’s time to remove this page title and extra space in the header section.
Click on the O icon on the right top of the page, just click on it. Inside that check General section set padding: disabled and inside Title selection Title: disabled
It’s time to add a few more required sections on the homepage, I will add a recent listings section now.
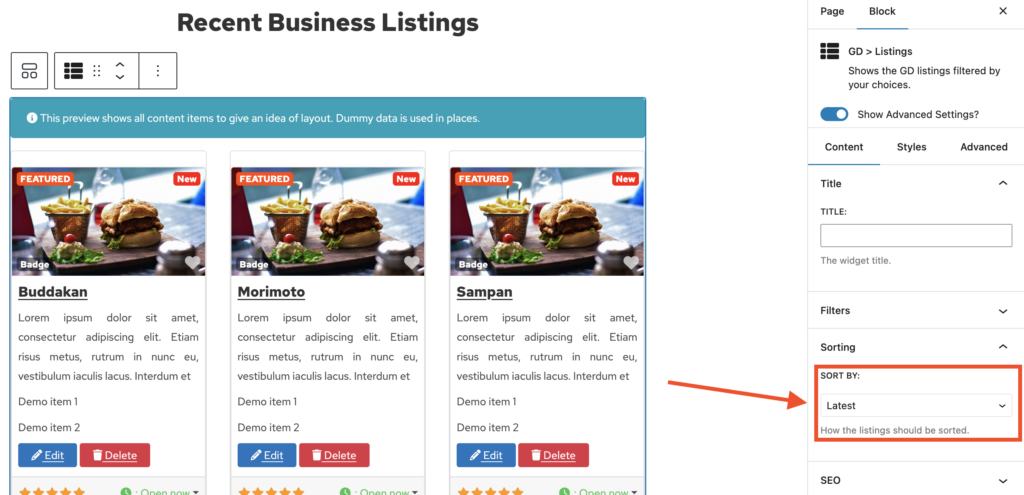
Below the hero section, add one more container by clicking on the plus icon and add the GD > Listings blocks there.
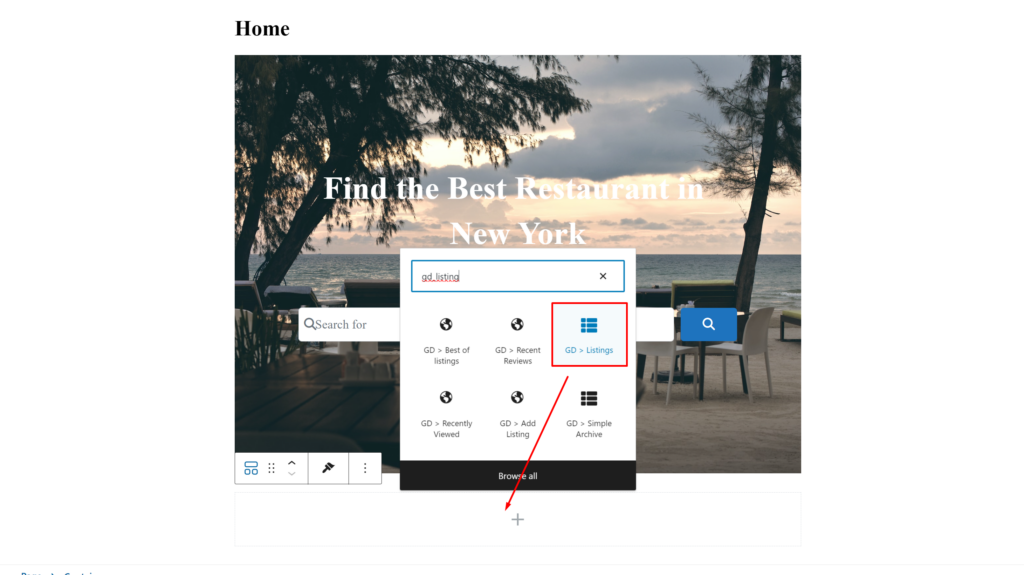
Now we will do some needed settings in this GD > Listings block. we will set sorting: recent
Now we will add a CTA to attract business owners to add their businesses. we will add an empty container and in the style setting.
let’s set a background.
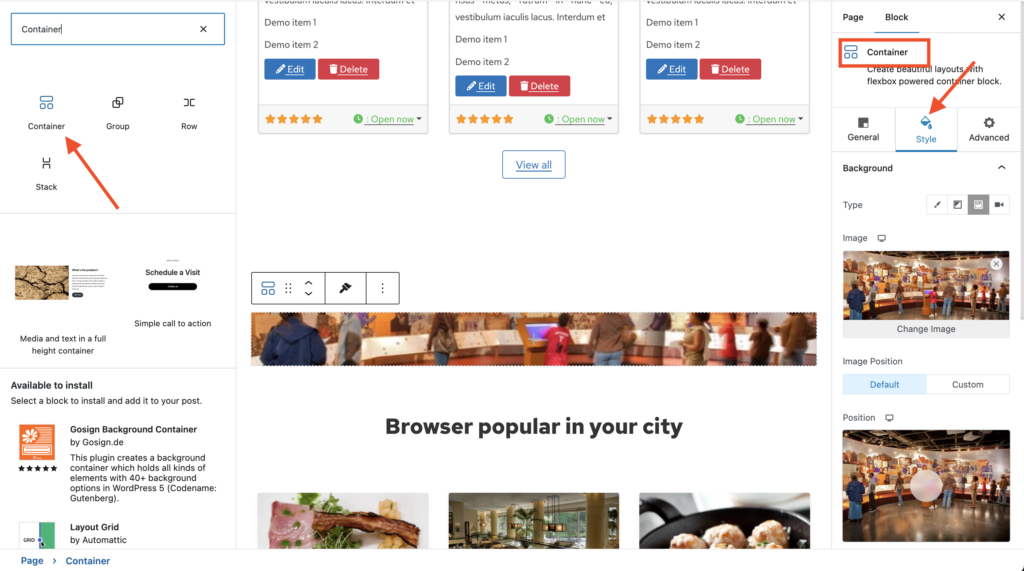
Now Let’s add the container styles:
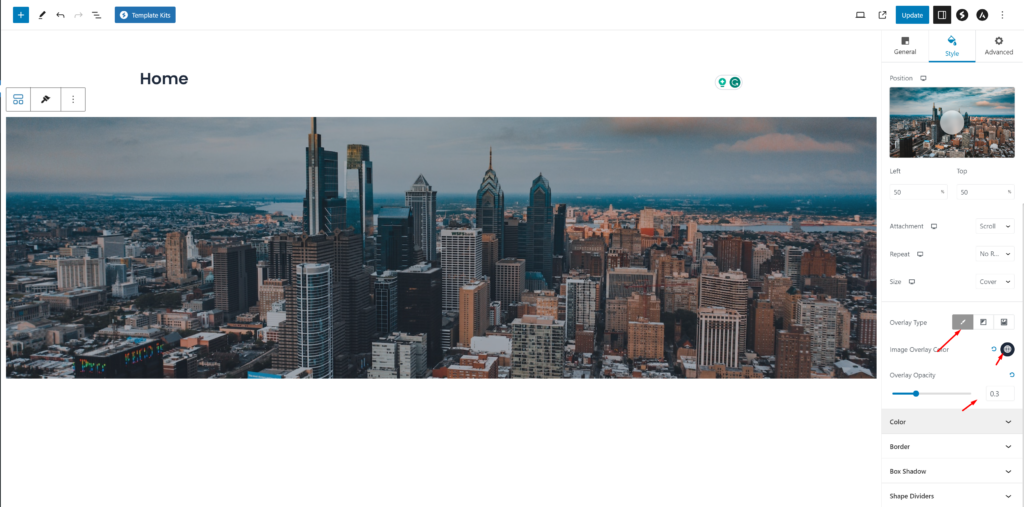
Overlay Type: Color
Image Overlay Color: #FF6900
Overlay Opacity: 0.3
Container Width: Full Width
Content Width: Boxed
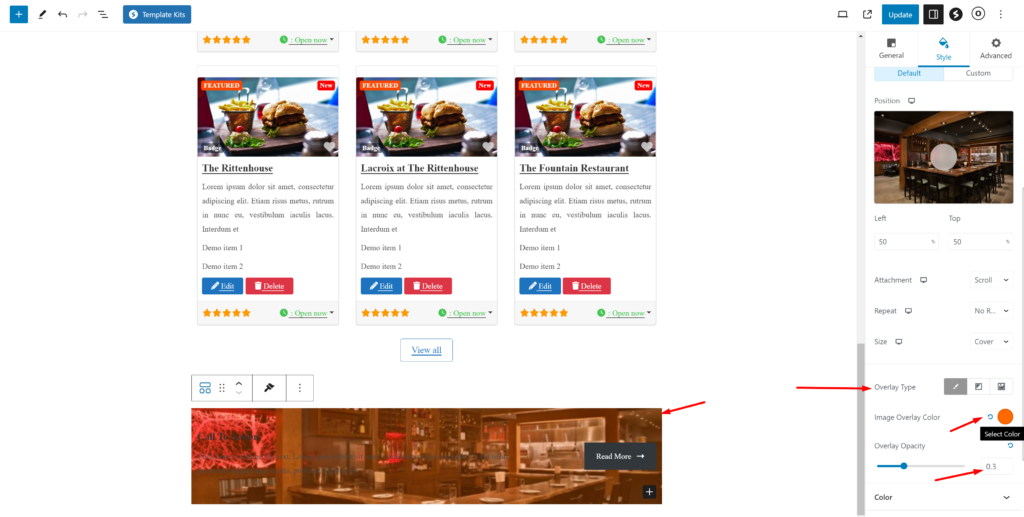
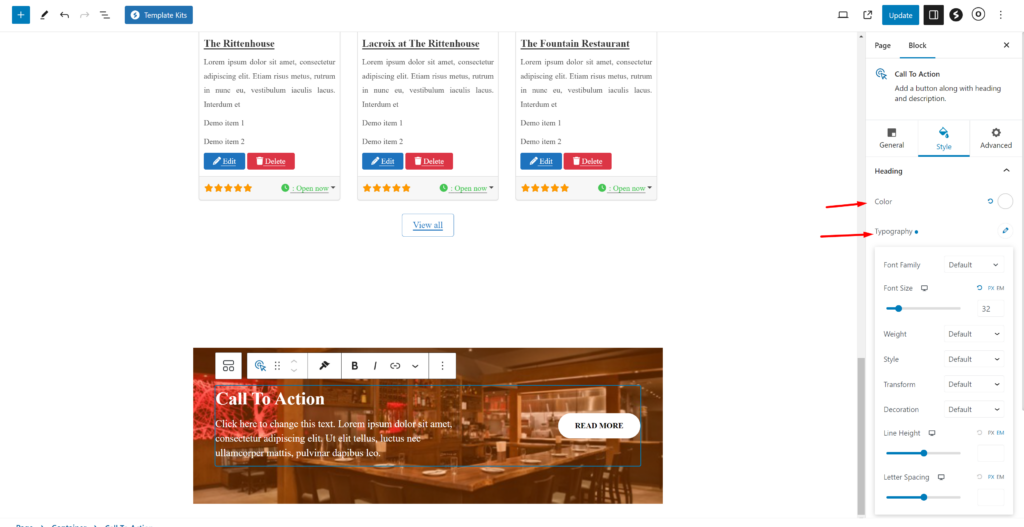
Now we will also add a Call To Action block provided by spectra inside this container.
Typography for the CTA section.
Color: #fffff
Font Size: 32px
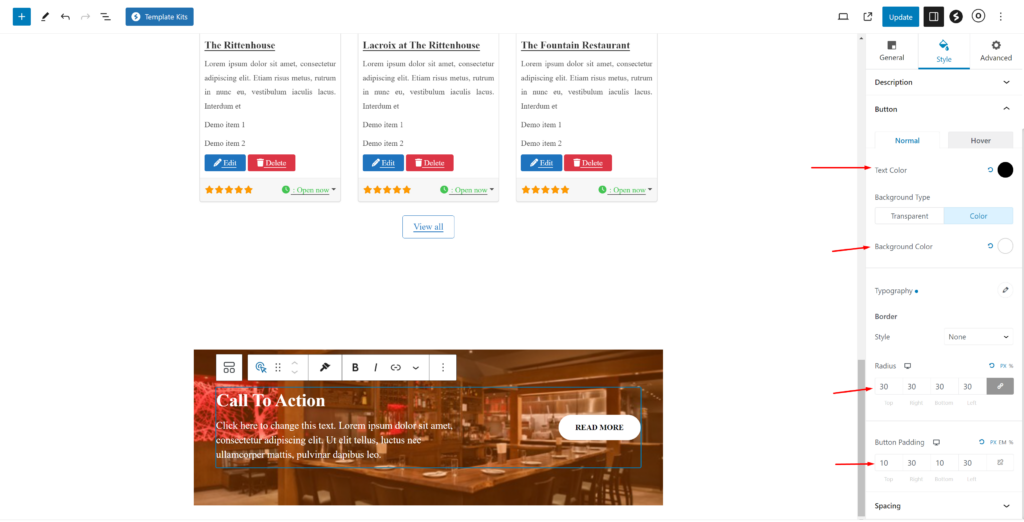
let’s add some style to the button.
Text Color: #000000
Background Color: #FFFFFF
Radius: 30px all sides
Padding: 10px, 30px, 10px, 30px
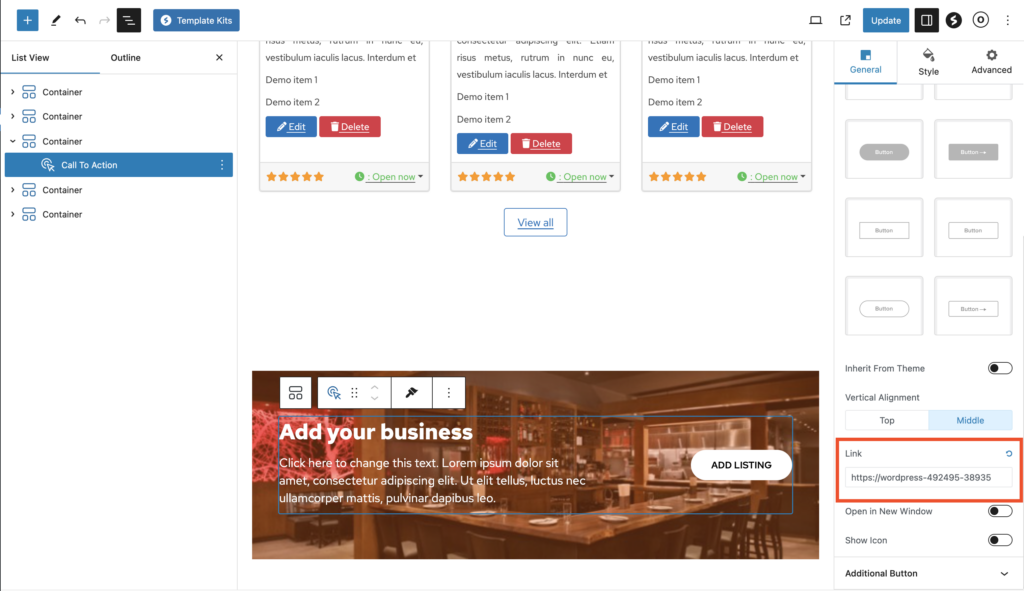
Let’s change the button text to Add Listing and the link to the Add Listing page link.
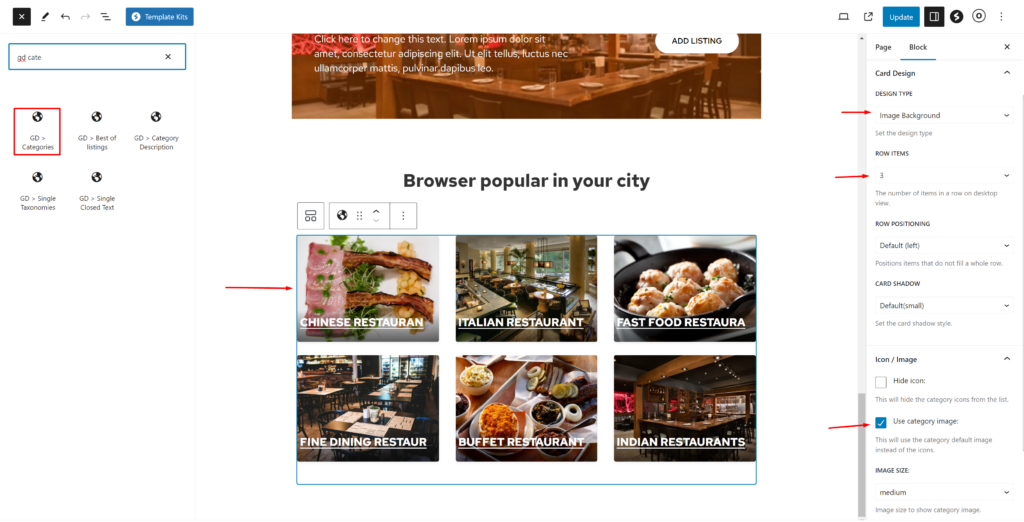
So now our CTA section is completed. we will add one more section the GD > Categories section below it.
Settings will be the following
Design type: Image Background
Row Items: 3
Enable Use Category Image
You can set the image to a category by editing the category from wp-admin -> places -> Place Categories.
Each category has an option to set a default image
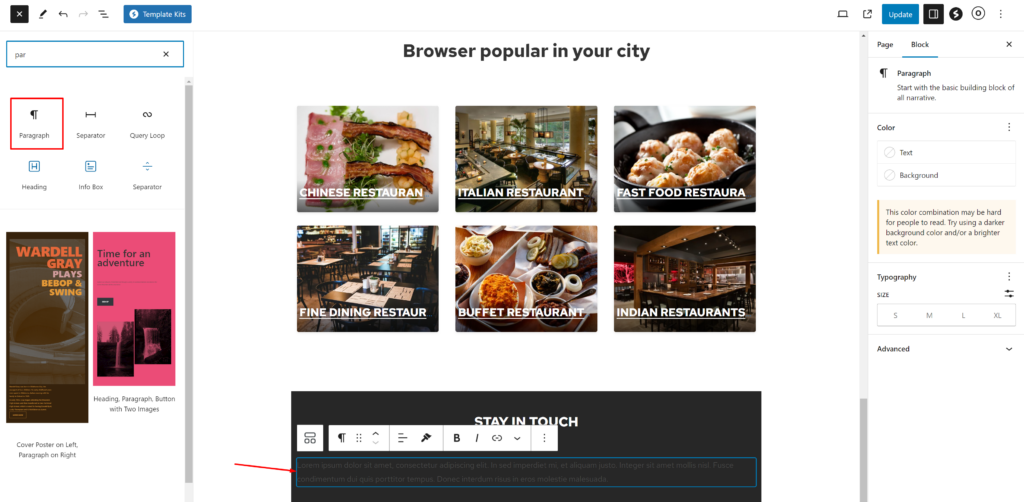
There you go now let’s add the last section for social media link display. we will call it STAY IN TOUCH.
Add a new empty container with background #000000.
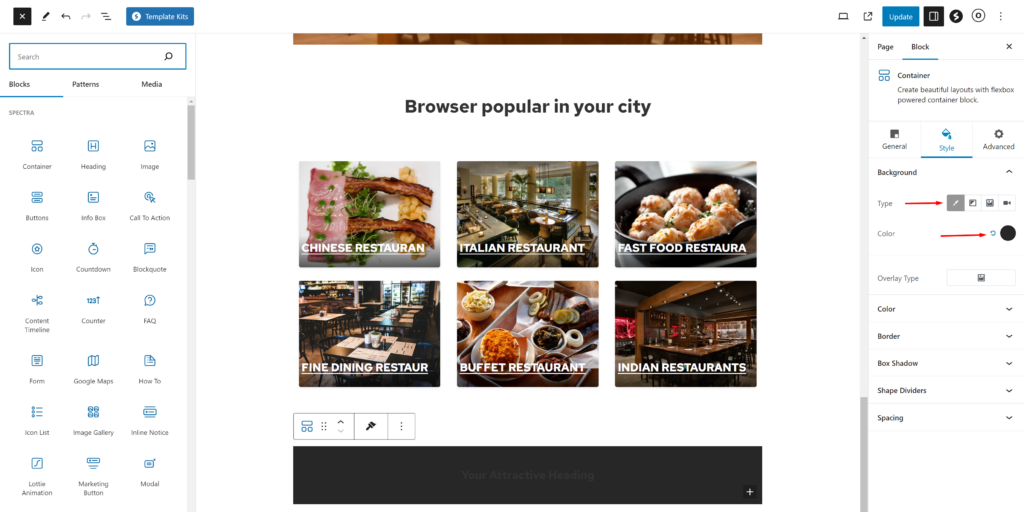
Now we will add a heading in this container with Alignment: Center and Heading: H3
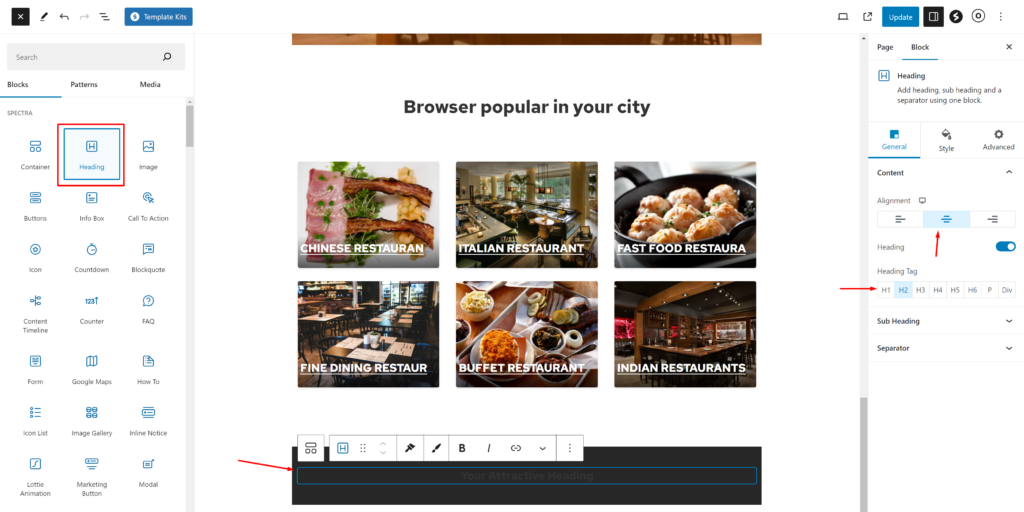
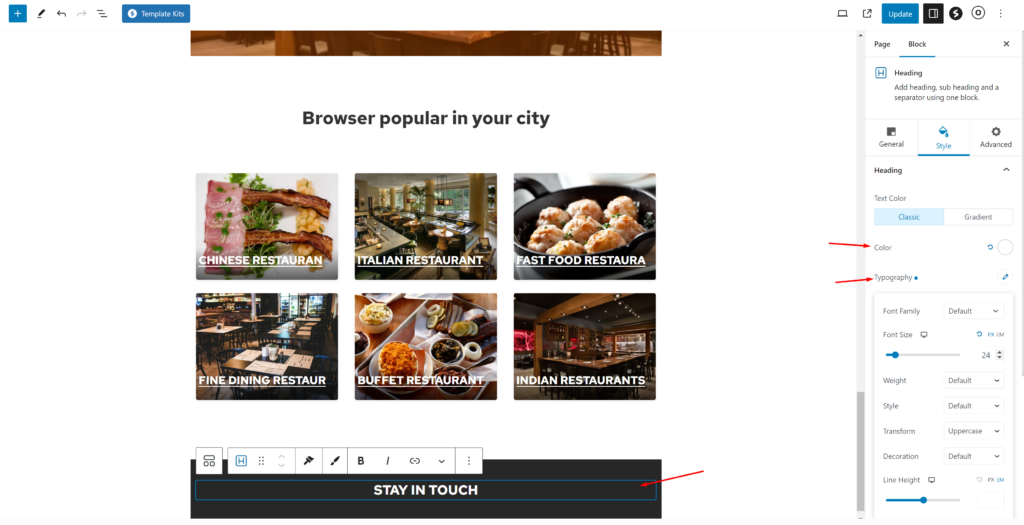
I will add the text “Stay in Touch”
Color: #ffffff
Font Size: 24px
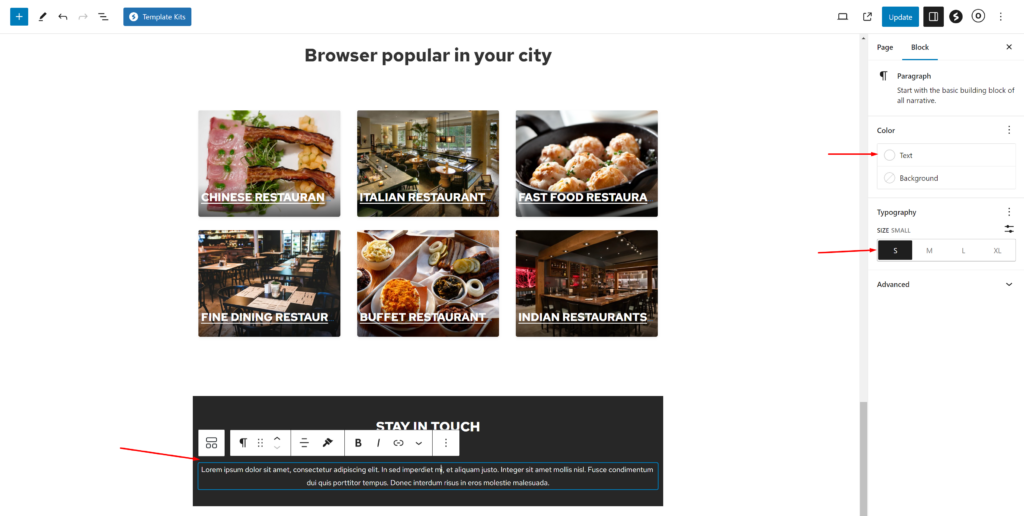
Let’s now add a paragraph below it to add some text.
Add some style
Text Color: #ffffff
Size: Small
Now we will add the social icon block below it.
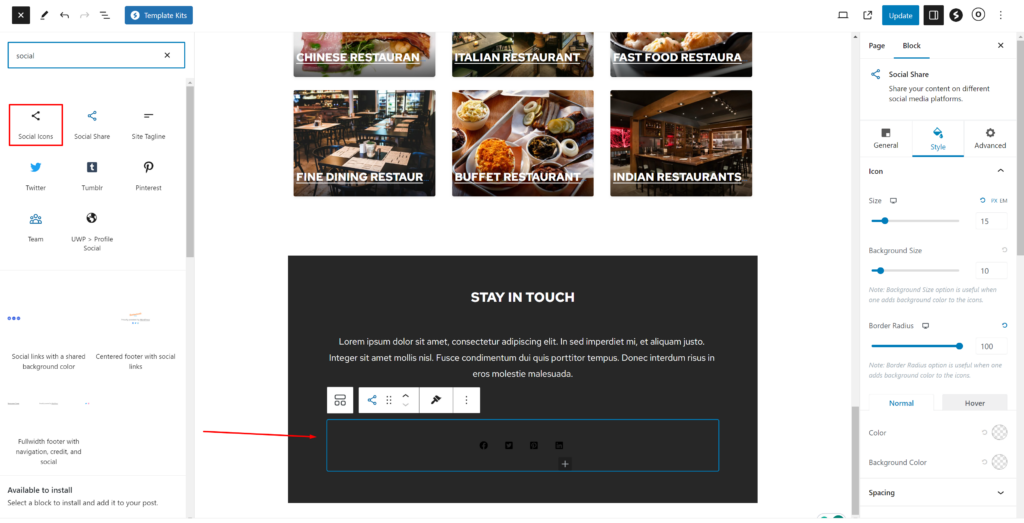
In this social icon block add the following style
Size: 15px
Background size: 10px
Border Radius: 100
Color: #ffffff

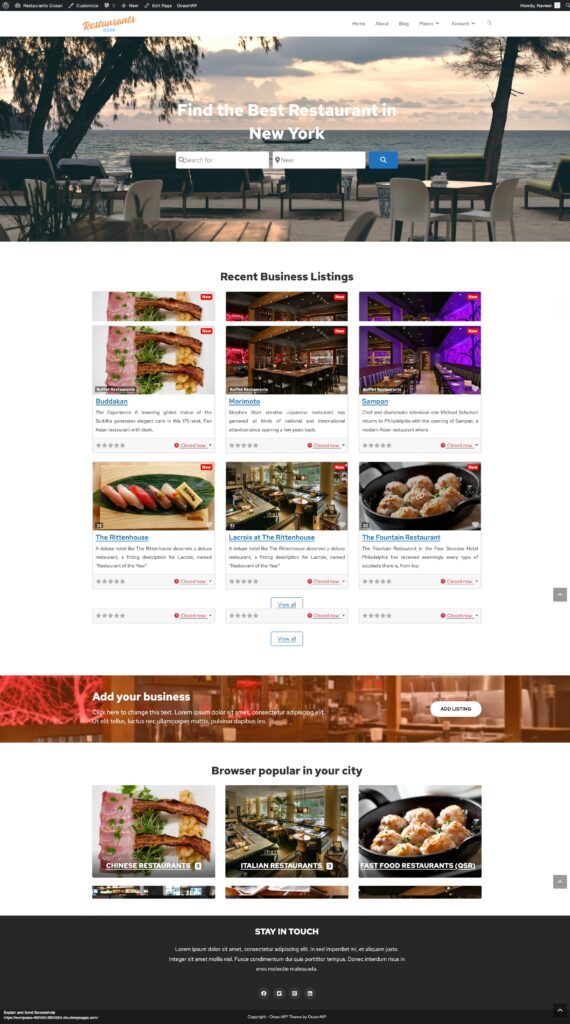
Congratulations! Your homepage is Completed.
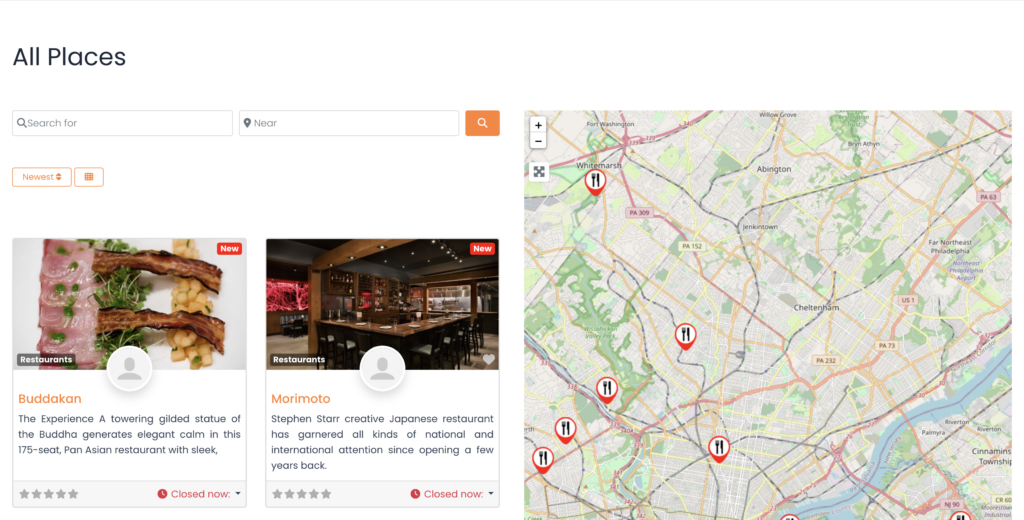
2. OceanWP Directory Website Listings and Search page design
Now you need to design two pages that are essential for any directory.
The listings page (general archive, categories, tags), and the search results page.
GeoDirectory creates them by default with a general layout. In this tutorial, we will customize the layout of these pages a bit.
The listing and search pages are mostly identical so we create it once and just copy the layout on the other page.
We decided the Listing page layout would be the listings on the left, and on the right, a sticky map showing the listings’ precise location.
This is very easy.
Listings page
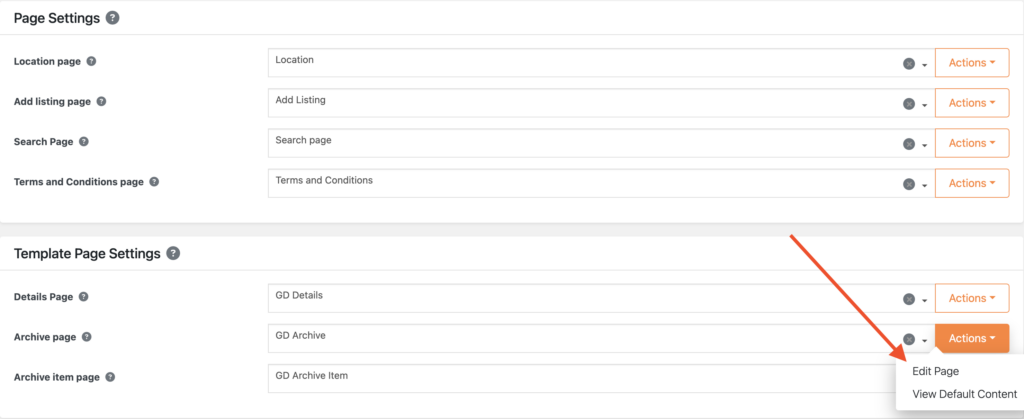
Go to Geodirectory > Settings > General > Pages > Click on edit GD Archive page template
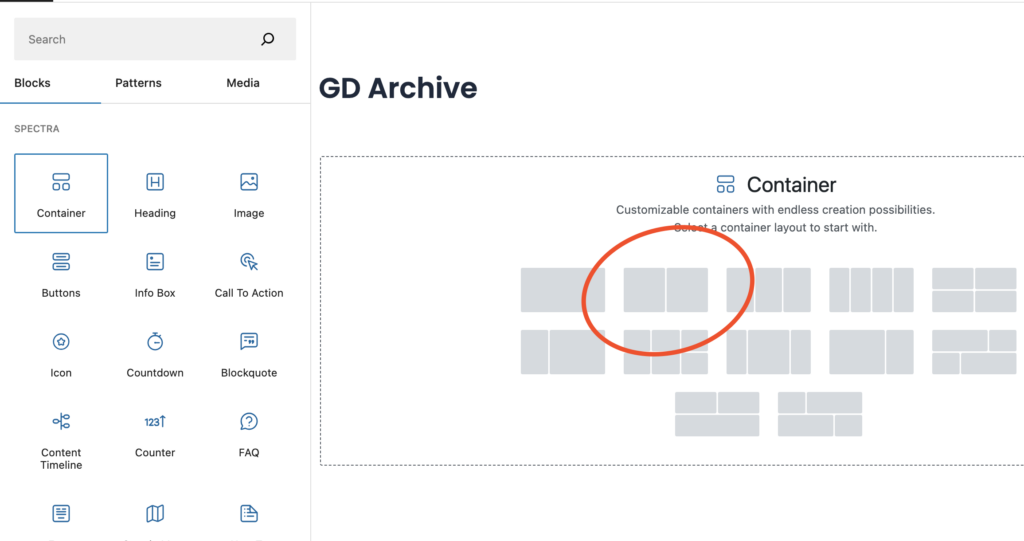
Remove all the content from this GD Archive page template.
Now add a container with two columns.
Now on the left container, we will drag GD Archive page-related widgets like GD > Loop Action, GD > Loop, GD > Loop Pagination, and GD > Search on top so the user can search from the Archive page.
On the right column, we will drag the GD > Map block.
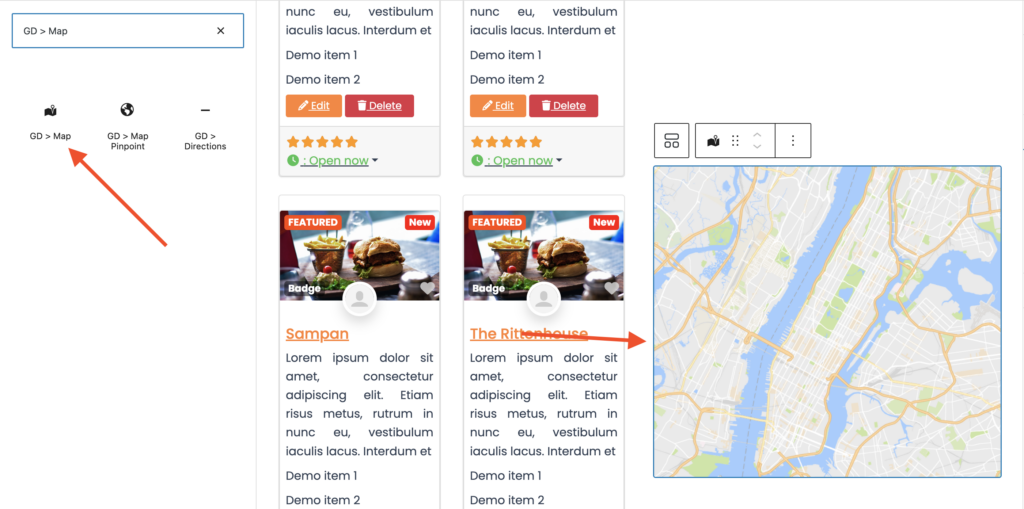
we will keep all the settings default for the GD > Map. let’s give it some height and I have decided to give it the height of 100vh.
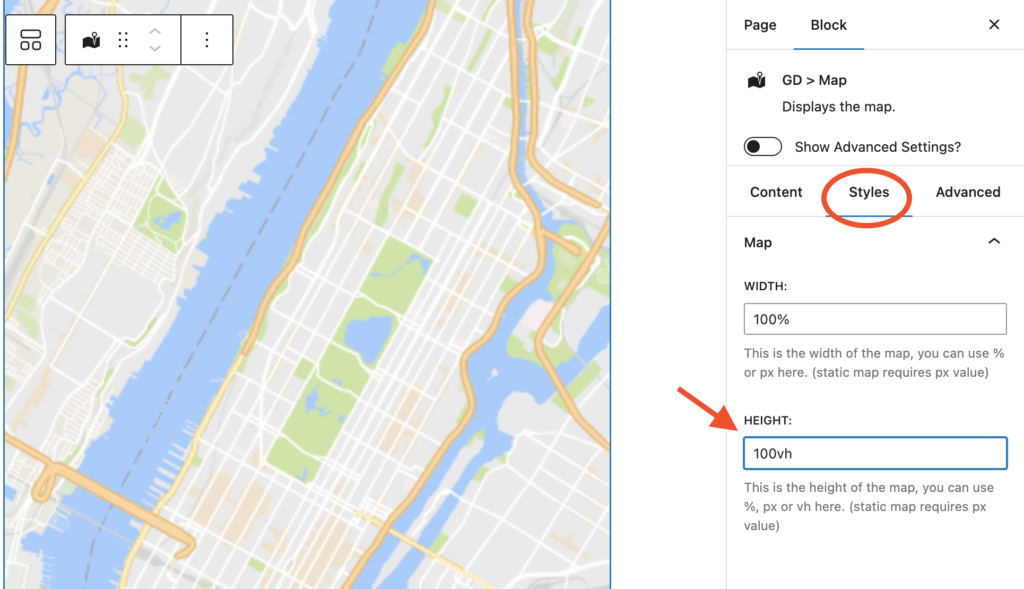
Now just set the main container to full width by following below instructions given in the image below.
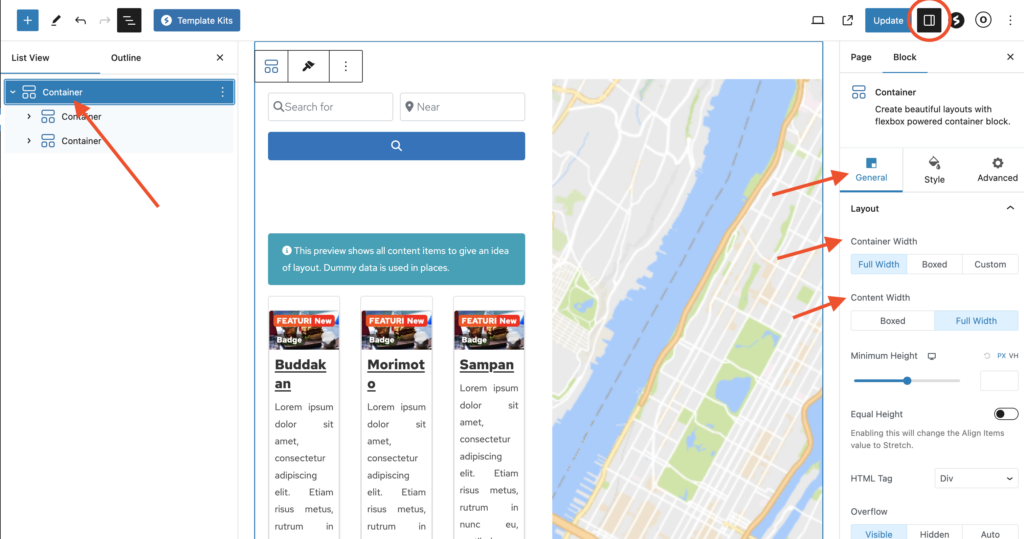
Now we will set the Archive page template to Full width
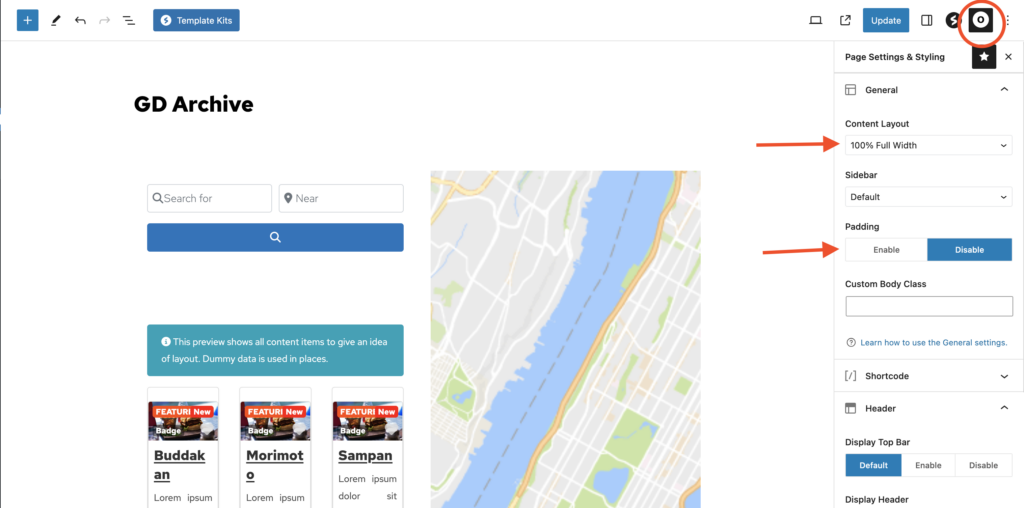
we will also adjust the header style section for all pages from the Theme Customizer > General Options > General Settings.
with Style
Heading Style: Centered
Padding: 20px
Background Color: #1e73be
Text Color: #ffffff
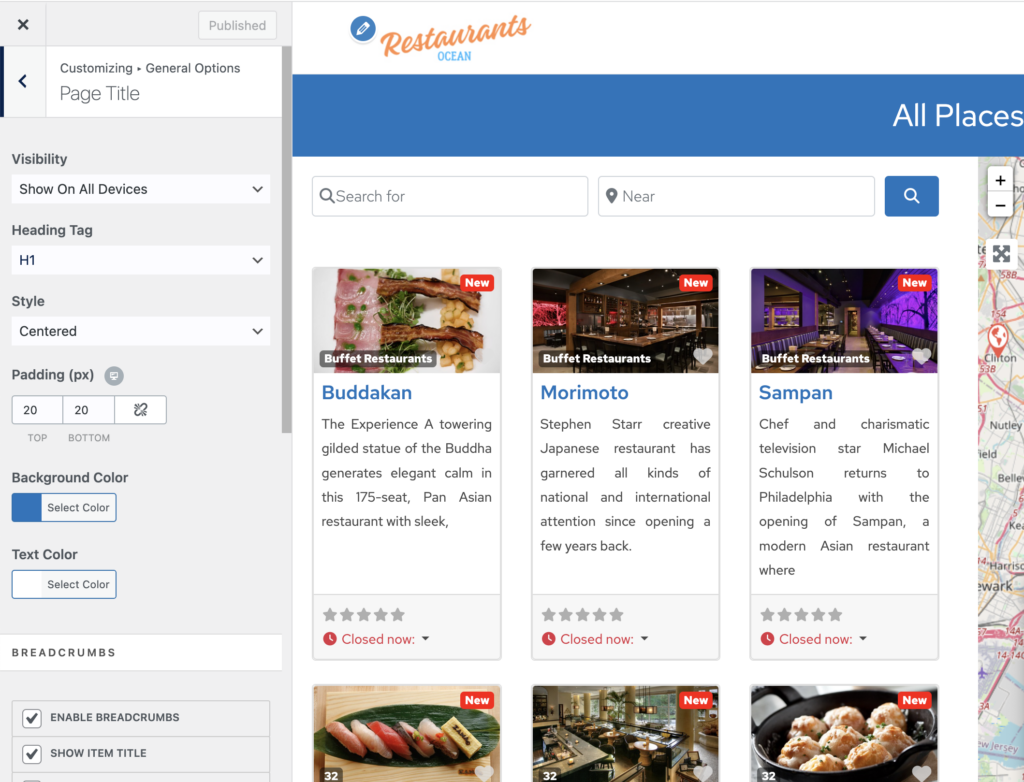
Now after this, the Listing Archive page is ready.
Another option is to use the GD > Simple Archive block as explained in this tutorial on how to Build a Directory Website with Elementor.
For the search page, we repeat the same process.
Search page
Go to Geodirectory > Settings > General > Pages > Click on edit GD Search page template
Remove all the content from this GD Search page template.
Copy all the content of the GD Archive page and paste it into the GD Search page.
So now our GD Search and Archive page is ready.
3. OceanWP Directory Website single Listing page design
Now to edit and customize the GD Detail page, You can go to Geodirectory > Settings > General > Pages > Click on edit GD Detail page template.
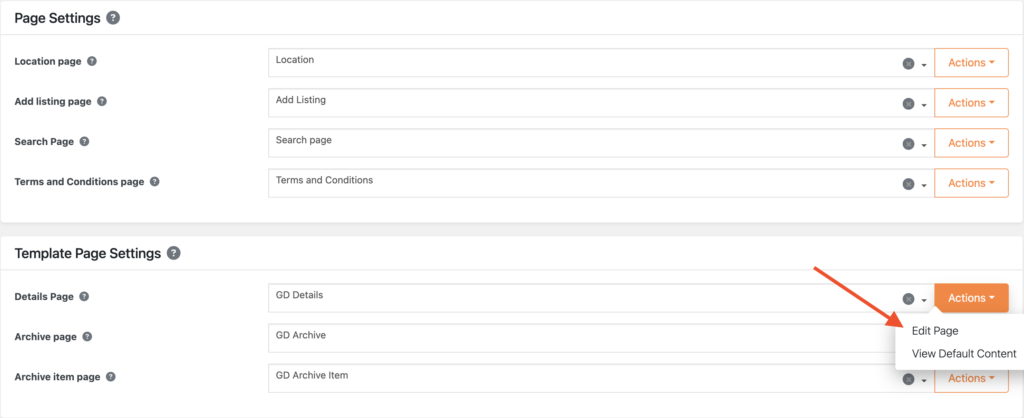
In this template, you will already find default content generated by Geodirectory.
we will remove all these default content and add a new container.
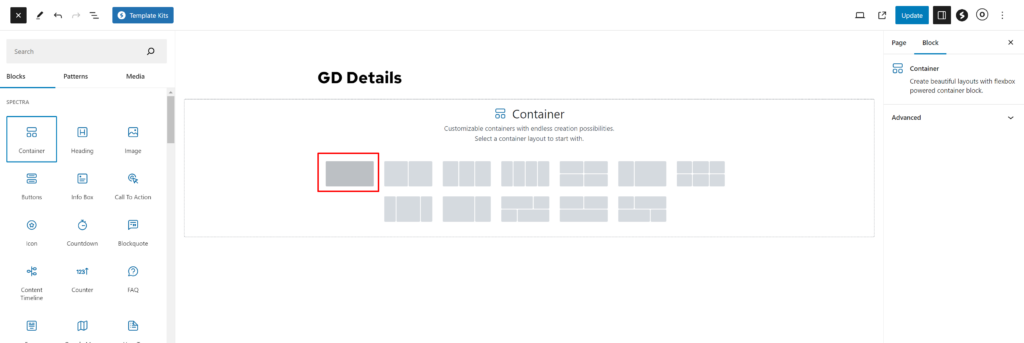
Let’s first add an image slider at the top of the Listing Detail page. we will drag the GD > Post Image block in this container.
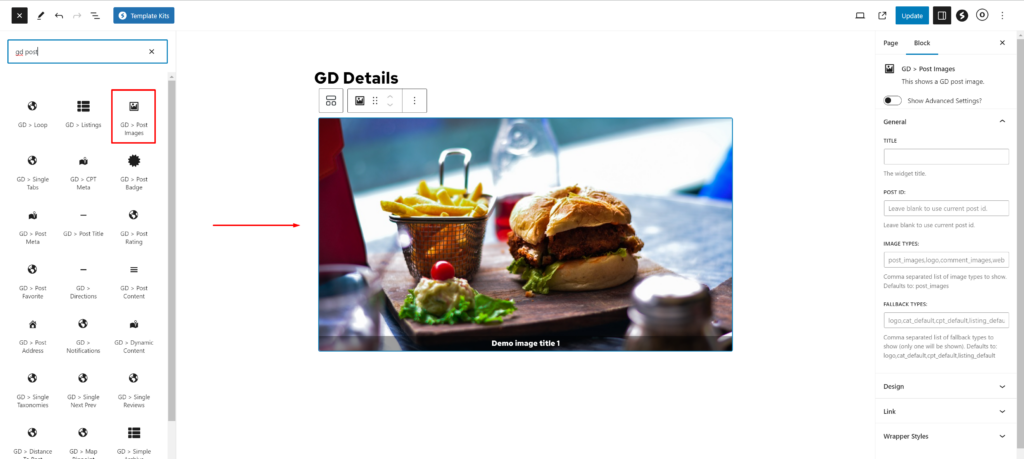
In this GD > Image block adjust the following settings.
Image Limit: 50
Show Limit: 2

Now let’s add one more container below this container. where we will add other required blocks of the Geodirectory Detail page.
Now let’s add all required GD Detail page shortcodes here one by one. Which includes GD > Single Taxonomies, GD > Single Tabs, GD > Single Next Prev.
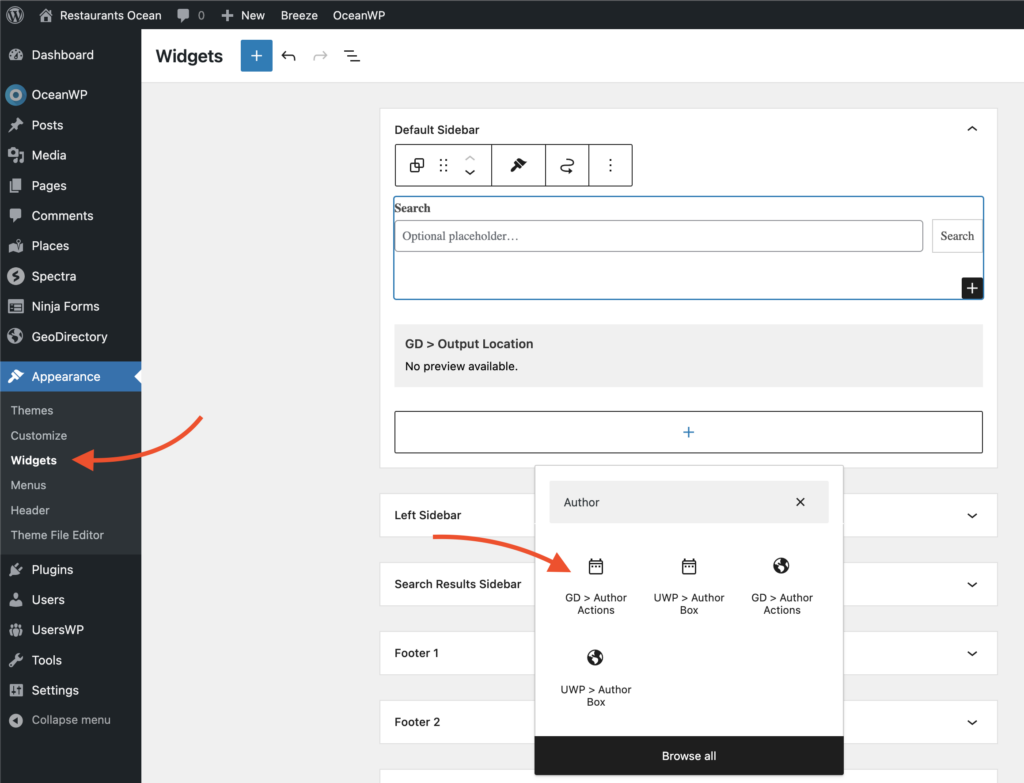
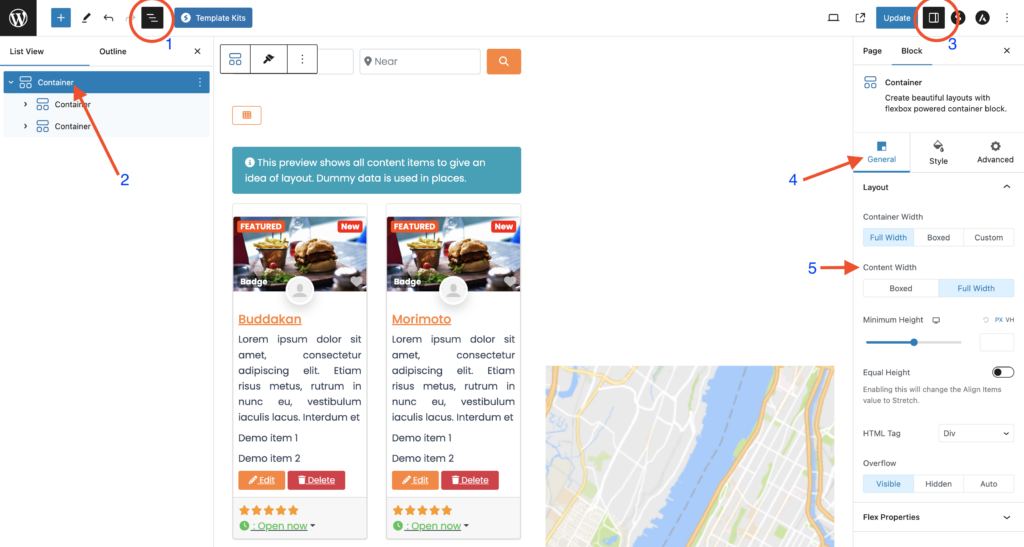
Now it’s time to add some sidebar widgets. so we will go to wp-admin > Appearance > Widgets.
Add GD > Author Action widget in the main sidebar. This widget will provide an Edit, Delete Listing option to the Listing Author.
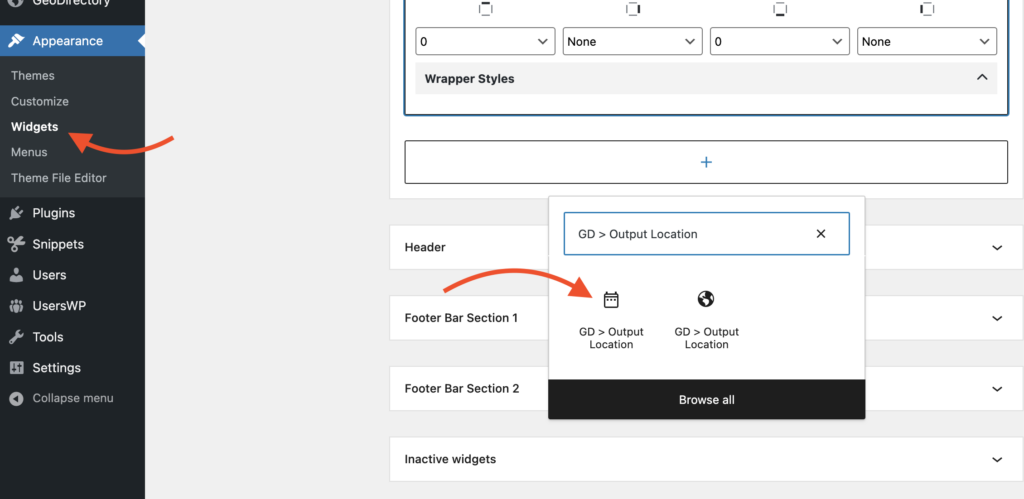
Add one more widget GD > Output Location. This widget will show all major listing details that have been marked to be visible on the Detail page.
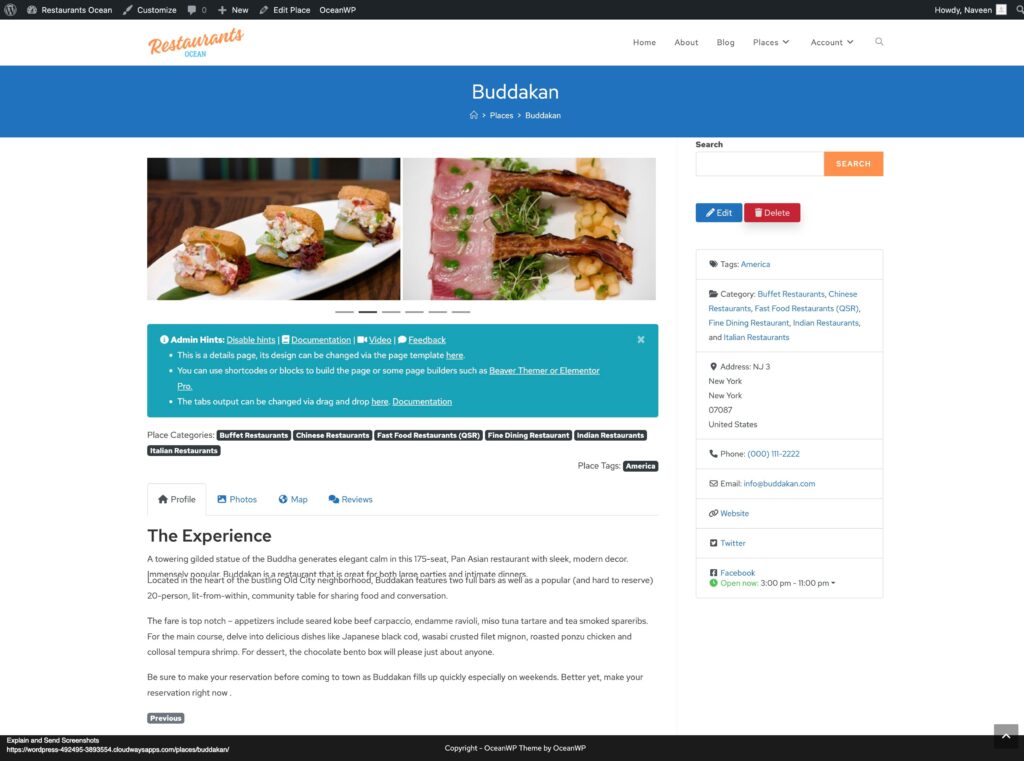
After doing this our Listing Detail page has been completed.
Adding premium features to your OceanWP Directory Website
If you wish, now you can add premium features to your directory, such as:
- Paid Listings: with the GeoDirectory Listing Price Manager add-on, you can set prices for listing submission. For each price tier, you can enable/disable features such as: Restricting the number of pictures for free listings while allowing more pictures for paid listings. Allowing more or fewer tags and categories. Enabling or disabling specific custom fields. Submitting longer or shorter descriptions.
- Claim Listings: This is a fundamental feature for a directory where the admin creates the database and invites business owners to take control of their free listings. The claim listing process may include forcing an upgrade to a paid listing to take over the listing’s ownership.
- Advertising: selling ads is another form of monetizing an online directory. If you have a lot of traffic, you can use Ads networks. Otherwise, you may sell ads directly, allowing businesses to add banners in specific areas of your website or allowing for listings to appear as ads, for example, on top of organic search results.
These are just three examples. However, a directory website offers many ways to make money online.
You can create a global marketplace of handcrafted items, sell event tickets, or sell discount coupons.
Make your directory website stand out by following this guide: Create a professional directory website.
The possibilities are limitless.
What is the best way to build a Kadence Directory Website?
Building a Kadence Directory Website involves the use of the Kadence Theme, Kadence Blocks, and the Best Kadence Directory plugin.
The Kadence Theme is a versatile and highly customizable WordPress theme that provides a solid foundation for your directory website.
Kadence Blocks, on the other hand, is a Gutenberg block library that allows you to create custom layouts and add various functionalities to your website.
Lastly, the GeoDirectory plugin is by far the best directory plugin for the Kadence theme, a powerful tool that enables you to add directory features to your website, such as business listings, user reviews, and advanced search capabilities.
Together, these tools provide a comprehensive solution for creating a robust and feature-rich directory website.
Kadence Directory Website using only a Free Theme and Free Plugins
In this tutorial, we will guide you through the process of building a comprehensive directory website using free WordPress resources, such as the Free Kadence Theme, the Kadence Blocks plugin, and the Free GeoDirectory plugin.
The directory website will feature:
- Unlimited listings with unlimited custom fields.
- Proximity search functionality.
- User Reviews.
- A front-end submission form, allowing users to submit, edit, and/or delete their listings.
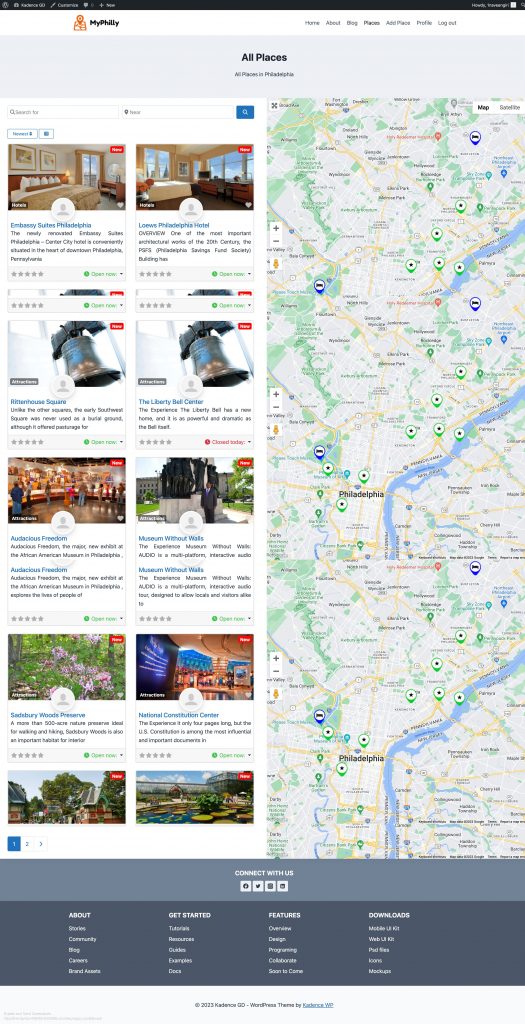
We assume you already have a WordPress installation with a hosting provider. For this tutorial, we will create a Business Directory for the City of Philadelphia.
Here’s what we’ll cover in this tutorial:
- Install and configure the Theme and Plugins
- GeoDirectory Install Wizard
- Design the Kadence Directory Website
- The Listings and Search Page Design
- The Single Listing Page Design
- Adding premium features to your Kadence Directory Website
- Kadence Blocks Directory Website Templates
By the end of this tutorial, you will have a fully functional directory website that’s ready to go live. Let’s get started!
Install and configure the Kadence theme and plugins
1. Install the Kadence Theme
To kick things off, we’ll begin by installing a theme. For the purposes of this tutorial, we’ll be using the Kadence Theme.
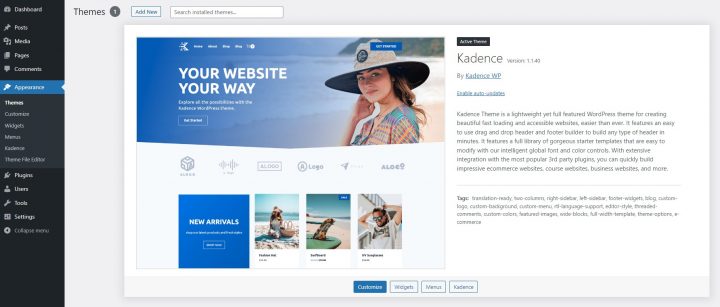
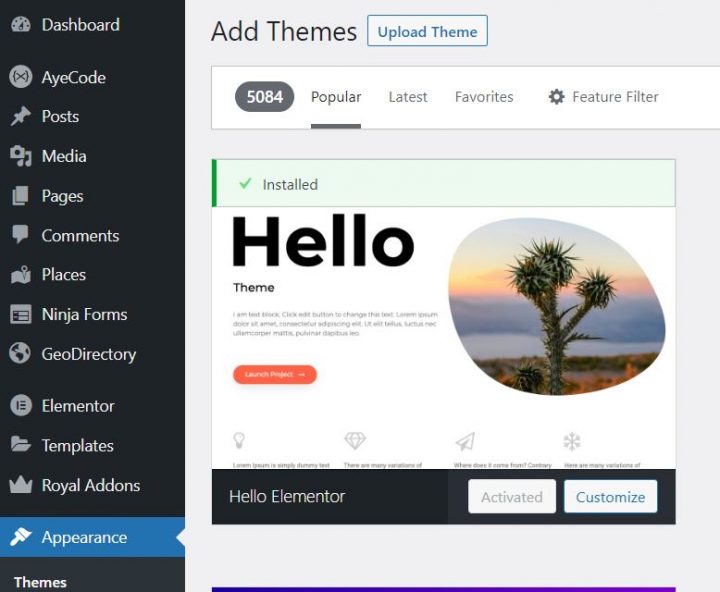
Go to Appearance >> Themes
Select Add New, Install, and Activate the Hello Theme.
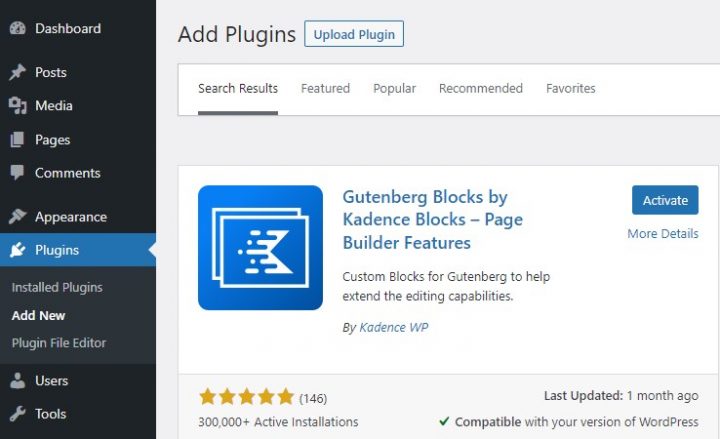
2. Install the Kadence Blocks plugin
Now you will need to install the Kadence Block Pluginì.
Go to Plugins >> Add new.
Search for Kadence. Install it and Activate it.
3. Install GeoDirectory
Last but not least, you need to install GeoDirectory.
Go to Plugins >> Add new, search GeoDirectory. Please install and activate it, and we are done installing plugins for now.
- Create or select an existing project.
- Enable the Keys.
- Get the Key.
- Activate a billing account.
- Restrict the API key (so it can only be used from the URL of your website)

4. GeoDirectory Install Wizard
For GeoDirectory, you will need to complete the Setup Wizard to configure the Google Maps API key and import a few dummy listings.
Choosing the Map System (Google Maps or OpenStreetMap)

You can choose between two mapping systems on the wizard’s first step. Google Maps and Open Street Maps (which doesn’t require an API key).
In this tutorial, we select Google Maps.
Click on the Generate Key button and follow the steps of this doc to generate a valid API key.
The essential steps are:
About point four: it is a requirement. However, you only get charged if you pass the threshold, which is $200/month.
This free credit is more than enough for 99% of directories.
Setting the default city
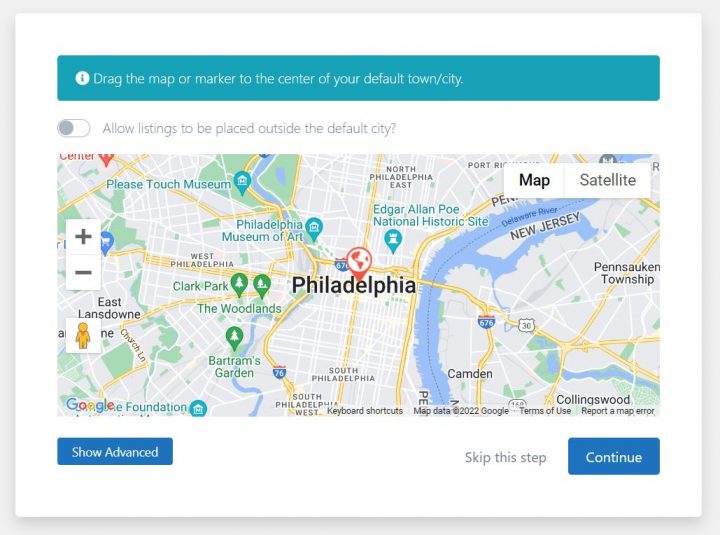
After that, you will set the default location. This is the city for which the directory is created. We will leave the default city unchanged.
GeoDirectory uses Philadelphia as the default City.
You can use whatever location you need.
If you need to add listings to more than one city, you will need the Location Manager add-on.
Adding extra features
In this step, we will install our UsersWP plugin, a user registration plugin that lets users register and sign in to your website.
This is needed to allow users to add and edit their listings. It will also create user profiles where they can find their listings, reviews, and so on.
We will also install Ninja Forms so that all listings have a contact form that sends emails directly to the listing owners.
AyeCode Connect is not mandatory for this tutorial. It is mainly needed if you want to add GeoDirectory premium add-ons and install them directly from the WordPress Dashboard.
Adding Dummy Data
The last step to complete the installation wizard is adding some dummy listings. This will also add listing categories that you can edit later according to your needs.
You will not add sidebar widgets and menu items right now, as we will do that later.
Design the Kadence Directory Website
Now that we installed the theme and the plugins and done the preliminary setup of GeoDirectory, we can start designing our Directory Website with the Kadence Suite of tools.
1. Kadence Directory Home page design
You can create a new page or use one WordPress creates by default, like the Sample Page.
Go to Pages, edit the Sample page, and rename it Home or create a new page for this.
Now click the page setting icon on the top right section of the screen.
Apply the following changes:
- Page Title: Disable
- Page Layout: Full Width
- Content Style: Unboxed
Leave the rest unchanged. Next, go to Appearance > Customize > Homepage Settings and select the above page for your Home.
We will select the Posts page later.
Before creating the Home Page content we need to work on the header.
We’ll come back to design the Home Page content after that.
The Logo
First thing first, we will need a logo for our website.
You don’t need to invest in a designer to sketch the 1st version of your logo.
One of the biggest mistakes you can make when starting a new directory is investing too much time and money before testing the product market fit.
You can design a logo in five minutes with an app like Canva, which is cheap and surprisingly good.
For an MVP (minimum viable product), a logo designed with Canva will be more than enough.
There are several logo templates to choose from, and it doesn’t matter if your initial logo is not as perfect and original as you believe it should be.
If your project gets traction, you can always invest in improving it or radically changing it later.
An average logo is never the leading cause of a failed project.
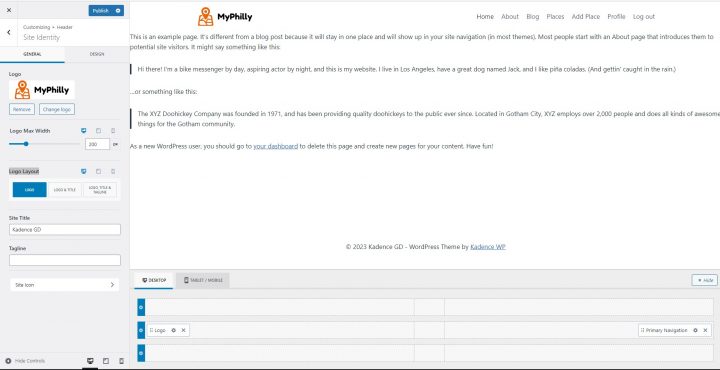
After designing your logo, go to Appearance > Customize > Header, click Logo > Select Logo, and upload your PNG file. Skip cropping (or crop the image as needed), in Logo Layout select the option Logo and click publish.
The Navigation Menu
After creating and adding the logo, go to Appearance > Menus, and create your menu.
Add the links needed (from the left column to the right column) and save. In the Menu Settings > Display location section, you can check the “Primary” option.
If you want, you can make the same menu appear on the footer or create another menu to appear there.
In this example, we’ll only have the header navigation menu.
We added eight links:
- Home
- About
- Blog
- Places
- Add Places
- Profile
- Login
- Logout
The Login link (from UsersWP Endpoints) will only appear for Logged-out users, while the logout and profile links will only appear for logged-in users.
The Content
Now you can start designing the home page. First, you will need to add a hero image below the header.
To do this, go to Pages > Home and click Edit.
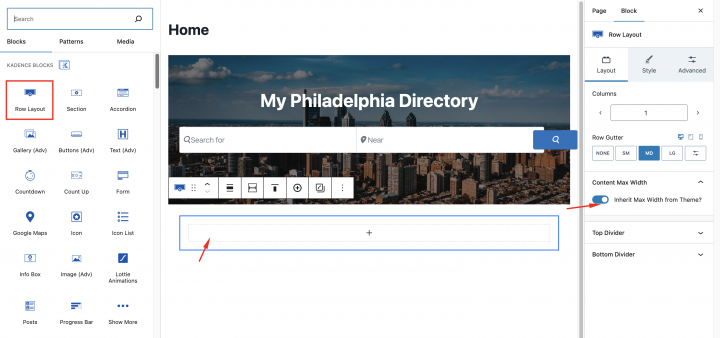
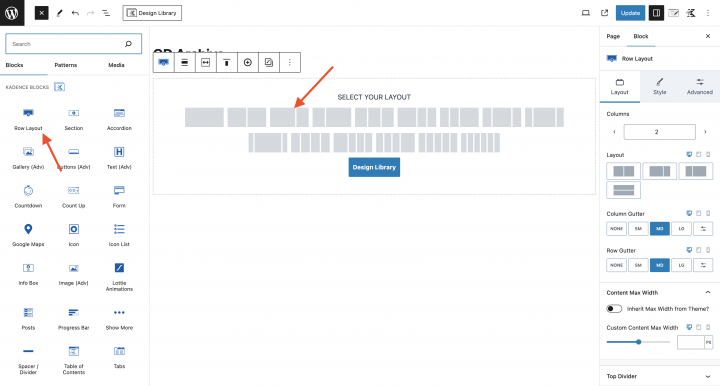
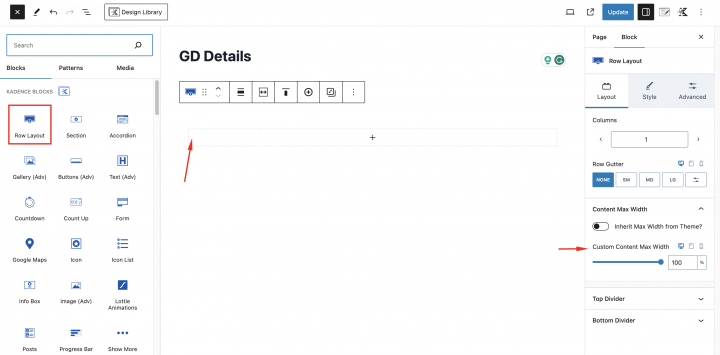
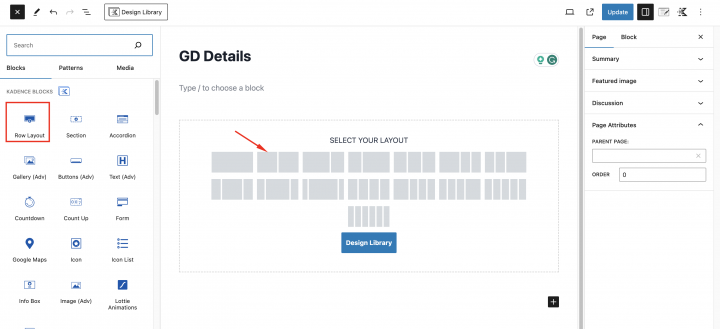
If you used the Sample page, delete the Text. If you created a new page, add a new Row Layout block.
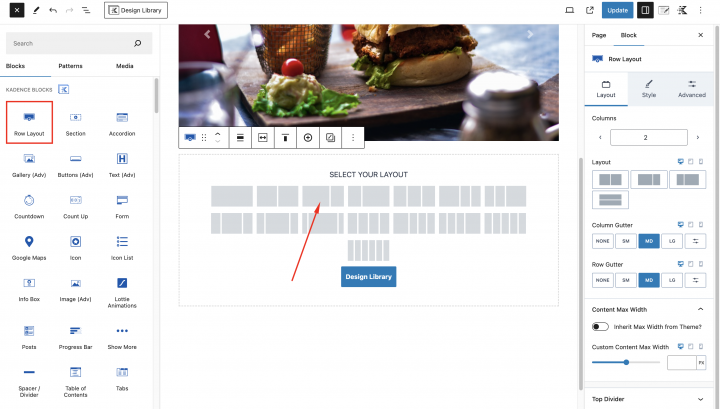
Type /Row where it says Type / to choose a block and select a Kadence Row Layout Block. Next, select the single Row (1st option)
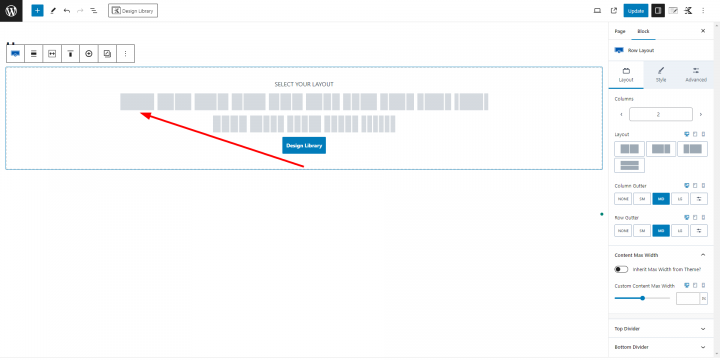
In the Content Max Width option add 800.
Next, click Style from the block top tabs. Click Select Image in the Background image option
For the Hero Section, we will use this free image of Philadelphia from Pexels.com (Thanks, @Kelly).
Upload your image and select the Fixed option for the Background Image Attachment and update.
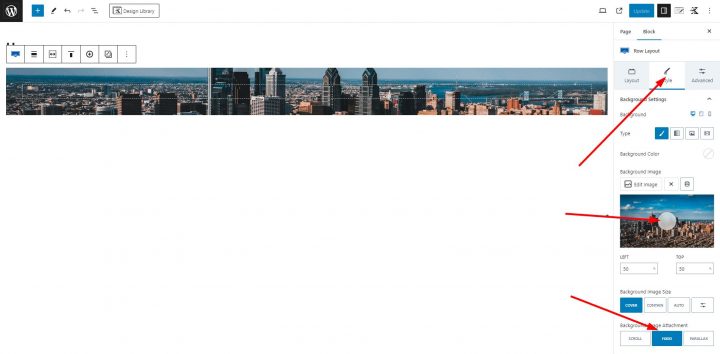
You can now see only a ribbon of our image, but the next steps will make it appear as needed.
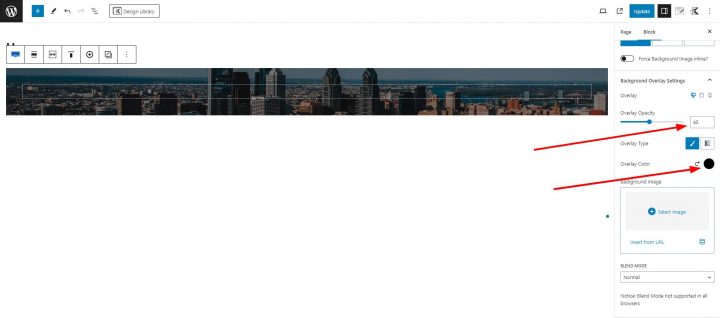
The image needs an overlay, or any text on top won’t have sufficient contrast and will be difficult to read.
Select Background overlay settings, set Overlay Opacity to 45, and Overlay Color to 000000 (Black).
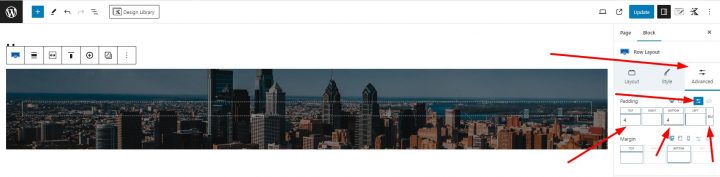
Now click on the Advanced Tab and let’s add some padding. 4 em Top and Bottom padding to be precise. To do so click on the Set Custom Size Icon, add 4 in both the top and bottom input fields, and select EM as size.
Now that we have made the hero image darker, we can add text.
Click the center of the image (a plus button is barely visible). This will allow you to select a new block. Add a Section block.
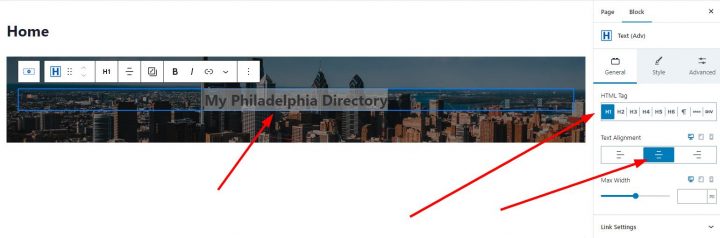
Click the center of the image again and add a Text (Adv) block.
in the Text block add something like: “My Philadelphia Directory”.
In the General Section of the Block select H1 as HTML Tag. Text Alignment Center.
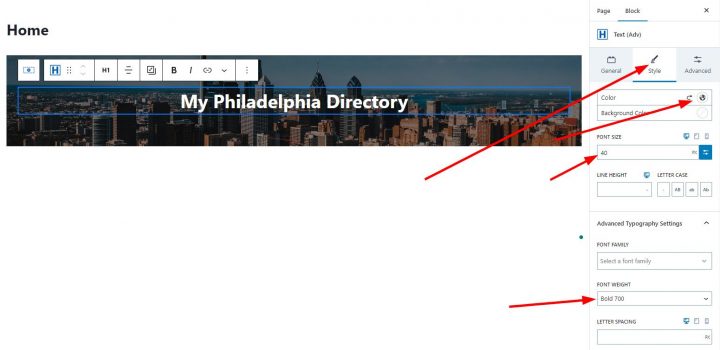
Click on the Style tab, and select Color FFFFFF (white).
Next in the FONT SIZE section, click the set custom size icon and set 40 as the font size.
Finally, in Advanced Typography Settings > FONT WEIGHT select Bold 700.
At this point, we can add the search form to the hero section of our Kadence directory website.
Click on the + button at the lower-right corner of the Title Section to add a new section.
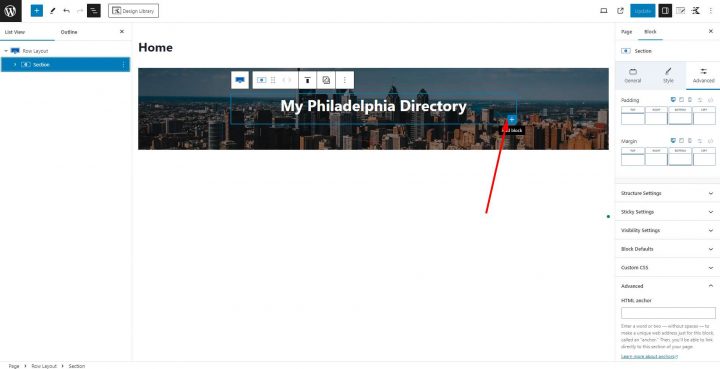
Search and select another Section Block, click on the plus button in the middle of the new section, and add a GD > Search block.
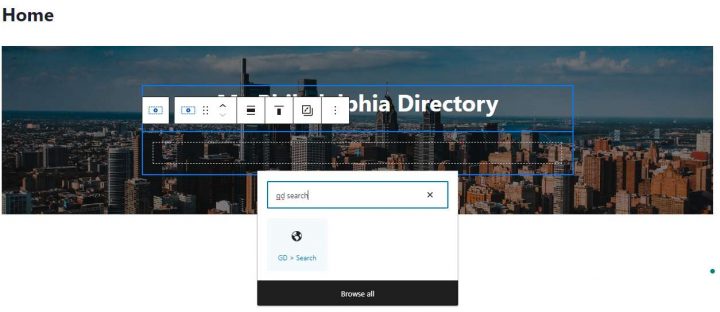
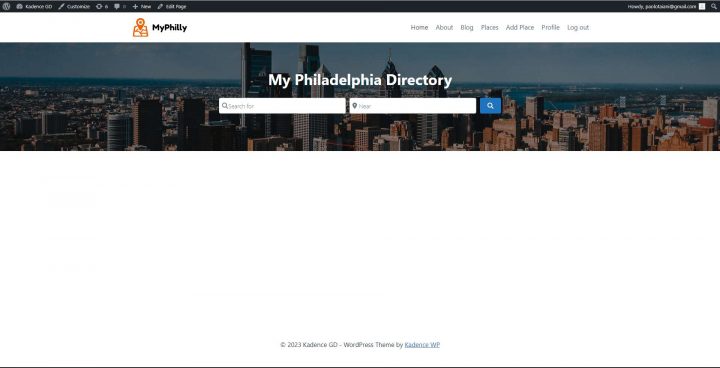
At this point, we completed the Hero Section of the home page and this is what it looks like.
It’s time to add a few more required sections on the homepage, I will add a recent listings section now.
Below the hero section, add one Row Layout block by clicking on the plus icon and add a Section block inside it.
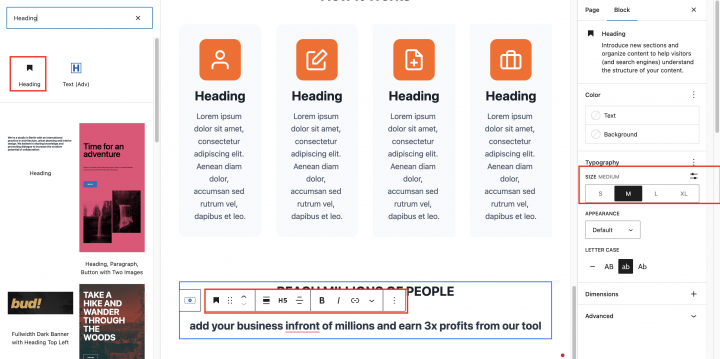
Now we will add a heading block and set Typography to
Size: Large
Letter case: Ab
Text: Recent Business Listings
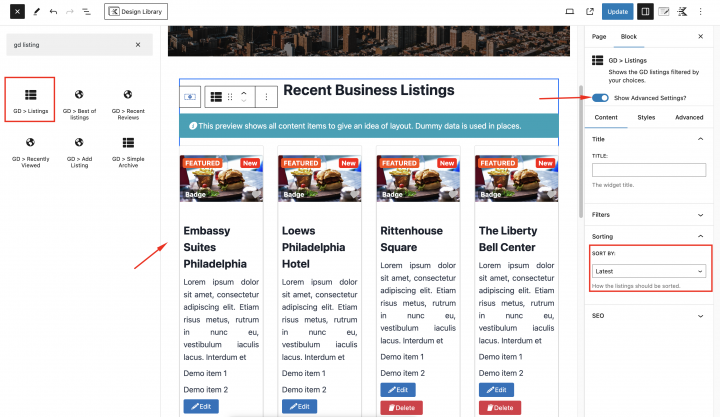
To show the latest listings Let’s add the GD > Listings block below it with the following setting.
Sort by: Latest
Layout: Grid View( 4 Columns )
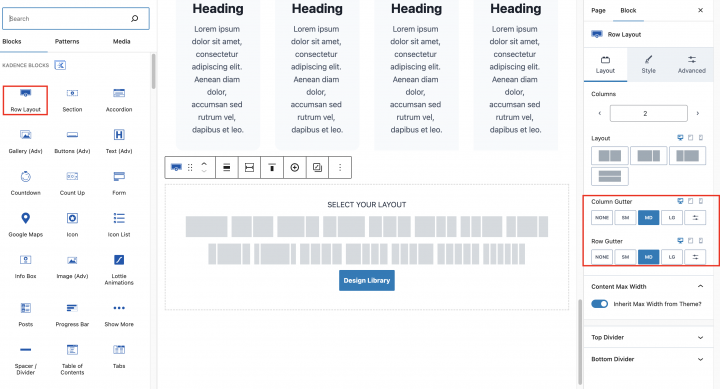
Now let’s add one Row Layout block by clicking on the plus icon and adding a Section block inside it.
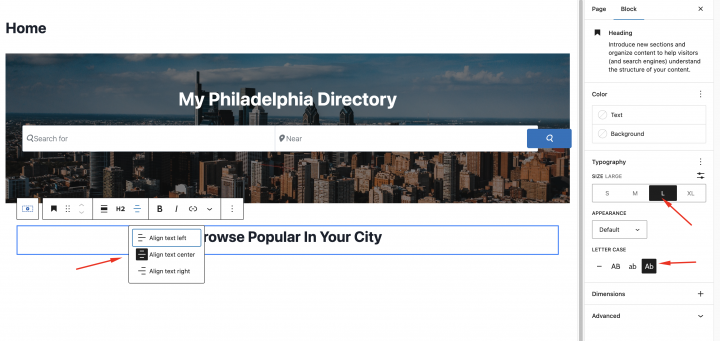
In the Typography setting of the heading block
Size: Large
Letter case: Ab
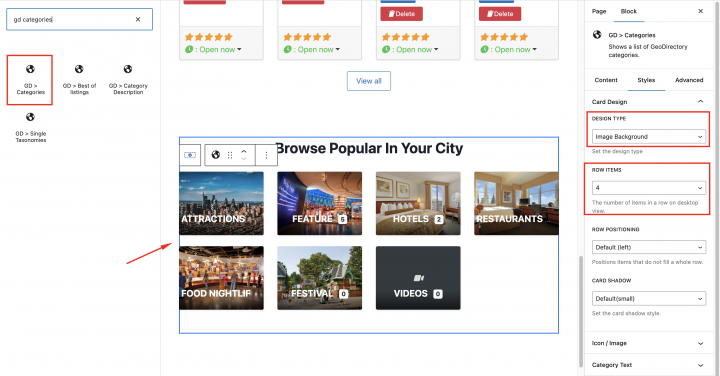
Text: Browse Popular In Your City

Now add the GD>Category block inside it to display all the categories.
In the style add the following settings
Row Items: 4
Design Type: Image Background
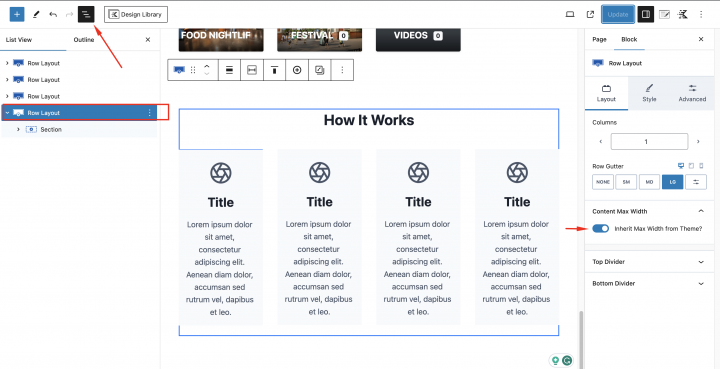
Now we will add one more section for How It Works. let’s add one Row Layout block by clicking on the plus icon and selecting the 4-column layout.
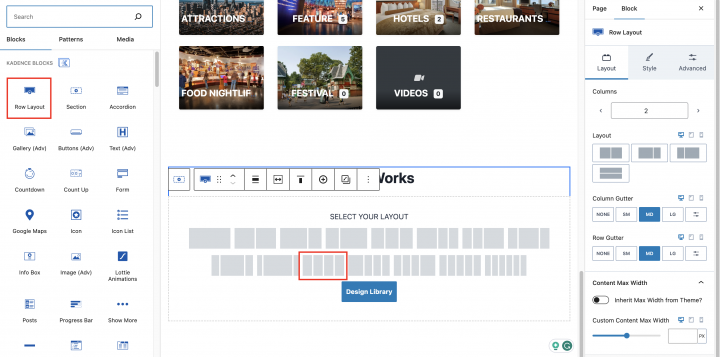
Now add the Info box block in all the containers.
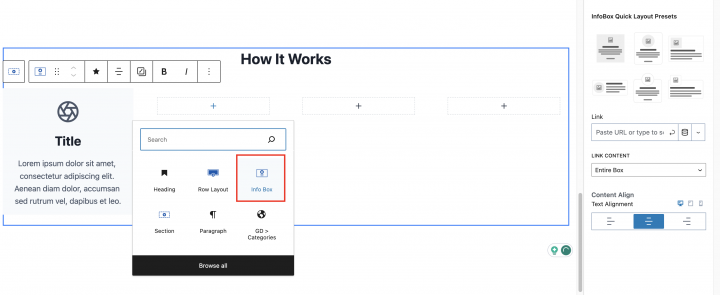
In the content max-width: Inherit Max width from the theme.
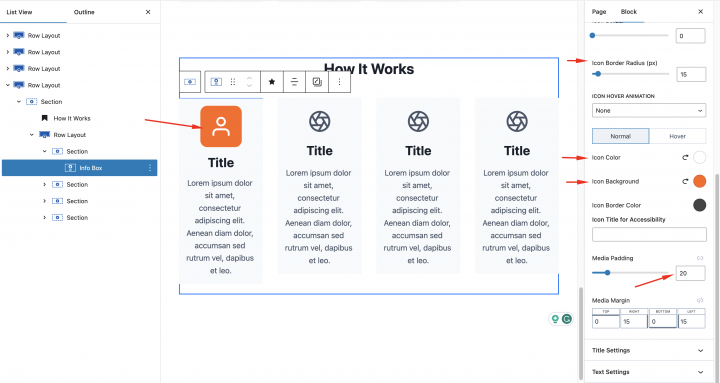
Now we will set the icon for each container. Click on any Info Box and in the block setting Style > Media Settings
Media Type: Icon

Now let’s set the color of the icons
Icon Color: #FFFFFF
Icon Background: #FF6616
Media Padding: 20px
Icon Border Radius: 15px
Now let’s add one more empty Row Layout
we will add a CTA inside it.
Add a Heading and in the Typography setting of the heading block
Size: Large
Letter case: Ab
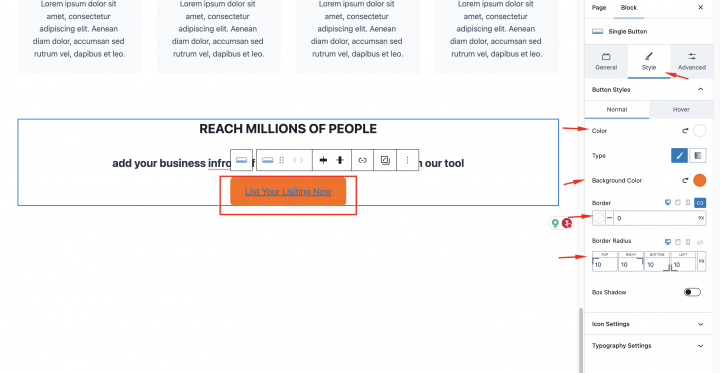
we will add the single button block and Inside the style setting of this block set
Color: #FFFFF
Background Color: #FF6A00
Border Radius: 10px
We will set up the Footer now.
Let’s go to Appearance > Customize > Footer
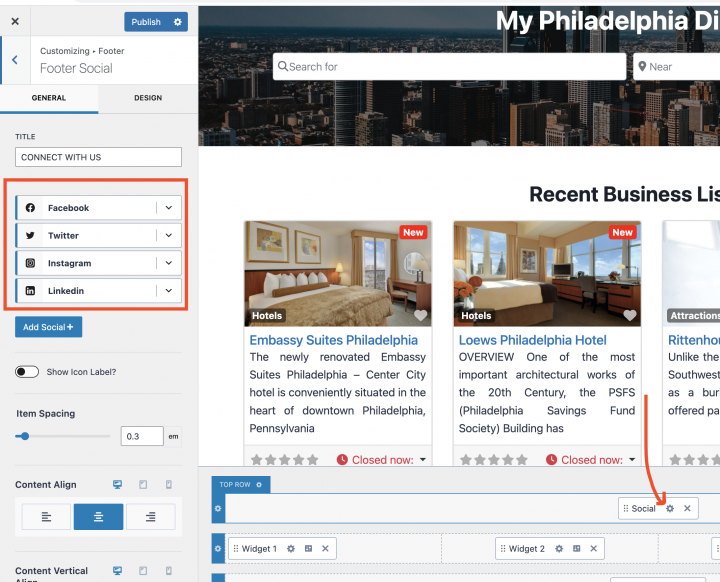
We will add a few footer menu widgets here and Kadence provide a Social block. You can add it at the top of the Footer section.
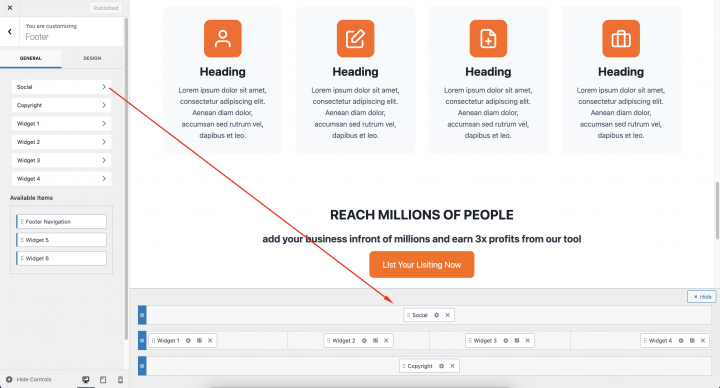
When you click on the setting icons of the social widget. it will open up a setting where you can set Social options.
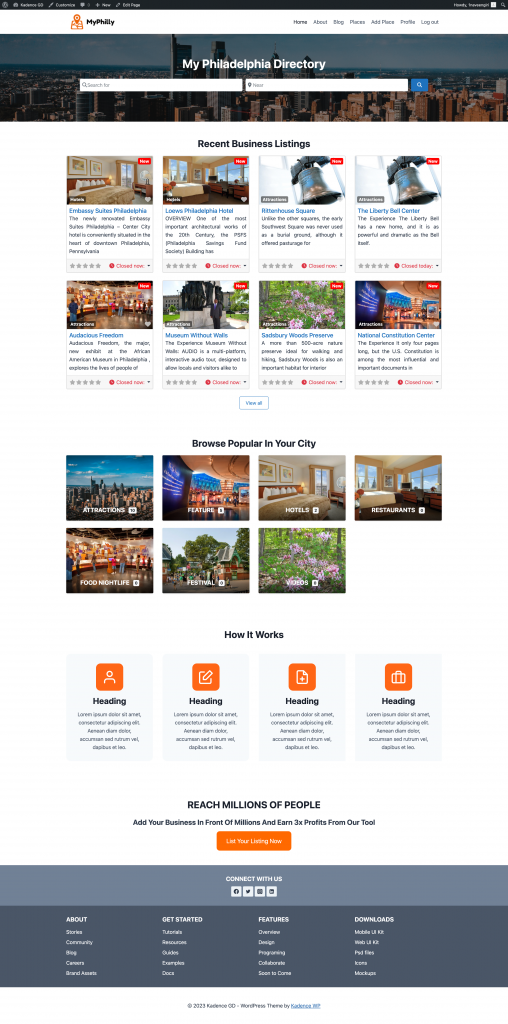
Congratulations your Hompage is ready now.
Kadence Directory Website Listings and Search Page Design
Now we need to design two pages that are essential for any directory.
The listings page (general archive, categories, tags), and the search results page.
GeoDirectory creates them by default with a general layout. In this tutorial, we will customize the layout of these pages a bit.
The listing and search pages are mostly identical so we create it once and just copy the layout on the other page.
I have decided the Listing page layout would be the listings on the left, and on the right, a sticky map showing the listings’ precise location.
This is very easy.
Listings page
Go to Geodirectory > Settings > General > Pages > Click on edit GD Archive page template
Remove all the content from this GD Archive page template.
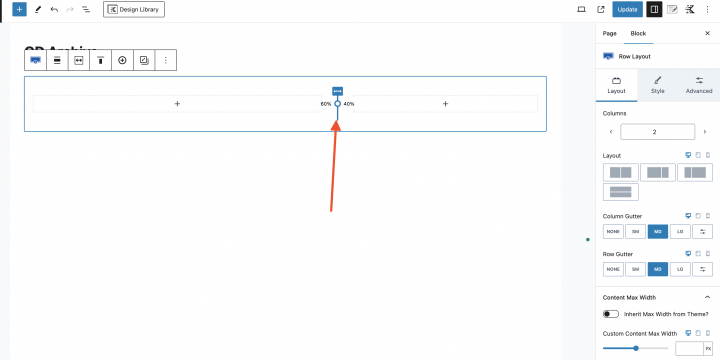
Add a Row layout with
Make it a 60 – 40 ratio by dragging the marked dot in the below image.
Now in the left section, we will add all required blocks for the GD Archive page. Example like GD > Loop Action, GD > Loop, GD > Loop Pagination, and GD > Search
On the right column, we will drag the GD > Map block.
we will keep all the settings default for the GD > Map. let’s give it some height and I have decided to give it the height of 100vh.
In the map block parent row container, we will add a CSS class kt-inside-inner-col
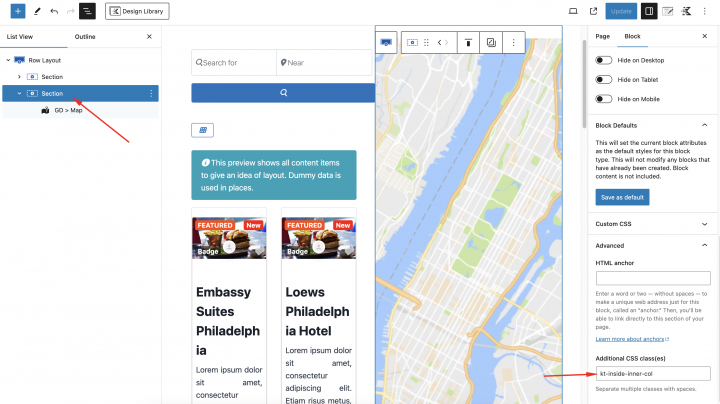
and we will add the following CSS in the theme customizer Appearance > Customize > Additional CSS
body.archive .kt-inside-inner-col {
    position: sticky;
    top: 0;
}
Now at last we will make the page Full Width by clicking on the Kadence icon on the top right and set Page Layout to Full Width.
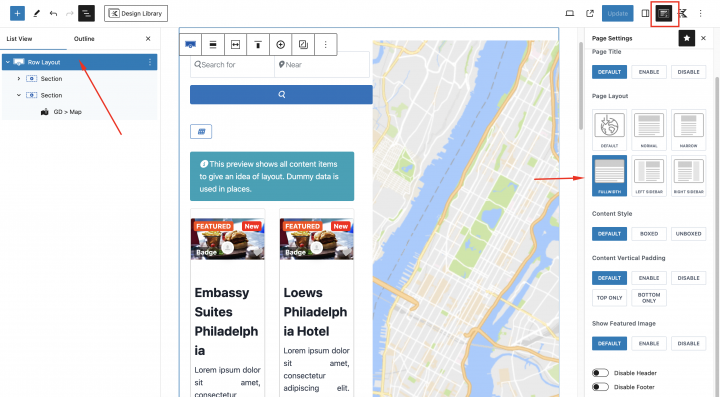
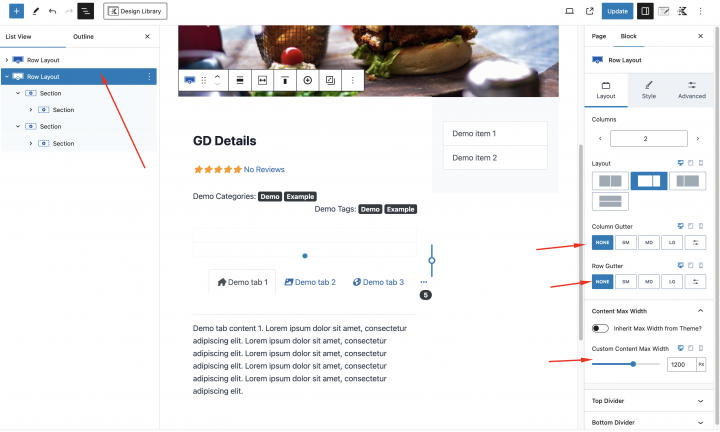
and we will also set the following style for the main Row Layout.
Max Width: 100%
Column Gutter: SW
Row Gutter: None
Go to Geodirectory > Settings > General > Pages > Click on edit GD Search page template
Remove all the content from this GD Search page template.
Copy all the content of the GD Archive page and paste it into the GD Search page.
So now our GD Search and Archive page is ready.
Another option to easily create this template is to use a full-width page template and the GD > Simple Archive block.
Kadence Directory Website single Listing page design
Now to edit and customize the GD Detail page, You can go to Geodirectory > Settings > General > Pages > Click on edit GD Detail page template.
In this template, you will already find default content generated by Geodirectory.
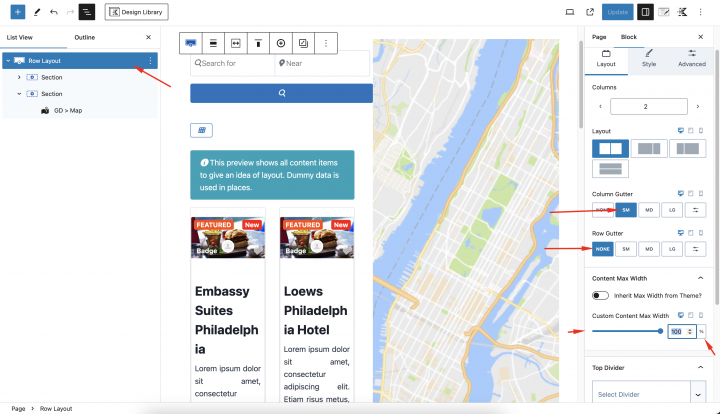
we will remove all these default content and add a new Row Layout with: Content Width: 100%
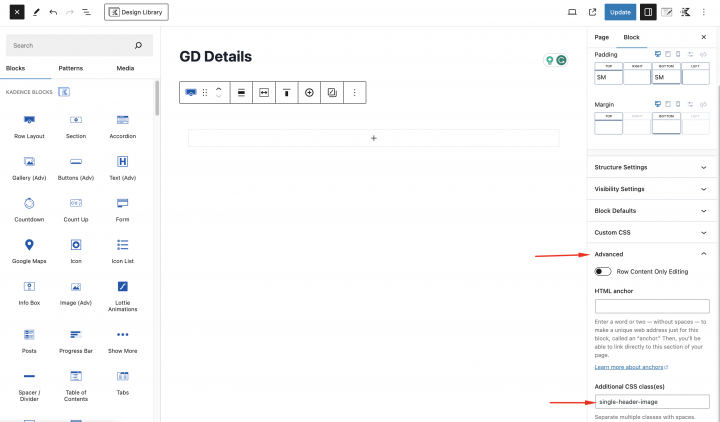
Add a class (single-header-image) to this row layout from Advanced > Additional CSS class
Now we will add a two-column Row Layout container.
On the Left container, we will add the GD > Post Badge block to define some badges and on the right container, we will add the GD > Post Favorite block.
Inside the parent Row Layout of this container, we will add a custom class(header-position-feature).
Below this, we will add an image slider and for that, we will drag the GD > Post Image block.

we will select the following settings
Output Type: Slider
Auto Start: Enable
Animation: Slide
Now we will add a two-column Row Layout Container.
Inside the left container, we will add the required blocks for the GD Detail page. which includes GD > Single Taxonomies, GD > Single Tabs, GD > Single Next Prev.
With following settings
Max Width: 1200px
Column Gutter: SW
Row Gutter: None
On the right container, we will use the GD > Output Location and GD > Author Actions block.
we will add some extra design to the GD Detail page layout with the below css.
Add the following CSS in the Apperanace > Customize > Additional CSS
.single-header-image {
    max-height: 400px !important;
    overflow: hidden;
}

.geodir-page-single .entry-header {
	display: none;
}
.geodir-page-single .content-area {
	margin: 0px;
}
.geodir-page-single .content-container {
	padding: 0px;
	max-width: 100%;
}
@media (min-width: 576px) {
.bsui .row.row-cols-md-0 .card .embed-responsive {
    max-width: 100% !important;
    display: inline-block;
}
}
.geodir-page-single .entry-content-wrap {
	padding: 0px !important;
}
.geodir-page-single .entry-content {
	margin-top: 0px;
}
.single-header-image {
	max-height: 400px !important;
	overflow: hidden;
}
.single-feature {
	padding: 10px !important;
}

.header-position-feature {
	position: absolute !important;
	width: 100%;
}

.kb-row-layout-id15_c06314-2b > .kt-row-column-wrap {
    z-index: 1;
    position: relative;
		padding:0px !important;
}
Now our GD Detaiil page is ready.

Adding premium features to your Kadence Directory Website
If you wish, now you can add premium features to your directory, such as:
- Paid Listings: with the GeoDirectory Listing Price Manager add-on, you can set prices for listing submission. For each price tier, you can enable/disable features such as: Restricting the number of pictures for free listings while allowing more pictures for paid listings. Allowing more or fewer tags and categories. Enabling or disabling specific custom fields. Submitting longer or shorter descriptions.
- Claim Listings: This is a fundamental feature for a directory where the admin creates the database and invites business owners to take control of their free listings. The claim listing process may include forcing an upgrade to a paid listing to take over the listing’s ownership.
- Advertising: selling ads is another form of monetizing an online directory. If you have a lot of traffic, you can use Ads networks. Otherwise, you may sell ads directly, allowing businesses to add banners in specific areas of your website or allowing for listings to appear as ads, for example, on top of organic search results.
These are just three examples. However, a directory website offers many ways to make money online.
You can create a global marketplace of handcrafted items, sell event tickets, or sell discount coupons.
Navigate the creation process with ease using this guide: A step-by-step guide to creating a directory website.
The possibilities are Unlimited.
Build a Directory Website with Kadence Blocks
The Kadence theme provides many extended blocks. You can find these blocks inside the Kadence Blocks list and you can also find them in Gutenberg block lists for using it.
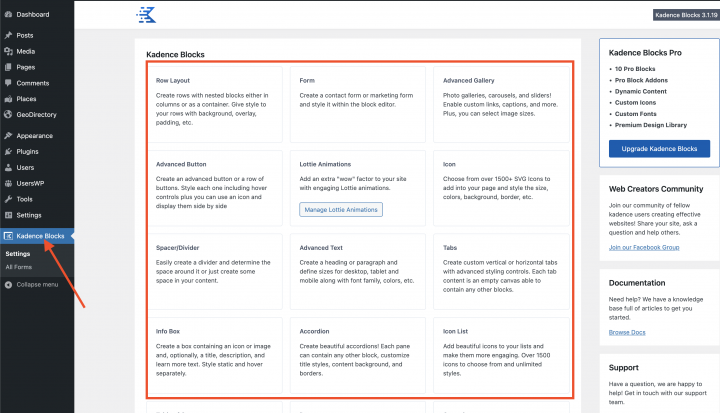
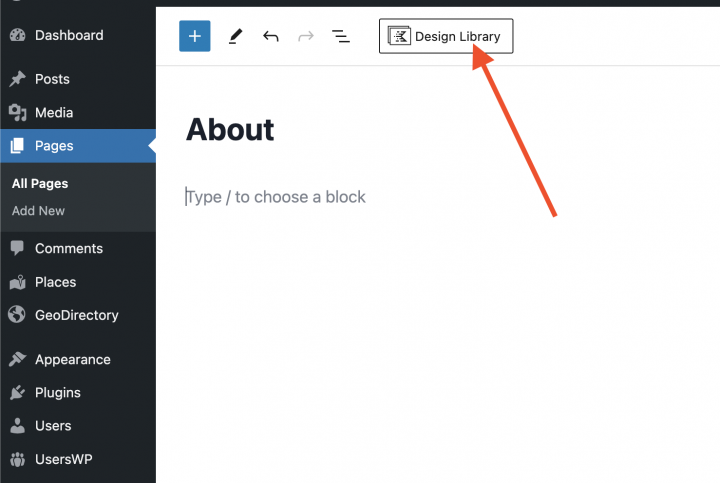
Inside each page, you have a Design Library button at the top. You can click it and use all the predefined block layouts from there.
Kadence Blocks Directory Website Templates
Geodirectory has many predefined demos available with the Kadence theme. You can find all these beautiful demos here.
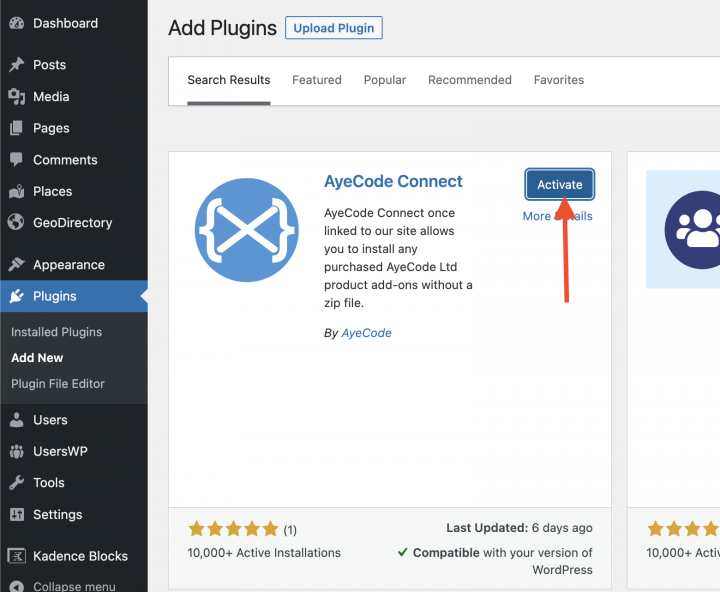
You can import these templates into your website. You need the Ayecode connects plugin, Download and Activate this plugin if not already installed.
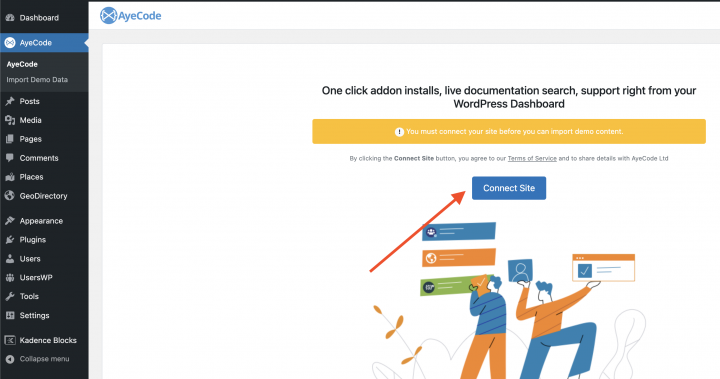
After Activating this plugin, you have to connect your membership.
You can import the demo by clicking on the view button beside the Kadence demo.
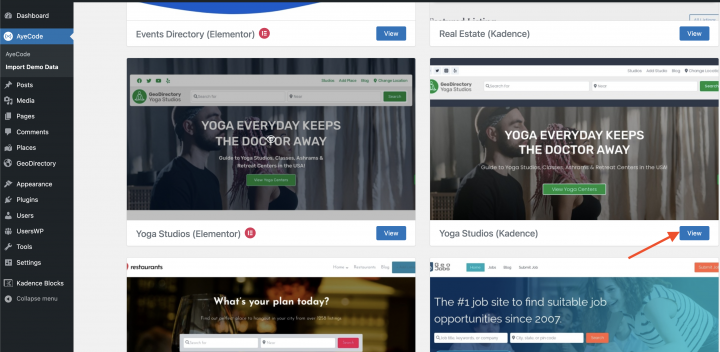
Examples are the Real Estate Directory Theme, The Restaurant Directory Theme, the Job Board Theme and the Yoga Salon Directory Theme designs for the Kadence Theme.
What’s the best way to build a Directory Website using the Astra Theme?
The best way to create a directory website using the Astra Theme is by using the GeoDirectory Plugin and the Spectra Blocks Plugin. A great way to build a powerful and customizable online directory.
Here’s a step-by-step guide to building a Directory Website using the Astra theme and their Spectra Website Builder Plugin
- Install the Astra theme
- Install Spectra Blocks
- Install and set up GeoDirectory
- Design the Directory Website using the Astra theme and Spectra Block
Let’s see how we can build a Directory Website with GeoDirectory and the Astra theme in detail.
In this tutorial, we will:
Installing Theme and Plugins.
1. Install the Astra Theme
First, you will need to install a Theme, and for this tutorial, you will install the Astra theme.
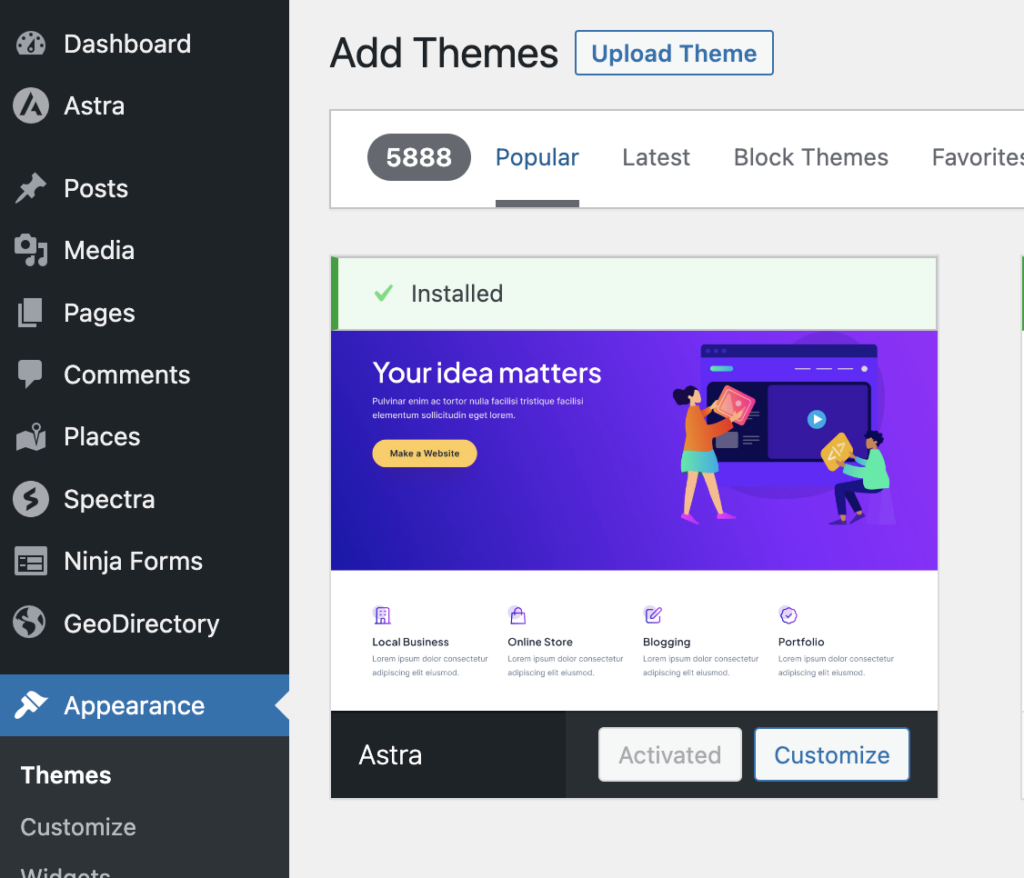
Go to Appearance >> Themes
Select Add New, Install, and Activate the Astra Theme.
2. Install the Spectra Blocks plugin
Now you will need to install the Spectra Blocks plugin. This plugin provides more options to design the page using Gutenberg blocks.
Go to Plugins >> Add new.
Search for Spectra Blocks. Install it and activate it.
You can skip all steps of the Setup Wizard.
3. Install GeoDirectory
Last but not least, you need to install GeoDirectory.
Go to Plugins >> Add new, search GeoDirectory. Please install and activate it, and we are done installing plugins for now.
4. GeoDirectory Install Wizard
For GeoDirectory, you will need to complete the Setup Wizard to configure the Google Maps API key and import a few dummy listings.
Choosing the Map System (Google Maps or OpenStreetMap)
You can choose between two mapping systems on the wizard’s first step. Google Maps and Open Street Maps (which doesn’t require an API key).
In this tutorial, we select Google Maps.
Click on the Generate Key button and follow the steps in this doc to generate a valid API key.
The essential steps are:
- Enable the Keys.
- Create or select an existing project.
- Get the Key.
- Activate a billing account.
- Restrict the API key (so it can only be used from the URL of your website)
About point four: it is a requirement. However, you only get charged if you pass the threshold, which is $200/month.
This free credit is more than enough for 99% of directories.
Setting the default city
After that, you will set the default location. This is the city for which the directory is created. We will leave the default city unchanged.
GeoDirectory uses Philadelphia as the default City.
You can use whatever location you need.
If you need to add listings to more than one city, you will need the Location Manager add-on.
Adding extra features
In this step, we will install UsersWP, a user registration plugin that enables users to register and log in to your website.
This is needed to allow users to add and edit their listings. It will also create user profiles where users can find their listings, reviews, and other relevant information.
We will also install Ninja Forms so that all listings have a contact form that sends emails directly to the listing owners.
AyeCode Connect is not mandatory for this tutorial. It is mainly needed if you want to add GeoDirectory premium add-ons and install them directly from the WordPress Dashboard.
Adding Dummy Data

The last step in the installation wizard is to add some dummy listings. This will also add listing categories that you can edit later according to your needs.
You will not add sidebar widgets and menu items right now, as we will do that later.
Design the Astra Directory Website
Now that we have installed the theme, plugins, and completed the preliminary setup of GeoDirectory, we can start designing our Directory Website with Astra.
1. Astra Directory Website Home Page design
You can create a new page or use one WordPress creates by default, like the Sample Page.
Go to Pages, edit the Sample page, and rename it Home, or create a new page for this purpose.
Next, go to Appearance > Customize > Homepage Settings and select your Home.
The Logo
First things first, we will need a logo for our website.
You don’t need to invest in a designer to sketch the 1st version of your logo.
One of the biggest mistakes you can make when starting a new web directory business is investing too much time and money before testing the product market fit.
You can design a logo in just five minutes with an app like Canva, which is surprisingly affordable and effective.
For an MVP (minimum viable product), a logo designed with Canva will be more than enough.
There are several logo templates to choose from, and it doesn’t matter if your initial logo isn’t as perfect or original as you believe it should be.
If your project gains traction, you can always invest in improving it or make radical changes later.
An average logo is never the leading cause of a failed project.
After designing your logo, go to Appearance > Customize > Site Identity, click Select Logo, and upload your PNG file. Skip cropping (or crop the image as needed) and click publish.
The Navigation Menu
After creating and adding the logo, go to Appearance > Menus, and create your menu.
Add the links needed (from the left column to the right column) and save. In the Menu Settings > Display location section, you can check the “Header” option.
If you want, you can make the same menu appear on the footer or create another menu to appear there.
In this example, we’ll only have the header navigation menu.
We added seven links:
- Home
- About
- Blog
- Places
- Profile
- Login
- Logout
The Login link (from UsersWP Endpoints) will only appear for Logged-out users, while the log-out and profile links will only appear for logged-in users.
The Typography
Now let’s define the Typography for the website text font and size. I am setting a global Font Family, Font Weight, and Font Size that will be applied to all site text.
The Content
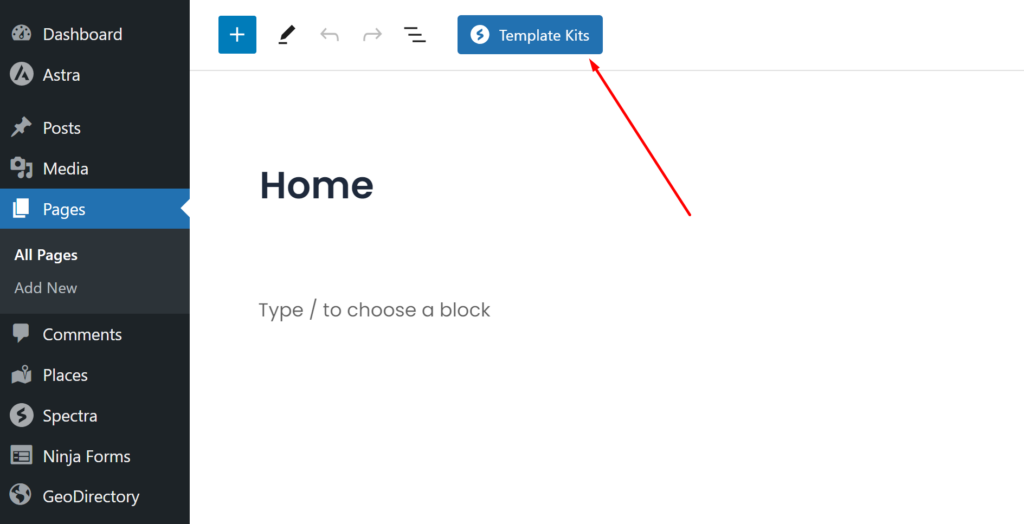
The Spectra block plugin provides many pre-built page templates. You can access them by clicking the Template Kits button at the top of the edit page screen.
You can use these page templates or a specific pattern for building your site pages.
I will start building this page from scratch using the Spactra Blocks plugin.
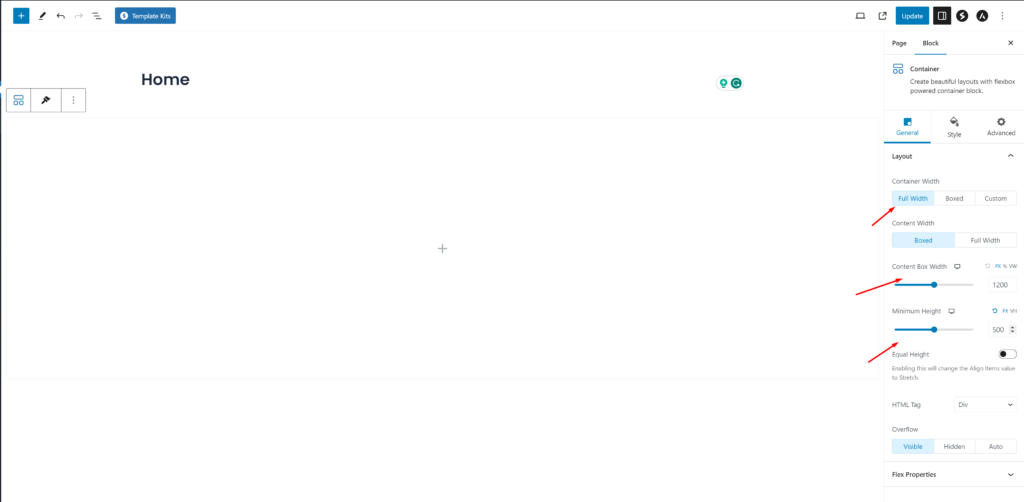
We need a hero header on the homepage; let’s add a container block provided by the Spectra Blocks plugin.
Click on the added section and select Full Width in the Content Width option as mentioned in the screenshot below.
Next, click Style from the top tabs. Select > Type Images as the Background Type.
For the Hero Section, we need an image, which we will download for free from Pexels.com (Thanks, @Kelly).
Upload your image and select Repeat to No Repeat and Size to Cover.
The image needs an overlay, or any text on top won’t have sufficient contrast and will be difficult to read.
Select Overlay Type: Color, Color: #1E293B, and Opacity: 0.3
Now that we have made the hero image darker, we can add text.
Drag and Drop a Heading Element inside the Hero Image.
It’s time to give a title to our Homepage Hero Image.
From the Style tab, change the text color to white (#FFFFFF) to improve the contrast and readability.
In this tutorial, I will use a simple example, such as “Find the Best Restaurant in Philadelphia.” You can add whatever slogan you want here. Don’t forget to center the text using the alignment option.
To add the GD search to the homepage header, drag the GD > Search block into the hero container.
Next, add some minimum height to this hero container. I will set the height and width to 800px, and also make the container’s width full width and its content width to Boxed.
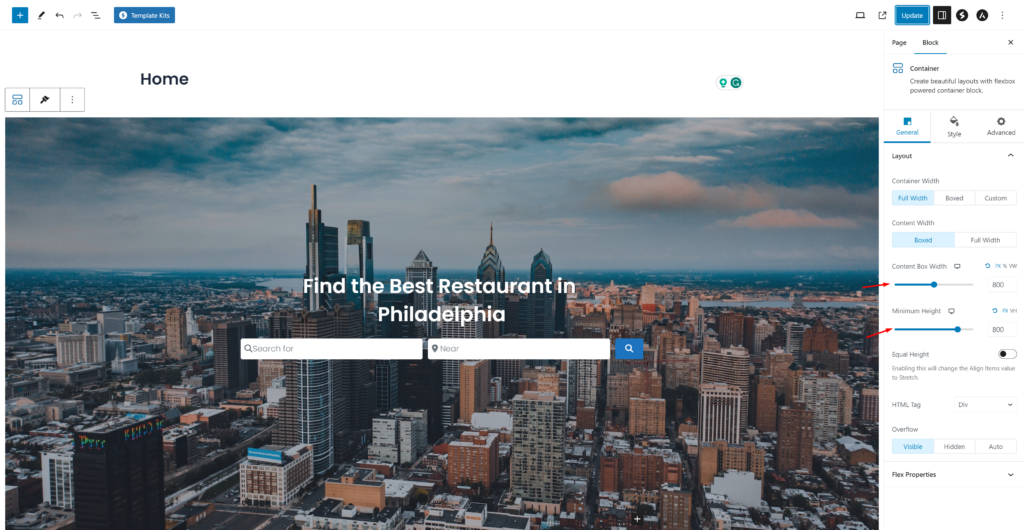
Now the homepage header looks like this with the page title and some extra space.
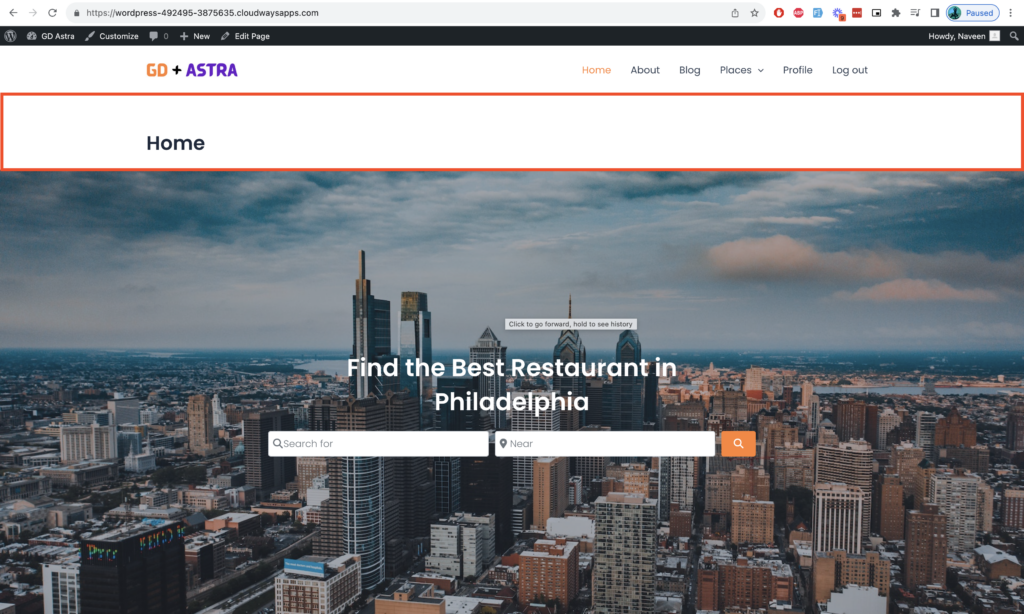
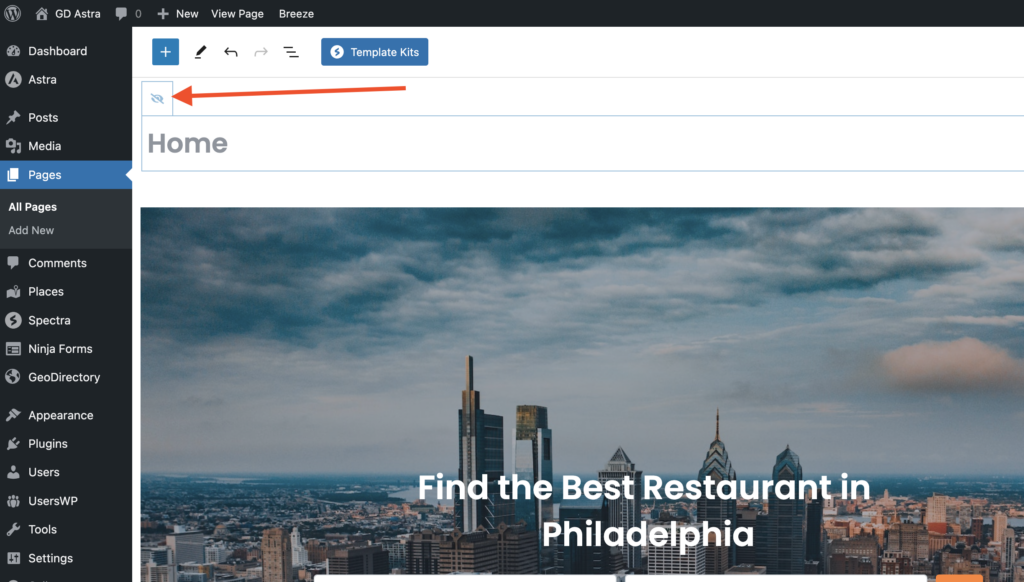
It’s time to remove this page title and extra space in the header section.
Click on the page title, and you will see an Eye icon; click on it to hide the page title and remove the extra space.
It’s time to add a few more required sections on the homepage. I will add a category section now.
Below the hero section, click the plus icon to add another container, then add the GD > Categories blocks there.
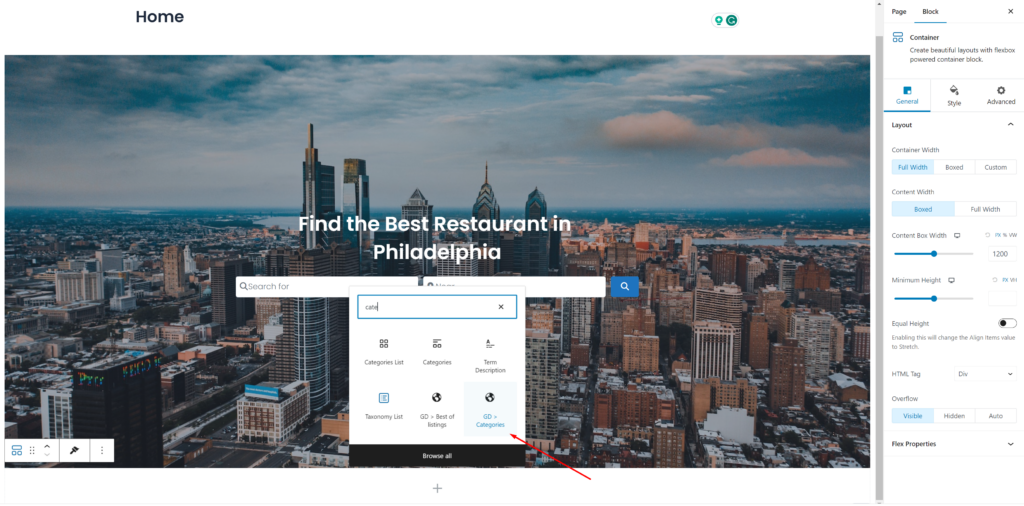
Now we will set up some necessary configurations in this GD > category block. We will set the Design type to Image Background, with 4 Row Items, and enable the use category image setting.
You can set the image to a category by editing the category from the wp-admin -> places -> Place Categories.
Each category has an option to set a default image
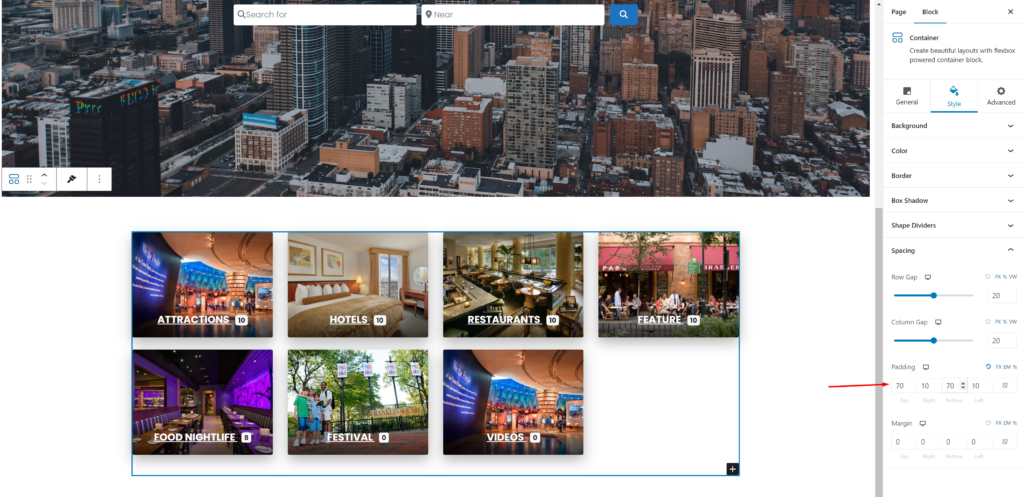
Now is the time to add some padding to this new container. So you can click on the outer container and set the required padding from the Style section. I am giving it 70px padding from top and bottom.
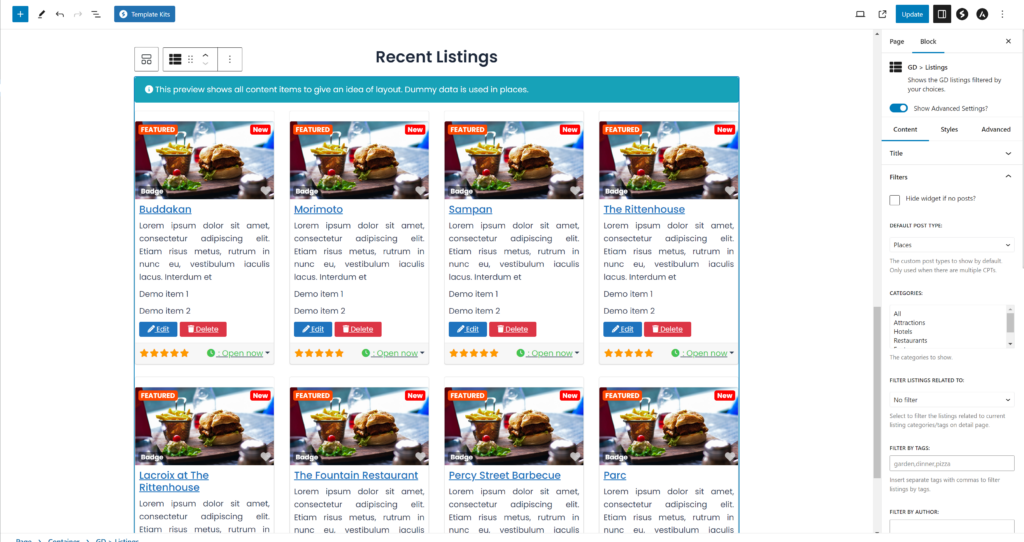
Now, quickly, we will add a few more containers. I will add recent listings below the category section using the GD > Listings widget.
The settings to be changed are:
In Filters > Post to Show = 4
In Sorting > Sort by = latest
In Design > Layout = Grid View (four columns)
Wrappers Styles > Margin Top = 5
Let’s add some maps there so users can sort out listings with different filters and check them out on the map.
Let’s use GD > Map with the following settings:
Map Type: Directory Map
Map Options: Enable all of them
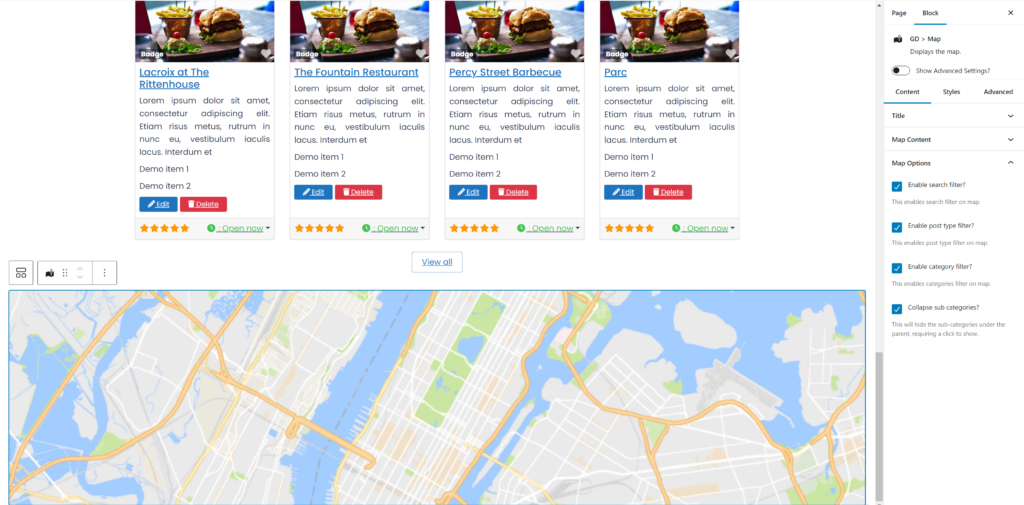
Let’s add some style by clicking on the styles tab and setting the width to 100% and the height to 600px to ensure it’s well displayed.
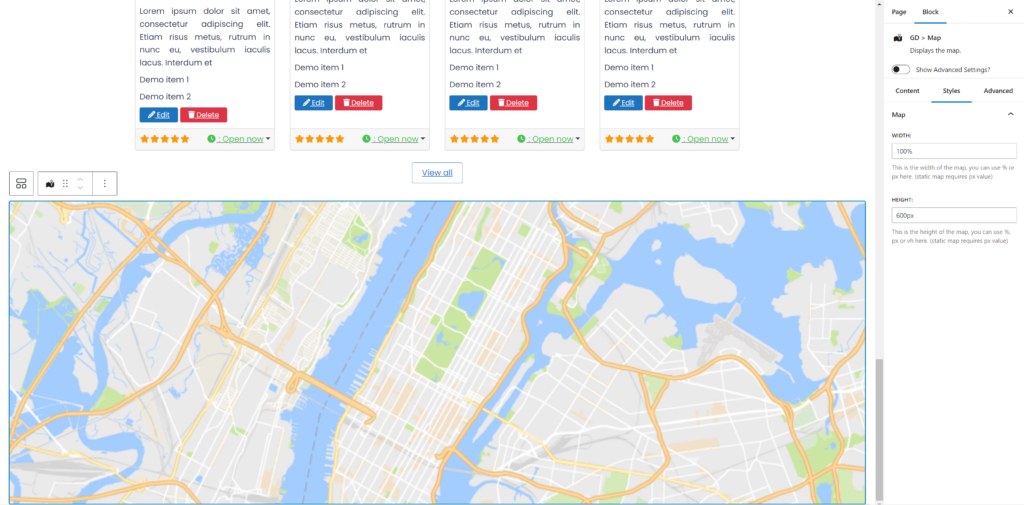
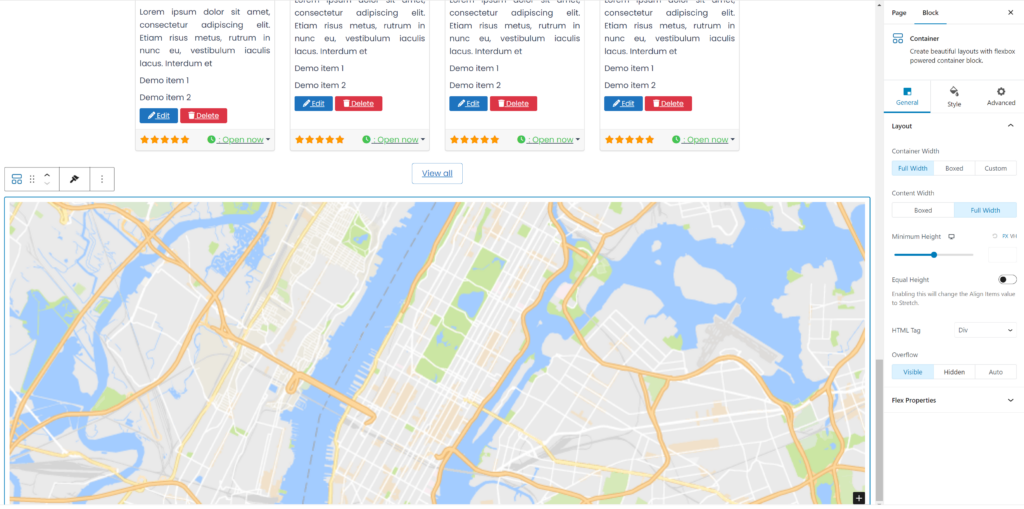
We will also make the map container full-width to make it look wider and look good.
Click on the outer container of the map, and in the general settings, set Container Width: Full Width and Content Width: Full Width.
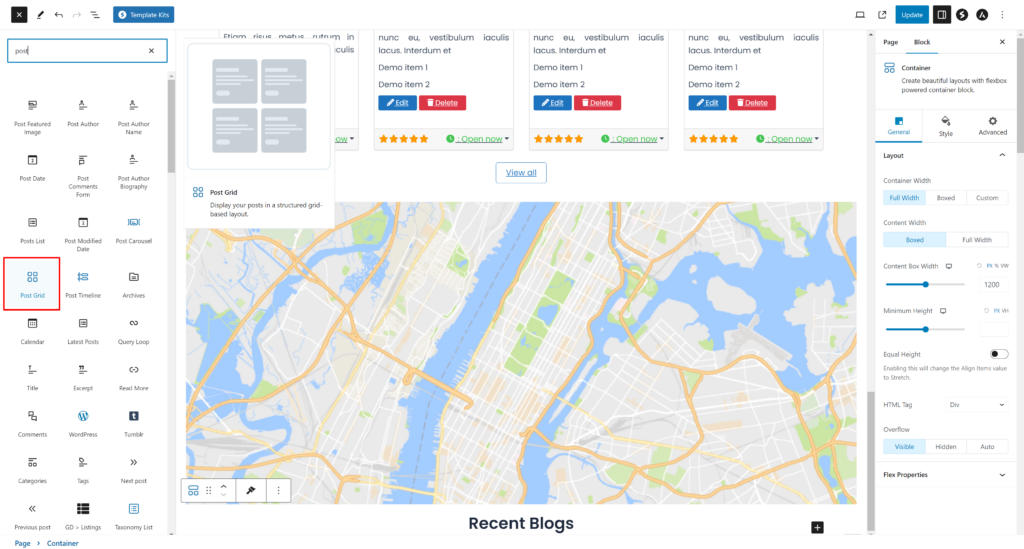
Now let’s add one more container to show recent posts. You can use the Post Grid block container provided by the Spectra Blocks plugin.
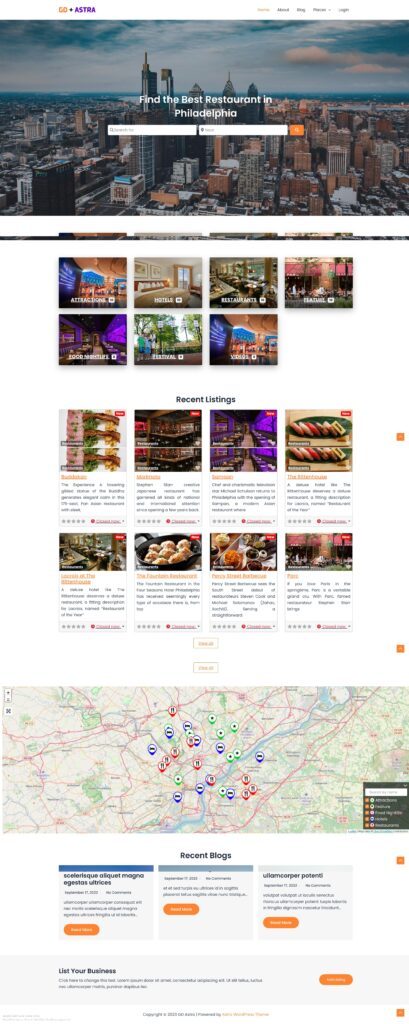
Congratulations! Your homepage is completed.
If you want, you can add multiple other containers or CTA.
2. Astra Directory Website Listings and Search page design
Now you need to design two pages that are essential for any directory.
The listings page (general archive, categories, tags) and the search results page.
GeoDirectory creates them by default with a general layout. In this tutorial, we will customize the design of these pages a bit.
The listing and search pages are mostly identical, so we create it once and copy the layout on the other page.
We decided the Listing page layout would be the listings on the left, and on the right, a sticky map showing the listings’ precise location.
This is very easy.
Listings page
Go to Geodirectory > Settings > General > Pages > Click on edit GD Archive page template
Remove all the content from this GD Archive page template.
Now add a container with two columns.
Now, in the left container, we will drag GD Archive page-related widgets like GD > Loop Action, GD > Loop, GD > Loop Pagination, and GD > Search to the top so the user can search from the Archive page.
On the right column, we will drag the GD > Map block.
We will keep all the settings default for the GD > Map. Let’s give it some height, and I have decided to provide it with the height of 100vh.
Now just set the main container to full width by following the instructions given in the image.
Now, after this, the Listing Archive page is ready.

Astra’s free version has limited settings, so you might need the below CSS snippet to make the left container content equal in size to the correct map container. You can paste it into your theme customizer from wp-admin > Appearance > Customise
.geodir-archive .wp-block-geodirectory-geodir-widget-loop .geodir-loop-container .geodir-listing-posts{
    overflow-y: scroll;
    max-height: 100vh;
}
There is an even easier way. If you set your page to full width, you can add the GD > Simple Archive Block as explained in our tutorial How to build a directory website with Elementor.
For the search page, we repeat the same process.
Search page
Go to Geodirectory > Settings > General > Pages > Click on edit GD Search page template.
Remove all the content from this GD Search page template.
Copy all the content of the GD Archive page and paste it into the GD Search page.
So now our GD Search and Archive page is ready.
3. Astra Directory Website single Listing page design
Now to edit and customize the GD Detail page, you can go to Geodirectory > Settings > General > Pages > Click on edit GD Detail page template.
In this template, you will already find default content generated by Geodirectory.
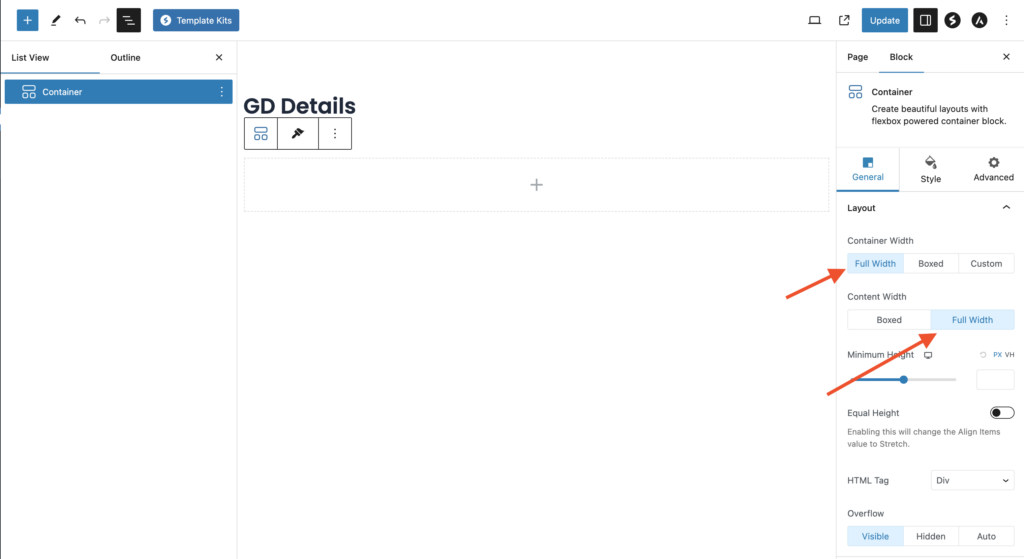
We will remove all this default content and add a container with the setting Container width: Full Width and Content Width: Full Width.
Now let’s add an image slider at the top of the Listing Detail page. We will drag the GD > Post Image block into this container.
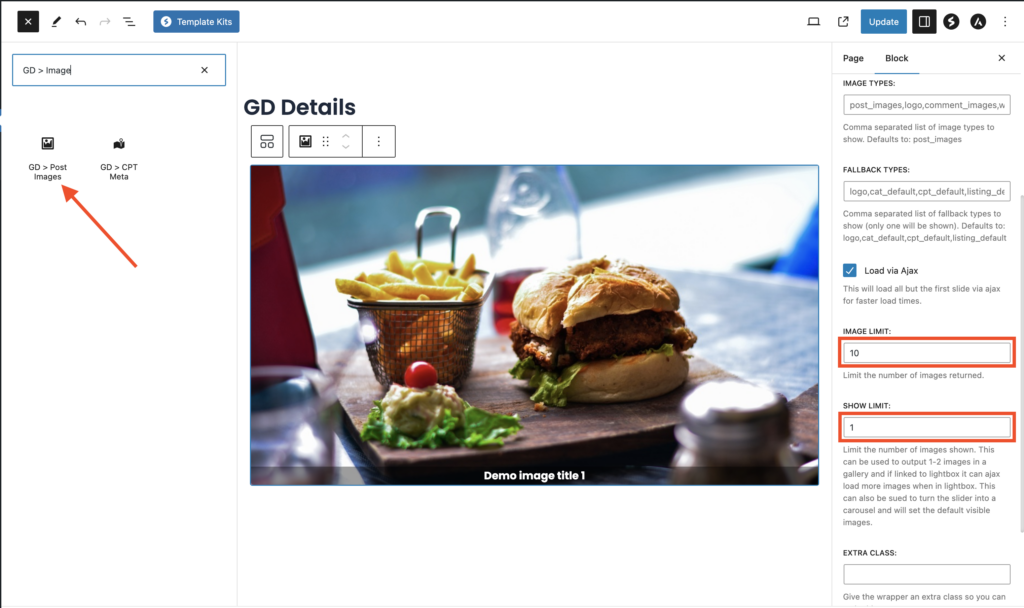
We will set the Image Limit to 10 and Show limit to 1, so only a single image gets displayed on each slide.
Now, let’s add another container below this one, where we’ll place the other required blocks of the Geodirectory Detail page.
Now, let’s add all the required GD Detail page shortcodes here one by one. Which includes GD > Single Taxonomies, GD > Single Tabs
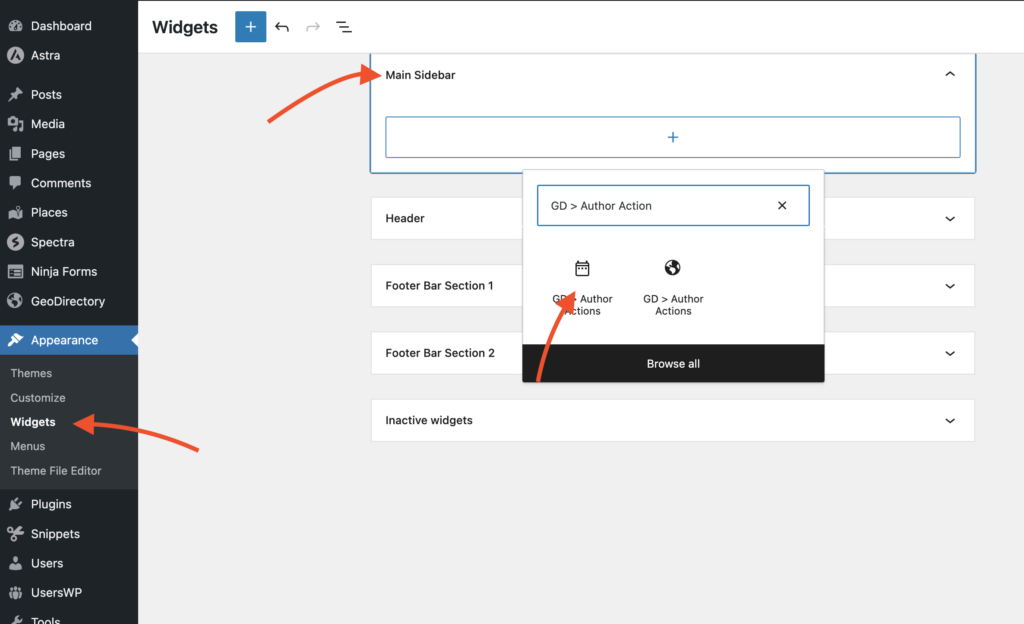
Now it’s time to add some sidebar widgets. So we will go to wp-admin > Appearance > Widgets.
Add the GD > Author Action widget in the primary sidebar. This widget will provide an Edit and Delete Listing option to the Listing Author.
Add one more widget, GD > Output Location. This widget will show all major listing details that have been marked to be visible on the Detail page.
After doing this, our Listing Detail page has been completed.

Adding premium features to your Astra Directory Website
If you wish, now you can add premium features to your directory, such as:
- Paid Listings: With the GeoDirectory Listing Price Manager add-on, you can set prices for listing submission. For each price tier, you can enable/disable features such as: Restricting the number of pictures for free listings while allowing more pictures for paid listings, and allowing more or fewer tags and categories, enabling or disabling specific custom fields. Submitting longer or shorter descriptions.
- Claim Listings: This is a fundamental feature for a directory where the admin creates the database and invites business owners to take control of their free listings. The claim listing process may include forcing an upgrade to a paid listing to take over the listing’s ownership.
- Advertising: selling ads is another form of monetizing an online directory. If you have a lot of traffic, you can use ad networks. Otherwise, you may sell ads directly, allowing businesses to add banners in specific areas of your website or allowing for listings to appear as ads, for example, on top of organic search results.
These are just three examples. However, a directory website offers many ways to make money online.
You can create a global marketplace of handcrafted items, sell event tickets, or sell discount coupons.
Develop your perfect directory site with this comprehensive resource: Crafting your directory website: A comprehensive guide.
The possibilities are endless.
How to build an Elementor Directory Website?
The easiest way to build an Elementor Directory Website using the free Elementor plugin is to implement the following 4 steps:
- Install the Hello Theme
- Install Elementor
- Install and set up GeoDirectory
- Design the Elementor Directory Website
Let’s see how we can do that in detail. But first, let’s see why this solution is the best.
The best way to build a directory website using Elementor.
To build an Elementor Directory Website, Elementor.com suggests using the Custom Post Type UI, the Advanced Custom Fields, and the Elementor Custom Skin plugins.
Is that the best way to go?
Possibly, but only if you are planning to build a simple directory without the following:
- A high number of listings (The wp-posts database table doesn’t scale well)
- Many custom fields for each listing (Advanced Custom Fields does not scale either)
- Option for users to add and edit their listings from the front end
- Advanced search by location, proximity, GeoLocation, or custom fields
- Paid listings with extra features and added visibility
- Options for listing owners to claim their listing
- User reviews and sort listings by rating
- Interactive maps offering directions to reach the business
- Contact forms to send emails to business owners
- Other monetization options
- An Events Directory
Following their tutorial, you can build a catalog of businesses with essential information and very little interactivity for your website visitors.
Here we list all the challenges that you will face following this approach:
Developing a Directory Website with Custom Post Types and Advanced Custom Fields
If you need one or more of the points listed above instead, you would need many extra plugins and, in some cases, quite a lot of custom code.
There must be a better way! Wait, there is!
You can use GeoDirectory:
The Best Elementor Directory Plugin
With its premium add-ons, you can get everything listed above and much more.
In addition, you may even avoid using Elementor PRO because the free version of Elementor will be more than enough for this tutorial.
You only need Elementor PRO if you have a very sophisticated and personalized design.
So, without further ado, let’s see how you can build a Directory Website with GeoDirectory, a free theme, the basic version of the Elementor plugin, with a third-party free add-on.
Elementor Directory Website using only a Free Theme and Free Plugins
We will start this tutorial by showing you how to build a simple directory website using free WordPress resources, such as the Free Elementor Plugin, its free Hello Theme, and the Free GeoDirectory plugin.
It will feature the following:
- Unlimited listings with unlimited custom fields.
- Search by proximity.
- User Reviews
- An add listing form, allowing users to submit their listings, edit, and/or delete them from the website front end.
Of course, WordPress, out of the box, comes with the option to create a blog and unlimited pages.
We assume you already have a Hosting provider and WordPress installed.
I’m creating a Business Directory for the City of Philadelphia in this tutorial.
In this tutorial, we will:
Installing Theme and Plugins.
1. Install the Hello Theme
First, you will need to install a Theme, and for this tutorial, you will install the Hello Theme, which is the Elementor starter theme.
Go to Appearance >> Themes
Select Add New, Install, and Activate the Hello Theme.
2. Install Elementor
Now you will need to install the page builder. In this case, you are installing the free version of the Elementor Plugin.
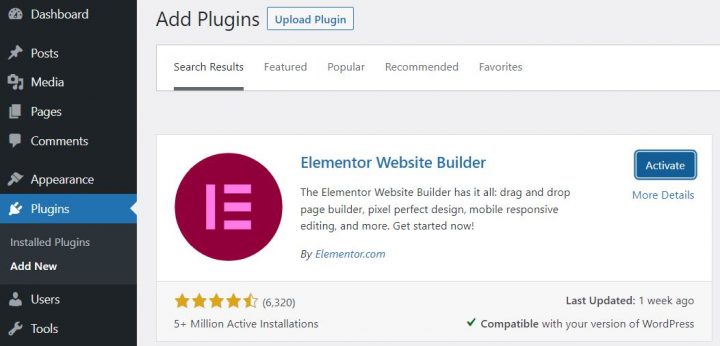
Go to Plugins >> Add new.
Search for Elementor. Install it and activate it.
You can skip all steps of the Setup Wizard.
3. Install GeoDirectory
Last but not least, you need to install GeoDirectory.
Go to Plugins >> Add new, search GeoDirectory. Please install and activate it, and we are done installing plugins for now.
4. GeoDirectory Install Wizard
For GeoDirectory, you will need to complete the Setup Wizard to configure the Google Maps API key and import a few dummy listings.
Choosing the Map System (Google Maps or OpenStreetMap)
You can choose between two mapping systems on the wizard’s first step. Google Maps and Open Street Maps (which doesn’t require an API key).
In this tutorial, we select Google Maps.
Click on the Generate Key button and follow the steps in this doc to generate a valid API key.
The essential steps are:
- Create or select an existing project.
- Enable the Keys.
- Get the Key.
- Activate a billing account.
- Restrict the API key (so it can only be used from the URL of your website)
About point four: it is a requirement. However, you only get charged if you pass the threshold, which is $200/month.
This free credit is more than enough for 99% of directories.
Setting the default city
After that, you will set the default location. This is the city for which the directory is created. We will leave the default city unchanged.
GeoDirectory uses Philadelphia as the default City.
You can use whatever location you need.
If you need to add listings to more than one city, you will need the Location Manager add-on.
Adding extra features
In this step, we will install UsersWP, our user registration plugin that enables users to register and log in to your website.
This is needed to allow users to add and edit their listings. It will also create user profiles where users can find their listings, reviews, and other relevant information.
We will also install Ninja Forms so that all listings have a contact form that sends emails directly to the listing owners.
AyeCode Connect is not mandatory for this tutorial. It is mainly needed if you want to add GeoDirectory premium add-ons and install them directly from the WordPress Dashboard.
Adding Dummy Data
The last step in the installation wizard is to add some dummy listings. This will also add listings categories that you can edit later according to your needs.
You will not add sidebar widgets and menu items right now, as we will do that later.
Design the Elementor Directory Website
Now that we have installed the theme, plugins, and completed the preliminary setup of GeoDirectory, we can start designing our Directory Website with Elementor.
1. Elementor Directory Website Home Page design
You can create a new page or use one WordPress creates by default, like the Sample Page.
Go to Pages, edit the Sample page, and rename it Home, or create a new page for this.
Next, go to Appearance > Customize > Homepage Settings and select your Home.
We will select the Posts page later.
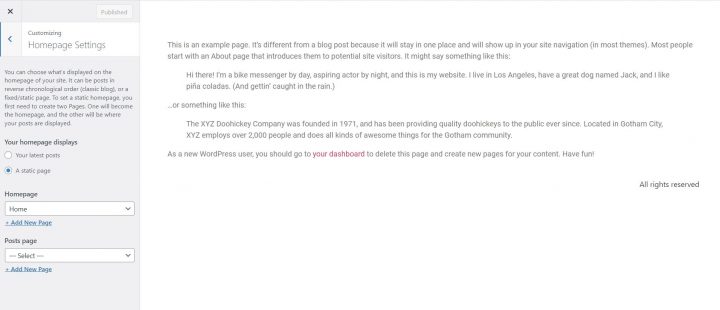
The Logo
First things first, we will need a logo for our website.
You don’t need to invest in a designer to sketch the 1st version of your logo.
One of the biggest mistakes you can make when starting a new business is investing too much time and money before testing the product market fit.
You can design a logo in just five minutes with an app like Canva, which is surprisingly affordable and effective.
For an MVP (minimum viable product), a logo designed with Canva will be more than enough.
There are several logo templates to choose from, and it doesn’t matter if your initial logo isn’t as perfect or original as you’d like.
If your project gains traction, you can always invest in improving it or making radical changes later.
An average logo is never the leading cause of a failed project.
After designing your logo, go to Appearance > Customize > Site Identity, click Select Logo, and upload your PNG file. Skip cropping (or crop the image as needed) and click publish.
The Navigation Menu
After creating and adding the logo, go to Appearance > Menus, and create your menu.
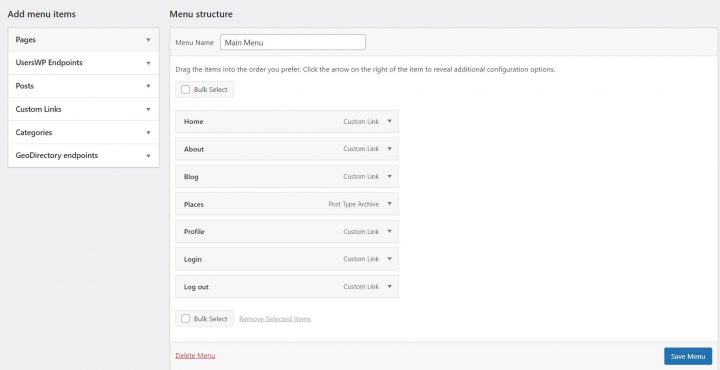
Add the links needed (from the left column to the right column) and save. In the Menu Settings > Display location section, you can check the “Header” option.
If you want, you can make the same menu appear on the footer or create another menu to appear there.
In this example, we’ll only have the header navigation menu.
We added seven links:
- Home
- About
- Blog
- Places
- Profile
- Login
- Logout
The Login link (from UsersWP Endpoints) will only appear for logged-out users, while the log-out and profile links will only appear for logged-in users.
The Content
Now you can start designing the home page. First, you will need to add a hero image below the header.
To do this, go to Pages > Home and click Edit with Elementor.
If you used the Sample page, delete the Text Editor by right-clicking on the text and selecting delete. If you created a new page, add a section. (Click the plus button of the page builder where it says Drag widget here.)
Now you have a blank page with only one section of one column.
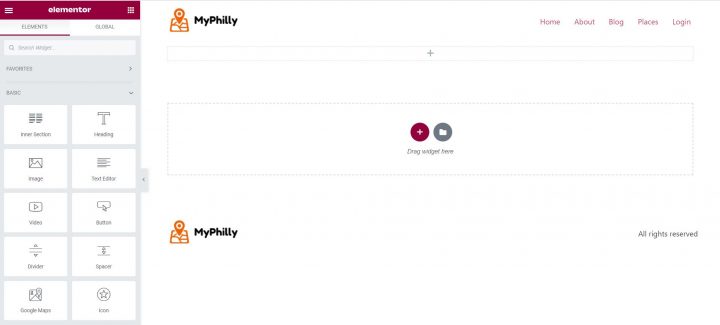
Click the Edit Section Icon (light-blue central icon of sections) and select Full Width in the Content Width option.
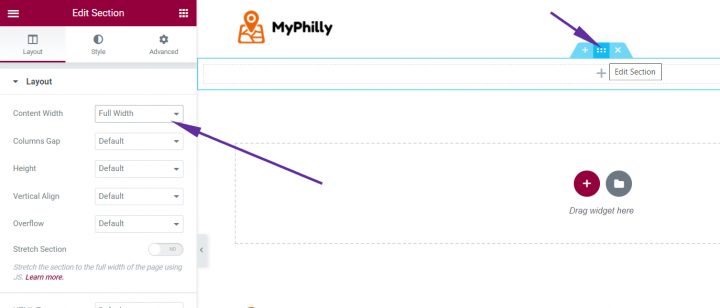
Next, click Style from the top tabs. Select > Classic as the Background Type.
For the Hero Section, we will use this free image of Philadelphia from Pexels.com (Thanks, @Kelly).
Upload your image and use the Position option to adjust the appearance of the background. In this case, select “Center Center.”
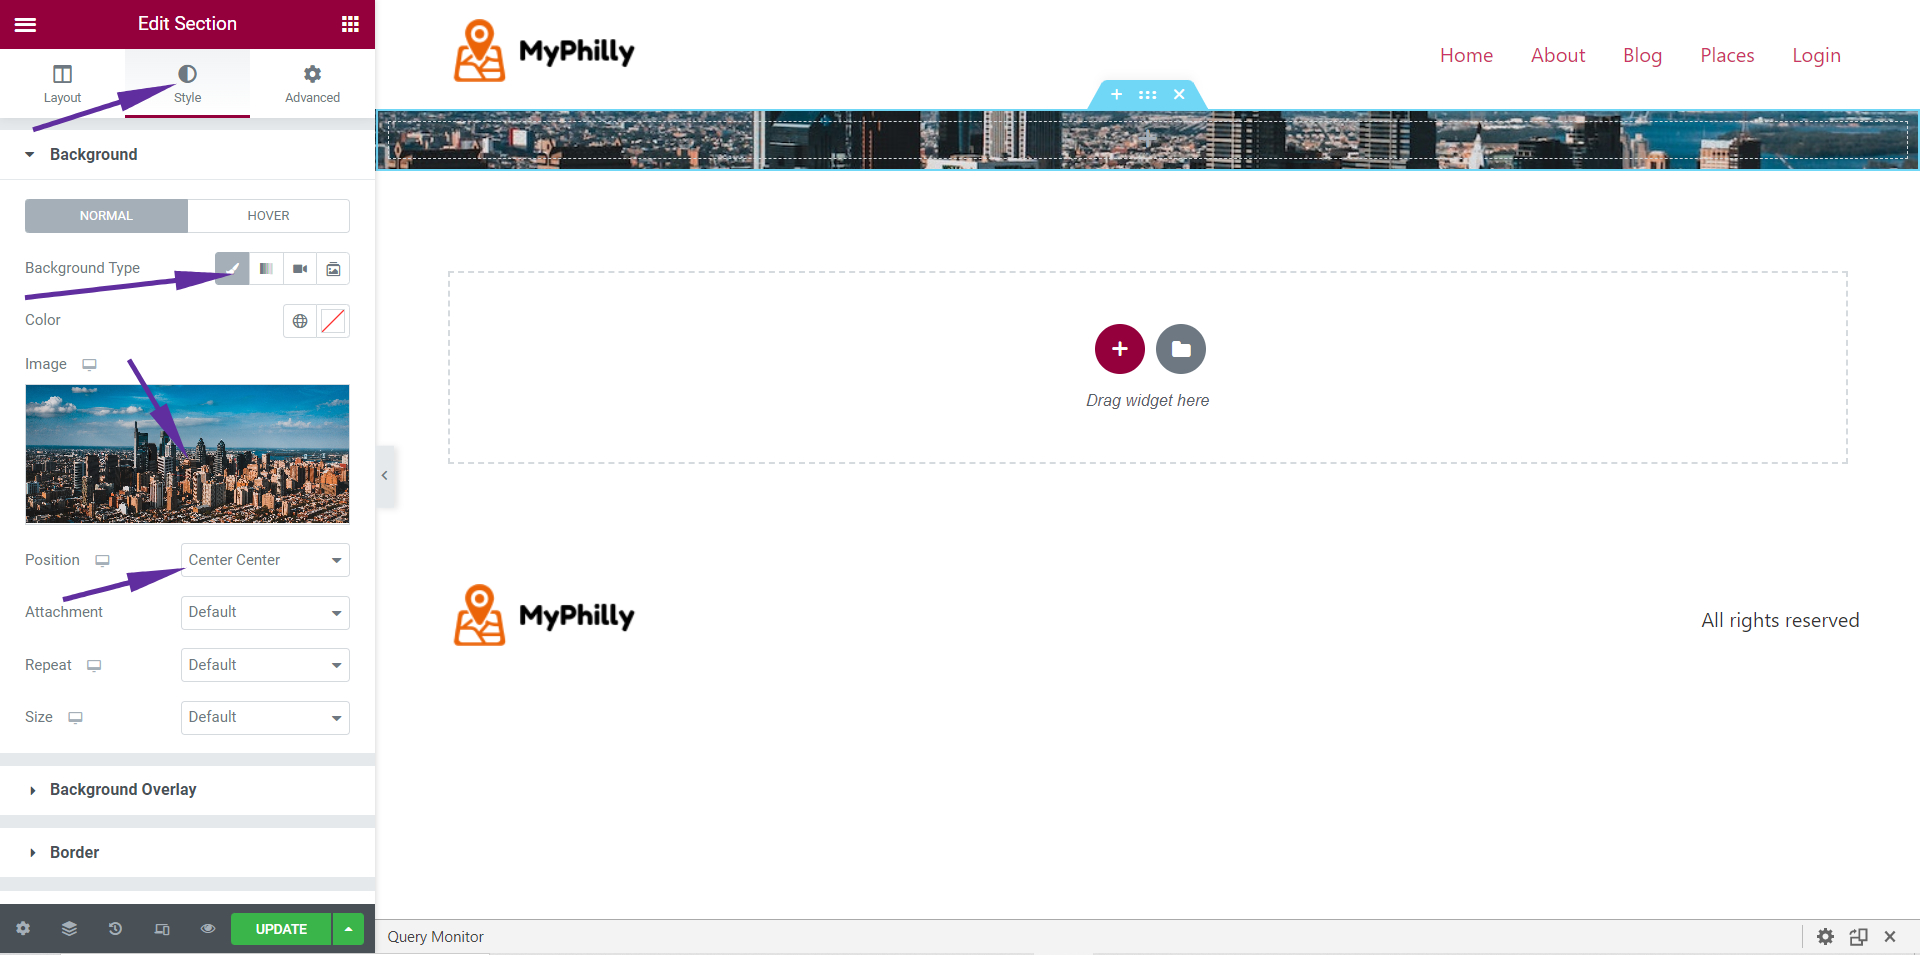
You can now see only a ribbon of our image, but the next step will make it appear as needed.
The image needs an overlay, or any text on top won’t have sufficient contrast and will be difficult to read.
Click Background Overlay, select Background Type: Classic, Color: Black (#000000), and Opacity: 0.5 (it should already be set that way).
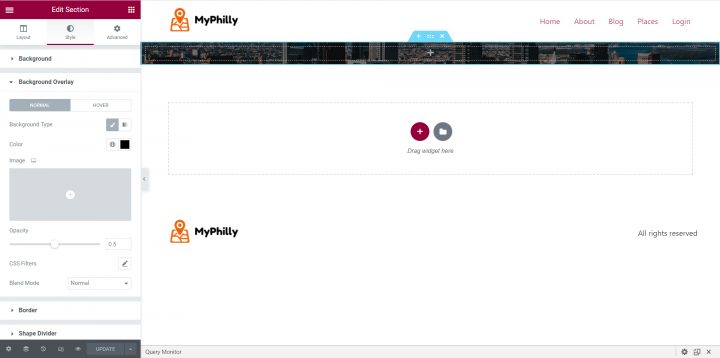
Now that we have made the hero image darker, we can add text.
Click the center of the image (a gray plus button is barely visible). This will bring up the widgets on the left Elementor Panel.
Drag and Drop a Heading Element inside the Hero Image.
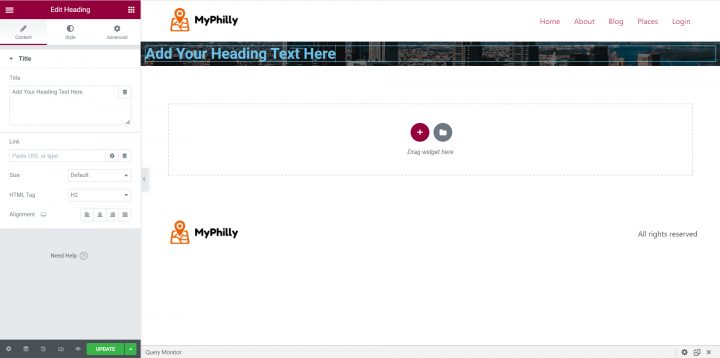
It’s time to give a title to our Homepage Hero Image.
In this tutorial, I will use something simple like “My Philadelphia Directory.” You can add whatever slogan you want here. Don’t forget to center the text utilizing the alignment option.
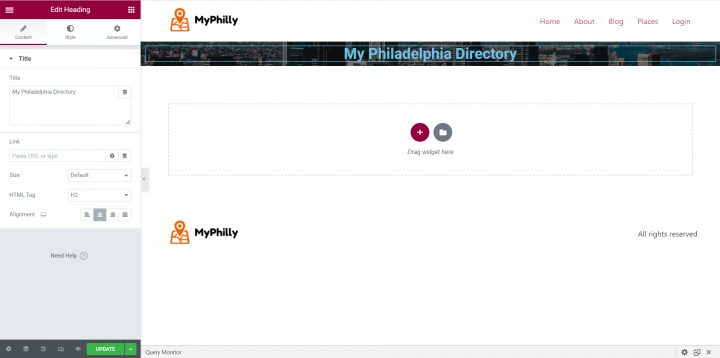
From the Style tab, change the text color to white (#FFFFFF) to improve the contrast and readability.
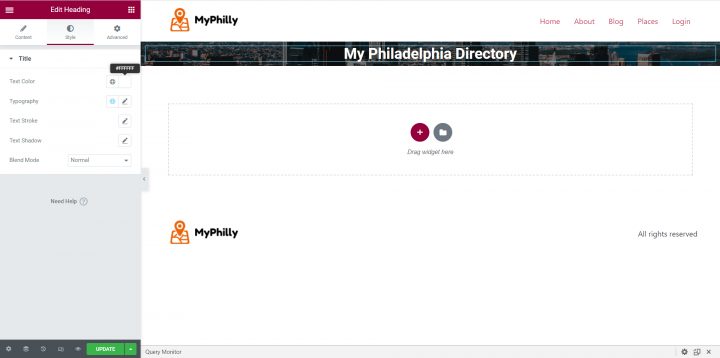
Next, add some padding to reveal the hero image as intended. Select the Advanced tab of the left-side Elementor panel, and unlink padding values (this is done by clicking the link icon at the end of the values).
Add 250 to the top value and 50 to the bottom value. Leave 0 for both the right and left values.
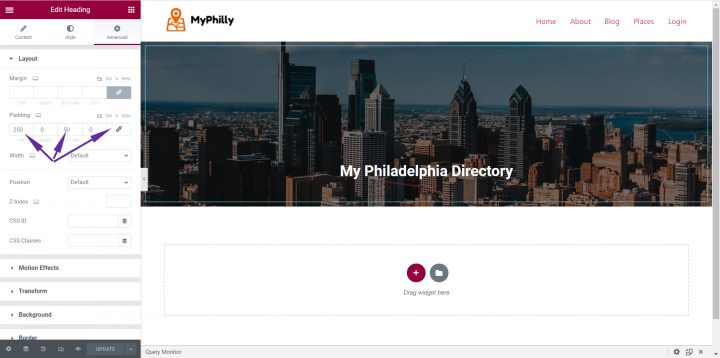
You can add the GeoDirectory Search Widget below the title to complete the Hero Image of the homepage.
But first, you need to add an inner section to control the width of the search form.
On the Elementor Left panel, click the grid icon (right of the Elementor Logo) to return to the Elements List.
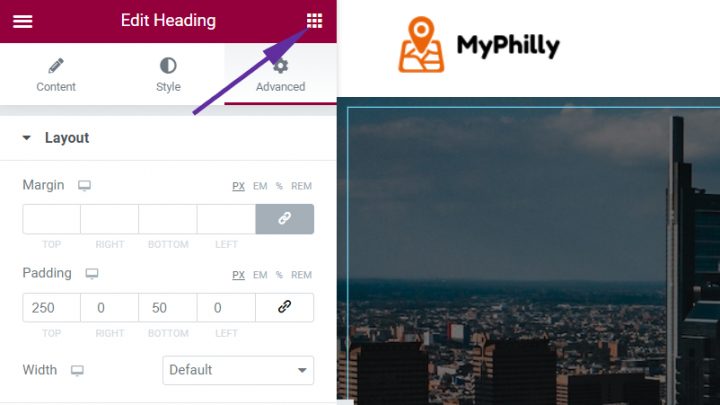
Drag and drop an Inner Section element below the Title.
The inner section will have two columns by default. You have to delete one.
Right-click on one of them and delete it. Now click on the other one and set its width to 700.
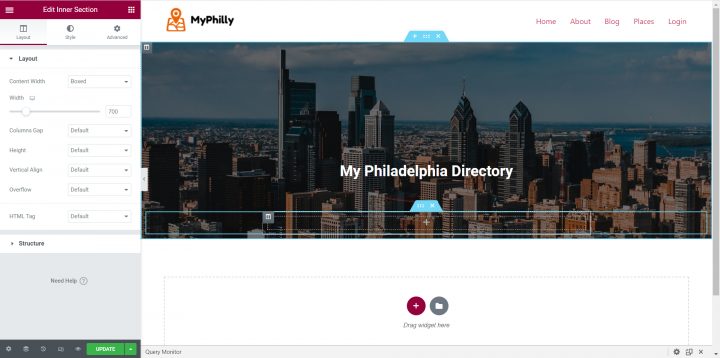
Now you can add the GD > Search element to the Inner Section.
On the Elementor Left panel, click the grid icon again (right of the Elementor Logo) to return to the Elements List.
Search GD > Search and drag and drop it inside the inner section.
Finally, click the Advanced Tab, unlink padding values, and add 200 to the bottom padding option. This will show the bottom part of the hero image.
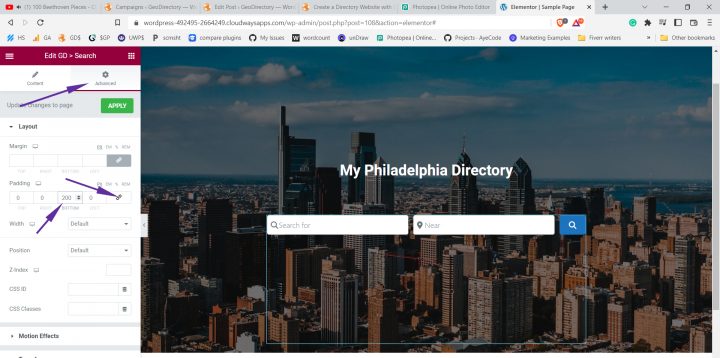
You can now add a few listings widgets below the hero image, along with a widget featuring a few blog posts.
To add, let’s say, a grid with four listings, you will need to add a new section below the hero image, set with a boxed content width and 1140 as width.
Inside this section, first, add a Heading for the recent listing, change the text to Recent Listings (or whatever you see fit), center the text, change the color to dark gray (#333333), and add 50px of Top Margin from the Advanced tab.
Next, add the “GD > Listings” widget. The settings to be changed are:
In Filters > Post to Show = 4
In Sorting > Sort by = latest
In Design > Layout = Grid View (four columns)
Wrappers Styles > Margin Top = 5
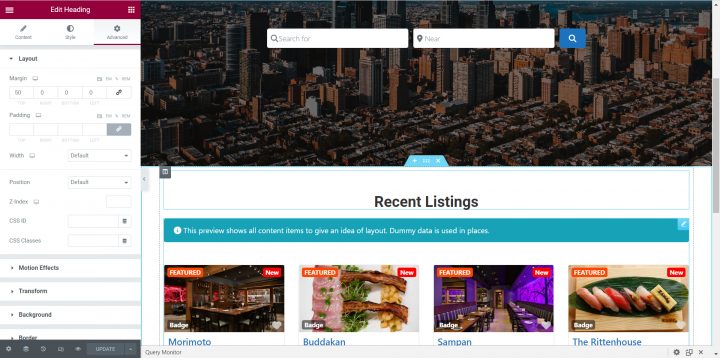
Time to add some blog posts.
I used this plugin to generate dummy posts with Images. I used the Post Grid Elementor Add-on to display them on the homepage.
Below the listings, add a Heading for the recent posts, change the text to Recent Posts (or whatever you see fit), center the text, change the color to dark gray (#333333), and add 50px of Top Margin from the Advanced tab.
Next, add the Post Grid (from WPC Element) and adjust the following settings:
From the Style tab > Title > Typography, change the font size to 1.25rem and the color to match the listings titles’ color (#1E73BE).
Finally, from the Advanced tab, add a 50px top margin.
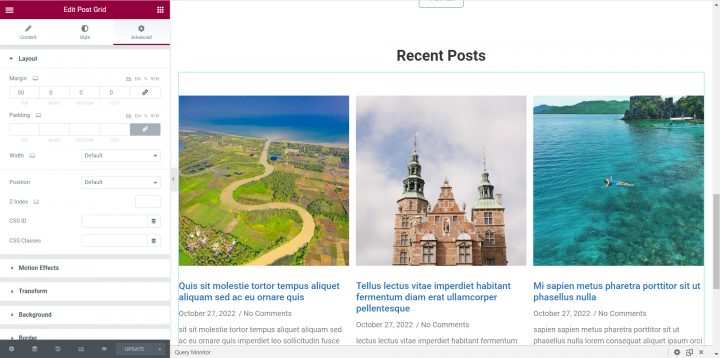
There you go. The homepage is completed. You can add whatever you want next, but this is more than enough for this tutorial.
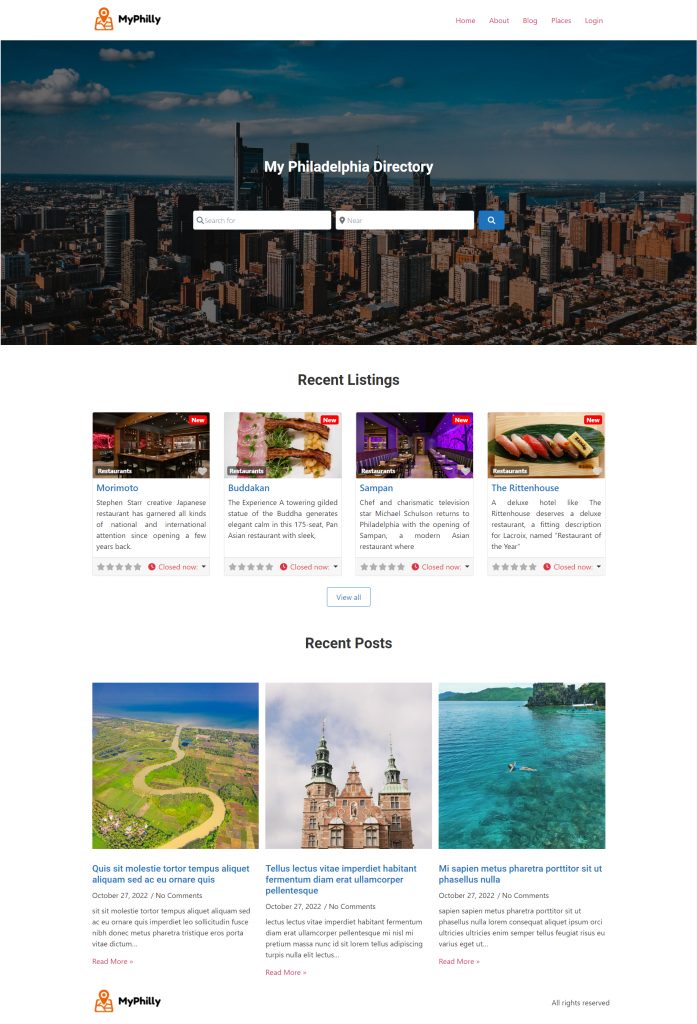
2. Elementor Directory Website Listings and Search page design
Now you need to design two pages that are essential for any directory.
The listings page (general archive, categories, tags), and the search results page.
GeoDirectory creates them by default, but in this tutorial, we will delete the default pages and create our own.
You will create two identical pages. We will use a layout with two wide columns.
There will be the listings on the left, and on the right, a sticky map showing the listings’ precise location.
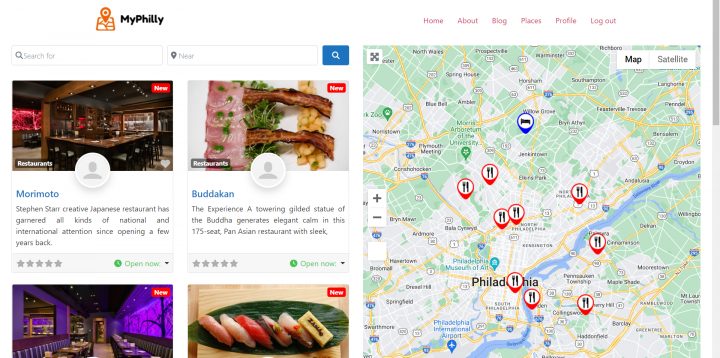
This is very easy.
Listings page
Go to Pages > Add new > Add Title = Listings. Publish the new page.
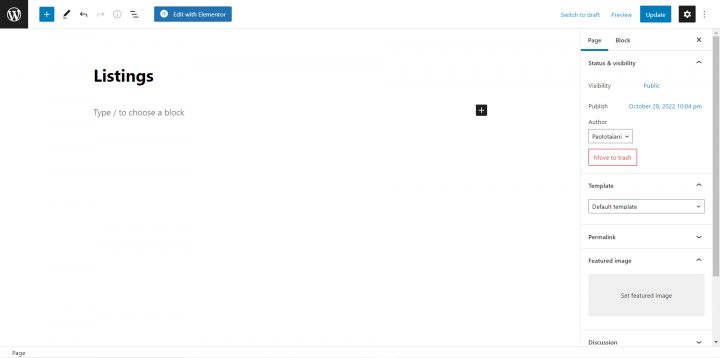
After publishing the page, click the Edit with Elementor button.
Click the Gear Icon at the screen’s bottom-left corner, hide the title, set the page layout to Elementor Full Width, and click update.
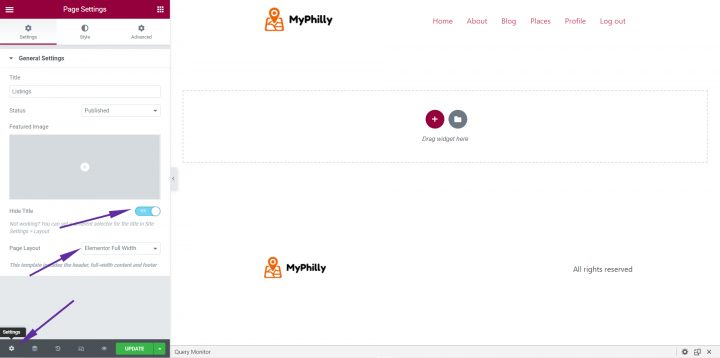
Add a section (Click the plus button of the page builder where it says Drag widget here.)
In Layout > Content Width, set Full Width. Now, click the plus button inside the new section, search for GD > Simple Archive, and drag and drop the widget inside the newly created section.
Adjust the following settings.
Main Output > Check Show Search
Map > Enable Sticky Map
Click Update. That’s it for the Listings page.
For the search page, we repeat the same process.
Search page
Go to Pages > Add new > Add Title = S. Publish the new page.
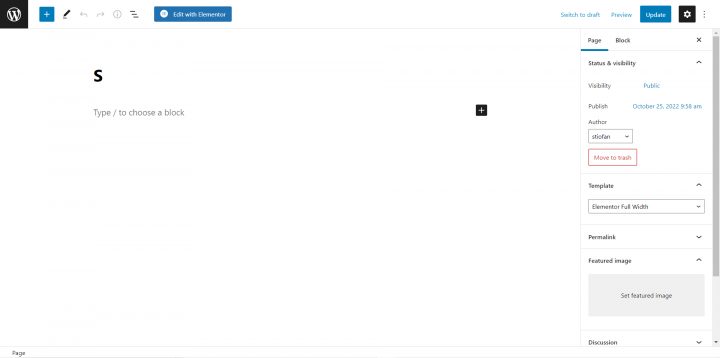
After publishing the page, click the Edit with Elementor button.
Click the Gear Icon at the screen’s bottom-left corner, hide the title, set the page layout to Elementor Full Width, and click update.
Add a section (Click the plus button of the page builder where it says Drag widget here.)
In Layout > Content Width, set Full Width. Now click the plus button inside the new section, search for GD > Simple Archive, and drag and drop the widget inside the newly created section.
Adjust the following settings:
- Main Output > Check Show Search
- Map > Enable Sticky Map
Click Update. That’s it for the Search page.
We need to change GeoDirectory settings to tell the plugin to use these two pages instead of the default ones.
From the WordPress Dashboard, click GeoDirectory > Settings > Pages.
Assign our page titled Listings as the Archive page and the page titled S as the Search Page.
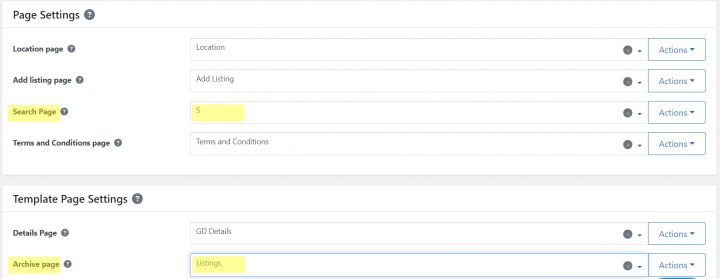
We have completed both the new Listings and Search pages, and GeoDirectory knows how to use these new templates.
3. Elementor Directory Website single Listing page design
To complete the directory, we need to design one more template, the GD Details page. This is the template used to show the single listings.
GeoDirectory generates one automatically, but we will replace it to create a new page.
Use whatever title you prefer. I called it “mpdetails”. Save it as a draft.
We need to change GeoDirectory settings to tell the plugin to use this page instead of the default GD Details page.
From the WordPress Dashboard, click GeoDirectory > Settings > Pages.
Assign our page titled “mpdetail” as the Details Page.
Now let’s go back to the page, open it, and click the edit with Elementor button.
Like we did for previous pages, click the Gear Icon at the screen’s bottom-left corner, hide the title, set the page layout to Elementor Full Width, and click update.
Add a section (Click the plus button of the page builder where it says Drag widget here.)
In Layout > Content Width, set Full Width. Now, click the plus button inside the new section, search for GD > Post Images, and drag and drop the widget inside the newly created section.
Adjust the following settings:
- General > Show Limit: 3
- Design > Output Type: Slider
Next, we need to add the listing title. Search for the element GD > Post Title, then drag it to the “Drag Widget Here” area.
Adjust the following settings:
- General > Output Type: H1
- Design > Font Size: H1
Now we will need to add the Listing Content. Add a new section (Click the plus button of the page builder where it says Drag widget here.)
Select the two-column layout 66/33 (with the left column twice the size of the right column)
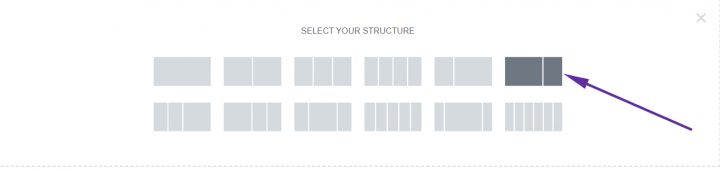
We will drag the element GD > Single Tabs to the left column. The only option to enable is Content > Show as a list.
It will output the Description, Photo Gallery, Map, and Reviews of each listing as a list.
If you do now enable the Show as List option, it will output a group of 4 tabs, each tab showing the content previously mentioned.
We will add the GD > Output location element in the right column.
This element groups several pieces of information about the listing, including tags, categories, addresses, contact information, and Hours of operation.
These details are also available as unique elements that can be used separately for custom designs.
For example, you can use the GD > Post Address element to show the address anywhere on your page.
For all content, there is the GD > Post Meta element. Every custom field can be output through this element by setting the KEY Value accordingly.
Alternatively, you can use the element GD > Badge to show just about any listing information as a button.
To complete our single directory listing page, I will add custom CSS to adapt the design to the theme and achieve the desired look.
I like to keep all my CSS in one spot, and I prefer to add it to Appearance >> Customizer >> Additional CSS with comments.
/* Reduce list heading font size */

h2.gd-tab-list-title.h3 {
font-size: 1.25rem;
}

/* Add white space between headings and content */
div#geodir-tab-content-post_content, div#geodir-tab-content-post_images, div#geodir-tab-content-post_map, div#geodir-tab-content-reviews {
    margin-top: 30px
;
}
This is what the single listing page looks like after this.
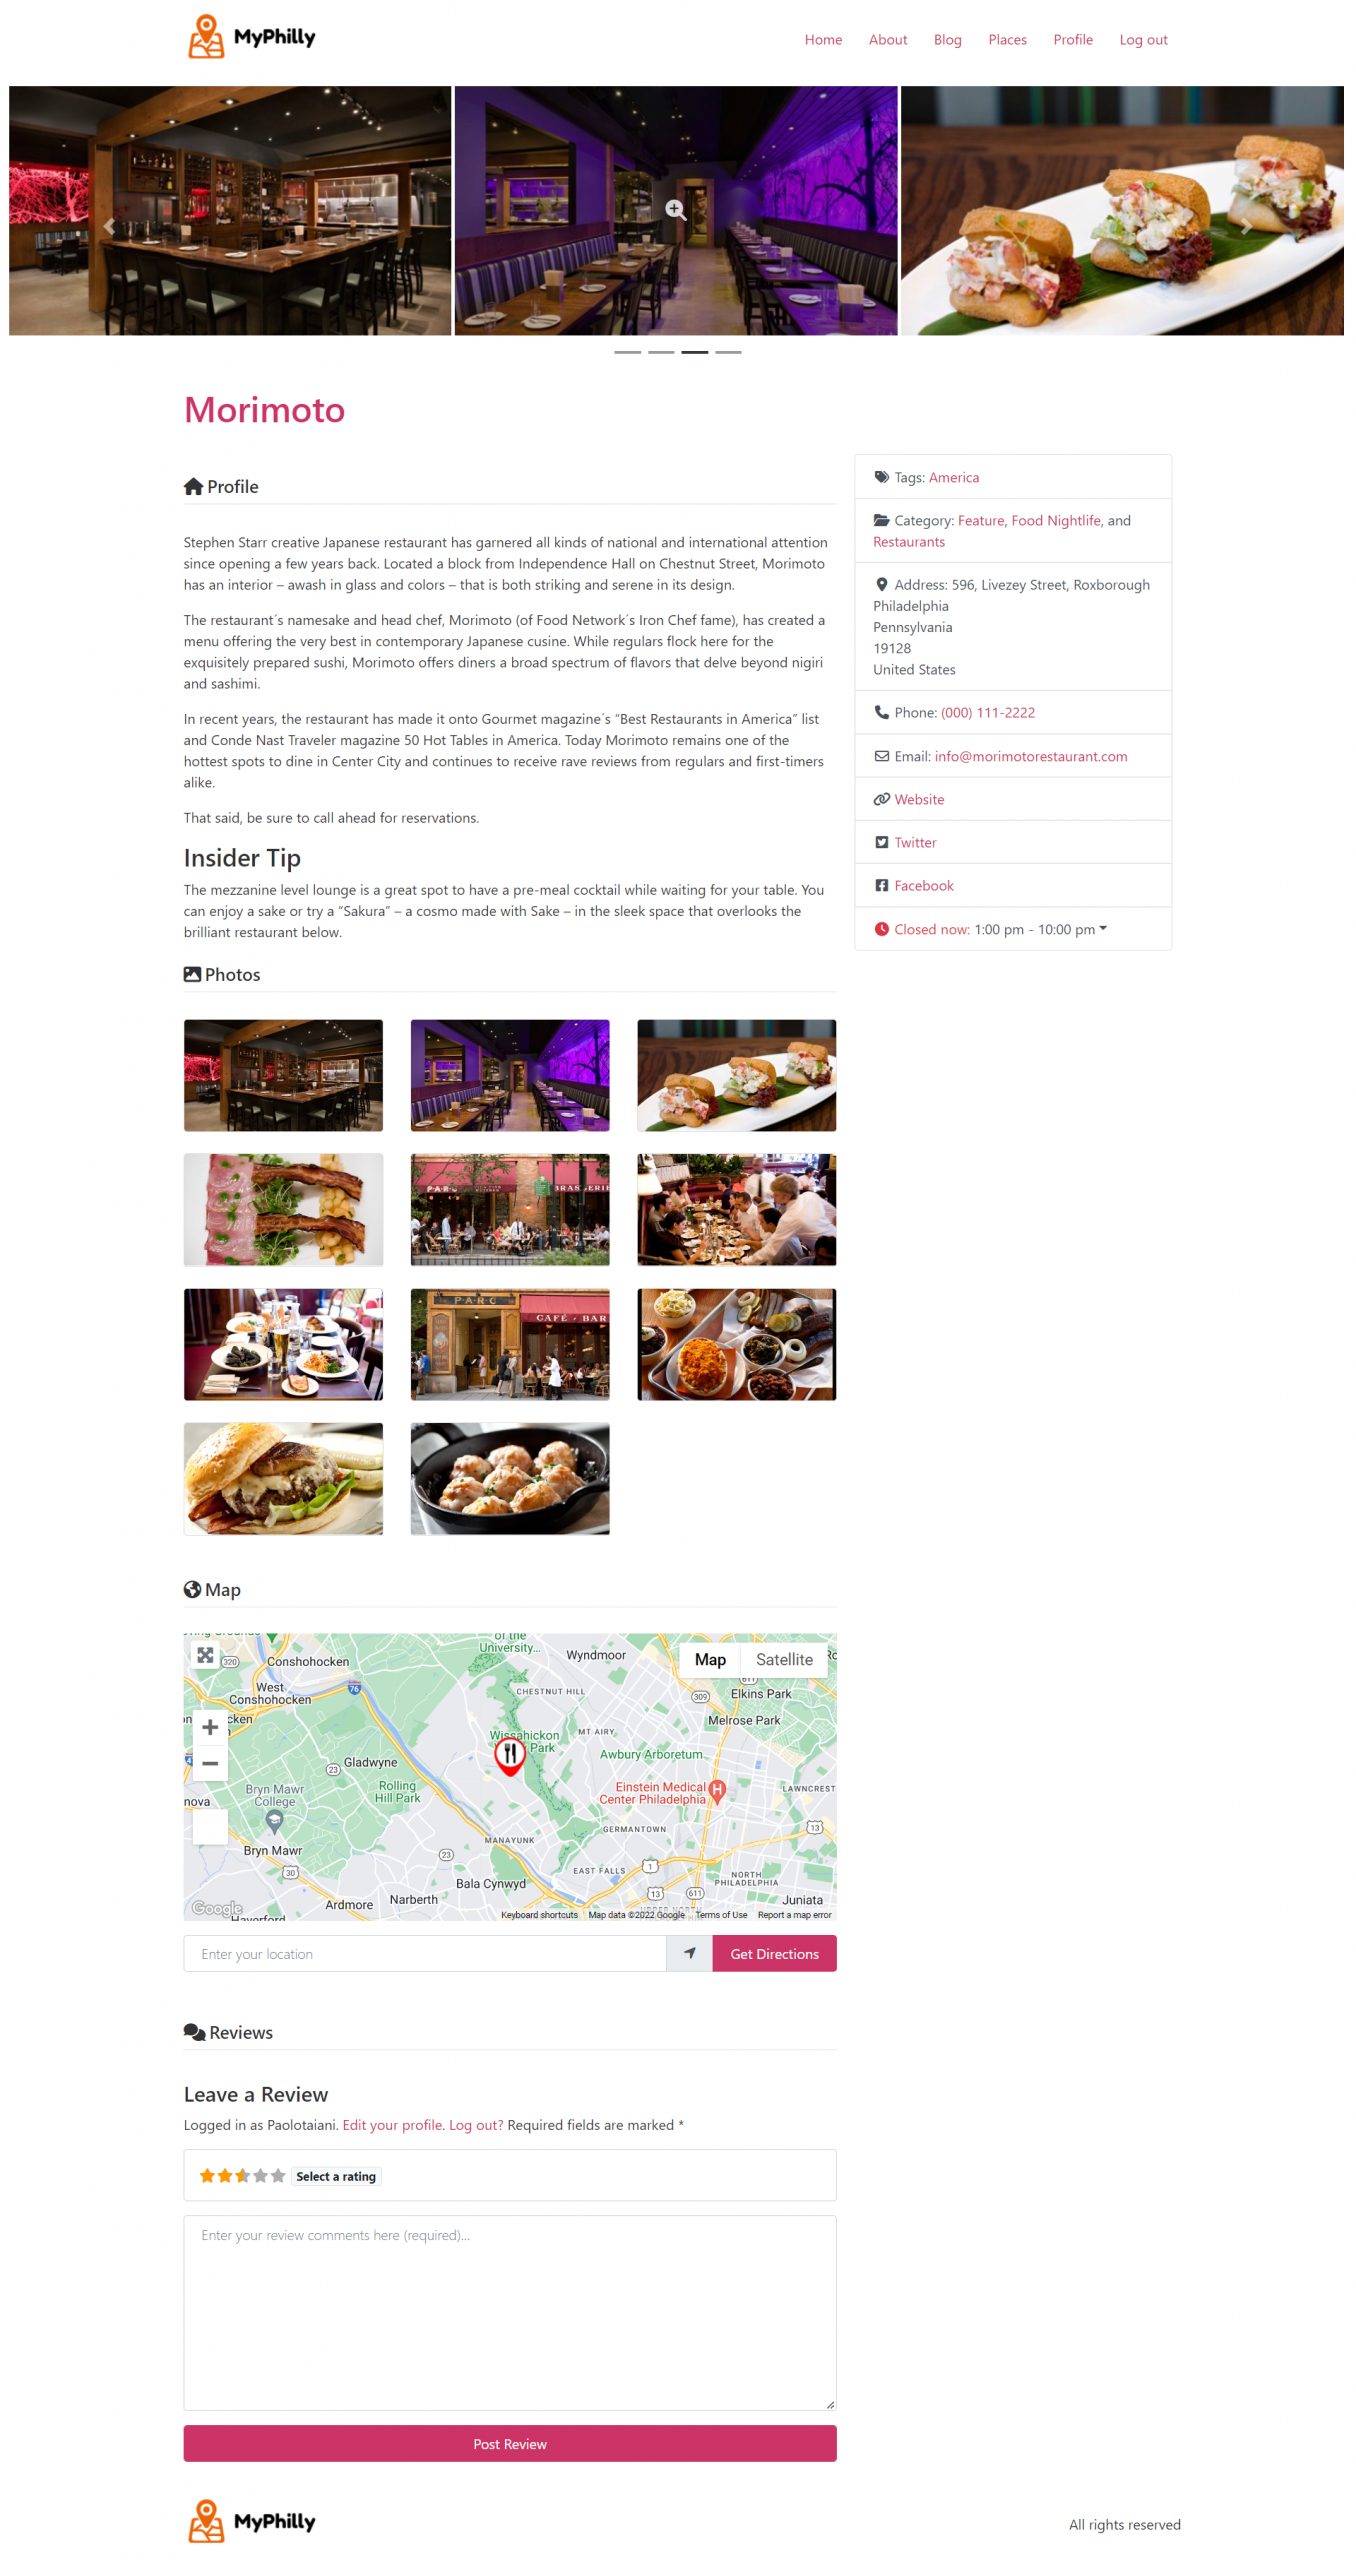
This is it. We built our Elementor Directory Website with the Hello Theme, the free version of Elementor, and GeoDirectory.
Adding premium features to your Elementor Directory Website
If you wish, now you can add premium features to your directory, such as:
- Paid Listings: With the GeoDirectory Listing Price Manager add-on, you can set prices for listing submission. For each price tier, you can enable/disable features such as: Restricting the number of pictures for free listings while allowing more pictures for paid listings, allowing more or fewer tags and categories, enabling or disabling specific custom fields. Submitting longer or shorter descriptions.
- Claim Listings: This is a fundamental feature for a directory where the admin creates the database and invites business owners to take control of their free listings. The claim listing process may include forcing an upgrade to a paid listing to take over the listing’s ownership.
- Advertising: selling ads is another form of monetizing an online directory. If you have a lot of traffic, you can use ad networks. Otherwise, you may sell ads directly, allowing businesses to add banners in specific areas of your website or allowing for listings to appear as ads, for example, on top of organic search results.
These are just three examples. However, a directory website offers many ways to make money online.
You can create a global marketplace for handcrafted items, sell event tickets, or offer discount coupons.
Join our community of members and bring your idea to life: Create a directory website.
The possibilities are endless.
Build a Directory Website with Elementor PRO
As previously mentioned, with Elementor PRO, you can achieve much more sophisticated designs, and I suggest you check this blog post to see the full extent of the GeoDirectory integration with Elementor PRO:
Customize the design of GeoDirectory Templates with Elementor Pro
Elementor Pro Directory Website Templates
For Elementor PRO users, we offer several one-click install templates that provide fully functioning Directory Websites with dummy data.
These templates are free and can be installed in less than a minute.
Next, edit the dummy content with your legitimate content and adjust the template to match your branding by changing the logo, the Directory Website color palette, and typography.
The following are a few examples of what you can get with GeoDirectory and Elementor PRO.
One click install DEMOS via AyeCode connect plugin, see this blog post for a tutorial

Events Directory (Elementor Pro)
An Events directory and tickets marketplace built with elementor pro.


Interested in a tutorial to build a Directory Website with Gutenberg instead of Elementor? Check out this post about how to build a Directory Website with the Astra Theme.

As we transition from physical directories to the vast landscape of online directories, the challenges and opportunities have evolved dramatically.
Among the tools that have risen to these challenges are ChatGPT, an advanced language model developed by OpenAI, and GeoDirectory, a robust WordPress directory plugin that effortlessly transforms any WordPress website into a global business directory.
In this post, we are going to discuss how these two powerful tools can synergize, creating a sophisticated, user-friendly, and interactive online business directory.
ChatGPT, with its cutting-edge AI capabilities, can breathe life into a GeoDirectory-based business directory, taking care of your content marketing and listing descriptions.
Ready? Let’s go.
Before starting: Gather your toolkit
The first thing you’ll need to do is assemble your toolkit, which includes a few pieces of software:
- ChatGPT: Available in a freemium model, ChatGPT by OpenAI is a state-of-the-art language model that will handle data management, user interaction, security, and more. Sign up on the OpenAI platform and familiarize yourself with the API documentation.
- WordPress: The world’s most popular open-source content management system, meaning it’s free to use – all you’ll need is a domain and a hosting service.
- GeoDirectory Plugin: This powerful WordPress plugin is specifically designed to create a location-based business directory. The core plugin is free, but additional features can be unlocked through premium add-ons.
- Yoast SEO Plugin: To ensure that your directory is visible and highly ranked on search engines, Yoast SEO is a must. This plugin helps optimize your website for search engines, making sure that your content and meta tags are SEO-friendly.
- Blockstrap: Is AyeCode’s latest theme built around the Bootstrap CSS framework. Paired with the Directory child theme, it is the best theme ever built for GeoDirectory
- Directory Theme: The Directory Child Theme will make your Directory Website as beautiful as those of the top startups out there.
Choosing Your Niche for a Business Directory
- Identify Your Passion and Expertise: What do you love or know well? Say you’re a vegan foodie, you could start a directory for local vegan restaurants.
- Do Your Market Research: Use tools like Google Trends to understand demand. For instance, if pet services are trending in your area, that might be your niche.
- Evaluate Profit Potential: How will your directory make money? Could vegan restaurants pay for premium listings? Or maybe there are affiliate marketing opportunities with vegan food brands.
- Look at SEO Opportunities: Use tools like SEMrush to find high-volume, low-competition keywords in your niche. Keywords like “best vegan restaurants in [your city]” can boost your directory’s visibility.
- Leverage ChatGPT: Unsure about vegan dining interest in your area? Draft a survey with ChatGPT. It can also help you plan your market research and create SEO-friendly content.
Remember, your ideal niche should combine your passion, market demand, monetization opportunities, and SEO potential.
With tools like ChatGPT, you can navigate your way to the perfect niche for your online business directory.
Step 1: Choosing the Right Theme for Your Business Directory
Selecting the ideal theme is crucial when creating a business directory with WordPress. GeoDirectory gives you an attractive and customizable collection of themes, both free and premium ($19 to $39).
That said, currently the best theme for GeoDirectory is definitely The Directory Child Theme of the Blockstrap theme.
This theme is designed for both single or multi-city directories and seamlessly integrates with Google Maps.
It provides predefined listing types for various business features and services, ensuring a smooth experience for listing submissions.
Step 2: Setting Up Your Domain and Hosting
To make your business directory website accessible, you’ll need a domain and hosting service.
Choose a domain name that reflects the directory’s identity and purpose. Aim for simplicity and relevance, perhaps incorporating your industry or region’s name.
Godaddy or Namecheap are great options to acquire your favorite domain name.
For hosting, popular providers like Cloudways, SiteGround, and WP Engine offer dependable services for storing your site’s data and making it accessible online.
Step 3: Install GeoDirectory & Configure Your Settings
After securing your domain and hosting with WordPress one-click install, set up your new WordPress website.
Next, install the GeoDirectory plugin.
This plugin is critical for building a functional business directory, offering a range of tools to manage business profiles, event management, booking capabilities, and business amenities.
Here’s how to install the GeoDirectory plugin:
- From your Dashboard, navigate to Plugins > Add New.
- In the search field, type “GeoDirectory” and press Enter.
- Locate the “GeoDirectory – Business Directory Plugin” and click “Install”.
- After the installation is complete, click on the “Activate” button.

GeoDirectory’s features are designed to meet the unique needs of business directories:
- Easy Listing Management: Manage and organize listings for different businesses. Track relevant details such as contact information, descriptions, and photos.
- Events Management: Promote business events, including sales, meetings, or workshops. Create event listings with dates, locations, and descriptions.
- Business Profiles: Showcase businesses by creating profiles that highlight their services, areas of expertise, and contact information.
- User Reviews and Ratings: Allow users to share feedback and rate their experiences with various businesses.
- Business Facilities and Amenities: Highlight different facilities and amenities provided by businesses.
Step 4: Personalize Submission Form Fields
Tailoring the form fields in GeoDirectory for your business directory involves the following steps:
- Access the WordPress dashboard and navigate to ‘CPT > Settings > Custom Fields’.
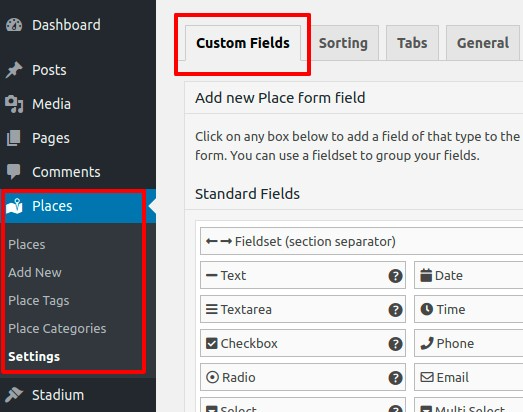
- In the interface, ‘Add New CPT Form Field’ allows you to create new fields. ‘Add New CPT Listing Form’ displays the currently available fields.
- Choose from ‘Standard Fields’, and ‘Predefined Fields’, or use the ‘Custom Fields’ area to incorporate your custom fields (PHP coding required).
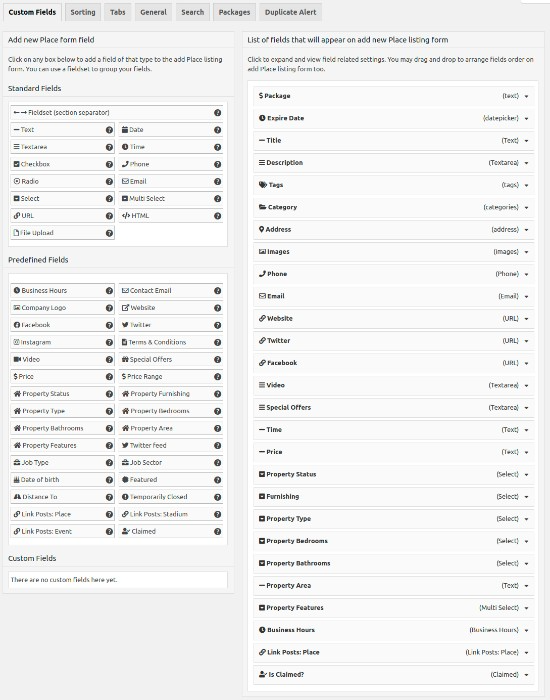
Once you’ve customized the field, click ‘Save’. Don’t forget to check the ‘Is Active?’ option to ensure the field is visible on your directory website.
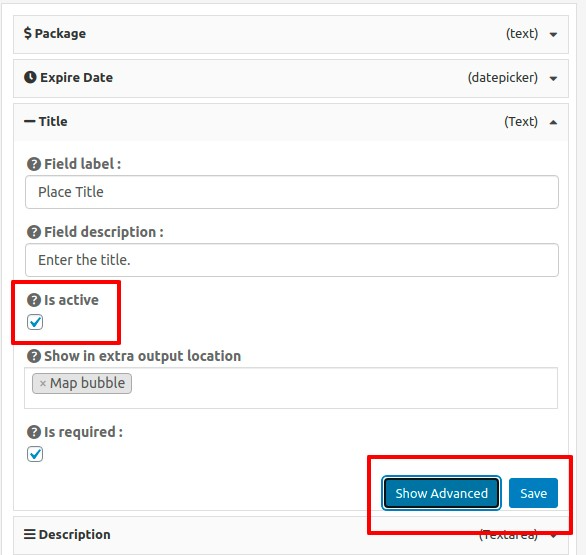
Some customization ideas for your business directory might include:
- Business Category Field: Include a dropdown menu or checkboxes to specify the business categories associated with each listing.
- Services Field: Add a field to specify the services offered by each listed business.
- Operation Hours Field: Provide a field for businesses to specify their operation hours.
- Facilities and Amenities Field: Create a field to highlight the facilities and amenities provided by each business.
Step 5: Creating Your Categories
Creating a well-structured category system is vital for maintaining organization and usability.
GeoDirectory provides the capability to establish hierarchical categories, including parent categories and subcategories, tailored specifically for business directories.
To start, select ‘CPT > CPT Categories’ within your WordPress dashboard and follow these steps:

- Name: Enter the name of the category you want to create, such as ‘Restaurants’, ‘Hotels’, or ‘Shops’. Here’s an example:

- Slug: Define the category slug, which will be part of the URL leading to the category’s page. For example, ‘restaurants’, ‘hotels’, or ‘shops’.
- Parent Category: If applicable, position your new category as a subcategory under a parent category. This helps to organize listings hierarchically. For instance, ‘Food & Beverages’ could be a parent category, with ‘Restaurants’, ‘Cafes’, and ‘Bakeries’ as subcategories.
- Description: Optionally, provide a brief description of the category, offering additional context or details about the listings it encompasses.
- Category Top Description: This text will appear at the top of the category’s listings page, serving as an introduction or providing important information related to that specific category.
- Default Listing Image: Choose a default image that represents listings within this category. It could be an icon, photo, or graphic that visually represents the nature of the category.
- Map Icon: If desired, select a map icon from your media files to visually represent this category on any maps displayed on the directory.
- Category Icon: Set a category icon that visually represents the category. This icon can be utilized within the directory for easy recognition and navigation.

- Category Color: Choose a color that corresponds to the category, providing visual differentiation and aiding in categorization throughout the directory.

- Schema Type: If there is a suitable schema type available for your category, select it. This helps search engines understand the data within the category and may enhance search result display.
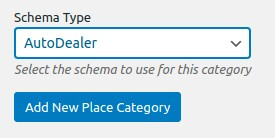
After completing these fields, make sure to save your newly created category.
This category will now be an available selection when introducing new listings to your business directory.
By crafting categories in an effective manner, you bolster the organization and usability of your directory.
This, in turn, simplifies the navigation process and aids users in discovering pertinent information.
Where ChatGPT comes in (+ Example Prompts)
1. Writing Blog Posts
Blog posts are a great way to drive traffic to your directory.
They can provide useful information about the businesses in your directory, advice for business owners, and much more.
ChatGPT can assist in generating high-quality, engaging content for your blog.
Here’s a sample prompt that you can use:
Prompt: “ChatGPT, write a blog post about the importance of local businesses in strengthening the community.”
You would then receive a blog post draft that you could review and edit as needed.
- Content Ideas: Need ideas for your next blog post or feature article on your directory site? ChatGPT can help brainstorm new content ideas. If your directory is only about local vegan restaurants: “ChatGPT, provide five blog post ideas centered around local vegan restaurants.”
- Creating FAQs: Frequently Asked Questions (FAQs) are a great way to address common inquiries your users may have. Go on Google and search for your main keyword (the topic of the article). Then copy-paste the ‘People Also Ask’ questions and ask ChatGPT to answer them while brainstorming more on your behalf as well. Prompt: “ChatGPT, think of all possible FAQs for [Insert Topic] and write short, concise answers for them.” You would then receive a FAQ page draft that you could review and edit as needed.
- Generating Titles: For any article or post, titles are an important part of making them stand out from the crowd: “ChatGPT, write 5 attractive titles for a blog post about the benefits of using a local business directory.”
2. Generating Listing Descriptions
Creating engaging and persuasive descriptions for each listing can be a daunting task, especially if your directory has hundreds or thousands of businesses.
With ChatGPT, you can create a basic description and then use the model to expand and improve it.
For instance, if you have a coffee shop in your directory, you might start with a basic description like this:
“The Coffee Bean is a local coffee shop located in downtown Springfield. They offer a variety of coffee drinks, pastries, and sandwiches.”
You can then ask ChatGPT to expand this description with more detail and persuasive language:
Prompt: “ChatGPT, can you expand on this description for a coffee shop listing? ‘The Coffee Bean is a local coffee shop located in downtown Springfield. They offer a variety of coffee drinks, pastries, and sandwiches.'”
The AI might respond with something like this:
“Tucked away in the heart of downtown Springfield, The Coffee Bean is more than just a coffee shop – it’s a haven for coffee enthusiasts and food lovers alike. Boasting an impressive variety of aromatic coffee drinks sourced from the finest beans, The Coffee Bean ensures each cup is a delightful experience. Their extensive menu also includes a selection of freshly baked pastries and gourmet sandwiches, perfect for a quick breakfast, a leisurely brunch, or a light lunch. Step into The Coffee Bean and find yourself immersed in the rich, enticing aroma of fresh coffee, the warm hospitality of their staff, and a community atmosphere that feels like home.”
With ChatGPT, the potential applications are vast, and these are just a couple of examples of how it can be used to assist in building your business directory.
It can save you significant time and effort, and help you create a more engaging and valuable resource for your users.
3. Email Communication
Whether you need to respond to inquiries, send updates to the businesses in your directory, or create a newsletter, ChatGPT can help craft the perfect email. For example:
- Prompt: “ChatGPT, write an email informing business owners about an upcoming update to our directory that will allow them to add discount coupons to their listings.”
4. Social Media Posts
Promoting your directory on social media is essential to grow your user base. ChatGPT can help generate engaging posts for different platforms. For example:
- Prompt: “ChatGPT, please write a Facebook post promoting the new businesses that have been added to our directory this week.” Then add the list of new businesses.
5. User Testimonials
You can generate example user testimonials to illustrate the value of your business directory.
Of course, you should only use actual testimonials for marketing purposes, but AI-generated examples can give you an idea of what effective testimonials might look like. For example:
Prompt: “ChatGPT, write an example of a positive testimonial from a user who found a great local restaurant through our directory.”
Monetizing Your Business Directory with ChatGPT
Building a comprehensive, user-friendly, and up-to-date business directory opens up several potential monetization strategies.
It’s crucial, however, to balance revenue generation with a positive user experience and value.
The power of AI, and specifically ChatGPT, can help you accomplish this while also creating additional monetization opportunities.
Let’s delve into some strategies where ChatGPT can play a crucial role.
1. Premium Listings
A common monetization method is offering premium listings.
Basic listings in your directory could be free, but businesses could choose to pay for a premium listing that offers more visibility and additional features.
For instance, premium listings could include expanded, AI-generated descriptions written by ChatGPT 4.
The AI can draft unique, compelling content that highlights the business’s offerings, ensuring each premium listing stands out.
2. Advertising
Advertising is another effective way to generate revenue. ChatGPT can contribute in several ways:
- Display Ads: You can create targeted ad copy with the help of ChatGPT, tailoring messages to appeal to different audiences. This personalized approach could make your ad space more valuable to advertisers.
- Sponsored Content: Businesses could pay for AI-generated articles, blog posts, or other content featuring their products or services. ChatGPT can assist in writing this content, ensuring it’s valuable and relevant to your users.
- Affiliate Marketing: If businesses in your directory sell products or services online, you could earn a commission on any sales that originate from your directory. ChatGPT can help draft persuasive product descriptions or reviews that include affiliate links.
3. Partnerships and Sponsorships
When forming partnerships or sponsorships with businesses, ChatGPT can be used to draft partnership proposals, create sponsored content, or develop other communication materials.
This not only makes the process more efficient but also helps you maintain a professional and consistent tone.
4. Subscription or Membership Fees
Depending on the value your directory provides, you may be able to charge users a subscription or membership fee for access to exclusive benefits. ChatGPT can help create exclusive content, such as detailed guides or articles, for subscribers only. Additionally, it can assist in crafting communication about subscription benefits, promotional offers, or renewal reminders.
5. Selling Data Insights
As you gather data about businesses and users, you may find valuable insights that could be beneficial to other businesses, researchers, or government bodies. ChatGPT can assist in generating comprehensive, understandable reports or summaries of this data, making it more valuable and sellable.
6. Legal Copy
ChatGPT can write all your policies, procedures, terms of service, and any legal text that your business might require.
Ready to kickstart your Business Directory?
In the digital age, integrating AI tools like ChatGPT and powerful plugins like GeoDirectory can make your online business directory more dynamic and interactive.
From creating engaging content to assisting in monetization strategies, ChatGPT can significantly enhance your directory.
Remember, building an effective directory is a journey that requires constant evolution and improvement.
So keep exploring and leveraging tools like ChatGPT to stay at the forefront of technology and business.
As you continue this journey, the potential for growth and success is limitless. Good luck with your AI-powered business directory!
In the digital age, information is truly at our fingertips. From finding the nearest bakery to the best bicycle shop in town, a city directory can be a pivotal resource for locals and tourists alike.
In this guide, we will demystify building a city directory using WordPress, one of the world’s most popular content management systems.
Whether you’re a WordPress beginner or a seasoned expert, we’ll walk you through each step, from conceptualizing your directory to launching it online. We will provide you with all the tools and knowledge you need to get started.
By the end of this article, you’ll know how to create a comprehensive, user-friendly city directory that is both functional and visually appealing.
So let’s dive into the exciting world of WordPress and start building your city directory.
What Should I Include in a City Directory?
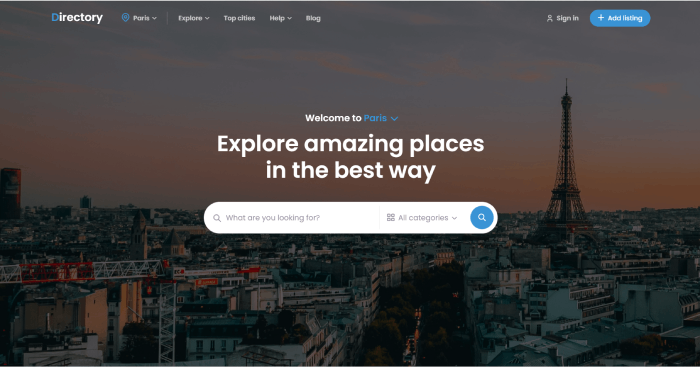
The first step in building a city directory is deciding what content you want to include.
Your directory could be as basic or comprehensive as you’d like – it all depends on your target audience and the resources you have available.
Generally speaking, a city directory should include:
- Business Listings: This is the backbone of any city directory. List businesses by categories, such as restaurants, retail stores, hotels, and service providers. Include essential details such as business hours, contact information, and a brief description of the services they offer.
- Job Listings: job listings can be easily monetized if the directory receives decent traffic and usually generates a good amount of traffic once the job boards start getting traction.
- Points of Interest: Highlight popular tourist attractions, landmarks, museums, parks, and other points of interest. Include a brief description, location, opening hours, and other relevant information.
- Community Resources: Include information about community centers, libraries, hospitals, police stations, and other critical public resources. This section is especially helpful for newcomers to the city.
- Events Calendar: A regularly updated calendar of events can add value to your city directory and bring back visitors repeatedly. This could include concerts, festivals, public meetings, sports events, etc. Include details such as the event date, time, venue, and a brief description. GeoDirectory features a free events add-on that lets you do this.
- Public Transportation: Details about the city’s public transportation system, such as bus and train schedules, fare information, and route maps, can be incredibly helpful for residents and visitors.
- Housing and Real Estate: Listings of available housing, real estate listings, or noteworthy residential areas can benefit individuals planning to move to the city.
- Local News and Updates: This could involve updates about city development projects, changes in local regulations, or other important news that residents should be aware of.
- Reviews and Ratings: Allowing users to rate and review businesses and points of interest can add an interactive element to your directory and provide valuable feedback for other users.
- Maps and Navigation: Embedding a map for each listed location will help users find their way around. Providing directions or navigational aids can be a helpful feature, especially for larger cities.
Remember, ensuring the information is accurate, up-to-date, and user-friendly is key to a successful city directory.
Tailor your directory to your specific city and audience, and you’ll create a resource that residents and visitors will turn to time and time again.
Step 1: Choosing the right theme
A well-suited theme is crucial when creating a city directory site with WordPress. GeoDirectory conveniently offers a beautiful selection of themes – some of which are free, and others that range from $19 to $39.
In April 2023, we released the new FSE Directory theme, and if you are interested in building a city directory with WordPress, you should consider it as it is the most customizable Directory Theme ever built and it’s ideally suited to build your next City Directory.
All GeoDirectory themes are adaptable to single or multi-city directories and integrate seamlessly with Google Maps.
They include predefined listing types for various city features and events, plus a user-friendly front-end listing submission system with payment processing.
Step 2: Setting Up Domain and Hosting
A WordPress theme is the skeleton of your website, but to bring it to life, you need a domain and hosting.
The domain name is your website’s unique internet address, while the hosting service stores your site’s data and makes it accessible online (e.g., Cloudways, SiteGround, and WP Engine).
Some tips for naming your city directory:
- Local Relevance: Incorporate the city or region name in your domain. This directly signals the website’s purpose and can enhance local search engine optimization.
- Directory Indication: Consider including terms like “directory,” “guide,” or “hub” in your domain name. This helps communicate the nature of your site to users.
- Keep it Simple and Memorable: The domain name should be easy to remember and type. Avoid complex spellings, excessive hyphens, or numbers, as these can confuse users.
- Dot-Com Dominance: If available, opt for a “.com” domain. It’s the most recognized and trusted domain extension.
- Avoid Copyright Issues: Ensure the domain name doesn’t infringe upon trademarks or existing brands. This can lead to legal issues and confusion among users.
- Consider Future Expansion: If you plan to expand your directory to include more cities or regions in the future, choose a domain name that allows for this growth.
Step 3: Install GeoDirectory & Configure Your Settings
Once you have your domain and hosting, it’s time to install GeoDirectory, the leading WordPress Directory Plugin.
This is a crucial step for creating a functional city directory, as it provides all the necessary tools for managing listings, events, payments, reviews, ratings, and more.
- From the Dashboard select Plugins > Add New.
- In the search field enter “GeoDirectory”, then select install on “GeoDirectory – Business Directory Plugin”
- After installation, click Activate.
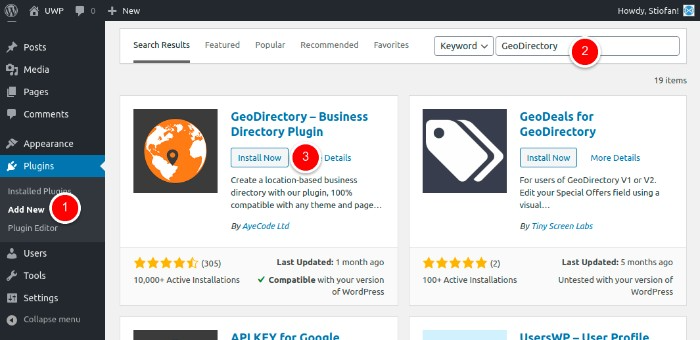
Once activated you will find a new menu item on the WordPress dashboard.
The GeoDirectory > Dashboard shows you Actions Required and Statistics about your City Directory.
Under Settings, you will find the following:
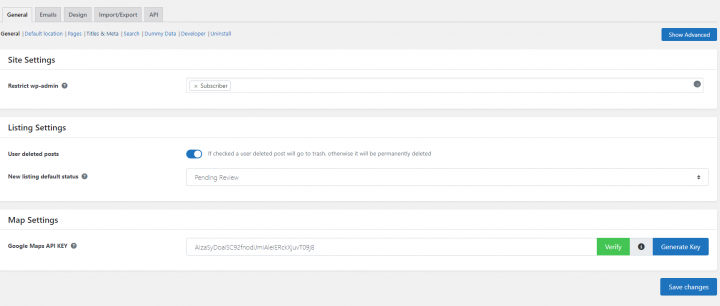
- General: This section is where you handle listings and map settings. Where you select the default location which is the starting point of the add listing form map and Directory pages are set up. It also includes SEO settings, Search settings, Dummy data creation, and more.
- Email: This is where to set up Email and Notification options. This is also where you can modify the email templates.
- Design: Under this tab, you find general design options for the listings archive page, single listing page, reviews, and email templates.
- Import/Export: This is where you can import and export listings, categories, reviews, and settings in bulk via CSV file.
- API: The API tab allows you to enable the REST API for listings and to create an API key for any external application to interact with API.
Remember, configuring these settings best to match your vision and the needs of your audience is crucial for the success of your city directory website.
Step 4: Personalize Submission Form Fields
GeoDirectory comes equipped with standard form fields for listing submissions, appropriate for a basic city directory structure. Of course, you can tailor these fields to your specific needs, enhancing the relevancy and depth of your directory listings.
- Begin by navigating to ‘CPT > Settings > Custom Fields’ on your WordPress dashboard.

2. Here, you’ll find the interface divided into two sections. ‘Add New CPT Form Field’ on the left is for creating new fields, while the right panel displays the fields currently available on the ‘Add New CPT Listing Form’.
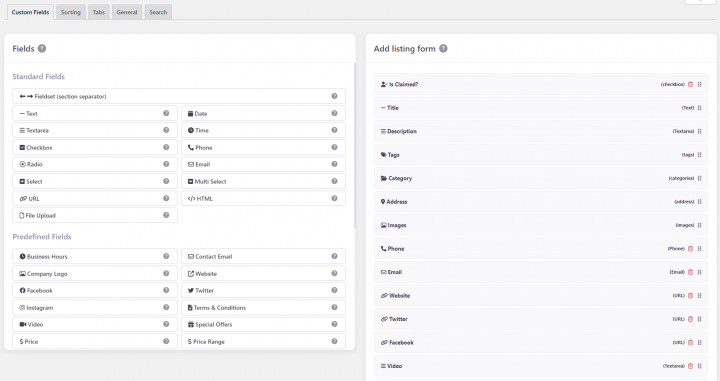
3. Within these sections, you have the choice of ‘Standard Fields’, ‘Predefined Fields’, and a ‘Custom Fields’ area. This last one is particularly useful for developers, enabling them to incorporate their own custom fields through custom code.
4. To add a new custom field, click on your desired field in the left panel, and it will be added to the right panel.
5. Click the newly added custom field and the settings will appear in the right panel.
6. Once you’ve customized your field, click ‘Save’. Be sure to check the ‘Is Active?’ option before saving to ensure your custom field will be visible on your site.
Some ideas for your city directory:
- Add a ‘Neighborhood’ Field: If your city has distinct neighborhoods or boroughs, you might want to add a ‘Neighborhood’ dropdown menu in your submission form. This can help visitors find businesses in specific parts of the city. (Location Manager add-on required)
- Include a ‘Business Hours’ Field: This can be beneficial for users as they can know when the listed businesses or services are open.
- Integrate a ‘Parking Available’ Checkbox: If parking is a concern in your city, a checkbox indicating whether a location has parking available could be a useful addition.
- Add ‘Public Transport Links’ Field: This could provide information about nearby public transport links for each listing. It could be a text field where users can enter information about the nearest subway station, bus routes, etc.
- Create a ‘Special Features’ Field: This could be a text box where listers can add any unique attributes or services their business offers.
Step 5: Creating Your Categories
A city directory website can quickly become overwhelming with hundreds, if not thousands, of listings. The key to maintaining organization and usability lies in well-structured categories.
The GeoDirectory themes allow you to establish categories in a hierarchical form, from a parent category to its subsequent subcategories.
To begin with, go to your WordPress dashboard and select ‘CPT > CPT Categories’. Here, you’ll notice a form on the left side of the page, allowing you to create a new category.
Follow these steps:
- Name: Input the name of the category you want to create. Typically, it’s better to use a plural term such as ‘Cars’ rather than ‘Car’. This is the only required field, though we advise completing the subsequent fields for a more robust directory.

- Slug: Define the category slug. This will form part of the URL that leads to this category’s page.
- Parent Category: If necessary, you can position your new category as a subcategory under a parent category.
- Description: Include a brief description of the category, if desired.
- Category Top Description: This text will appear at the top of your category’s listings page.
- Default Listing Image: Choose a default image for listings within this category.
- Map Icon: Optionally, select a map icon from your Media files to represent this category on any maps.
- Category Icon: Setting a category icon without a specific Map Icon will auto-generate a Map Icon using the Category Icon and Category Color values. Be aware that not all icons are supported.
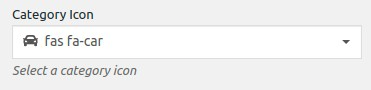
Category Color: Choose a color for this category. This color is also used to create a custom Map Icon and is utilized in other settings around the site.
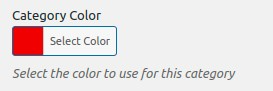
Schema Type: If a suitable schema type exists for your category type, it’s beneficial to set one. This informs search engines about the data they can expect, and sometimes, Google might display Schema-specific information in search results.

After completing these fields, submit your new category. It will now be available when adding new listings to your city directory.
Step 6: Add Your First Listing with the Submission Form
You’ve successfully completed all the fundamental steps to create a city directory site in WordPress. With the full system established, it’s time to add your inaugural listing.
Navigate to the directory page you established in step three.
Here, you’ll find an “Add Listing” button. Click on it to bring up the submission form. Complete the form with relevant information and submit your first listing.
Ensure that everything is functioning smoothly. If you’ve set up any email notifications, make sure to verify these as well. A handy feature of the Business Directory Plugin is its CSV Import & Export capability. This allows you to maintain backups and add multiple items in one go.
Step 7: Attract Visitors to Your City Directory
Congratulations! You’ve successfully built a city directory in WordPress. You can now integrate your directory page into your main menu or any other appropriate location on your website.
Now it’s time to promote your city directory. Some tried-and-true methods include SEO, social media promotion, content marketing, paid advertising, and promotional deals. But you already know those methods.
Related: Boost Your Directory Website’s Traffic with this Comprehensive SEO Guide.
Here are some more creative and actionable strategies to get started on now:
- Host a Launch Event: Consider organizing an event to launch your directory. This could be a meet-and-greet with local businesses, a promotional event with interactive activities, or even a virtual event.
- Run a Contest: Organize a fun and engaging contest. For instance, have users vote for their favorite local business or share their favorite city spots on social media with a designated hashtag. Reward winners with exclusive deals or special recognition.
- Leverage User-Generated Content: Encourage users to share their experiences with businesses listed in the directory. This could be through reviews, social media posts, or blog contributions. Rewarding the best contributions can increase participation.
- Develop a Referral Program: Incentivize users to refer others to your directory. This could be through offering exclusive benefits, discounts, or premium features for successful referrals.
- Establish a Local Ambassador Program: Identify influential locals who love your city and would be happy to promote your directory. Provide them with the tools and incentives to spread the word.
- Offer Exclusive Content: Provide content that users won’t find anywhere else. This could be interviews with local celebrities, deep dives into local history, or insider tips for living in the city.
- Collaborate with a Local Charity: Partner with a local charity and donate a portion of your profits for a certain period. This can generate positive publicity and bring more attention to your directory.
- Utilize QR Codes: Distribute flyers or posters with a QR code that directly links to your directory. This can be a quick and easy way for people to access your directory on the go.
- Create Video Content: A video tour of some top businesses or locations in the city can be engaging content. Share these videos on social media and on your directory site.
- Design an Interactive City Tour: Based on your directory listings, design a virtual or real-life city tour. This can showcase the breadth of your directory and provide a fun experience for users.
Ready to give your city the best directory it’s ever seen?
All in all, creating a city directory in WordPress is a rewarding endeavor that brings your city closer to your online audience. With careful planning, robust organization, and strategic customization, you can create an engaging and informative city directory that benefits local businesses and residents alike.
Remember, a city directory is more than just a collection of listings. It’s a dynamic platform that showcases the spirit of your city. Therefore, continually updating your directory, responding to user feedback, and promoting your platform creatively is essential to maintain its relevance and usefulness.
Use the tips and strategies outlined in this article as your guide. With the right approach and dedication, you can turn your city directory into a valuable resource that enriches your local community and beyond.

What is an Online Directory and why is it important in 2023
A directory website is an online platform that serves as a comprehensive and organized repository of information about businesses, services, or products within a specific industry or niche.
By providing users with a convenient and centralized source of information, directory websites help them make informed decisions when searching for products, services, or businesses that cater to their needs.
In the digital age, where consumers rely heavily on the internet to find solutions and gather information, directory websites play a critical role in connecting businesses with their target audience.
These websites not only make it easier for users to discover and compare offerings from various businesses but also help businesses increase their online visibility, generate leads, and improve their credibility.
With the ever-growing competition in the online space, having a well-designed and user-friendly directory website is essential for standing out and providing value to both users and businesses.
Using WordPress Custom Post Types, and Advanced Custom Fields in creating directory websites
If you ask WordPress-centered Facebook Groups and Subreddits what the best way to build a directory website is, the majority will answer to avoid built-for-purpose plugins and build it with CPT UI (Custom Post Type) and ACF (Advanced Custom Fields).
These are very capable plugins used by millions of users, however, when it comes to developing a directory website using WordPress, Custom Post Types, and the Advanced Custom Fields, the process can be challenging, frustrating, and with a lot of hidden costs.
These tools, while popular and widely used, often require a steep learning curve for developers in order to achieve complexity and can result in suboptimal performance and limited options.
Let me show you why.
15 Challenges in Achieving Desired Features with Custom Post Types and ACF When Building a Directory Website:
- Create a Front-End Submit Listing Form for Adding and Editing Listings with payments and listing expiration.
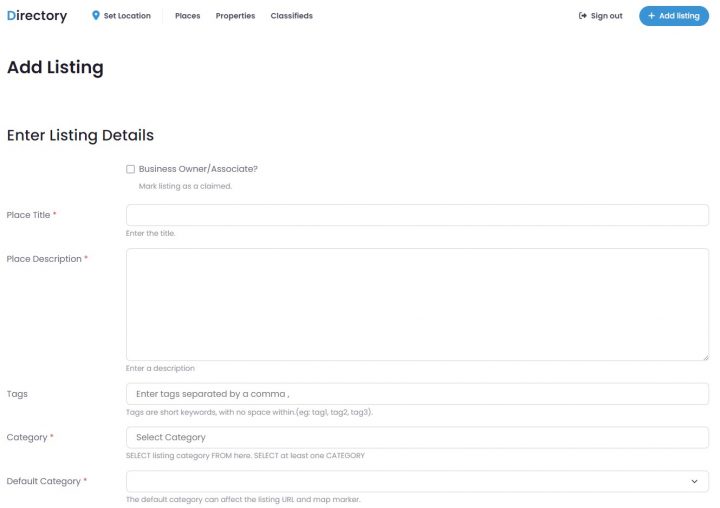
while with ACF you can easily create a form on the front end of your website to add or edit content, make it accept payments, offer extra features for paid listings vs free listings, allow for subscriptions (recurring payments), and so on will be a lot harder to accomplish.
If you are a hardcore developer who prefers to create DIY solutions, the only way would be to custom-code all extra features.
This would result in weeks of work (months if it is the first time taking on a similar task).
Otherwise, this can be accomplished by adding extra paid plugins.
For example, the pro version of the Frontend Admin plugin would provide front-end user registration, paid listing submission, and editing.
For a single site, this plugin would add $90/year to your budget.
- Distinguishing Premium Listings from Free Listings
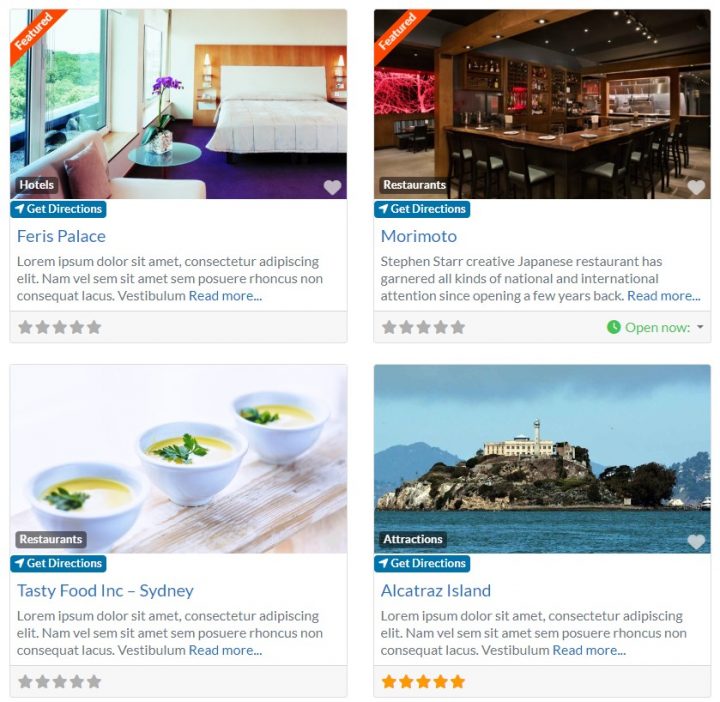
If you want to sell premium listings, while having also free listings, you must differentiate the two and add value to the paid option.
The best option you have is to create a “submit listing” form for each listing type and add extra features to the premium listings in the form of extra custom fields.
For example, the free listing could have only the listing Name, Address, Phone number, and 1 picture.
While the premium listings would have more details like a web address, social media accounts, more pictures, a longer text description, a contact form, and so on.
In addition, the premium listings should be visually different, for example showing a “FEATURED” badge, or a different layout.
This is not particularly difficult to accomplish, still, it is relatively time-consuming.
What is not as easy, would be providing extra visibility to the Premium Listings as opposed to the free listings.
For example, making premium listings always rank on top of category archive pages.
For that, you need to master WP queries and or SQL.
- Managing Listing Subscriptions, Failed Recurring Payments, and Listings Expirations
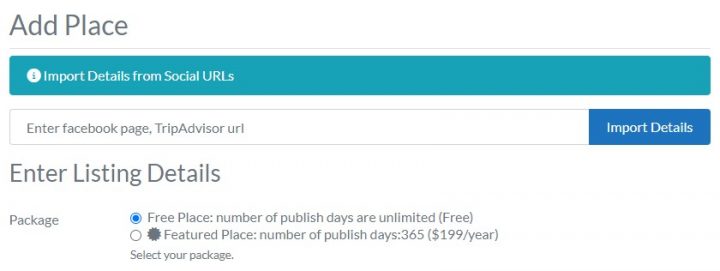
What do you do If a listing owner doesn’t renew a listing by paying again?
Or in the case where you set up a subscription with a recurring payment, and the listing owner cancels the subscription, or his payment method is declined?
You definitely don’t want the listing to remain active or to get the perks of a premium listing without paying, right?
You must set up a system to either downgrade the listing or make it expire and change its status to unpublished.
All this will require custom code and to develop something like that, you need good knowledge of payment gateways APIs, and especially IPNs (instant payment notifications).
You also need to know how to set up a CRON job, how to alter post statuses, and how to turn a premium listing into a free listing, possibly without losing the extra data.
- Developing a Map with Multiple Pins.
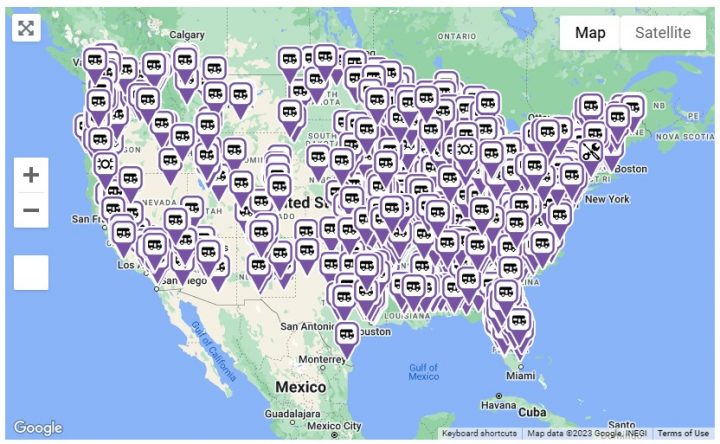
Plotting locations on a Google Map using Advanced Custom Fields and a little javascript, is relatively easy.
The first step is to GeoCode the addresses of each listing, and we will talk more about that in point 6 of this list.
What is not easy is plotting a lot of locations. Especially if you are passing more than just a listing title to the map to show on the Map Markers when clicked.
If you start trying to show more than a few hundred listings on a map (less if the server isn’t top-notch), the map will load extremely slowly or even freeze.
The only solution is to asynchronously load the locations and also the information (AJAX).
Doing that is a lot harder than putting up a map with a few markers, and will take a lot more time to accomplish even for a seasoned developer.
The more listings you have the more complex your solution needs to be.
First, you will hit the maximum AJAX response size of the browser, then you need to load details of single listings via AJAX, then you will need clustering and even server-side clustering which can show millions of listings.
Building a system that gathers the Map Markers in clusters for a high amount of listings becomes imperative when dealing with a vast number of listings.
Hitting these limits on a live site, because your site got some publicity is not something you want or can fix overnight
Building this kind of system comes with another huge set of challenges.
Achieving that requires a lot of coding experience.
- Integrating a Dynamic Contact Form to the Listings
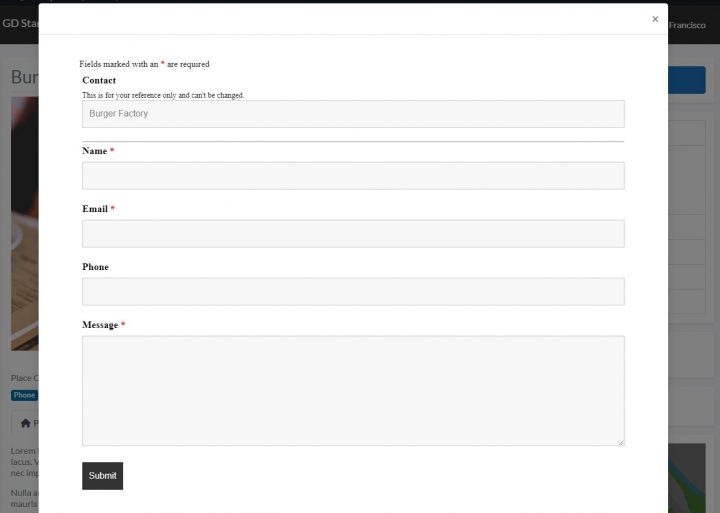
Integrating a unique contact form for each listing, which allows website visitors to contact the business owner directly, can present several challenges.
The complexity of dynamic form generation, data management, customization and consistency, spam prevention, compatibility issues, performance concerns, and ongoing maintenance and updates.
Despite these difficulties, implementing this feature can greatly enhance the website’s functionality and improve communication between visitors and business owners.
There is no plugin available that provides this functionality out of the box.
Significant custom coding is required to implement such a feature in a WordPress directory built using Custom Post Types and Advanced Custom Fields.
- GeoCoding listings and Searching by Proximity
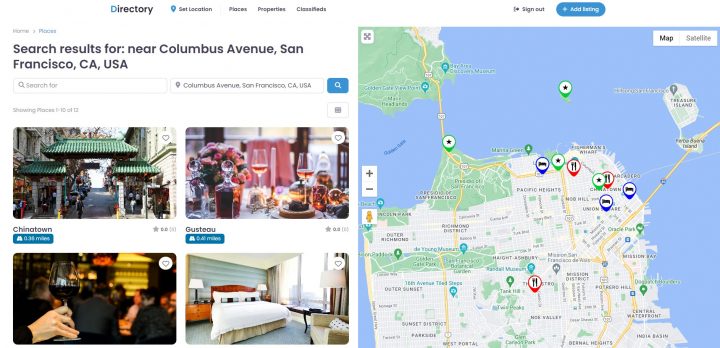
To create a search by proximity feature, you first need to GeoCode the address of each listing.
GeoCoding means getting the longitude and latitude coordinates from the address.
This can be done through the Google Maps GeoCoding API, there are several tutorials online and it’s not a very complex task, however, it takes time.
There is a plugin that can help get started, but it’s not been updated in over 4 years: https://wordpress.org/plugins/address-geocoder/
Once you have all your listings GeoCoded, you have what you need to search by proximity, but achieving that feature requires good WP-Query/SQL knowledge and custom code.
Another option would be to use FacetWP, a premium search plugin that starts at $99/year for 1 to 3 websites.
- GeoLocating Users and Displaying Nearby Listings
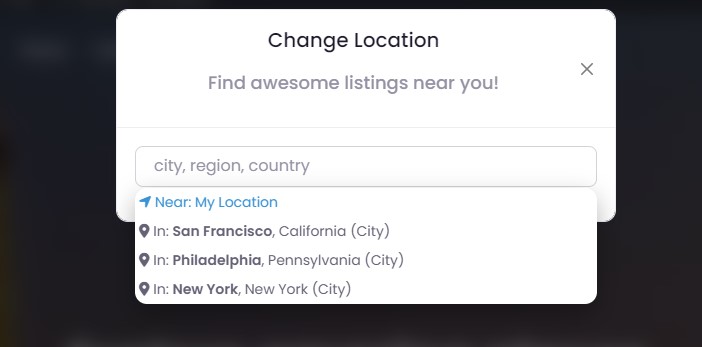
This can be done automatically (you’ll need Trusted IP Geolocation Data).
Or, by using the Google GeoLocation API, by asking users to share their browser location.
The first option is more user-friendly but less precise. The IP address rarely returns a 100% correct address.
The second option will return the user’s location with much higher precision but only works with the user’s authorization.
Both options will require custom coding as there is no plugin that will automate all this.
In addition, having the user’s location is just the starting point.
You still need to query the database and return the listings which are closer to the user location.
- Automating Listing Claims for Business Owners
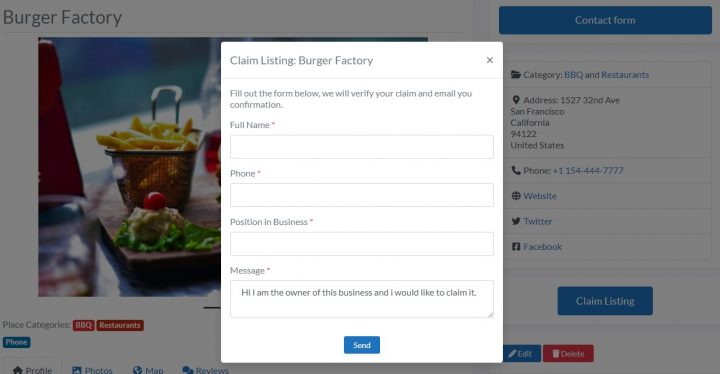
One of the easier ways to engage with business owners and get them to pay a premium listing is to add their business to your directory as a free listing and let them claim it.
You can then either contact them directly and let them know about the opportunity, possibly with a free trial.
Or, the other option, which normally tends to have the best outcome, is that they discover their listing on your directory, by themselves.
This way you are showing them on the spot that you know how to give visibility to your website and become right away, 10x more attractive to them.
For the second option to be possible, you need to have a Claim Listing system in place.
A claim listing system is a feature implemented in directory websites that allows business owners to take ownership of their business listing on the platform.
This system is designed to ensure that the information displayed on the directory website is accurate, up-to-date, and managed by the authorized business owner or representative.
To claim a listing, business owners must follow a verification process set by the directory website, which may involve providing proof of identity or business ownership, such as a business license, tax identification number, or utility bill.
Once the claim is approved, the business owner gains control over the listing and can update the information, add photos, respond to reviews, or promote their business using premium features offered by the directory website.
For a tiny directory with a few listings, you may set this up with a contact form and a manual process.
If you wish to add some automation, a lot of custom coding need to go into this feature. Especially if you want business owners to pay to upgrade their listing as part of the claim process.
There is no plugin that will do this out of the box for Directories built with CPT and ACF.
- Showing Business Hours and Search Filtering by Availability
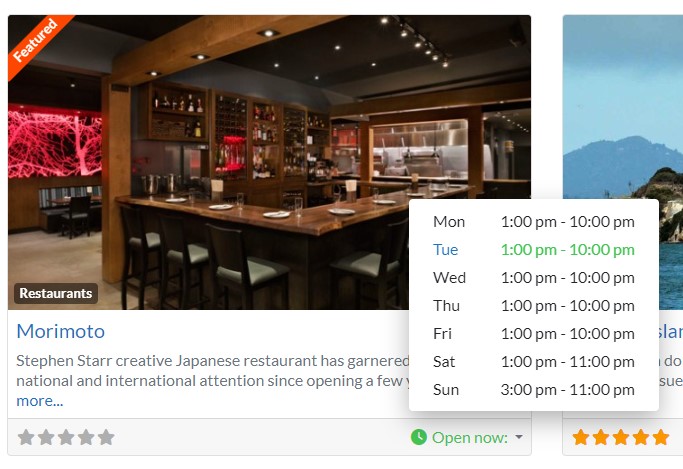
with the Advanced Custom Fields plugin, you can create repeater fields for the opening hours of each listing.
You’ll need to create a dropdown field with the hour values and then use PHP to format it properly for display or calculations.
If you want minute-specific time, you’ll need to use a number field.
Searching by “Open now” or “Closed now”, especially if you have to take into consideration Timezones for the calculation, is only possible with custom queries and code.
Another big challenge is caching this information without disrupting the open/closed status of the listings.
This requires JavaScript skills to have the Open /Closed change live on the page.
It goes without saying that there is no ready-made plugin that will help you accomplish this feature for a CPT and ACF listing.
- Adding Ratings, Reviews, and Sorting Listings by Top Rated
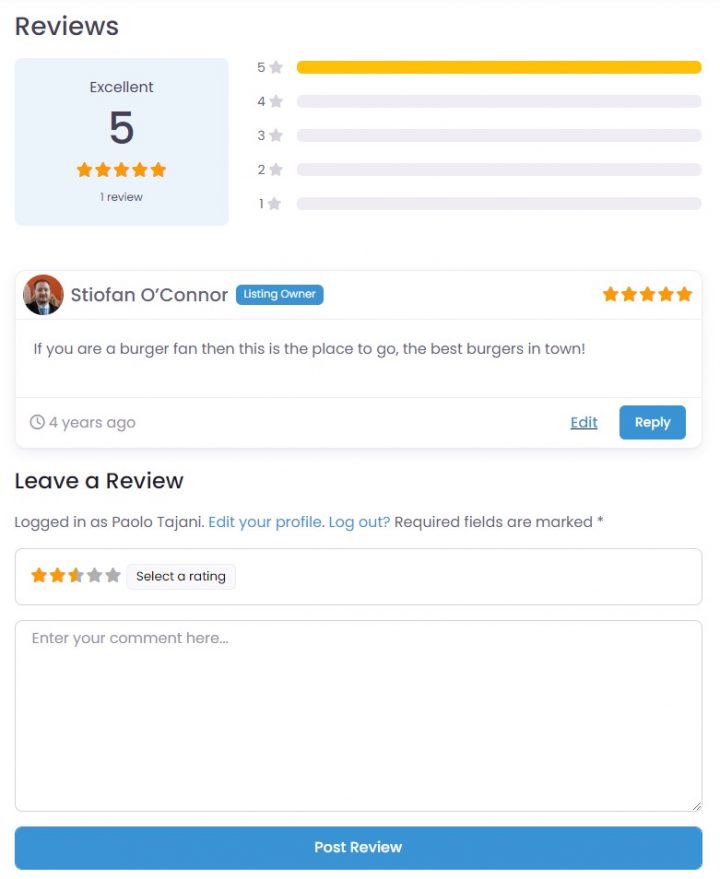
Adding ratings and reviews to a custom post type, using the comments system is relatively easy.
There are free and premium plugins that will help you do that, and you may even find tutorials on how to achieve it without a plugin.
Sorting listings by popularity or top ratings is a bit more complex and will require some custom code and knowledge of the WP_Query class and possibly SQL.
Also, when working on this, you soon realize a simple best rating ordering is a poor ranking factor and it requires more complex ranking queries.
Especially if you decide to build custom database tables because, with all these fields, you will quickly notice that ACF is not scalable at all.
But more on this in the next point.
- Searching Listings by Custom Fields or Location
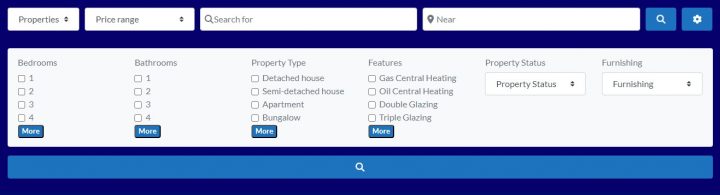
This is where this approach will fail miserably at scale.
The wp_postmeta database table (custom fields) isn’t designed for querying posts by custom fields.
Filtering by anything more than 1 custom field can result in an exponential increase in query times and even a small directory would struggle with filtering more than two custom fields.
For those looking for a technical explanation, you can read this post about ACF scalability limits.
Unless you are dealing with a few hundred listings with a low number of custom fields each, even when using a fantastic search plugin like FacetWP, you will hit a wall quite quickly.
The better your server, the longer it will take you to hit that wall, but eventually, you’ll get there.
There are plugins that save ACF data in custom database tables like: https://hookturn.io/downloads/acf-custom-database-tables/, but it is an extra cost and you will need to write a custom query for your search form to search into the new database tables.
- Implementing Free and Paid Trials for Business Owners
Offering trial options for easier onboarding is an effective way to encourage business owners to explore the features and benefits of a directory website.
By providing free or discounted access to premium features, business owners can experience the value of the platform without making an immediate financial commitment.
This approach helps reduce the barriers to entry and fosters trust between the directory website and potential customers.
As business owners become familiar with the platform and witness its potential to increase their online visibility, generate leads, and improve their reputation, they are more likely to convert from trial users to paying customers.
That said, offering a free or paid trial might not be as simple. If you go the develop-from-scratch route, this will add days if not weeks of custom coding to your project and budget.
- Adding Events and Searching by Date
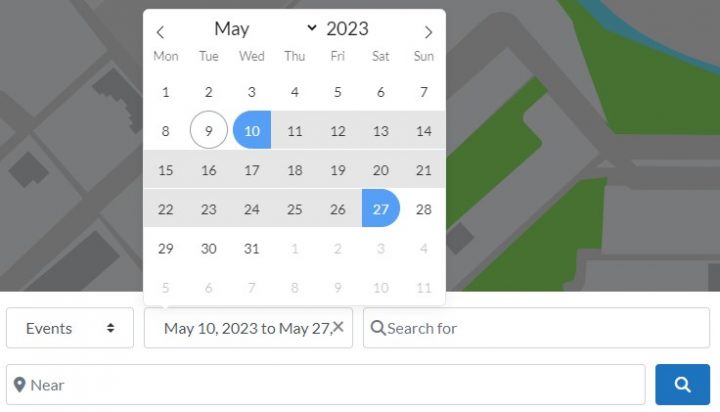
Events are listings with more statuses than the usual listings, which depend on a start date and end date. Events can be Past, upcoming, or ongoing.
You will need yet another custom post type and more complex search queries.
There are several plugins that will add a full Event Calendar to your website, but the style will be completely different from your listings built with CPT/ACF combo.
If you decide to build this too with CPT/ACF, your development time just doubled.
- Creating a Compare Listings Feature
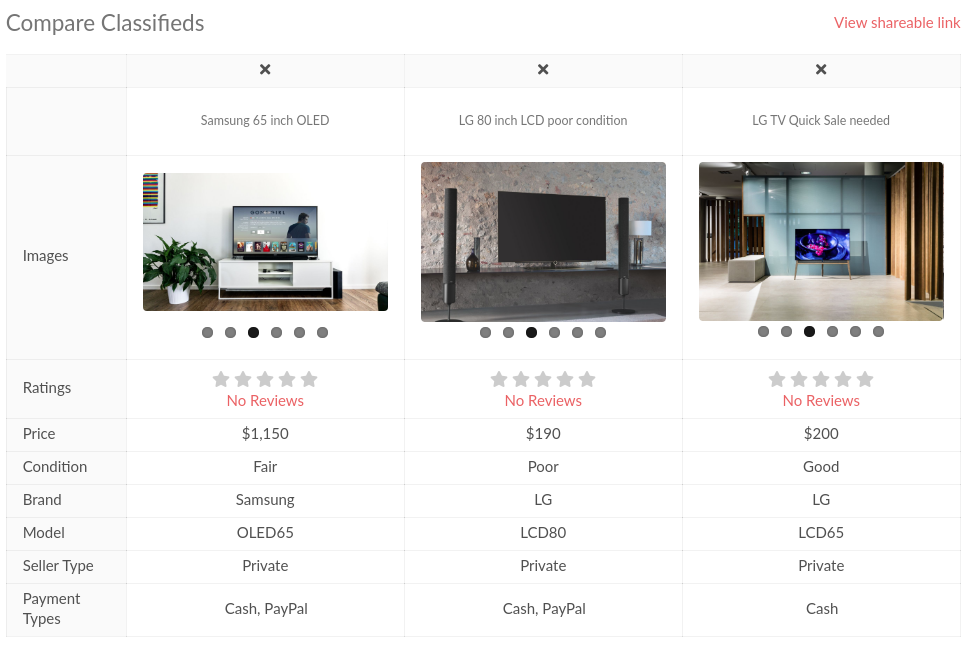
The benefits of allowing users to compare listings on a directory website are numerous.
By enabling users to easily evaluate different businesses or services side by side, a comparison feature can help them make more informed decisions.
This feature allows users to quickly identify key differences, such as pricing, features, ratings, or proximity, and choose the most suitable option based on their needs and preferences.
Implementing a compare listings feature using custom post types and Advanced Custom Fields can be challenging and time-consuming.
The difficulty stems from the need to create a system that dynamically generates a side-by-side comparison of the chosen listings, taking into account various custom fields and attributes.
Additionally, the comparison interface must be designed to be user-friendly, visually appealing, and responsive to different screen sizes and devices.
The amount of time required to implement a compare listings feature depends on several factors, such as the complexity of the listings, the number of custom fields to be compared, and the developer’s expertise with Custom Post Types and Advanced Custom Fields.
However, it is not uncommon for this process to take several weeks of development and testing to ensure a smooth and functional user experience.
- Adding a Booking System for vacation rentals
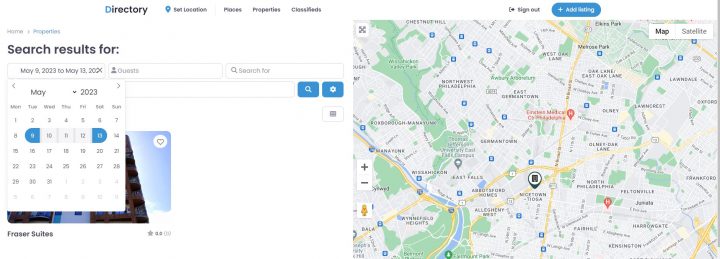
This would be a really complex task with CPT and ACF alone. It would require months of custom coding.
There are a few free plugins that will allow us to take bookings for one property, but in this case, we would need to take bookings for several properties, each owned by different people.
We couldn’t find a premium plugin that would allow multivendor bookings, with a global search by dates, custom fields (Swimming Pool, WiFi, parking), and number of people.
GeoDirectory now is the only solution offering a complete booking plugin for vacation rentals, which allows building a complete Airbnb Clone where the Directory Admin can make money through a commission for each booking secured.
Conclusions
While it is indeed possible to build a fully-fledged business directory using Custom Post Types and Advanced Custom Fields, this approach could take months or even years of custom coding to implement all the required features.
An alternative solution is to use ACF-compatible plugins, which can help streamline certain aspects of development.
However, this approach may require installing an array of plugins from different developers, many of which are not free, leading to potential compatibility issues and increased costs.
For example, if you were to use:
- Frontend Admin: $49.99/year
- FactWP: $99/year
- ACF Custom Database Tables: $149/year
You are already at almost $300/year and you only covered a tiny fraction of the features needed.
A more efficient and cost-effective option is to use a dedicated WordPress business directory plugin, such as GeoDirectory.
By choosing this route, you benefit from a suite of features designed specifically for directory websites, all developed by a single developer.
The plugins are typically lightweight, minimizing performance concerns, and offering a more cohesive and superior application tailored to the purpose of building a directory website.
By opting for a solution like GeoDirectory, you save both time and money, enabling you to create a powerful and user-friendly directory website without the challenges and complexities associated with custom coding and managing multiple plugins.
Did you know that 80% of all job searches were done online as of 2022, and approximately 50% came from job boards?
As the job market becomes more competitive, job seekers and recruiters alike need to be able to find and manage job postings quickly and efficiently.
In response to this growing need, many job board plugins have been developed to help streamline the job-hunting process.
That’s why in this article, we’ll explore some of the top job board plugins available for WordPress.
Whether you are a job seeker or a recruiter, these plugins can help simplify the job search process and make it easier for you to find the perfect match.
Ready? Let’s go.
What is a WordPress Job Board Plugin?
A WordPress job board plugin is a plugin that allows you to publish available jobs from your own company or other companies through WordPress.
These plugins are specifically designed for recruitment and job boards.
Companies and organizations often use them to streamline their hiring process and attract qualified candidates.
Why should you use a job board plugin?
Job plugins are essential components of any job management system.
They provide additional functionalities to simplify job creation, execution, and monitoring processes. Here are some reasons why job plugins are essential:
- Simplify the job search process: Job plugins enable job seekers to find relevant job postings quickly and easily. By offering a centralized location with advanced search capabilities, people can search for open positions without navigating through multiple websites or job boards.
- Job plugins provide customizable job management options, such as the ability to add custom fields to job postings, create custom job application forms, and use custom email templates. These customizations can help you collect relevant information from job seekers, make informed hiring decisions, and build strong relationships with potential candidates.
- Saving time and money: Using a job plugin on your WordPress website means you don’t have to spend extra money on another website for job postings. It also saves you time by eliminating the need to find a third-party job board site.
- Drive traffic to your website: Having a job board on your website can increase its traffic. Indeed, for instance, has averaged more than 600 million monthly visits so far this year.
Criteria to consider when choosing a job board plugin
When selecting job plugins, there are various criteria to consider. Here are some of the most important ones:
- User interface: Look for a job board plugin that is easy to navigate and use, with an intuitive user interface that is easy to understand.
- Customization options: Consider a job board plugin that offers customization options to meet your specific needs, such as the ability to add custom fields or create custom job application forms.
- Compatibility: Ensure that the job board plugin is compatible with your version of WordPress, as well as with any other plugins, themes, or tools you may be using, like an applicant tracking system or email marketing software.
- Features and functionality: Evaluate the features and functionality of the job board plugin, such as the ability to manage job listings, applicant profiles, and notifications. Consider whether the job board plugin provides the necessary features for your organization’s hiring needs.
- Reliability: The plugin should be reliable and stable. An unstable plugin or bug can cause issues with your job management system, such as job failures or data corruption. Check the plugin’s documentation, user reviews, and support resources to ensure reliability.
- Price: Evaluate the cost of the job board plugin, considering both upfront and ongoing costs, and whether it provides value for your organization’s budget.
1. GeoDirectory
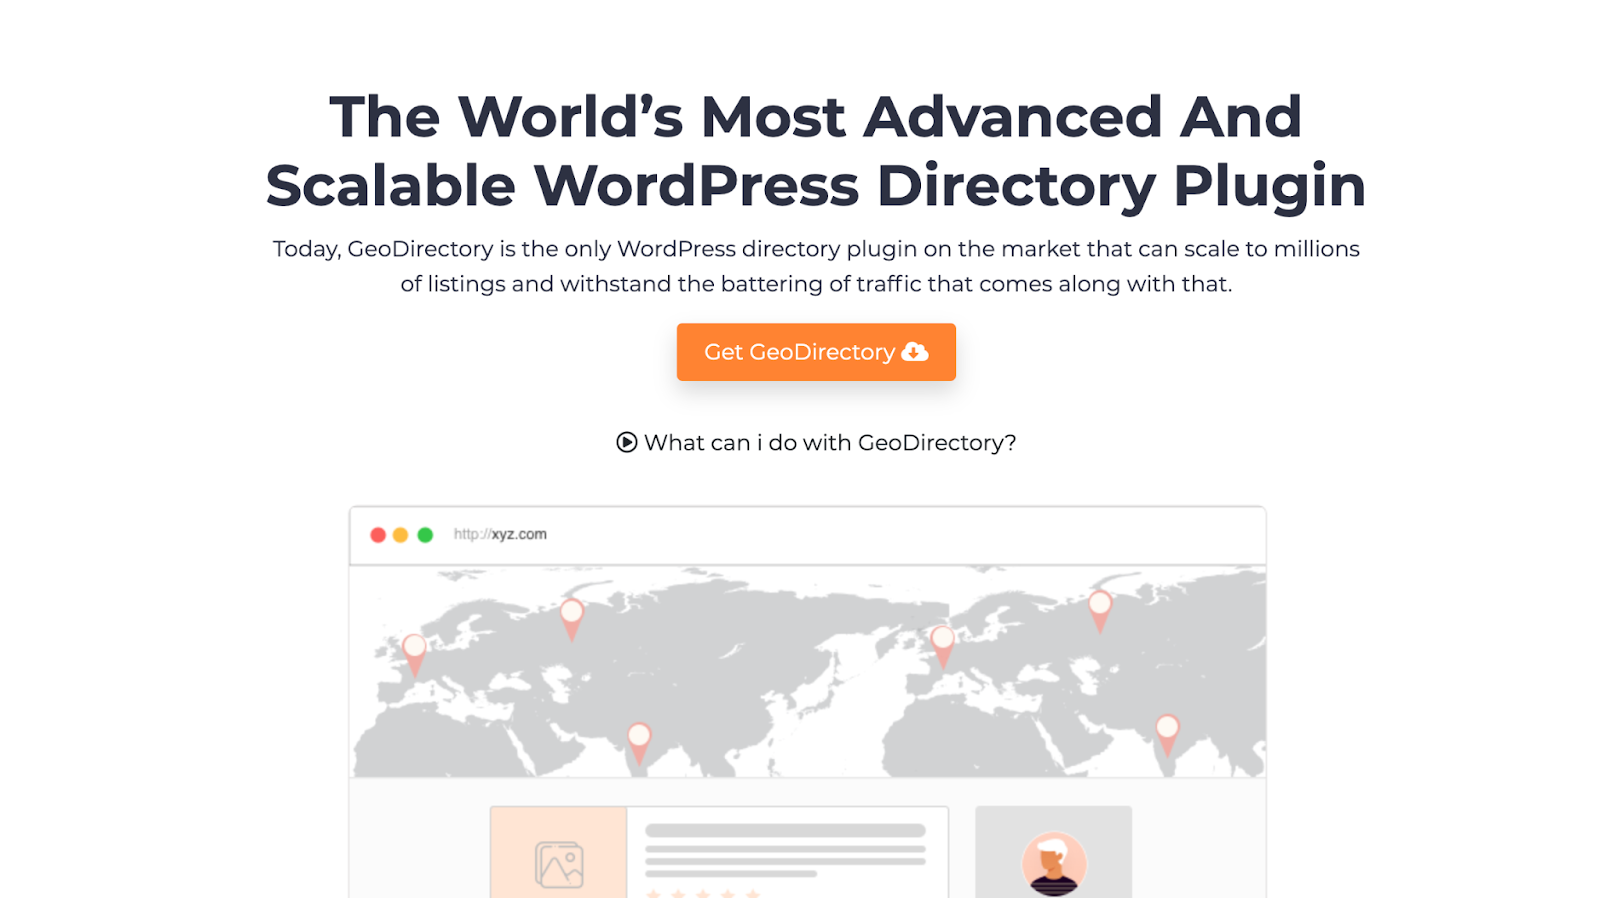
With over 10,000 installations and a 4.7 average rating, the GeoDirectory job board plugin from AyeCode Ltd is one of the most advanced and scalable tools on the market.
This plugin has undergone a complete rewrite in April 2019, resulting in an even more feature-rich solution that’s easier to customize with an improved code base.
Designed to seamlessly integrate with any free or paid job board theme, this plugin makes it easy to create a professional-looking website that will help you attract more job seekers and employers.
If you’re looking for a powerful and versatile job board plugin, here are some of the features that make it stand out as one of the top choices in the industry:
Key Features
- Job listing management: Easily manage all of your job listings in one place, including adding new listings, editing existing ones, and deleting expired listings.
- Paid Job Listings: Monetize Job Listing submissions by offering more features such as extra custom fields, more visibility and priority in search results.
- Custom fields: Create custom fields to collect additional job-specific information from employers, such as required education, experience, and skills.
- Advanced search: Job seekers can easily find the right job with advanced search options, such as location, job type, salary range, and more.
- SEO optimization: Optimize your job board for search engines with built-in SEO features, including custom URLs, meta tags, and more.
- User management: With seamless integration of UsersWP, easily manage job seekers and employers with user registration, login, and account management features.
- Listing comparison: The plugin includes a Compare Listing add-on, which allows job seekers to compare job listings side by side, making it easier for them to make informed decisions and find the best job opportunities.
Pricing
The GeoDirectory core plugin is free and can be more than enough to develop a basic Job Board.
To add extra features like Advanced Search, Job Types, and compare jobs, there are various pricing plans.
The membership starts at $99 including 4 months of support and updates for unlimited websites.
The yearly membership instead costs $199 and includes support for unlimited sites and all features for 12 months.
Pros
- Powerful search and filtering options make it easy for users to find the needed listings.
- User reviews and ratings provide valuable feedback and enhance the user experience.
- Google Maps integration provides accurate location information and maps for job listings.
- The active development community provides frequent updates and support.
Cons
- The learning curve can be steep for WordPress beginners.
- Some features may require additional plugins, which can increase costs.
2. WP Job Manager
WP Job Manager is a WordPress job board plugin developed by Automattic.
With just a few steps – creating new pages and adding shortcodes – you can establish a fully functional job portal within minutes.
This plugin enables recruiters to sign up on your website and post job openings, while job seekers can effortlessly manage their listings via an intuitive dashboard.
Moreover, WP Job Manager offers the opportunity to generate revenue through paid job postings using premium add-ons.
Additional add-ons allow for email notifications, seamless integration with WooCommerce for monetization, the inclusion of a resume manager, and more.
WP Job Manager is best for providing alerts and filterable job listings.
Key features
- Advanced search and filtering options: The plugin offers a range of search and filtering options that allow users to find jobs based on various criteria, such as location, category, and keywords.
- Resume manager: It offers a resume manager that allows job seekers to upload their resumes and apply for jobs directly through the website.
- Job alerts: WP Job Manager offers job alerts functionality that enables users to receive notifications when new jobs are posted that match their criteria.
- Integrates with a variety of other plugins and tools.
- Easy-to-use dashboard for job listings.
Pricing
WP Job Manager offers a free version with basic features and a range of paid add-ons that provide additional functionality. The pricing for a single personal site is $159 per year, inclusive of all core add-ons.
Pros
- Lightweight and easy to use, making it a popular choice for small businesses and startups.
- Customizable job submission forms enable administrators to collect the information they need from job seekers.
- Advanced search and filtering options make it easy for users to find the jobs they need.
- Resume manager and job alerts functionality enhance the user experience.
Cons
- Some features are only available through paid add-ons, which can increase costs.
- Limited functionality compared to more robust job board plugins.
- Some users have reported issues with support and documentation.
3. Simple Job Board
Simple Job Board is a shortcode-based job board plugin that enables you to establish a highly adaptable online job board system.
Simply insert the [jobpost] shortcode on your desired location within your website to begin utilizing the plugin.
You can craft distinct application forms for each job vacancy, incorporating multiple-choice options, specifying required fields, and more.
Supporting 14 languages, Simple Job Board is the perfect choice for multilingual websites.
Simple Job Board is best for a multilingual site.
Key Features
- Uses shortcode to add job listings.
- Ability to add notes to applications from the dashboard.
- Ability to add multiple job features to job listings.
- Customizable application forms.
Pricing
The plugin is currently free, but there are several paid add-ons, which are needed to extend the plugin’s features and capabilities.
Pros
- Available in 14 languages.
- Enables you to short out unsuitable applicants quickly.
Cons
- PHP 7.0 and above is required.
- Limited features make the plugin lack advanced features vital for a job board.
4. ApplyOnline
Apply Online is a versatile classified ads management plugin that enables users to respond promptly to listings.
With this plugin, effortlessly incorporating a job board into your website and accepting applications becomes a breeze.
Equipped with robust features such as ad categories, filters, customizable application form fields, and email notifications, Apply Online delivers a comprehensive solution.
However, one limitation is its inability to create paid job listing websites.
To overcome this, you can integrate a membership plugin to establish subscription plans or utilize a payment form plugin to accept orders.
Key Features
- Resume parsing: ApplyOnline automatically parses resumes and extracts relevant information, making it easy for employers to review applications.
- Drag and drop form builder.
- Notification system: The plugin notifies employers when new applications are received, making it easy to manage the hiring process.
- Integration with job board plugins: It integrates seamlessly with popular job board plugins such as JobRoller and WP Job Manager.
- Multiple file attachment fields.
Pricing
ApplyOnline offers a range of pricing plans based on the number of sites and features required.
The Premium Pack plan starts at $199 for a license including 6 months of updates and support.
Pros
- Customizable application forms enable employers to collect the information they need from job applicants.
- Resume parsing makes it easy for employers to review applications.
- A notification system makes it easy to manage the hiring process.
- Integration with popular job board plugins provides additional functionality.
Cons
- Limited customization options for templates and design.
- Some users have reported issues with performance and stability.
- Plugin is not compatible with all WordPress themes.
- Limited customer support.
5. WP Job Openings
WP Job Openings is another good option for incorporating a job board into your WordPress website.
WP Job Openings is a powerful and user-friendly plugin for creating job listing pages on WordPress websites.
It is designed based on a thorough analysis of various job listing layouts and methods, offering simplicity and extensibility as a high-performing recruitment tool.
Key Features
- Simple and easy setup and usage
- Two modern layout options: Grid and List
- Unlimited job specifications and filtering options
- AJAX-powered job listing and filtering
- Default application submission form and HR role setup
- Customizable email notifications and templates
- Job expiry options and SEO-friendly structured data
- WPML support and compatibility with top WordPress themes and plugins
Pricing
The free version of WP Job Openings can be upgraded to a PRO version that cost $69/year for 1 website, $139/year for up to 5 websites, and $399 for unlimited websites.
Pros
- Intuitive design and user-friendly interface
- Extensive customization options
- Regular updates and detailed documentation
- Compatible with many WordPress themes and plugins
Cons
- Premium features require paid add-ons
- Limited to two layout options
The verdict: Which is the best job board plugin?
All in all, if you’re looking for the best job board plugin for your WordPress site, there are plenty of great options available.
The right job board plugin for you will depend on your website’s needs and requirements.
By considering each plugin’s key features, pricing, pros, and cons, website owners can choose the best plugin for their needs.
However, if you need greater flexibility and a plugin that is more than just a Job Board and that can be used for any kind of listing, GeoDirectory stands out as the clear winner.
With its advanced features and user-friendly interface, the plugin makes it easy to manage job listings, attract top talent, and create a professional-looking job board website.
So if you want to take your job board to the next level, we highly recommend giving GeoDirectory a try.

Are you looking for ways to make some extra money on the side and maybe grow a side hustle into your main business? You’re not alone.
Escaping the 9-to-5 rat race and managing your own time should be your top priority.
For Stiofan and me, that’s exactly what GeoDirectory was meant to be. It’s a side hustle to earn some extra cash.
I wanted to build an Italian version of “Yelp” on the side while still working with my SEO customers.
This was over a decade ago, when Yelp was starting to launch in major European cities, such as Paris and London.
I knew they would eventually come to Milan and Rome, and they would likely acquire anything that could give them a competitive edge. That was my plan. Build a database of businesses and reviews to sell to Yelp.
Stiofan wanted to rebuild his directory of hotels and B&Bs on the Scottish Island where he comes from.
Coincidentally, we found ourselves working on the same project at the same time – a fully functional Directory Theme for WordPress.
When we met on a forum and realized we could complete the task faster as a team, we started working together.
Once we finished the theme, we realized that many people would want to use what we created, so we started selling it publicly.
Business picked up quickly. I never even started building my Yelp clone, and Stiofan only puts in a few hours of work each year on his Barra Island Directory.
GeoDirectory has become a solid business that has not only sustained both our families since then but also grown into a team of twelve which is still expanding.
In summary, GeoDirectory started as a side hustle but has grown into a solid business, proving that making a little extra money on the side can lead to big things.
Opportunities like this are still out there, for those willing to take a shot.
WordPress now is a behemoth and with some very basic skills and some hard work, you could start making money working with it today.
Whether you want to supplement your income, make it a full-time thing, or just have a little fun, here are 15 great side hustles you can start today!
We’ll also discuss what skills are needed for each one, how difficult it is to get started, and recommend tools that make getting paid easy. So let’s dive in!
1. Blog Marketing
- Skills needed: Writing proficiency + Basic SEO
- Difficulty: Low/Medium
- Tools needed: WordPress hosting + domain, AdSense account (or any other ads network)
If you’ve got a knack for writing, blogging is one of the best side hustles to get started on WordPress.
You can start your own blog by picking a niche that interests you, writing high-quality content regularly, and using search engine optimization (SEO) practices to get more people to visit your website.
Some great free resources for learning the basics of SEO include Search Engine Journal, Matt Diggity’s videos, and the SEMrush blog.
Once you start generating solid monthly traffic, you can monetize this organic audience with ads, affiliate links, and sponsored posts, which is how most bloggers make the vast majority of their income.
With a plugin like GetPaid, you can sell text and image ads on your WordPress site based on the number of impressions, clicks, or by time on your website.
You can pick zones on your site to display these ads:

Alternatively, you can leverage your writing talents to help other people market their blogs.
45% of marketers say blogging is the #1 most important piece of their content strategy.
So, if you have a good handle on what works in terms of writing and SEO, you can start doing freelance blog marketing for small businesses.
2. Affiliate Marketing
- Skills needed: Writing proficiency, basic SEO, sales and marketing knowledge
- Difficulty: Low/Medium
- Tools needed: WordPress hosting + domain, online merchant accounts.
From 2015 to 2023, google searches for “Affiliate Marketing” more than doubled. Why? Because it’s an effective way to make money.
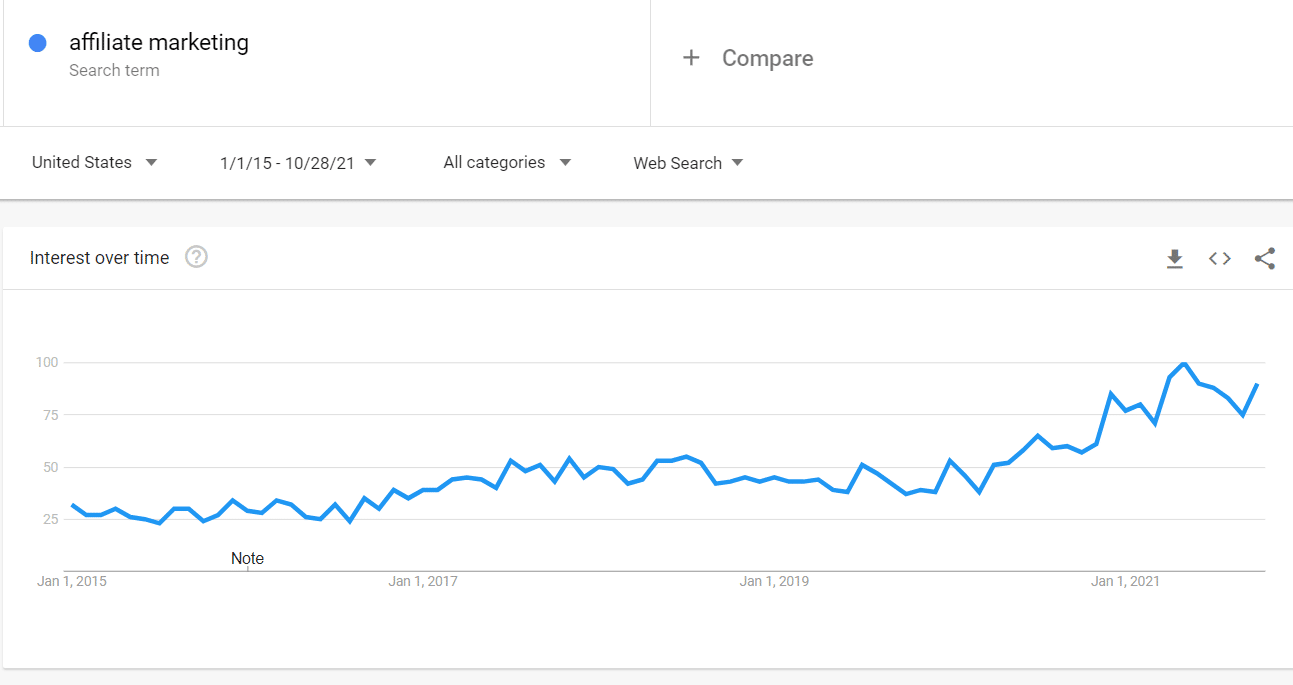
All you have to do is create content about products and services that you already love and promote them through your blog.
Every time someone clicks on one of your links and makes a purchase, you will earn a commission from the sale.
- Find a niche that you are passionate about, and that has a large audience.
- Research and partner with reputable affiliate programs that align with your niche.
- Create valuable content that promotes the products or services you are affiliated with.
- Utilize multiple marketing channels such as social media, email marketing, and influencer partnerships.
- Track your performance and adjust your strategy accordingly.
- Be transparent and disclose your affiliate relationships to your audience.
- Continuously educate yourself on industry developments and new marketing techniques.
3. Web Directories
- Skill needed: Writing proficiency + Basic SEO
- Difficulty: Low/Medium
- Tools needed: WordPress hosting, GeoDirectory, GetPaid
Sites like Yelp, TripAdvisor, and Angie’s List are great for finding reputable services or businesses.
But did you know you can start your own directory on WordPress?
With a plugin like our GeoDirectory, you can easily create an online directory with custom categories, ratings, and reviews.
Once your directory is set up, the next step is to start getting paid.

Here’s how you can make money with a directory:
- Charge a fee for businesses to claim their listing in your directory.
- Offer memberships that include premium features, such as featured listings, priority support, and discounts on products or services.
- You can also sell text and image ads in different zones of your directory site.

With the GetPaid plugin, you can easily add payment gateways for listings and other premium features.
What would my online directory be about?
Your online directory could be about anything that you are passionate about and knowledgeable about. Here are a few ideas:
- Restaurants, bars, and cafes in your local area
- Local attractions or activities
- Shopping services or stores
- Home service providers like plumbers and electricians
- Real Estate
- Software
- Medical services
For example, Coast Radar is a directory website that acts as a guide to the best beaches and coastlines in the UK.
 Of course, you’ll also need to market your directory. Here are some of the best ways to do that:
- Optimize your website for search engines by incorporating relevant keywords and meta tags.
- Build backlinks to your website from other reputable websites.
- Utilize social media platforms to promote your directory and engage with your audience.
- Create valuable content, such as blog posts or videos, that highlights the businesses listed in your directory.
- Email marketing is a great way to reach out to potential customers and businesses, and a newsletter can help keep your audience engaged and informed about new businesses and updates to the directory. You can use automation tools like Mailchimp to make this process easier.
- Use paid advertising on social media or Google Ads.
- Create a referral program to encourage satisfied customers to share their positive experiences with your directory.
Click here for a full Directory SEO Guide.
4. eCommerce: Physical goods
- Skills needed: Writing proficiency, basic SEO, sales
- Difficulty: Medium/High
- Tools needed: WordPress hosting, GetPaid, Products to sell
Want to start selling physical goods online? With WordPress, you can easily set up an eCommerce store in minutes.
First, you’ll need to decide what type of products you want to sell.
Then, you can use the GetPaid plugin to add payment gateways for customers and manage orders.
For example, you can sell individual items or bundles using the “BUY NOW” button, which displays an overlaying payment form.

You can also set up a blog on your site promoting your products. This is an effective way to increase organic search traffic and drive more sales for your store.
Once your store is set up, it’s time to start marketing.
You can use SEO, paid ads, and social media to get the word out about your products.
Additionally, ensure that you provide quality customer service to keep customers coming back.
5. eCommerce: Digital goods
- Skill needed: Writing proficiency, basic SEO
- Difficulty: Medium/High
- Tools needed: WordPress hosting, GetPaid, one or more digital products to sell
Like physical goods, you can also create an eCommerce store for digital products.
Whether you’re selling digital downloads or subscription-based services, GetPaid makes it easy to set up a digital store and start selling.

Start by adding your digital products to the store, then use SEO and paid advertising to drive traffic.
You can also create promotional campaigns for specific products or bundles.
Additionally, you may want to consider setting up an email list to engage with your customers regularly.
6. Copywriting
- Skill needed: Native-level writing proficiency, sales and marketing knowledge, basic SEO, and a good understanding of different social platforms
- Difficulty: High
- Tools needed: WordPress hosting, GetPaid, and copywriting frameworks
Copywriting is a great way to make money online, and for many, it can be a lucrative side hustle.
Copywriters write the marketing material for advertising campaigns, websites, emails, landing pages, and other marketing materials.
It’s essential to have native-level language proficiency and a solid grasp of search engine optimization (SEO) to create compelling copy that resonates with the target audience online.
To get started, you can learn with resources like the Kopywriting Kourse, Udemy’s Complete Copywriting Course, or The Copywriter’s Handbook.
Once you’ve become comfortable with the basics, you should set up a portfolio website on WordPress with samples of your work to showcase your skills, along with packages to sell your services using GetPaid’s service retainer feature:

7. Server Management Service
- Skill needed: IT
- Difficulty: High
- Tools needed: WordPress hosting, GetPaid
Companies need server management services for maintenance and upgrades, monitoring and troubleshooting, backup and recovery, compliance, cost-effectiveness, and security.
If you have IT experience, you can start a server management service – which requires advanced knowledge of networking, server hardware, and system administration.
This can be a lucrative side hustle for those with the technical know-how to manage servers.
You can use WordPress hosting to create your website and GetPaid to set up packages for your services.
Ensure that your website includes a portfolio showcasing your previous projects or clients that you’ve worked with.
Additionally, it’s essential to have a good understanding of different social platforms so that you can promote your services and interact with potential clients.
Pro tip (applicable to service-based businesses in this article): When selling a service tailored to specific business needs (as opposed to a standardized plan), you can send clients a custom quote through GetPaid, which they can accept. This will then automatically convert into an invoice.

8. Security Researcher
- Skill needed: Writing proficiency + IT security
- Difficulty: Very High
- Tools needed: WordPress hosting, GetPaid, vulnerability scanners, malware analysis tools, debugging tools, network analyzers
If you’re passionate about computer science and networks with a background in IT security, then security research could be a great side hustle.
As a security researcher, you’d be responsible for testing the security of applications and systems, identifying vulnerabilities, and recommending solutions to fix them.
You’ll need an understanding of the different types of attack vectors, how to detect and respond to malicious threats, and how to develop secure applications.
9. SEO/SEM Services
- Skills needed: Writing proficiency + SEO/Marketing
- Difficulty: High
- Tools needed: WordPress hosting, GetPaid, Ahrefs, Surfer SEO
If you have a solid understanding of search engines and digital marketing, offering SEO and SEM services can be a profitable side hustle on WordPress.
You can help businesses improve their search engine rankings, drive more traffic to their website, and increase conversions.
One of the best tools for SEO and SEM services is Ahrefs, which allows you to research keywords and backlinks, track organic traffic and competitors, and monitor your own website’s performance.
A tool like Surfer SEO will help you optimize your content based on the keyword and competitor data.
The SEO industry is constantly evolving, so it’s essential to stay current with the latest trends.
You also want a portfolio with a proven track record since the space is known for many self-proclaimed professionals selling empty promises.
10. Web Design
- Skills needed: UI/UX Design
- Difficulty: Medium/High
- Tools needed: WordPress hosting, BLockstrap, Divi or Elementor
Web design is another in-demand side hustle on WordPress.
With a good eye for design and a solid understanding of UI/UX, you can create beautiful and functional websites for businesses, nonprofits, and individuals.
Our newest Blockstrap theme (+ plugin) is free, and you can build any website with it using the Bootstrap framework without writing one line of code.
Alternatively, two popular WordPress page builders are Divi and Elementor, which allow you to create custom designs without writing any code as well.
They also have a library of pre-designed templates that you can customize to fit your client’s needs.
11. Custom Back end Development
- Skills needed: Programming
- Difficulty: High
- Tools needed: WordPress hosting, PHP, MySQL
Do you have strong programming skills? You can offer custom back-end development services on WordPress.
This includes creating custom plugins, integrating with third-party APIs, and optimizing database performance.
To offer this service, you’ll need a solid understanding of PHP and MySQL.
Additionally, you can use tools like the Query Monitor plugin to debug and optimize your custom plugins and functions.
12. Hosting Provider
- Skills needed: IT + Large Capital
- Difficulty: Very High
- Tools needed: Data center infrastructure, cPanel, WHM
If you have a strong background in IT and a significant amount of capital to invest, you can start your own hosting provider business for WordPress.
Being a hosting provider requires a significant investment in data center infrastructure, servers, and networking equipment.
You can offer a range of hosting services, including shared hosting, VPS hosting, and dedicated hosting.
You will also need to have a good understanding of cPanel and WHM, which are popular control panel software for managing web hosting accounts.
It’s a challenging business, as it requires a substantial investment of time and resources. Still, it can also be a highly profitable venture, given the ongoing demand for web hosting services.
As a hosting provider, you will also need to demonstrate excellent customer service and technical support, as well as a solid understanding of security, to keep your customers’ websites safe and secure.
Additionally, you will have to continuously monitor and upgrade your infrastructure to ensure that your hosting services are always running at optimal performance.
13. Plugins Development and Distribution
- Skills needed: Programming + Basic SEO
- Difficulty: High
- Tools needed: WordPress hosting, GitHub, CodeCanyon
Developing and distributing your own plugins for the biggest open-source content management system in the free world can be pretty lucrative.
Creating a WordPress plugin requires mastering the art of PHP, JS, and MySQL programming.
PHP is the backbone of WordPress plugin development as it allows interaction with WordPress functions and APIs.
JavaScript and ReactJS, in particular, are becoming increasingly prominent as the new editor is built with them.
MySQL, on the other hand, is used to store and retrieve data for the plugin, such as user information and settings.
You’ll also need a deep understanding of WordPress plugin development guidelines, actions, and filters, as well as best practices, to create a plugin that seamlessly integrates with the platform and provides an excellent user experience.
And if you’re looking to add more advanced features to your plugin, knowing HTML, CSS, and JavaScript will definitely come in handy.
You can distribute your plugins using the Freemium business model using the WordPress.org plugins repository and selling premium add-ons (like we do) using a plugin like GetPaid and its license manager plugin.
Alternatively, you could use a platform like CodeCanyon, a marketplace for commercial WordPress plugins, which allows you to focus on developing and providing support. At the same time, they handle every other aspect of the business for you.
14. Themes Development and Distribution
- Skills needed: Programming + UI/UX Design + Basic SEO
- Difficulty: High
- Tools needed: WordPress hosting, GitHub, ThemeForest
Just as you can develop and distribute your own WordPress plugins, more design-focused and artistic individuals can do the same for WordPress themes to earn a good income.
To design and develop WordPress themes, you will need a solid understanding of HTML, CSS, JavaScript, PHP, and MySQL, as well as knowledge of WordPress’s template hierarchy, template tags, and action/filter hooks.
With a keen eye for design and a strong understanding of web design frameworks like Bootstrap or Foundation, you can create beautiful and functional themes that help businesses and individuals enhance their website’s performance and functionality.
You can distribute your themes on WordPress.org or on ThemeForest, which is a marketplace for commercial WordPress themes.
15. Website Maintenance Service
- Skills needed: Basic IT, Programming, and UI/UX Design
- Difficulty: Medium/High
- Tools needed: WordPress hosting, UpdraftPlus, WP-Optimize
Website maintenance is an ongoing task that must be performed to keep a website running smoothly and ensure it remains up-to-date.
If you have skills in IT, programming, and UI/UX design, you can offer website maintenance services on WordPress.
You can use backup tools to make sure that your client’s website is backed up regularly, a security plugin to keep it secure, and caching plugins to keep it fast and efficient.
You can also offer services such as plugin and theme updates, security scans and monitoring, and other performance optimization.
Parting words
Starting a side hustle on WordPress can be a great way to make money while also honing your skills and gaining experience with the platform.
Whether you choose to develop plugins and themes or offer website maintenance services, there is a range of businesses that you can pursue on WordPress.
What are you waiting for? Get started on your WordPress side hustle today!
Good luck, and enjoy the ride!