On this page:
Introduction Add the package ID to the body attribute Adding CPT-specific content on top of the Add Listing page Making the listing description optional Sorting on Listings pages: Featured first, then alphabetic Detail Page Hide ‘No Reviews’ Remove GD Scripts Supreme Directory Showing icons instead of category links in list and grid view
Introduction
We recommend using the Code Snippets plugin to add custom PHP code.
CSS can be added to GD > Design > Scripts
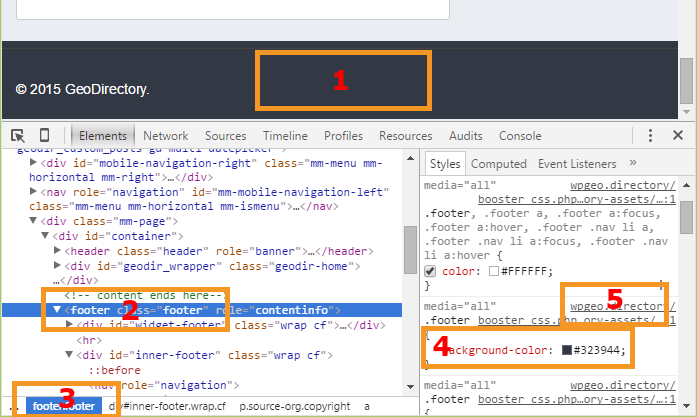
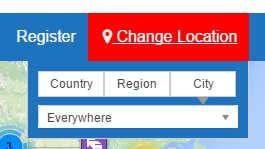
Add the package ID to the body attribute
- If you want to change the looks of the detail page depending on the price package, you can do that by adding the ID to the code of the detail page:

- To do this, add this code to your child theme’s functions.php file:
[php]
// add the package id to the body
add_filter( ‘body_class’, ‘my_add_package_class’,10,1 );
function my_add_package_class($class){
global $post;
if (geodir_is_page(‘detail’) && isset($post->package_id)) {
$class[] = "gd-package-id-".$post->package_id;
}
return $class;
}
[/php] - You can now target elements of the detail page using the package ID class, for example
[css]
.gd-package-id-1 .geodir-tags {display: none}
[/css]would hide tags for price packages with ID 1.
Adding CPT-specific content on top of the Add Listing page
- If you want to add any special content to your Add Listing page, you can just add that in the content section using the normal way of editing your WP page “Add Listing”.
- If you want to add content specific to a CPT you can use this code, adjust as required:
[php]
function geodir_add_place_before_main_content_custom() {
if (isset($_GET[‘listing_type’]) && $_GET[‘listing_type’] == ‘gd_place’) {
?><div>bla bla</div>
<?php
}
}
add_action(‘geodir_add_listing_before_main_content’, ‘geodir_add_place_before_main_content_custom’);
[/php]
Making the listing description optional
- The listing description field on the Add Listing page is a required field by default.
- You can make the description field optional by adding some JS and CSS code.
- Add the following code to GD > Design > Scripts tab > Footer script code:
[javascript]
<img src="data:image/gif;base64,R0lGODlhAQABAIAAAAAAAP///yH5BAEAAAAALAAAAAABAAEAAAIBRAA7" data-wp-preserve="%3Cscript%20type%3D%22text%2Fjavascript%22%3E%0AjQuery(%20document%20).ready(function()%20%7B%0A%20%20%20%20jQuery(%22%23geodir_post_desc_row%22).removeClass(%22required_field%22)%3B%0A%7D)%3B%0A%3C%2Fscript%3E" data-mce-resize="false" data-mce-placeholder="1" class="mce-object" width="20" height="20" alt="<script>" title="<script>" />
[/javascript] - Also add the following CSS code:
[css]
#geodir_post_desc_row label span,
#geodir_post_desc_row .geodir_message_error {
display:none !important;
}
[/css]
Sorting on Listings pages: Featured first, then alphabetic
- The sorting options for listings can only set one default sorting option.
- The following code will order alphabetically even if the default order is set to show featured listings first:
[php]
add_filter(‘geodir_posts_order_by_sort’,’_my_custom_order_by’,10,3);
function _my_custom_order_by($orderby, $sort_by, $table){
global $wpdb;if($sort_by==’is_featured_asc’){
$orderby .= " $wpdb->posts.post_title ASC, ";
}
return $orderby;
}
[/php]
Detail page – hide ‘No Reviews’ text if there are no reviews
- Maybe you have a new site without a lot of reviews.
- The following code will hide the ‘no Reviews’ text
[php]
function _gd_custom_hide_no_review_text( $class ) {
global $post;
if ( empty( $post->rating_count ) ) {
$class .= ‘gd-custom-no-review’;
}
return $class;
}
add_filter( ‘geodir_post_view_article_extra_class’, ‘_gd_custom_hide_no_review_text’, 10, 1 );
[/php]And this short bit of CSS
.gd-custom-no-review .geodir-entry-meta a.geodir-pcomments {

display: none !important;

}
Snippet to Remove GeoDirectory Scripts
Some site owner may want to optimize their site by loading GD scripts only on GD pages. The following applies only to GD core. Each Addon has additional scripts.
In GD core most of the scripts and styles are loaded via geodir_templates_scripts() and geodir_templates_styles() functions. You can use the following to skip loading of GD Core scripts.
[php]
remove_action( ‘wp_enqueue_scripts’, ‘geodir_templates_scripts’ );
remove_action( ‘wp_enqueue_scripts’, ‘geodir_templates_styles’, 8 );
[/php]
geodir_is_geodir_page() is used to identify the GD page
Here’s a Snippet that will execute only on GD Pages.
*Caution* – Snippet below is only capable of detecting GD Pages, and will not detect other WP pages where you might be using a shortcode or widget. Use with Caution!
[php]
add_action( ‘wp’, ‘wpdocs_dequeue_script’, 100 );
function wpdocs_dequeue_script() {
if (!geodir_is_geodir_page()){
remove_action(‘wp_enqueue_scripts’, ‘geodir_templates_scripts’);
remove_action(‘wp_enqueue_scripts’, ‘geodir_templates_styles’, 8);
}
}
[/php]
Common Code Snippets for Supreme Directory
See the Supreme Directory FAQ page
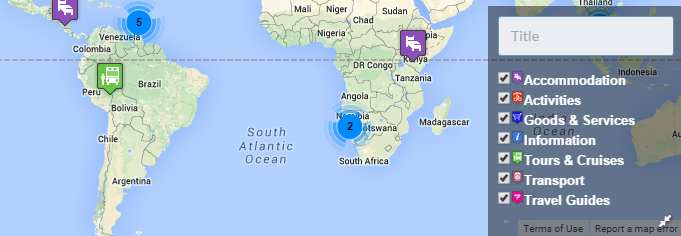
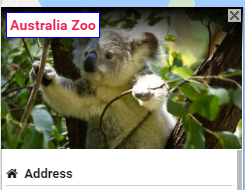
Showing icons instead of category links in list and grid view
Let’s change this

into this

- Make sure to add categories to the Listings pages, as explained here:

- Now add this PHP code as a new Code Snippet or to your child theme’s functions.php:
[php]
function _gd_custom_listing_view_category_icon( $html, $location, $cf ) {
global $post, $_gd_custom_term_icons;$html_var = $cf[‘htmlvar_name’];
if ( !empty( $post->post_type ) && $html_var == $post->post_type . ‘category’ && !empty( $post->{$html_var} ) ) {
if ( empty( $_gd_custom_term_icons ) ) {
$_gd_custom_term_icons = geodir_get_term_icon();
}$post_taxonomy = $post->post_type . ‘category’;
$field_value = $post->{$html_var};
$links = array();
$terms = array();
$termsOrdered = array();
if (!is_array($field_value)) {
$field_value = explode(",", trim($field_value, ","));
}$field_value = array_unique($field_value);
if (!empty($field_value)) {
foreach ($field_value as $term) {
$term = trim($term);if ($term != ”) {
$term = get_term_by(‘id’, $term, $html_var);
if (is_object($term)) {
$term_icon_url = ! empty( $_gd_custom_term_icons ) && isset( $_gd_custom_term_icons[ $term->term_id ] ) ? $_gd_custom_term_icons[ $term->term_id ] : ”;
$term_link = ‘<a title="’ . esc_attr( $term->name ) . ‘" href="’ . esc_attr(get_term_link($term, $post_taxonomy)) . ‘"><img src="’ . $term_icon_url . ‘" alt="’ . esc_attr( $term->slug ) . ‘ icon" class="_gd-custom-cat-icon" /></a>’;
//$term_link .= " <a href=’" . esc_attr(get_term_link($term, $post_taxonomy)) . "’>" . $term->name . "</a>";
$links[] = $term_link;
$terms[] = $term;
}
}
}
if (!empty($links)) {
// order alphabetically
asort($links);
foreach (array_keys($links) as $key) {
$termsOrdered[$key] = $terms[$key];
}
$terms = $termsOrdered;
}
}
//$html_value = !empty($links) && !empty($terms) ? wp_sprintf(‘%l’, $links, (object)$terms) : ”;
$html_value = !empty($links) ? implode(‘ ‘, $links) : ”;if ($html_value != ”) {
$field_icon = geodir_field_icon_proccess($cf);
if (strpos($field_icon, ‘http’) !== false) {
$field_icon_af = ”;
} else if ($field_icon == ”) {
$field_icon_af = ”;
} else {
$field_icon_af = $field_icon;
$field_icon = ”;
}$html = ‘
<div class="geodir_more_info ‘ . $cf[‘css_class’] . ‘ ‘ . $html_var . ‘" style="clear:both;"><span class="geodir-i-taxonomy geodir-i-category" style="’ . $field_icon . ‘">’ . $field_icon_af;
$html .= (trim($cf[‘site_title’])) ? __($cf[‘site_title’], ‘geodirectory’) . ‘: ‘ : ”;
$html .= ‘</span> ‘ . $html_value . ‘</div>‘;
}
}return $html;
}
add_filter( ‘geodir_custom_field_output_taxonomy_key_taxonomy’, ‘_gd_custom_listing_view_category_icon’, 10, 3 );
[/php] - And add this CSS:
[css]
.geodir_category_list_view ._gd-custom-cat-icon {
vertical-align: middle;
height: 24px;
margin: 0 5px;
}
[/css]

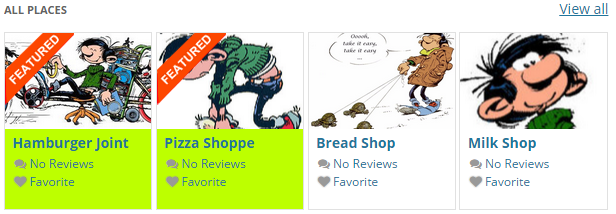
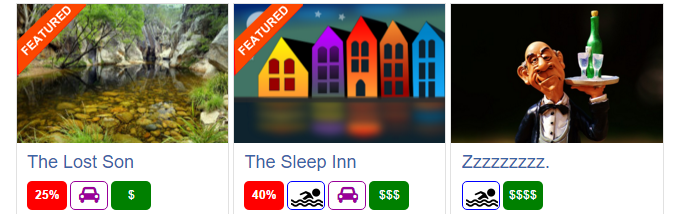
 is created using a checkbox custom field and an image background.
 is created using a
  is created using a
  is created using a checkbox custom field and a FontAwesome background.