Themes – GeoDirectory

GeoDirectory Framework

The GeoDirectory Framework is specially designed to be used with the GeoDirectory plugin, but it can be used without it. You can enable and disable widget areas and also style almost any area of your website from within the Framework Options Page.

There are also GeoDirectory Framework child themes available:

  • GDF modern child theme
  • GDF child theme

Compatibility for popular themes

Compatibility for some popular themes is included in the core plugin and new themes compatibility can be both imported or exported.

Themes compatibility currently included for:

  • Avada
  • Enfold
  • Divi
  • Genesis
  • Jupiter
  • MultiNews
  • X

To use these themes with GeoDirectory, follow these steps:

  1. Upload to your server:
    1. Main theme
    2. Optional but strongly recommended: a child theme for your theme
    3. GeoDirectory plugin
  2. Then go to GeoDirectory > Theme Compability > Select your theme

Avada

To use the Avada theme, follow further instructions here.

Buying addons and support

On this page:

Buying addons and support  Downloading addons  Third party GD addons

Buying addons and support

Buying a GeoDirectory membership

If you buy a GD membership here then you get access to all GeoDirectory addons and themes listed on these pages, and any new ones we release while your membership is active.
If you decide not to continue your membership then you can continue to use the versions you have but you will not be entitled to paid support or updates of the addons.
You will still get support for the free GD core plugin available from WordPress.

Buying separate addons or themes

You can also buy addons or themes individually. Licenses for individual add-ons provide auto-updates for 1, 5 or unlimited websites depending on the option selected. We no longer sell licenses providing lifetime support and updates.

Downloading addons

  1. If you have a current GD membership or have bought individual addons or themes, you can download the ZIP files from https://wpgeodirectory.com/your-account/
  2. In your download area, you will find a link to download the files, the licence key to activate the addon or theme, and the current version.
  3. Download the add-on from there and install it normally by uploading it via your WordPress admin, see Installing addons for more information.


Third party GD addons

There are some addons listed here that are by 3rd party developers, such as “GD Business Hours” and “GD Vouchers“. You will be buying these addons directly from those 3rd party developers, and they will provide you support directly. These addons and their support are not included in the GD membership.

Understanding navigation, searching and browsing …

On this page:

Introduction

As explained here, the main directory pages created are the GD Home/location, Listings (archive or category) pages, the search page and detail pages.

Your website can be navigated using two different ways, browsing and searching. These terms are not interchangeable: browsing is not the same as searching, and searching is not the same as browsing.

Browsing

Browsing is when a visitor or you follow the links as presented in menus, or on maps, or anywhere on a page, for example

  1. If your site uses the Location Manager, you can navigate locations by selecting a location from the location switcher in the menu:
  2. You can follow links from the Popular Categories widget:

Searching

Searching is when a visitor uses the GD Search to find one or more listings in your directory:

The basic GD Search function

Using the “Search for” field only

  1. GD will check the entry titles, description and taxonomies (tags and categories) of the listings.
  2. The results will be listed in order of relevance depending on the keyword(s) entered.
  3. For example, if you only search for “hotel, the results will be returned with listings that have hotel in the title first, etc:
    1. Search:
    2. Results:
  4. If a visitor clicks Search without adding any keywords, the results will be ordered based on the settings at GD > Place [or other CPT] Settings > Sorting Options tab.

Using the “Near” field only

  1. When you enter a location in the Near field, GD will calculate the center of that location.
  2. GD then will look for all listings within an area with a default that match the Search for criteria.
  3. Your default search area is set at GD > General > Search.
  4. The default GD search is not an IN search, but a search NEAR THE CENTER OF.
  5. For example, assuming your site has listings in New York, and you enter “World Trade Center” in the Near field, the results will return all listings in order of proximity to the World Trade Center:
    1. Search:

    2. Results:

Using both the “Search for” and the “Near” field

  1. When using both fields for searching, all relevant results will be returned in order of proximity:
    1. Search:
    2. Results:

Tips and tricks

Adding featured listings to the search page

  1. Because search results will always be ordered by relevance to the search criteria, any featured listings will be included in the search results using the same relevance to the visitors keywords used.
  2. But you can add a Popular Post widget, filtered for featured listings only in the top section or sidebar etc.

More information

The GD Search is explained in more detail here, and includes all the Advanced Search options etc.

Social Importer Addon

IMPORTANT: Facebook requires that all apps be submitted to Facebook for review (link). Facebook review is very slow, and so far we are not aware of any Social Importer apps having received approval for the permissions required.
See this forum topic for more information.

Introduction
Installation & Translation
Facebook Setup Update March 2018 Posting to FB
Yelp Setup

 Introduction

The Social Importer Addon allows your listing owners to import their business or event information from Facebook, or their business information from Yelp. Users who visit your site’s frontend Add-Listing page can enter the URL in the dedicated field and then click Import to bring their details into the form. Once your GD site is connected to your FB app, you can also choose a FB page where new GD listings will be posted.

Once set up, an extra field will be added to the Add listing forms:

Installation

  • Adding the Social Importer Addon to your site is done in the usual way, see Installing Addons.
  • “Social Importer” will be added to your GD menu once the Addon is activated

Setup Facebook

Facebook:

  1. Login to your Facebook developer account.
  2. Go to My Apps > Add a New App
  3. On the next screen, add a Display Name and your email, and then click Create App ID:
  4. Next select Facebook Login ( earlier app versions automatically added Facebook Login, so it may already be set up as per image in step 10):
  5. Choose Website:
  6. On the next screen, all you have to enter is your site URL, exactly as it is at WP Settings > General > WordPress Address (URL):
  7. Under Settings > Basic, enter your website domain (not URL or web address), example: mysite.com

  8. Click Save Changes.
  9. Go to Products > Facebook Login (if it is not listed then add it under products):
  10. You need to enter your OAuth redirect URI, which you can find at GD > Social Importer > Facebook > OAuth redirect URI:
    The exact URL should be in the format: https://my-website.com/admin.php?page=geodirectory&tab=facebook_integration
  11. You may already have other URIs there and this URI should be in addition, make sure you get the URI exactly right, if you use www. and your site does not use it then it will fail.
  12. Make sure on that page that Web OAuth Login is set to Yes:
  13. Open your website in another tab or window and navigate to GeoDirectory > Social Importer > Facebook.
  14. Copy and paste the Facebook App ID and Facebook App Secret from Facebook to your site.
  15. Save first and then click Connect Your App.
  16. This will open a window like this, ignore everything, and just click Continue:
  17. In the next screen, again ignore everything and click OK:
  18. In the next screen, again ignore everything and click OK:
  19. Once finished, your Facebook settings should look like this:
  20. Now click Save changes.
  21. That should connect the Facebook app and your site, and you should see the expiry date of your token:

Facebook App settings March 2018

FB APP Basic Settings

FB APP Advanced Settings

FB APP – FB LOGIN Settings

Posting GeoDirectory listings to your Facebook page

Once your GD site is connected to your FB app, a list of pages you manage will be available for the Post to page settings.

Select the Facebook Page where new GD listings will be posted and Save.

Yelp Setup

  1. Create a Yelp account and then login to your Yelp developer account and select Yelp Fusion.
  2. Then click on Manage App and you will get the Create New App screen:
  3. After filling in the form, click on Create New App and your Client ID will be ready:
  4. Enter the details at GD > Social Importer > Yelp tab > App ID:
  5. Click Save Changes.

Translating themes (including GeoDirectory themes)

This article is about translating your theme, and making sure that your translations are not lost when there is an update to your theme.
The example used is the GeoDirectory Framework Theme, but the instructions apply for all themes.

The first thing you should have done after deciding to use the GDF theme is to use a child theme, this way you won’t lose your changes when the main theme is updated.
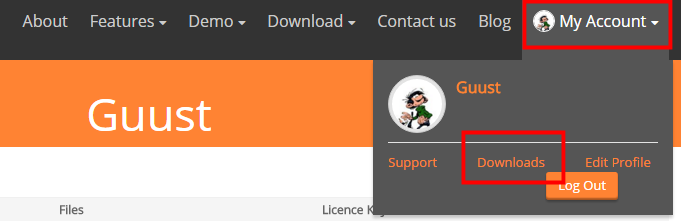
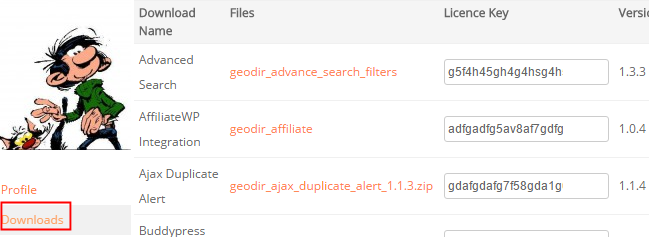
You can download both the GeoDirectory Framework Theme and its child theme, and the GDF Modern child theme from your download area.

Let’s get started:

1. Download poedit or check here for alternatives

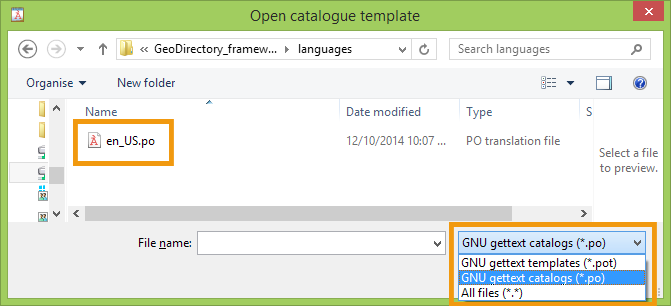
2. Download the main theme’s  language file to your computer using FTP. For the GDF theme that file is at
/wp-content/themes/GeoDirectory_framework/languages/en_US.po.

3. Open poedit and choose

  1. Edit a translation (if you want to keep your site in US English)
  2. Create a new translation (if you are using any other language for your site)

4. Select the en_US.po from your computer.
You might have to change the type of file displayed from .POT to .PO.

Skip step 5 and 6 if you are not translating to another language, but only editing the US English version.

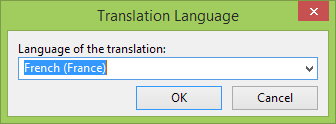
5. If you are translating to another language, then poedit will ask you what language you want to use for your translation.
For example if you are translating to French you would choose French from the list provided:

6. Save your translated file in the same format as the original language file:
In our example that would be fr_FR.po.

7. Change any of the language strings you want to translate or change.
When you then save the .po file, a .mo file will automatically be created.

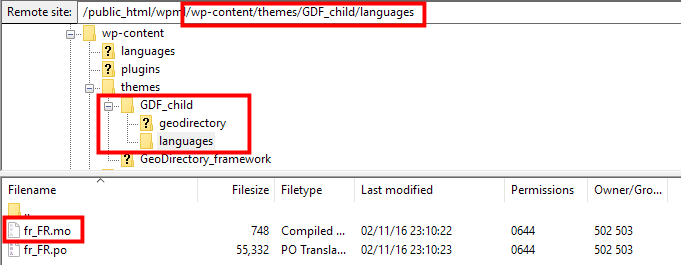
8. Upload the .mo file (in our case en_US.mo or fr_FR.mo) to your child theme languages folder.
If there is no languages folder in your child theme just create one.
The result should look like this /wp-content/themes/GDF_child/languages/en_US.mo or /wp-content/themes/GDF_child/languages/fr_FR.mo.

9. If you have not set the language of your website yet, you do that by going to your wp-admin area, and then go to Settings > General > Site language and select your language there.
If your language is not available there, then you can download your WordPress language file here.

10. Go to your homepage and refresh to see your changes :).

Protect your files during theme updates
WordPress 4.6 introduced a new option to all you to store your theme translation in the following location:

/wp-content/languages/themes/my-theme-en_US.mo

When you store your translation in this folder, it will not be overwritten. The file should be named the same as the theme folder name.

Customizing your style

This article explains how you can create new CSS rules to change the style of your site.

Most browsers have a built-in code inspector, for example FireFox has Firebug, Internet Explorer and Chrome have Developer Tools.

For the example below, we will use Chrome’s Developer Tools to change the footer background color on the GeoDirectory Demo.

  1. Open the Chrome browser to the web page where we want to change the style of an element.
  2. Right click on the footer area element we want to change [Step 1 in the image below – we are right clicking on the footer].
  3. From the pop-up menu, choose Inspect element. If the code inspector is not open yet, it will open.
  4. If the element is not highlighted yet, we click on it to make sure it is [Step 2 and 3 – highlight the footer style].
  5. We can continue to select ‘Inspect’ until the element we want is highlighted in the code[Step 4 – in this case it shows that the footer class has a background color specified].
  6. The code inspector will also show you in which file you can find the code [Step 5].
    Turn off GD Booster before checking your CSS.
  7. The CSS code is displayed, and we click on the rule to change the background color; double click starts the editing. In this case we will change the background color to red [Step 6 in the second image].
  8. If the CSS code is correct, the web page will adjust to show your change [The footer is now red].
  9. Use the mouse to highlight the CSS code and copy it to your clipboard; proceed to add it to your site. You can add custom CSS to GeoDirectory at GeoDirectory > Design > Scripts > CSS Custom Code, or use anotherplugin or even add that code to the stylesheet of your child theme at WP Admin > Appearance > Editor and locate style.css in your child theme.
  10. Add the code .footer {background-color:red;}, and save. That will update your site.

Hints

  • You can add “!important” if your style rule doesn’t seem to have an effect. ‘!important’ will raise the priority of the rule if it conflicts with other rules. Example:
    [css]
    .footer {background-color:red !important;}
    [/css]
  • The code inspector will provide you with valid auto-complete suggestions as you type. Choose one, or two, and try them out until you become comfortable with the editor.
  • See it in action on Youtbe by WPBeginner.
  • Set a reminder on your calendar to backup your custom styles by copy/paste into a file every month. If you need to uninstall GD temporarily, don’t forget to make a copy of the Scripts you store in this location.

How to add CSS, PHP, and Javascript Snippets to your site

  • CSS – Add CSS to the GeoDirectory Design Admin Panel called Scripts. Navigate to YourSite > GeoDirectory > Design > Scripts > Custom Style CSS Code
  • PHP – Add PHP Snippets to your site with the Code Snippets plugin, a Very lightweight plugin that makes it easy to manage your custom code, and keeps it all in one place even if your plugins or themes get updated. There is a special case for ‘constants’, values that apply sitewide. These are PHP Snippets that start with ‘define’ like define(‘SD_DEFAULT_FEATURED_IMAGE’, “http://yourdomain.com/images/featured.jpg”). Constants should be added to your site’s wp-config.php file.
  • Javascript – You may never need this, but if you do need to add a Javascript snippet, add it to YourSite > GeoDirectory > Design > Scripts > Header Script Code or Footer Script Code, depending on the instructions you receive with the snippet.

Useful resources

Using child themes http://codex.wordpress.org/Child_Themes
CSS tutorial http://www.w3schools.com/css/
Using FireFox Page Inspector https://developer.mozilla.org/en-US/docs/Tools/Page_Inspector
Using Chrome Dev Tools https://developer.chrome.com/devtools/docs/elements-styles
Using Internet Explorer F12 developer tools http://msdn.microsoft.com/library/ie/bg182326
SiteOrigin CSS Plugin https://wordpress.org/plugins/so-css/

Installing Addons

When you finished installing your GD core plugin, you can extend your GeoDirectory site by adding any of the Addons.
1. Download your new Addon ZIP file to your computer
2. Login to your WordPress Admin
3. Upload your Addon
4. Activate your Addon
5. Review the Addon settings
6. Auto Updates
7. Manual Updates
8. Frequently Asked Questions

1. Download your new Addon ZIP file to your computer.

You can buy individual Addons of your choice here, or you can buy a membership that includes all Addons and themes here.

2. Login to your WordPress Admin

  1. Log in to the WordPress Admin area of your website.
  2. Navigate to PluginsAdd New > and click on Upload

3. Upload your Addon

  1. Browse for the Addon ZIP file on your computer.
  2. Once you selected the ZIP file, click install.

4. Activate your Addon

  1. Wait for the upload to happen and then activate your Addon.

5. Review the Addon settings

As soon the Addon is activated, you will be taken to the Settings page of the new plugin:

6. Auto Updates / Licensing

  1. To keep your plugins up to date, you need to install the WP Easy Updates plugin.
  2. Follow steps 3 and 4 above to activate the WP Easy Updates plugin.
  3. You now will be able to add your license for your addon:
  4. Click on Licence key and add your licence:
  5. Click on Activate:
  6. To get your licences, go to your download area at https://wpgeodirectory.com/your-account/
  7. In future, your Addons will be able to be updated with a single click, just like any other WordPress plugins.

7. Manual Updates

    WordPress has a built-in feature to install themes and plugins by supplying a zip file. Unfortunately, you cannot upgrade a theme or plugin using the same process. Instead, WordPress will say “destination already exists” when trying to upgrade using a zip file and will fail to upgrade the theme or plugin.

    Easy Theme and Plugin Upgrades fixes this limitation in WordPress by automatically upgrading the GeoDirectory theme or plugin if it already exists.

    To perform a manual upgrade of an addon:

    1. Install and activate Easy Theme and Plugin Upgrades
    2. Download the addon you want to update from https://wpgeodirectory.com/your-account/.
    3. Visit the plugin page of your site and choose “Add New” and then “Upload Plugin”.
    4. Find the addon file, and choose “Install”
    5. Next you should see a confirmation like the following:

    8. Frequently Asked Questions

    Why do my automatic updates fail?

    Incorrect/Updated License/Key
    If you purchased a new subscription after your old one expired, your keys will have changed.
    Get your license key from https://wpgeodirectory.com/your-account/.
    Carefully copy and paste into the appropriate license field.

    Page Cache Issue
    If you copied and pasted the key, but the update still fails, try:
    1. Deactivate the key
    2. Refresh the plugin page
    3. Copy and paste the key again, then Activate
    4. After activation, refresh the page again and try the update.

    If that still doesn’t work, you can try a manual update.

    Review Setup of Automatic Updates
    Find the setup guide for autoupdates here: https://wpgeodirectory.com/docs/installing-addons/#updates

    Double Check Licensing and Membership
    Make sure your licenses are added at WordPress > Installed Plugins and that your membership is active.

    Update Single Site Licenses when Changing Site URL
    If you have a single site license, then whenever your site domain changes you will need to update the license for each plugin. For example, you might have been working on a development site at one URL, and now you have moved the site to a new URL. Follow these steps to deactivate the license at the old URL and activate the license at the new URL.

    1. Visit the old site at the old URL.
    2. Visit the old site plugin page.
    3. Find the addon license and click “Deactivate”.
    4. Visit the new site at the new URL and go to the plugins page.
    5. Find the addon license and paste your license code, then press Activate.

    Update Single Site License for a decommissioned site
    It may be that you started working on a site, then changed the URL or deleted or otherwise decommissioned the site. In this case, follow these steps:

    1. Visit https://wpgeodirectory.com/your-account/purchase-history/
    2. Select “View Licences” for the product.
    3. Select “Manage Sites”
    4. Select the sites where you want to deactivate the license.

    [qa cat=wp-easy-updates search=none title=none homelink=none]