Location Manager – Location Settings

These are the sections you will find when you install the Location Manager:

Introduction and Location Settings tabManage Location tab – SEO Settings tab – Add/Edit Location tab – Translate Countries tab

On this page:

Introduction – Installation – Location Settings – Home URL SettingsMain Navigation SettingsGeo Directory Location SettingsAdd Listing Form Settings

Introduction

  1. With our MultiLocations Manager you can turn your GeoDirectory into a global directory. As standard, GeoDirectory can be setup from a single location and listings can be added only for that location, but with our Location Manager plugin, you can let users set the location of their listings and the location will be stored in your locations database. This means visitors can then select any added location and browse listings only from that area (you can also browse from “Everywhere”).
  2. The areas you can filter listings by are: Countries, regions, city or neighborhoods. Apart from neighborhoods all other areas can be added by a user when they add their listing. So the location does not have to be in your database for a user to be able to add a listing.
  3. If a duplicate city is added with slightly different spelling, there is a tool to merge the two cities. Locations can also be edited/added by the admin from the backend.

Installation

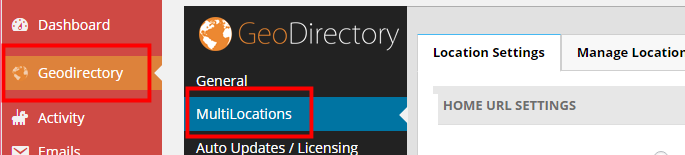
After uploading and activating the Addon, you will be taken to the Settings page:

Location Settings

Home URL Settings

  1. This setting allows you to choose the URL of the Home link in your breadcrumb, either clicking Home in the breadcrumb will take you to the homepage of your website, or clicking Home in the breadcrumb will take you to the location page for the selected location.
  2. Home page should go to Site root (ex: mysite.com/) will take you to your homepage:
  3. Home page should go to Current location page (ex: mysite.com/location/glasgow/) will take you to the start page for the selected location:

Main Navigation Settings

Show location switcher in menu

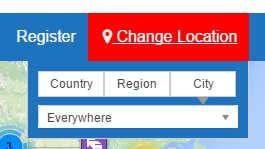
This setting will add a navigation tool to your main menu:

  • It will allow your visitors to easily choose a city, region or country on your site
  • It highlights the location your visitors has browsed to


It is highly recommended to use the location switcher, it makes life a lot easier for your visitors.
Make sure you have selected a menu to be used for your GeoDirectory links at GD > Design > Navigation

List drilled-down Regions, Cities or List all Countries, Regions, Cities
  1. The first option (List drilled-down Regions, Cities) will narrow the list of regions or cities, depending of the choices made by your visitors.
    1. For example if a visitor has selected United States as country, then only US states and cities will be available in the Region and Cities filter.
    2. If the user then chooses Florida from the Region filter, then only Florida cities will be shown in the Cities filter.
  2. The second option (List all Countries, Regions, Cities) will always list all regions and cities in your database, regardless of any other filter already applied.
    1. For example, if a visitor has selected United States as country, all regions and cities in other countries will still be available in the Region and Cities filters.

Geo Directory Location Settings

Country – Region – City
  1. The settings for countries, regions and cities are basically the same:
    1. Choose to accept listings for every country, region or city
    2. Or restrict to particular countries, regions and cities.
  2. If you tick the Everywhere box, Everywhere will be listed as an option for countries, regions or cities.This allows your visitors to zoom out.
    1. For example if a visitor has browsed to Orlando, they can choose to see all the listings for Florida by either choosing the Everywhere option for Cities, or they can choose Florida from the Region filter.
Wish to enable neighborhoods?

Refer to City Neighborhoods.

Examples:

Directory for the United Kingdom and Ireland:
Country > enable selected countries > select United Kingdom and Ireland
Region > enable Multi Regions
City > enable Multi Cities
Note: you would need at least one location in the United Kingdom and one in Ireland before the countries will be available for selection

Directory for Japan:
Country > enable default country
Region > enable Multi Regions
City > enable Multi Cities

Add Listing Form Settings

The following settings affect how users add addresses and locations for their listings in the Add Listing forms.

Disable Google address autocomplete?

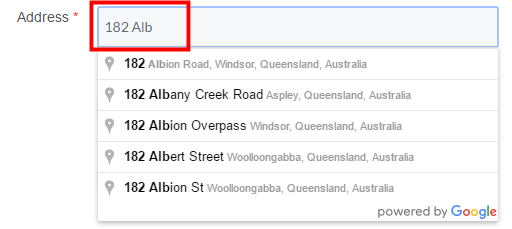
This will stop the address suggestions when you start typing in the address box on the Add Listing page:

Show all locations in dropdown?

Rather than showing a few locations only and then searching as the user types a location, you can choose to present all current locations in your database at once. This can be useful if you have a small directory but can break your site if you have many locations.

Disable set address on map from changing address fields

By default after selecting your location from the dropdowns, clicking on Set address on map will move the marker to that location. You can disable, this may be useful if you have a small directory and you have custom locations or your locations are not known by the Google API and they break the address.
Highly recommended not to enable this.

Disable move map pin from changing address fields

By default, dragging the marker on the map will change the location fields to match. Similar to the previous option, you can disable this, it might be useful if you have a small directory and you have custom locations or your locations are not known by the Google API and they break the address.
Highly recommended not to enable this.

Redirecting the login or registration page


On this page we’ll explain how to integrate your GeoDirectory with some other plugins that use the WordPress user accounts.

Introduction

  1. By default GD will add its own registration and login page.
  2. But you may want to redirect either the login and/or registration links to other pages, for example because you are using a membershipp plugin.
  3. You can add the following code snippets to your child theme’s functions.php or use the code snippets plugin.

1. Redirecting your login

[php]add_filter(‘geodir_login_url’,’change_geodir_login_url’,10,3);
function change_geodir_login_url($login_url,$args,$gd_page_id){
//change the url to whatever you want.
$login_url = ‘http://your-site.com/my-login-page’;
return $login_url;
}[/php]

2. Redirecting your registration

[php]add_filter(‘geodir_login_url’,’_my_geodir_login_url’,10,3);
function _my_geodir_login_url($login_url,$args,$gd_page_id){
if(isset($args[‘signup’])){
//change the url to whatever you want.
$login_url = ‘http://your-site.com/my-rego-page’;
}
return $login_url;
}[/php]

3. Adjust for your particular integration

In the code above you’ll see we are redirecting geodir_signup to /wp-login.php

The page it is redirecting to might have to be adjusted for your situation.

WooCommerce

A standard installation of WooCommerce creates a shopper’s account page at /my-account.

You would change the above code to

[php]$login_url = ‘http://your-site.com/my-account’;[/php]

bbPress, s2Member etc

The code above will work to by-pass GD’s registration and login process for all plugins that use the standard WP login, like:

  • bbPress
  • s2Member

Customizing GeoDirectory templates

Your GeoDirectory site uses a number of special templates to create your map pages, category pages, detail pages etc.

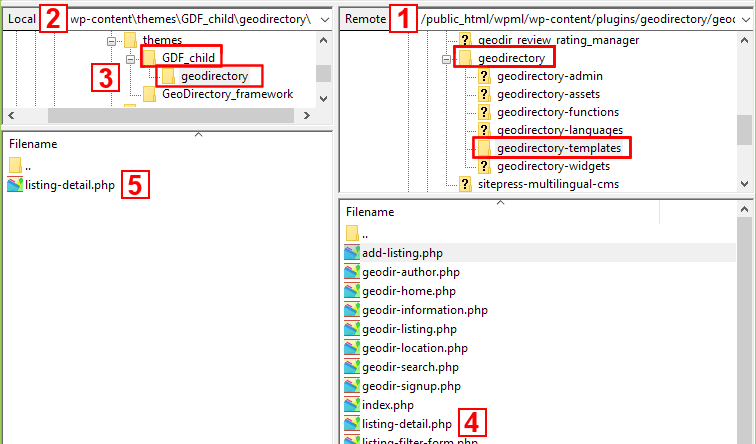
You can find the default templates at /wp-content/plugins/geodirectory/geodirectory-templates.

We provide many hooks and filters that can provide lots of customization options without having to replace templates (this is the preferred way) but If you want to customize them in any way, just follow these steps:

  1. The default templates at /wp-content/plugins/geodirectory/geodirectory-templates.
  2. Navigate to your child theme.
  3. Create a folder in your active child theme folder called geodirectory. 
  4. Find the template you want to customize.
  5. And copy that template to the geodirectory folder in your active child theme.
  6. You can then change the original templates and insert any code needed to adapt the templates for your site or theme.
  7. By creating a copy of the template to your child theme, you will preserve all your changes when the plugin needs upgrading.


The two files login_frm.php and reg_frm.php are called in the template geodir-signup.php, you can replace this template but there are easier ways , adding the code below to your child theme functions.php will then allow you to replace those two files as the same way as all the others via the above method.

Advanced Search Filters Addon – Search By Distance

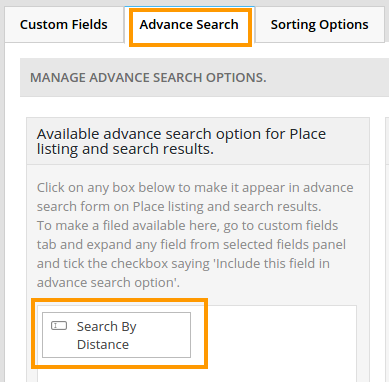
When you activate the Advanced Search Filters Addon, the Search By Distance field will automatically be added to the fields you can add to your custom search.

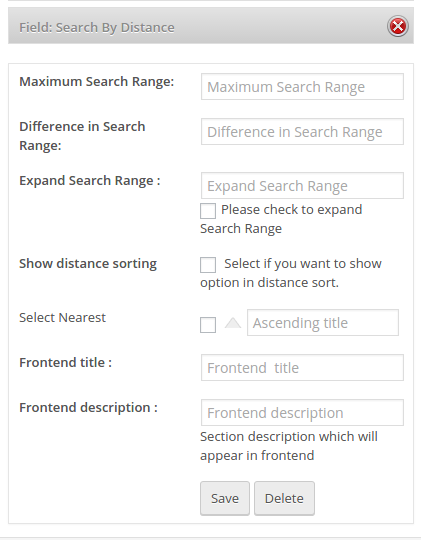
When you click on Field: Search by Distance, you’ll see the following options:

Options

Maximum Search Range

Enter the maximum radius of the search zone you want to create, for example if you want your visitors to search any listing within 50 miles or kilometers from the current location, then you would enter 50.

You have to set your choice of miles or kilometers at
WP admin > GeoDirectory > General > Search > Show search distances in miles or km

Difference in Search Range

Here you decide how many different search radii you make available to your visitors.

If you enter a fifth of the Maximum Search Range, there will be 5 options; if you enter half of the Maximum Search Range, then there will be 2 options.

Expand Search Range

If you leave this blank, then all options as per Difference in Search Range will be shown.

Entering a  number lower than the number of options as per Difference in Search Range will only show that lower number of options, and will add a More link to expand the options so all will be shown.

Show distance sorting:

Tick this if you want your visitors to be able to sort the search results in order of distance, either ascending or descending.

You will also need to provide text for the ascending or descending options.

Frontend title

This will be shown as the heading of the Search By Distance filter.

Frontend description

Optional description shown below to give your visitors tips about how to use the filter.

Examples

Example 1: all options

The following example illustrates all the options:

  1. The search will search all relevant listings within a maximum 100 km radius (Maximum Search Range = 100)
  2. Visitors will be able to choose a smaller radius than 100km, in 20 km increments (Difference in Search Range = 20)
  3. Visitors will initially have 4 options to choose from (Expand Search Range = 4)
  4. Visitors will be able to order the search results by closest or furthest away (Show distance sorting = checked)
  5. The first image is how the search will initially show: Our heading and 4 options
  6. The second image shows what happens if the visitor clicked on More; all the options would be revealed
  7. The third image shows how the visitor can choose to order by closest or furthest away

Example 2: minimal options

  1. Visitors will only have two options because the Difference in Search Range is half of the maximum radius
  2. No other options will be available to the visitor

Advanced Search Filters Addon – Overview

On this page

Introduction – Installation – Configuration (search autocompleter settings – near autocompleter settings – redirect settings on first time loadgeolocation settings)

Introduction

This addon extends the default GeoDirectory search widget by letting you filter search results by certain custom fields you may have added to your listings.

For example, if you had added a custom select field Pet Friendly you could then filter results that only include pet friendly listings, this could be useful for hotels, café’s, bars etc.

You can also filter by multiple values, you could set up your directory so you could search for Pet Friendly, F” listings within 10 miles of the location you enter in the Near field.

This plugin also integrates well with our GeoDirectory Custom Post Types plugin to allow you to add different filter options per post type and also search per post type.

Installation

Installation is done by uploading the ZIP file in the plugin section of your WordPress admin area.
Installing GD Addons

Configuration

Once you activated the Advanced Search Filters addon, you will get a new set of settings in the GD admin panel:

SEARCH AUTOCOMPLETER SETTINGS

Enable Search autocompleter: This setting will start giving suggestions as your visitor start searching:

Autosubmit the form on select a Search option: If this option is selected, the search form will automatically load the detail page of the listing selected.

Min chars needed to trigger autocomplete: Enter a number of characters here before the autocompleter search is triggered.

Max Results to be returned by autocomplete: Enter a number here to limit the number of listings presented by the autocompleter.

NEAR AUTOCOMPLETER SETTINGS

This setting will only be here if you have the Location Manager addon activated.

Enable Near autocompleter: This setting will start giving suggestions as your visitor start searching:
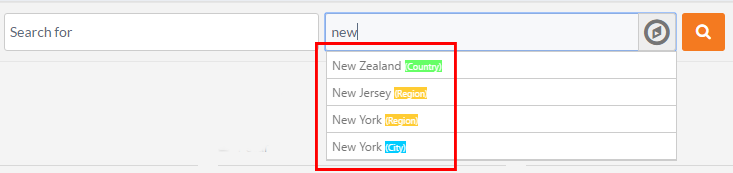
Autosubmit the form on select a Search option: If this option is selected, the search form will automatically load the detail page of the listing selected.

REDIRECT SETTINGS ON FIRST TIME LOAD

This setting will only be here if you have the Location Manager addon activated.

You will need to have a secure site – HTTPS – with a SSL certificate installed for geolocation and redirection to work in all browsers and devices.

There are 3 options:

  1. No redirect: You guessed right, no redirection
  2. Redirect to nearest location (on first time load users will be auto geolocated and redirected to nearest geolocation found): With this option,
    1. the system will try to locate where the visitor is located
    2. if there are listings within the set search radius, a page will be served with those listings and the location of the visitor
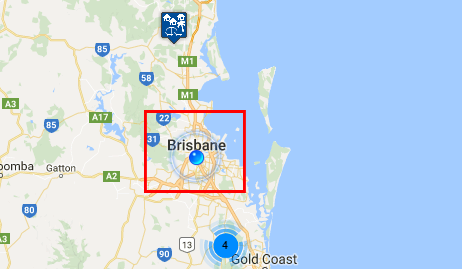
    3. if there are no listings close to the visitor, then the system will look in your database to determine what the closest location is to the visitor
    4. and then serve the location page for that location.
    5. Example:
      1. There are only 2 locations in your database: New York City and Los Angeles.
      2. A visitor who is in San Francisco visits your website.
      3. The system will redirect to yoursite.com/location/united-states/california/los-angeles
  3. Redirect to default location (on first time load users will be redirected to default location: This setting will redirect your visitors on first entry to the location page of your default location.
    Using the example just above, if New York City is your default location, any visitors landing on your site will be redirected to yoursite.com/location/united-states/new-york/new-york-city.

GEOLOCATION SETTINGS

You will need to have a secure site – HTTPS – with a SSL certificate installed for geolocation and redirection to work in all browsers and devices.

Default Near Me miles limit (1-200): 

Choose miles or kilometers at GD > General > Search

Dos and Don’ts

This table lists some important things you should never do, and some things you definitely should do.

It is a good checklist to make sure you don’t break your site, and that you get the most out of your setup.

Don't Do NOT do this ! Do Do this
Page caching plugins do not work well with GD, GD creates page dynamically. GD Booster is specifically designed to cache GD pages and your normal WordPress pages. Another option is to use WP Super CacheREAD MORE Allow Anyone to register READ MORE
When adding a location or address, DO NOT change the lat and lng coordinates automatically created below the map after you click Set address on map Set WordPress permalinks to use Postnames READ MORE
Do NOT install and activate the BuddyPress Integration or the AffiliateWP Integration addons without installing the BuddyPress or AffiliateWP plugins themselves first. Tick Organize my uploads into month- and year-based folders in the WordPress Media settings READ MORE
Do NOT delete a location in the list of locations at Multilocations, because that will also delete any listings in that location! READ MORE Create at least one category for your Custom Post Types like Places or Events, AND each listing has to be in at least one category, or your listings will not show on the frontend of your site READ MORE
Do NOT use any parent page for any of the GD pages. READ MORE Backup your database and files before trying customizations. You will be able to restore your site if you break something.
Do NOT import CSV files with post IDs unless you want to over-write/update existing listings. If you add post IDs that refer to an existing WP page or WP post, or another GD listing, they will be over-written.  READ MORE If using GD for the homepage of your site, make sure to set WP Admin > Settings > Reading > Front page displays > Your latest posts > YES.
When using the MultiLocation addon, make sure to enable the location switcher at GD > Multilocations > Location Settings tab > Main navigation settings.

GeoDirectory Core Widgets

When you install the GeoDirectory plugin, you’ll find a number of new GD widgets in the appearance section of your WP admin area.

Widget name Can be used on these pages:
Home Listings Search Detail Author Non-GD pages
GD Core widgets
GD > Advertise yes yes yes yes yes yes
GD > Best of widget yes yes yes yes yes
GD > CPT Categories yes yes yes yes yes yes
GD > CPT Listings yes yes yes yes yes yes
GD > Features yes yes yes yes yes yes
GD > Flickr Photos yes yes yes yes yes yes
GD > GMap Home page yes yes
GD > GMap Listing page yes yes yes yes yes
GD > Listing Slider yes yes yes yes yes yes
GD > Loginbox yes yes yes yes yes yes
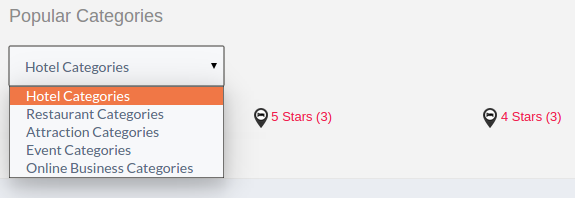
GD > Popular Post Category yes yes yes yes yes yes
GD > Popular Post View yes yes yes yes yes yes
GD > Recent Reviews yes yes yes yes yes yes
GD > Related Listing yes yes
GD > Search yes yes yes yes yes yes
GD > Social Like yes yes yes yes yes yes
GD > Twitter yes yes yes yes yes yes
Events addon only widgets
GD > Related Events Listing yes
Location Manager addon only widgets
GD > Popular Location yes yes yes yes

GD > Advertise widget

  1. This widget can be added to any section of a GD page or a non-GD page.
  2. You could use this widget for example to add your AdSense code to the pages and sections of your choice.
  3. You can also use this widget for any other text or code you’d like to add to your pages.

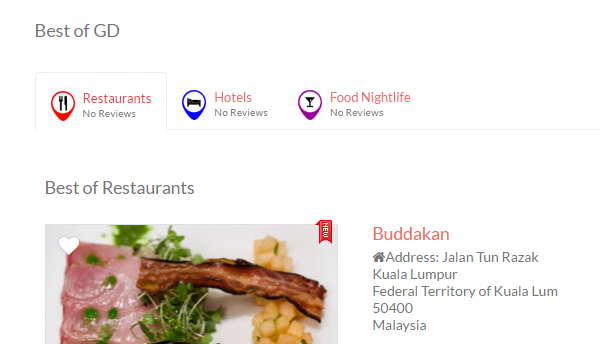
GD > Best of widget

  1. This widget can be added to a certain section of a GD page or a non-GD page.
  2. This widget will create tabs that display a certain amount of listings, according to the categories.
  3. Choose the number posts and categories to display.
  4. Limit your excerpt character count.
  5. Choose tab layout type.
  6. Choose excerpt type.
  7. Enable location filter.

Note : Listings would be sorted by ratings and if there are no ratings on the listings, it would be sorted randomly.

best-of-cpt-2

GD > CPT Categories widget

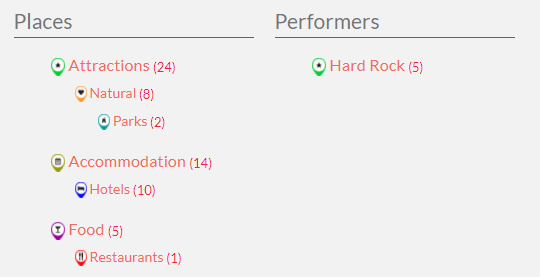
  1. This widget will add a list of categories to your pages:
  2. This widget can also be added using the [gd_cpt_categories] shortcode.

Options

  1. Title: Enter any title – if left blank, then there will be no title
  2. Select CPT: Select all CPTs, or select one or more by CTRL + click
  3. Hide empty categories: Tick this to hide links to categories without any listings
  4. Show category count: This will show the number of listings in the linked category 
  5. Hide category icon: Tick this to only use text for the link to the categories
  6. Show CPT on same line: By default category blocks for CPTs will be placed below each other, but if you tick this option, they will be shown next to each other.
    1. Example of CPT category blocks next to each other
    2. Example of default setting (look in sidebar)
  7. Sort by: Choose alphabetic or most popular (categories with most listings first)
  8. Max number of sub-categories: If you have sub-categories, select the maximum number of sub-categories that will be listed
  9. Show max sub-categories depth: If you use sub-categories and sub-sub-categories, you can select to what level of sub-category you want to link
  10. Don’t filter for current viewing post type: By default, the CPT Categories widget only shows links to the categories of the current CPT, so tick this if you always want the widget to show all CPTs
  11. Don’t filter for current viewing category:

GD > CPT Listing widget

  1. This widget will list the CPT images with links.
    cpt_listing
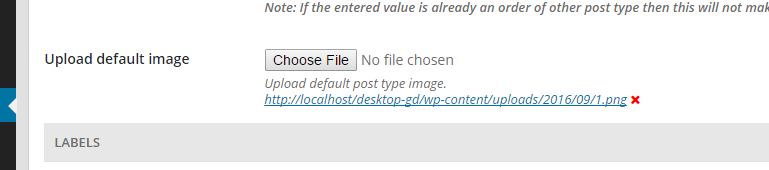
  2. Navigate to GD > Custom Post Types > Edit(CPT) > Post Type > Upload Default Image
    upload_listing

GD > Features

  1. This widget can be added to any section of a GD page or a non-GD page.
  2. This widget will allow you to create blocks that displays an icon, title and description.

block-image

GD >  Flickr Photos widget

  1. Designed to be used in a sidebar of any of your pages, but can also be used anywhere else on your site.
  2. You will need the Flickr ID number for the Flickr user or group whose images you want to use: just follow the link in the widget and follow the instructions there.
  3. Choose the number of images you want to display.

GD > GMap – Home Page

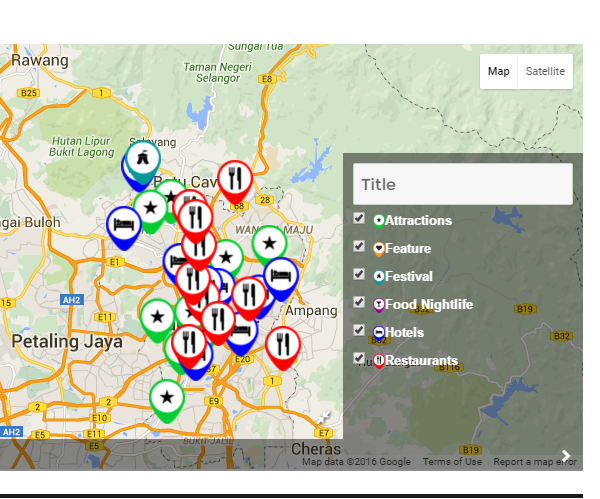
This will show you google map V3 for Home page with category checkbox selection.

googlemap

GD > GMap Listing page

This widget can be added to any section of a GD page except the GD Home template.

A map will be added where you added the widget, and will automatically be populated by relevant listings:

Listings page: filtered by the location, custom post type and category the visitor has browsed to
Search page: depending on the search performed
Detail page: only adds the location of the particular listing
Author page: filtered by listings submitted or claimed by the user, or by listings added by the user as favorites

Settings

Map Width: Enter a width as a percentage or pixels, for example
if you add the widget to a content section, enter 100%, and
if you add the widget to a sidebar, enter the required width in pixels, for example 298
Map Height: Enter a height in pixels, or leave blank for the default height
Map Zoom Level: Choose a map zoom level:
1 will show the whole world and 19 will zoom in as far as possible
Note 1: This setting is overwritten if you use Auto Zoom
Note 2: It is recommended to use a zoom level of about 10 if you use the widget on a Detail page
Map Auto Zoom: If you tick this box, then the map will automatically zoom to a level that shows all listings
Note: Not recommended if yo use the widget on a Detail page
Map Sticky: If you use the widget in a sidebar, this setting will make sure that the map stays visible even if a visitor browses lower than the map.
This is handy on a Listings or Search page, because it allows visitors to pinpoint the location of a listing even when there are lots of listings shown on the one page.
Mouse Scroll: Allows visitors to use their mouse to zoom in or out, rather than being restricted by the map control

GD > Listing Slider

This widget will add a slider of selected listings to any of your GD pages, and can also be used on any non-GD page.
You can only use one Listing Slider per page!
This widget is designed to be used in content sections or full-width sections, it does not work well in sidebars or columns with limited width.
Only listings with images will be shown.

GD > Login Box

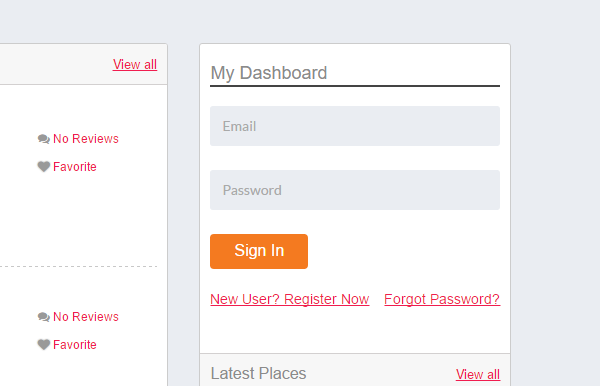
This widget will add a login box to any of your GD pages, and can also be used on any non-GD page.
This is how it would look like.
loginbox

GD > Popular Post Category widget

Popular Post Category

GD > Popular Post View widget

This widget can be used in Content and Sidebar sections, as well as non-GD pages.

You can also add this widget using a shortcode.

Settings

Most of the settings are straight forward, but note the following:

Title: This will be used for the heading of the widget.
You can use %posttype_singular_label% or %posttype_plural_label% here.
This is especially useful if you also use the Use current viewing post type setting (see below); in that case the heading will adapt to the post name of your Custom Post Type a visitor is viewing.
For example New %posttype_plural_label% would show as New Places on any Place category page, and as New Events on any Event category page.
Listing width: Although this normally can be left empty, this setting allows you to tweak the automatic width of the listing.
For example, if you choose a Two Column Grid View, your listings will be 50% wide.
Entering 48 into this field will adjust the width if necessary to 48%.
Note: Do not enter % as part of this setting, that will confuse some browsers.
Post Content excerpt character count: Set this to the number of characters you want to show as part of the listing.
Note: By default, excerpts will only be shown for List View and Two Column Grid View. But excerpts can be shown for all Grid Views by adding this to your CSS:
.geodir_category_list_view li.geodir-gridview .geodir-content .geodir-entry-content {display: inline;}
Enable Location Filter: If you tick this box, then any listings shown will be filtered by the location chosen by your visitors.
Use current viewing post type: If you choose this setting, then the listings displayed will be from the same Custom Post Type as the page the visitor is viewing.
See also the Title setting above.
Note: This setting only applies if you add the widget to the GD Listings page.
Hide if no posts: This setting will hide the widget completely if there are no listings returned for your parameters.
So instead of saying that no records are found, the widget will just not be displayed.

This widget is automatically added to your GD Search page and the GD Listings pages. Review how to adjust the display of these pages here.

GD > Recent Reviews

This widget will add a Recent Review section to any of your GD pages, and can also be used on any non-GD page.
You can limit the number of reviews to display by inserting a value inside the widget options
This is how it would look like.

review

GD > Related Listing

GD > Social Like

  1. This widget has no settings and can be added to any page of your website.
  2. It will allow your visitors to share the page on their Twitter, Facebook or Google+ pages.
  3. This is how the widget looks like:

GD > Search

  1. This widget can be added to any page of your website.
  2. You can also add this widget using a shortcode.
  3. There are no settings unless you have the Advanced Search addon activated. The following options can then be selected:
    1. Default: Custom search options will become available when your visitors click on the Customize Search button
    2. Open when searched: This setting will show the custom search open when your visitors access your GD Search page, but not on other pages
    3. Always open: the advanced search options will be available without your visitors having to click on the Customize Search button
  4. To better understand the GD Search, review this documentation:
    1. Understanding navigation, searching and browsing …
    2. The GD Search explained

GD > Twitter

  1. With this widget you can embed a variety of Twitter feeds or widgets on your website.
  2. In your Twitter account, go to Settings > Widgets and create a widget or copy one of the codes.
  3. Paste the code in the GD > Twitter widget.

GD > Related Events Listing

Settings

This Events widget is specifically for the detail pages of your listings, and will show the events that have been submitted for a particular place.

The widget will only work on the default custom post type Places; it will not show on any other custom post type detail pages.

Most of the settings are self-explaining, and are the same as some of the settings of the Popular Post View widget, with one main difference:

Enable Location Filter: You can show events at a listing automatically on the detail page of that listing if you have both the Prices Manager Addon and Events Addon enabled. Just follow these steps:

  1. In the Prices and Payment settings, set Link business to Yes in the Events pricing.
  2. Add the Related Events Listing widget to the detail page, and enable the Location Filter
  3. Now if the same user adds an event and chooses one of the listings from the Fill in Business Details menu, that event will automatically be listed on the detail page for the listing.

Understanding Places, Categories, Listings and Custom Post Types

Introduction

Once you installed your GD directory plugin, you will need to create categories before you can add any listings to your directory.

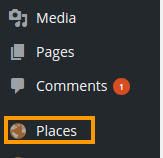
The free GD plugin will automatically create a new custom type of WordPress posts, which allows you to add content to your directory. The GD plugin calls these custom posts Places, and you will find them in the main WP admin menu.
core-places
In the GeoDirectory context, these posts are called listings.

Every listing will need to be in a category, or the listing will not be added to the GD maps.

GD will work with one level of sub-category as well:

Places > Category > Sub-category > Listing

Examples using GD core

One example is a local directory, and this could be your setup:

Category Sub-category Listing OR Category Listings
Restaurants French L’escargot Restaurants L’escargot
La Baguette La Baguette
Italian Mario Mario
The Pizza Dude The Pizza Dude
Accommodation Hotels The Sleep Inn Accommodation The Sleep Inn
The Rich The Rich
Bed and Breakfast Chez Nous Chez Nous
The Rooster The Rooster

Extending your directory

The above examples are based an the standard free GD plugin installation: All your listings and categories will need to be of the same custom post type Places.

Custom Post Types Addon

The Custom Post Types Addon (CPT) lets you add as many CPTs as you need.

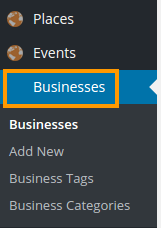
As standard, GeoDirectory comes with one CPT called Places (see above), new CPTs will have their own dedicated sidebar menu and management system just like Places.

ctp

Why and when to use Custom Post Types?

The advantages of this plugin are that instead of trying to manage a large diverse directory with many categories all under the one post type, you can split these into more manageable CPTs.

Factors worth considering whether you want to organise your site with different CPTs:

  • you can add different custom fields to each Custom Post Type
  • it is easier to manage different pricing levels with CPTs than categories
  • a listing can only be submitted to one CPT at the time, but it is possible to submit the same listing to more than one category
  • Some widgets can only be filtered on one CPT at the time.
  • Maps can only show one CPT at the time but can show multiple categories at the same time.

Events Addon

The Events Addon is a custom post type specifically designed for the way events are prioritized by dates.

With this plugin you can let users add their events to your site. Events are ordered by upcoming date by default. Users can enter recurring dates for their events instead of having to create lots of separate events. As this is also a custom post type you have the usual ability to add custom fields and sort options.

Examples using CTP and Events addons

CTP Category Sub-category Listing
Enjoy Restaurants French L’escargot
La Baguette
Italian Mario
The Pizza Dude
Accommodation Hotels The Sleep Inn
The Rich
Bed and Breakfast Chez Nous
The Rooster
Events Markets Weekly Farmers Market
Antiques Show
Music Concerts Milli Vanilla
Elvis Presley Live
Lessons Bagpipe School
Local Health Doctors Doctors R Us
Fitness Centres Fitness4U
Building Hardware Nuts&Bolts
Carpenters We’ll Nail You

Understanding GeoDirectory pages and layout

On this page:

  1. Introduction
  2. Directory pages
  3. Directory management pages
  4. Other GD pages

Introduction

  1. When you activate GD on your site, GD will create some extra pages. These are listed below.
  2. In the Pages section of your WP admin dashboard, you can change the title and the slug of the page. Also, do not move the pages under a parent!
  3. GD Page content is provided by GeoDirectory. Any content added to body of these pages will be ignored by GeoDirectory.
  4. Generally, the public directory pages can be modified by firstly selecting which sections you want to use, and then by adding widgets to those sections.

Directory pages:

  1. GD Home page – for all locations
  2. GD Search
  3. GD Detail – for each individual listing
  4. GD Author page – where the user can find links to edit their listings etc

Directory management pages:

  1. Add Listing – to add all types of listings
  2. Listing Preview – to check submission before paying and/or publishing
  3. GD Checkout – used with Payments Manager only
  4. Listing Success – shown on completion of the submission process
  5. GD Info
  6. Manage Invoices – page where your users can review their payments

Other GD pages:

  1. GD Login

Directory pages

Here are links to more details of the different templates further down the page:
Home  |  Listings  |  Search | Detail  |  Author

Typical layout

  1. Below is a standard layout of a WordPress site, using the GeoDirectory plugin.
  2. All the GD directory pages are based on this layout.
  3. The default Design settings only use the GD Right Section and not the GD Left Section, because that is the most common layout.
  4. Also, the GD Bottom Section is not enabled by default, although this section allows you to add content to the bottom of your GD pages you maybe do not want in the footer section of your non-GD pages.
  5. You can adjust the settings for these by going to WP Admin > GeoDirectory > Design and this article details the settings.
Header section
Part of your theme: logo, header menu etc
GD Top section
Use GD widgets here like map, popular categories etc
GD Left section
Used for sidebar widgets
GD Content section
This content will vary depending on whether this is your GD home page, GD Listings page, GD Detail page or GD Search page
GD Right section
Used for sidebar widgets
GD Bottom section
Footer section
Part of your theme: footer menus, copyright text etc

GD Home page

  1. This is the home page for your GeoDirectory. You tell GeoDirectory which page is the GD Home at GD > Permalinks > GD Home.
  2. Some GeoDirectory themes with links to “home” will redirect users to this page, even if it is not set as your WordPress static home page.
  3. You can set WordPress > Reading > Static Front Page to this same page, if you want your GeoDirectory page to also be the front page of your site. You can also use a different pages for your WordPress Front Page and the GD Home. Some members choose to use different pages so they can create a customized Front Page with a builder and add specific widgets or shortcodes that are not display on the GD Home and Location pages.
  4. See the basic installation documentation about setup.
  5. The GD Home page is a WordPress page, but any content added to the page content area is ignored by GeoDirectory. To add content to GD Home, you will need to add Widgets at WP > Appearance > Widgets.
  6. GD Home is also the template used for each of the locations in your GD installation (including countries, regions and cities).
  7. Normally, you’d want the map in the top section, as you see at the GD demo.
  8. Without the Location Manager addon, you will only have one location.

Examples:

  • yoursite.com/location will show all listings
  • yoursite.com/location/belgium will show all listings in Belgium
  • yoursite.com/location/united-kingdon/greater-london will show all listings in Greater London
  • yoursite.com/location/italy/lombardia/milano will show all listings in Milan

GD Home

Location Page Layout Options (using the GD Home Template)

  1. The location page is used to display listings for each location.
  2. Each location, whether it is a country, region, city or neighborhood will display using the location page.
  3. GD Home is actually the location “everywhere” and so sorts and shows all the listings.
  4. The Location page uses the same widget settings as the GD Home Page. When you add widgets to your home page, they will also be displayed on the Location page.
  5. With the Location Manager Addon you can add the Popular Locations shortcodes for displaying a list of your locations to drive visitors to location pages. You can also create direct links manually for special menus, add the Location Switcher widget, or the Location Switcher Menu.
  6. When you add widgets or shortcodes to your Home/Location page, you should consider checking “filter results for location” when available, so only the listings for the particular location will be shown.”
  7. Read more about Location Manager Shortcodes

GD Listings page

  1. This is the template that will display a list of all listings in a particular category or custom post type, and will show different listings depending on location and category requested.

Examples:

  • yoursite.com/attractions will show all listed attractions
  • yoursite.com/hotels/finland will show all listed hotels in Finland

GD Search page

  1. You guessed it, this is the page displaying the result of a GD search.

GD Detail page

  1. The detail template is used to display all the detail of each of your listings.
  2. It will display all the information one of your users has submitted about their place, business, organisation or event etc.

GD Author page

  1. This is the page displaying content specific to your users when they are logged in; it is your users’ dashboard.
  2. It will list their favorite listings and/or events, and the listings they have submitted themselves.

Keep reading here to find more detail on the settings

Directory management pages

Add Listing

  1. This page is only available to registered users.
  2. Different Add Listing pages will be created for each Custom Post Type.
  3. You can also create this page with shortcodes.

Listing Preview

  1. Once a user has entered all data, this page allows for a review, and for changes to be made if required.

GD Checkout

  1. If charging a fee for submissions using the Payments Manager, the user will be taken to this page once they reviewed their submitted data.
  2. For free listings, this page gets by-passed.

Listing Success

  1. This is the last page in the free submission process, and provides a link to the newly created listing.

GD Info

  1. This page is used to display messages like payment received etc.
  2. For paid listings, it will display payment received details etc, and provide a link to the newly created listing.

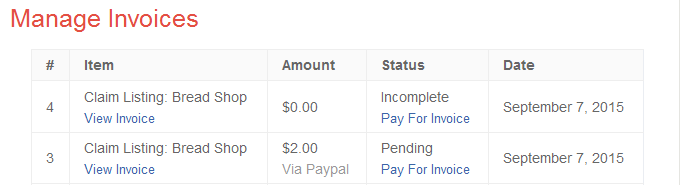
Manage Invoices

  1. This page lists all invoices of a user if you are using the Payments Manager.
  2. This page uses the GD Author right sidebar.
  3. Example:

Other GD pages

GD Login

  1. This is used for both registration and login in a default setup.
  2. If using the Buddypress registration, it will only be used for login.