Autoptimize Settings

GD Booster can not be used with this plugin, we recommend using WP Super Cache to compliment Autoptimize
Autoptimize is a popular html optimization plugin for WordPress and is now compatible with GeoDirectory. For Autoptimize and GeoDirectoy to work together properly there are a few settings you must enable.

Under Settings>Autoptimize>:
The settings below are the ones that worked best during our testing and are highly recommended to follow but your theme may require different settings.

  1. Enable: Optimize HTML Code?
  2. Enable: Optimize JavaScript Code?
  3. Disable: Force JavaScript in?
  4. Disable: Also aggregate inline JS?
  5. Exclude scripts from Autoptimize:
    s_sid,smowtion_size,sc_project,WAU_,wau_add,comment-form-quicktags,edToolbar,ch_client,seal.js,jquery.js,frontend.min.js,quicktags.min.js,tinymce.min.js
  6. Enable: Add try-catch wrapping?
  7. Enable: Optimize CSS Code?
  8. Enable: Generate data: URIs for images?
  9. Enable: Remove Google Fonts?
  10. Enable: Also aggregate inline CSS?
  11. Disable: Inline and Defer CSS?
  12. Enable: Inline all CSS?
  13. Exclude CSS from Autoptimize: admin-bar.min.css, dashicons.min.css

Autoptimize

WP Super Cache

GD Booster can not be used with this plugin, we recommend using Autoptimize to compliment WP Super Cache
WP Super Cache is a very popular caching plugin for WordPress and is now compatible with GeoDirectory. For WP Super Cache and GeoDirectoy to work together properly there are a few settings you must enable.

Under Settings>WP Super Cache>Advanced make sure to set the following settings:

  1. Enable: Don’t cache pages for known users.
  2. Enable: Don’t cache pages with GET parameters. (?x=y at the end of a url)

Add Google API KEY

  1. You can find the setting in GeoDirectory under GeoDirectory > Design > Map > Google Maps API KEY:
  2. Log into your Google account in another tab or window.
  3. Click on Generate API Key.
  4. In the popup, select Create a new project:
  5. When the popup shows the New Project, change the name if you like, and then click Create and enable API:
  6. Copy the key from the next screen:
  7. Close the popup.
  8. Paste the key in the API key field:
  9. Scroll to the bottom of the page and Save.
  10. Once you have it up and running, you may want to restrict the API to your website domain by clicking on Generate API Key, selecting the project you created earlier and go to the API console:
  11. Under credentials for the key created, select HTTP referrers, and then add *.mysite.com/* (change to your domain) in the HTTP referrers field, and then Save:


Versions 1.6.10 of the GD core plugin and earlier:

You can find the setting in GeoDirectory under GeoDirectory > Design > Map > Google Maps API KEY

  1. Go to this link to start (you will need a google account)
  2. Click Continue to add a new project (or you can select a current one)
  3. If you see this message: “You don’t have permission to create an API key” follow this step, if not skip to the next step.
    permissions

    It means exactly what it says.
    You’ll need to create new credentials before an API key can be generated.

    Click on the “Credentials” link in the left hand sidebar
    Click the “Create credentials” button
    Select the “API Key” option
    Then click the “Browser key” button from the pop-up
    Now you’ll be taken back to the create a browser key step above and can proceed.

  4. It is important you follow this step exactly:
    You will need to add two urls here,enter the name of your project and the url of your site, add one as: *.yoursite.com/*
    AND one as
    yoursite.com

    as shown below:gkey2You will then be presented with your API KEY:

    If you already have a project with a verified domain, you might be presented with a different screen, in that case select those settings to get your API key:
  5. Copy and paste your API KEY into your GeoDirectory Settings and click save:
  6. Wait for a while before checking, Google says this can take 5 minutes but we have found it to take up to 15 minutes in some cases.

Once that is all done, you can happily use google maps 🙂

If you did not use our tutorial link or you already have a current project:

…If you did not use the link we provided to create a new API key they you will have to manually activate several API’s:

  1. In your API project click “Overview” and then “Enabled API’s”
    overview
  2. Make sure the below APIs are enabled:
    apis
  3. If they are not all enabled then click “Google API’s” and search for them and enable them.

GeoTheme to GeoDirectory Conversion Tutorial

Before you start:

  1. BACKUP EVERYTHING! (yes that is me shouting)
  2. Make sure you have the latest GeoTheme (GT) installed (3.7.1).
  3. Make sure your WordPress (WP) is up to date (4.5+)

For this tutorial we will be converting the site barra-accommodation.co.uk from GT to GD.
Please don’t try this on a live site, we will be copying our entire site to a sub directory and running the conversion there first.

Make a dev site for the conversion:

  1. Copy your site files to a sub-folder or sub-domain for testing the conversion, in our case we will be copying our site to a /GD/ sub-folder. Below i am using Cpanel but the same can be achieved with SSH or FTP.
    gd-folder-createcopy-files
  2. Copy Your DataBase (DB), in my case i am using phpMyAdmin to do this which is included in cpanel usually.
    Select your table:
    select-dbSelect “Operations”:
    select-operations
    Copy the table:
    name-new-db
  3. Edit your wp-config.php file in your dev site to use the copied Database.
    edit-wp-config
  4. Make sure the DB user has privileges on the new table, you can use Cpanel for this to add the user to the copied table:
    add-user-to-db
  5. Finally change the “siteurl” and “home” values to the new url in your DB wp_options table.
    chnge-urls-db
    to our dev url with /GD at the end:
    urls-change-db
  6. Dev Note:  If you have plugin “Query Monitor” installed and active it can cause problems, just delete the folder from your plugins if you are getting 500 error on your dev site.

You should now have a working dev site that we will use for the conversion.

Start The Conversion:

  1. Install and activate the GT2GD conversion plugin DOWNLOAD Latest
    gt2gd-install
  2. Go to the GT2GD admin screen, here it will have most instructions on what to do next but in this case you can continue to follow this tutorial:
    gt2gd-screen
  3. Switch theme to a non GT theme, i would suggest Directory Starter which can be installed direct from your wp-admin area by searching themes for “Directory Starter” but you could use just a standard WP theme.
  4. Disable any non essential plugins, especially any caching plugins.
  5. Install and activate GeoDirectory and set the default location and then any addons you will be using.  It is important to install and activate addons like Location Manager, Events, Payments Manager, Claim listings addons etc if you have this sort of info in your GT install. (or just activate everything if your not sure). You dont need to add any setting for the addons at first, you can do that after the conversion.
  6. Now visit the GT2GD admin screen again and you should now see the button to start the conversion:
    start-conversionClick the button to start the conversion:
    conversion-done
  7. Once done, go to both Place & Event Settings for custom fields and simple save any ONE field, this will rebuild the sort order which can stop some fields showing on the edit pages.
  8. Check over your listings to make sure they converted properly.

If the conversion worked for your site you can then either reverse the steps for creating the dev site to copy the dev site to the main site or simply carry out the conversion on your live site (assuming you have another backup), if copying the dev site over be sure to search the DB for any dev site urls. You might want to setup your theme and setting on your dev site first before making it live, and remember to setup your new payment settings etc.

If you changed some settings on your dev site and now your live site seems to be pointing to them you can use a plugin called Better Search Replace to replace your dev site urls to your live site urls: https://wordpress.org/plugins/better-search-replace/

If you had existing PayPal subscription payments (recurring) you will need to add this snippet of code to your child theme functions file to be sure the PayPal payment updates your listing ok.

As always if you have any problems please open a new post on our support forum.

Thanks,

The GeoDirectory Team

Add licensing to your GD Addon

The aim of this post is to give 3rd party developers a way to add licensing to their GD Addons so they can be sold and updated via the GeoDirectory servers.

The process of adding licensing to a product is relatively very simple and can be done in only two steps:

#1 Add the required file to your addon: https://gist.github.com/Stiofan/d97f5e74d59bdfdd3199

#2 Then add this code to the near top of your main plugin file:
Replacing the following variables in the function call with your own, you can see explinations of what they are in the code comments, the most important one is the $download_id, you get this id once you add your addon to our site for sale.

It’s that simple, the same update file is used in all our addons that is why we surround it with if(!class_exists(‘GD_Plugin_Updater’)) and you should too.

Adding a payment gateway to payments manager

This method is deprecated, please see: https://wpinvoicing.com/docs/creating-a-payment-gateway/

This tutorial will show you how to create a new plugin to integrate a new payment gateway with our new payment manager.
We have made it very easy to integrate almost any payment gateway, in the example below i will be integrating a gateway called “PayFast” which is mainly used in South Africa.

  1. Create the basic plugin
  2. Add the admin settings
  3. Add checkout page fields and scripts
  4. Dealing with the checkout submission
  5. Dealing with the IPN/ITN notifications

Creating the basic plugin:

If you are reading this far then you should know how to create a basic plugin but for completeness i am going to list every step in the process. 

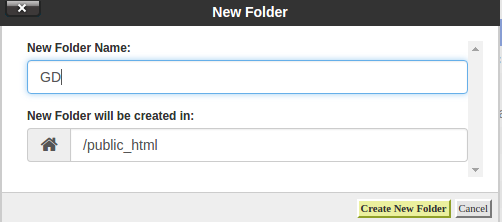
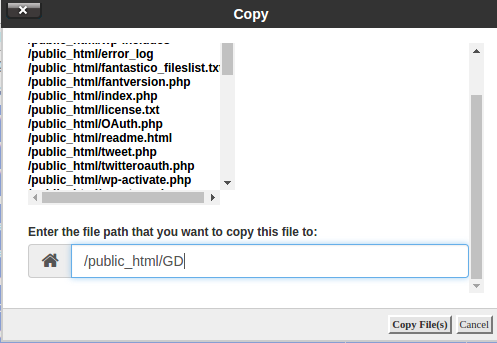
  1. Create a new folder for your plugin, for this tutorial we are calling ours: geodir_payfast_payment_manager
  2. Create a new PHP file inside the folder and call it exactly as the folder name with .php at the end: geodir_payfast_payment_manager.php
  3. Add the basic text to the file that makes the plugin: 

Congratulations, you now have a new plugin, you could install and activate this, it would not do anything but this is the start of our new plugin for adding our payment gateway.

Add the admin settings:

We have made this extremely simple as you will see below.

  1. First we will need to install and uninstall our settings preferably on the plugin activation and deactivation/uninstall so we add the code to run the functions to add our settings:
  2. Now we add the functions to add the settings. IMPORTANT: Whatever you use as the “key” in the below code is what will be used at the end of the checkout and ITN/IPN hook names, here we use “payfast” so the hooks we have to use are “geodir_payment_form_handler_payfast” and “geodir_ipn_handler_payfast“, you will replace those with your own key from the below code.

Now if we activate/deactivate our plugin we will see the settings added to the payment manager settings page.payfast1

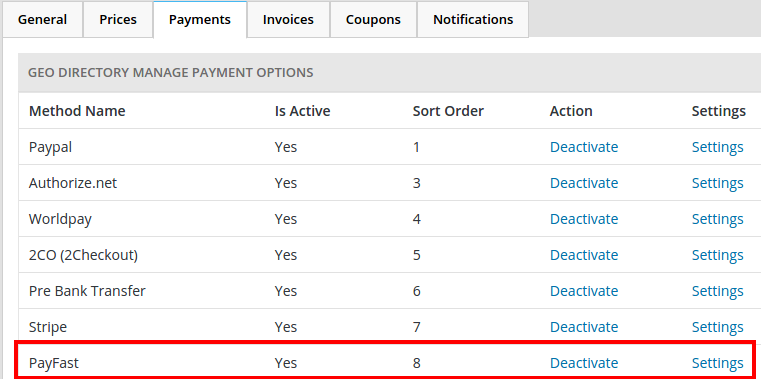
Add checkout page fields and scripts:

Again we have made this very simple.  Some payment gateways you will enter your payment info on the screen at checkout and the next step will process it and in other cases you will be sent to the payment gateways website for payment such as PayPal standard, in our case for this example we are sent to the PayFast website but we will also ask for “First Name”, “Last Name” and “Email” at the checkout so we can show how to do both.

  1. If your gateway needs any extra info then we should ask for it when the payment method is selected, for PayFast we could maybe get away with not asking for any extra but they do ask for first name and last name where as on signup GD asks for a “full name” so this gives us a good opportunity to show how to show extra fields (you may not need this step for your payment gateway): First we create a function that will add the extra fields.
  2. Then we add the code to call the function in the correct place with a hook. 
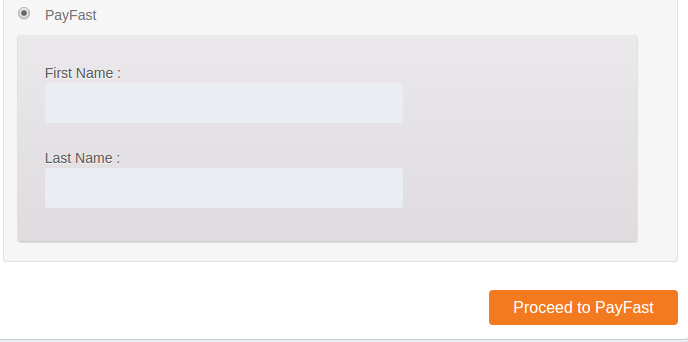
  3. PayFast is like paypal standard where payment takes place on the PayFast website, so instead to the normal “Pay & Publish” checkout button we will add a little snippet that changes the GD checkout button to “Proceed to PayFast”.

Now on the GD checkout page if you select PayFast you will be asked to enter your first and last name.
payfast2

Dealing with the checkout submission:

Here we use the submitted info to build a form and auto submit it to PayFast.

Dealing with the IPN/ITN notifications:

Most of the code below is taken from the PayFast website that tells us how to verify the ITN (instant Transaction Notification). The code below that is enclosed in “###########################” is the code we use to mark the invoice paid and sent the payment notification emails.

You should now have a working payment gateway. If you have any questions or need pointers for integrating a new payment gateway, just let us know on our support forum and we will give you guidance and tips.
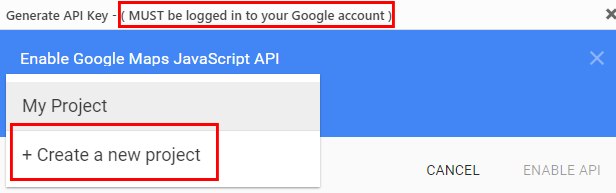
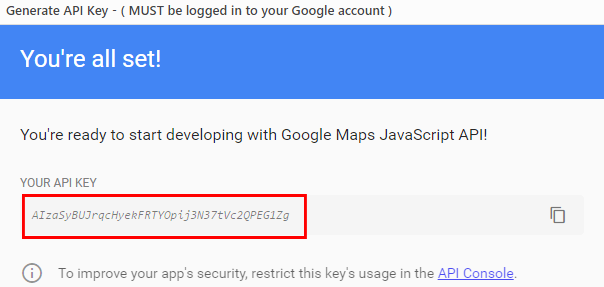
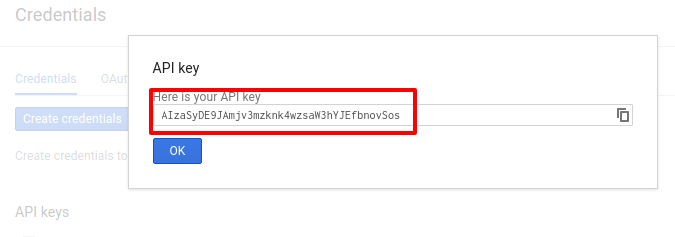
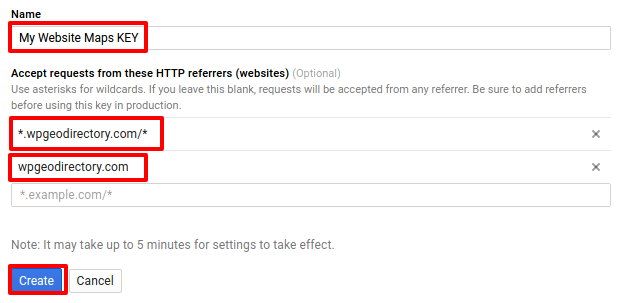
GeoDirectory does not have access to your filesystem


If you receive the above error message this will mean that things like import / export won’t work as they can’t read or write files to the system, this will also cause problems for most of our themes as they dynamically write styles files from your settings.

You should follow the above links and read the page which explains the problems http://codex.wordpress.org/Editing_wp-config.php#WordPress_Upgrade_Constants

This problem is usually fixed by following the below steps:

1. Open your wp-config.php file located in the root of your website (you will need to do this via FTP or some other file manager)

2. Somewhere near the bottom of the file, usually just below the line “define(‘WP_DEBUG’, false);” try adding the line:
“define( ‘FS_METHOD’, ‘direct’ );” and then upload and refresh your admin area to see if the message has disappeared.  If the message does not disappear after a refresh try changing the line you added and specifically the ‘direct’ to the following and each time try uploading and refreshing to see if it fixes it:  “ssh2“, “ftpext“, or “ftpsockets“.

3. If #2 did not fix your problem try adding these two lines:
define( ‘FTP_USER’, ‘username’ );
define( ‘FTP_PASS’, ‘password’ );
Replacing the ‘username’ and ‘password’ with your FTP username and password, again try uploading and refreshing to see if it fixes the problem, if the problem persists repeat #2 now that you have the ftp user/pass defined.

The above three steps should fix the majority of problems, if not then please post in our support forum and a member of our support staff will assist.


GD Core Plugin – Google Analytics

These are the sections you will find when you install the GeoDirectory Core (free) plugin only:

Overview General Google Analytics Design Permalinks Titles & Permalinks Notifications Set Default Location Place Settings Theme Compatibility Import & Export GD Tools

GeoDirectory > General > Google Analytics

This option will show meaningful statistics to your listing owners, read more about GD’s Front end Google Analytics here.

This setup guide assumes you already have your Google Analytics profile setup for your website. It will not work without an active Google Analytics account.

If you use the Pricing Manager, Google Analytics can be turned on and off for different packages.

Show business owner Google Analytics stats:

  1. This option simply enables or disables the showing of Google Analytics to users.

Google analytics access

  1. Click on Authorize.
  2. That will open a popup:
  3. Click Allow.
  4. That will generate a special code:
  5. Copy that code and paste it in the Google analytics Auth Code field:
  6. Now Save.
  7. This will populate the Analytics Account field with the sites set up in your Analytics account:
  8. Select the correct website profile and Save.

Add Google analytics tracking code to site?

  1. If you have not added your tracking code yet anywhere else on your site, select Yes here. That is by far the simplest way to add the code to your site.

Auto refresh active users?

  1. Select here if you want the statistics to auto-refresh or when the user clicks the refresh button again:

Time interval for auto refresh active users

  1. If you have set the above setting to auto-refresh, set the interval between data refresh.

Event Manager Shortcodes

On this page:

Event ListingsEvent CalendarRelated Events

Event Listings

Shortcode: [gd_event_listing]

Parameters:

  • category – ID number of the category to show (default = 0 for all)
  • post_number – Number of posts to show (default = 5)
  • layout – Number of columns to show (default = 2)
  • add_location_filter – True or False (default = false)
  • listing_width – A percent between 20 and 100 (default = ‘’)
  • list_sort – One of az, upcoming, latest, featured, high_review, high_rating, random (default = latest)
  • list_filter – One of all, today, upcoming, past (default = all)
  • character_count – Number of characters to show from the Excerpt (Min/default = 20)
  • title – title

This example shows a widget with 5 listings in a row of 5 (5 grid), showing upcoming events ordered by earliest first, and the widget will have a tile Featured Events:

[gd_event_listing layout=5 post_number=5 list_sort=upcoming list_filter=upcoming title=”Featured Events”]

Event Calendar

Shortcode: [gd_event_calendar]

Parameters:
  • title – title
  • day – One of sunday or monday

Related Events

Shortcode: [gd_related_events]

Parameters:

  • post_number – Number of posts to show (default = 5)
  • layout – Number of columns to show (default = 2)
  • event_type – One of all, today, upcoming, past (default = all)
  • add_location_filter – True or False (default = false)
  • listing_width – A percent between 20 and 100 (default = ‘’)
  • list_sort – One of az, latest, featured, high_review, high_rating, random (default = latest)
  • character_count – Number of characters to show from the Excerpt (Min/default = 20)

Translating Custom Fields

Introduction

If your site is only in one language, you create your custom fields in the language used on your site.

But if your site is in more than one language, you will need to use WPML. The instructions below are different depending on the version of WPML you use. The String Translation module is only available in the Multilingual CMS version of the plugin.

Translating Custom Fields using WPML’s String Translation module

  1. Make sure you have selected to use String Translation, use one of the two options:
  2. Create your custom field, and enter description, front end title etc. For this example we are creating a text field:
  3. Then go to GD > Tools > Load custom fields translation:
  4. This will scan your DB for custom fields and copy them to a file in your geodirectory plugin folder called db-language.php
  5. WPML will then be able to scan this file and allow you to translate them.
  6. To translate them go to WPML > String Translation, where you will see the new fields added:
  7. Now you can translate them and save:
  8. This would be the result on the Add Listing page:
    French

    English

    Dutch

Translating Custom Fields without WPML’s String Translation module

  1. If you are only using the WPML blog version, then first follow steps 2 and 3 as explained above.
  2. That will create a file called db-language.php that you will find in your geodirectory folder on the server.
  3. Copy that file and your GD core language file to your computer and then open the .po file and rescan the project.
  4. This will add the translations to the .po file and you can then follow the normal translation process as explained here.
  5. Below you can learn more about the process for merging the custom field data with the normal language files.

Instructions

  1. After you scanned the database for custom fields, download a copy of the GD core plugin from your server to your local computer using FTP:
  2. Then open /wp-content/plugins/geodirectory/geodirectory-languages/geodirectory-en_US.po using PoEdit:
  3. From the catalogue menu, choose Update from sources ...:
  4. That will merge db-language.php:
  5. Save the file and then follow the instructions for translating your core language file [first time translation] or updating your language file [if already translated earlier].