Introduction
The GD reCAPTCHA addon integrates the new Google reCAPTCHA api and allows you to add the noCAPTCHA reCAPTCHA widget to any GeoDirectory form.
It can be added to:
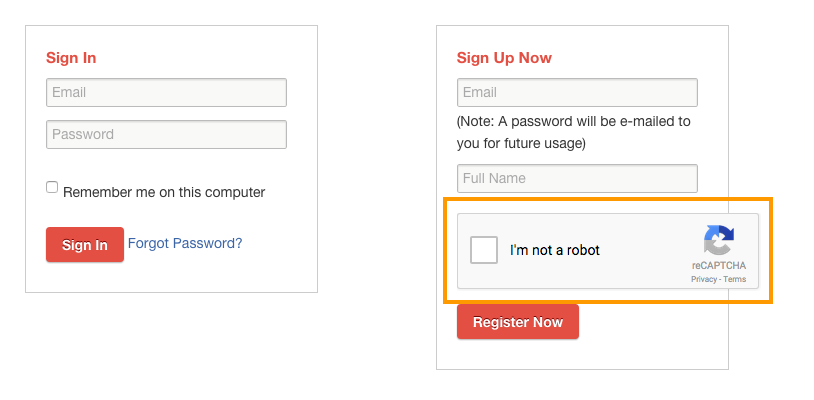
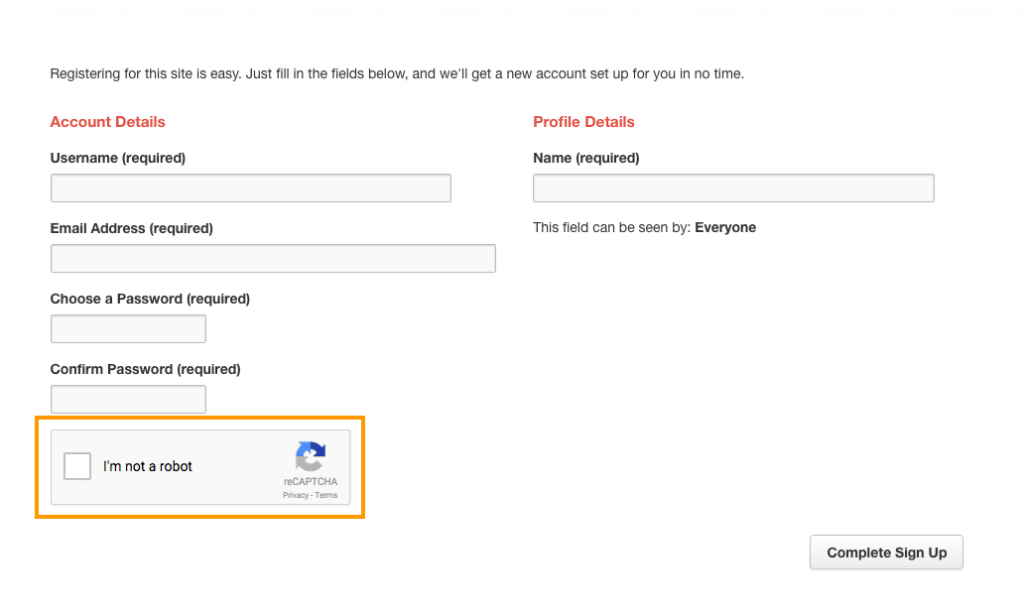
- GeoDirectory Registration
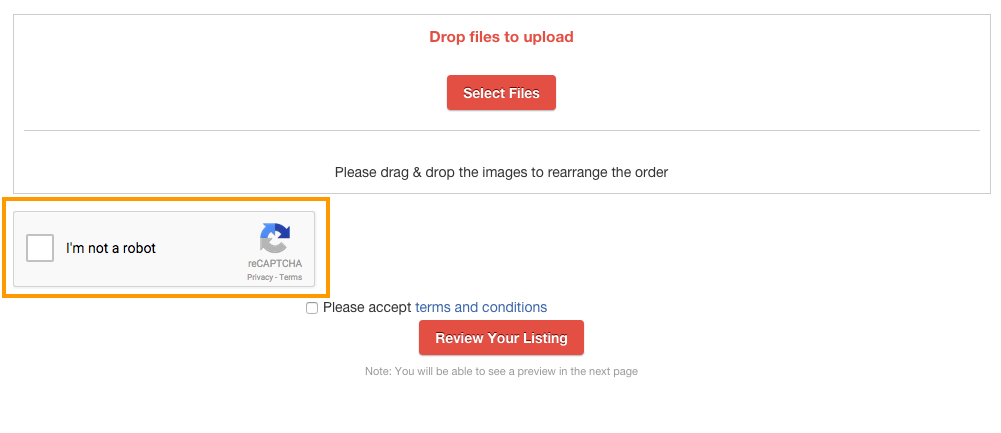
- GeoDirectory Add Listing
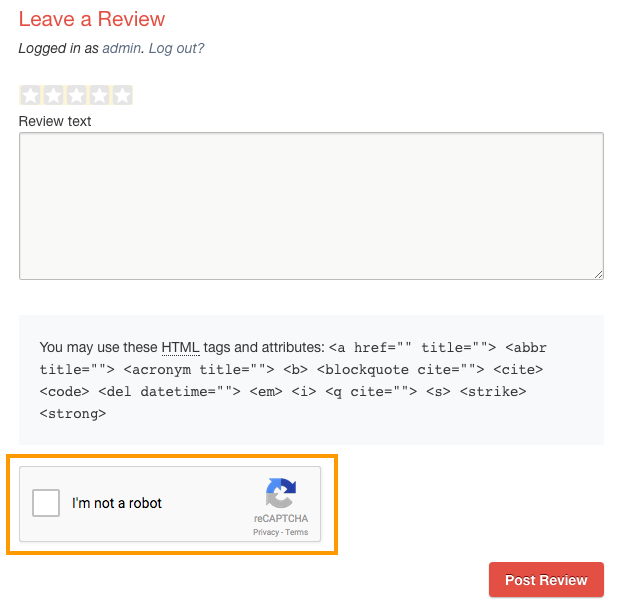
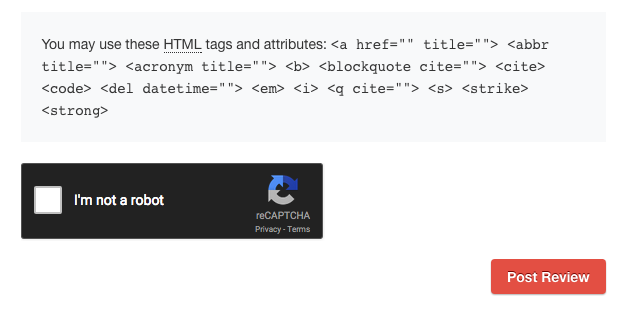
- GeoDirectory Comments
- GeoDirectory Send To Friend
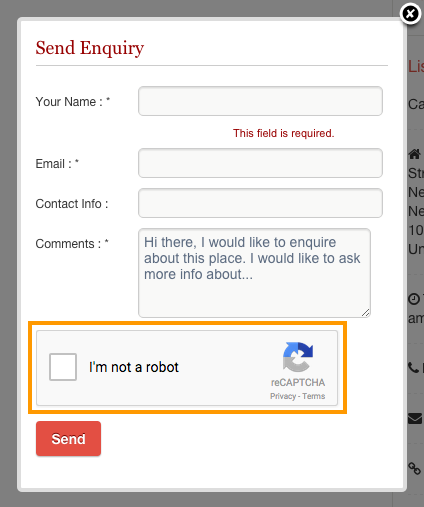
- GeoDirectory Send Enquiry
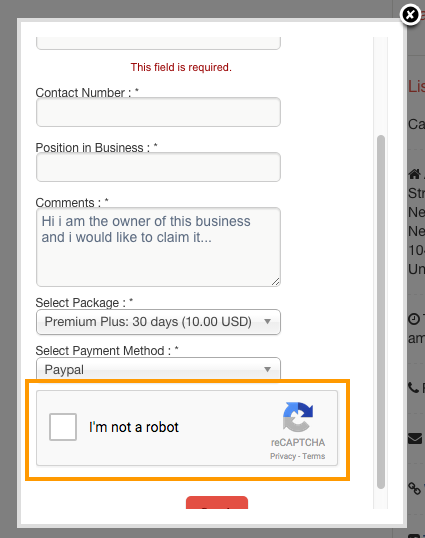
- GeoDirectory Claim Listing
It can also be disabled for logged in users, based on user’s role.
Installation
- Visit wpgeodirectory.com ( Buy a subscription if Required )
- Navigate to My Account > Downloads ( Login if Required )
- Download Geodir reCAPTCHA zip file.
- Go to your WordPress site dashboard, Navigate to Plugins > Add New > Upload Plugin
- Browse and Upload the zip file you downloaded from wpgeodirectory.com
- Activate the plugin.
Configuration
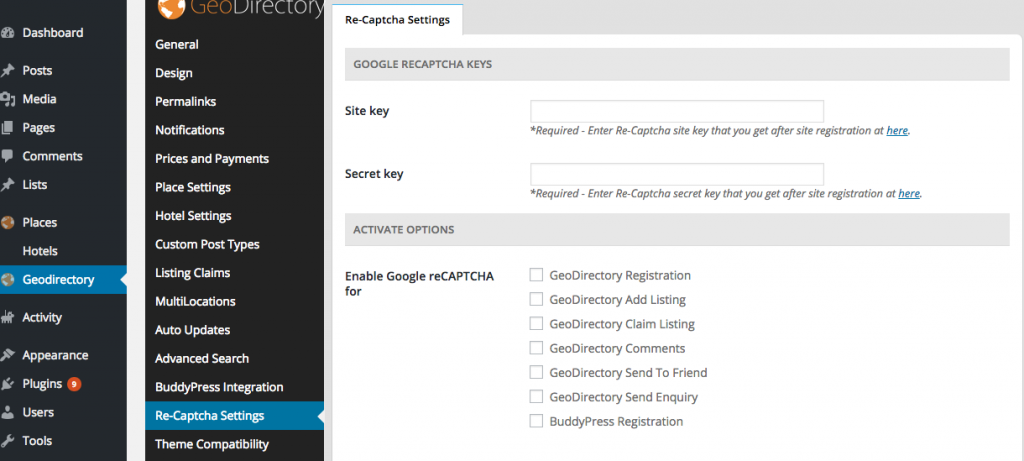
Re-Captcha Settings Tab
Google Re-Captcha Keys
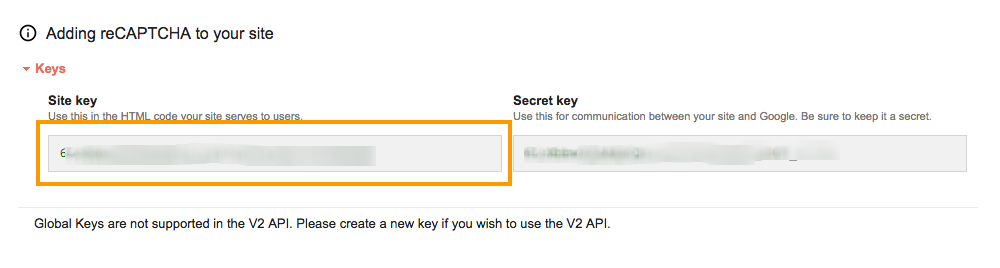
- Site Key
- This is a required field.
- To get your site Key
- Visit this page
- Register a new site or click the site if you have added already
- Make sure to select reCaptcha V2
- Keys are available under Adding reCAPTCHA to your site section.
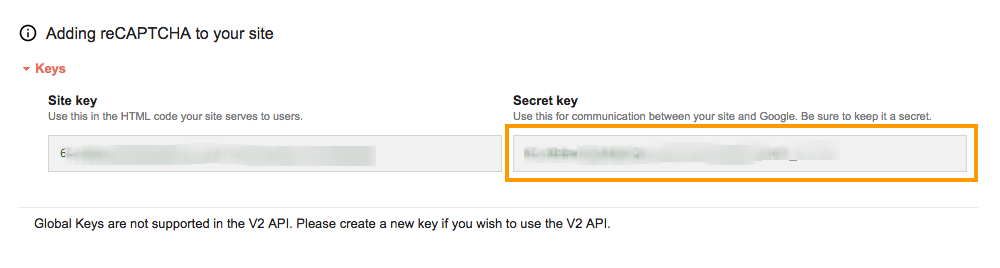
- Secret Key
- This is a required field.
- To get your site Key
- Visit this page
- Register a new site or click the site if you have added already.
- Keys are available under Adding reCAPTCHA to your site section.
Activate Options
- Enable Google reCAPTCHA for
- GeoDirectory Registration
- GeoDirectory Add Listing
- GeoDirectory Claim Listing
- GeoDirectory Comments
- GeoDirectory Send To Friend
- GeoDirectory Send Enquiry
- BuddyPress Registration
- GeoDirectory Registration
- Disable Google reCAPTCHA for
- Administrator
- Editor
- Author
- Contributor
- Subscriber
- Captcha Title
- Captcha title to be displayed above captcha code, leave blank to hide.
- Captcha Theme
- Select color theme of captcha widget
- Light
- Dark
- Select color theme of captcha widget