Changing the look of a featured listing Adjusting the location switcher for cities only or a one country site Hiding category legend from location map Hiding the listings count in the popular categories widget Changing the link in the map bubble
Modifying the GD Search bar Hiding the Custom Post Type (CPT) selector Removing one CPT only from the Custom Post Type (CPT) selector Hiding the “Search for” field Changing the Advanced Search cogwheel icon to text
Customizing or hiding address details Removing reviews from one CPT only Making the reCAPTCHA V2 box resize to smaller screens
Adjust Supreme Directory Featured Image Overlay Opacity
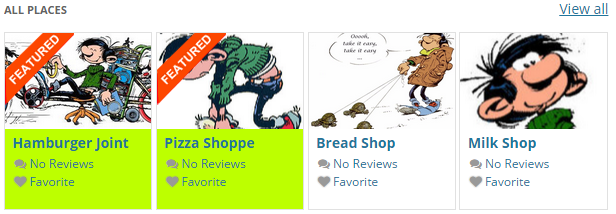
Changing the look of a featured listing
Each featured listing has the class gd-post-featured applied in listings pages.
This class can then be targeted to change the look of featured listings.
For example adding this to your CSS:
[css].gd-post-featured {background: #BDFF00 none repeat scroll 0 0;}[/css]
results in this:
Adjusting the location switcher for cities only or a one country site
The default location switcher looks like this:
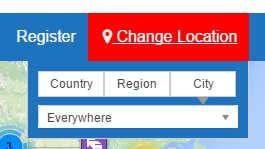
If you have a GeoDirectory site for one country only, you can add this to your child theme’s style.css file:
[css]#menu-item-gd-location-switcher dd {width: 50%;}[/css]
And then your switcher will look like this:
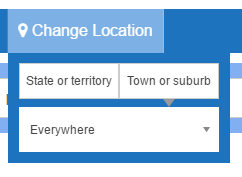
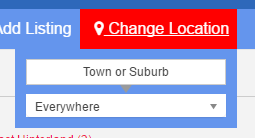
And if you have a GeoDirectory site for one region only, you can add this to your child theme’s style.css file:
[css]#menu-item-gd-location-switcher dd {width: 100%;}[/css]
And then your switcher will look like this:
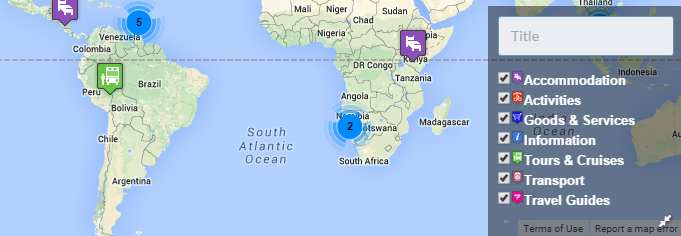
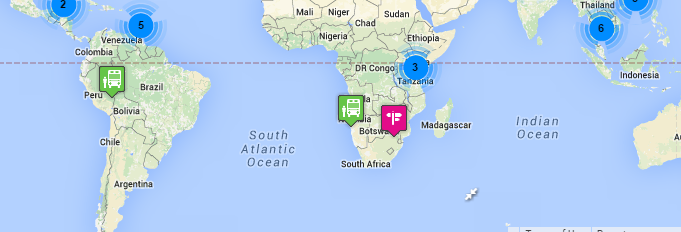
Removing category legend from location map
The default location map will have a legend showing the categories in the bottom right hand corner, like this:
If you want to hide that category list hidden by default, use the code posted below. Clicking on the expand/reduce icon will then open/close it:
Then add this CSS to your child theme’s style.css file:
[css].map_category {display: none;}[/css]
To only hide it on mobile views, you can add this CSS, adjust as required:
[css]@media only screen and (max-width: 1040px) {.map_category {display: none;}}[/css]
Hiding the listings count in the popular categories widget
The popular categories widget will have show the number of listings in the categories for the selected location like this:

If you want to hide those numbers, use the code posted below:

[css]span.geodir_term_class {display: none;}[/css]
Changing the link in the map bubble
If you want to change how the main link to the listing looks, use the code below, and adjust as required:
[css].geodir-bubble_desc h4 a {background: white; padding: 3px; border: 1px solid blue;}[/css]
These pictures show before and after:
Modifying the GD Search bar
The GD Search bar can have a few different components depending on the addons you use, and your settings.
Learn more about the search bar here.
Hiding the Custom Post Type (CPT) selector
This CSS will hide the CPT selector everywhere:
[css].gd-search-field-cpt {display: none;}[/css]
This CSS will hide the CPT selector on all Listings (CPT and categories) pages:
[css].gd-search-input-wrapper.gd-search-field-cpt {display: none;}[/css]
This CSS will hide the CPT selector on all Listings (CPT and categories) pages:
[css].gd-search-input-wrapper.gd-search-field-cpt {display: none;}[/css]
Removing one CPT only from the Custom Post Type (CPT) selector
This CSS will hide one CPT from the CPT selector everywhere (adjust as required):
[css].search_by_post option[value=gd_event] {display: none;}[/css]
Hiding the “Search for” field
This CSS will hide the “Search for” field everywhere:
[css].gd-search-field-search {display: none;}[/css]
Full width with all search inputs inline
This CSS will allow the search bar to expand to 100% width on the screen, allowing all the items inline:
[css].geodir-loc-bar-in {max-width: 100%;}[/css]
Using Supreme Theme you can add:
[css].sd.home .featured-area .geodir-loc-bar-in {max-width: 100%;}[/css]
Changing the Advanced Search cogwheel icon to text
To change from 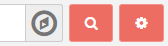 to
to  add this CSS:
[css].fa-cog:after {content: " Advanced Filter";}[/css]
Change the Advanced Search icons
Adjust this CSS for your own style; find more icons at http://fontawesome.io/cheatsheet/
To change the cog wheel:
[css]
.fa-cog:after {font-family: FontAwesome;
content: "\f1b9"; color:white; font-size: 16px;}
.fa-cog {color:transparent; font-size: 0}
[/css]
To change the search icon:
[css]
.fa-search:after {font-family: FontAwesome;
content: "\f1b9"; color:white; font-size: 16px;}
.fa-search {color:transparent; font-size: 0}
[/css]
Use font awesome icons in any text area or as links http://fontawesome.io/cheatsheet/
[html]
<i class="fa fa-facebook-square" aria-hidden="true"></i>
[/html]
Customizing or hiding address details
The display of the different levels of the address are controlled by CSS classes:
- span[itemprop=”streetAddress”]
- span[itemprop=”addressLocality”]
- span[itemprop=”addressRegion”]
- span[itemprop=”addressCountry”]
- span[itemprop=”postalCode”]
For example, if you only want to display the region and country, add this to your child theme’s style.css file:
[css]span[itemprop="streetAddress"],
span[itemprop="addressLocality"],
span[itemprop="postalCode"] {
display: none;
}[/css]
Hide the default phone number from logged out users
Sometimes you may want to hide some listing information from users that are not logged in. Here is an example of how you can do that with the default phone number.
[css]
.geodir_contact {display: none}
.logged-in .geodir_contact {display: initial}
[/css]
Removing reviews from one CPT only
If you only want to disable reviews for some but not all CPTs, you can use this CSS, adjust for the CPTs you want to hide. For example, replace every event with place:
[css]
.post-type-archive-gd_event .geodir_Star {display: none;}
.post-type-archive-gd_event .geodir-bubble-meta-bottom .geodir-bubble-reviews {display: none;}
.search-results .geodir-bubble-meta-bottom .geodir-bubble-reviews {display: none;}
.post-type-archive-gd_event a.geodir-pcomments {display: none !important;}
#reviewsTab {display: none !important;}
.single-gd_event dl.geodir-tab-head [data-tab="#reviews"] {display: none !important;}
.single-gd_event .sd-detail-cta .dt-btn {display: none;}
.single-gd_event .sd-ratings {display: none;}
.gd-post-gd_event .geodir-rating {display: none;}
.search-results .geodir-bubble-meta-bottom .geodir-rating {display: none;}
.gd-post-gd_event a.geodir-pcomments {display: none !important;}
[/css]
Making the reCAPTCHA V2 box resize to smaller screens
- You have the option to choose two different reCAPTCHA versions:
- reCAPTCHA V2 which requires visitors to tick a box
- Invisible reCAPTCHA which works in the background
- reCAPTCHA V2 has a fixed width as provided by Google and therefore sometimes is to wide for a small screen or another container element on your screen.
- To fix this you can apply the following CSS:
[css]
@media screen and (max-height: 575px){
.gd-captcha {transform:scale(0.8);
-webkit-transform:scale(0.8);transform-origin:0 0;-webkit-transform-origin:0 0;}
}
[/css]
- Adjust the @media screen settings to target the sizes you want.
Adjusting Supreme Directory theme featured image overlay opacity
-
- Supreme Directory theme has a really strong display of the featured image.
- Adjusting the opacity of the featured image overlay can brighten or darken your site to suit your needs
- Here is some CSS that you can adjust to suit your site:
[css]
/*location pages overlay */
.sd-location .featured-area::before {
opacity:0.5!important;
}
/* listing pages overlay */
.single .featured-area::before {
opacity:0.2 !important;
}
/* homepage overlay */
.sd-homepage .featured-area::before {
opacity:0.5 !important;
}[/css]
</ol
Remove Supreme Parallax Effect
Want a little less movement on your page?
Here’s some CSS to remove the parallax effect.
Each page type has a class, so, there are different ways to target the CSS, based on your needs.
First, this CSS will remove the effect everywhere:
[css]
.featured-img {
background-position: 50% 50% !important;
}
[/css]
This CSS is targeted at the single page for a gd_place:
[css]
.single-gd_place .featured-img {
background-position: 50% 50% !important;
}
[/css]
This is targeted more widely at any CPT for a single page, but will leave the effect in place on the home page:
[css]
.single .featured-img {
background-position: 50% 50% !important;
}
[/css]